Hacking The EX47* MediaSmart BIOS
To complete this exercise, you must download two free software tools and two “donor BIOSes” from which necessary ingredients will be extracted to patch the BIOS built into the MediaSmart Server. You’ll want to copy all of these files to a directory on the MediaSmart Server—I created a folder on the D: (Data) drive called BIOS-lab where I then worked to complete the BIOS maneuvers needed to update the BIOS. Table 5 provides information about and links to these downloads.
Table 5: BIOS Update Tools and Inputs
| Name | Description | URL ( all start with http://) |
|---|---|---|
| WinFlash.zip | Award BIOS tool | www.techpowerup.com/downloads/1282/Winflash_2.0.1.5.htm |
| Cbrom182.zip | Bios edit / extract tool | www.esnips.com/doc/0c608383-606f-4761-91c1-8820dd83a7fa/ |
| SS21S10J.bin | Shuttle donor BIOS | eu.shuttle.com/download/Downloads/Barebone/SS21T/ |
| M601b_18.zip | Abit donor BIOS | file.abit.com.tw/pub/download/bios/an9//m601b18.zip |
While there are newer versions of CBrom around (the latest appears to be 2.15), I couldn’t get them to work properly with the EX47* BIOS. That’s why I stuck with the older version recommended in my source for this hack at Alex Kuretz’s excellent MediaSmartServer.net site.
Basically, what’s going on here is you’re adding two elements to the existing Award BIOS that HP installs on the MediaSmart Server. One adds support for dual-core AMD CPUs (agesacpu.rom) and the other adds the ability to recognize more processors than the built-in BIOS can (acpitbl.bin). WinFlash is the tool you use to copy your existing BIOS for hacking and CBrom is the tool you use to extract modules from the other two donor BIOSes and add them to your existing BIOS. Finally, you use WinFlash to update the MediaSmart BIOS to add the changes you made using CBrom. After all these maneuvers, your updated MediaSmart EX47* Server should be able to recognize a 3800+ and the various LE- and BE-class processors that will work in this machine. Here’s the step-by-step drill:
Step 1: Download and Place the Files in a Working Directory
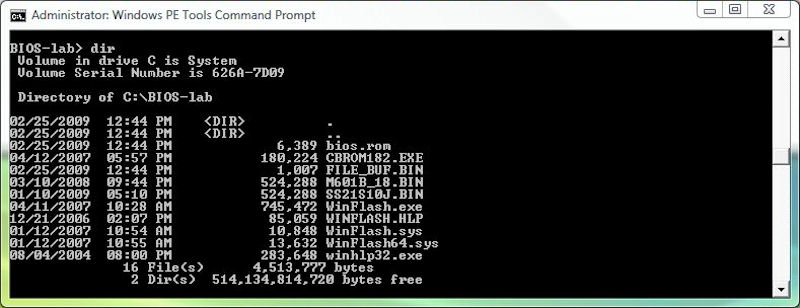
Mine was named BIOS-lab, but you can call yours whatever you like. I’ll simply call it the working directory from here on out. To begin, visit the links in Table 5 and download the various files onto the EX47*. I did this from a remote desktop connection from my primary production machine and you should do likewise. Extract the contents of all the ZIP directories into your working directory. Except for M601b_18.zip, you need only to extract the BIOS file itself, M601b_18.BIN, into that directory. This should produce a list of files like the one you see in the next screenshot:
Step 2: Run WinFlash on the EX47* Server, Create a BIOS Backup.
Get Tom's Hardware's best news and in-depth reviews, straight to your inbox.
Using either Windows Explorer or the command line on the MediaSmart Server, navigate to the working directory and run the WinFlash.exe program. Click on File, then Save original BIOS. By default, this will save the server’s BIOS into a file named awdbios.bin. Next, create a copy of the awdbios.bin file and name it awdbios.bak (you’ll need this if anything goes wrong with your BIOS edits). Just to be extremely safe, you might want to copy this file to a USB flash drive as well.
Step 3: Use CBrom to Add Missing Items to the EX47* BIOS
Use your command window to run the following sequence of commands from inside the working directory (you can skip the comment text which starts with a hash mark #):
- cbrom182 awdbios.bin /d #displays BIOS content
- cbrom182 SS21S10J.BIN /acpitbl extract #extract acpitbl from Shuttle BIOS into file acpitbl.bin
- cbrom182 mb601b_18.BIN /gv3 extract #extract agesacpu from Abit BIOS into file agesacpu.rom
- cbrom182 awdbios.bin /gv3 agesacpu.rom #insert Abit BIOS element into Award BIOS
- cbrom182 awdbios.bin /acpitbl acpitbl.bin #insert Shuttle BIOS element into Award BIOS
- cbrom182 awdbios.bin /d #display patched BIOS content
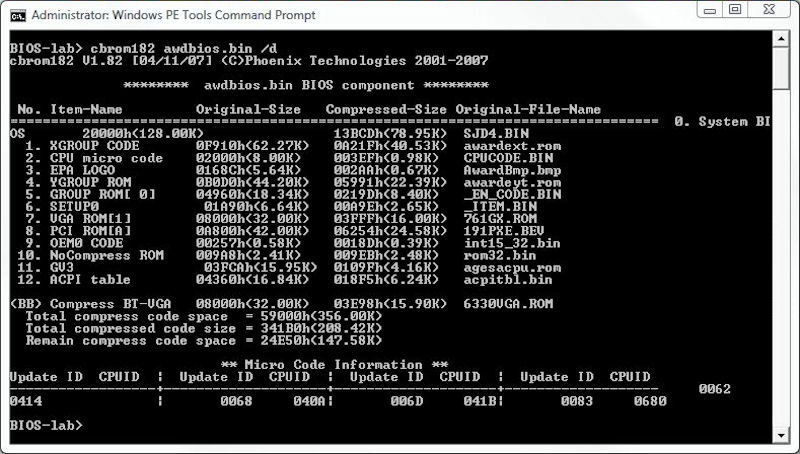
If all goes well, you’ll see a display like the following when you enter the final command, which now includes the added GV3 and ACPI Table elements as items 11 and 12 in that list. If you follow the instructions to the letter, everything should work just fine. If your results are not the same as what you see here, don’t proceed to the next step until they match.
Step 4: Flash the BIOS on Your EX47* Server
Open WinFlash again, then click File, Update BIOS. Be sure to close all other open applications before you do this. Because you’re flashing the BIOS from Windows, you don’t want Windows to get distracted while this process is underway. If you’re feeling vulnerable, you might even want to disconnect the server from the network while you complete this task. It’ll squawk, but it’ll still work.
When you reboot your server, it should recognize any of the new CPUs you might have installed. For dual-core CPUs, a second reboot is often required to get WHS to recognize the second processor core (that’s what happened on my machine when I did the upgrade, and is also widely reported by other users who’ve done likewise).


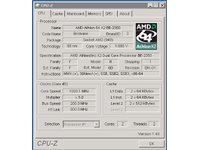
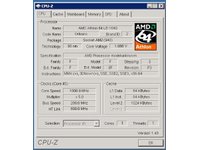
With a patched BIOS, the EX47* servers can identify LE- and BE-class AMD processor.
Check prices for HP's MediaSmart EX475
Current page: Hacking The EX47* MediaSmart BIOS
Prev Page Swapping The Processor, Step-By-Step Next Page How To Prepare And What To Do If Something Goes WrongEd Tittel is a long-time IT writer, researcher and consultant, and occasional contributor to Tom’s Hardware. A Windows Insider MVP since 2018, he likes to cover OS-related driver, troubleshooting, and security topics.
-
neiroatopelcc Seems like a nice do-it-yourself guide. I don't own such a nas, so I can't tell if something's missing. But it's nice to see something like this on toms. Too rarely do we get such a treat.Reply
Now tell us how we can convert a zyxel router into a storage system, or how we can mod a sata controller into a sas controller, or whatever else can be done to hardware if you know how.
ps. it's a bit wierd that you describe how to unplug an atx power cable ... I would expect people who'd dare take their working nas apart would know, or figure that out, on their own. -
DiscoDuck Has anyone run performance numbers on single versus dual core on a homebrew WHS? IS it possible the small gains on the HP dual core setup are a limitation of the motherboard?Reply -
FrustratedRhino It is a computer... no matter how evil it is inside, since the compaqs of the late 80s/early 90s every computers is very easy to upgrade. To say that a HTPC knockoff needed a whole guide, to upgrade it, is rather silly.Reply
Slow news day I guess. -
deredita Excellent write-up. I been thinking about the HP MediaSmart servers, and what would be involved to mod one.Reply -
etittel DiscoDuckHas anyone run performance numbers on single versus dual core on a homebrew WHS? IS it possible the small gains on the HP dual core setup are a limitation of the motherboard?Reply
Good Question! I didn't think to tackle this within the scope of the current story, but it certainly would make fertile ground for a look at WHS in general. Having built numerous (more than 20) AMD AM2 systems and benchmarked them all, I didn't get the sense that we were dealing with motherboard limitations. Tim Higgins at SmallNetBuilder gives the EX470/475 models pretty high marks in head-to-head comparisons with other NASes so I don't think this box is hampered by inherent performance problems. But comparing it to other builds/set-ups is a good idea, and I will see if my editor is interested in a follow-up.
Thanks!
--Ed--
PS to neiroatopelcc: I wish I knew how to convert a zyxel router into a NAS/SAN, or how to mode SATA into SAS controllers. Both are things I too would like to know how to do. -
MoUsE-WiZ FrustratedRhinoIt is a computer... no matter how evil it is inside, since the compaqs of the late 80s/early 90s every computers is very easy to upgrade. To say that a HTPC knockoff needed a whole guide, to upgrade it, is rather silly.Slow news day I guess.Yeah, that. Glancing through the guide, anybody who's ever done any sort of hardware upgrade on any machine should be able to figure all of this out, changing the BIOS is probably the only bit that requires any extra knowledge.Reply
Next up; guide to fitting square peg in square hole? -
etittel To all:Reply
I'd like to thank HP and Micron/Crucial for their support of this article. Micron actually overnighted me a 4GB DDR2-667 SDRAM module when I was unable to buy one anywhere in the US, on very short notice.
I'd also like to thank the following terrific HP MediaSmart sites that helped me learn what I needed to know to write this story:
1. Alex Kuretz: www.mediasmartserver.net
2. Capable Networks MediaSmart Home (May be MS sponsored, hard to tell, still useful tho)
3. Terry Walsh We Got Served4. Andrew Edney Using Windows Home Server5. Donavon West Home Server Hacks6. Microsoft WHS Team Homeserver Blog
There may be more, but these are the most useful such sites I found. If you know of any please add them here.
--Ed-- -
etittel Drivers for EX47* ServersReply
I recently blogged on my own Vista site to list all of the latest workable drivers for the EX470/EX475 MediaSmart Servers. Anybody interested in making sure they're current on drivers should find this useful. I include the link to download.com for some less-than-brand-new drivers (which SiS has since updated, but which don't work on the EX47* models) because SiS doesn't keep an archive of older drivers (at least, not where I could find them).
HTH,
--Ed-- -
etittel Sorry forgot the driver link URL: http://viztaview.wordpress.com/2009/03/05/drivers-for-hp-ex-47-mediasmart-servers/. My apologies.Reply
--Ed-- -
cruiseoveride So basically, you buy an over priced media center "PC" and then upgrade it?Reply
okaaaaay


