 Join Tom’s Hardware today


Establishing A VPN Connection
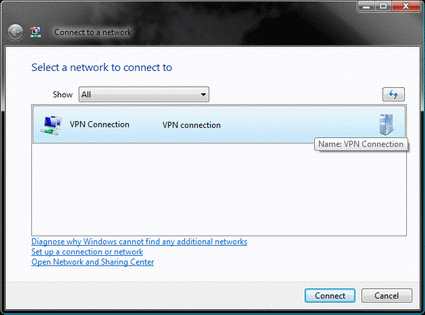
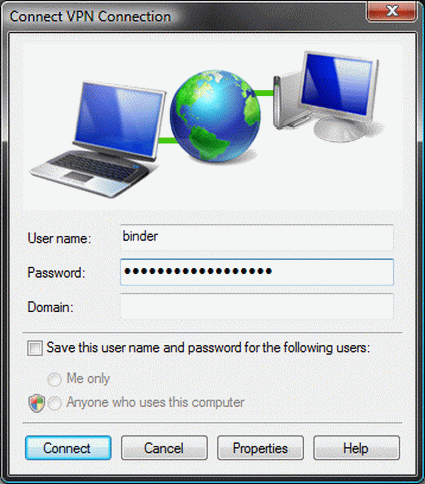
Once you have done all the preparation work, there should be nothing left to hinder a successful VPN connection. If you now wish to access your desktop computer while away from home, all you need is an Internet connection. Once you are connected to the Internet, you will need to start a VPN connection by opening the Network and Sharing Center and clicking on the "Connect to a network" option. In the window that opens up, select the connection that you have just created, and click "Establish connection". In the subsequent dialog box, enter you user name and password, if required. Done!
Once the connection is established, you can use Windows Explorer to access shared folders on your desktop by entering the IP address (\\192.168.1.x) as the universal naming convention (UNC) path in the address bar. This is only necessary when name resolution does not work correctly in the Windows network.
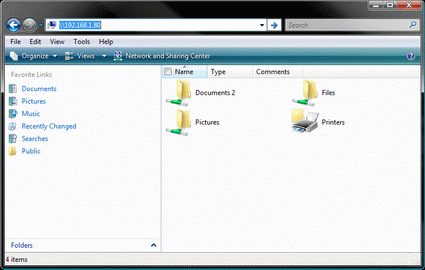
Not exactly elegant, but it works: Using the IP address as a UNC path
A more elegant method than entering an IP address as a UNC path is to modify the lmhosts.sam file on the VPN client computer (your laptop). This file manages manual assignments of host names and IP addresses, and can be found in the folder C:\Windows\System32\drivers\etc. In this file, you need to enter the IP address your desktop PC uses for VPN connections, followed by the Windows name of your computer, such as "HomePC". Once you have made your changes, save the file. Now when the VPN connection is established you can access your computer in Windows Explorer by entering \\HomePC as the UNC path. If there are other devices in the home network, you will need to modify the lmhosts.sam file accordingly.
