Getting The Most Out Of Your TiVo
Swap 'A' Drives
Remove both drives from your PC. Now, we need to change the jumper settings of the newly created backup 'A' drive to the "Master" setting. Again, incorrect jumper settings cause the majority of the problems in this process. Check the drive manufacturer's documentation if you are unsure how to set the jumpers. If you haven't already done so, remove the mounting bracket from the original 'A' drive and attach it to the backup 'A' drive. Place your original 'A' drive in a static bag and store it in a safe place.
Mount Backup 'A' Drive And 'B' (Large Capacity) Drive In PC
The process is almost complete now; just a few more steps are left. Verify that the jumper settings on the backup 'A' drive are set to "Master." Attach backup drive 'A' to the Secondary IDE channel as a "Master" (end of the ribbon cable). Now, take the drive you will be using as the 'B' drive and set its jumper settings to "Slave." As usual, if you don't know where to place the jumpers, consult the drive manufacturer's documentation. Attach the new 'B' drive as a "Slave" on the Secondary IDE channel (middle of the ribbon cable).
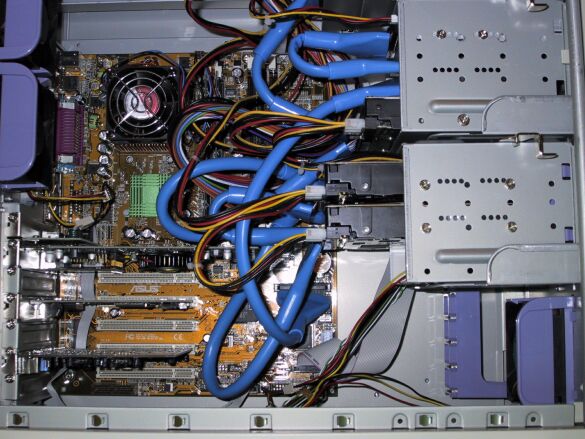
Inside the backup machine with both Maxtor drives installed. With these in, we can expand the 'A' drive and "bless" the 'B' drive.
Get Tom's Hardware's best news and in-depth reviews, straight to your inbox.
Current page: Swap 'A' Drives
Prev Page Restore Backup Image To The New 'A' Drive Next Page "Bless" 'B' Drive And Expand Backup 'A' Drive