Tuning Extreme: Overclocking with the Asus A7V
Choosing The Correct Core Voltage
To make setting the correct core voltage a bit easier we put together a table with all the exact voltages. After the installation of the resistor the lowest voltage is 1.37 Volts, while 2.32 Volts is the maximum voltage. According to our experience no processors should be operated permanently with more than 2.11 Volts. Appropriate cooling is an important factor for successful tuning when the voltage is increased. Otherwise the higher power dissipation of the processor contributes to an early death of the CPU.
| CPU Core Voltage at Bios | CPU Core Voltage after Modification |
|---|---|
| 1,1 Volt | 1,37 Volt |
| 1,15 Volt | 1,44 Volt |
| 1,2 Volt | 1,47 Volt |
| 1,25 Volt | 1,55 Volt |
| 1,3 Volt | 1,61 Volt |
| 1,35 Volt | 1,66 Volt |
| 1,4 Volt | 1,72 Volt |
| 1,45 Volt | 1,79 Volt |
| 1,5 Volt | 1,88 Volt |
| 1,55 Volt | 1,95 Volt |
| 1,6 Volt | 2,03 Volt |
| 1,65 Volt | 2,06 Volt |
| 1,7 Volt | 2,11 Volt |
| 1,75 Volt | 2,17 Volt |
| 1,8 Volt | 2,24 Volt |
| 1,85 Volt | 2,32 Volt |
According to this table the core voltage can be increased step-by-step. Extreme caution is highly recommended with values above 2.1 Volts. This situation requires a very powerful heat sink/fan.
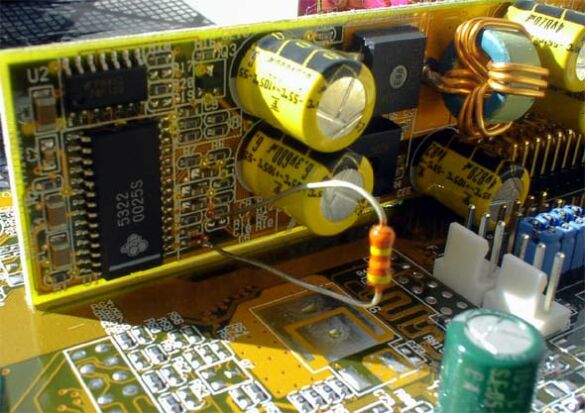
A frontal view of the modified VRM module: The soldering must be done very carefully to avoid destroying components of the Asus A7V.
Get Tom's Hardware's best news and in-depth reviews, straight to your inbox.
Current page: Choosing The Correct Core Voltage
Prev Page Building Instruction: A Maximum Core Voltage Of 2.32 Volts Next Page The actual core voltage can be set with the power menu in the BIOS: If the voltage is set to 1.85 Volts in the BIOS, the Asus A7V generates a maximum core voltage of 2.32 Volts after the retrofit.