How to transfer and share files over a network without a USB flash drive — and with just one line of code
For those times when you can’t find a USB flash drive.
Transferring files is something that we take for granted thanks to super-cheap USB storage and fast network connections. Every single reader has had an occasion where they needed to transfer files, and I bet most of us have just reached for a USB flash drive (perhaps one of the best flash drives).
That tried-and-trusted method is just one way to transfer files, but what if there were alternatives? I’m not talking about Iomega Zip drives (I miss those!) or floppy disks (those too!) I’m talking about direct file transfer between machines on the same network.
Lets start with one of the most useful and simple methods. Luckily, it's baked directly into Python, which you can run on your OS of choice – but we’ll be focusing on Windows for this tutorial.
Running a Python File Server
- Transferring files without a USB flash drive is possible using Python.
- A Python web server can be run in any directory on your PC and files can be downloaded on the destination PC.
- This is useful for quickly transferring files, to multiple users across a network.
Yes, Python has its own web / file server baked into the standard Python library. Best of all, it is really easy to use.
You will need to have Python installed on your computer. Linux users will have this by default, and Windows users should follow our guide on how to install Python.
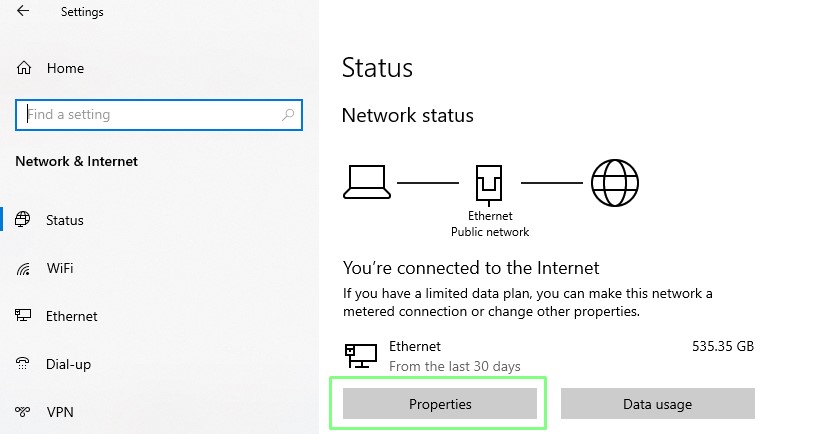
1. Find your IP address by first going to Settings >> Network & Internet, and click on Properties.
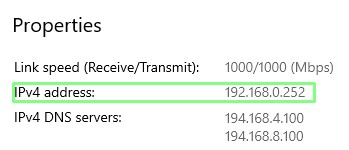
2. Scroll down to the Properties section and make a note of your IP address.
Get Tom's Hardware's best news and in-depth reviews, straight to your inbox.
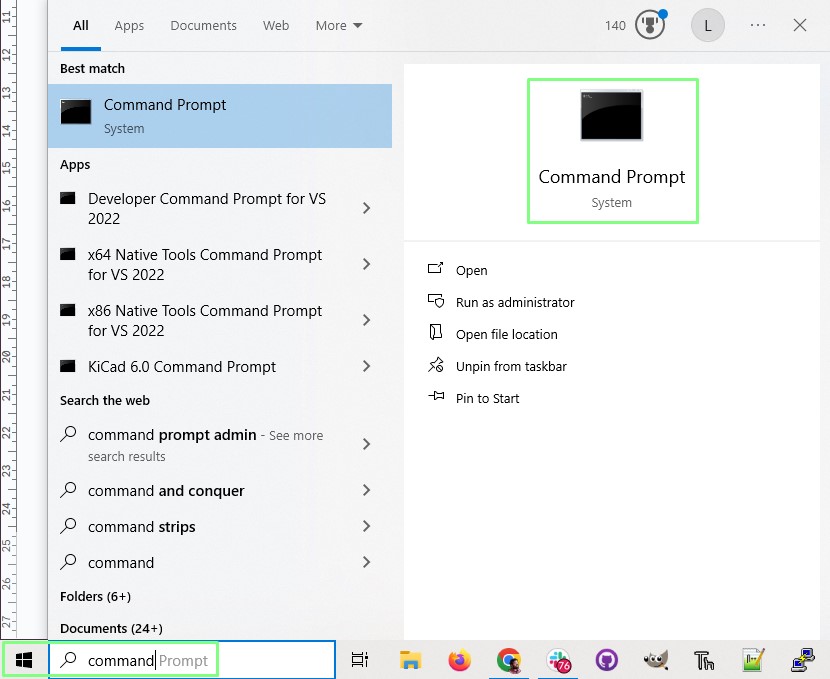
3. Click on the Windows logo and search for Command prompt and press Enter to open.
4. Navigate to the directory from which you wish to share files. I’ve put a load of test files in the folder.
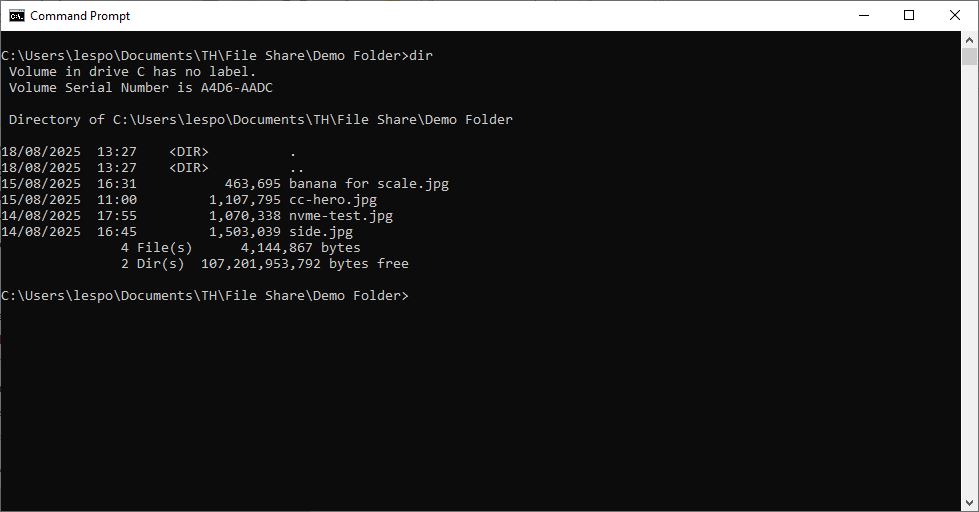
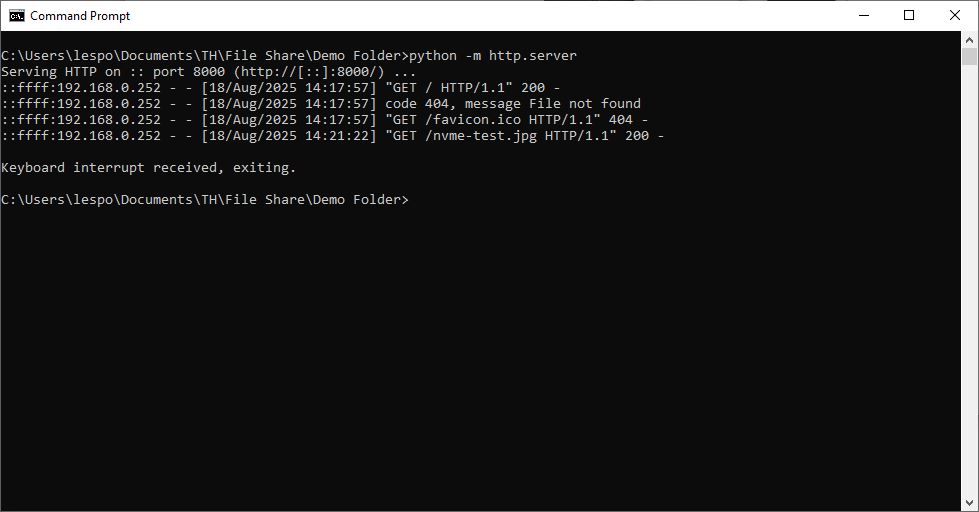
5. Run the command to start the server. Rather than starting an interactive Python session, this will start the Python interpreter and run the web server module from the standard Python library.
python -m http.server 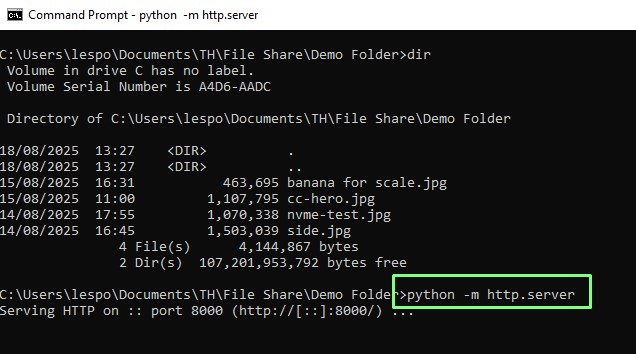
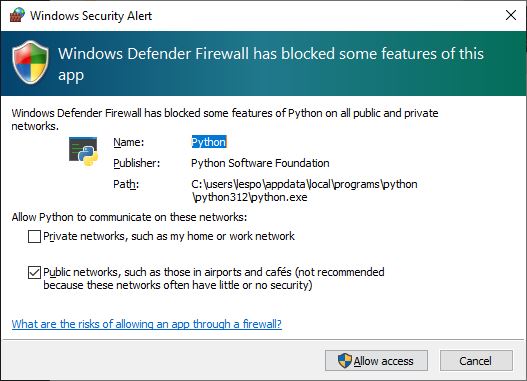
6. When prompted, allow access through your firewall.
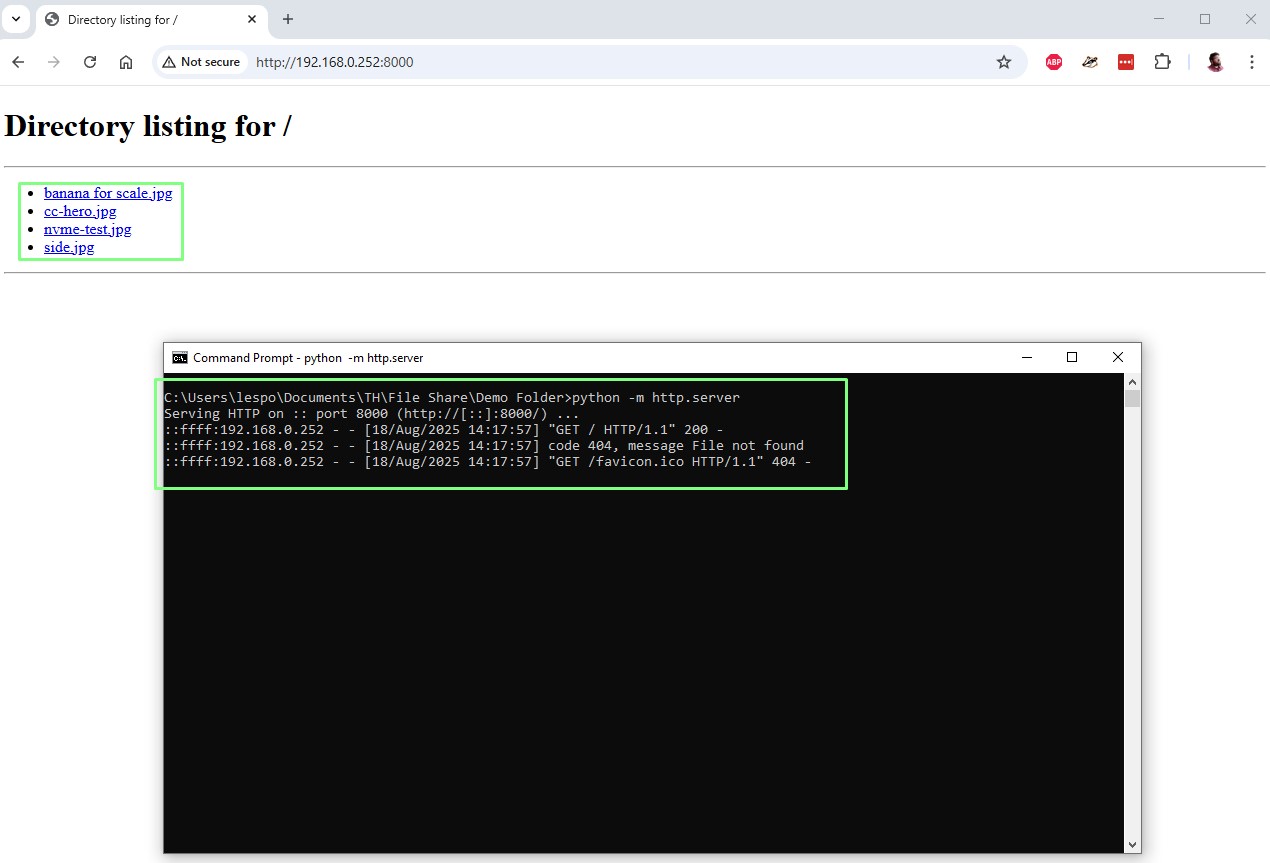
7. On another device, open a web browser and visit the IP address, add :8000 to the end. You will see the files in the directory, and the Command Prompt will update to show the HTTP requests made as files are downloaded.
8. To end the session, on the “server” press CTRL+C to stop the running command.
Host a server using Copyparty
- Copyparty can be used to quickly and easily share files across a network or the Internet.
- Copyparty has a browser-based interface that can be used as a basic file server.
- Need a quick media server? Copyparty can do that. Videos and audio can be played directly in your browser; no extra steps are required.
Created by 9001, Copyparty is a rather wonderful tool that turns almost any device capable of running Python into a file server. I’m not just talking about a simple file server here (though it does that too); it can also serve video to your devices directly from the browser, shrink downloads into ZIPs, create RSS feeds to track folder changes, and become an FTP or TFTP server. All you need is one file to make it happen, but Copyparty can be tweaked with an external config file should you want to perform more advanced tasks.
You will need to have Python installed on your computer. Linux users will have this by default, and Windows users should follow our guide on how to install Python.
Getting started with Copyparty
We’ll start with the most basic Copyparty setup: dropping one Python file in the directory that we want to share, and then running the file.
1. Download copyparty-sfx.py [direct download] from the Github repository.
2. Copy the file to the directory that you wish to share.
3. Open a Command Prompt / Terminal and run the Python file using the Python interpreter.
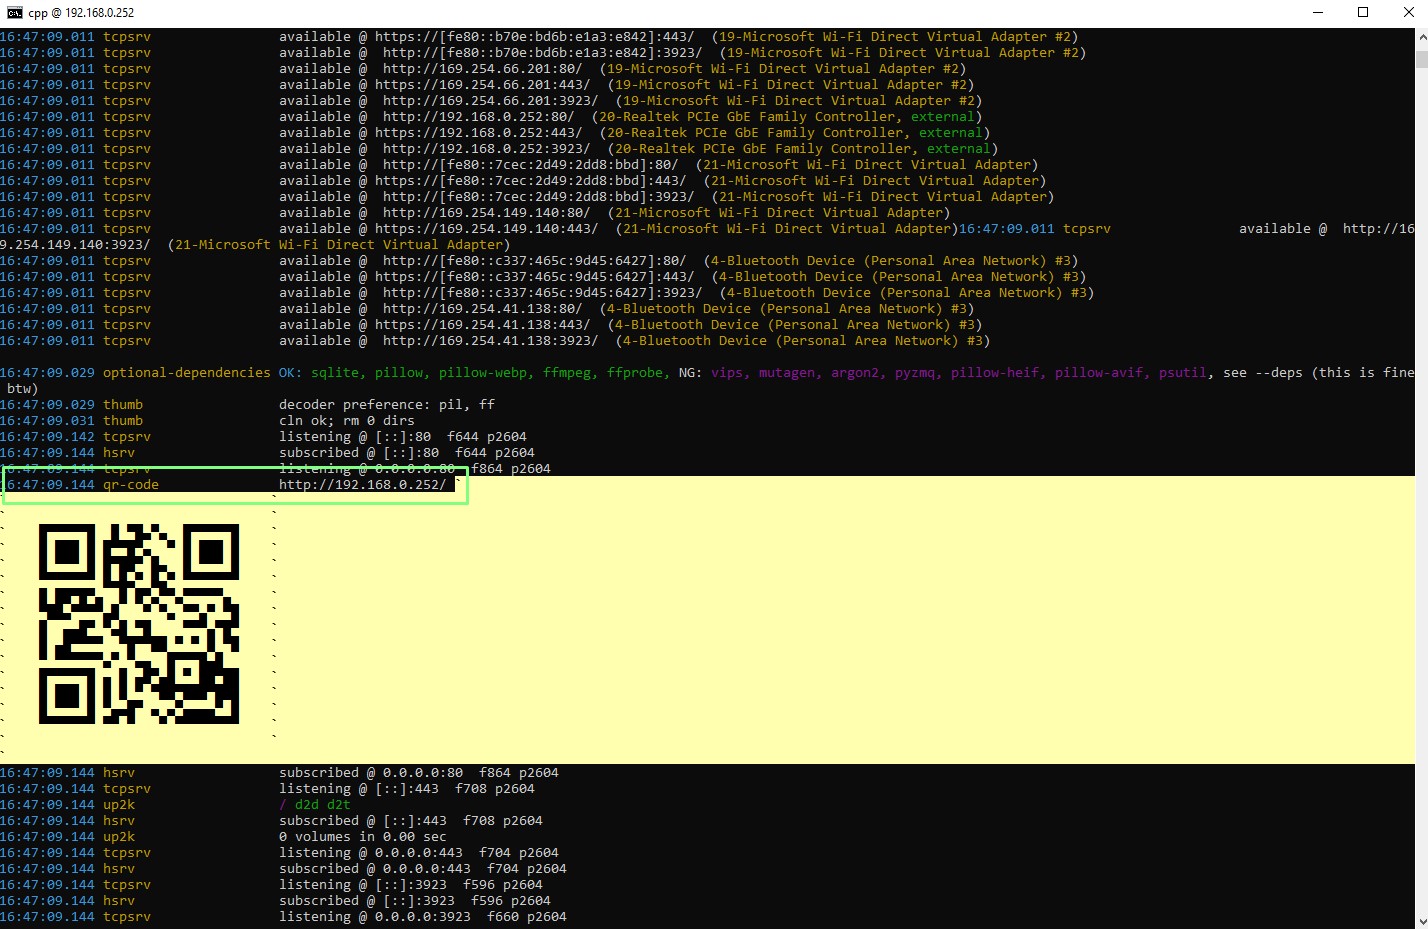
python copyparty-sfx.py4. Check the output for the IP address of the server, and make a note of it and the port number, typically 3923.
5. On another computer, open a web browser and enter the IP address and port number for the Copyparty server. Mobile users can use the QR code to quickly open the Copyparty interface.
The Copyparty Web Interface
Copyparty, at its most basic level, is accessed from any web browser (even Netscape 4.0, it claims!) and it provides a list of the files and directories inside the directory that you are sharing. You cannot go into any directories that are outside of the shared directory.
Lets take a look at the interface.
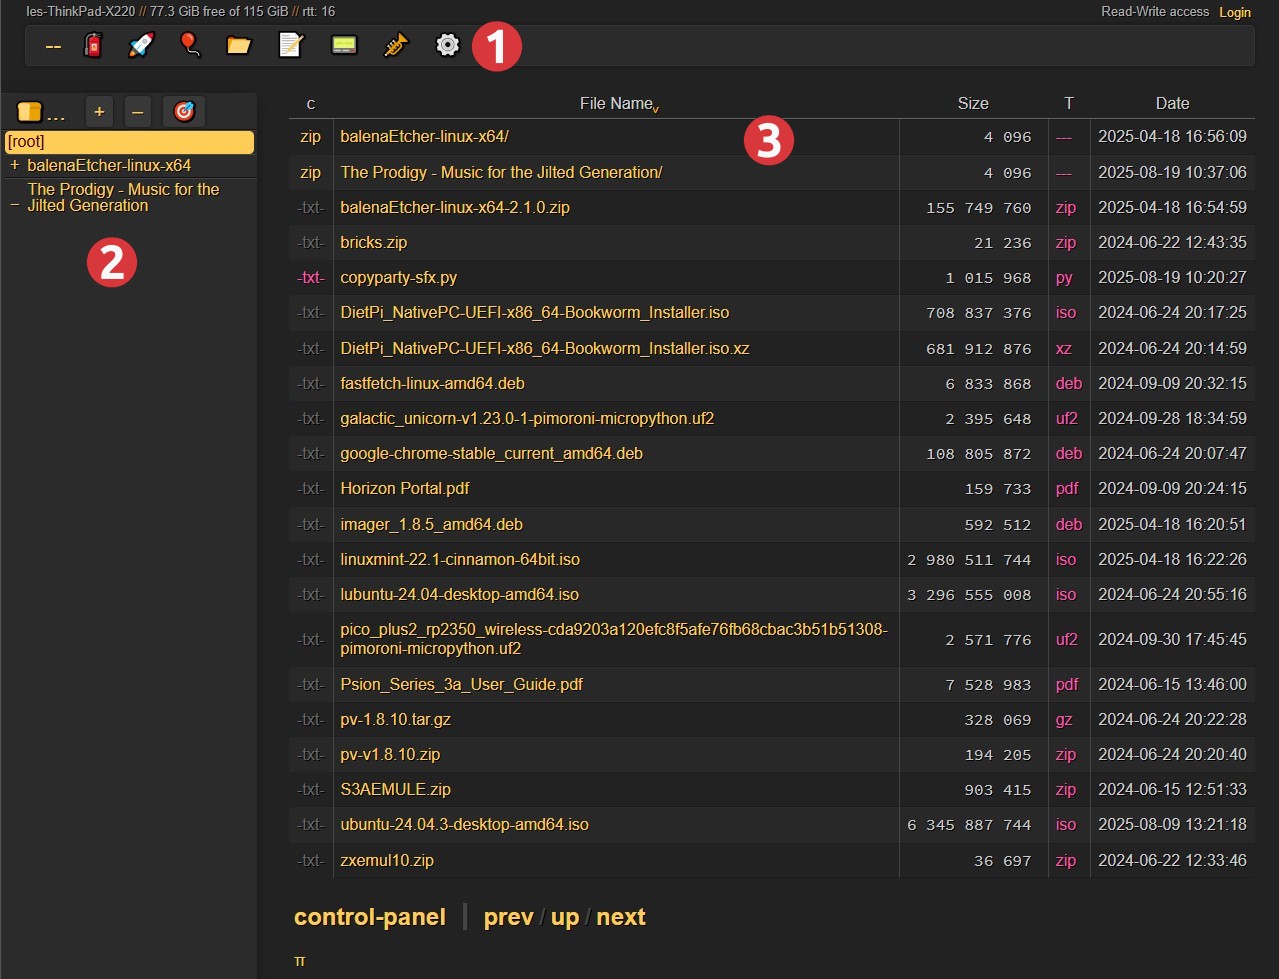
1. Toolbar submenu: Here, we can see the icons for
- Unpost: Delete / abort uploads.
- Up2k Uploads: Upload tool that supports resuming.
- Bup: Basic Uploader that supports Netscape 4.0.
- Mkdir: Make a new directory.
- New-md: Make a new markdown file.
- Msg: Send a message to the server log. (I love the pager icon!)
- Media Player Options: Yes, Copyparty can play media in the browser, more on that later.
- Configuration Options: Clicking on this opens a tool to change how Copyparty is displayed, how files are downloaded and configuration for resumable uploads.
2. Directory Tree: Show the directory structure where the Copyparty server is running from.
3. File Manager: Shows the files and directories hosted by the Copyparty server. Note that column C refers to the filetype. Directories appear as Zip archives in the file manager.
Downloading from the Copyparty Server
To open a file, simply click on it. This mostly triggers the browser to download the file, but for PDF, Images etc, the file will open in the browser. To directly download the file, right click and select Save As.
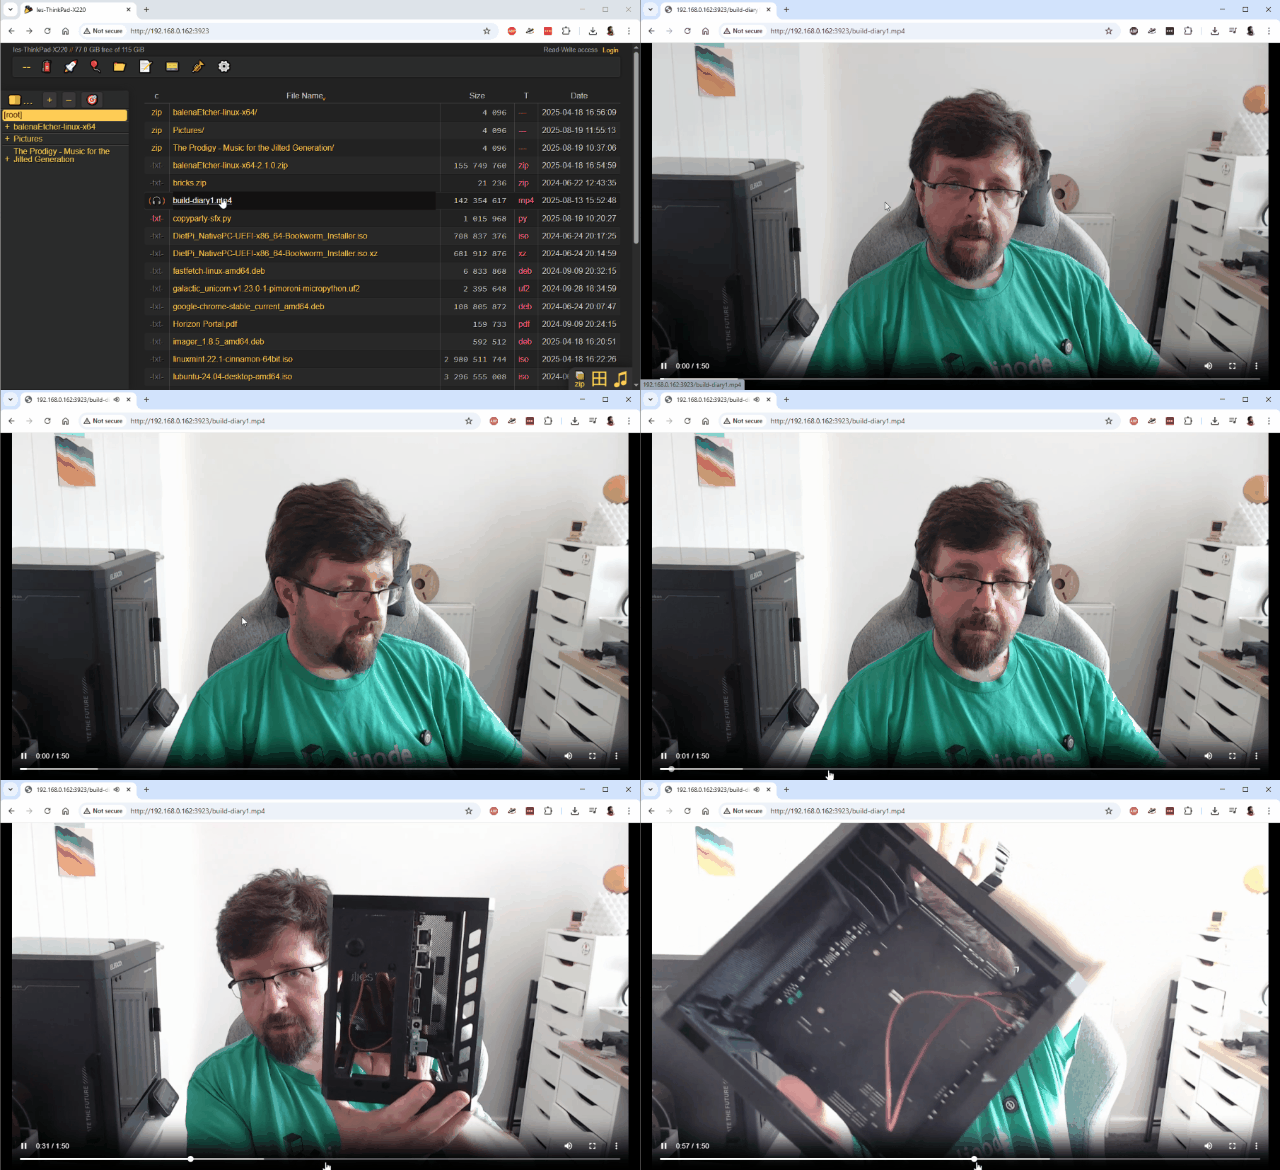
Media files can be played / previewed directly in the browser. So if you want to watch a movie or listen to music without installing any players, Copyparty will handle serving the media, and your browser will do the rest.
Uploading to the Copyparty Server
You’ll have full read/write permissions for the Copyparty server, and that means you can upload directly to the server from the browser.
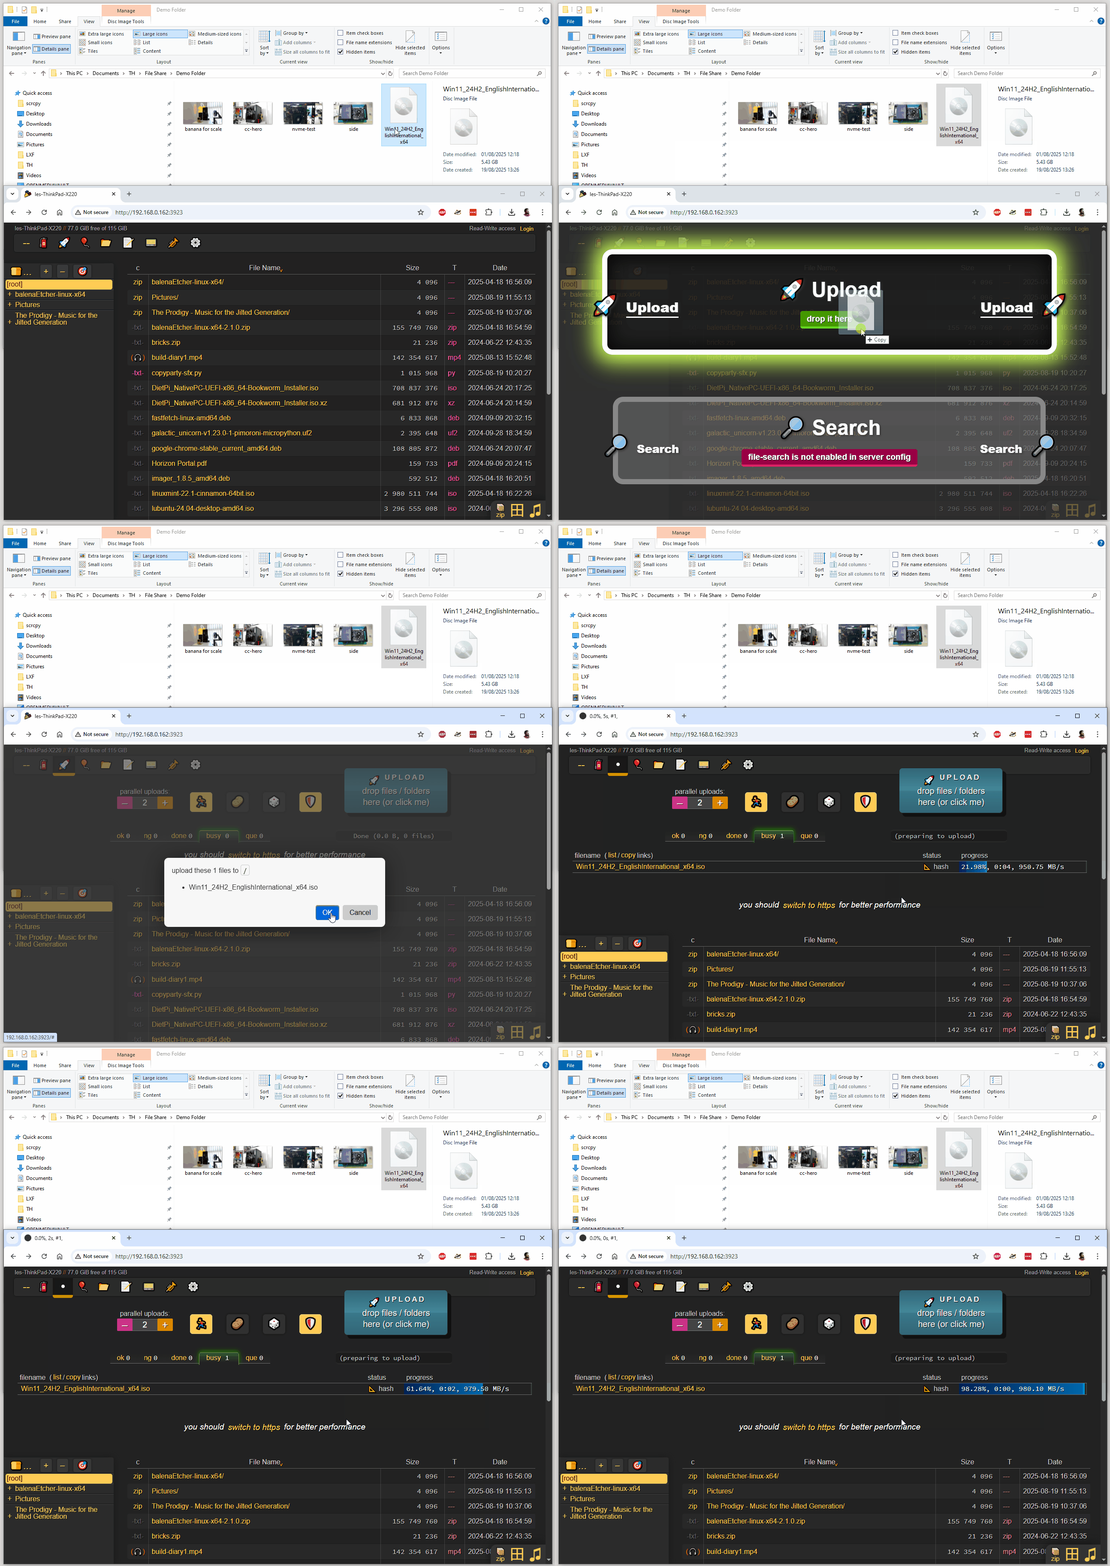
1. Using your OS file manager, locate the files/directories that you wish to upload and drag them into the Copyparty browser window.
2. Drop the files/directories onto Upload, and click OK to confirm.
Stopping the Copyparty Server
1. On the machine running Copyparty, press CTRL + C to end the running command. Alternatively, closing the terminal window will stop the server.
Taking Copyparty Further
Copyparty is insanely useful and powerful. It could easily be used as the basis of a simple home server or used externally via a service such as Cloudflare.
With Copyparty you can build the following servers.
- FTP
- TFTP
- SMB/CIFS
- Webdav
You just need an old, beat-up laptop (or any system) and some USB storage to make your own server. To take advantage of these features, you’ll need to delve into the extensive, well-written Copyparty documentation and follow the path for the server that you wish to create.

Les Pounder is an associate editor at Tom's Hardware. He is a creative technologist and for seven years has created projects to educate and inspire minds both young and old. He has worked with the Raspberry Pi Foundation to write and deliver their teacher training program "Picademy".
-
MisterMo Imagine bypassing your firewall to reinvent a worse version of right-click → Share. Windows, macOS, and Linux all solved this before Y2K.Reply
Future Article Ideas:
How to turn off your PC with just one line of code” → shutdown /s /t 0 (instead of clicking Start → Power → Shut down)
How to check the weather with just one line of code” → curl wttr.in (instead of glancing at your taskbar widget). -
Bruce Benson Back in the msdos days I discovered every pc could configure a ftp server to quickly exchange data.Reply
I use Python bottle to fire up quick servers all the time for sharing or exchanging information. Now with AI it is truly trivial to do. -
Joomsy Reply
Obligatory addition of "shutdown -h now" for our non-Windows friends. :)MisterMo said:Imagine bypassing your firewall to reinvent a worse version of right-click → Share. Windows, macOS, and Linux all solved this before Y2K.
Future Article Ideas:
How to turn off your PC with just one line of code” → shutdown /s /t 0 (instead of clicking Start → Power → Shut down)
How to check the weather with just one line of code” → curl wttr.in (instead of glancing at your taskbar widget).
And yeah, the Copyparty project is neat and all, but this is overkill for most scenarios. Just install OpenSSH, and use SFTP/scp/rsync. Any one of those will do the job, and the majority of devices can utilize them. I use them for my phone, TV, 3DS, PCs...You get the idea. And like you suggested, I also make use of Samba, but that's strictly for media server purposes.