Here's how I multi-task in the Linux terminal with Tmux
Elevate your sys admin powers!
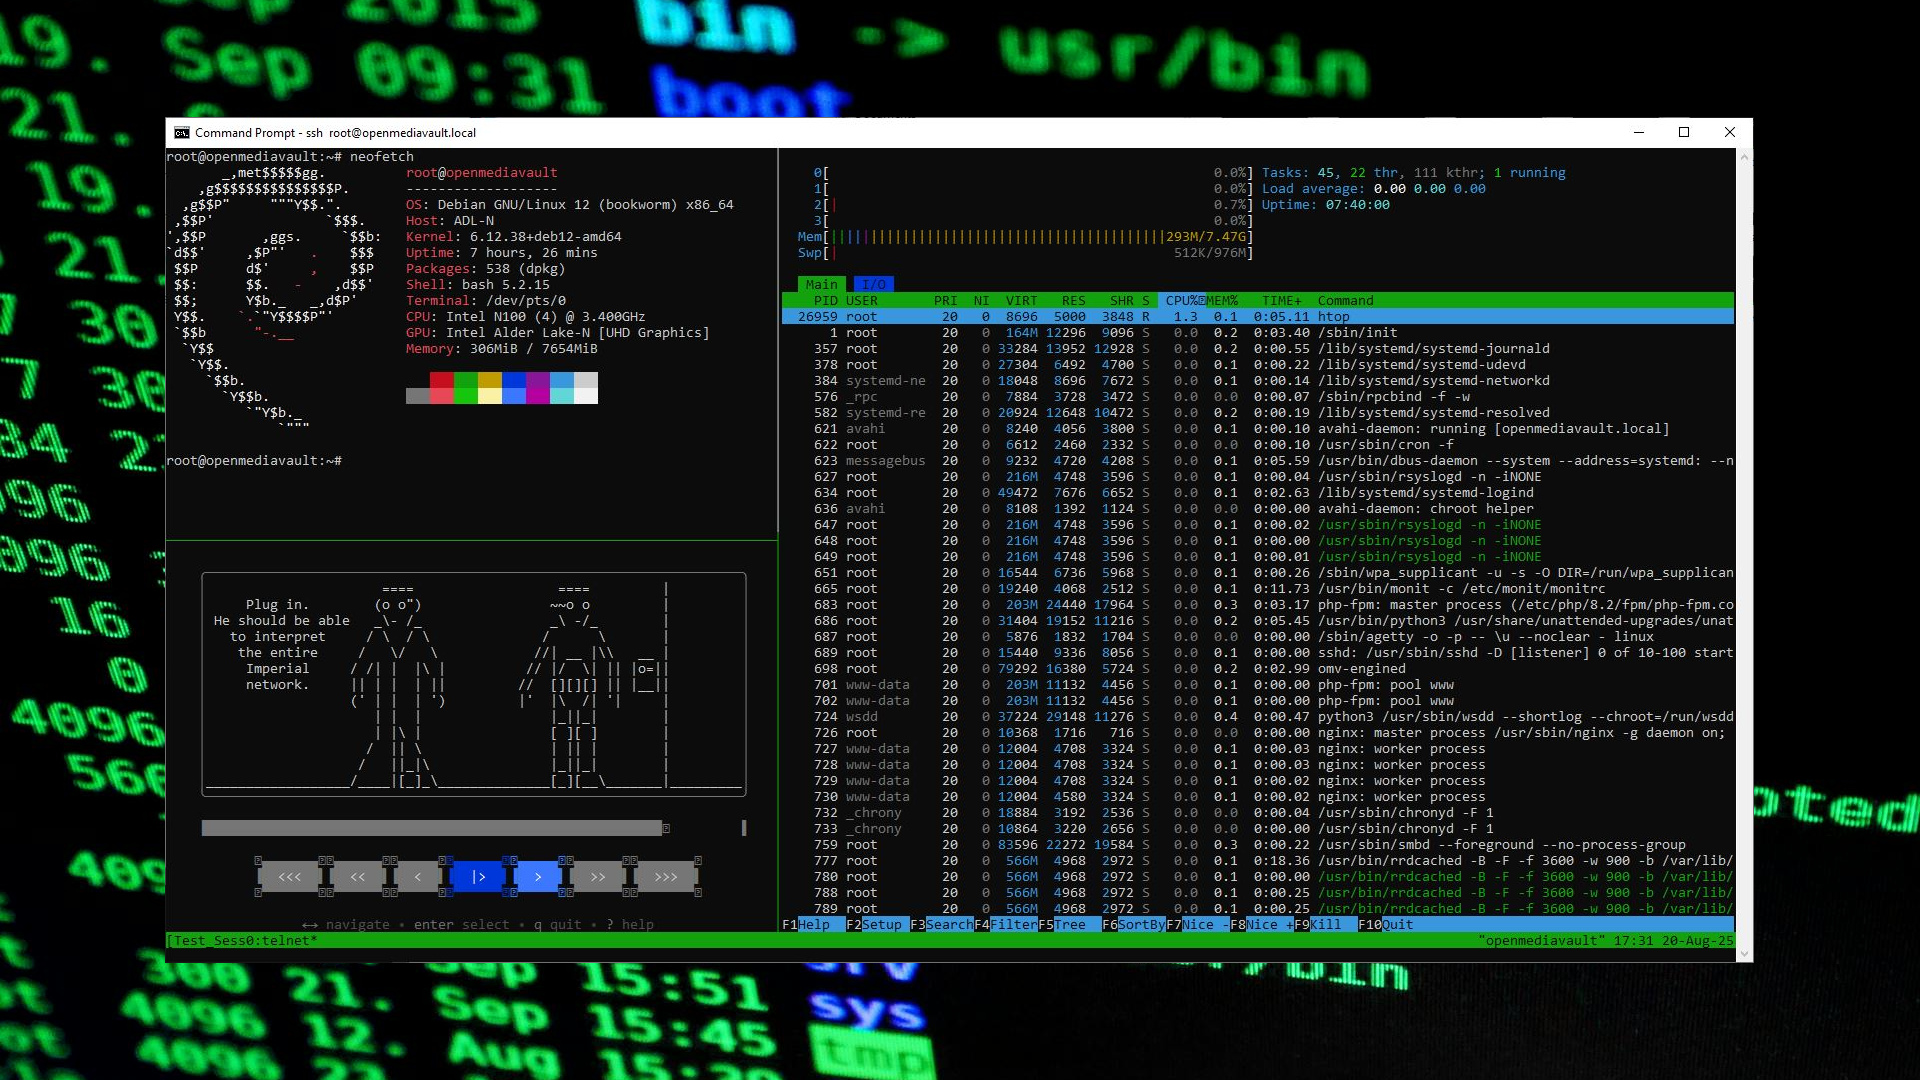
Linux users, new and old, have all hit this issue at some point in their careers: We’ve got a terminal session open and it's doing some long and incredibly important task, but we need to do something else. So we just open another terminal, right? Sure, you can do that, even over SSH, but there is a smarter way to do it, and that involves Tmux (Terminal Multiplexer).
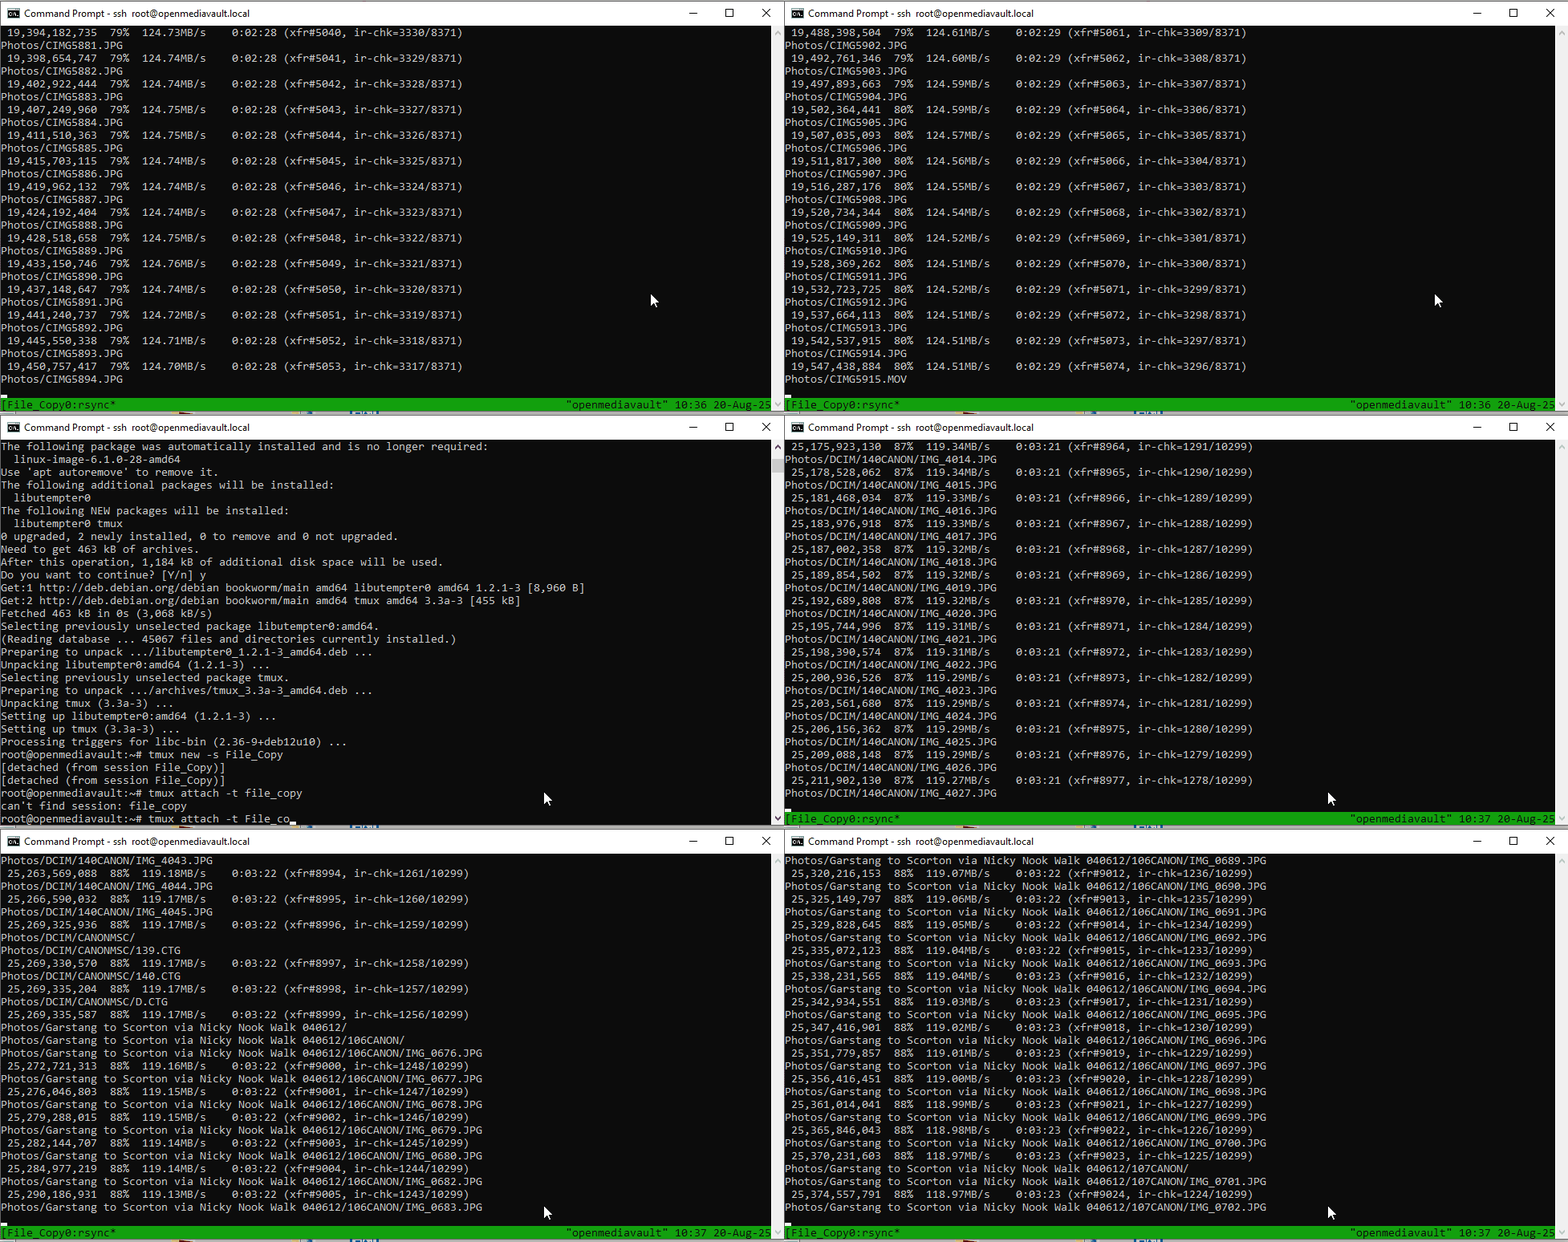
Tmux is a tool that enables you to run, manage, and organize many terminal sessions from one terminal window. We can detach from a running session, leaving it to perform a long task. For example, I am migrating lots of photos from one drive to another on my 3D printed server. So I am using Tmux to run the copy session, then detaching so that I can log off my PC / sleep / not break the copy process.
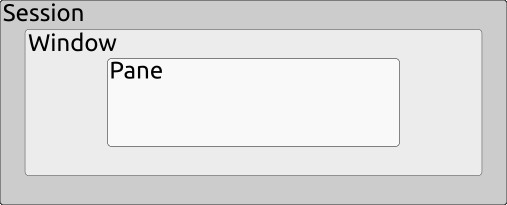
Tmux uses a Session >> Window >> Pane process to provide a workspace (Session) in which we can have multiple terminal tabs open (Windows), and those windows can be further split into subdivided regions (Panes).
So how do you get started with Tmux, and what can you do with it?
Creating Your First Tmux Session
In this first section, we will create a Tmux session in which we can work. But before we can use Tmux, we need to install it.
1. Open a terminal and update your software repositories, and then install Tmux.
sudo apt update && sudo apt install tmux2. Run the Tmux command to start a new named session called Test_Session.
Get Tom's Hardware's best news and in-depth reviews, straight to your inbox.
tmux new -s Test_Session3. Use a sleep command to force the terminal to pause for 30 seconds. We’ll use this command to tie up the Tmux session, simulating it doing a complex, time-consuming task.
sleep 304. Press CTRL + B and then d to detach from the session. You will return to the original terminal window.
5. Attach back to the Tmux session.
tmux attach -t Test_Session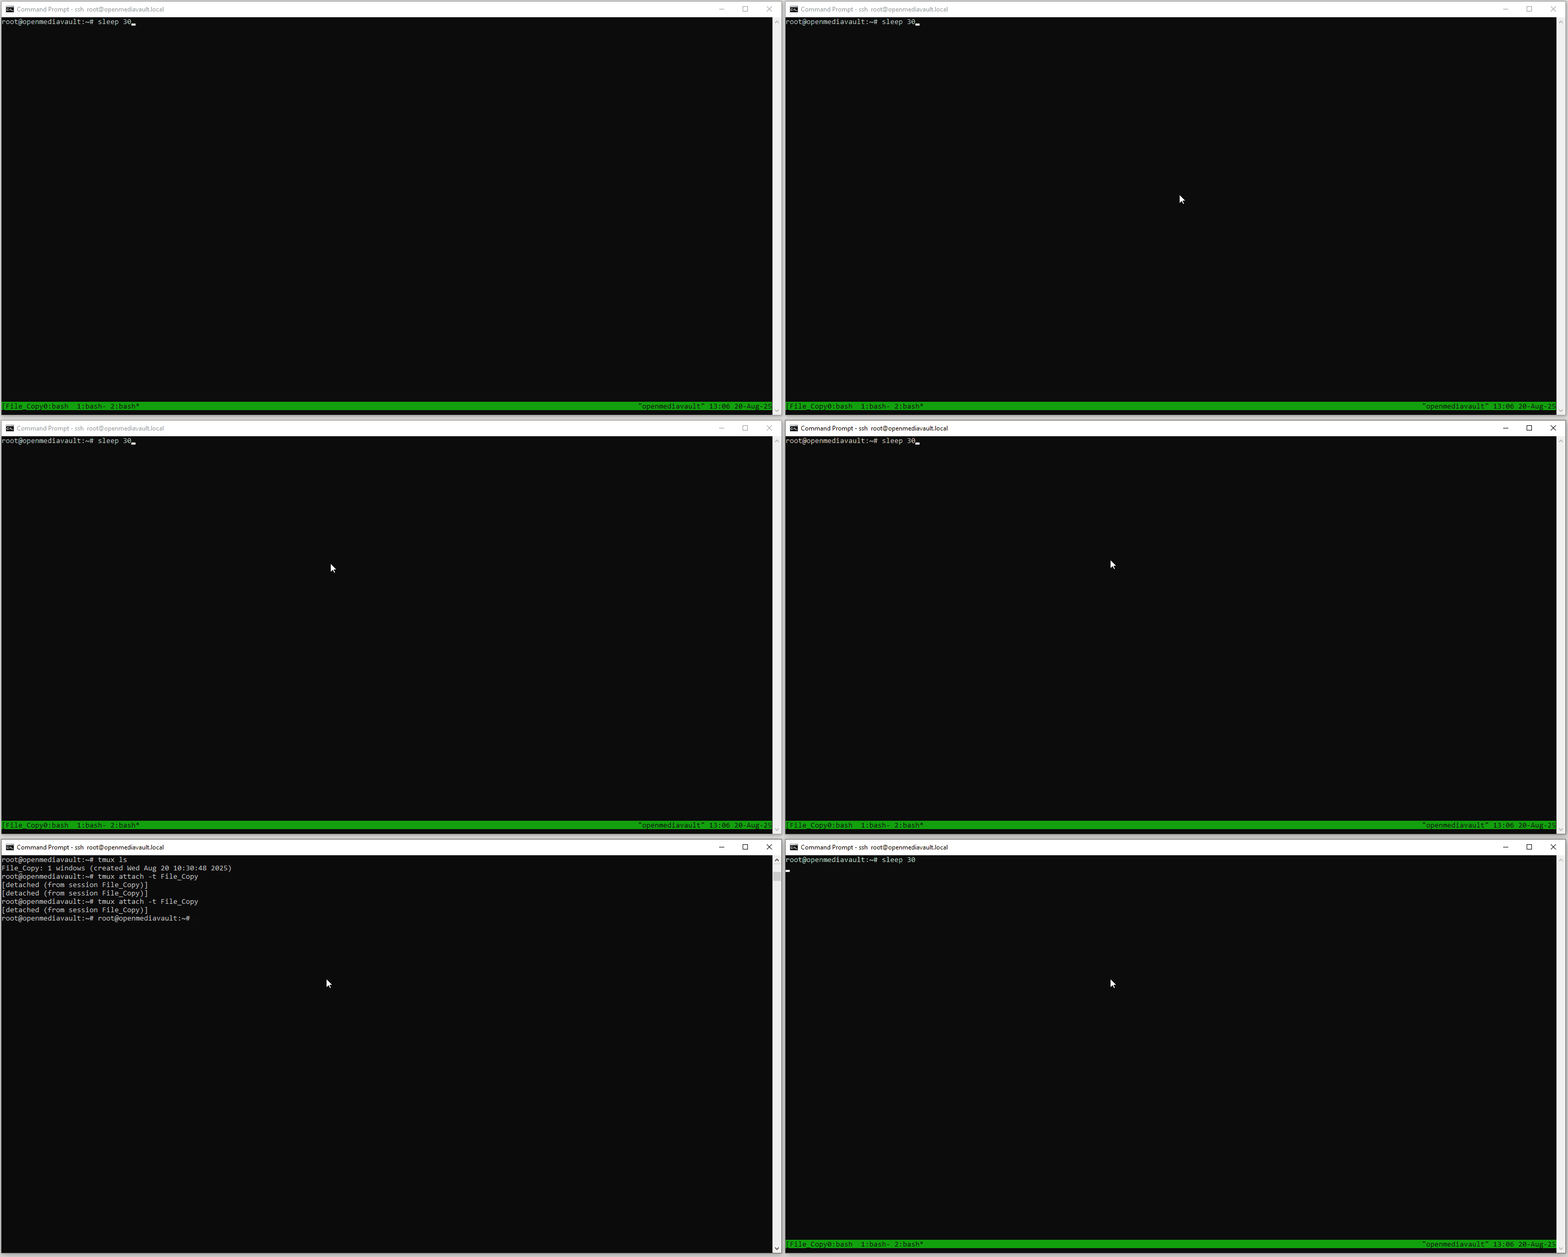
6. Detach from the session by pressing CTRL + B and then d
7. Create another session called Another_Session. We should now have two sessions running, one we are attached to (Another_Session) and the previous session (Test_Session)
tmux new -s Another_Session8. List all of the sessions. The attached (current active) session is clearly identified.
tmux ls 
9. Switch to the original Test_Session.
tmux switch -t Test_Session10. List the sessions and you will see that the attached session is now Test_Session.
tmux ls 
11. Kill Another_Session.
tmux kill-session -t Another_SessionCommand | Description | Example |
|---|---|---|
tmux | Starts a new Tmux session. | tmux |
tmux new -s name | Starts a new named Tmux session. | tmux new -s File_Copy |
tmux ls | List all of the Tmux sessions. | tmux ls |
tmux detach | Detach from the current session. You can also press CTRL + B and then press D to detach. | tmux detach |
tmux attach -t name | Attach to a running session. | tmux attach -t File_Copy |
tmux switch -t name | Switch to another running Tmux session. | tmux switch -t Resources |
tmux kill-session -t name | Kill a named session. | tmux kill-session -t File_Copy |
Using Tmux Windows
Each Tmux window is essentially its own shell, and we can use them to switch between tasks in our overall Tmux session. For example, we could have one window for a long-running session, and another for checking logs.
Let's start using Windows in our Tmux session.
1. Attach back to the Tmux session. If it has been killed, use Step 2 in the Session section to re-create it.
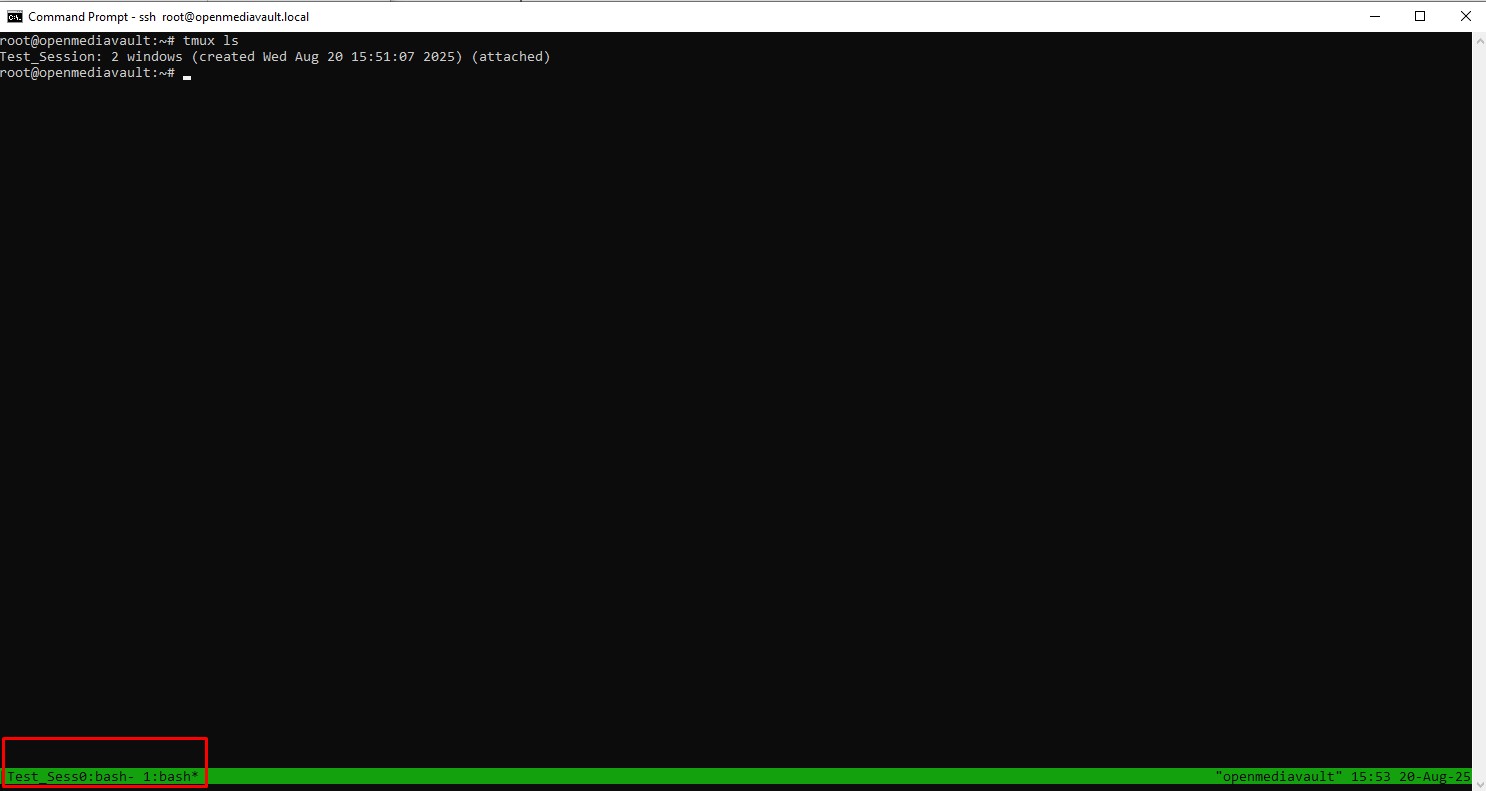
tmux attach -t Test_Session2. Press CTRL + B and then c to create a new Window. The name of the new Window is the same as the first, bash.
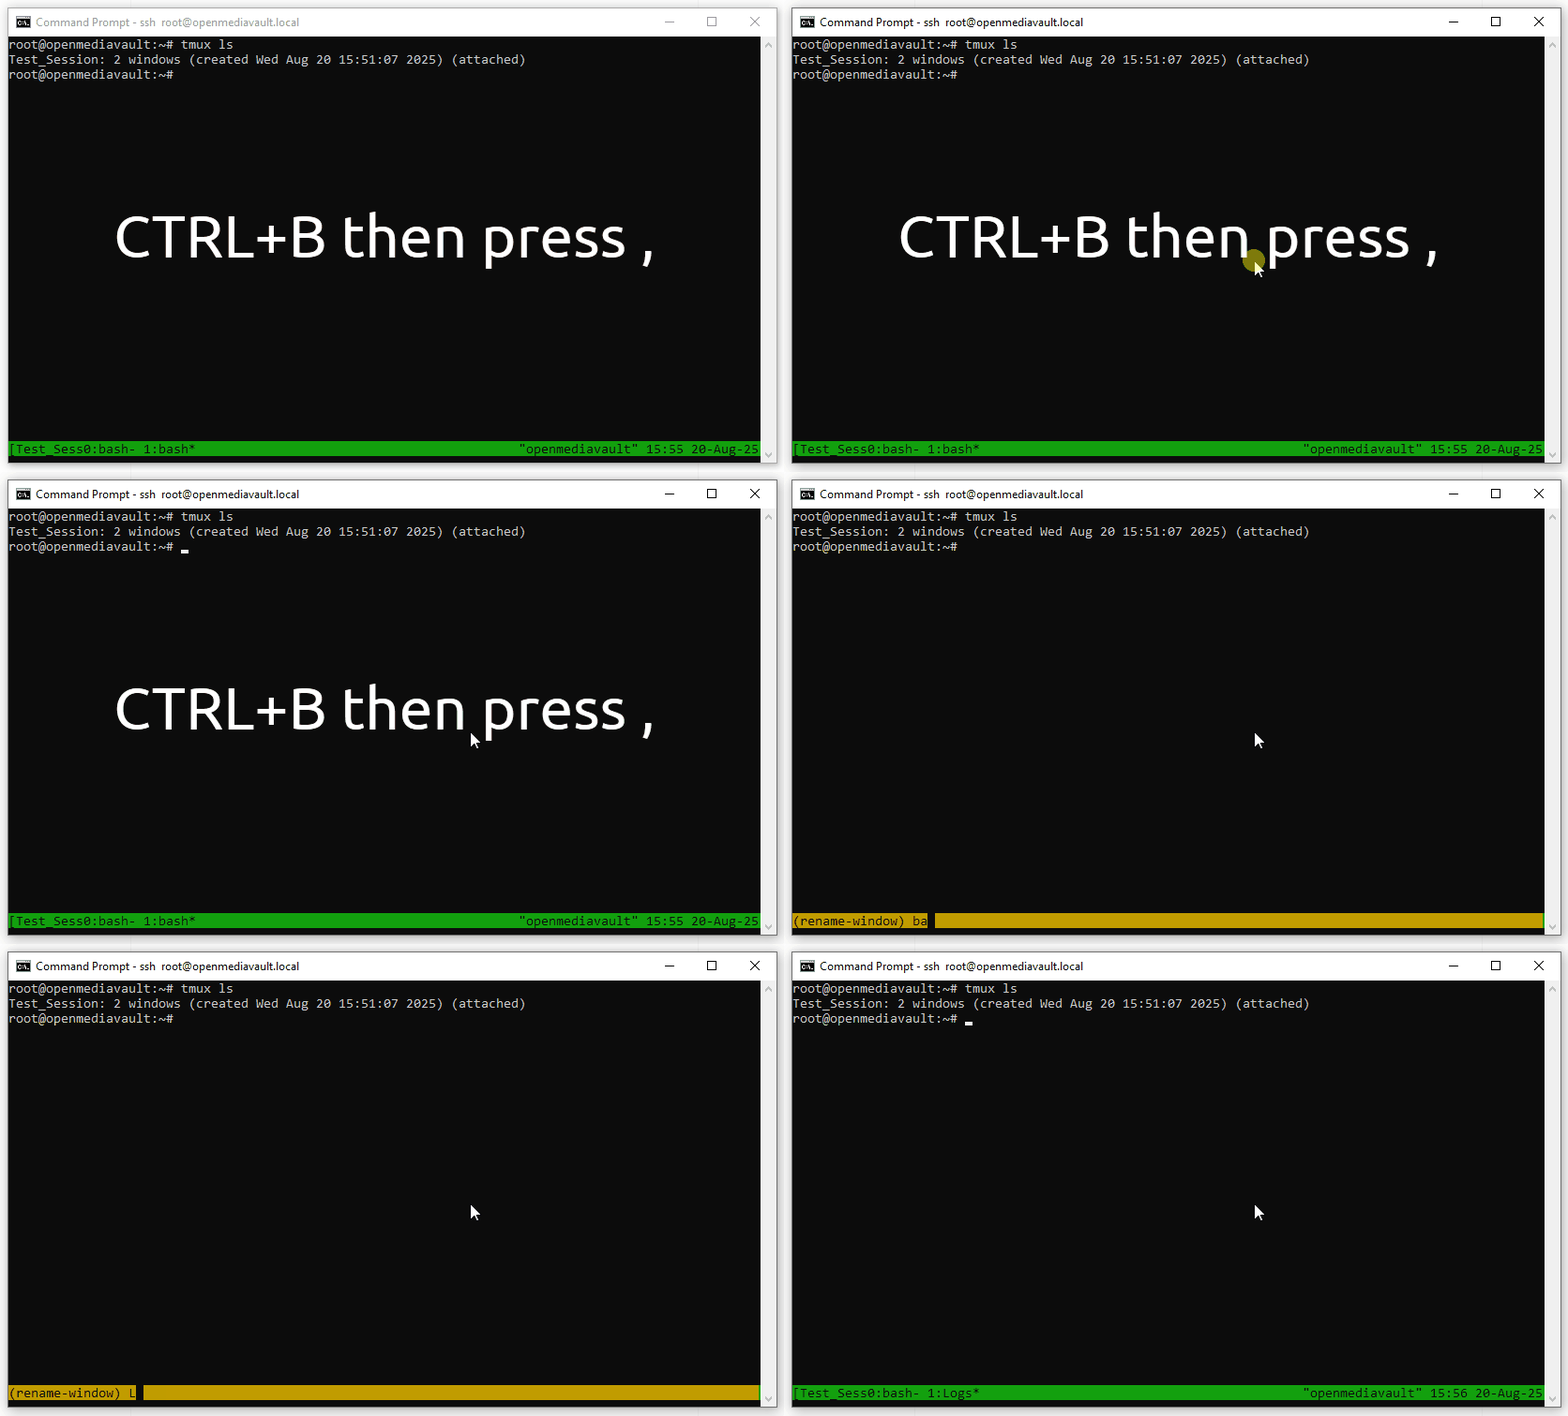
3. Rename the current window to Logs by pressing CTRL + B and then Press Enter when the filename has been changed. Note that the bottom left Window list has now been updated to show the new name.
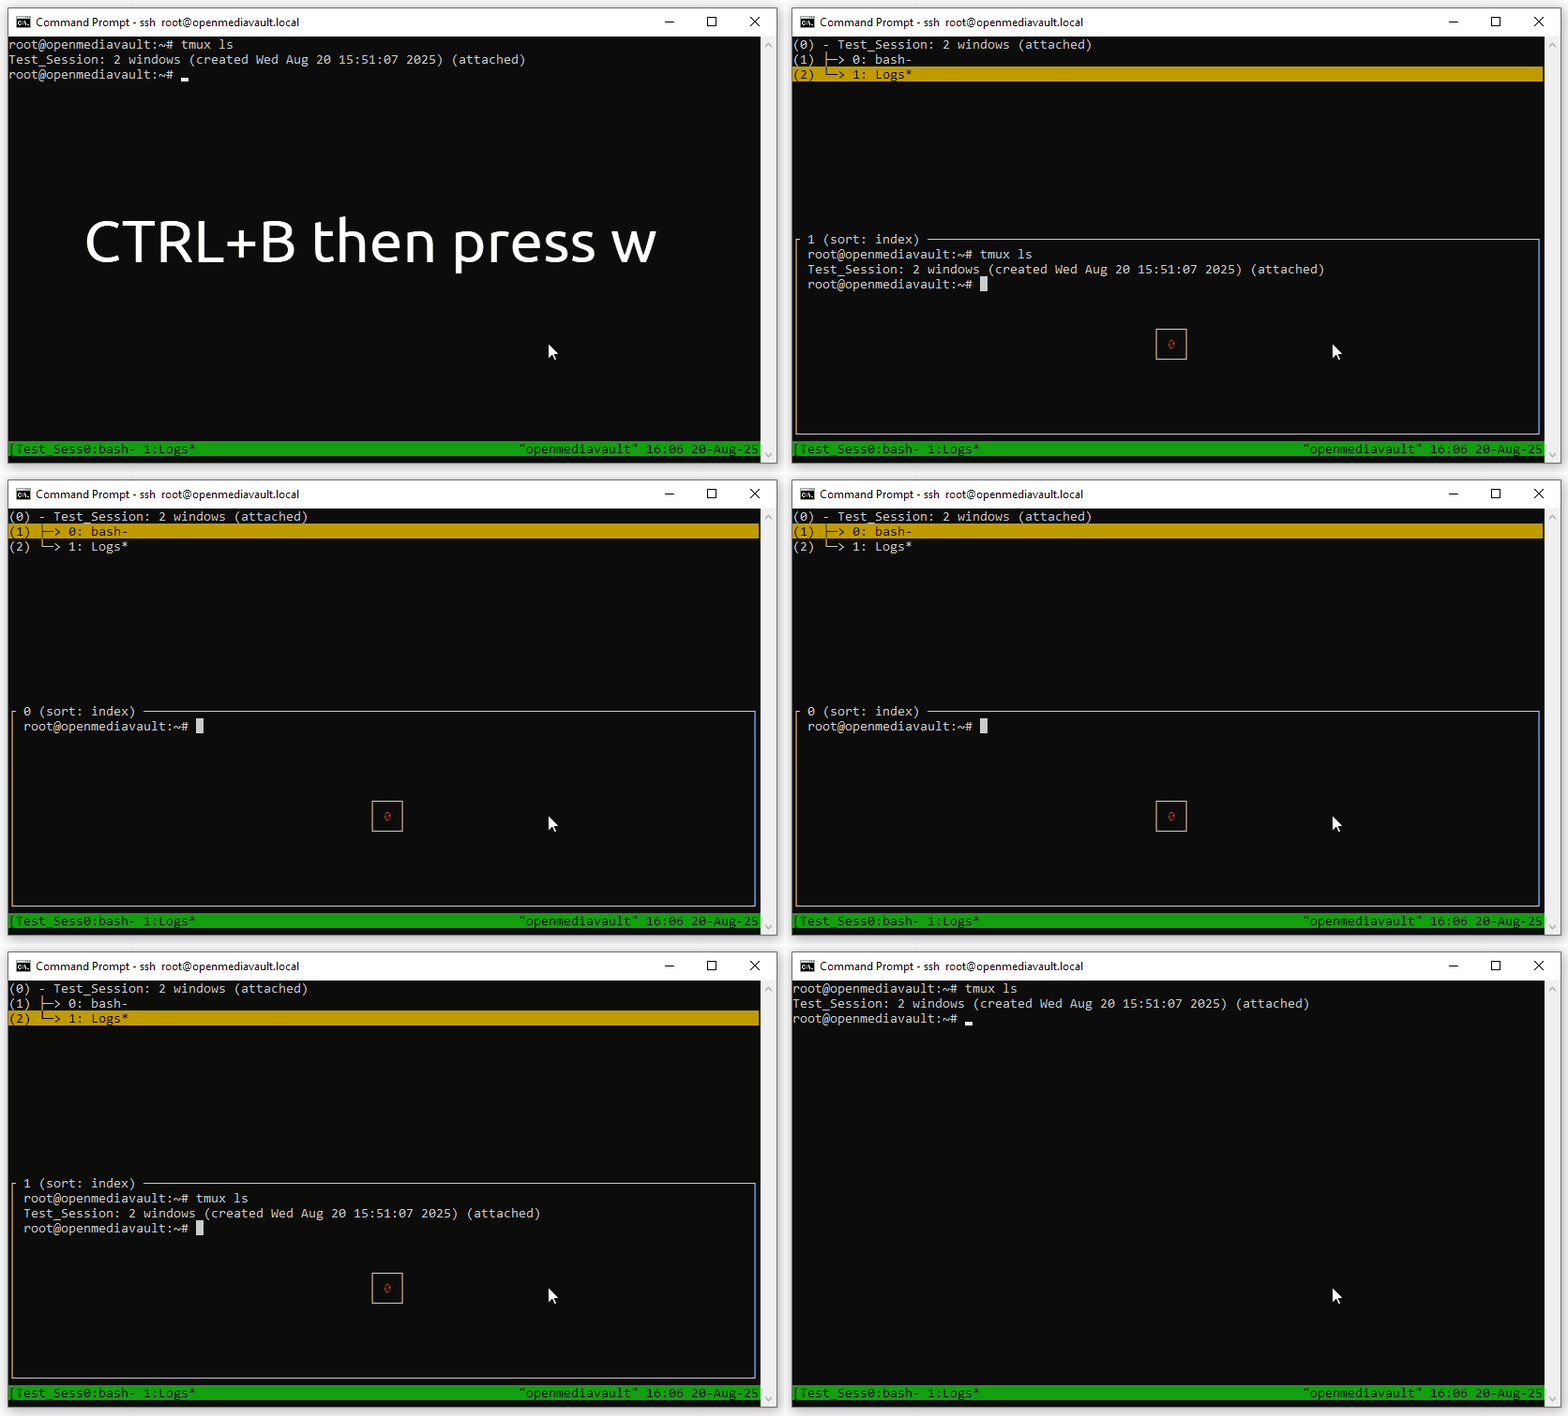
4. List all of the Windows by pressing CTRL + B then w. We can select any window using the arrow keys, press Enter to change to that window. Alternatively you can cycle through the windows by pressing CTRL + B and n (next window) or p for the previous.
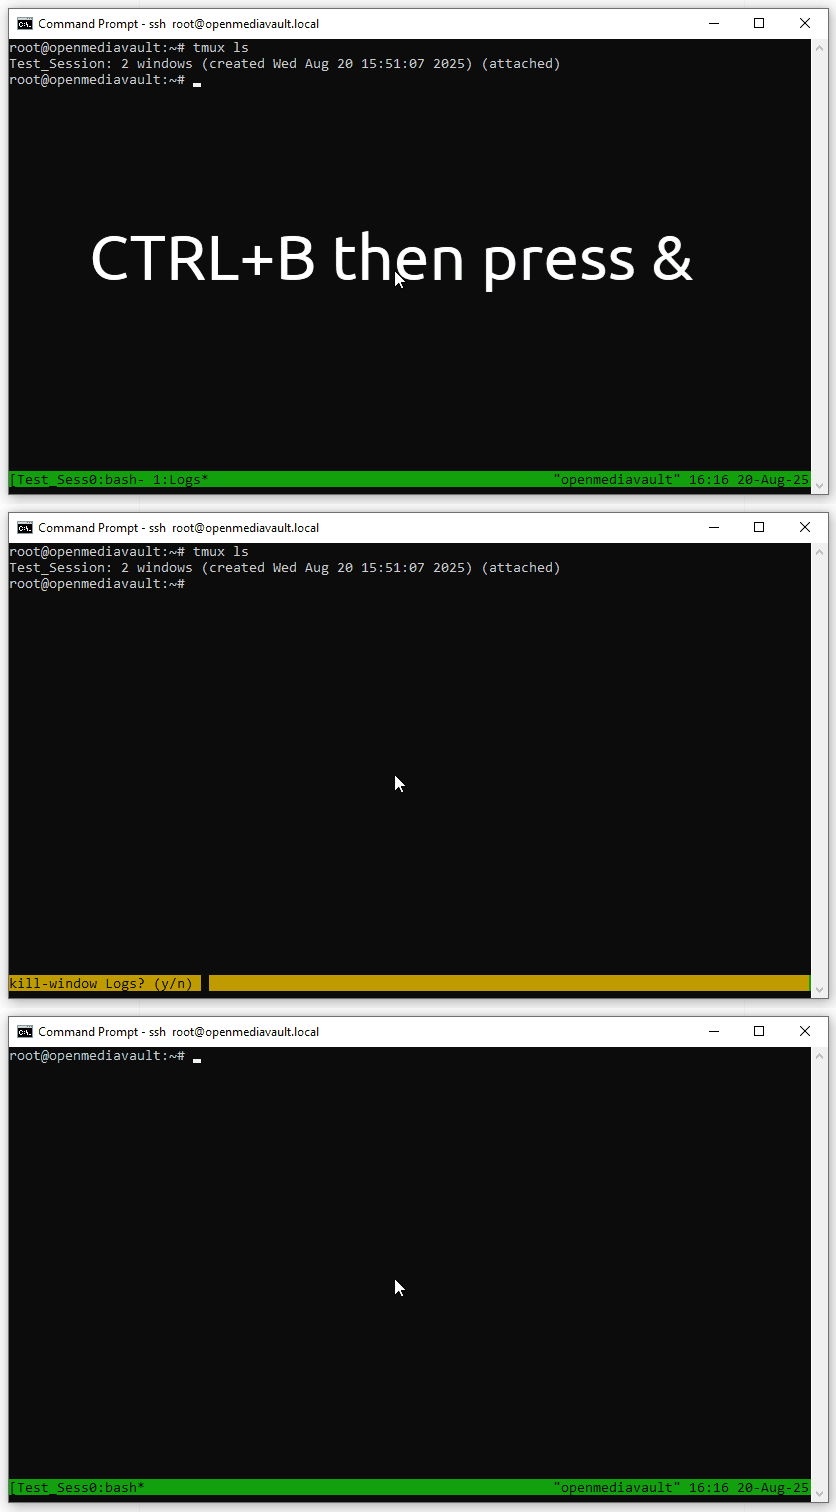
5. Close the current window by pressing CTRL + B and then &. Here I am closing the Logs window as I no longer require it.
Key combination | Description |
|---|---|
CTRL + B then press c | Create a new window. |
CTRL + B then press , | Rename the current window. |
CTRL + B then press w | List windows, use arrow keys and Enter to select. |
CTRL + B then press n | Next window. |
CTRL + B then press p | Previous window. |
CTRL + B then press & | Close the current window. |
Using Tmux Panes to split Windows
We can split any window into multiple panes. So if we need to keep an eye on some logs while doing other terminal work, we can!
1. Attach back to the Tmux session. If it has been killed, use Step 2 in the Session section to re-create it.
tmux attach -t Test_Session2. Press CTRL + B then % to split the window vertically, giving us two equally sized columns.
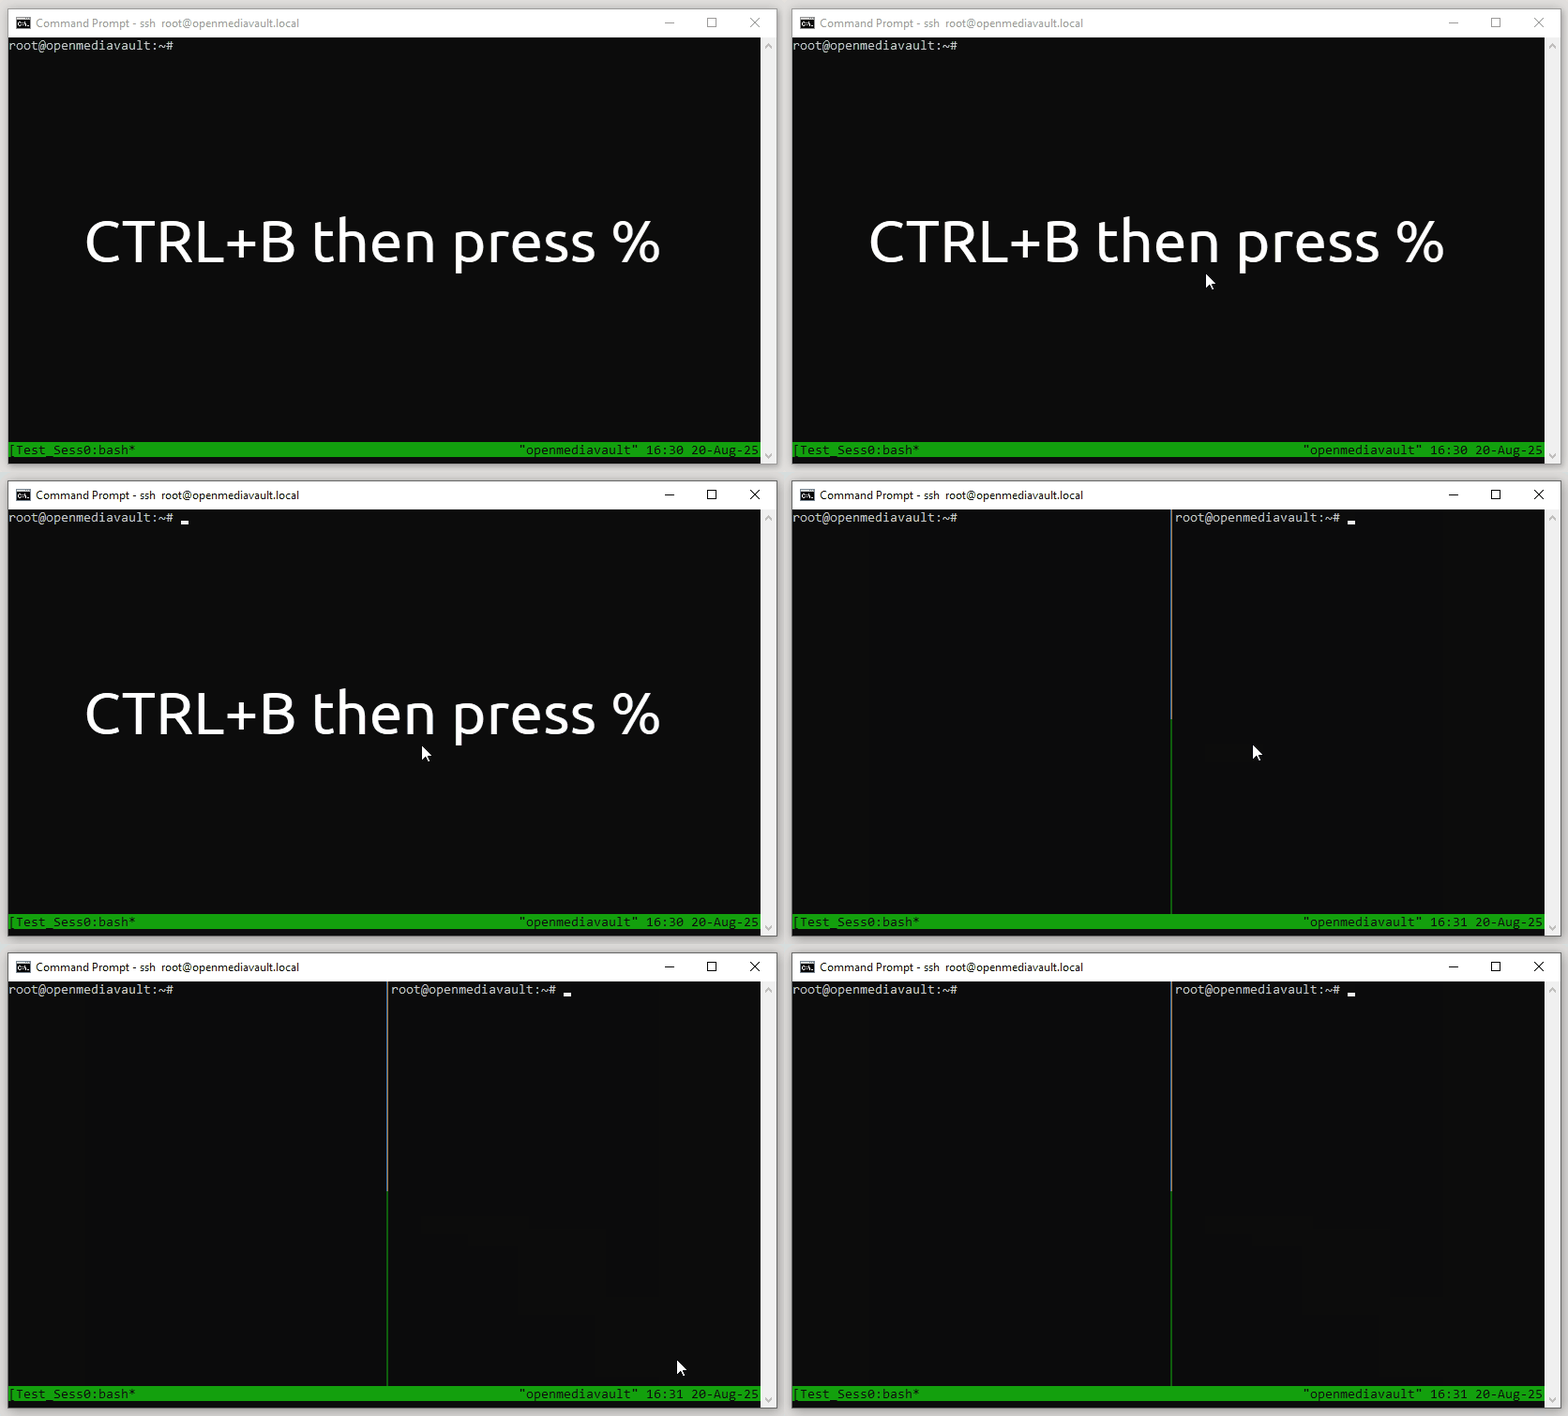
3. Press CTRL + B then “ to split the current pane horizontally. This could be useful for a long command where you need to keep an eye on the output. An rsync file transfer for example.
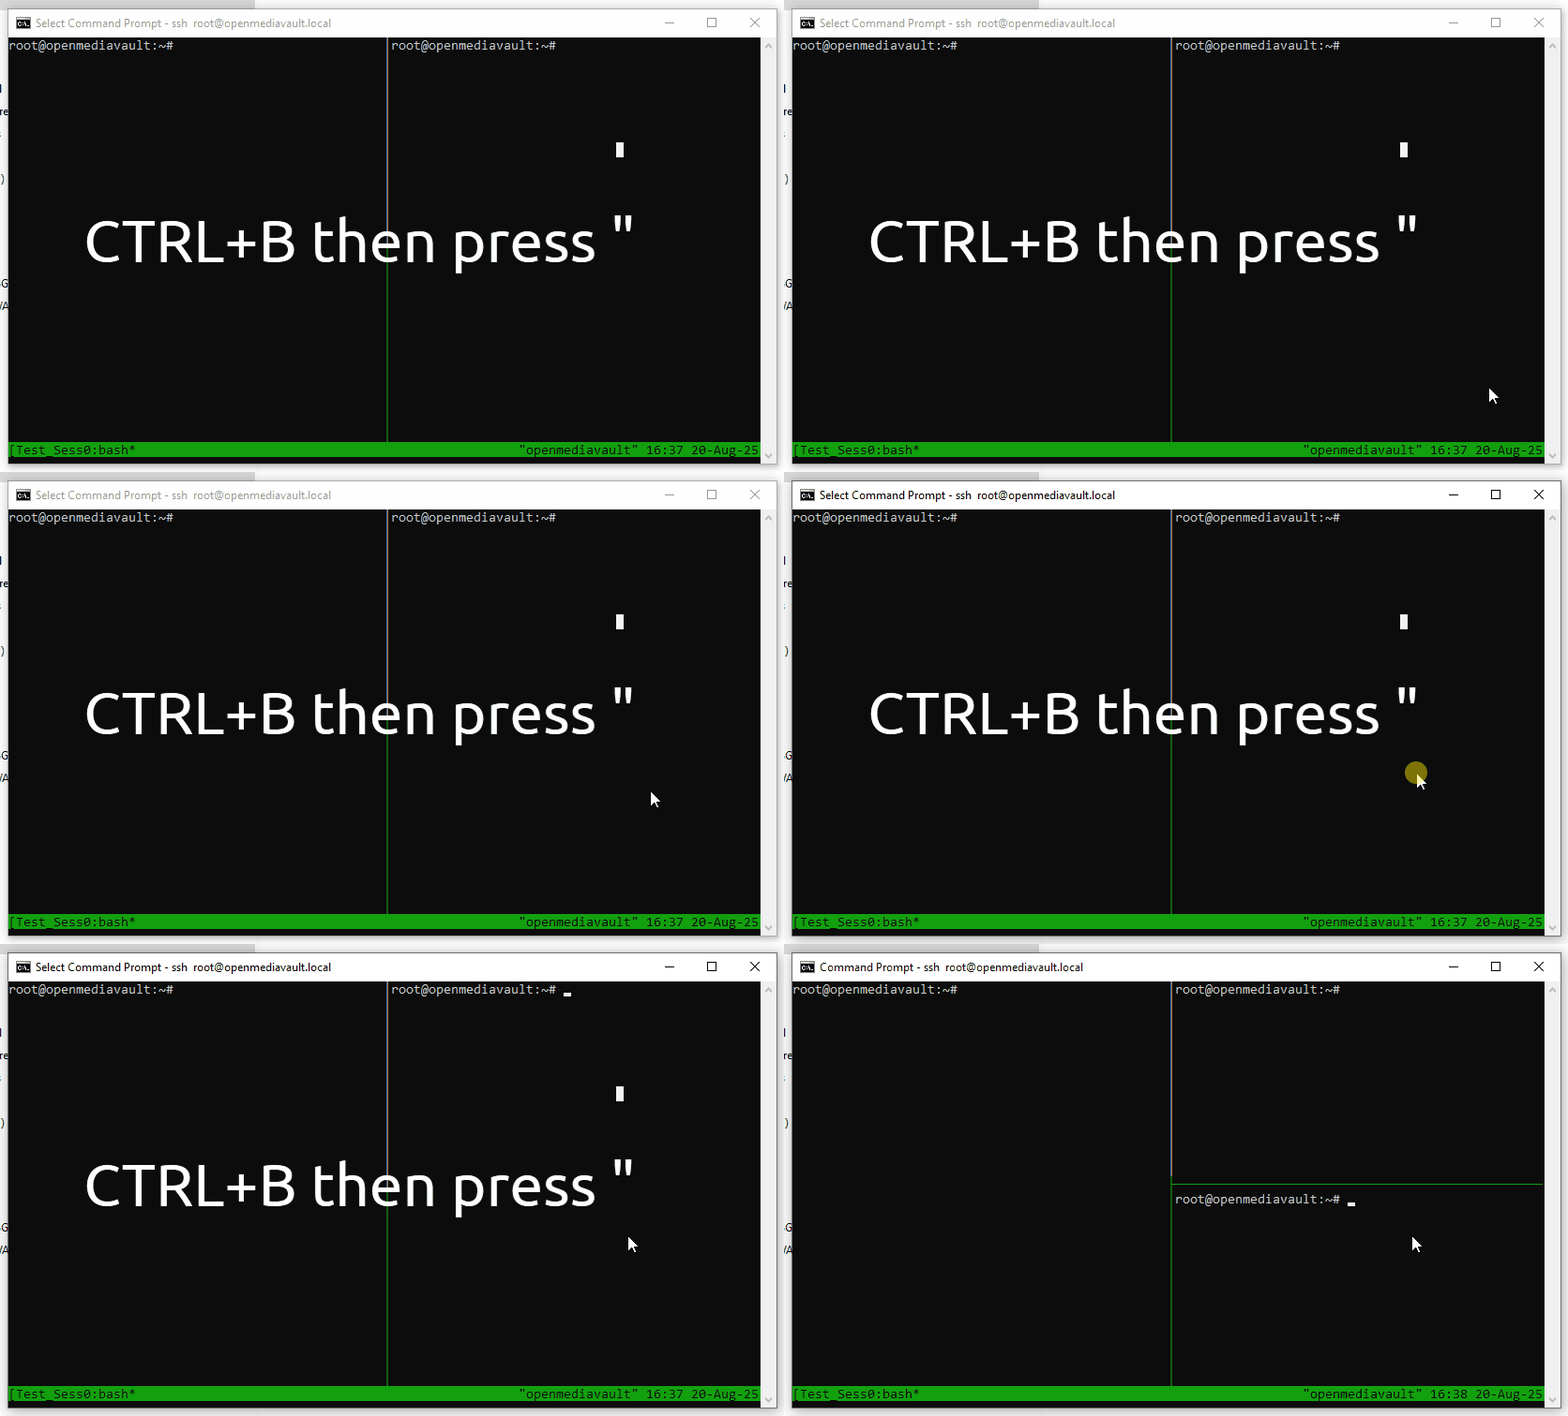
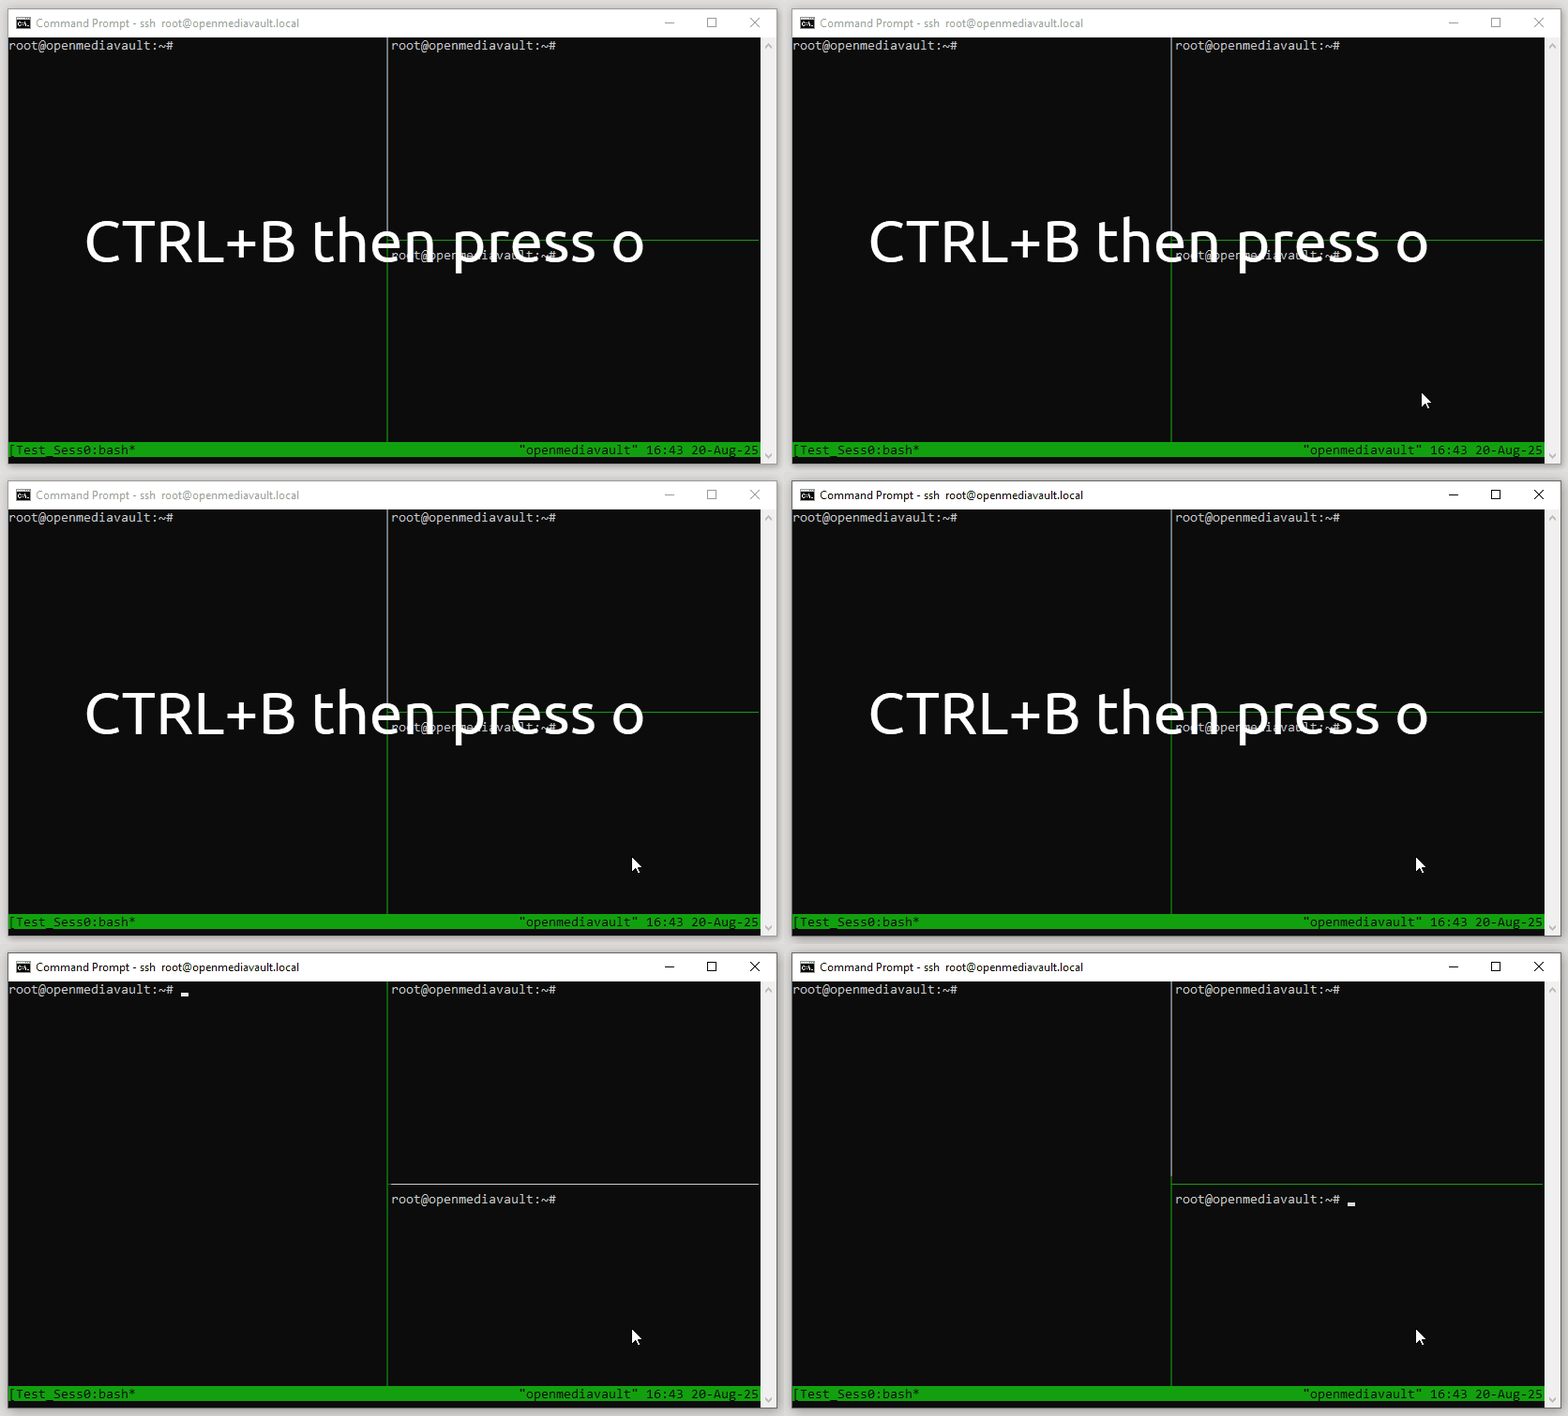
4. Press CTRL + B then o to switch between the panes. Alternatively press CTRL + B then ; to toggle between the last two panes.
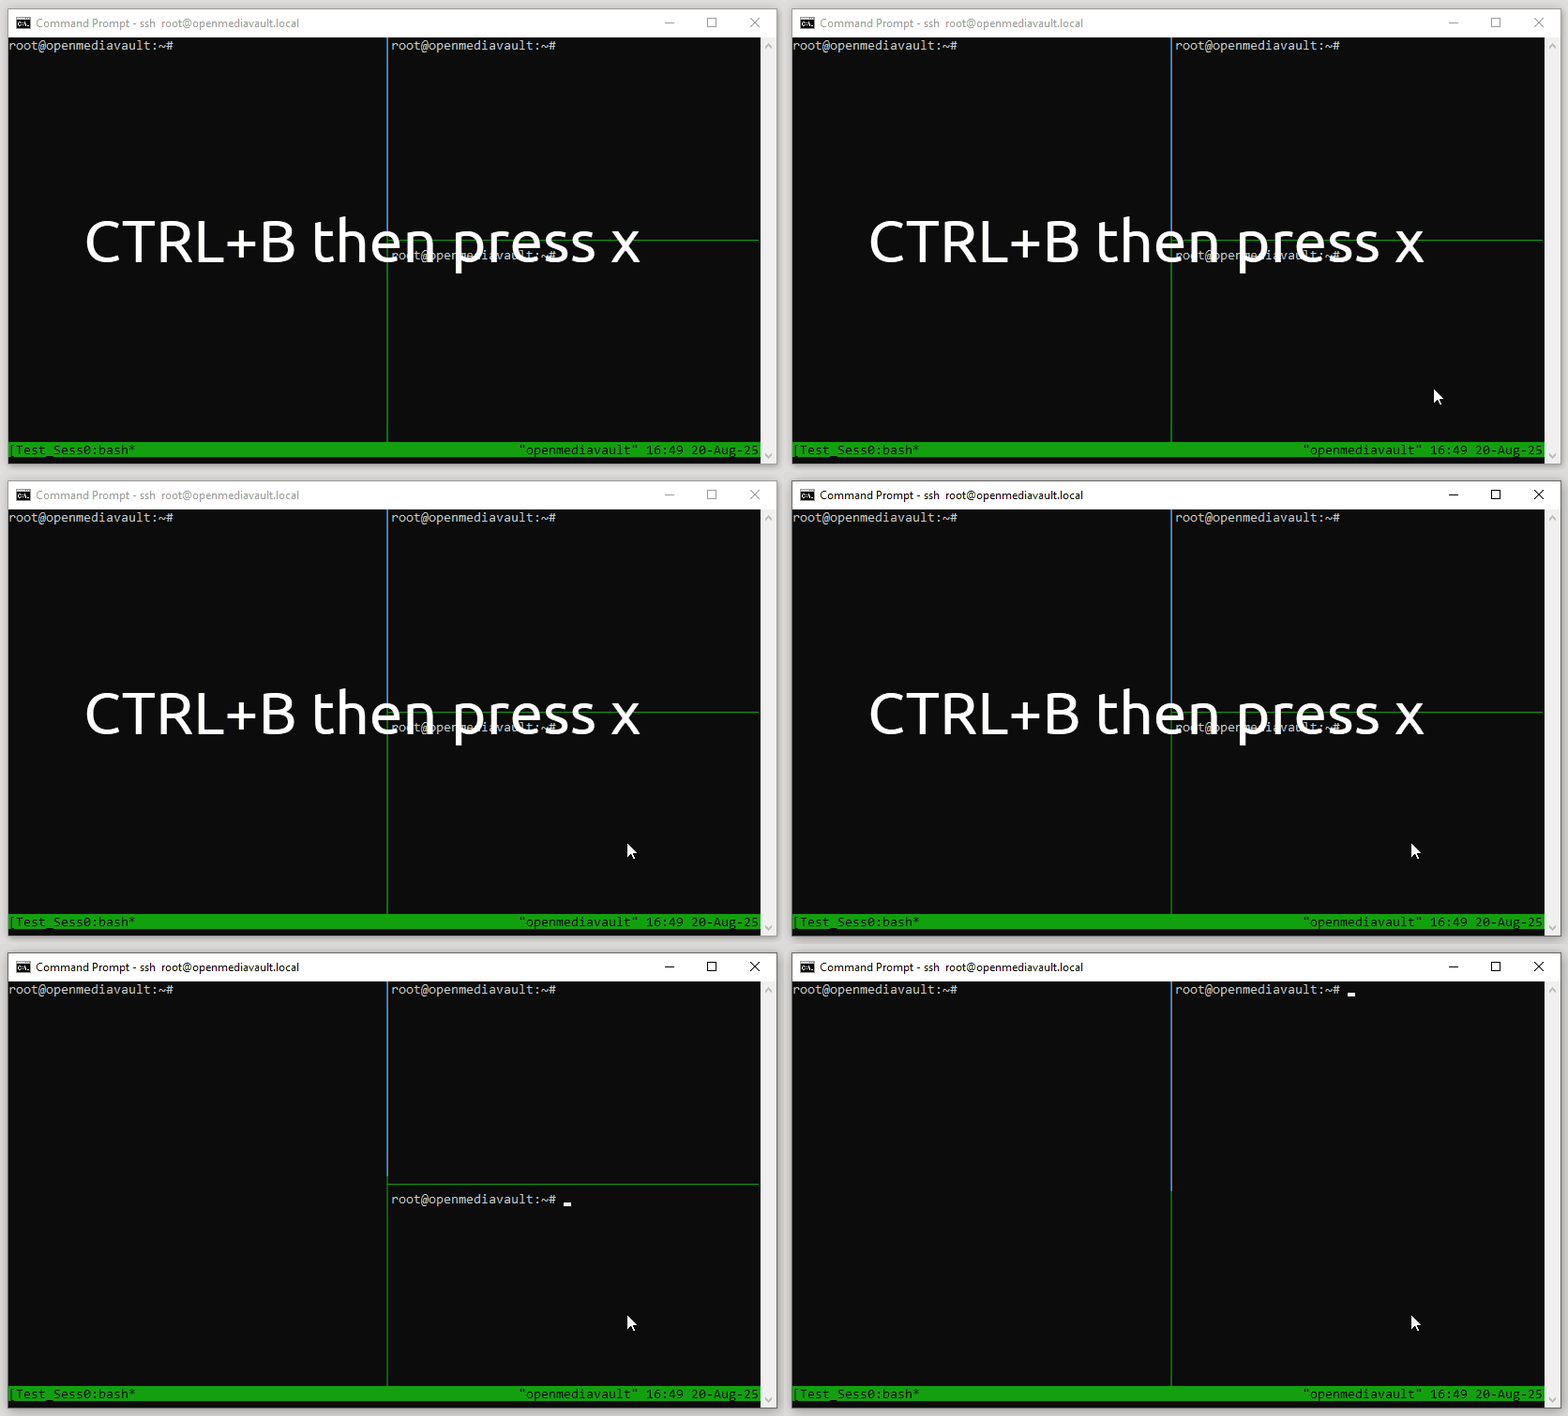
5. Press CTRL + B then x to close the currently selected pane. You will need to confirm the closure by pressing Y and Enter.
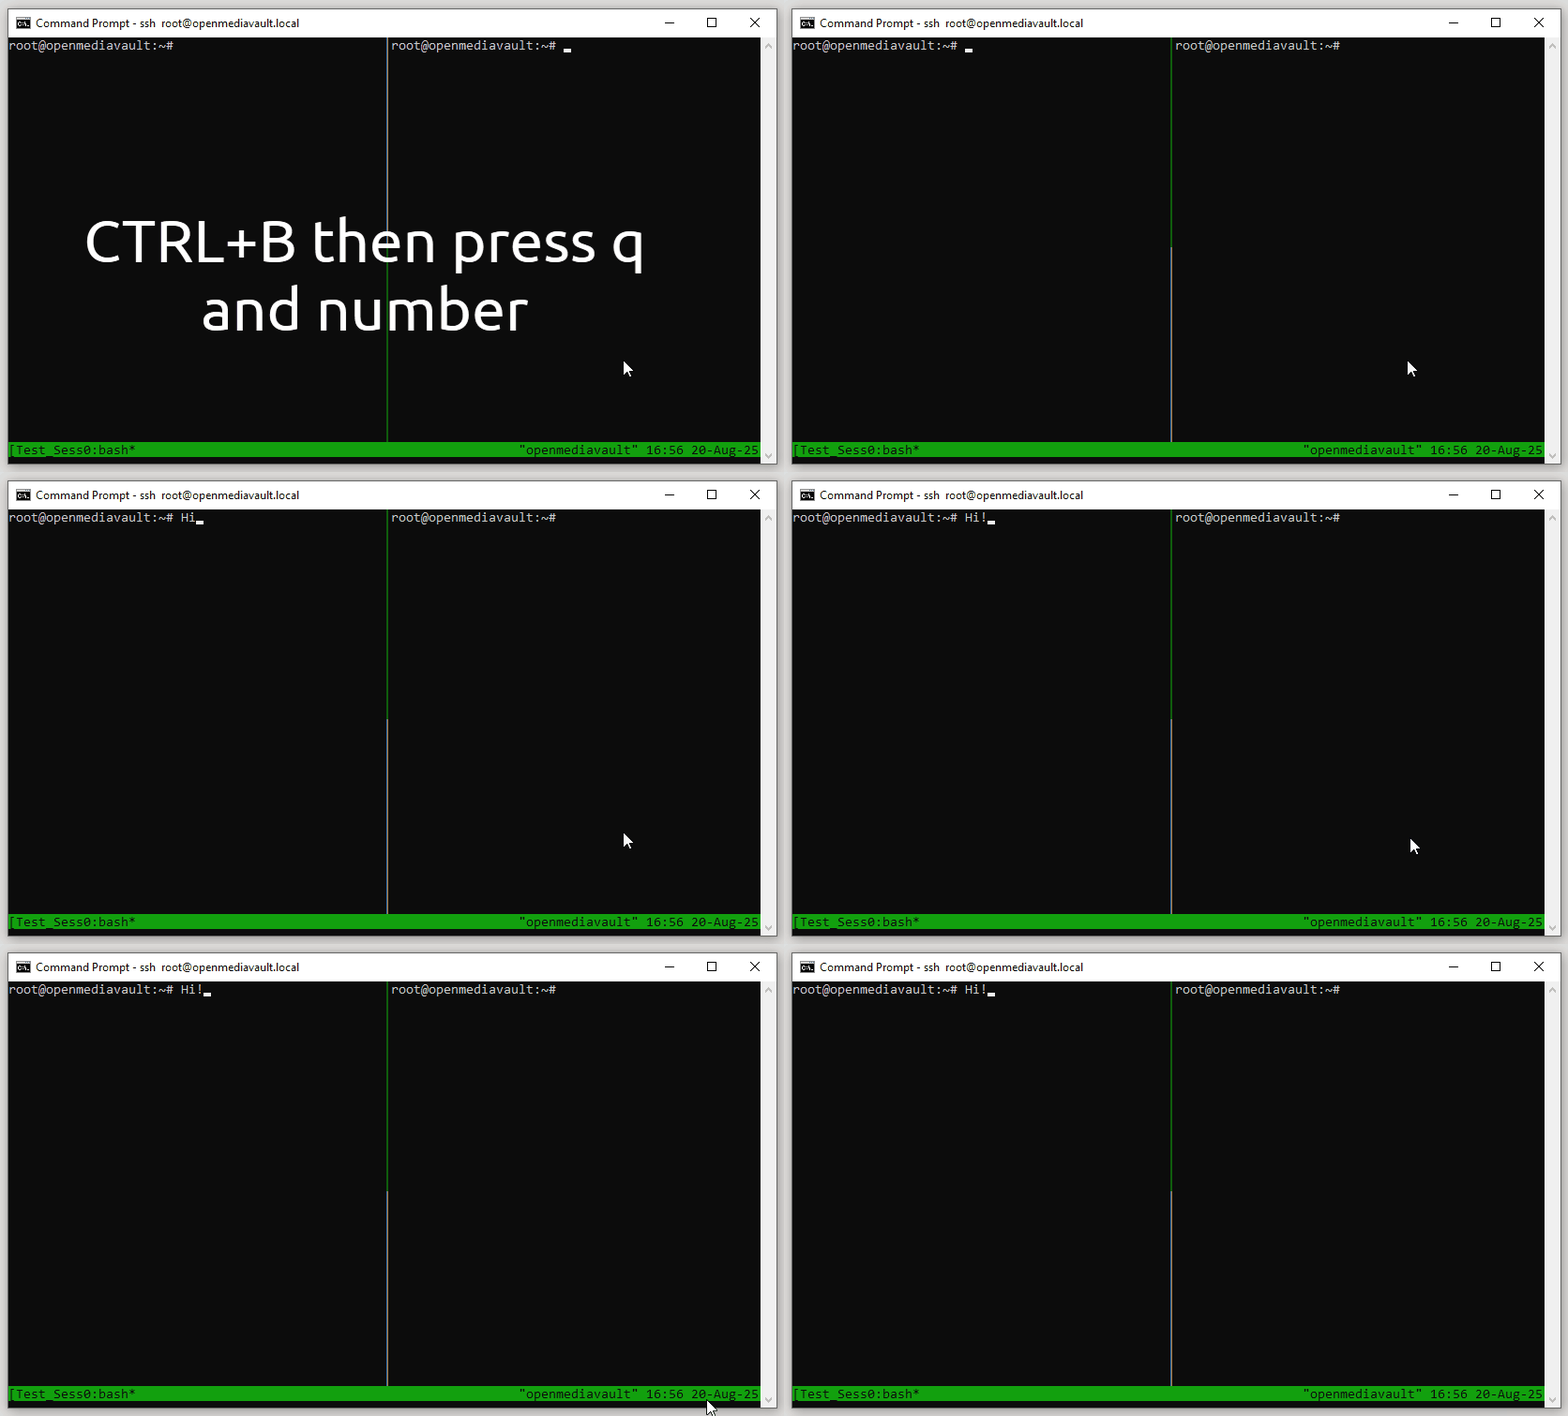
6. Press CTRL + B then q followed by the number of the pane that you wish to jump to. You need to be quick!
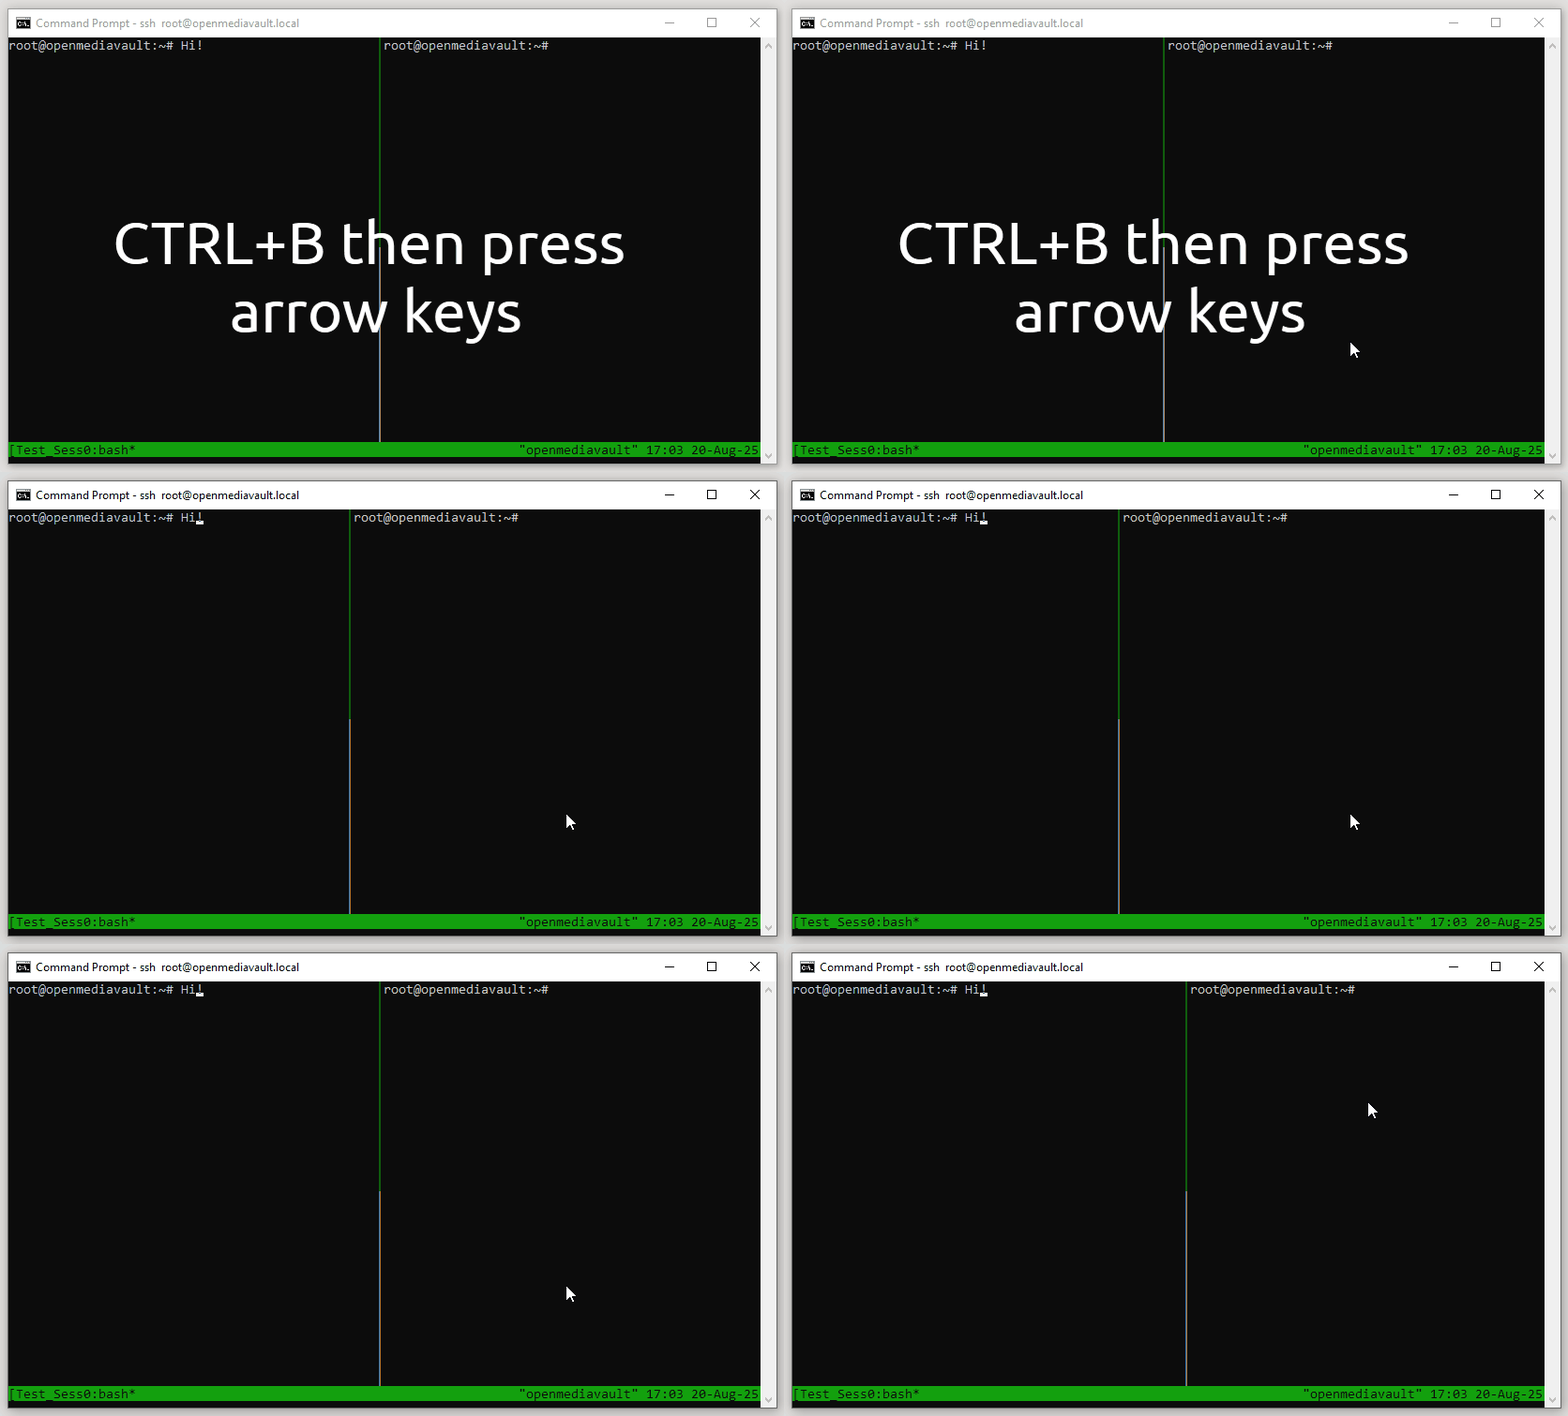
7. Press CTRL+B then press the arrow keys to resize the currently selected pane. You will need to repeatedly press the keys to tweak the size.
Key combination | Description |
|---|---|
CTRL + B then press % | Split vertically. |
CTRL + B then press “ | Split horizontally. |
CTRL + B then press o | Switch to the next pane. |
CTRL + B then press ; | Toggle between the last two panes. |
CTRL + B then press x | Close current pane. |
CTRL + B then press q | Show pane numbers, press the number to jump to that pane. |
Hold CTRL + B then press ◀▶🔼🔽(Arrow keys) | Resize pane. |

Les Pounder is an associate editor at Tom's Hardware. He is a creative technologist and for seven years has created projects to educate and inspire minds both young and old. He has worked with the Raspberry Pi Foundation to write and deliver their teacher training program "Picademy".