How to update to Windows 11 — make your upgrade as painless as possible now windows 10 support has ended
All it took was 75 minutes for a painless migration
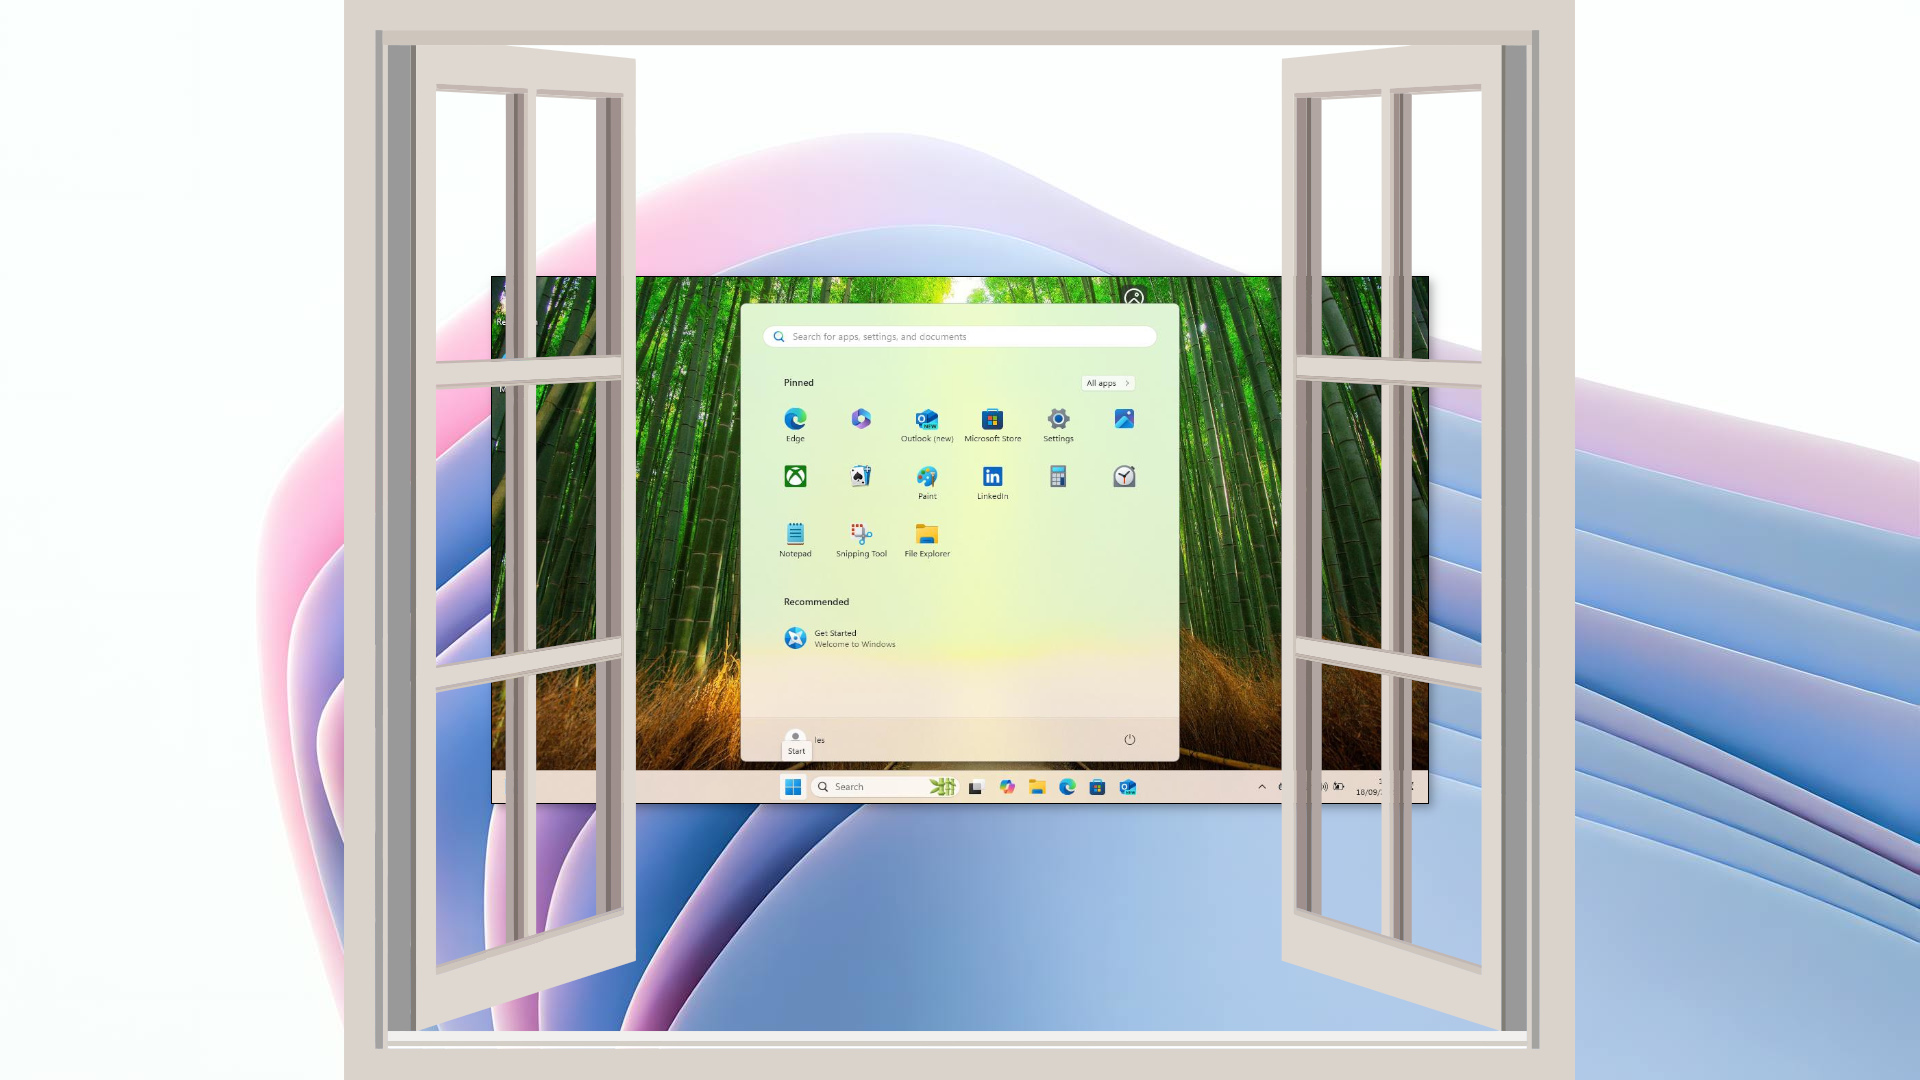
- Upgrading to Windows 11 is easier than you think.
- Windows 10 has a built-in tool to migrate users to Windows 11.
- A fresh install takes more time, but it provides a clean-slate for your rig.
The big day has arrived, and whether you like it or not, you need to take action! What am I talking about? Windows 11, of course. October 14, 2025, is when support for Windows 10 will end, unless you purchase an Extended Security Update (ESU), of course.
Windows 11 is where Microsoft wants users to go, and it is where I have been forced to go! Windows 10 has been nagging me for months, but today is the day that I have to take action. So let's go through the steps you need to take to upgrade your copy of Windows 10 to the latest version of Windows 11.
Before taking any action, ensure that you have backups for all of your important software, files, images, and other data. As with any major upgrade, moving from Windows 10 to 11 carries at least a small risk of data loss.
For those eager to tweak their Windows 11 install, for privacy, AI or system performance requirements, we've got a guide covering how to set Windows 11 to your exact requirements. This guide will work on upgraded and fresh installs of Windows 11.
Below, we outline how to update from Windows 10 to Windows 11 by either using the built-in updating utility, or just starting from scratch with a completely new installation.
How to Upgrade From Windows 10 to Windows 11
- Upgrading to Windows 11 took only 75 minutes.
- The process is entirely inside of Windows 10.
- There was no data loss.
1. From the start menu, click on Settings.
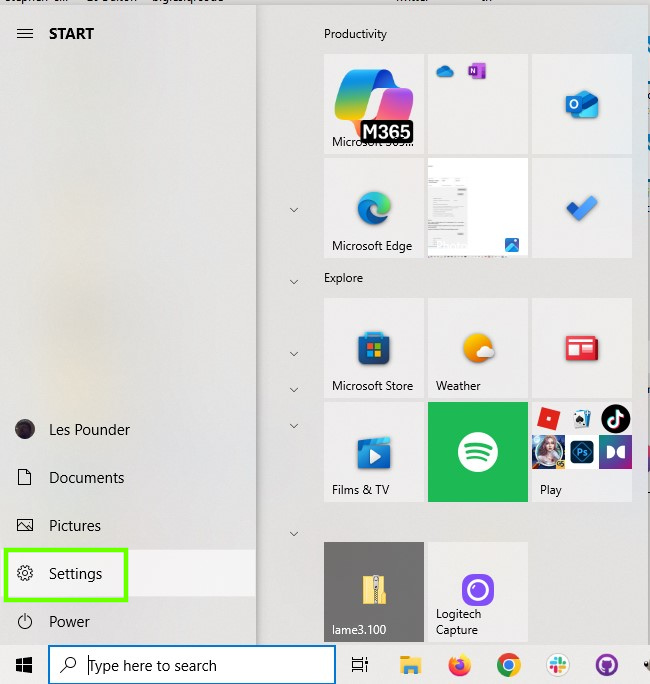
2. Select Update and Security
Get Tom's Hardware's best news and in-depth reviews, straight to your inbox.
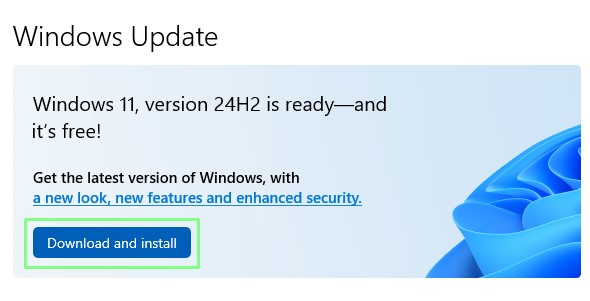
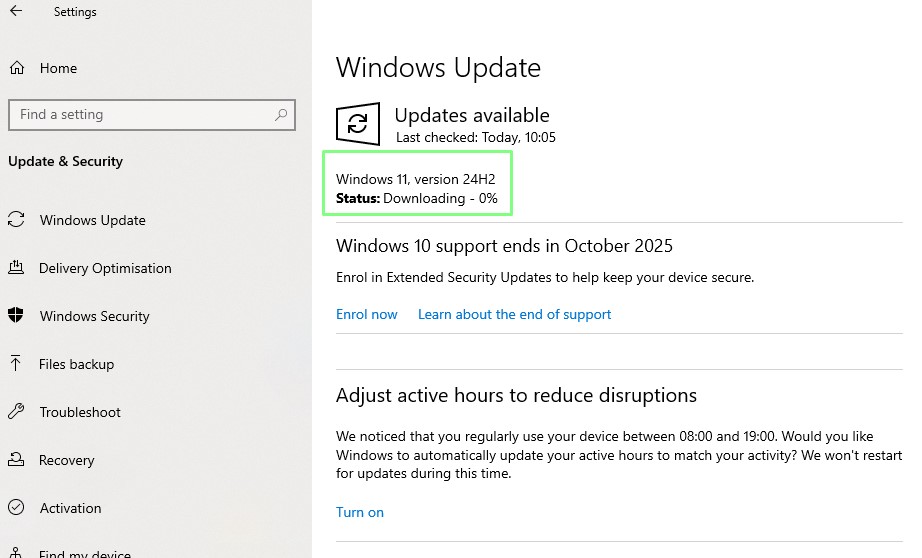
3. Click on the Windows 11 “Download and Install” button. This is the banner that has been nagging me for many months.
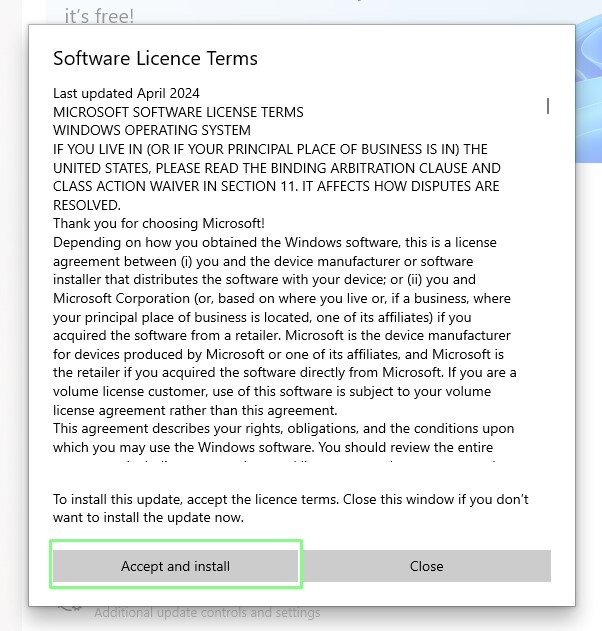
4. Accept and Install the software license terms.
5. Sit back with a beverage and wait for the download and install to complete. This took around 1 hour 15 minutes for me and there were multiple restarts.
How to do a fresh install of Windows 11
- Fresh installs provide a blank canvas to build your system.
- You will need to reinstall any applications and drivers.
- A fresh install takes longer than upgrading.
You may wish to perform a fresh install of Windows 11. For this, you will need a copy of the Windows 11 ISO image and a spare 8GB USB flash drive.
If you wish, you can use the Windows 11 Installation Assistant to check that your PC meets the requirements for Windows 11. If not, you can easily bypass them. My preferred means is to download a fresh Windows 11 ISO and boot directly from that.
Ensure that you have backed up before moving forward. This will completely erase the data on your SSD / HDD.
1. Download and install a copy of Rufus, a tool to write bootable USB sticks.
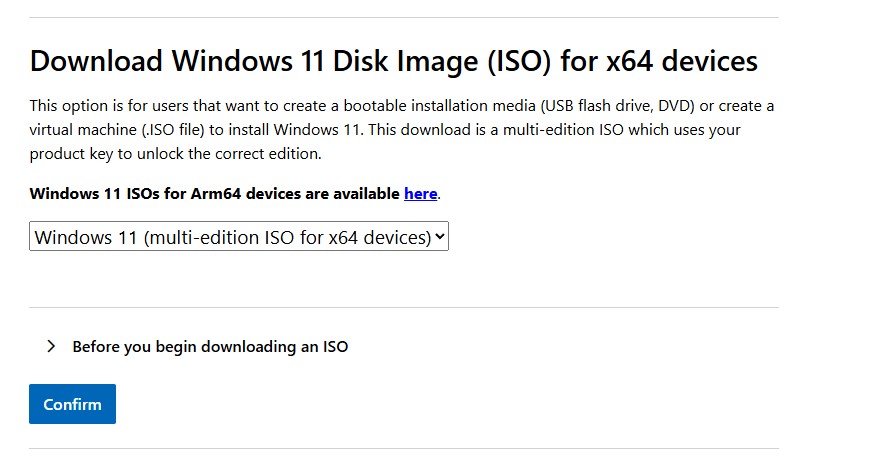
2. Go to the official Windows 11 page and in the Download Windows 11 Disk Image section, select Windows 11 (multi-edition for x64 device) from the dropdown menu.
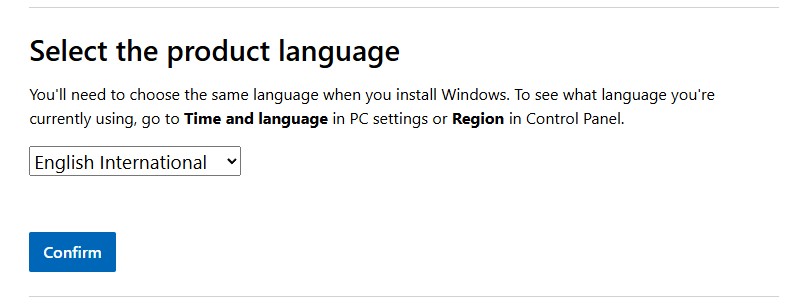
3. Select your preferred language.
4. Click on Download and wait for the process to finish. The disk image is around 7.2GB in size.

5. Insert the USB flashdrive and then open Rufus.
6. Select the USB flash drive.
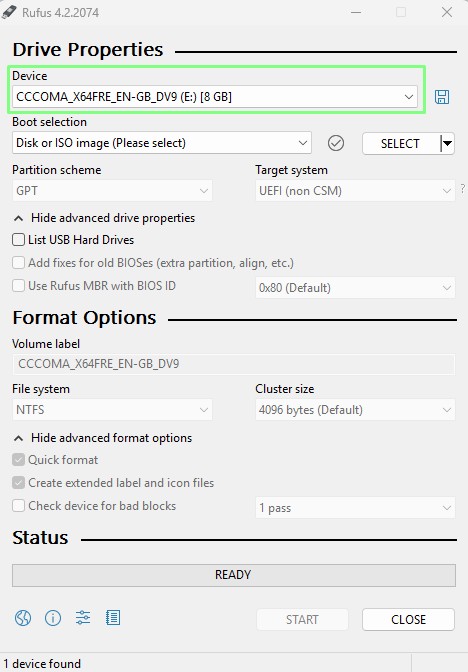
7. Select the Windows 11 ISO image.
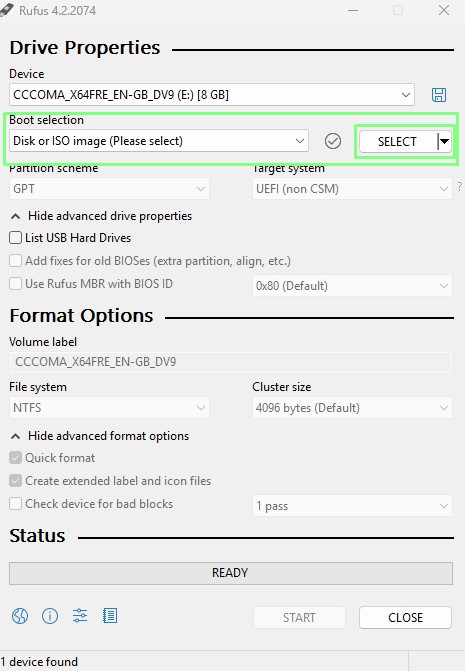
8. Click on Start to write the image.
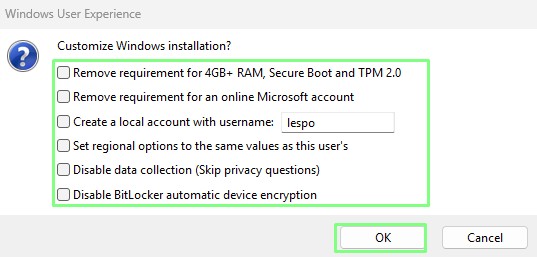
9. If prompted to tweak the install (no TPM, RAM requirement check, local account) decide on what you would like to tweak and then click OK.

10. Wait for Rufus to write the image to the USB flash drive.
11. Click Close and then eject the flash drive.
12. Reboot your PC and select the USB flash drive as the boot device. The process to do this will be different for every user.
13. Follow the Windows 11 install process and in a short while you will have Windows 11 on your PC.

Les Pounder is an associate editor at Tom's Hardware. He is a creative technologist and for seven years has created projects to educate and inspire minds both young and old. He has worked with the Raspberry Pi Foundation to write and deliver their teacher training program "Picademy".
-
CountryEvil The fact that you guys think the upgrade process is the issue....not the AI spyware and other control Microsoft is exerting over what we do with our own hardware in our own homes is quite the example of just how down the toilet this site has gone over the last decade.Reply
You weren't forced. You chose to take the lazy person's way out, and sign away your privacy to a corporation that didn't even value it's home country enough to give us updates for Win 10 for a year, even though they did it elsewhere. There's a substantial difference there. -
serhat359 I would love a tutorial on how to prevent updating my Windows 10 into Windows 11 permanently.Reply -
cyrusfox Reply
I created a script that auto-deleted these downloaded files to prevent this:serhat359 said:I would love a tutorial on how to prevent updating my Windows 10 into Windows 11 permanently.
net stop wuauserv
cd /d %SystemRoot%\SoftwareDistribution
del /s /q /f Download
net start wuauserv
I ran this code each morning during start up, bought me another day. If this is your personal machine you can likely delete the last line. And with a google search you may find more permanent and better methods.
The issue for me is this was on a work machine and eventually they forced the upgrade, but it did buy me a few months where I missed the more buggy deployment. -
Misgar Reply
I just switched off TPM in my BIOS. You could also disable Secure Boot if you don't use it. When I run Windows 10 Update, it tells me my computer isn't Windows 11 compatible.serhat359 said:I would love a tutorial on how to prevent updating my Windows 10 into Windows 11 permanently.
Of course your computer is less secure if you switch off these security features.
Yes, I thought that was unfair, especially as I believe I can make use of free ESU.CountryEvil said:a corporation that didn't even value it's home country enough to give us updates for Win 10 for a year, even though they did it elsewhere.
https://www.windowscentral.com/microsoft/windows-10/windows-10-free-esu-eea-requirements-revealed-microsoft-account-60-days -
Alvar "Miles" Udell Couple of corrections:Reply
You can download Windows 11's ISO directly through Rufus, just select Download and click on it, you can get the latest 25H2 version that way.
Also, you don't have to use Rufus if your computer meets the TPM 2.0 qualification, is running Windows 10, but is otherwise not offered the Windows 11 upgrade in Windows Update, just download the ISO, right click, mount it, and run setup.exe.