How to rip your DVDs with Handbrake — preserve your DVD library before bit rot claims another victim
Take back control of your media!

Get Tom's Hardware's best news and in-depth reviews, straight to your inbox.
You are now subscribed
Your newsletter sign-up was successful
One of the best tools for preserving your physical media is Handbrake, a free toolkit for video conversion, DVD, and Blu-ray ripping. Handbrake works with Windows, macOS, and Linux, and this guide will show you how to rip a DVD simply and easily. We’ll be using a Windows 11 PC for this how-to.
The humble Digital Versatile Disc, DVD, has been with us since the 1990s, and while it may not offer the clarity of Blu-ray, it is cheap and plentiful. Go into any thrift store, dollar store, yard sale, or charity shop, and you will find a plethora of DVDs, often at bargain prices. In the age of streaming, where your favorite series or movie can move from one service to another, or even cease to exist, ripping DVDs is the best way to archive what you want to watch. Not what an algorithm thinks you want to watch.
Backing up your DVD collection is also useful, given that “bit rot” — where the aluminum layer of the discs flakes away — is common in older discs. If your discs are not stored in a temperature-controlled environment (your loft/attic gets warm in the summer and cold in the winter) or you just happen to have a bad disc, your collection will disintegrate inside its cases.
- Ripping DVDs with Handbrake is a simple process that lets you watch your DVD collection on all your digital devices and archive them on a NAS or file server.
- Preserving your DVD library is essential as bit rot damages countless discs, making them unreadable.
- Our favorite shows are at the mercy of streaming services, which can remove underperforming shows or those for which it no longer holds a license with little notice.
Before we can rip any DVDs in Handbrake, we first need to install libdvdcss. Libdvdcss provides a library for accessing DVDs as if they were a block device. I remember installing libdvdcss on many Linux machines, but I’ve never had to do so on Windows until today.
- Download and install Handbrake for Windows.
- Download libdvdcss for Handbrake
- Copy the .dll to your Handbrake installation. For me, this was C:\Program Files\HandBrake
- Open Handbrake.
The structure of a DVD disc
Essentially, a DVD is really just a video disc full of video files. It is organized into a hierarchy that uses terms such as “title” and “chapter,” but what are they?
The term “title” refers to a major video file, usually the movie, trailer, or bonus features, such as a documentary.
This leads us to “chapters,” which are divisions of a title, usually created to navigate around the movie. An example would be Star Wars’ Tantive IV blockade runner and Imperial Star Destroyer scene that appears just after the opening crawl. If you don’t want to read the crawl, then you would skip to the next chapter.
Get Tom's Hardware's best news and in-depth reviews, straight to your inbox.
Handbrake traverses the disc’s hierarchy to identify the structure and titles that could contain content the user wants to rip. Handbrake will show a list of what it has found, and it can even generate a preview to really make sure.
Keep the terms “title” and “chapters” in mind while using Handbrake.
How to rip a DVD with Handbrake
This process has been tested with a handful of DVDs, which include my box set of The X-Files, The Abyss, and Hackers movies. The process can vary in time based on the length and number of video files. Ripping speeds are determined by your DVD drive, but encoding speeds can be tweaked and vastly improved if you have a compatible GPU, such as AMD Radeon RX6000, RX7000, and RX9000, or better GPUs. Nvidia RTX 2060, 3060, 4060, and 5060 or better GPUs. Intel 9th-Gen CPUs with Intel HD, Iris Xe, or Arc graphics are also compatible.
So let's start preserving our DVD collection!
1. Insert the disc into your drive.
2. Open a media player and play the disc for a few seconds. I used VLC for this step. This is necessary for Handbrake to recognize the disc. If you skip this step, Handbrake will fail during title scanning.
3. Open Handbrake.
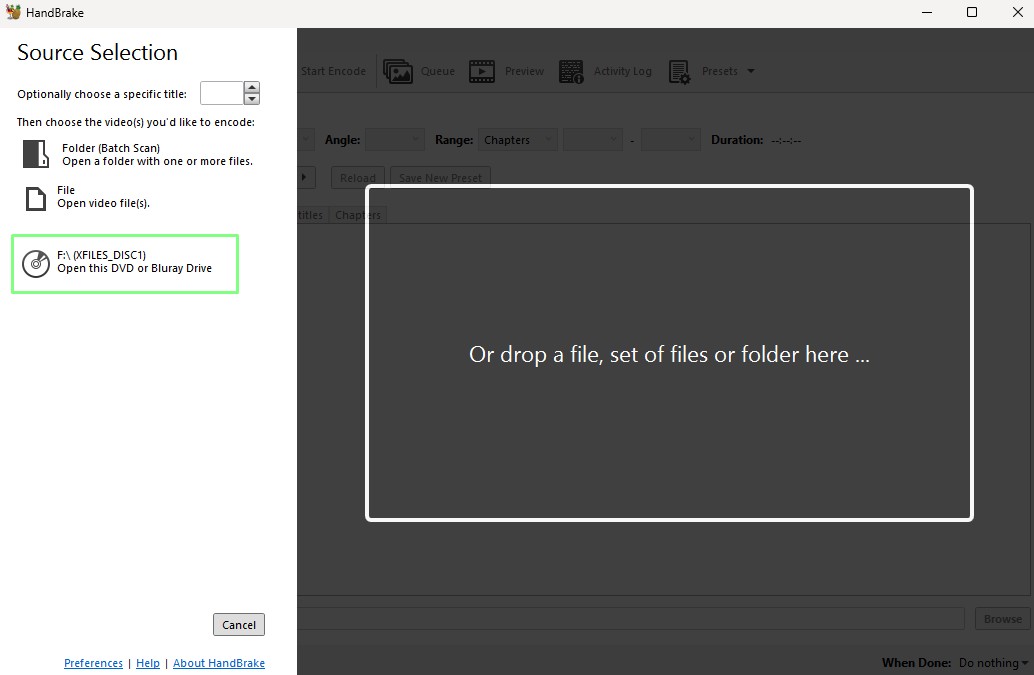
4. Select the drive as the source and let Handbrake search for the titles on the disc. This can take a while, depending on how many titles there are on the disc.
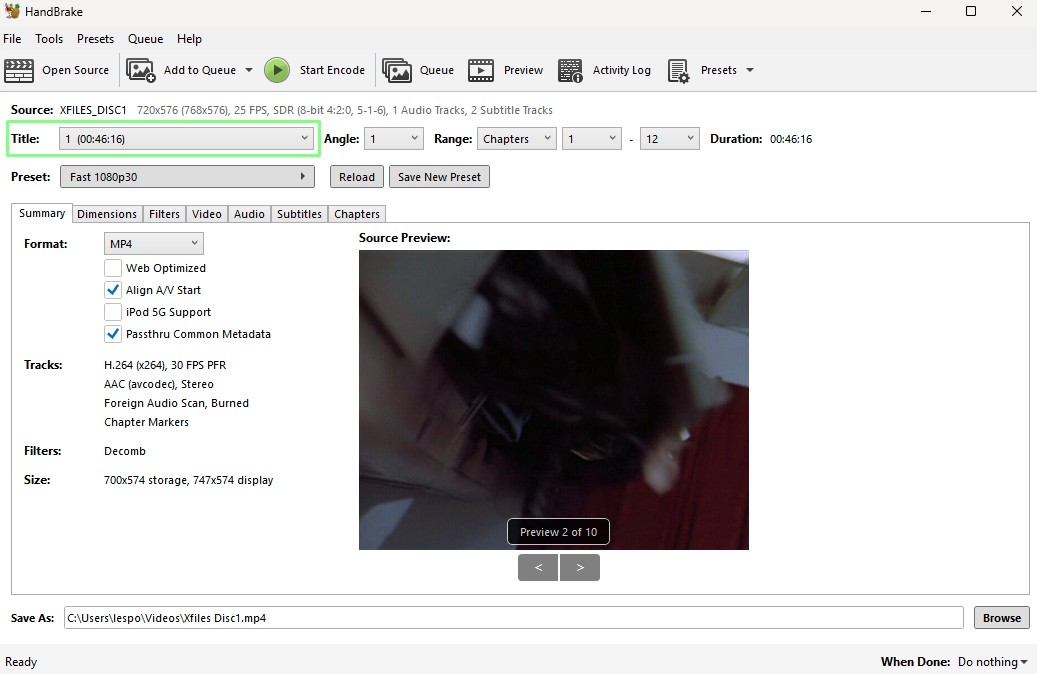
5. Using the dropdown, select the correct title that you wish to rip.
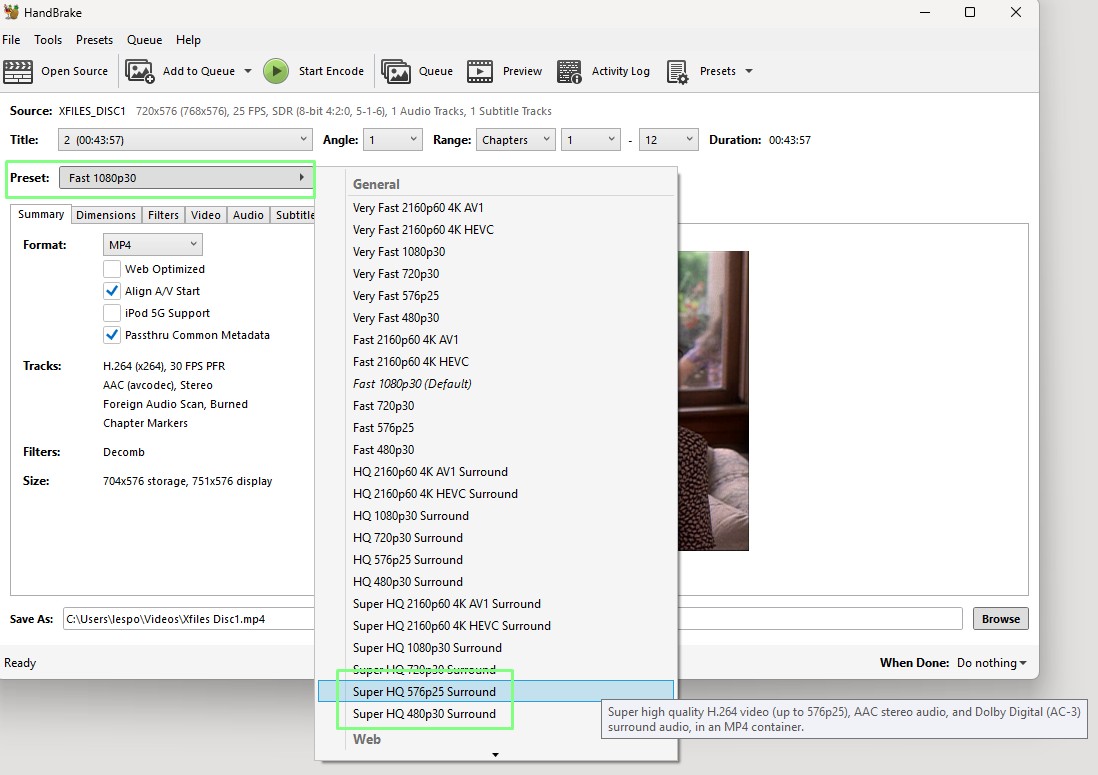
6. Set the preset to SuperHQ 480p for NTSC, SuperHQ 576P for PAL DVDs.
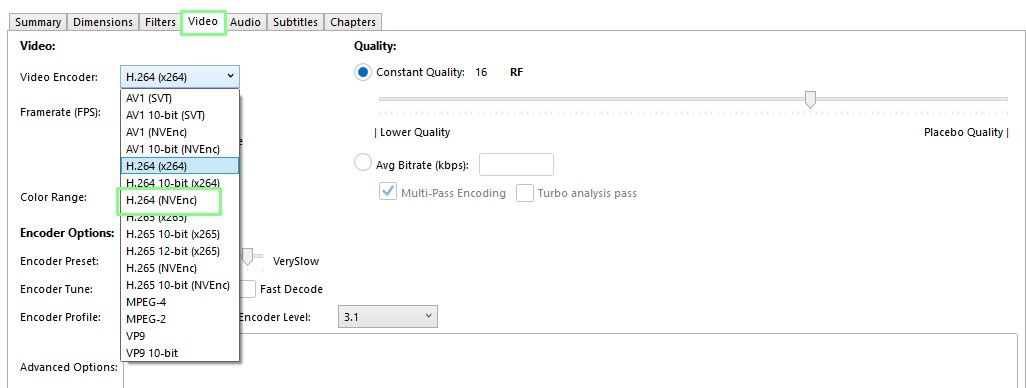
7. Click on the Video tab and then set the Video Encoder to your preferred choice. If you have a compatible GPU, in my case an Nvidia RTX 4070, you can select a hardware encoder such as NVEnc. This greatly speeds up the encoding process, but ripping the DVD depends on the speed of your DVD drive.
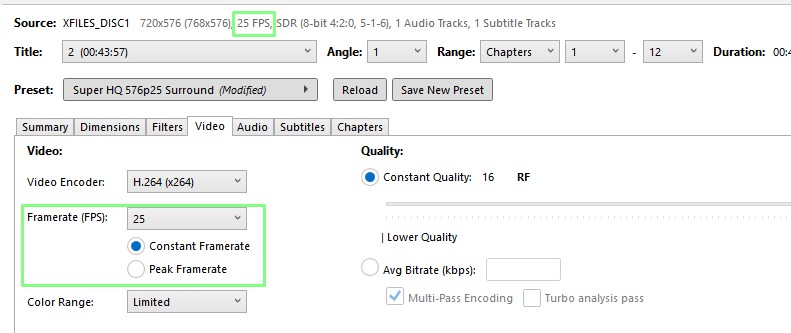
8. Set the framerate to Constant Framerate and check that it matches the source framerate. If we change the framerate, then the resulting file will look odd when played back on modern screens.
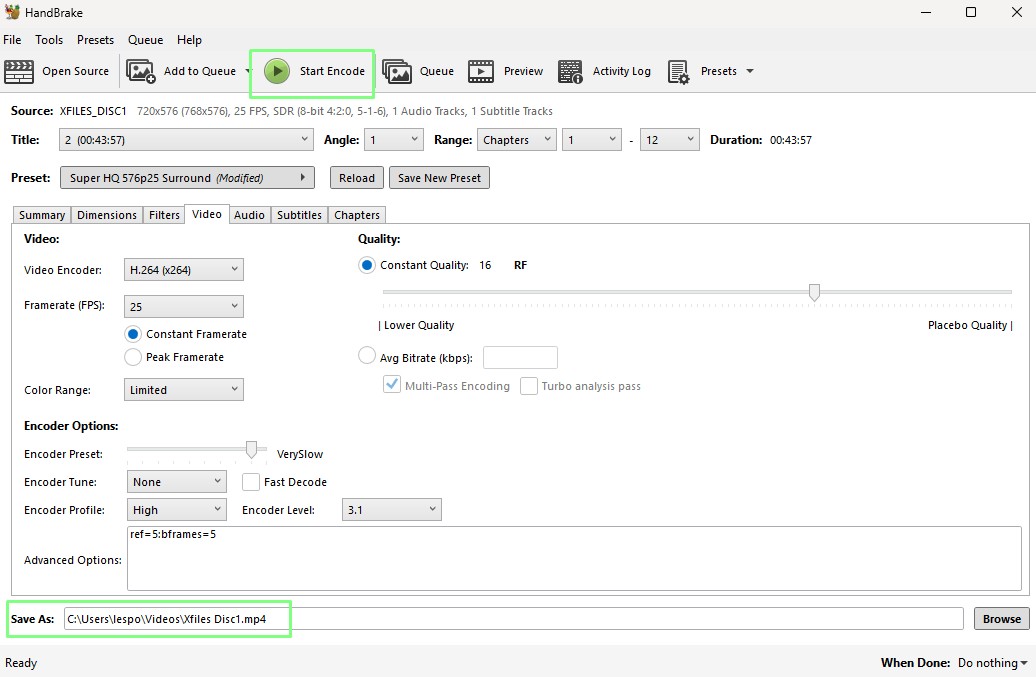
9. Check that the save location and file name are correct, and then click Start Encode to start the ripping process. The ripping process will take some time; encoding with a GPU should take next to no time.
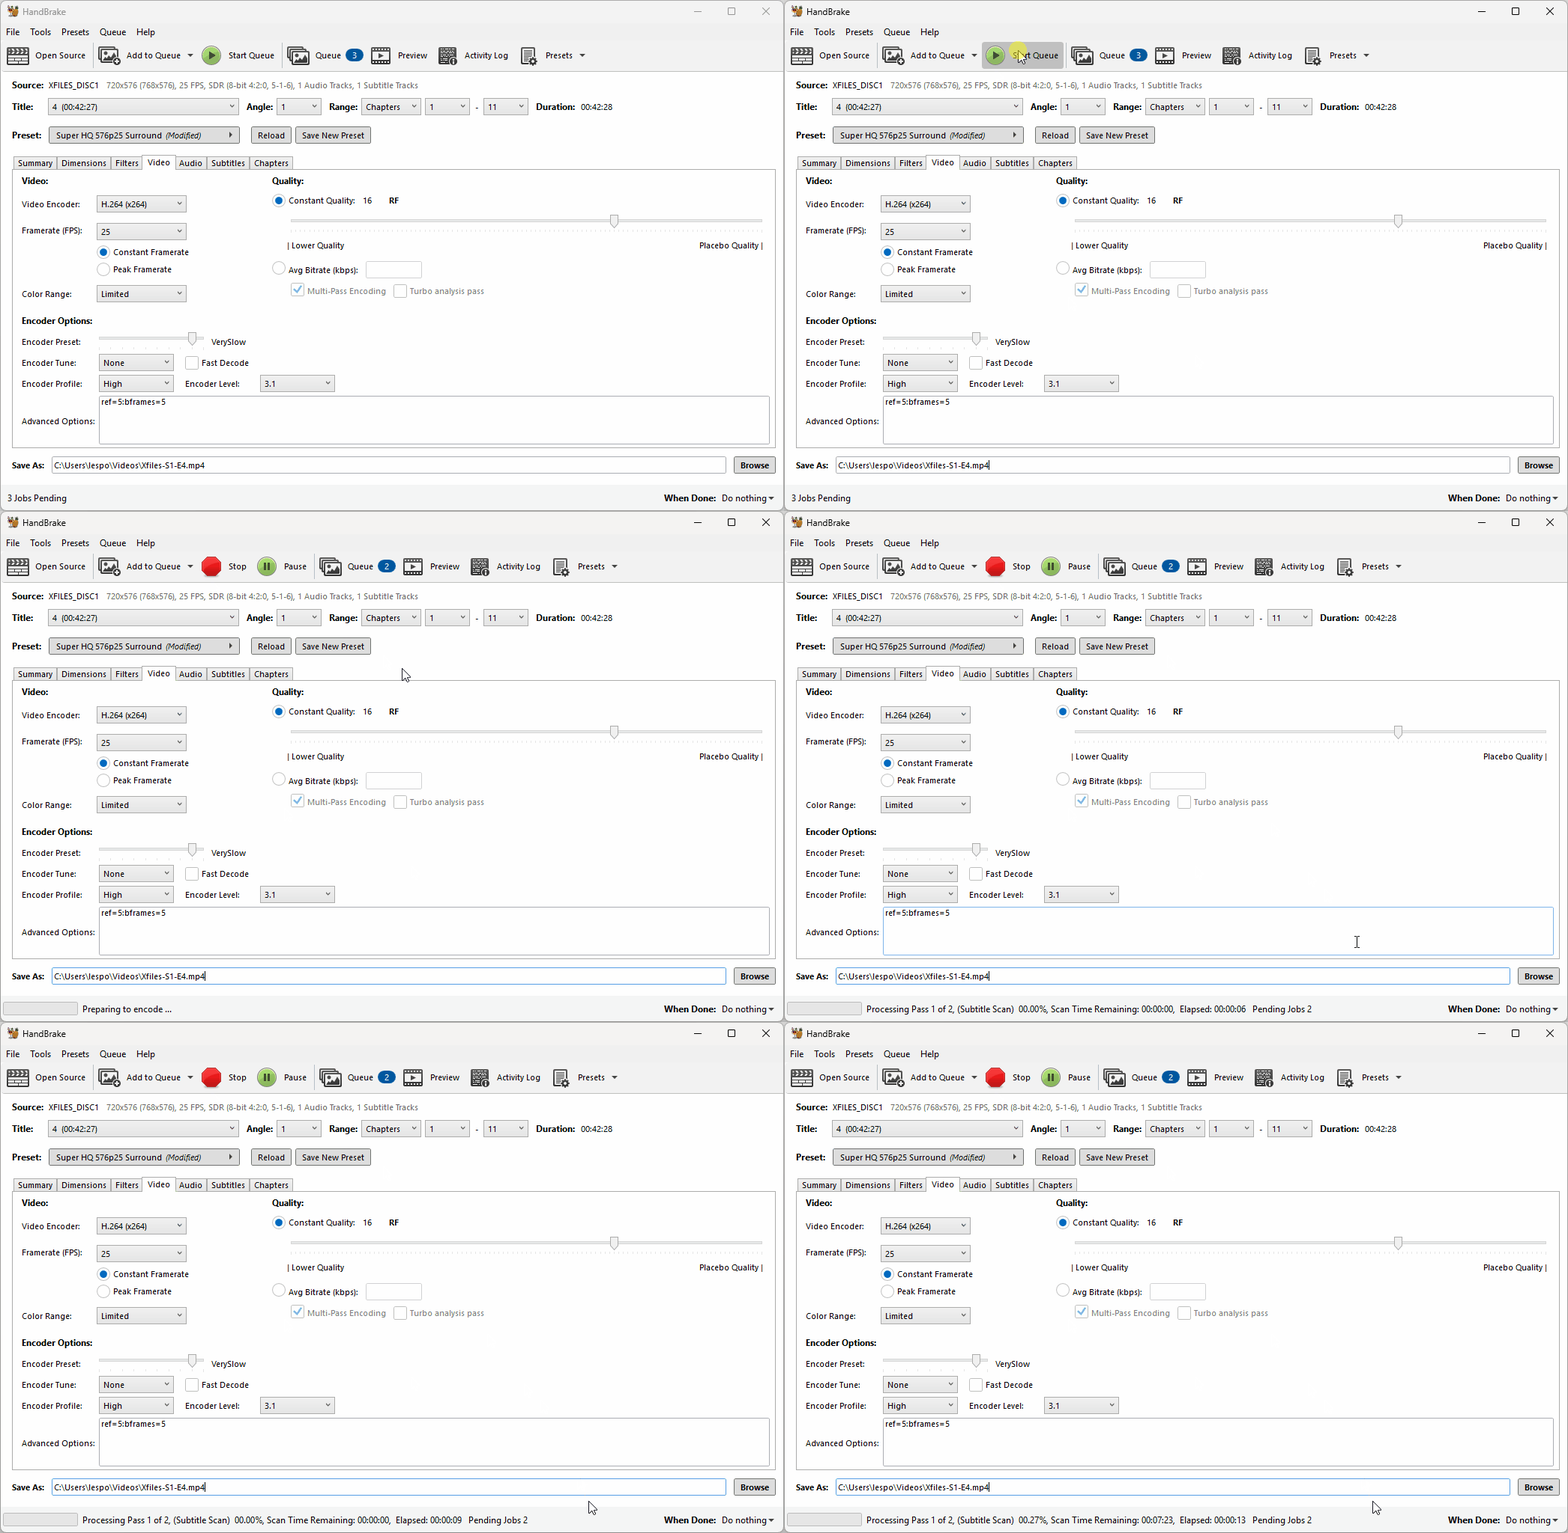
If you plan to rip TV series episodes, the episodes can be “queued,” and Handbrake will automatically move on after each is done.
10. Follow steps 1 to 8, but instead of clicking Start Encode, click on Add to Queue. Notice that the Queue counter increments to show that there are multiple files to be ripped.

11. Click on Start Queue, and Handbrake will start ripping all the titles in the queue.
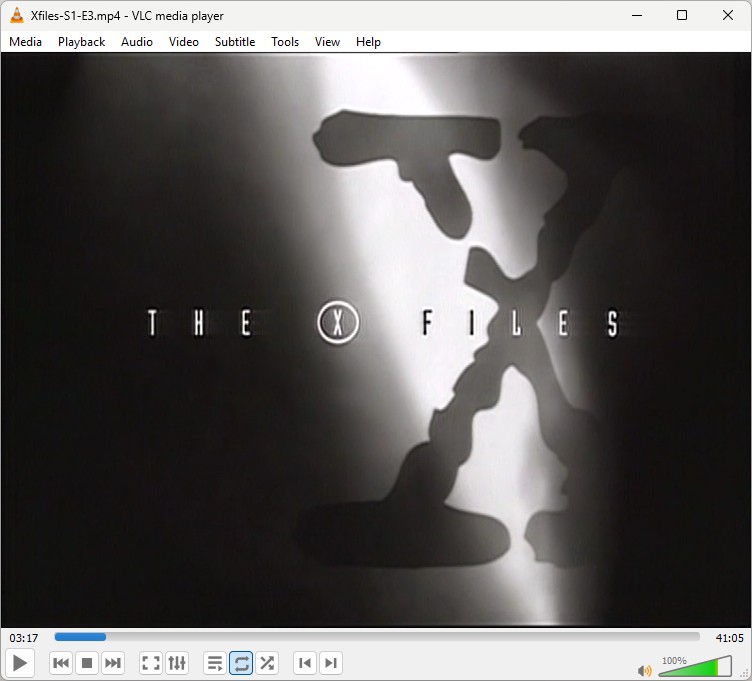
12. Check the files using your preferred media player. I opened all of the episodes in VLC and moved around the timeline to check that everything was fine.
You’ve successfully ripped your DVDs to files on your computer; now you can take your movie collection with you for your work commute, flights, or family car journeys.

Les Pounder is an associate editor at Tom's Hardware. He is a creative technologist and for seven years has created projects to educate and inspire minds both young and old. He has worked with the Raspberry Pi Foundation to write and deliver their teacher training program "Picademy".
-
FriesianKiwi Reply
Yes you are right but there are other rippers other than Handbrake that can bypass the copy right protection and make it legal.helpstar said:only legal if the DVD is not copy right protected -
FriesianKiwi I agree if you know how to use Handbrake. I tried but found you have to do a lot of this and that to make Handbrake work. There are other rippers out there that can do it more simply and I would use one of those, not Handbrake.Reply -
garioch7 There is a lot of controversy about ripping your CD/DVDs because of copyright issues. As @FriesianKiwi has said, there are lots of programs that can do that, and some very quickly and effectively, many, but not all of which, are paid software ripping programs.Reply
My personal view is that the laws of some jurisdictions are too strict. If I have paid the author of the DVD, and I legally own it, and want to make only a personal copy, I should be permitted to do so. There is sometimes a gap between ethics and morality vs the law in some countries.
I don't wish to engage in a political discussion, which is not permitted. I am just echoing what our new member has stated. By the way, welcome aboard, @FriesianKiwi !
Have a great day.
Regards,
Phil -
Math Geek The conflict is that you can legally make a backup for PERSONAL use. However, it is illegal to break the copy protection to create that personal backup.Reply
Bit of a contradictory catch 22 type thing -
garioch7 @Math Geek ,Reply
Math Geek said:Bit of a contradictory catch 22 type thing
No kidding! There is a very real disconnect between those two policies. Certainly, I do not endorse piracy, but the "copy protection" policy that I am not legally permitted to bypass would, in my view, negate my legal right to make a PERSONAL copy for my own use of media that I legally own.
So, each of us must make our own determination as which policy is overriding, since first policy (legal right to copy for personal use) is crippled by the second policy that makes it illegal for us to do so by bypassing the copy protection.
Just my thoughts. Have a great day.
Regards,
Phil