How to check and enable Secure Boot on your Windows PC
It's like having a bouncer for your boot process
Thinking of moving on from Windows 10 to Windows 11, or just want to play Battlefield 6? Then you’ll need to ensure your system is secure and meets Microsoft's requirements. One of the Windows 11 requirements is Secure Boot. Here we'll show you how to enable Secure Boot as fast and easily as possible.
What is UEFI Secure Boot?
Secure Boot’s goal is to ensure that your computer boots securely. Introduced in 2011 via version 2.3.1 of the UEFI specification, Secure Boot is there to keep the nasties out during the boot process; think rootkits and other malicious software. We first saw Secure Boot in Windows 8, and it has become the norm for it to be present in your motherboard's UEFI. The thing is, Secure Boot is often turned off. Mine was, until IT told me that I had to turn it on. Why did I have it turned off? I dual-boot Linux distros, and sometimes my Linux distro of choice won’t boot with it on.
Having Secure Boot enabled is slowly becoming the norm. Windows 11 is pushing for more security-focused features, such as TPM and, of course, Secure Boot. Even games are using TPM and Secure Boot for anti-cheats. If you want to play Battlefield 6, then you will need both TPM and Secure Boot enabled.
So let's get Secure Boot enabled on your Windows PC.
- Windows 11 officially requires TPM and Secure Boot in order to be installed.
- Secure Boot reduces the risk of rootkits or malware damaging your system during boot.
- Many games with anti-cheat functionality require TPM and Secure Boot to run.
Check if Secure Boot is enabled in Windows
1. Press Win + R and type msinfo32, then press Enter.

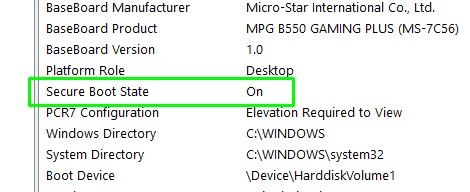
2. Look for “Secure Boot State” and check that the value is On. If the Secure Boot is on, then all is good, and you can carry on with life.
If you prefer to use PowerShell.
Get Tom's Hardware's best news and in-depth reviews, straight to your inbox.
1. Run PowerShell as an administrator.

2. In the PowerShell prompt, run this command, Confirm-SecureBootUEFI and then press Enter.
3. Check the output. If True is returned, Secure Boot is enabled. If disabled, False is returned.

How to enable Secure Boot
To enable Secure Boot, we need to delve into the UEFI BIOS, and this process is a little different for every motherboard (instructions here), but the general gist is the same.
1. Reboot your machine and go into the UEFI BIOS.
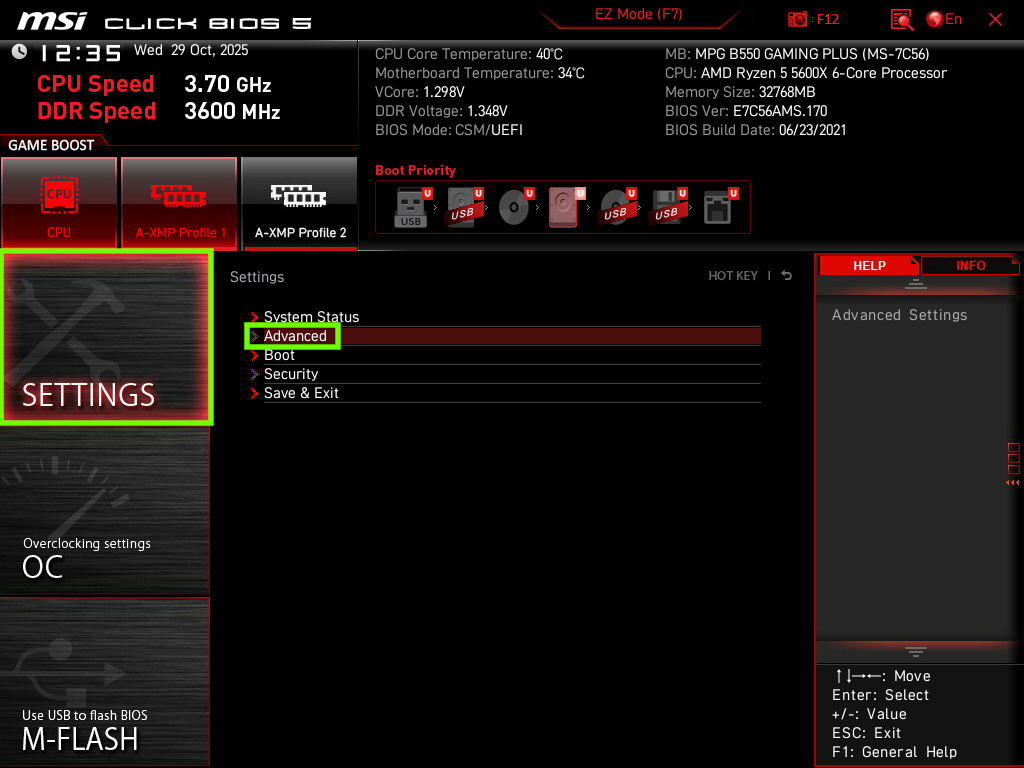
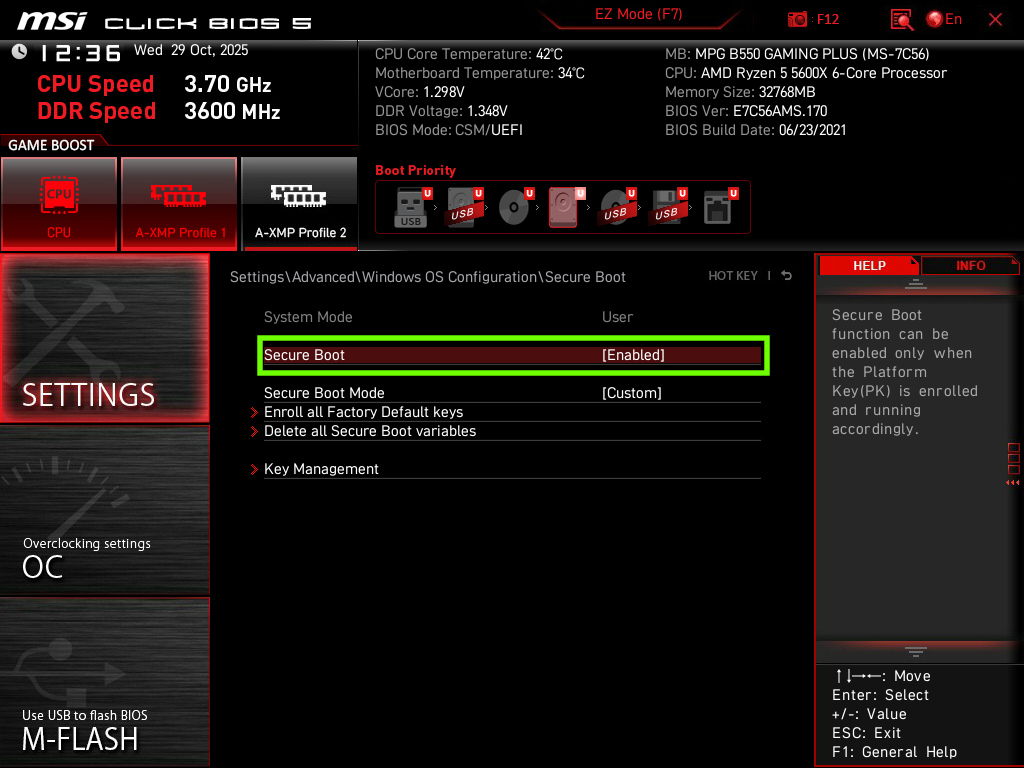
2. Look for Secure Boot in your UEFI. For my MSI motherboard, it was under Settings >> Advanced >> Windows OS Configuration >> Secure Boot
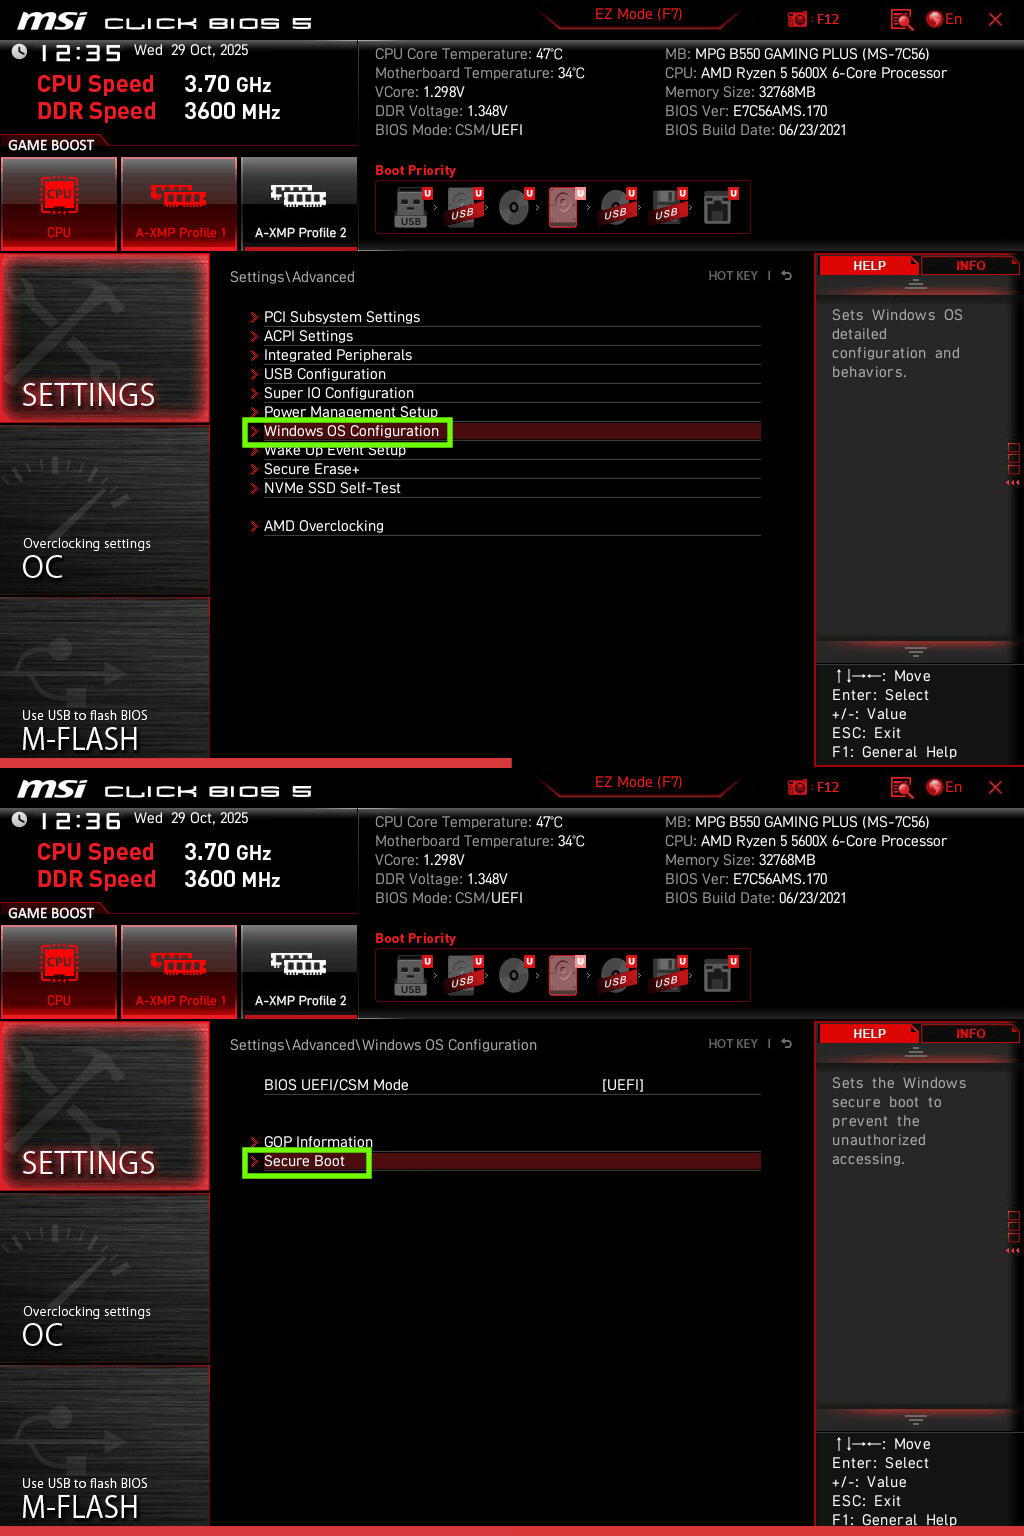
3. Enable Secure Boot, save, and then reboot the computer.
Final Thoughts
With Secure Boot enabled, your Windows PC now has an extra level of security during the boot process, and you can finally play Battlefield 6 or the latest Call of Duty. If you plan to dual-boot with a Linux distro, check that your chosen distro works with Secure Boot before attempting to install.

Les Pounder is an associate editor at Tom's Hardware. He is a creative technologist and for seven years has created projects to educate and inspire minds both young and old. He has worked with the Raspberry Pi Foundation to write and deliver their teacher training program "Picademy".