Build Your Own (Physical) 3D Models
Prototype Molding Vs. High Volume Production
If the model was to be recreated thousands of times, a better method would be to machine the mold out of aluminum or steel stock and specifically tailor the item to fit a commercial plastic injector. As this is going to be a small run, the master will be cut out of polyurethane foam, with the actual mold being made from two-part silicone rubber. A two-part resin will be mixed and poured into the silicone mold to create the final badge.
There are some advantages to milling prototype small runs in foam, one of the most prominent being speed. In foam, the rough pass to remove excess stock and the detail pass to finish the model can usually be done at the maximum speed of the mill without sacrificing transit speed.
In this example, the total depth of the model is 0.25". The bit for the detail pass can fully plunge to the maximum depth of the model and finish the job quite quickly. If aluminum was used, multiple passes of the roughing bit would have to be made, each taking off 0.02", until the final depth was reached.
Following this stage, multiple passes of the detail bit would also be made along the outer boundary revealed by the roughing pass, and finally into areas too large for the roughing bit. At this point, depending on what material you are working with, it comes down to sacrificing speed or maximum depth per pass. The harder the material used for the model, the lesser the depth or speed, and the greater the duration required for job completion.
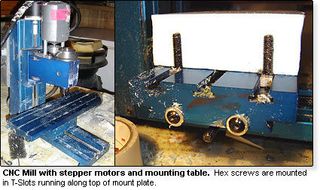
If the actual mold were to be milled for injection, it would be the inverse or negative mirror of the model, which would leave a space for the plastic or molten metal (metal injection) to fill. Since this master will be covered by silicone there is no need to create its inverse, and the geometry is milled as imported. So let's get our polyurethane foam mounted and start the job!

Stay on the Cutting Edge
Join the experts who read Tom's Hardware for the inside track on enthusiast PC tech news — and have for over 25 years. We'll send breaking news and in-depth reviews of CPUs, GPUs, AI, maker hardware and more straight to your inbox.
Current page: Prototype Molding Vs. High Volume Production
Prev Page The Roughing Pass Next Page Milling Preparations: MS DOS UsedMost Popular

