5 Key Design Rules for 3D Printing
Factors to consider when designing a model for printing.
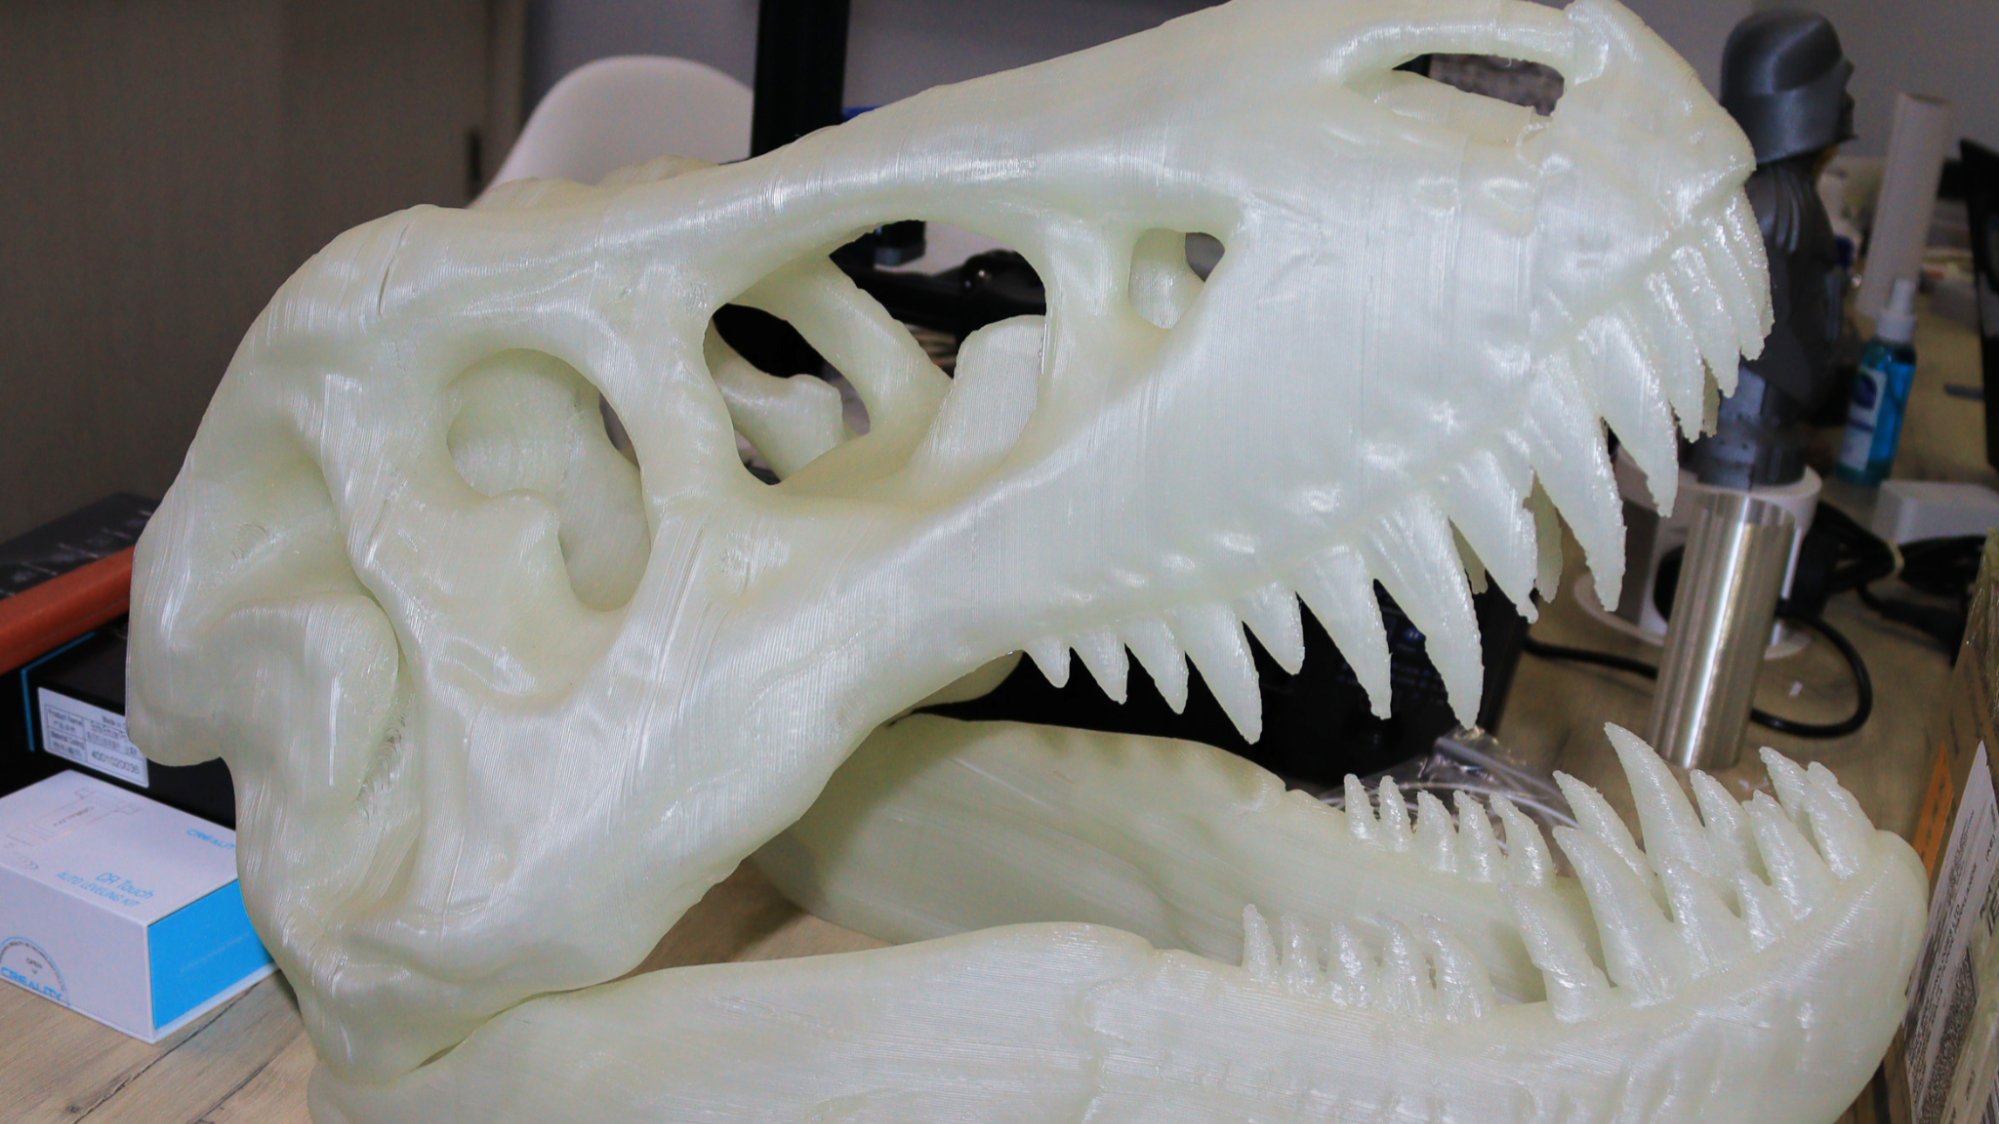
Designing for 3D printing is usually different from the traditional approach, and moving from an idea to creating a functional design requires following a certain set of rules and regulations even if you are using one of the best 3D printers. For example, you need to consider important details like the geometry of the design and ensure that the part is watertight and that there are no non-manifold edges that can make the design fail to print properly.
You should also be able to know when to use and when not to use support structures for overhangs and other complex and unsupported features. In addition, optimizing the part orientation to minimize time and material usage while maintaining the accuracy of the print and surface quality is also paramount. These factors and others are described below in detail.
1. Overhangs and 3D Printing Supports
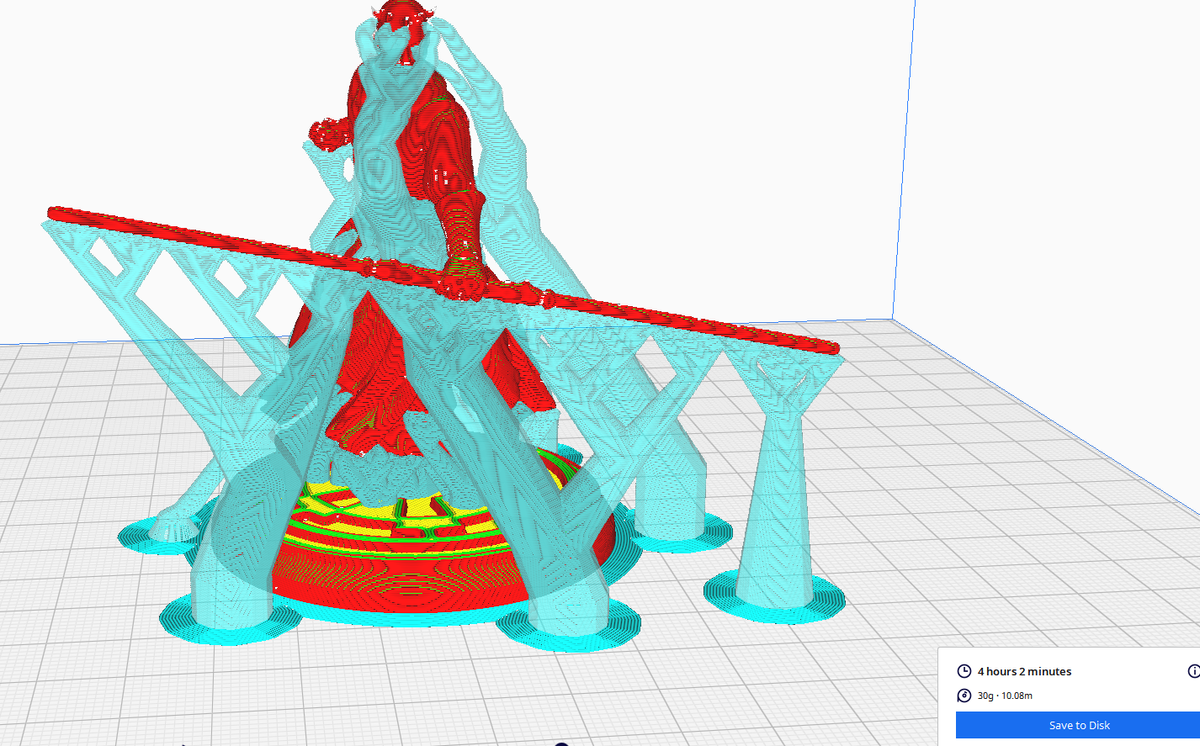
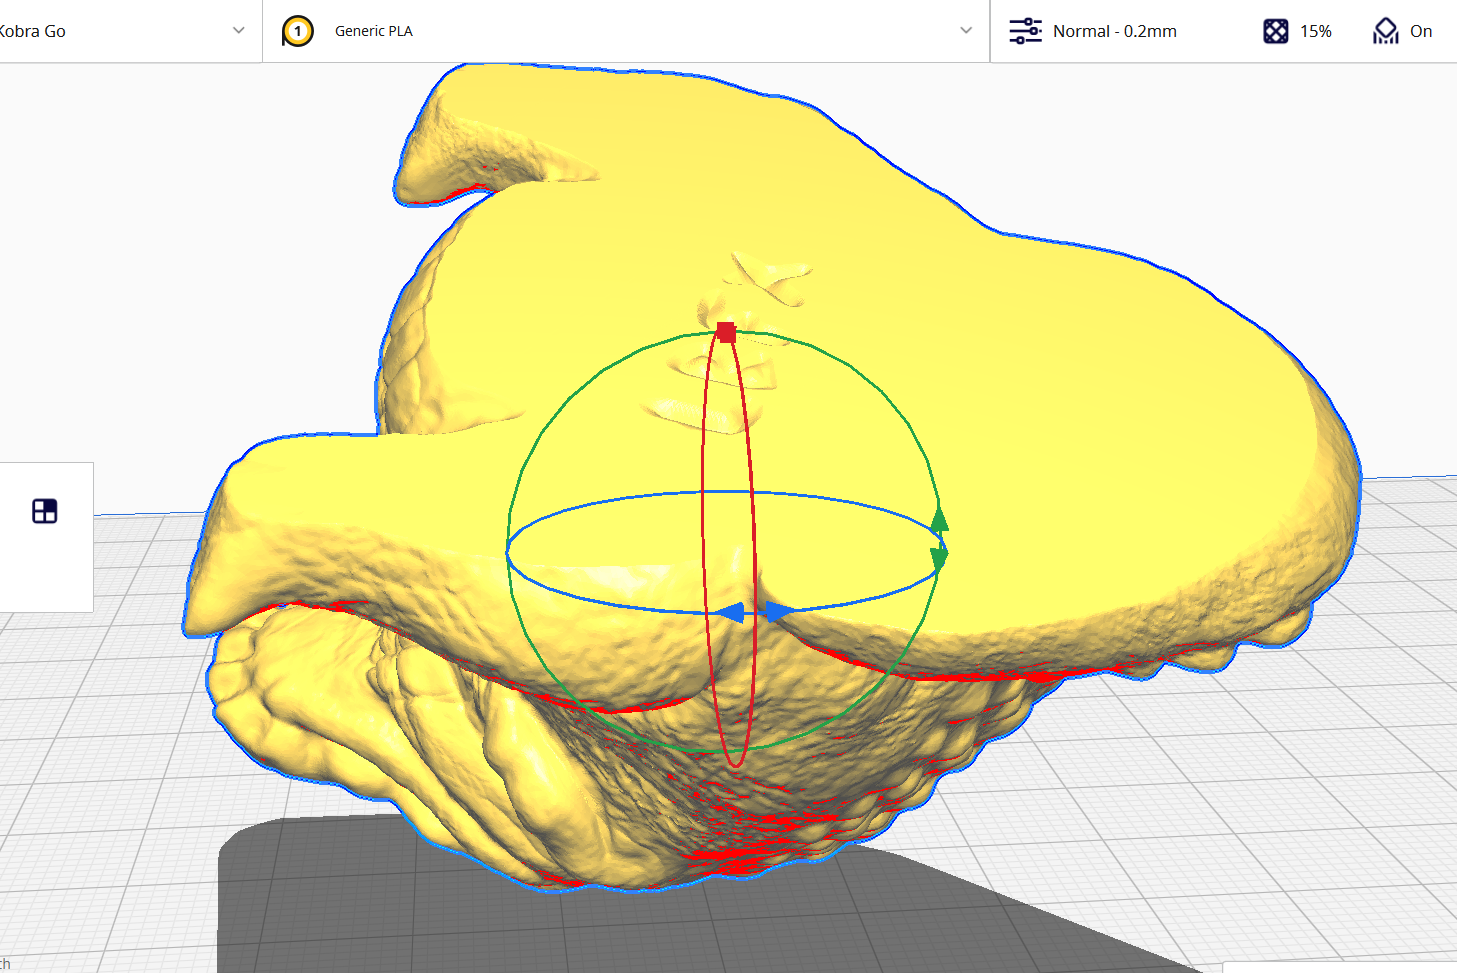
When designing your 3D models, there might be some features extending horizontally beyond the previously printed layers, and they don’t have other layers or supports underneath; these are overhangs. They can include elements like angles, arches, or any other part deviating from a vertical orientation. 3D printing supports are the structures you add to the design during the slicing process to provide temporary support for those hanging features. You can generate them automatically or add them manually.
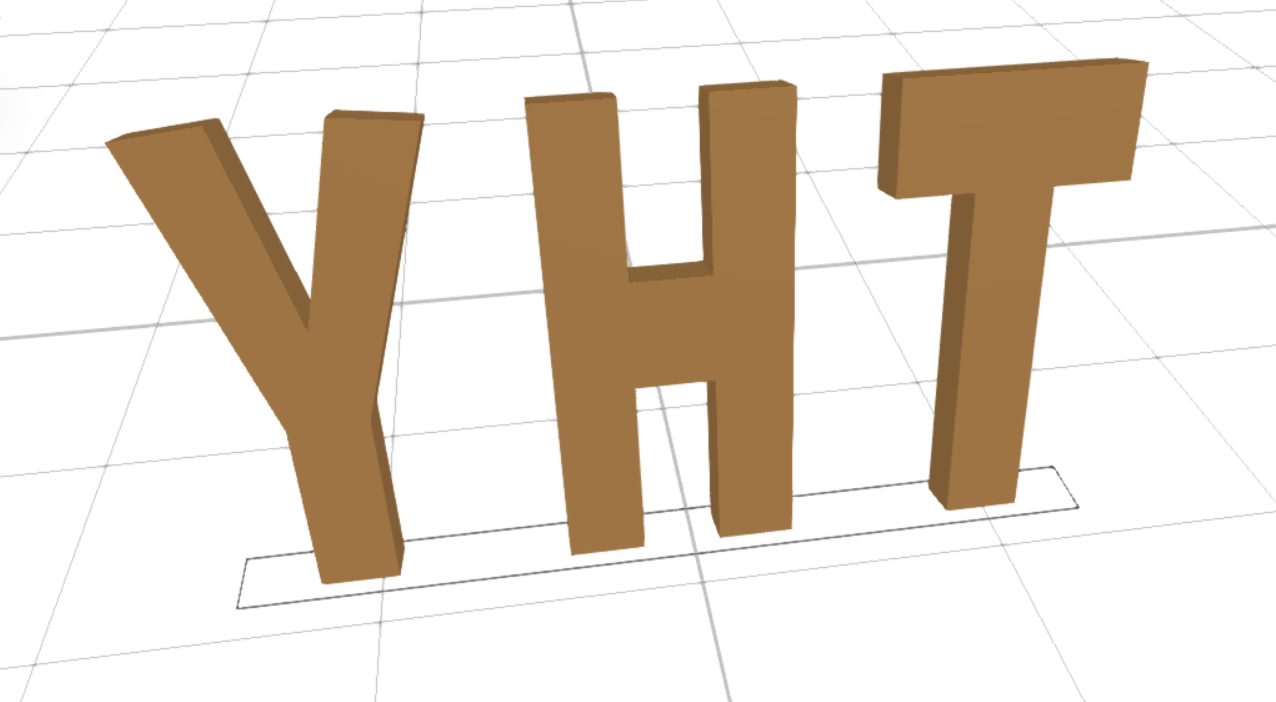
When dealing with overhangs, you should observe the 45-degree angle and YHT rules. According to the 45-degree angle, any overhang that extends beyond 45 degrees from the vertical axis of the 3D model should be supported so that they don’t collapse. However, as long as the overhang is within this angle limit, the material will have a stable base upon which to build, and there will be no deformation or collapse of the extended parts during 3D printing.
In the YHT rule, the “Y” letter has features extending at a 45-degree angle, and you can 3D print without supports. The letter “H” has two towers that bridge in the middle, and just like in the Y shape, you can print such designs without supports; however, if it extends too much, you will need to use supports to prevent the bridge from collapsing. For “T,” the arms extend at a 90-degree angle. For that, you will need to use supports to print them well.
3D printing supports are a necessary evil because even though they help prevent print failure, removing them sometimes is challenging, especially when located in hard-to-reach or delicate parts of the 3D print. They also increase 3D printing time and material usage. So, it’s important to strive to design your parts in such a way that they will not need supports. But if it’s a must to use them, you can use those that are easy to remove, like tree supports.
2. Wall Thickness
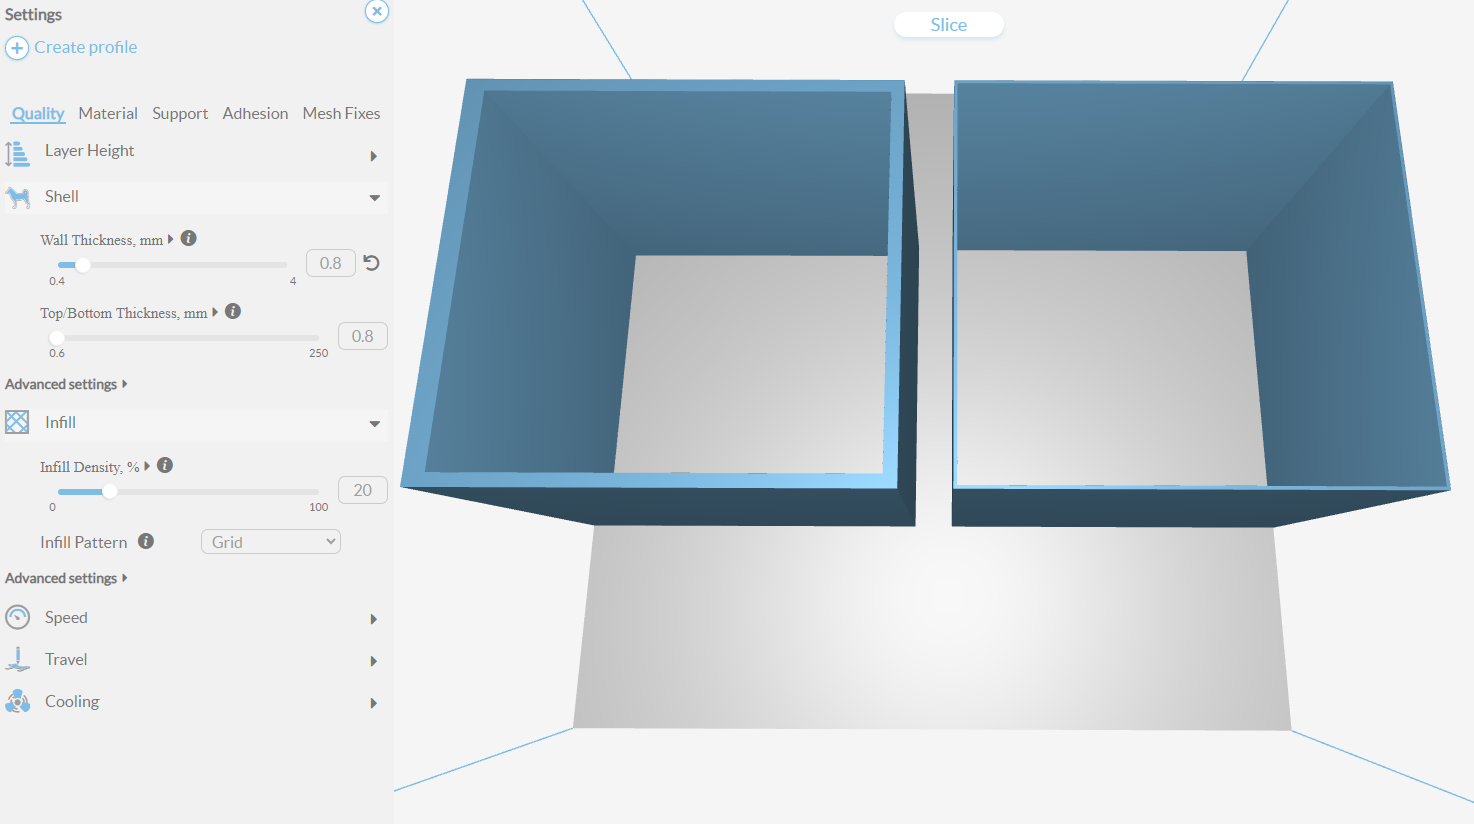
As you design for 3D printing, you should also consider the distance between the inner and outer walls of your 3D print. This is important as it plays a crucial role in determining the durability and ability of your 3D print to withstand loads. When the wall thickness is insufficient, the print might fail due to warping, and if it prints successfully, it can be weaker or fragile. Excessive thickness, however, can result in unnecessary material usage and longer print times. So, you need to find the optimal value for the specific part that you are 3D printing.
Get Tom's Hardware's best news and in-depth reviews, straight to your inbox.
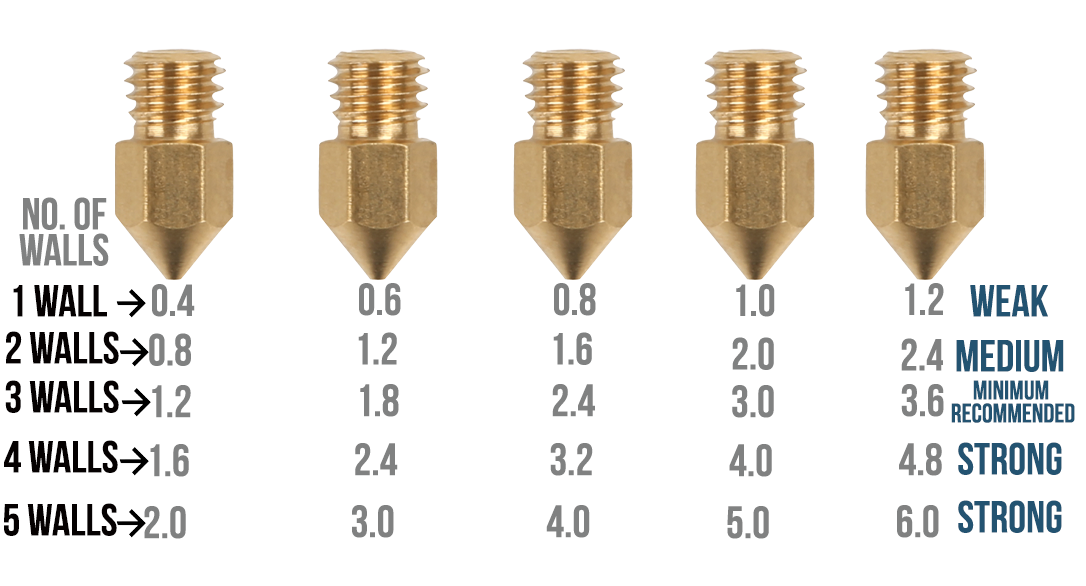
When printing moderately stronger parts, a wall thickness of between 0.8 and 2.0mm is usually appropriate, depending on the material and the purpose of the design. However, in most cases, the default values of the 3D slicer are usually suitable. For FDM 3D printing, you can determine the appropriate wall thickness by using a multiple of the 3D printer nozzle.
The higher the size of the walls, the stronger the 3D print, and vice versa.
3. Geometry of the Design
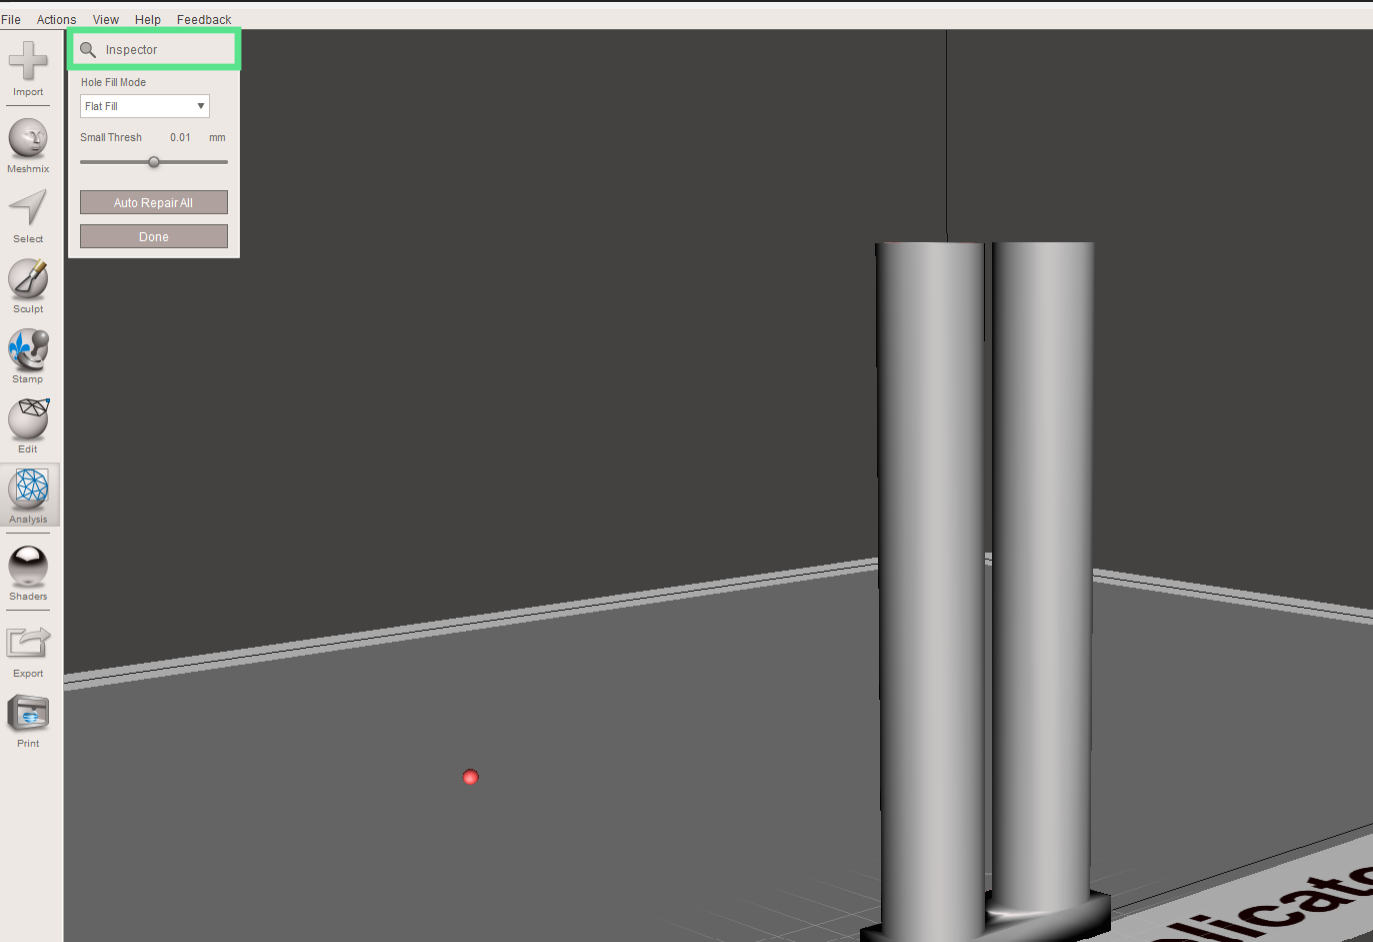
The geometry of the 3D model impacts various aspects, such as the design's ability to be printed, surface finish, and even structural integrity. You should ensure that the model is watertight. This means the geometry should be completely closed without holes, gaps, or overlapping surfaces to be printed successfully. You can use Meshmixer to detect and fix the issues in your file. After importing the file, go to Analysis > Inspector.
The software will be able to detect holes in your design automatically and provide options for fixing it. The three options for fixing them include Minimal Fill, Flat Fill, and Smooth Fill. In Minimal Fill, the hole is filled by adding minimal material to the bridge gap. Flat Fill creates a flat surface across the opening, filling it off, and Smooth Fill, on the other hand, creates a surface that smoothly blends with the surrounding geometry of the hole, eliminating any transitions and discontinuities.
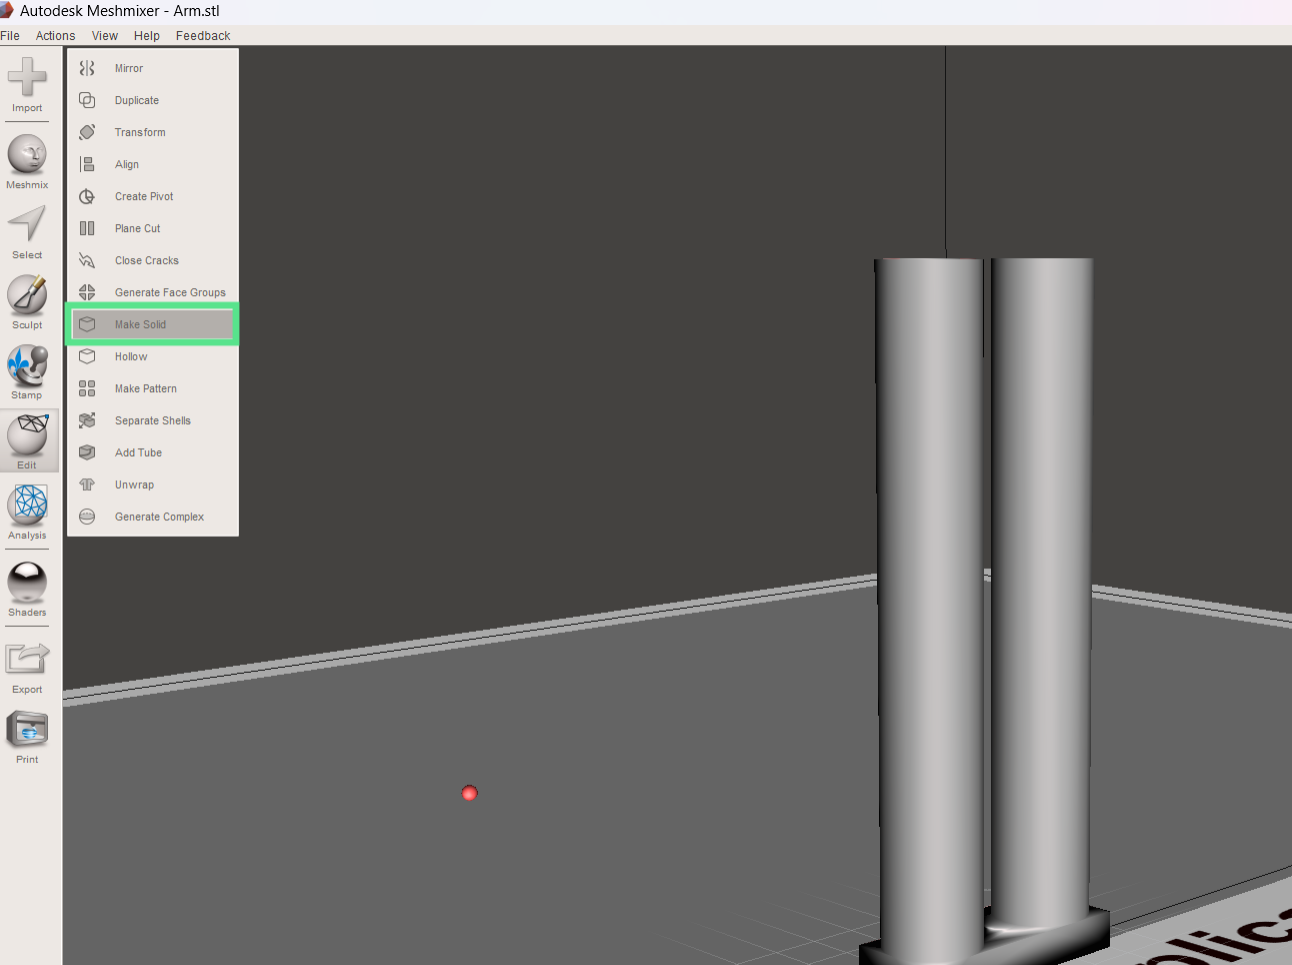
When you choose the appropriate option, you can click on Auto Repair All, which will automatically fill the holes and any intersecting and floating triangles. You can also go to Edit > Make Solid.
As the name suggests, this feature converts meshes into solid objects, filling any gaps or imperfections in the geometry. It also analyzes the mesh and checks if there are non-manifold geometries (edge shared by more than two faces), fixes them automatically, and ensures they are watertight and printable.
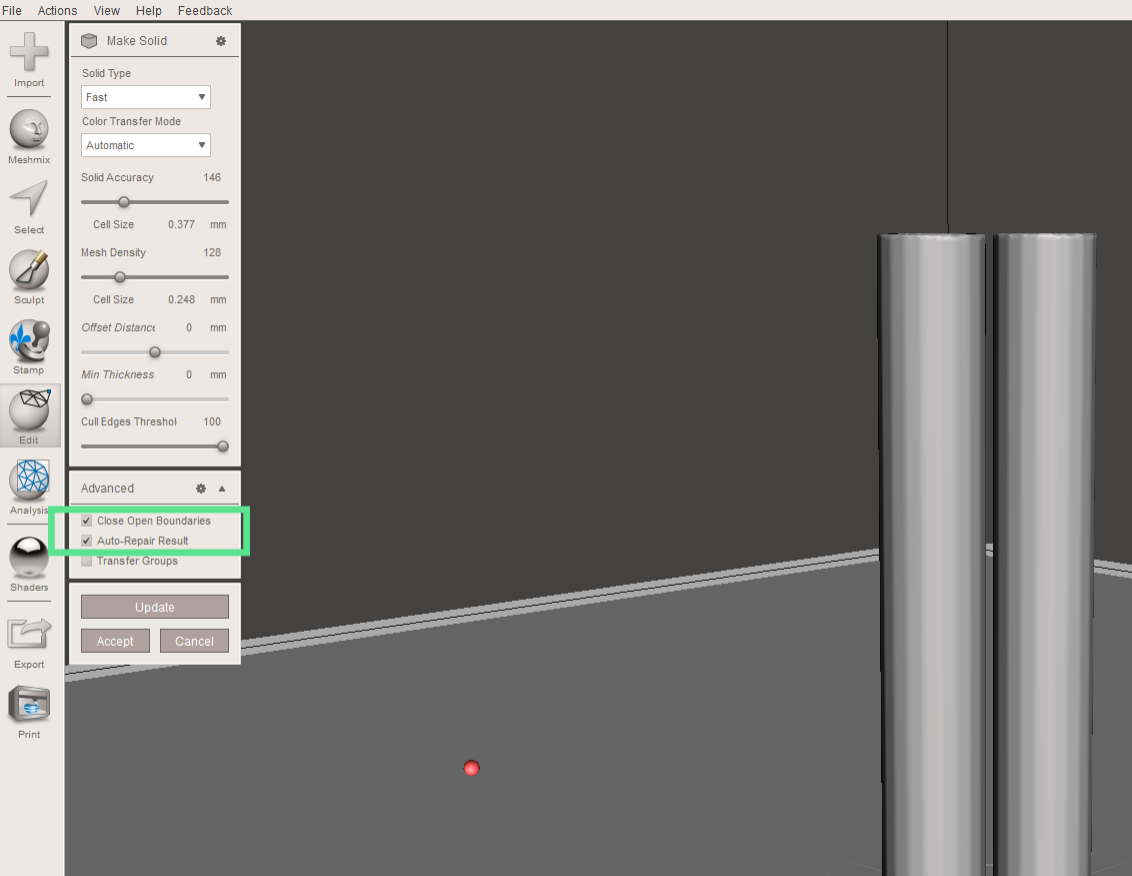
Several settings appear when you select this option, and you can customize based on your design. On top of the settings is the Solid Type, which determines the method for generating the solid geometry. You can either choose Blocky, Fast, Accurate, or Sharp Edge Preserve. There is also a Solid Accuracy setting that allows you to either increase or decrease the level of detail and precision in your solid object. When you increase the value, it will generate a more precise object, but it will take more time to process.
In the advanced section, you should ensure that the checkboxes of Close Open Boundaries and Auto-Repair Results are selected. Close Open Boundaries ensures that any open edges or boundaries in the mesh are sealed.
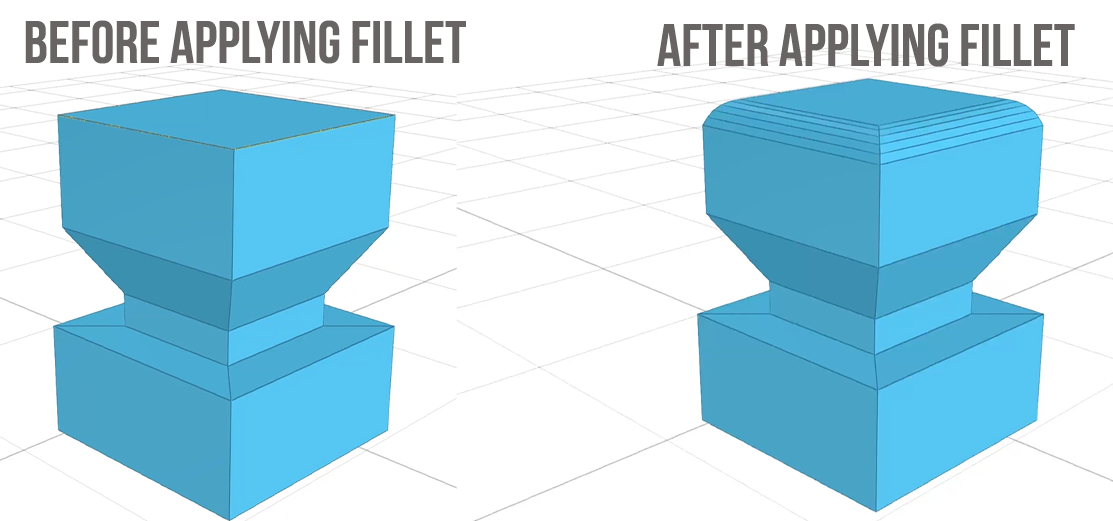
In addition to ensuring that your 3D model is watertight, you should avoid sharp corners, especially in functional designs. This is because they can create areas of high-stress concentration where mechanical forces concentrate, and when subjected to stress, these areas can be prone to cracking or warping. You can fix this by introducing chamfers and fillets to create a smoother transition. You can do this with 3D modeling software. Below is an example of before and after applying fillet to a 3D model.
Though applying a fillet helps smooth the corners, sometimes, when you do a downward-facing fillet, you will face issues, especially on the bottom edges, as shown below.
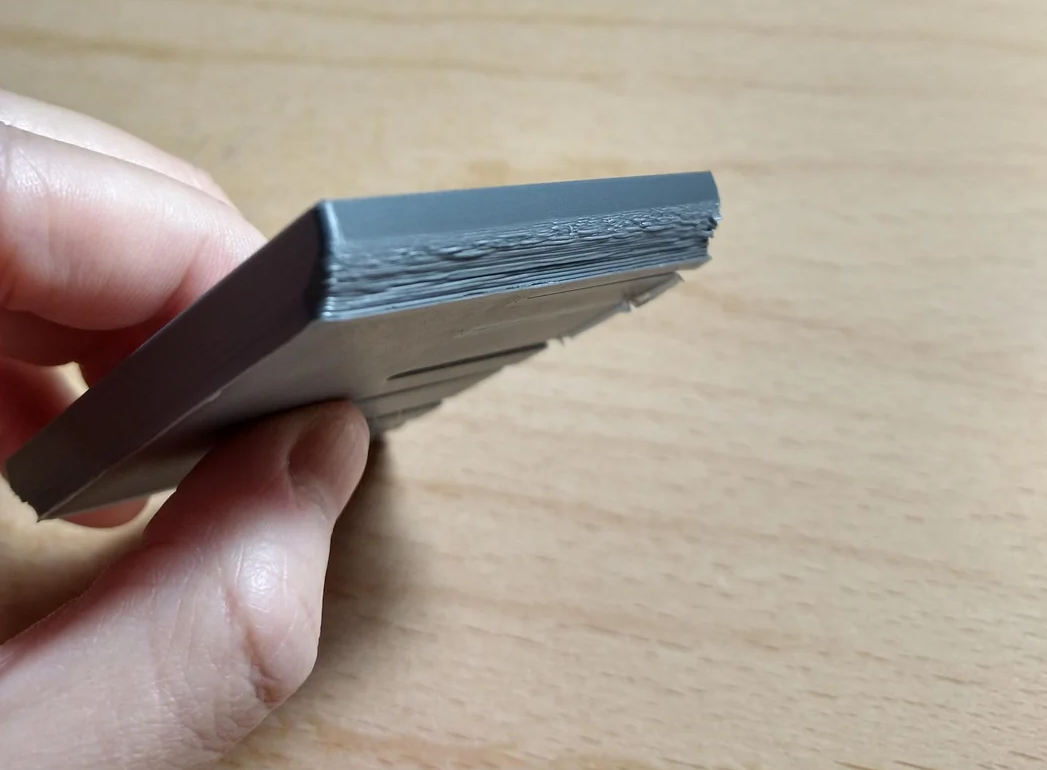
In such a case, it’s recommended to do a 45-degree chamfer and then later fillet the corners.
When using the chamfer, you can select a specific area in which you would like to create a smooth transition. The tool will then cut away some of the material in that section at a specific angle.
4. Orientation
How you position the model relative to the 3D printer bed affects the quality, strength, surface finish, printing time, and even support requirements of your print. You should find the face of the part that will provide good adhesion, and it should be large enough to provide plenty of surface area to maximize contact with the build plate, which will result in good interlayer bonding.
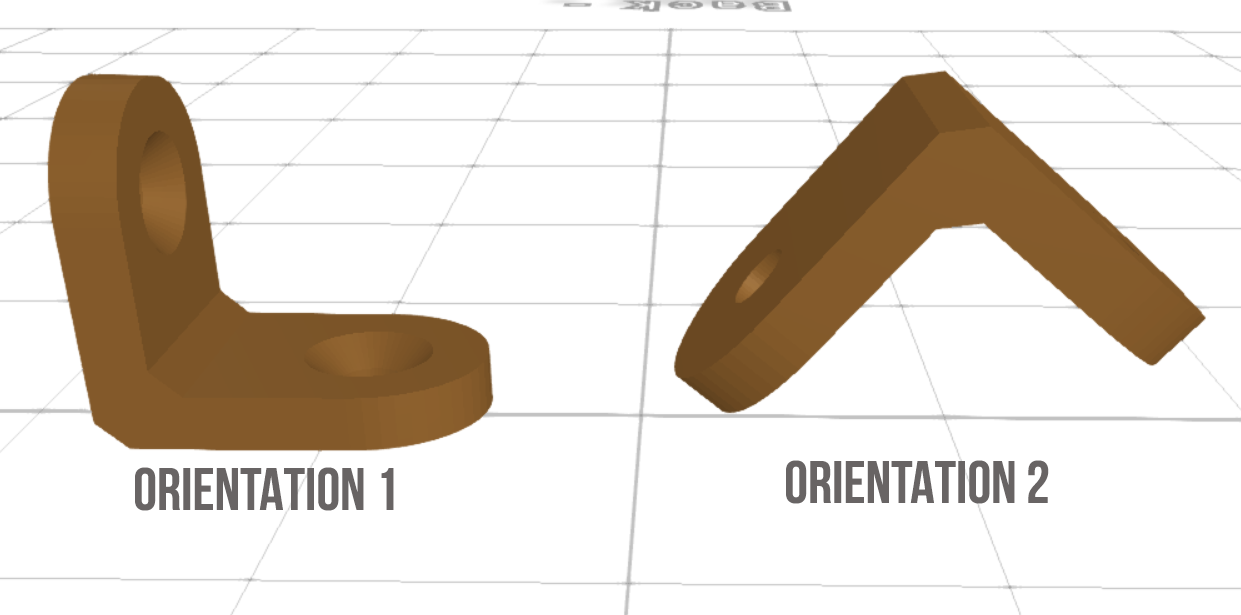
If the print will be subjected to stress, you should ensure that the forces acting on the part are in the direction where they have the least impact on the layers on the print to ensure better overall strength and durability. Also, you should orient it in a way that minimizes the need for supports to save on material and even time. In the image below, the second orientation will require supports, but the first option won’t need them.
Also, if your part has curved surfaces, you should position them in such a way that those parts go around the X and Y axes, as the 3D printer tends to print accurately on these axes, and this helps ensure that the surface quality is good.
5. Resolution
Resolution is the level of detail with which the 3D printer can print a part. It is the thickness of the horizontal and vertical layers of material that the nozzle deposits during 3D printing. The thinner the layers, the more detailed the part is, and also the imperfections on the print are hidden, resulting in a better quality surface. The resolution of a 3D printer depends on the layer height, and also the nozzle size. A lower layer height results in a final and smooth finish, but the printing time increases. A smaller nozzle diameter results in finer extrusion and allows for thinner lines of material to be laid down, and this helps achieve a higher resolution
The 3D printing technology also determines the resolution. SLA 3D printers have a higher resolution than FDM 3D printers, and they have the ability to print thinner layers and capture intricate details with greater precision. If you are printing 3D parts that require a higher level of detail and a smooth surface finish, such as jewelry and medical devices, you should consider SLA or DLP 3D printers. But if you are 3D printing functional parts where speed and cost-effectiveness are more important than fine details, FDM 3D printers are the most suitable.
MORE: Best 3D Printers
MORE: Best Budget 3D Printers
Sammy Ekaran is a freelancer writer for Tom's Hardware. He specializes in writing about 3D printing tutorials and guides. You can find more of his work on various publications, including Makeuseof, All3dp, and 3Dsourced.
