3D Printing Supports: How to Choose the Right Kind
There are five main types of supports. Each has its advantages.
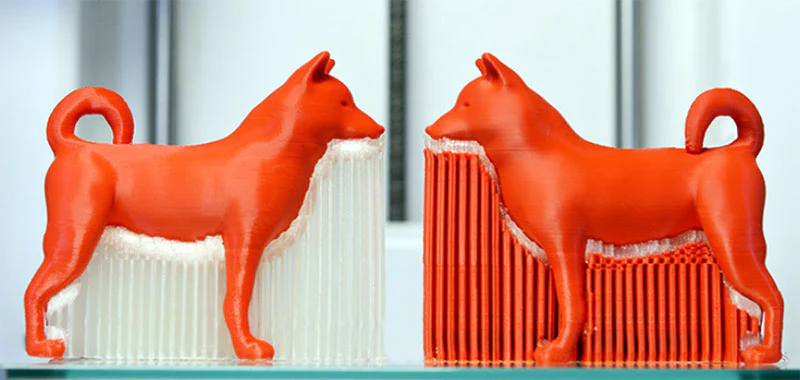
3D printing supports are crucial in providing stability and reinforcement on areas of the print with overhangs and bridges. As a 3D printer deposits materials, parts that exceed a 45-degree angle from the vertical section may not have sufficient underlying materials to support themselves, and gravity can cause these areas to sag or deform during the 3D printing process. Support structures help counter this issue by ensuring that the parts that extend from the print are held together in position and are 3D printed correctly. 3D printing supports are temporary, and they come in different forms. Below are the five main types.
1. Tree Supports
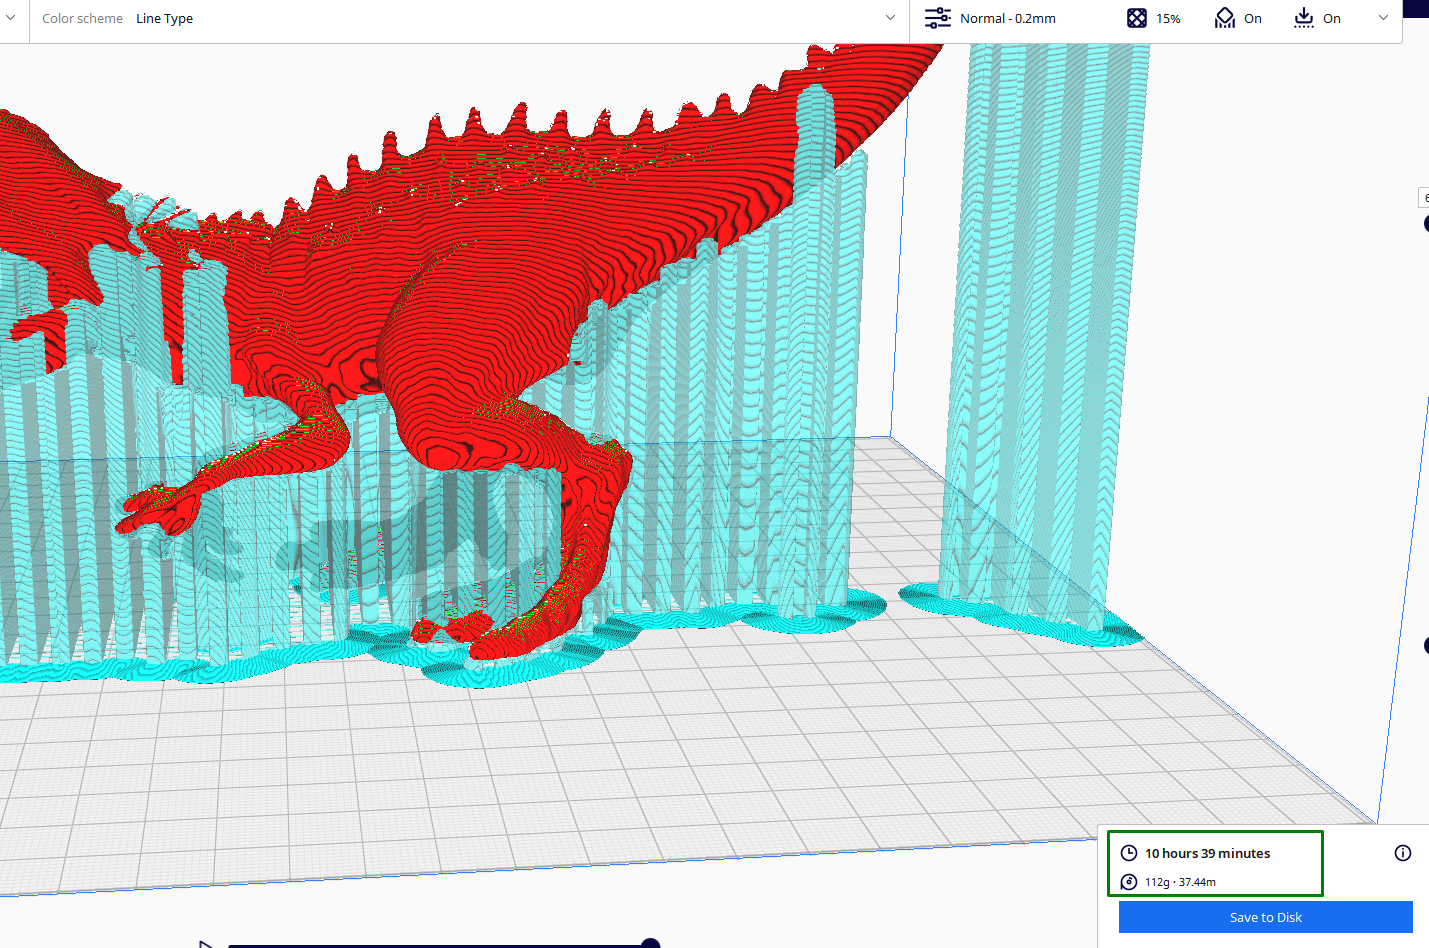
Tweaking your settings to make it easier to remove the supports is always challenging, and to try to solve this issue, tree supports were added to Ultimaker Cura, one of the most popular and best 3D slicers. As the name suggests, these supports have a tree-like structure with branches. They use less material and time to print. Below, you can see the print with normal supports takes around 10 hours to print.
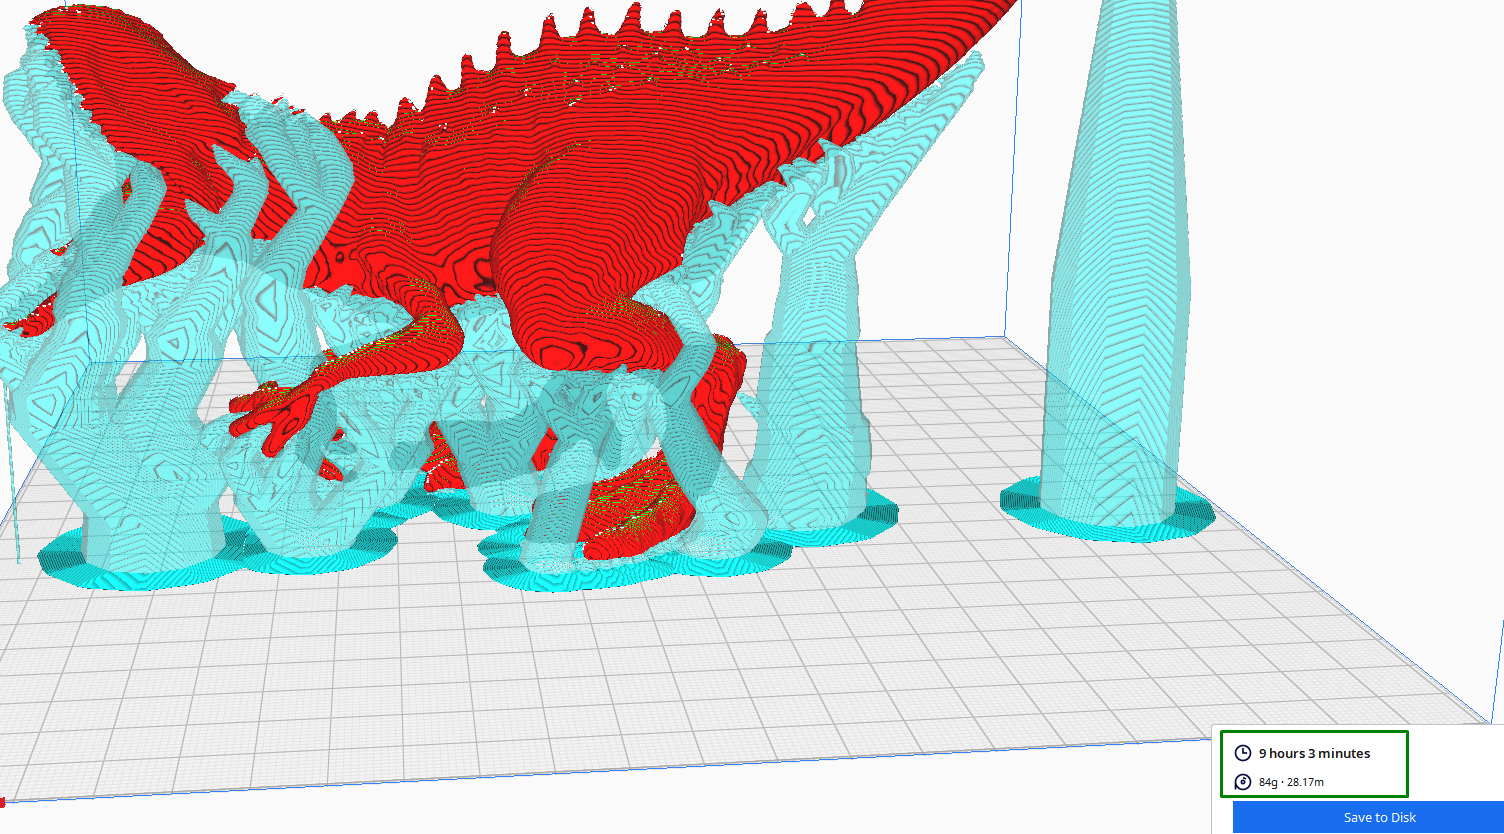
The one with tree supports takes around 9 hours only.
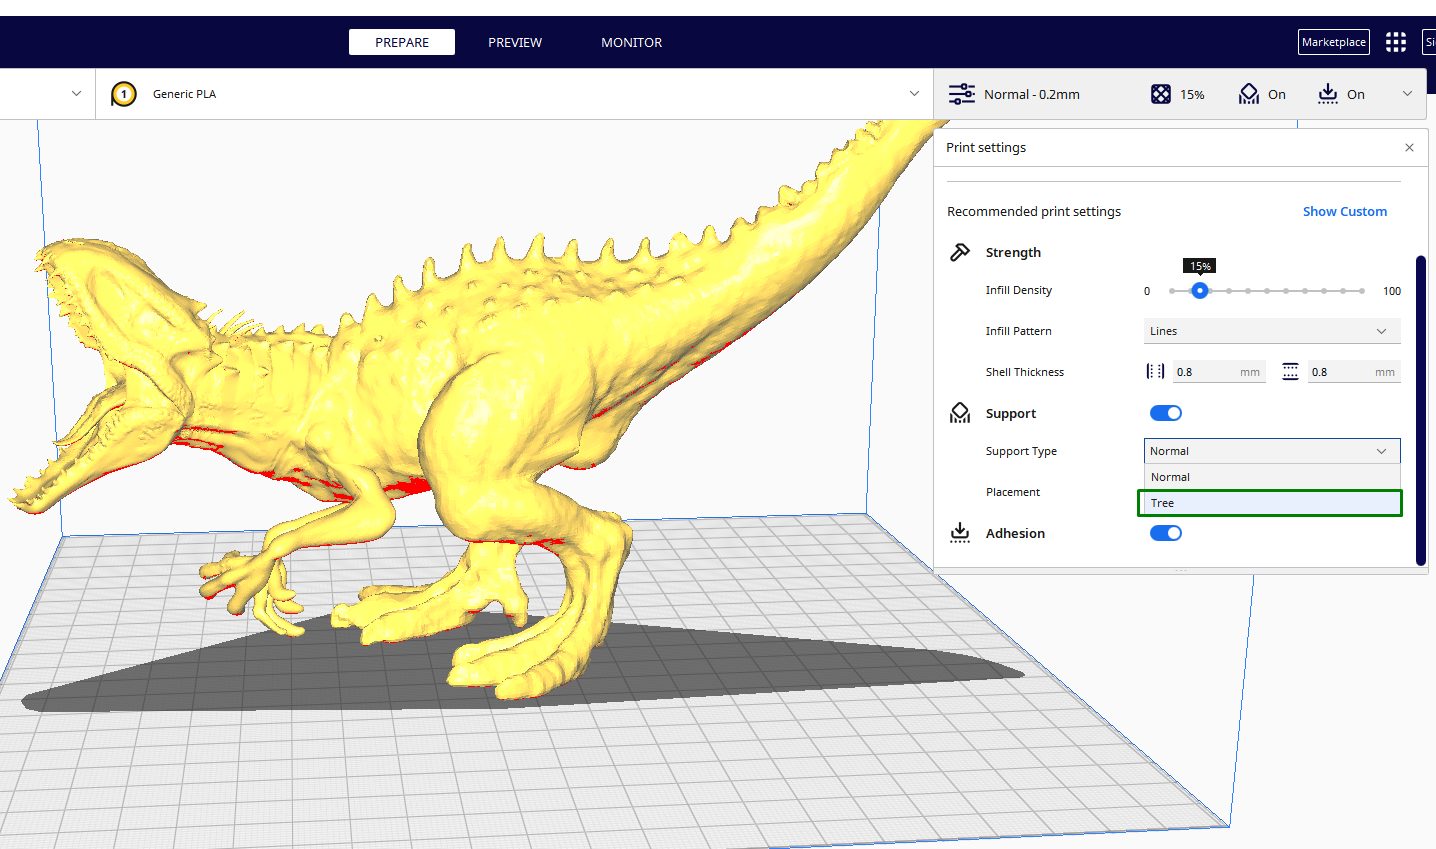
When you enable these supports, they appear around the print, thicker on the bottom and thinner on top, just like how trees look. To activate, go to Support > Support Type, and in the drop-down menu, choose Tree.
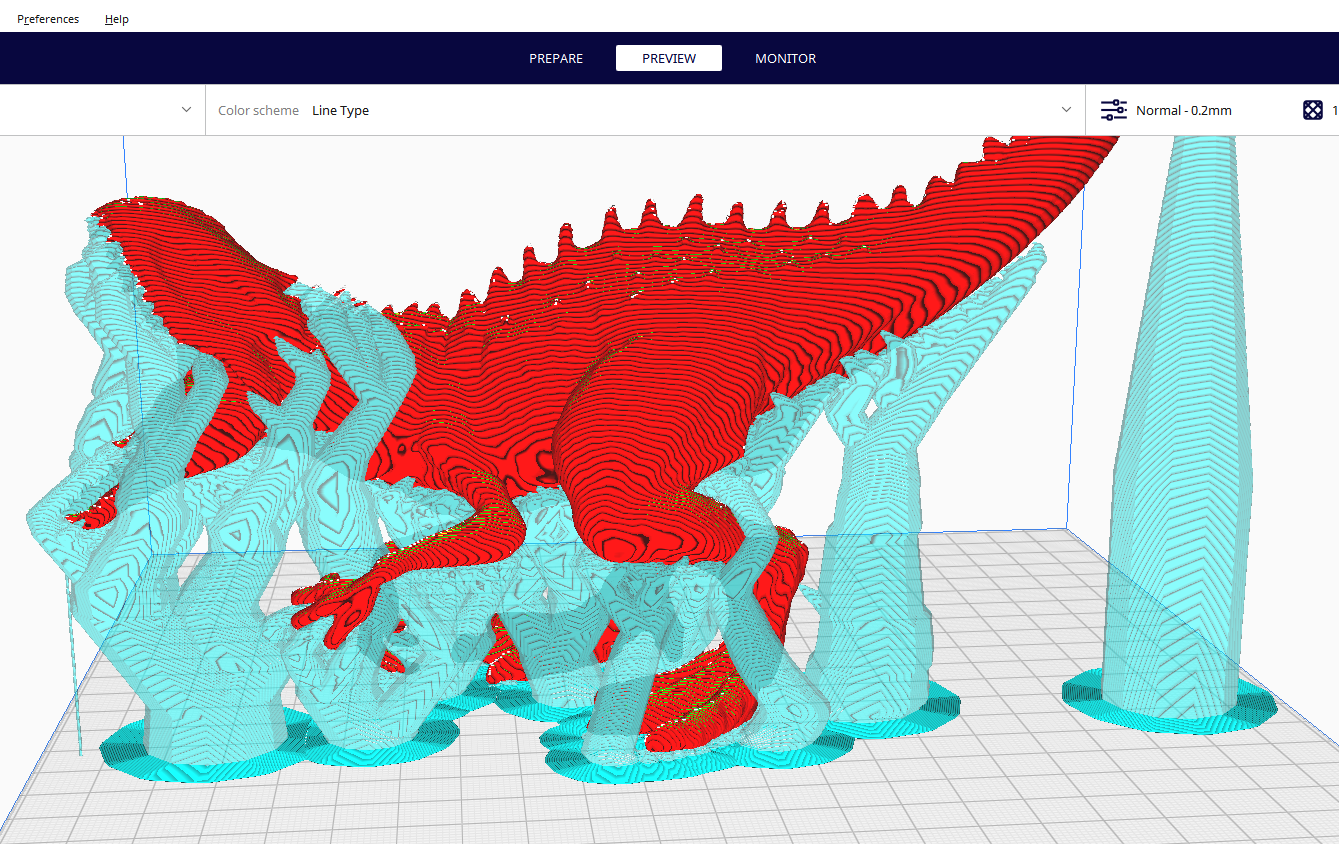
You can then slice and go to the preview section, and you will see the structure similar to the one below.
Just below the option for choosing the support structure, there is a Support Placement option where you can select Buildplate Touching or Everywhere. Touching Buildplate means the support structures will start from the build plate to the design. They will have the base layer that adheres to the build plate surface. Everywhere, on the other hand, means that the 3D printer slicer will add the supports in any necessary section. Some will start from the build platform and move towards the design, while others will use the design as its base.
2. Breakaway Supports
You can break these away using your hands as they easily detach from the printed object after 3D printing. They consist of solid columns or structures that touch the model at specific points where support is needed, and they leave a moderately clean surface finish after removal as they simply snap from the main part without you using a lot of force to remove them. They are great for prints which require their fine details to be preserved.
Get Tom's Hardware's best news and in-depth reviews, straight to your inbox.
The only challenge is that you can damage some parts of the design, especially the tiny and delicate ones as the supports and the 3D print itself are 3D printed with the same material. These supports are default in all 3D printers with one extruder.
3. Auto-Generated Supports
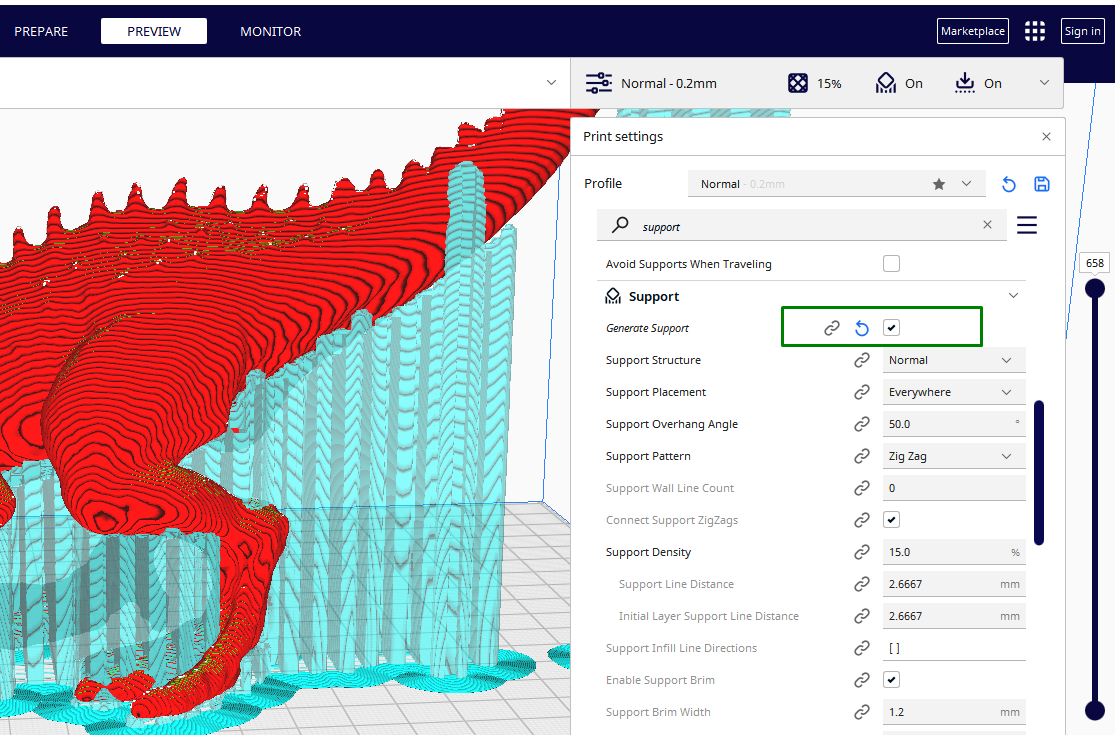
Auto-generated supports are those that are automatically added to the various parts of your model. The slicer analyzes the design, determines where the supports are required, and adds them automatically. In Cura, supports are generated automatically when you click the supports checkbox. You won’t need to specify any other settings.
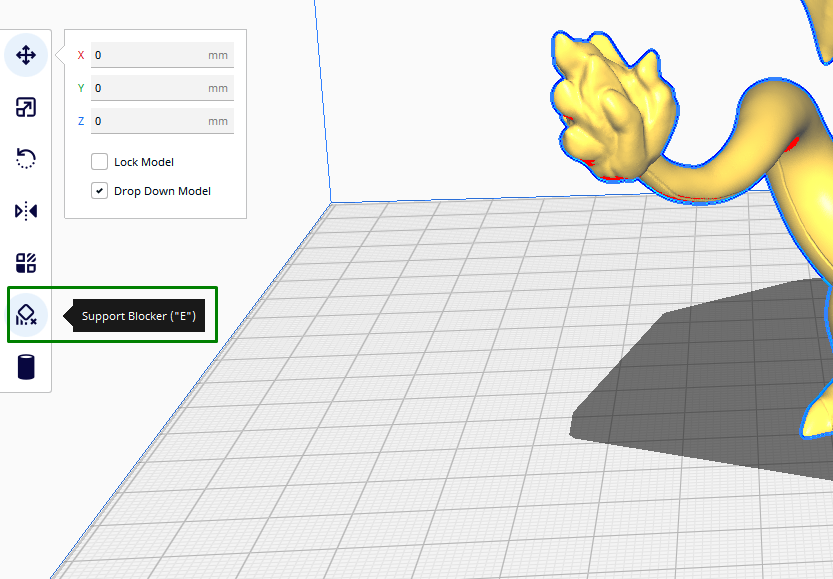
You should use support blockers if you don’t want the supports to appear on some sections of your design. To use this feature, you need first to slice the model and preview it to know the exact areas where you don’t want the supports to appear. After that, click on the support blockers option in the bottom left section, as highlighted below.
You can then select the areas where you don’t want the supports to appear. You will see square blocks appearing on the section you choose, and you can preview and see if you have done everything correctly.
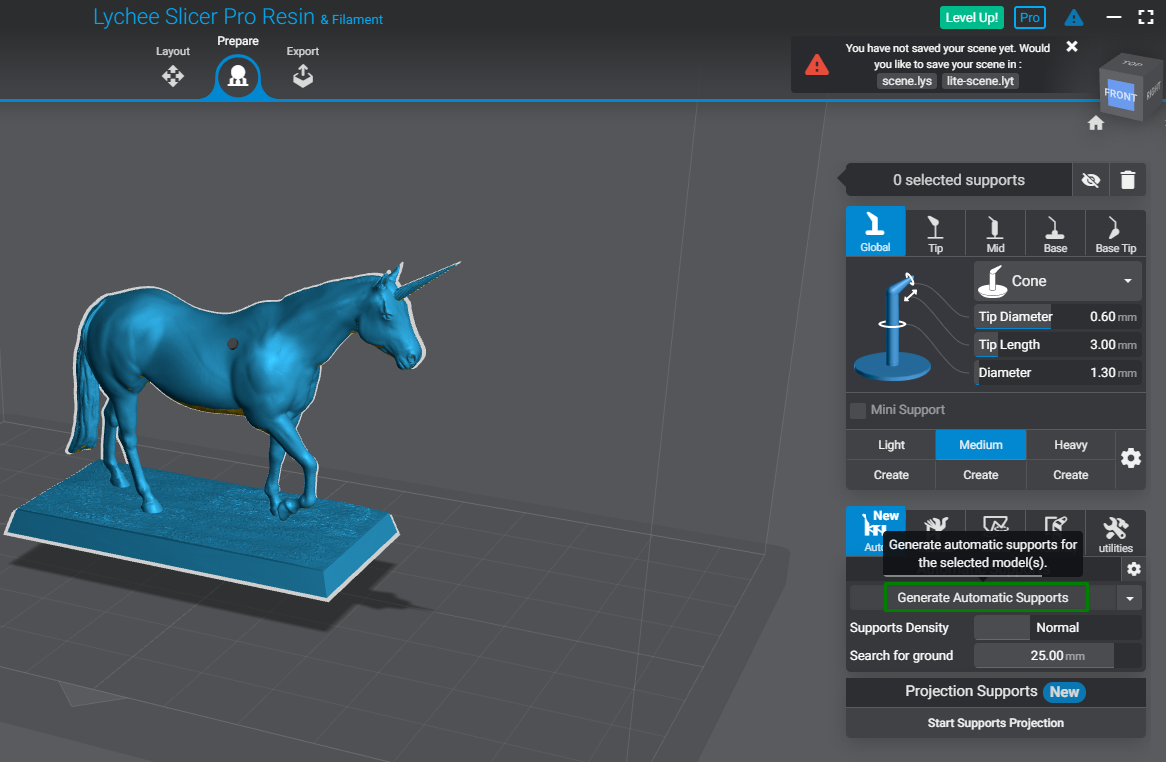
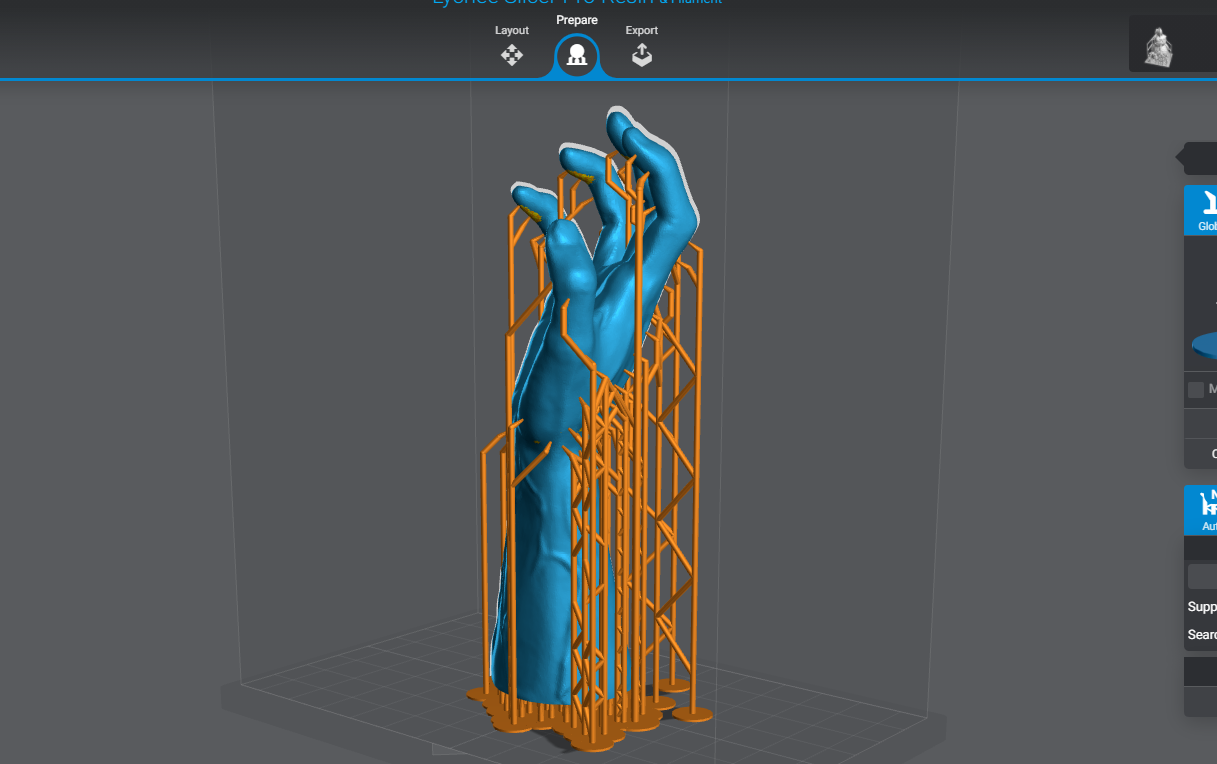
If you are preparing designs for resin 3D printing and you are using a slicer like Lychee, you click on Generate Automatic Supports, and it will be able to generate them.
4. Manual Supports
If you don’t want the slicer to add the supports automatically, you can add them manually. Unlike the auto-generated supports that we have described above which are placed based on how the slicer analyzes the design, you have complete control over the type of supports and even where you want to put them.
This option is helpful when you are working on a design with intricate geometries where auto-generated supports may not provide good results, and it also helps in saving the material as you place them where necessary only. You can customize the size, shape, and even their density.
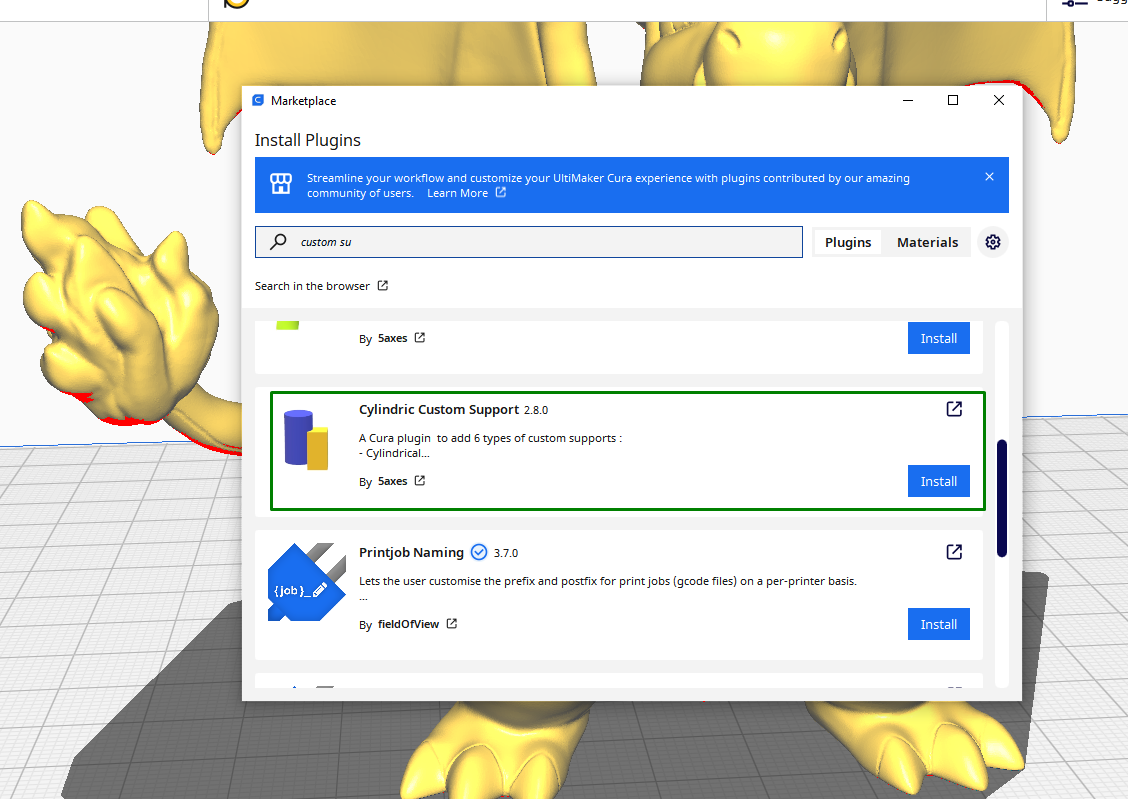
To add manual supports in Cura, you need to download the manual support plugin from the Marketplace section. This plugin will add cylindrical supports to your design.
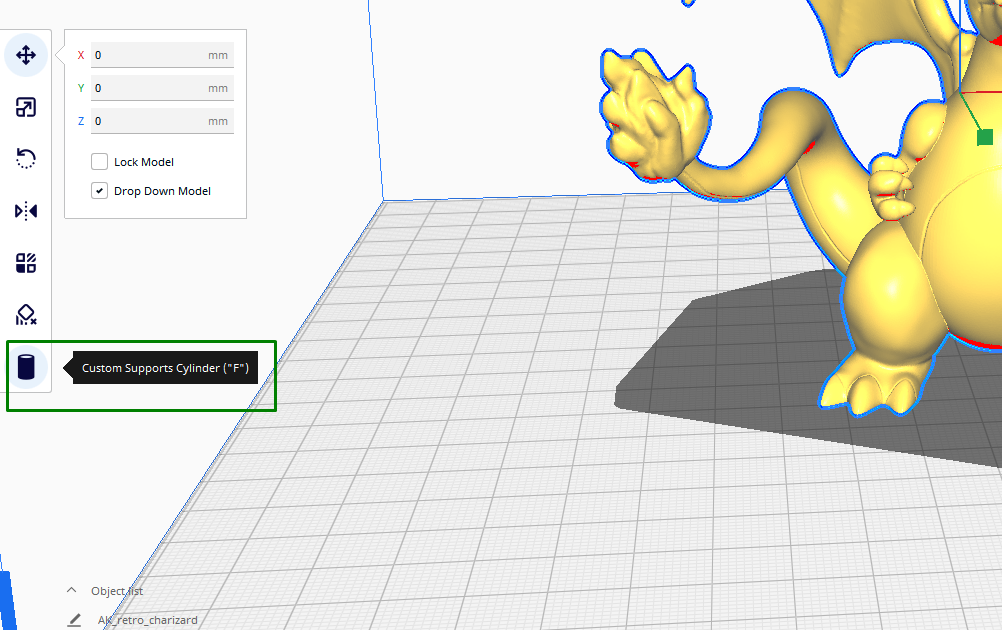
Once you install it, restart the software, and the plugin will reflect.
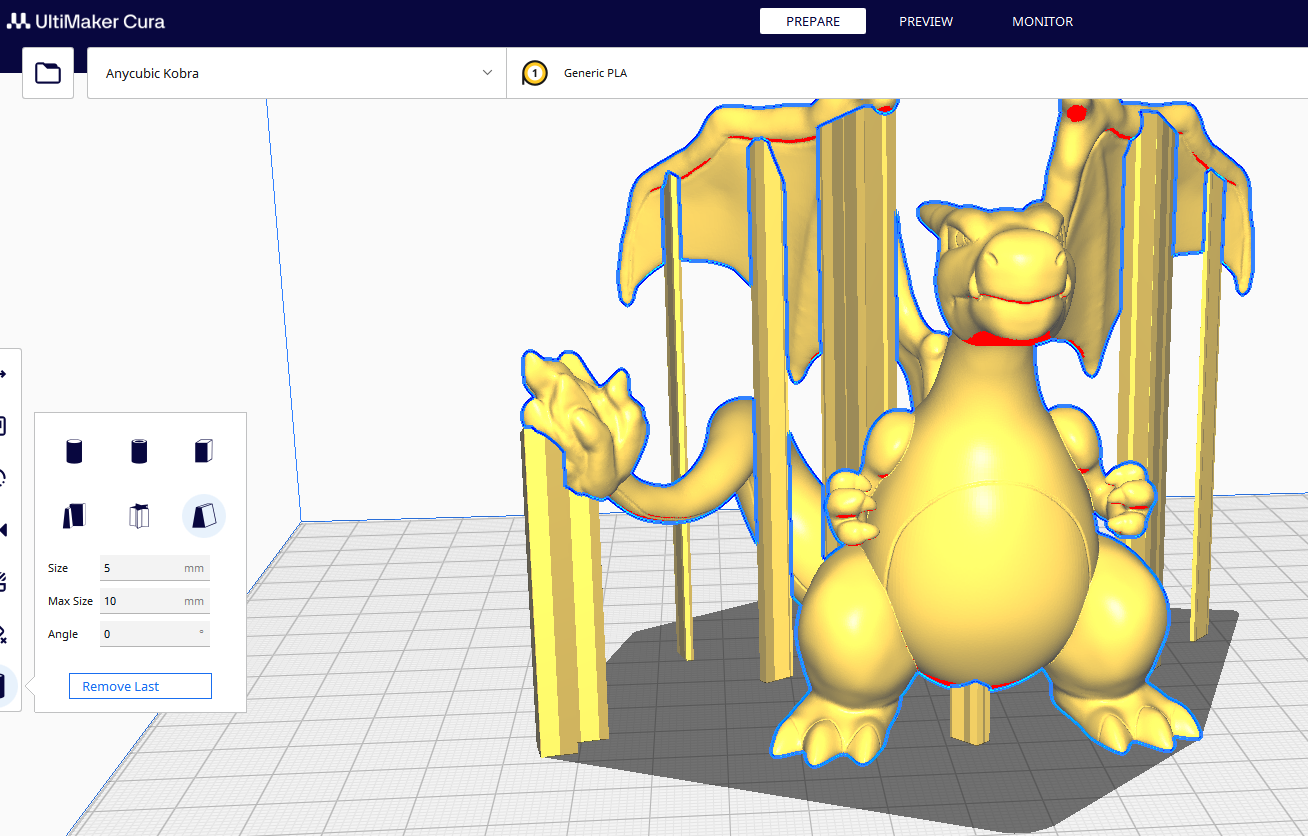
When you click on it, you will see a variety: Cylindrical, tube, cube, abutment, freeform, and custom. In my case, I will select custom, and then I will go and select the areas where I want them to appear, and it will appear like this.
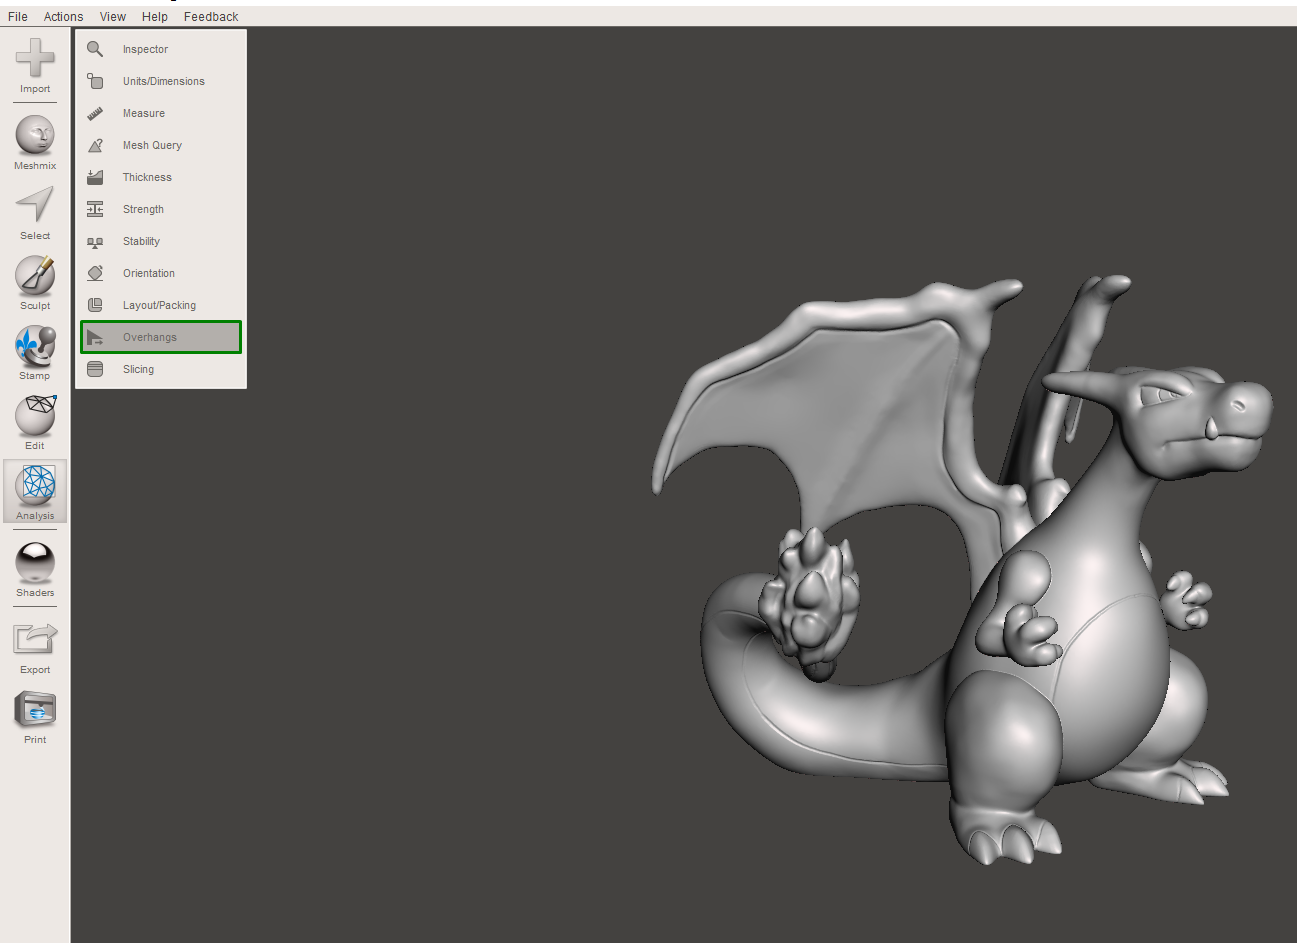
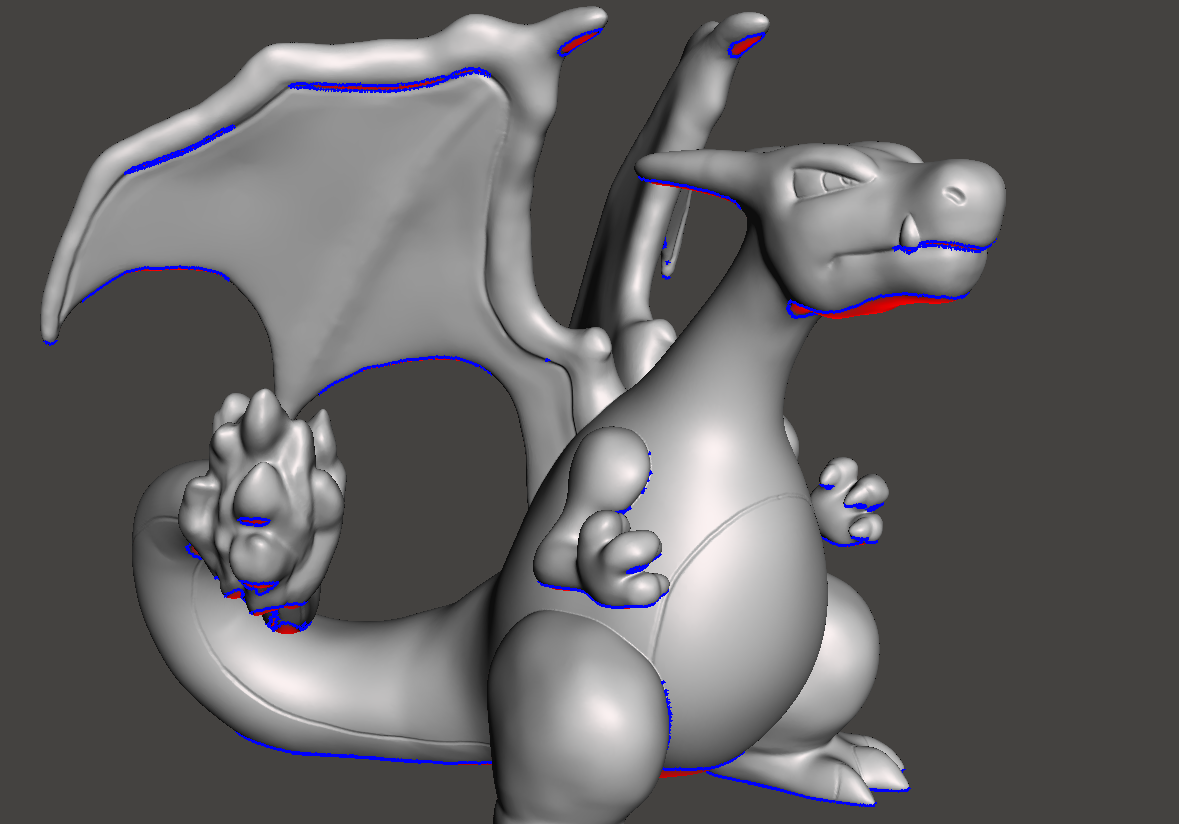
You can also specify the size and angles too based on your needs. If you are using Meshmixer, you can add and customize supports by going to Analysis > Overhangs.
The areas that need to be supported will be highlighted in red, as shown below.
You can go ahead and customize the support settings listed there. For example, you can adjust the angle threshold, Y-offset, tip, and base heights. All of these settings affect how the supports appear. When you finish setting, click on Generate Support to see them appearing on the design.
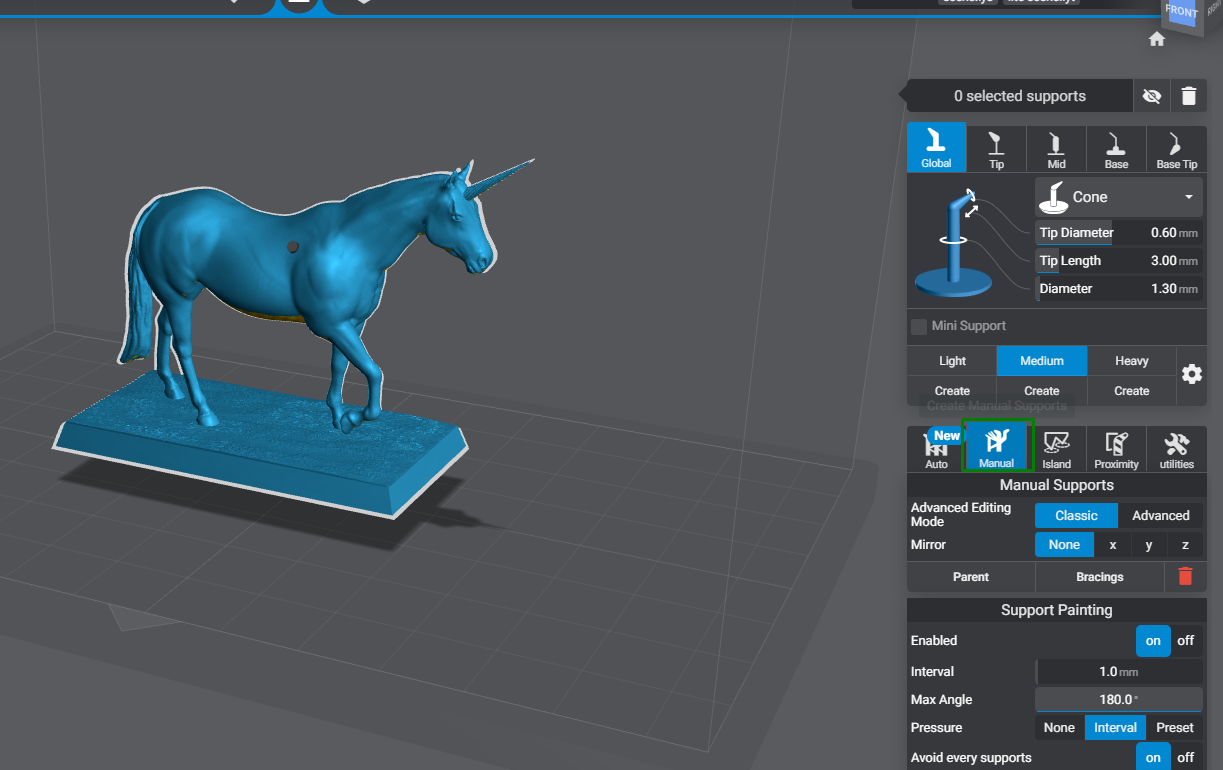
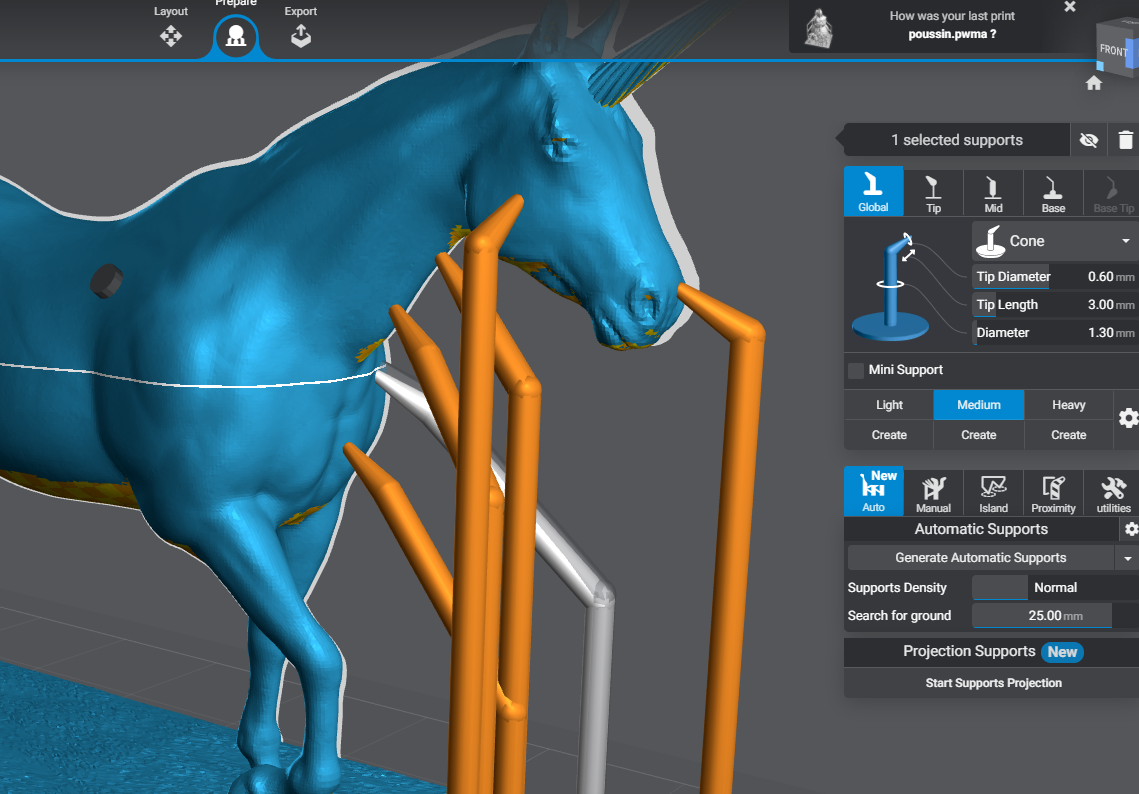
Lychee slicer also has an option to add manual supports to your 3D prints. To use it, click on the Manual option.
You can choose the structure of the supports, whether global, tip, mid, base, or base tip. For demonstration purposes, I will select Global and then go ahead and start applying the supports to the design.
You can also adjust the tip diameter, tip length, and the overall diameter of the supports.
5. Dissolvable Support Structures
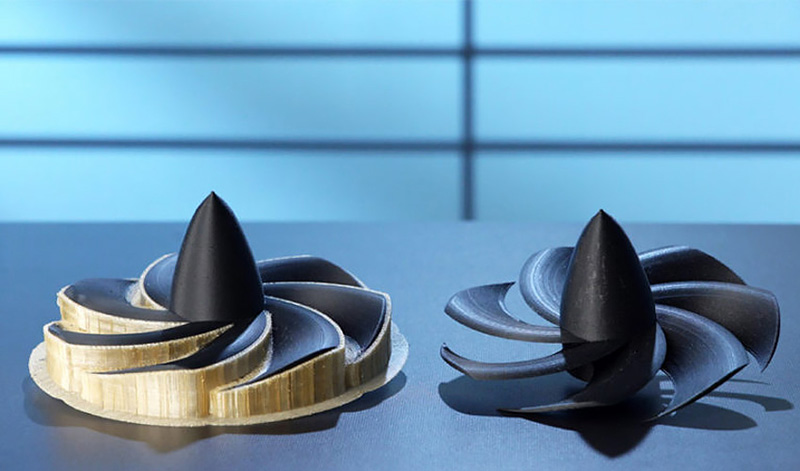
These supports address the challenges that come with removing supports. Unlike the other supports like breakaway, where the material you use for the design is the same as that of the supports, dissolvable supports use a different material that easily dissolves in water, like PVA filament.
It works on dual extruder 3D printers where one 3D printer is loaded with water-soluble filament and the other one with regular filament. After 3D printing, the design is submerged in water for some minutes or hours for the supports to dissolve leaving behind the finished design. The final design is usually characterized by a cleaner surface finish as compared to when other supports are added, and there is also less risk of damage to other delicate parts of the print.
Related Tutorials
More: How to Use PrusaSlicer: A Beginners Guide
More: 5 Ways Fix Z Banding in 3D Printing
More: How to Use FreeCAD for 3D Printing
More: How to Convert OBJ Files to STL Files for 3D Printing
More: How to Clean and Cure Resin Prints
Sammy Ekaran is a freelancer writer for Tom's Hardware. He specializes in writing about 3D printing tutorials and guides. You can find more of his work on various publications, including Makeuseof, All3dp, and 3Dsourced.
