How to Fix Pillowing Problems in Your 3D Prints
Prevent gaps and uneven layers on top sections of 3D prints
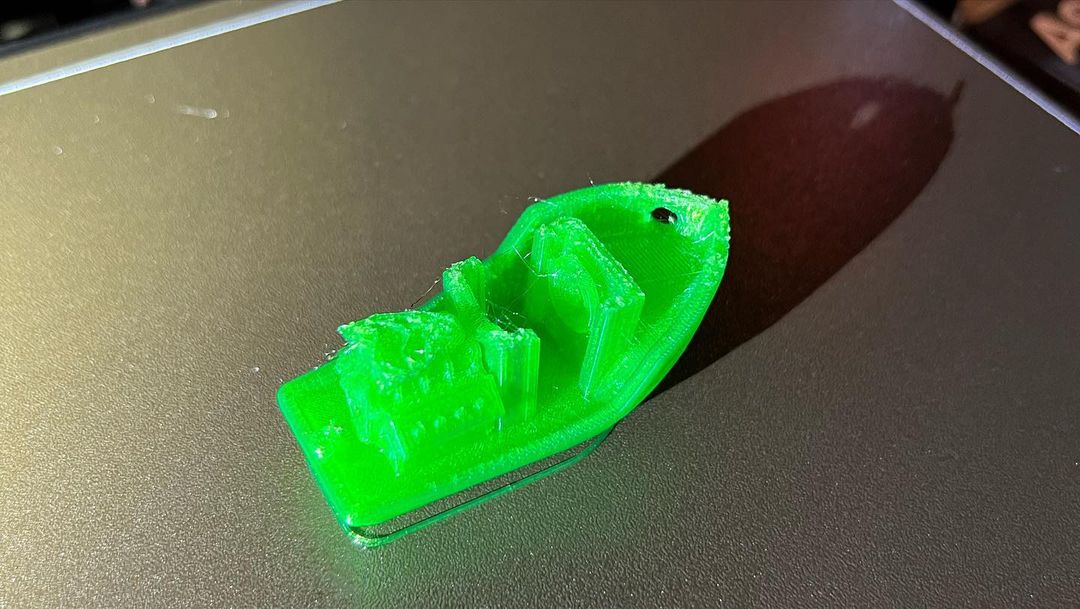
Pillowing is a 3D printing problem where the top layers of the 3D print are rough and might contain holes or irregular bumps. This can be as a result of It can be frustrating because, unlike some 3D printing issues that can be identified during the early stages, pillowing only becomes visible when the entire print is finished and this can lead to a significant waste of time and material in a 3D print that won’t turn out well in the end.
You can even have one of the best 3D printers but if there are settings not properly set, you can experience Pillowing. This 3D printing problem mainly arises when the top layers don’t have enough time to cool properly and insufficient materials on top, resulting in gaps and voids resembling a pillow. You can fix it using the methods below.
1. Increase Top Thickness
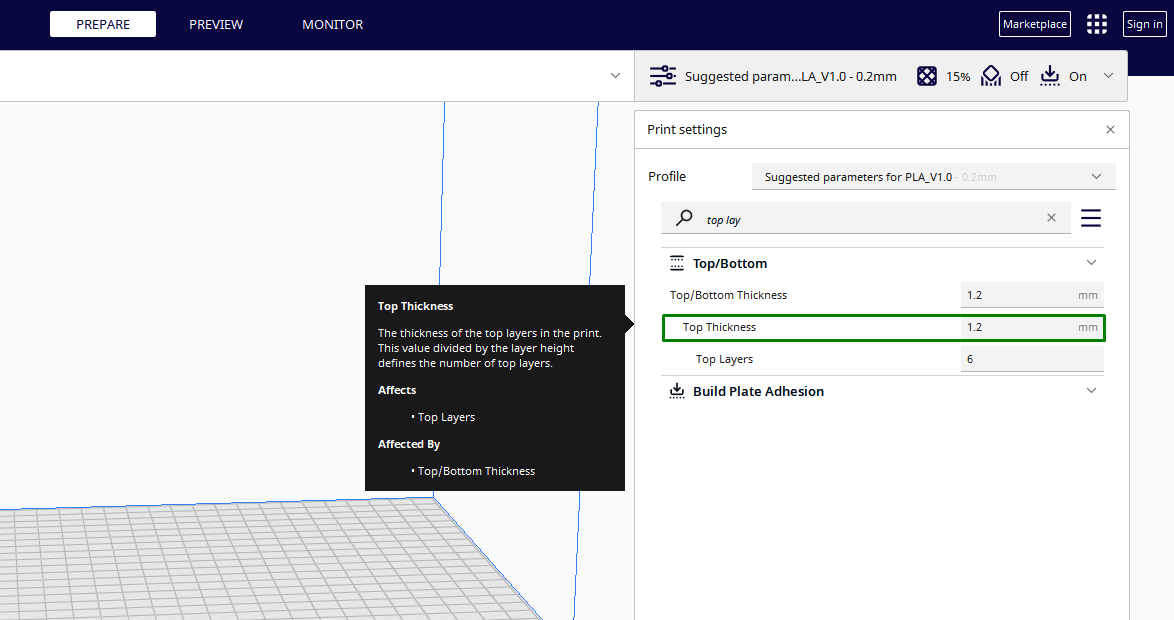
When you increase the top layers, more material will be deposited, creating a denser and more solid top surface, and this bridges any gaps, reducing the likelihood of pillowing. You adjust this in the 3D printer slicer. In Cura slicer, you can get the the settings on the Top/Bottom section.
The default value is around 1.2mm, and you can increase it up to approximately 1.6mm. As you increase, ensure that the value you choose is about 5 to 6 the value of the layer height. You can experiment with small designs and see how they appear until you achieve the optimal value. In addition to increasing the top layer thickness.
2. Use Proper Infill Density and Pattern
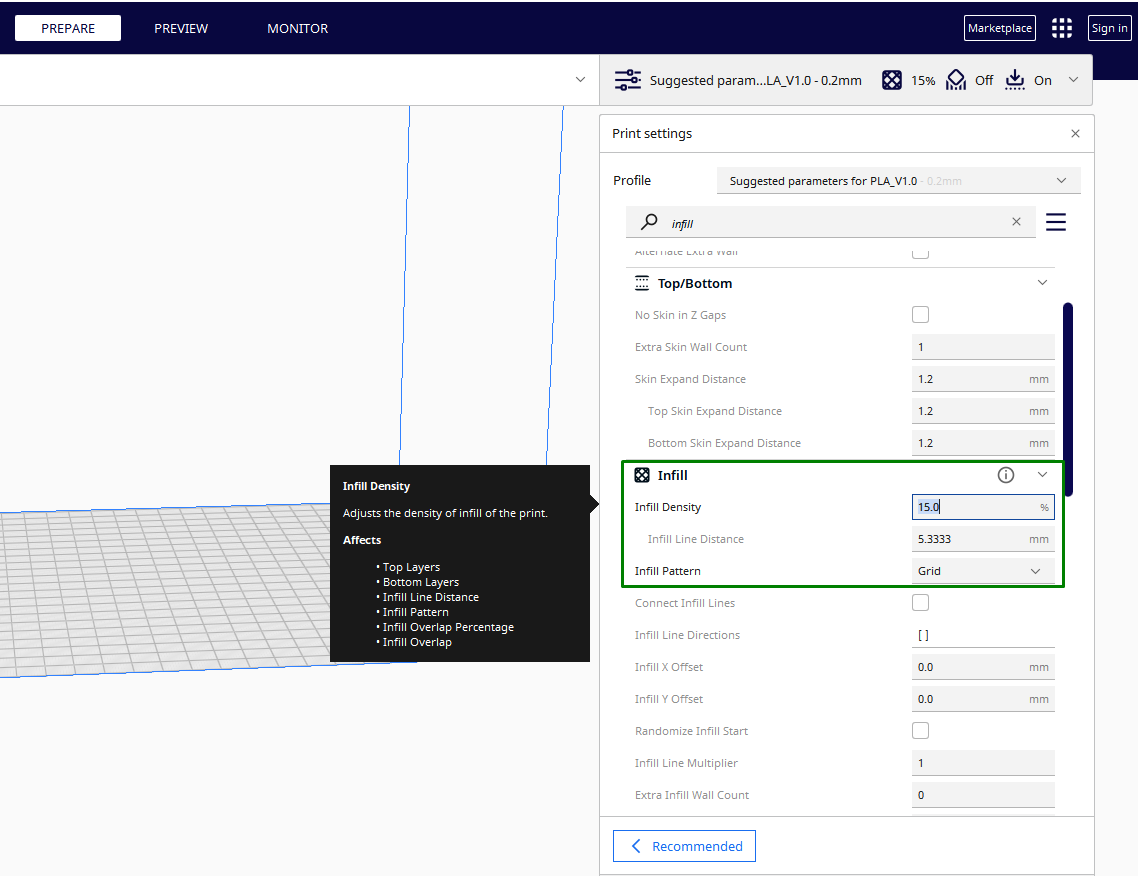
You need to adjust the infill settings to provide a stronger and greater number of internal support structures of the top layers, and it ensures that more materials cover them. As you adjust, you have to balance between material and time taken to 3D print. Infill patterns like honeycomb and gyroid as it distributes support evenly throughout the internal structure enhancing stability without being stiff. You can adjust the infill density and pattern in the Infill section.
For most standard prints, an infill of 15-50% is good and you can increase it a little bit. For functional 3D prints, a value between 50-100% is appropriate.
3. Properly Cool the Layers
Pillowing can occur if the top layers don’t have enough time to cool and solidify before the next layer is deposited and this can lead to excessive heat retention which can cause the material to remain soft and prone to deforming. Many 3D printers come with dual-fan configurations in which each play a crucial role.
Get Tom's Hardware's best news and in-depth reviews, straight to your inbox.
The first fan is the layer cooling fan that is positioned near the nozzle and its function is to cool the layers of the filament immediately after deposition. This is important for maintaining the structural integrity of the printed layers by ensuring that the layers solidifies appropriately. The second fan is the hotend fan that is essential in maintaining an optimal temperature at the top of the hotend preventing heat from traveling upwards causing unintended softening of the filament.
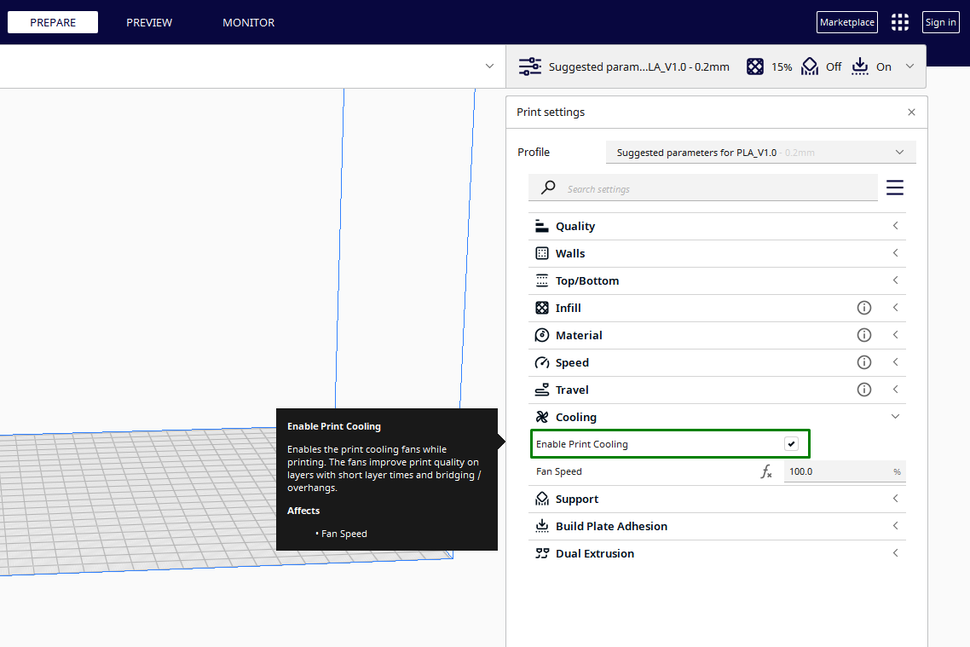
It’s important to properly configure your cooling systems and adjust the settings accordingly in the slicer to prevent pillowing. If you are using Cura slicer you can find the cooling settings in the Cooling option and you can activate it by checking the Enable Print Cooling box.
You can adjust settings like the fan speeds to strike a balance between effective cooling and avoiding potential complications like warping or layer adhesion issues. Maintaining the fan speed at 100% is important.
In addition to adjusting the settings, you can also consider 3D printing a fan duct upgrade to enhance uniform cooling. It does this by directing airflow precisely and ensuring that cooling distributes evenly across the printed layers. If your 3D printer doesn’t have a built-in enclosure, you can consider purchasing one or making a custom one at home. An enclosure stabilizes the internal temperature preventing uneven cooling.
4. Reduce 3D Printing Speed
When you reduce the printing speed, each deposited layer has enough time to cool uniformly before the next layer is deposited, preventing pillowing. If the speed is high, successive layers can be deposited before the previous ones have adequately cooled resulting in material remaining soft.
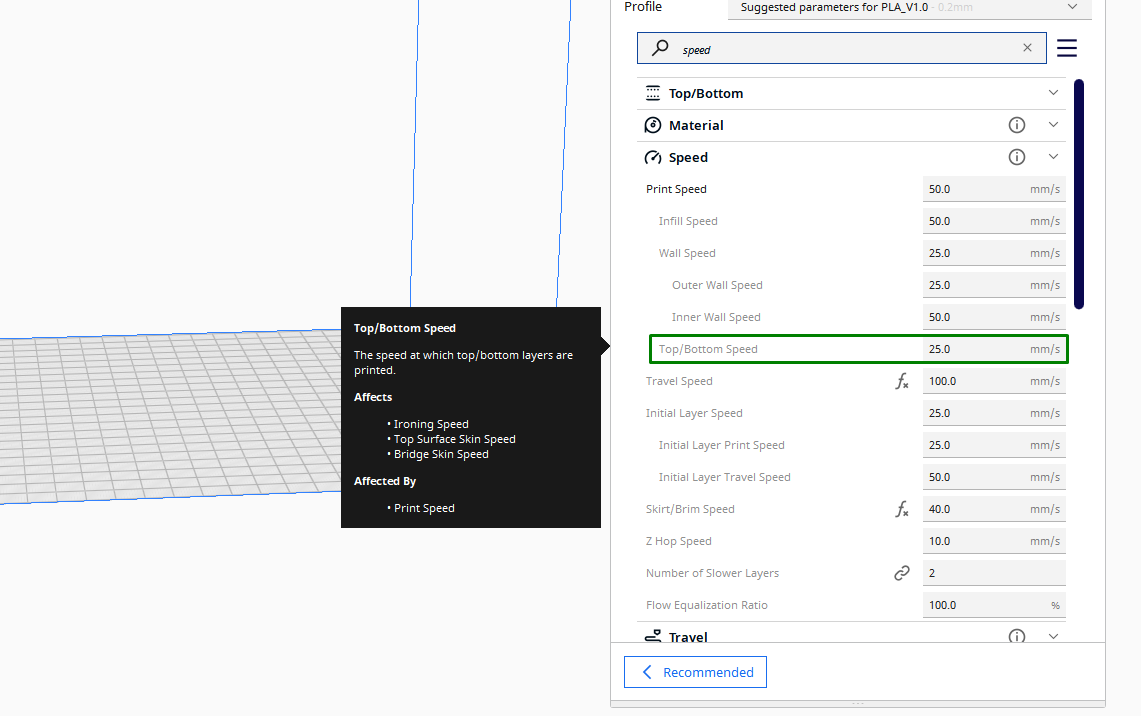
You can start with the default value and reduce it gradually until you find the optimal value. In addition to adjusting the general 3D printing speed, you should also consider the top speed and ensure that you optimize it properly.
The top speed determines the speed at which the top layers will be 3D printed. As you adjust the speed you should be careful not to reduce it too much as it can cause under-extruding issues.
5. Adjust 3D Printing Temperature
The printing temperature directly influences the ability of the 3D printer filament to adhere to the underlying layers. If it is too high, the material may remain soft for too long, increasing the likelihood of pillowing. Moreover, if it is too low, inadequate layer adhesion can occur compromising the structure of the top layers.
So you need to adjust it appropriately until you achieve the optimal value. Different filaments have different temperature requirements and you need to know the appropriate value for the one you are using. You can also 3D print a temperature tower and use it to adjust your temperature until you get the correct setting.
6. Fine Tune 3D Printing Settings for Filaments Prone to Pillowing
Some filaments like soft and flexible ones can be susceptible to pillowing and deformation as they tend to retain heat for longer periods which can result in insufficient cooling between layers and increased risk of undesirable effects on the surfaces. Also, their flexibility and softness can contribute to the issue because they are not able to maintain the shape during cooling because their rigidity may hinder their ability to provide adequate support for the layers above contributing to structural integrity.
To avoid this, it’s important to properly adjust temperature, speed, and cooling settings when printing with these materials so that they cool appropriately and achieve better layer adhesion and overall print quality. In addition to flexible and soft filaments, you should also ensure that you are using a high quality filament (perhaps one of the best filaments for 3D printing) that has no impurities and has the same diameter all across as these issues can compromise the structural integrity of the layers.
Related 3D PrintingTutorials
More: 5 Ways Fix Z Banding in 3D Printing
More: How to Use FreeCAD for 3D Printing
More: How to Convert OBJ Files to STL Files for 3D Printing
More: How to Use PrusaSlicer: A Beginners Guide
Sammy Ekaran is a freelancer writer for Tom's Hardware. He specializes in writing about 3D printing tutorials and guides. You can find more of his work on various publications, including Makeuseof, All3dp, and 3Dsourced.
