How To Install Tiny11 for Arm64 on Raspberry Pi 4
A lean Windows 11 install for Raspberry Pi
Think Raspberry Pi, think Linux right? That has been the way for all 11 years of the Raspberry Pi’s life. There was a brief interest in Windows for IoT, but not much has been heard for some time. Installing Windows 10 and Windows 11 on a Raspberry Pi 4 is nothing new, but Tiny11 for Arm64 aims to make the base installer smaller and leaner, which is ideal for the Raspberry Pi’s hardware.
Tiny11 has caused quite a stir in recent days. It offers a lighter Windows 11 installation, ideal for older, less powerful machines. The recent release of Tiny11 for Arm64 saw support for Windows 11. Our initial investigation used a micro SD card as the boot device, a mistake that this tutorial will rectify.
In this how to, you will learn how to install Tiny11 on a USB 3 drive, and then tweak the CPU clock and change the amount of RAM available to Tiny11. At the end of this how to, the Raspberry Pi 4 will boot directly into Tiny11 and feel comfortable for daily tasks. Note that Tiny11 does not support the native Wi-Fi of the Raspberry Pi, a USB dongle can be used but your mileage may vary. The GPIO is also not available for use.
What you will need to install Windows 11 on a Raspberry Pi 4
- Raspberry Pi 4 4GB or 8GB
- An 32GB or larger SSD via a USB 3 caddy. Best for performance or 16GB or larger microSD card, (see Best microSD Cards for Raspberry Pi)
- Passive or active cooling for the Raspberry Pi 4
- USB boot enabled, see below.
- An 8GB micro SD card to flash the firmware.
- Windows 10 PC
- Keyboard, mouse, HDMI and power for your Raspberry Pi
Configuring Raspberry Pi to boot off of SSD
Before using Windows 11 on the Raspberry Pi 4 with an SSD, first we need to ensure that the firmware and bootloader of our Raspberry Pi 4 is set to the latest version so that we can boot from USB 3. At a high level, we need to flash firmware to a micro SD card, then insert that into the Pi.
It copies the firmware to the Pi and we can then USB boot. The process to do this is detailed in our How to Boot Raspberry Pi 4 / 400 From a USB SSD or Flash Drive. Please complete those steps before moving on.
Setting Up Tiny11 for Arm64
Before Tiny11 for Arm64 can be used on a Raspberry Pi, it first needs to be installed onto a USB 3 drive. To do this, a Windows PC is used along with software from the Windows on Raspberry Pi project. This creates a bootable installation that will finish the installation and become the new boot drive.
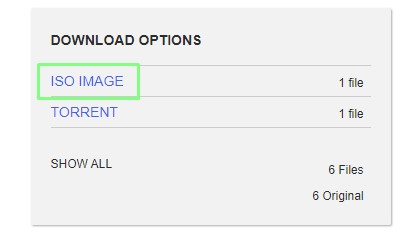
1. On your Windows PC Download the Tiny11 for Arm64 ISO from the Internet Archive.
Get Tom's Hardware's best news and in-depth reviews, straight to your inbox.
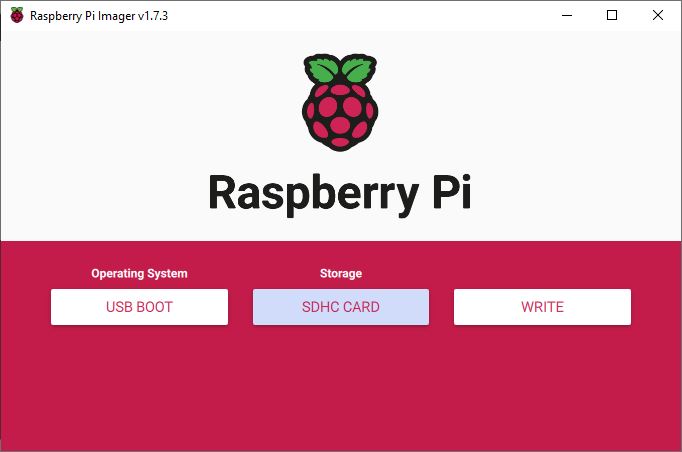
2. Download Raspberry Imager from the Windows on Raspberry project page.
3. Extract the WoR archive to a folder on your desktop.
4. Connect your USB 3 drive.
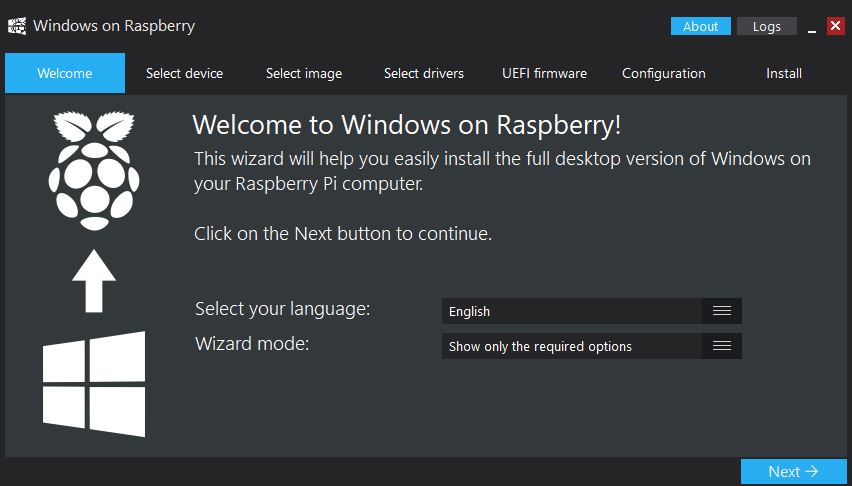
5. Go to the WoR folder and double click on the WoR application.
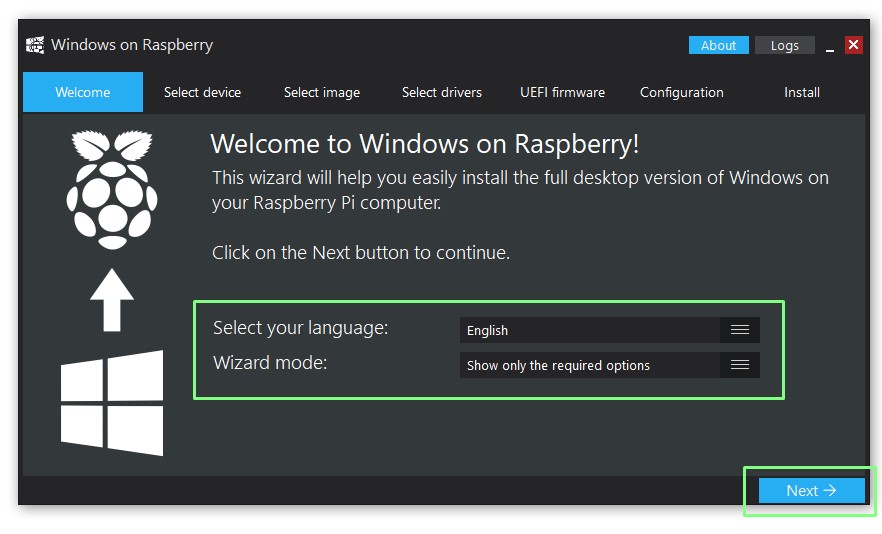
6. Set your language and wizard mode before clicking Next. The wizard mode can be left as is, only change this if you need to make any advanced configuration changes.
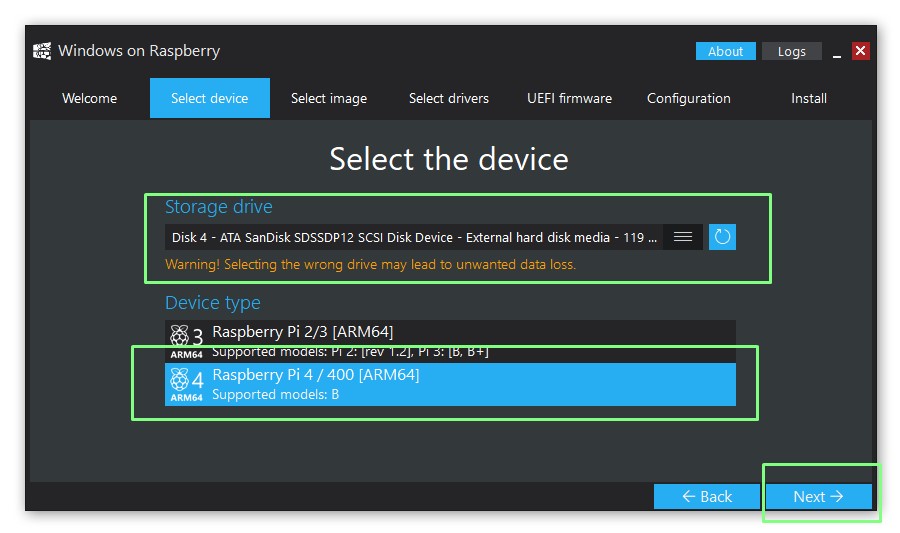
7. Select your storage device, and then set the device type for your Raspberry Pi 4 / 400 then click Next. Take care to select the correct drive to prevent data loss.
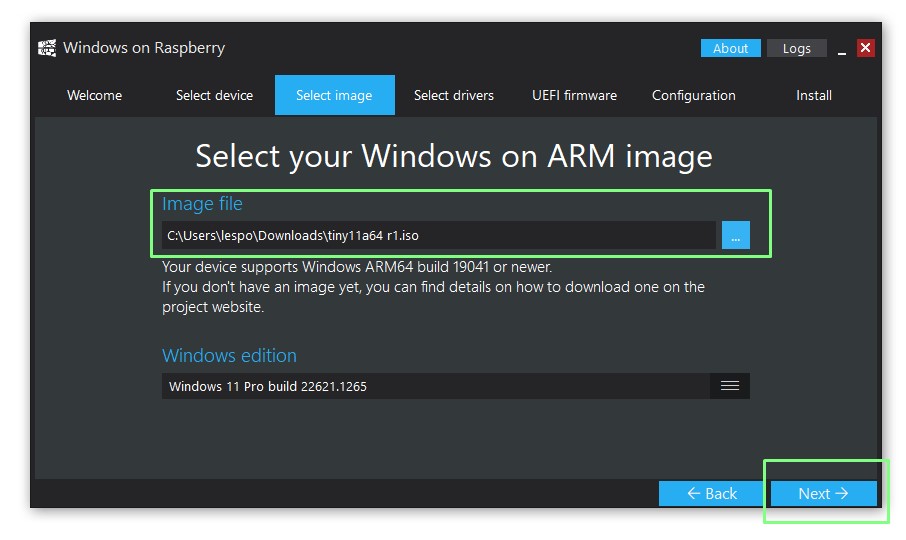
8. Select the downloaded Tiny11 for Arm64 image file. and click Next.
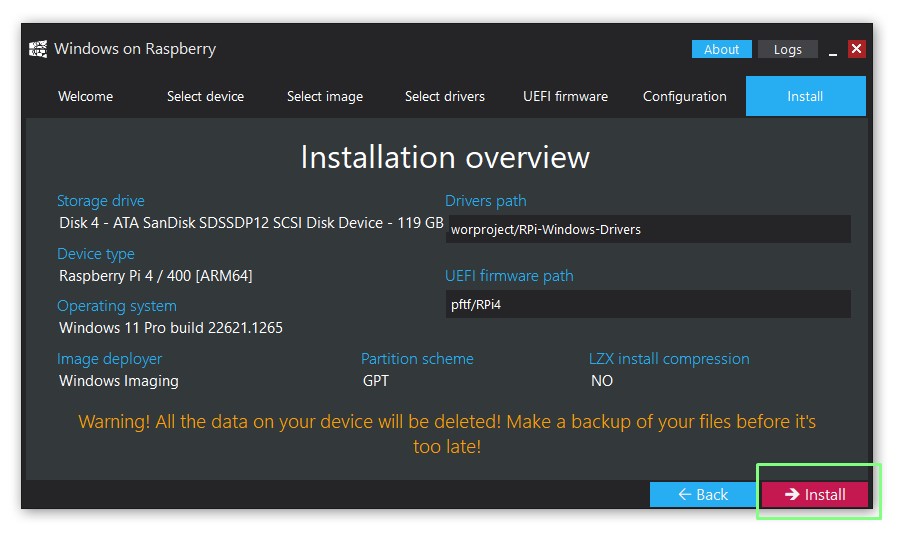
9. Check that installation overview for any errors. Pay particular attention to the storage drive and device type. When ready click Install.
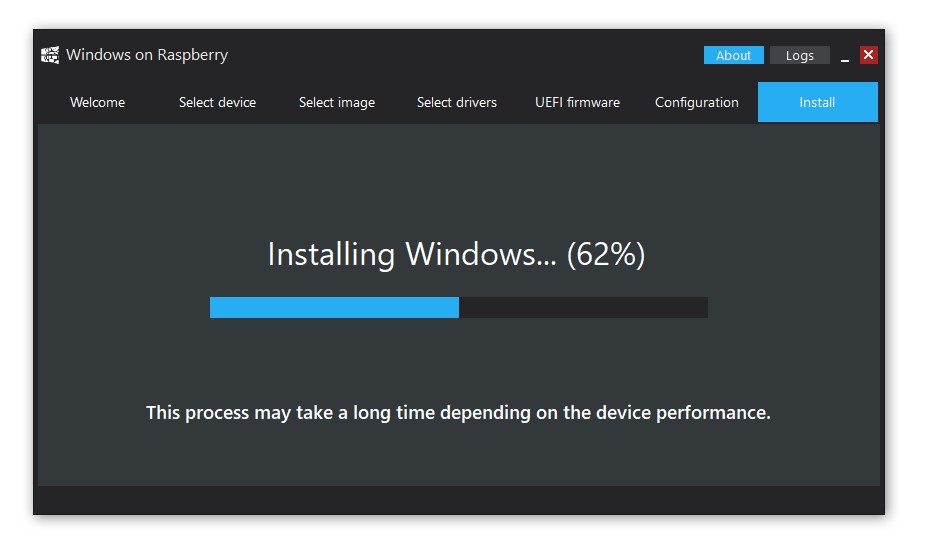
10. Wait for the installation process to complete. This can take some time especially if you chose to use a micro SD card.
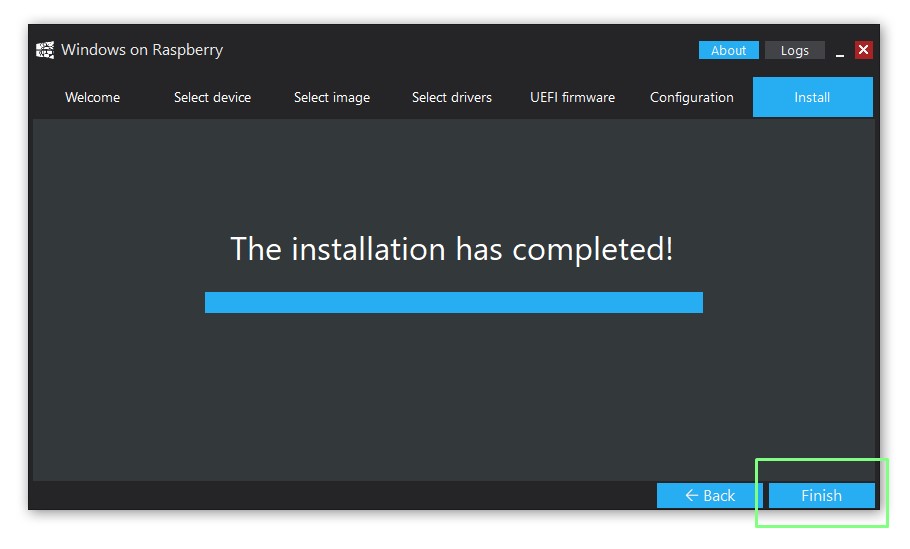
11. Click Finish to end the installation. The drive can now be removed from the Windows PC.
Booting Tiny11 for Arm64 on a Raspberry Pi 4 / 400
The first boot of any operating system will take much longer than subsequent boots. Here the USB 3 drive is configured to boot into the setup wizard which will tweak the installation to meet the needs of the user.
1. Connect the USB 3 drive to the Raspberry Pi 4 / 400’s USB 3 port.
2. Connect your keyboard, mouse, ethernet, HDMI and finally power to the Raspberry Pi. The Pi will boot up and the first boot will take some time, so hold tight. Wi-Fi does not currently work, so you will need an ethernet connection for the setup to download any updates.
3. Follow the Windows 11 setup instructions. After a short while the Windows 11 desktop will be displayed.
As it stands, this is a fairly usable install of Windows 11 for the Raspberry Pi 4. Tiny11 provides access to the Microsoft Store and Microsoft Edge. With this basic setup a user could do basic tasks. But we want to push the install further, and for that we need more RAM and a faster CPU.
Boosting Tiny11 for Arm64’s Performance
Tiny11 feels pretty good when running from a USB 3 drive, but we can make it better. Here are the steps to overclock the Raspberry Pi 4, initially to a conservative 1.8 GHz, but if you have adequate cooling, the same steps can be repeated to take the overclock further.
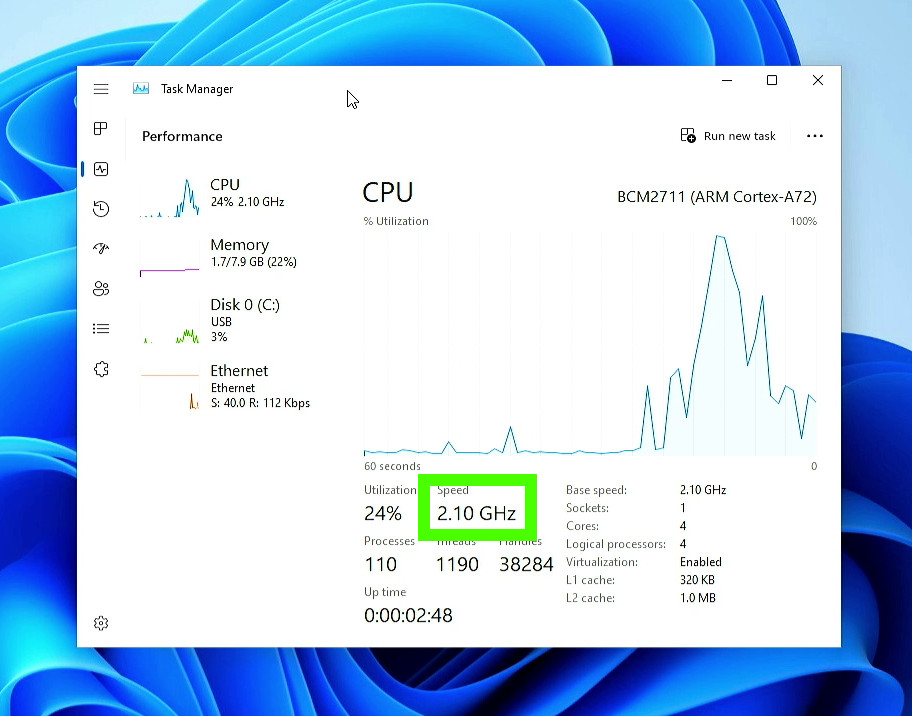
An overclock was possible up to 2.1 GHz. After that your stability depends on the silicon lottery. Good cooling is essential for anything over 2 GHz so invest in the best cooling case for the Raspberry Pi before going too far with overclocking. One of the best passively cooled cases for the Raspberry Pi 4 is Akasa’s Gem Pro. It looks funky and GPIO access is limited, but it keeps the Pi cool, and silent.
1. Reboot Windows 11.
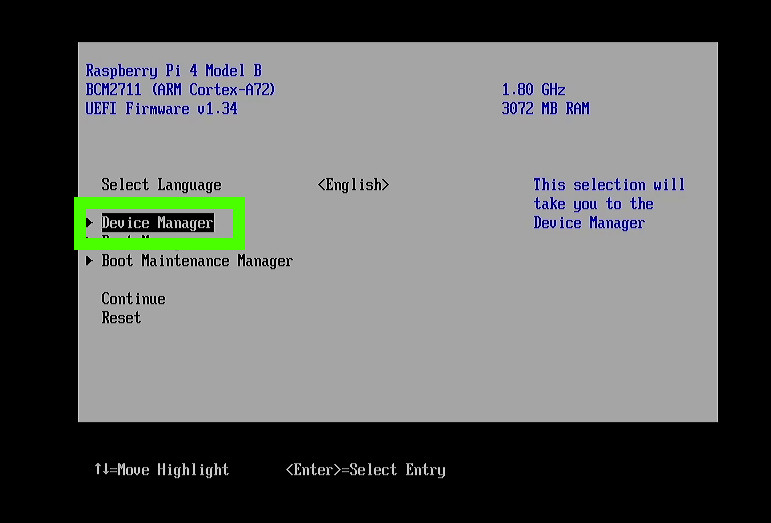
2. Press ESC to enter the BIOS.
3. Using the keyboard, select Device Manager and press Enter.
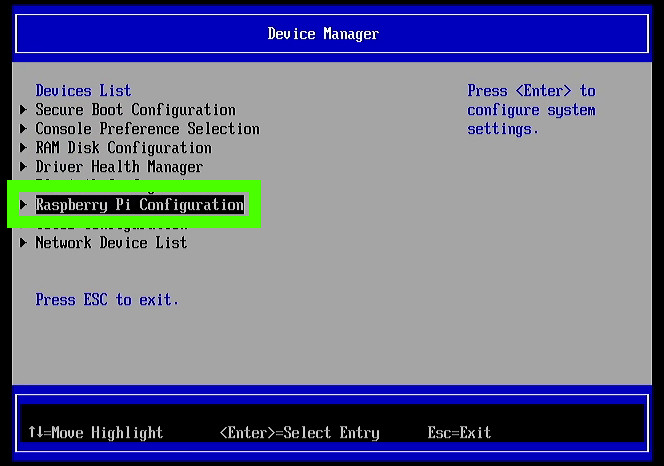
4. Select Raspberry Pi Configuration and press Enter.
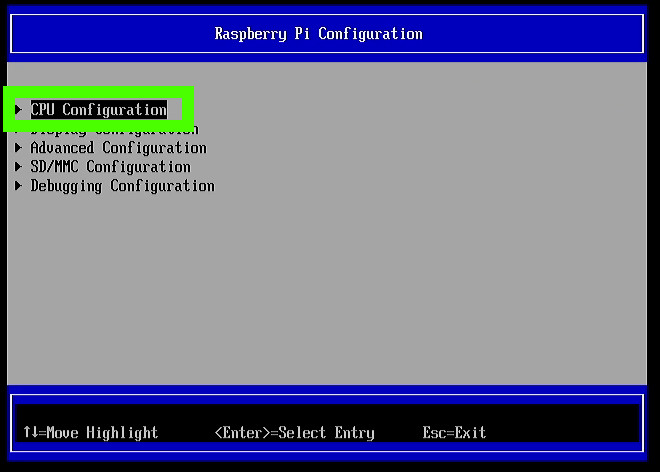
5. Select CPU Configuration and press Enter.
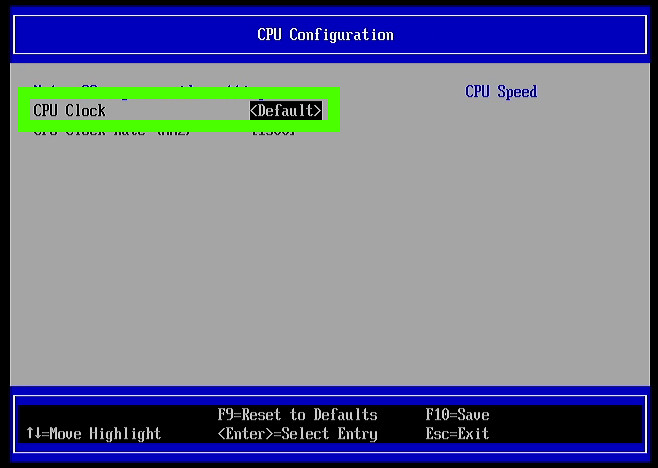
6. Select CPU Clock and press Enter to change Default to Custom. The list of options provides an enticing Max option. But we’d advise testing with a smaller overclock before maxing out the CPU.
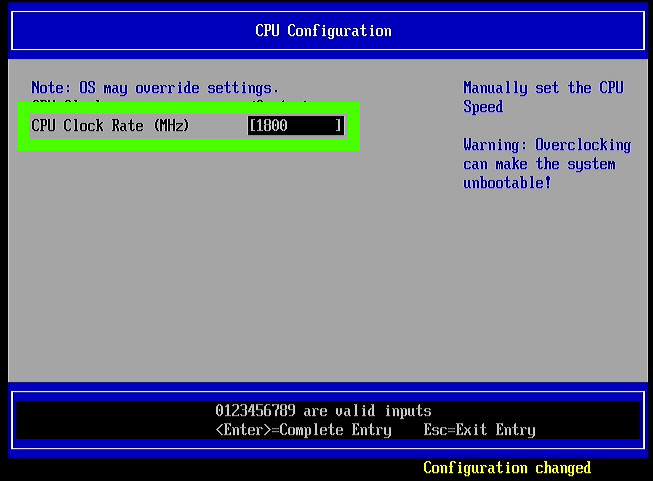
7. Set the overclock to 1800 MHz and press Enter. 1.8 GHz is the new default speed for Raspberry Pi 4. It debuted with the Raspberry Pi 400 which has a large heatsink under the keyboard. This overclock is relatively safe to use without cooling, but we would advise using a heatsink to reduce the chance of thermal throttle.
8. Press F10 to save the configuration, then press ESC to return to the Raspberry Pi Configuration menu.
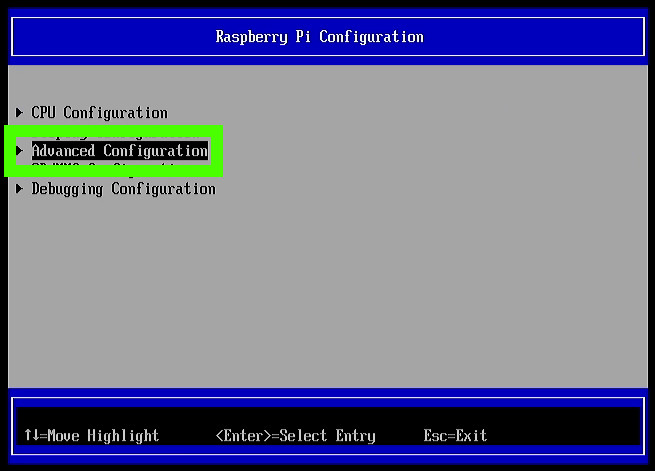
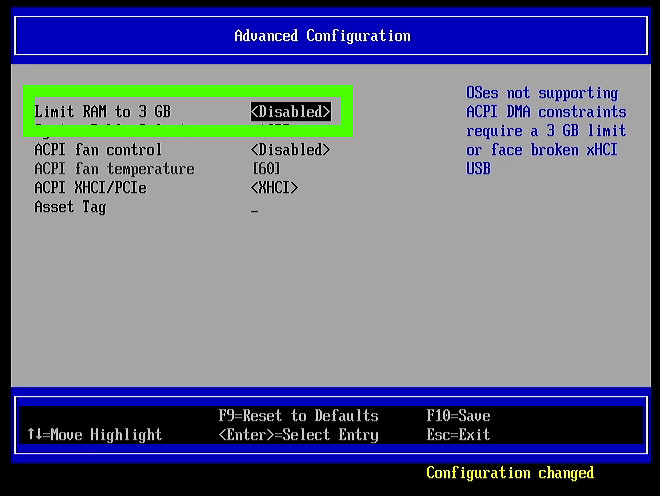
9. From the Raspberry Pi Configuration menu, select Advanced Configuration and press Enter.
10. Select, then disable Limit RAM to 3GB. Press F10 to Save. This will enable Windows 11 to have access to all of the RAM on our Raspberry Pi.
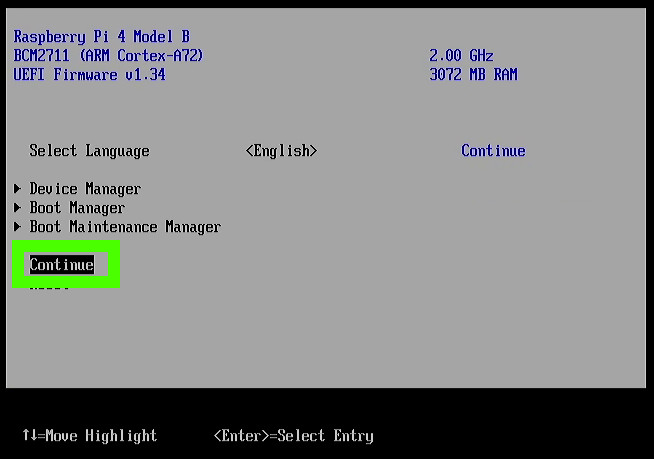
11. Press ESC a few times to reach the main BIOS menu and select continue. Press Enter to reboot, then Enter again to reset the Raspberry Pi.
The Raspberry Pi will now reboot into Windows 11 and opening Task Manager confirms that the Raspberry Pi 4 has been successfully overclocked to 1.8 GHz. Repeat these steps if you wish to increase the overclock.

Les Pounder is an associate editor at Tom's Hardware. He is a creative technologist and for seven years has created projects to educate and inspire minds both young and old. He has worked with the Raspberry Pi Foundation to write and deliver their teacher training program "Picademy".
-
YoungIslander Excellent "How-To". Thanks. The installation on Samsung T7 SSD and RPI4 went without a hitch. Windows 11 was "not activated", which is not surprising. An inexpensive key successfully activated it. Curiously, the time does not update automatically (always starts at Dec 16, 2022, 12:54), but does so with a "sync now" in settings. Tried the overclocking and all worked, but reverted due to heat concerns. Microsoft OneDrive seems to be not as well integrated as on my MiniPC running the same version of software. The SSD also booted in my RPI400. All in all a huge success. Thanks again.Reply
