Let's Take A Trip Inside Budget Power Bars, Part Two
Belkin's Void
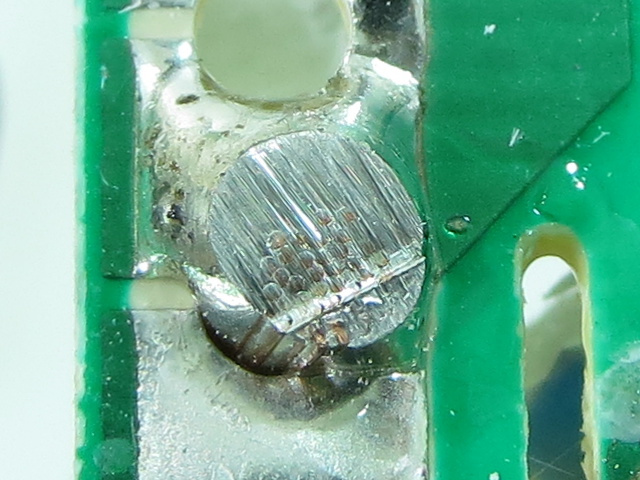
Here is that void I mentioned earlier (bottom-left of the wire). You can also get a better look at what a properly tinned multi-strand wire should look like when you cut it without crushing it.
Belkin's Jaywalker
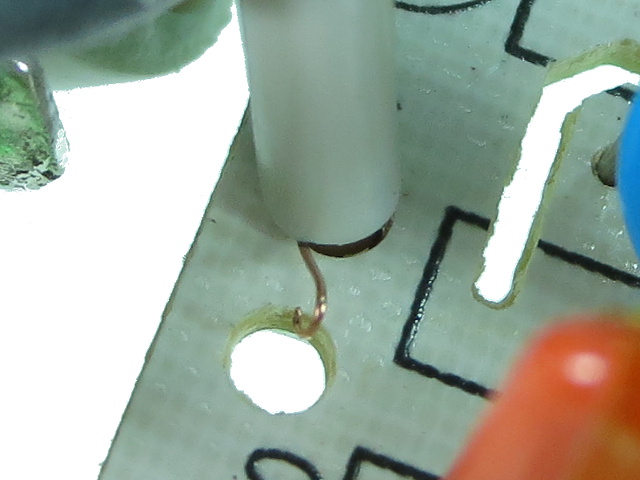
This wire does not go there. Having loose strands long enough to potentially bridge routed-out PCB gaps would defeat the whole point of bothering with isolation slots the first place.
Belkin's Spotty Welding
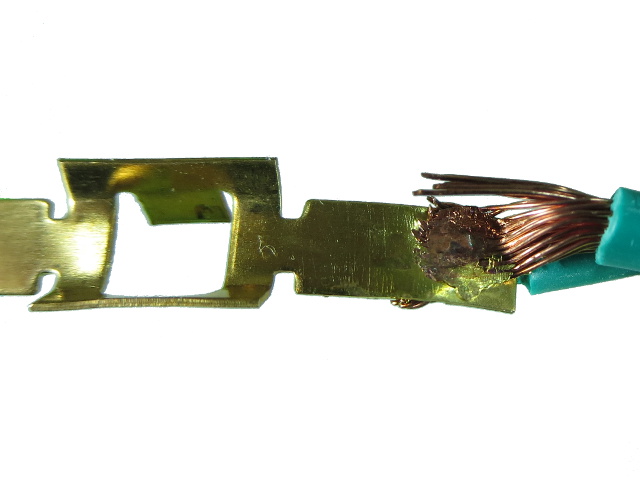
Here is some spotty welding on the ground strip. The welded strands were thoroughly crushed and fused together, while four loose strands show no sign of having ever been welded. The neutral strip also has a handful of loose strands.
For the few of you who might be paying attention to numbers, Belkin's power strips are 6.5mm wide by 0.5mm thick and its ground strip is 2.7mm wide at the necked-down areas by 0.4mm thick, making it one of the beefier units for power, but the flimsiest for ground.
Just Beat It
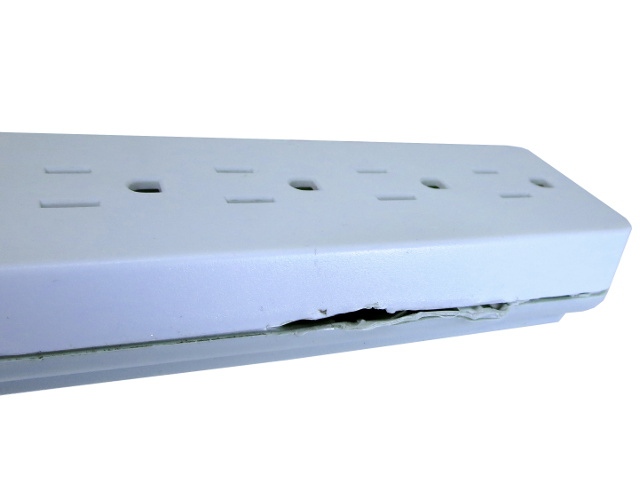
After the abuse required to get inside, this unit doesn't look very pretty. While the screws do allow it to hold itself together, I would not recommend putting this bar back into use.
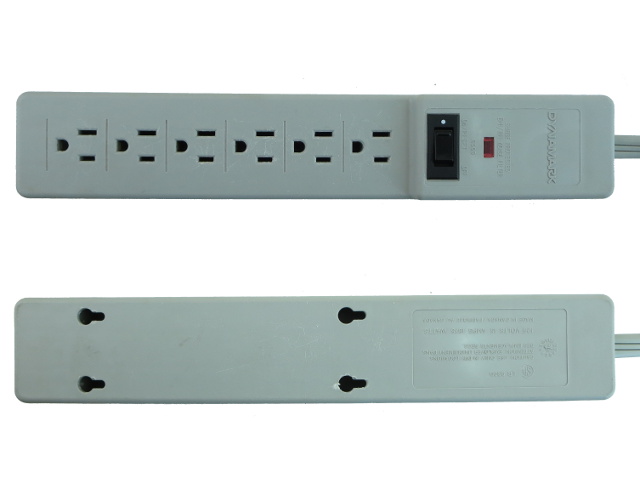
Bonus Unit: Dynamark 6503
Since some readers expressed interest in looking at what goes on inside those welded-shut strips (or otherwise non-obvious fastening) and I happened to have two old bars of that sort, I decided to sacrifice one in the name of finding out if they used to make them any different back in the day.
Of course, safety standards have changed since then.
Get Tom's Hardware's best news and in-depth reviews, straight to your inbox.
Dynamark's Label
And here we have my little reveal: this unit was manufactured in Canada in October 1996, making it almost a vintage device.
Some Pressure Required
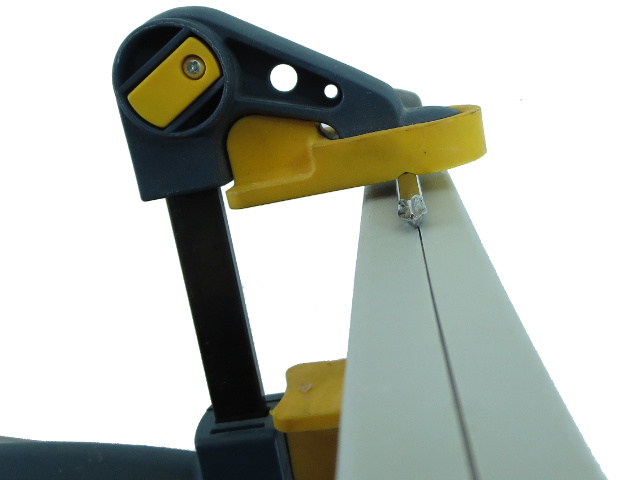
The “ducky clamp” treatment worked a treat on the Kensington and beat the Belkin into submission, so let's see if it's as successful at quacking this one open as well. These clamps are really handy for quickly applying pressure without worrying about overshooting.
…Or Perhaps Not
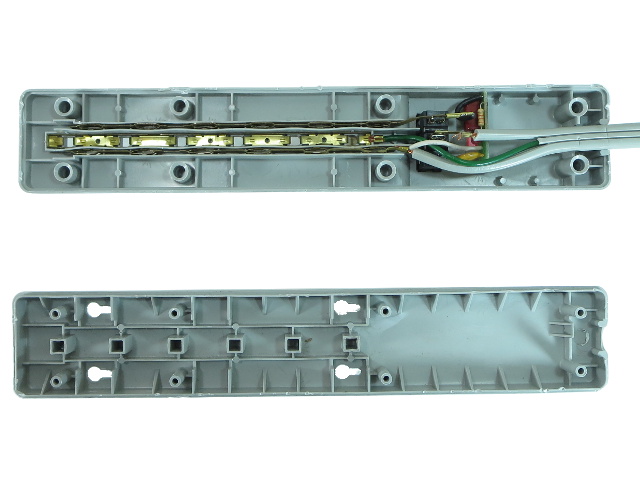
What was the secret to how this enclosure was held together? Press-fitted studs. No snaps, no glue, no welding, no barbs. Just plain plastic-on-plastic pressure and friction between a round peg and a slightly smaller hole. Popping them off took a surprising amount of force, but they survived. The enclosure edges, on the other hand, got mangled in places from all of my prying.
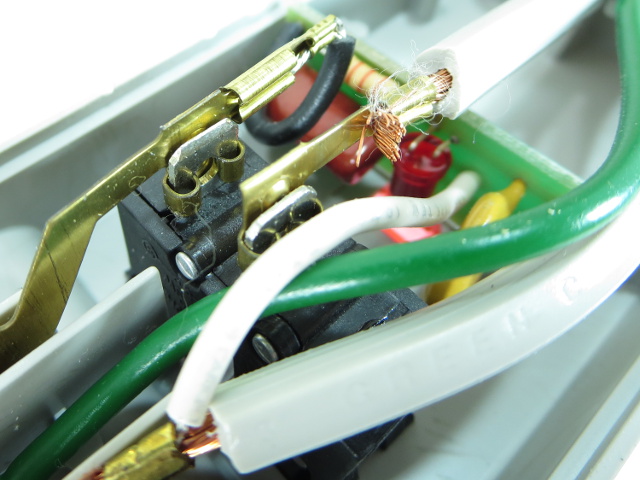
Other interesting construction details include the ground strips, which have a very different design from all other units in this whole round-up, and actual spade connections to the breaker switch instead of welding or soldering.
House Of Spades
The spade connection on the live strip is formed directly from the strip itself, along with the crimp connection for the EMI/SPD and power indicator LED PCB.
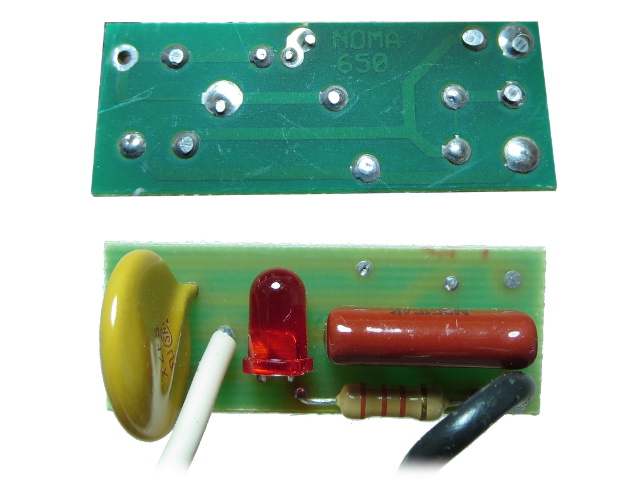
Dynamark's PCB
There's not much to see on this PCB apart from a JVR 14N221K MOV, an EMI filtering cap and the power indicator LED. There is no thermal shut-off, which is not surprising since those were merely recommended back then. Branding on the board suggests that the PCB (and presumably the bar itself) was designed by NOMA.
If you own surge-protecting strips older than 2004, you may want to replace them with newer models that meet UL 1449-rev2 or newer to reduce the fire hazard associated with unprotected MOVs.
-
Deemo13 Great article! I didnt really know that these power strips were that different, I am definitely using some ancient ones. I should probably replace them.Reply -
daveys93 I have a powerstrip/surge protector that powers off some of the powerstrip outlets based on the on/off state of one of the outlets. For example: I have my water-cooled PC plugged into the master outlet on the strip and then my speakers, monitors, etc. plugged into the slave outlets on the strip. When I put my PC in windows sleep mode or turn it off, the power strip senses the low power state and turns off the monitors, speakers, etc. There is even a few outlets on the strip that are not linked to the master so I can have my router and cable modem plugged into those and they will not be powered off when I put my PC to sleep. When I wake my PC with the keyboard or mouse, the power strip senses the master outlet on the strip as active and turns my monitors and speakers, etc. back on.Reply
I am generally not a fan of Monster products, like their cables and what not are just overpriced and bulked up to look expensive, however their "Greenpower" powerstrips are great and I think good value for the money and the unique power saving feature. I love not having to power down 3 monitors and my speakers everytime I put my PC to sleep or shutdown.
http://electronics.monsterproducts.com/search?site=allsites&asug=&view=grid&w=greenpower -
Daniel Sauvageau Reply
There are countless generic bars out there and it would be nearly impossible to have a look into all of them. Many of those will simply be re-branded variants of something else and at a glance, the "Koppla 6" I am seeing on Ikea's website looks an awful lot like the Sunbeam unit from part one so I would expect it to be the same thing except possibly for the non-missing thermal shut-off.14866297 said:Anyway you could pick up those IKEA strips and test? -
HarrisburgPA Ever thought about pulling apart something beefier like a Tripp Lite Isobar? I realize this series focuses on budget strips, but it would be nice to see a well-built unit for comparison.Reply -
daveys93 I have a powerstrip/surge protector that powers off some of the powerstrip outlets based on the on/off state of one of the outlets. For example: I have my water-cooled PC plugged into the master outlet on the strip and then my speakers, monitors, etc. plugged into the slave outlets on the strip. When I put my PC in windows sleep mode or turn it off, the power strip senses the low power state and turns off the monitors, speakers, etc. There is even a few outlets on the strip that are not linked to the master so I can have my router and cable modem plugged into those and they will not be powered off when I put my PC to sleep. When I wake my PC with the keyboard or mouse, the power strip senses the master outlet on the strip as active and turns my monitors and speakers, etc. back on.Reply
I am generally not a fan of Monster products, like their cables and what not are just overpriced and bulked up to look expensive, however their "Greenpower" powerstrips are great and I think good value for the money and the unique power saving feature. I love not having to power down 3 monitors and my speakers everytime I put my PC to sleep or shutdown.
http://electronics.monsterproducts.com/search?site=allsites&asug=&view=grid&w=greenpower -
Daniel Sauvageau Reply
I did not have much success getting manufacturers to send me review samples the first time I asked for some but now that I have a few of these out, I might have better luck.14870712 said:Ever thought about pulling apart something beefier like a Tripp Lite Isobar? -
Steelwing I'd love to see a review someday that included non-sacrificial surge protectors (that don't use MOVs), such as units from SurgeX, Brickwall, or Zero Surge.Reply
From what I'd seen and heard, they can deal with extremely high surges with no problems, and they (supposedly) don't wear out. They are considerably more expensive, though. There are a few videos on YouTube of them being tested. -
eidol I've stopped reading articles in this ridiculous picture-flip format. It's annoying on both a smartphone and a desktop. Is there any way to switch them to a full-form article?Reply
