QQC Q-Swap Power Bank Tear-Down
A Wild Power Bank Appears!
Have you ever heard of QQC? There's a good chance that this is the first time you've seen the brand mentioned. I hadn’t either until our editor-in-chief forwarded an e-mail from QQC’s marketing team asking if Tom’s Hardware would be interested in reviewing its Q-Swap.
What is the Q-Swap? It is a modular power bank based on 5200mAh Li-ion batteries (with a built-in charger) that snap into the “Q-Boost” frame, which provides the 5V type-A port for charging gadgets. The idea is that you can carry multiple battery packs for added run-time without the redundant bulk of boost circuitry and type-A ports in each of them. Sounds reasonable enough.
MORE: SilverStone PB06 USB Power Bank Tear-Down
MORE: Best Deals
Box
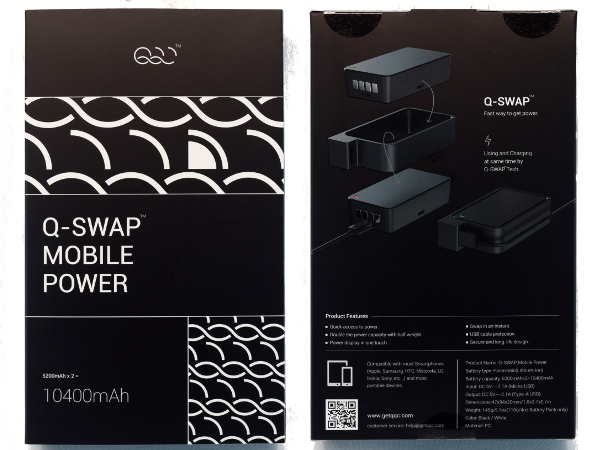
There isn’t much to see on the front of the packaging, other than the brand’s logo and product name. Around back, we are treated to a simple graphic showing how the battery snaps in and out of the frame, and how cables get plugged into it for charging or normal use.
Since this 10,400mAh kit is made up of two 5200mAh batteries, one battery can be charged while the other is in use. How is that better than having two completely independent banks? A typical 5.2Ah power bank has a volume of about 95cm³ while individual Q-Swap batteries have a volume of 63cm³, saving about 33% of the extra bulk per additional 5.2Ah. With the Q-Boost frame on, overall dimensions for the first 5.2Ah are similar.
MORE: SilverStone PB06 USB Power Bank Tear-Down
Get Tom's Hardware's best news and in-depth reviews, straight to your inbox.
MORE: Best Deals
Specs
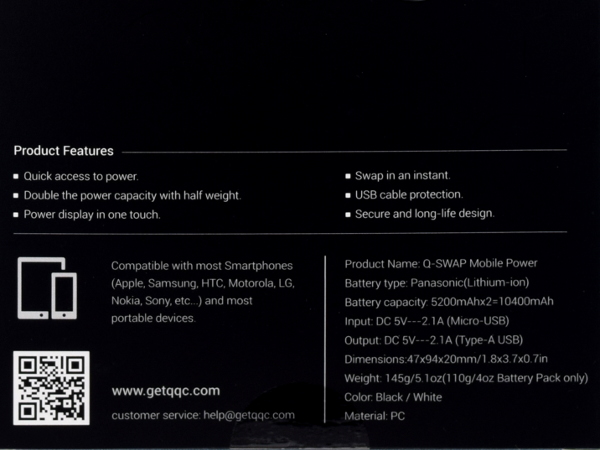
What are the key benefits? Compatibility with nearly anything under the sun, up to 2.1A charging and discharging, Panasonic cells, capacitive power display trigger, USB cable wear protection from the type-A connector opening flat against the Q-Boost frame, long-life design, and “double the power with half the weight.”
None of those claims are particularly outlandish, except that if you want to carry twice the capacity, you do need to carry twice as many of the 110-gram Q-Cells, which does nearly double the 145-gram carry weight of the first 5.2Ah.
MORE: SilverStone PB06 USB Power Bank Tear-Down
MORE: Best Deals
Packaging
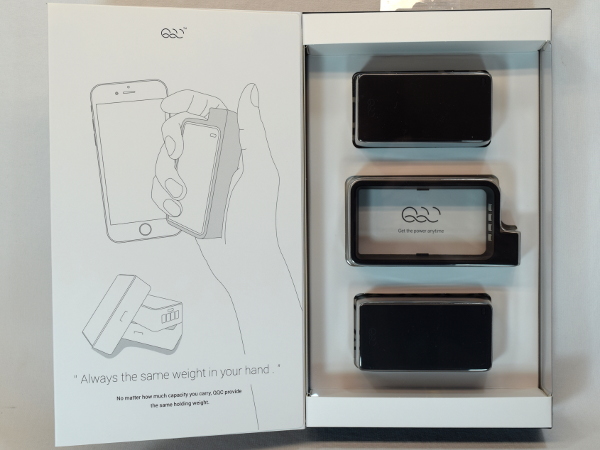
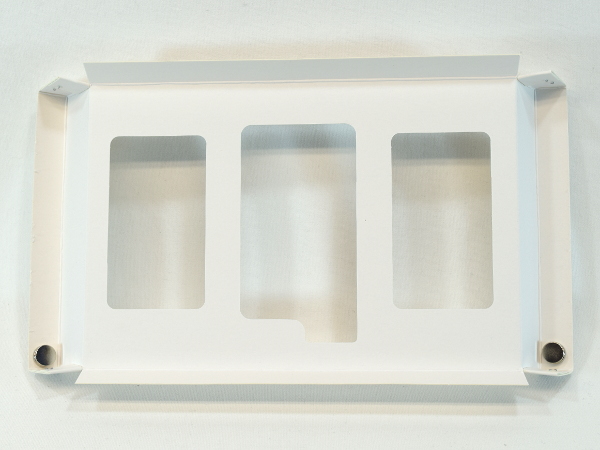
Opening the box’s cover reveals the Q-Swap’s two batteries and booster slotted in a raised cardboard spacer behind a plastic window. On the inside, we get a reminder that QQC’s focus is “the weight in your hand” rather than the total weight in your backpack or however else you may carry your extra Q-Cells (should you choose to carry any at all). That’s where QQC’s “twice the power, half the weight” comes from: not having to hold the whole 10,400mAh at once as you would with a conventional 10Ah power bank.
As you may already be thinking, you can achieve approximately the same goal by simply carrying two 5.2Ah power banks, albeit at the expense of slightly more total weight and bulk.
MORE: SilverStone PB06 USB Power Bank Tear-Down
MORE: Best Deals
Holding Fast
When I first opened the package, I noticed some odd resistance but did not pay much attention to it. While extracting the box’s contents, I discovered a pair of surprisingly strong magnet stacks glued in opposite corners. It took me a minute of head-scratching before I realized that these were holding the front cover shut with the help of ferromagnetic inserts embedded in the cover’s corners.
That's a rather expensive packaging choice. I didn't look up the Q-Swap's retail price until half-way through putting this story together, and when I saw its jaw-dropping $120 price tag, the design suddenly made more sense.
MORE: SilverStone PB06 USB Power Bank Tear-Down
MORE: Best Deals
Accessories
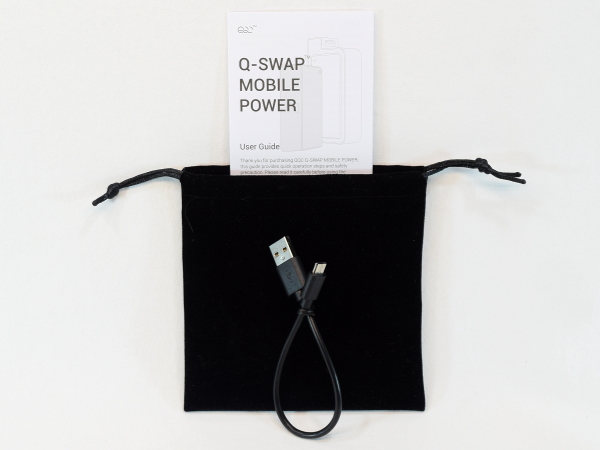
Bundled items include the obligatory instruction leaflet, a very short (21cm/8in-long) type A-to-micro-B cable, and a felt carrying pouch possibly large enough to contain up to four Q-Cells.
MORE: SilverStone PB06 USB Power Bank Tear-Down
MORE: Best Deals
Special Request
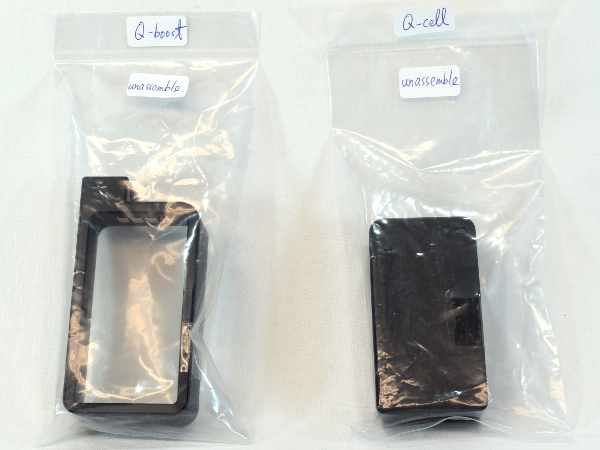
As part of my discussion with QQC to review its product, I asked if it would be possible to provide a unit missing any irreversible assembly steps. QQC was happy to oblige. Included in the generic brown shipping packaging was one Q-Boost and one Q-Cell in separate plastic bags, held together by pieces of adhesive tape instead of factory welds or glue. This makes the tear-down process much simpler, faster, and safer. Had QQC not provided these, I may have ended up crushing the Q-Boost’s electronics while attempting to crack it open due to how the PCB is laid out inside the frame. Poking at a 5Ah lithium battery could also have turned unpleasant.
Two thumbs up from me for the company's transparency here.
MORE: SilverStone PB06 USB Power Bank Tear-Down
MORE: Best Deals
The Q-Cell
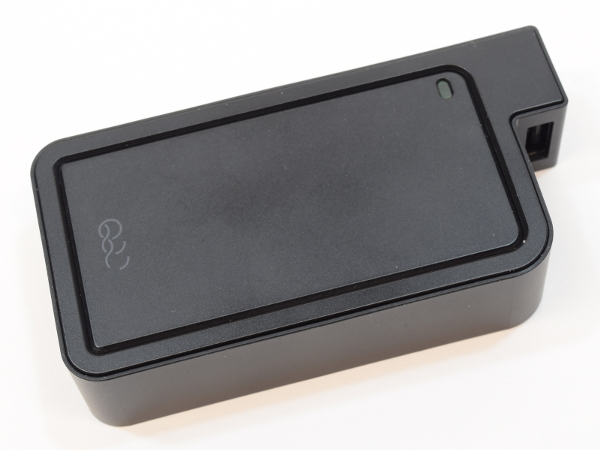
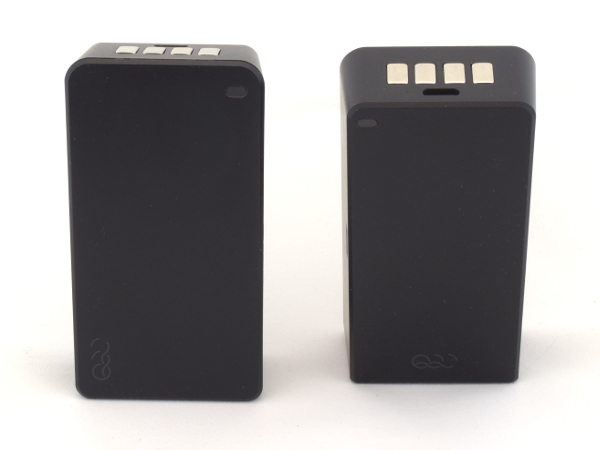
The first of two key components in the Q-Swap kit is the Q-Cell, which has a slight taper from its top to bottom, and tighter corner radii at the bottom edge where the QQC logos reside. This translates to the Q-Cell fitting only one way in the Q-Boost frame. Along the top edge, you can see the dimple from the LED light pipe.
There is no hint of where the "touch" function lies, which compelled me to read the manual in order to figure out how to trigger the charge indicator. A simple dot silk-screened in the corner, opposite the LED, to draw attention there would have made this far more intuitive.
MORE: SilverStone PB06 USB Power Bank Tear-Down
MORE: Best Deals
Q-Cell Contacts
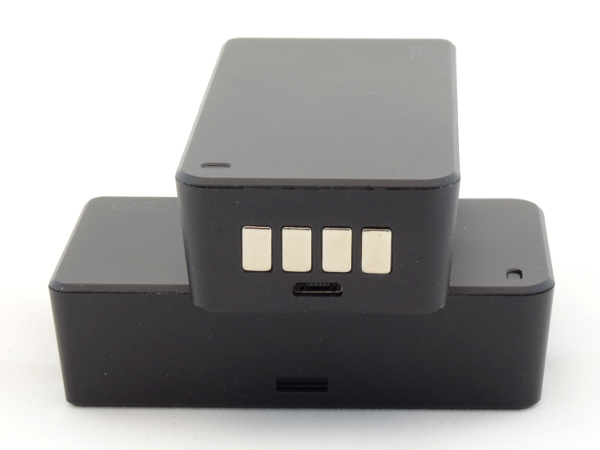
The Q-Cell’s top side is furnished with four contact slabs and a micro-B charging port. Two of the pads must be battery positive and negative. Due to the risk of shorting these terminals out while they are exposed, I expect some sort of current-limiting circuitry in there and possibly a protocol on the two center pads to enable full power output.
A few simple multimeter measurements reveal that the leftmost pad is likely ground, as it is the most negative pad relative to the other three, while the rightmost pad has to be the positive output as it floats to 4V under no-load condition. The remaining pads are tens of millivolts above the negative terminal, yielding no information about their function.
MORE: SilverStone PB06 USB Power Bank Tear-Down
MORE: Best Deals
Q-Cell Specs
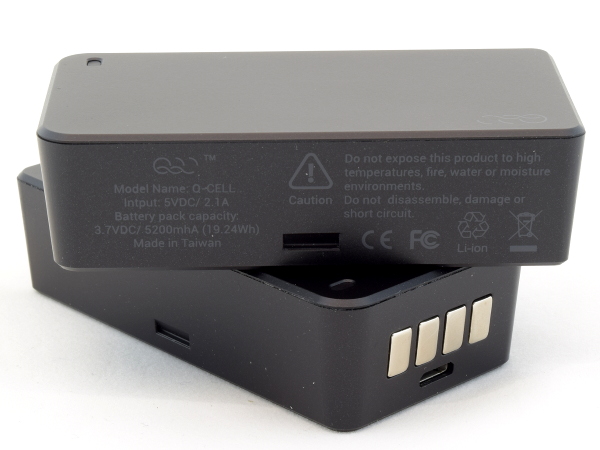
Unsurprisingly, the battery’s specifications match the packaging: 2.1A at 5V for the charging input, and 5.2Ah and 3.7V for the battery’s effective capacity.
Upon reading “do not short-circuit,” I had a compulsive urge to do the exact opposite. Instead of shorting it outright, though, I connected a discharged capacitor across the presumed power terminals to simulate a momentary short-circuit. The capacitor charged to 4V within one voltmeter refresh interval without visible or audible sparking, which may mean that the output terminals have some form of current limiting, and that getting useful power out of the Q-Cell could be as simple as remaining below its over-current cutoff. While this would be nice tinkering-wise, I would also be wary of carrying loose batteries with always-on output terminals.
MORE: SilverStone PB06 USB Power Bank Tear-Down
MORE: Best Deals
Q-Cell Opened
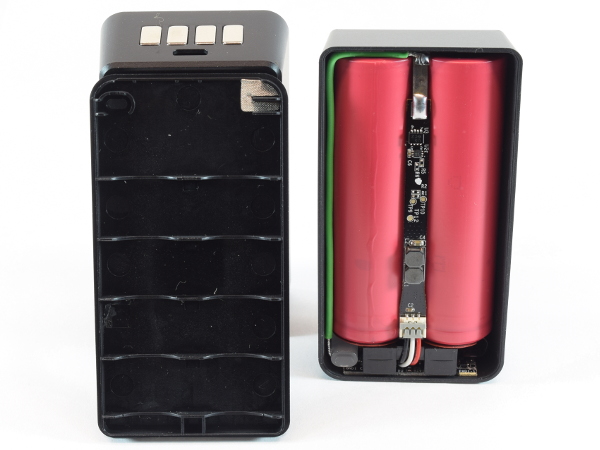
Upon popping the cover off of the unassembled Q-Cell, we are greeted by two 18650 cells and a slim circuit board nestled in-between. A second board is stuck vertically behind the contact pad side of the battery at the bottom, held in place by a plastic wedge. Behind that wedge lies a third board hosting the micro-B connector. I would say this is a surprisingly complex mechanical arrangement. A light pipe in the corner guides the status LED’s light to both sides of the Q-Cell.
I’m certain QQC could have found a suitable micro-B connector to fit on the main board, though putting the micro-B on its own board does have the benefit of decoupling mechanical stress, which may make it more reliable.
MORE: SilverStone PB06 USB Power Bank Tear-Down
MORE: Best Deals
-
JamsCB Interesting idea, but by going with this design of a spare battery with exposed contacts means you're going to have to do something with that extra battery if you want to fly anywhere, at least in the US (See the regulation: 49 CFR 175.10(a)(18) ). Personally I feel if you need that much spare charge, two separate banks would be the simpler and cheaper option.Reply -
sparkyman215 Asus makes a great battery pack with 10k mAh, and it's only $20. I've had mine for maybe a year and it hasn't exploded yetReply -
LostAlone Feels like this is entirely misguided on their part. Battery packs are bulk commodity items now, they've become cheap and ubiquitous. Everyone has their own branded ones out there. And with that in mind, I just don't understand an expensive version. Honestly, even in the corner case that you need so much juice that multiple battery packs are reasonable then I'd rather have another complete back with it's extra ports available. Sure, a little more bulk but only slightly and this gives me a truly redundant solution that I can lend to someone or have a complete spare in the event of loss or damage.Reply
In the end, given that battery packs are already light and small making a lighter smaller one isn't that big a deal. Any thing in the 10k mAh range is too big to keep in a pocket all day anyway, and once you're tossing the things in a bag then it really doesn't matter if it's a little big smaller or lighter. -
Daniel Sauvageau Reply
People stuff 6" 'phones' in their pockets. I've seen 10Ah power banks smaller than those but haven't tested one yet to see if they can actually deliver. I do plan to address that later this year.19802041 said:Any thing in the 10k mAh range is too big to keep in a pocket all day anyway
-
nukemaster Another good one.Reply
Looking forward to seeing your tests on some of those smaller 10Ah ones you mention. I rarely need an on the go charge(my old Zen did sometimes when I forgot to charge it), but it is always nice to have 5 volts for testing things. -
LostAlone ReplyPeople stuff 6" 'phones' in their pockets. I've seen 10Ah power banks smaller than those but haven't tested one yet to see if they can actually deliver. I do plan to address that later this year.
Phones have a bigger footprint but a 10k or 12k battery back is MUCH thicker and MUCH heavier. Take it from someone with a big phone AND a 12k battery pack; only one of those happily lives in my pocket all day. Maybe on something with cargo pockets you could stick the battery in a pocket but it wouldn't be comfortable to sit on it.
My battery pack is almost an inch thick dude; and totally inflexible and heavy enough that it can pull your pants down. It's a whole other kettle of fish compared to a phone, even a big phone. -
alextheblue I'll just shove this into my pocket with loose change...Reply
They need some kind of spring-loaded safety cover for those contacts, and at that price I would want so much more than what they're offering. Standard cylindrical cells? I would expect it to be using fancier (and higher density) packs using semi-prismatic cells or maybe higher-end well-engineered pouch cells.. Maybe support for Qi charging and higher amp output / higher volt QC capabilities. Otherwise... it's really no better than a typical 5200 pack in the $30 range. -
Daniel Sauvageau Reply
That depends heavily on the type of cells being used and by type, I mean the actual chemistry and geometry of the cell which dictate the cell's maximum charge/discharge current, cycle endurance and nominal capacity. There is a drastic energy density difference between high current, high endurance cells (thicker current-carrying electrodes and anode/cathode material) and those prioritizing energy density over all else.19805518 said:Phones have a bigger footprint but a 10k or 12k battery back is MUCH thicker and MUCH heavier.
Also, a power bank designed around pouch-style cells isn't constrained by the size of 18650 cells and can be made much thinner. -
Daniel Sauvageau Reply
Based on my limited short-circuit tests, that should actually be fine as the output cuts off within 2ms from the short being detected and wouldn't cause your change to warm up noticeably.19805743 said:I'll just shove this into my pocket with loose change...
Still, I am disappointed that there wasn't some sort of protocol between the pack and frame to limit current until the connection to an accessory is confirmed.
