Overclocking Intel's Core i9-7900X CPU Up to 5.8 GHz
Installing The Direct Die Frame
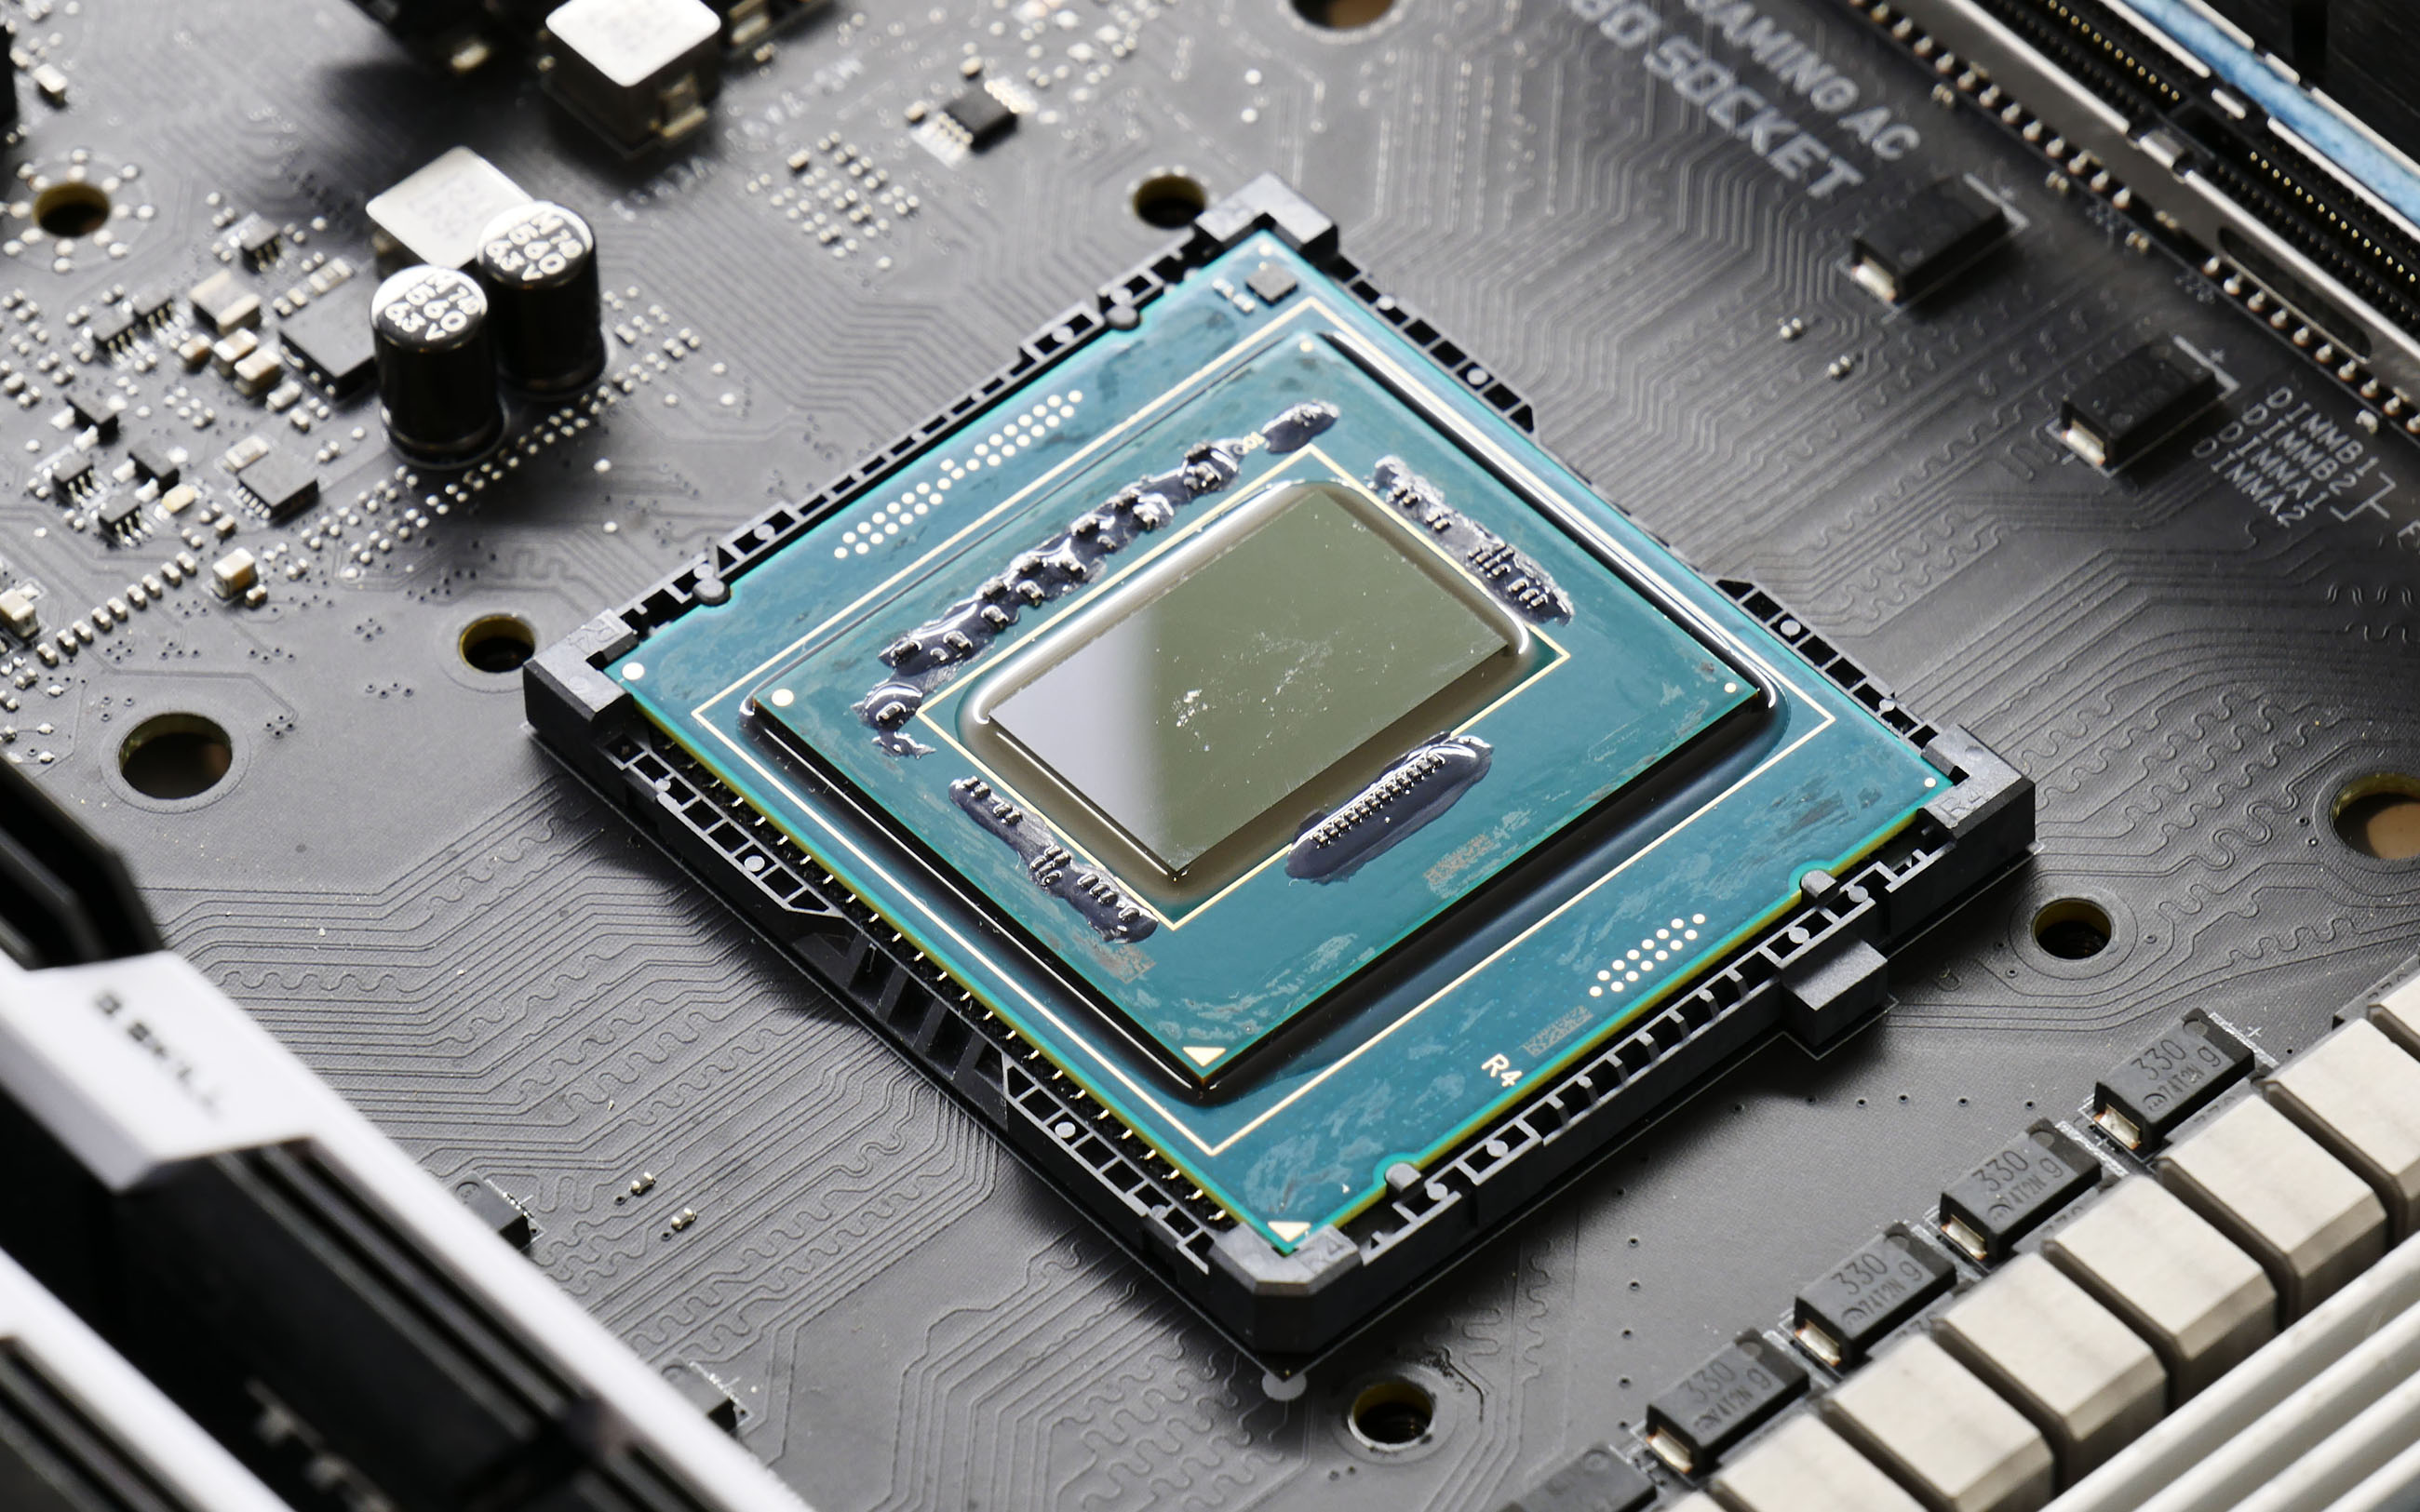
Delidding is already pretty advanced. With our Direct Die Frame, we take things to another level. Rather than temporarily removing the IHS to replace the thermal paste underneath, and then replacing it, the DDF concept calls for leaving it off. In theory, it is preferable to have less material between the die and heat sink to improve the transfer of thermal energy away from the CPU.
As mentioned, though, the die is more fragile in this unprotected configuration. The setup process isn't particularly difficult, but we still wouldn't recommend it to inexperienced overclockers who aren't accustomed to more extreme modifications like these.
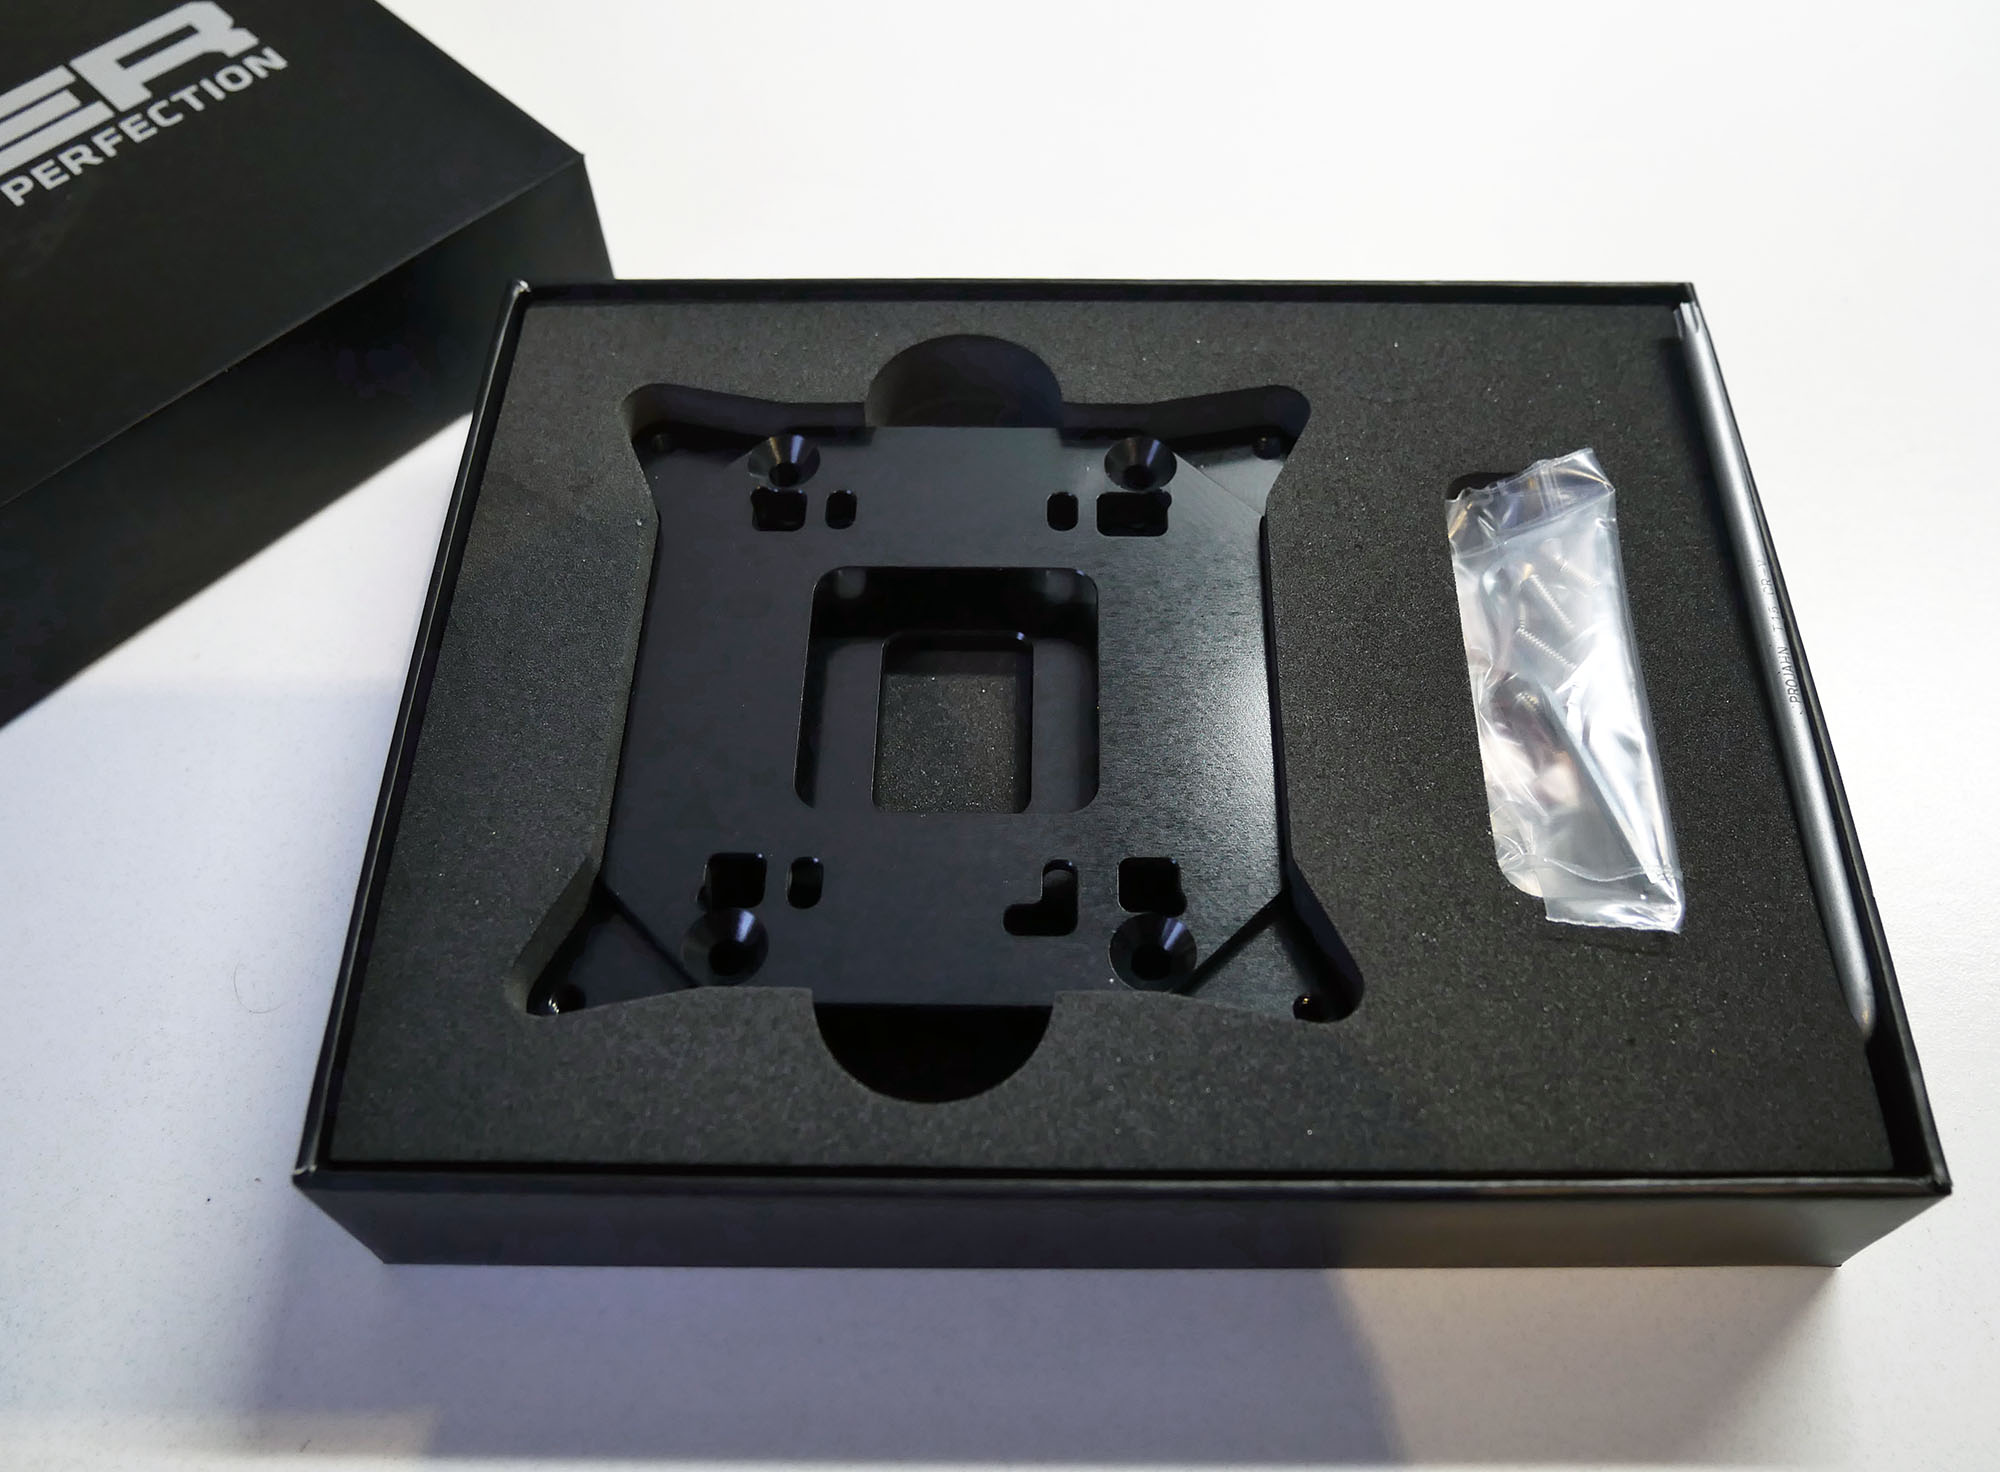
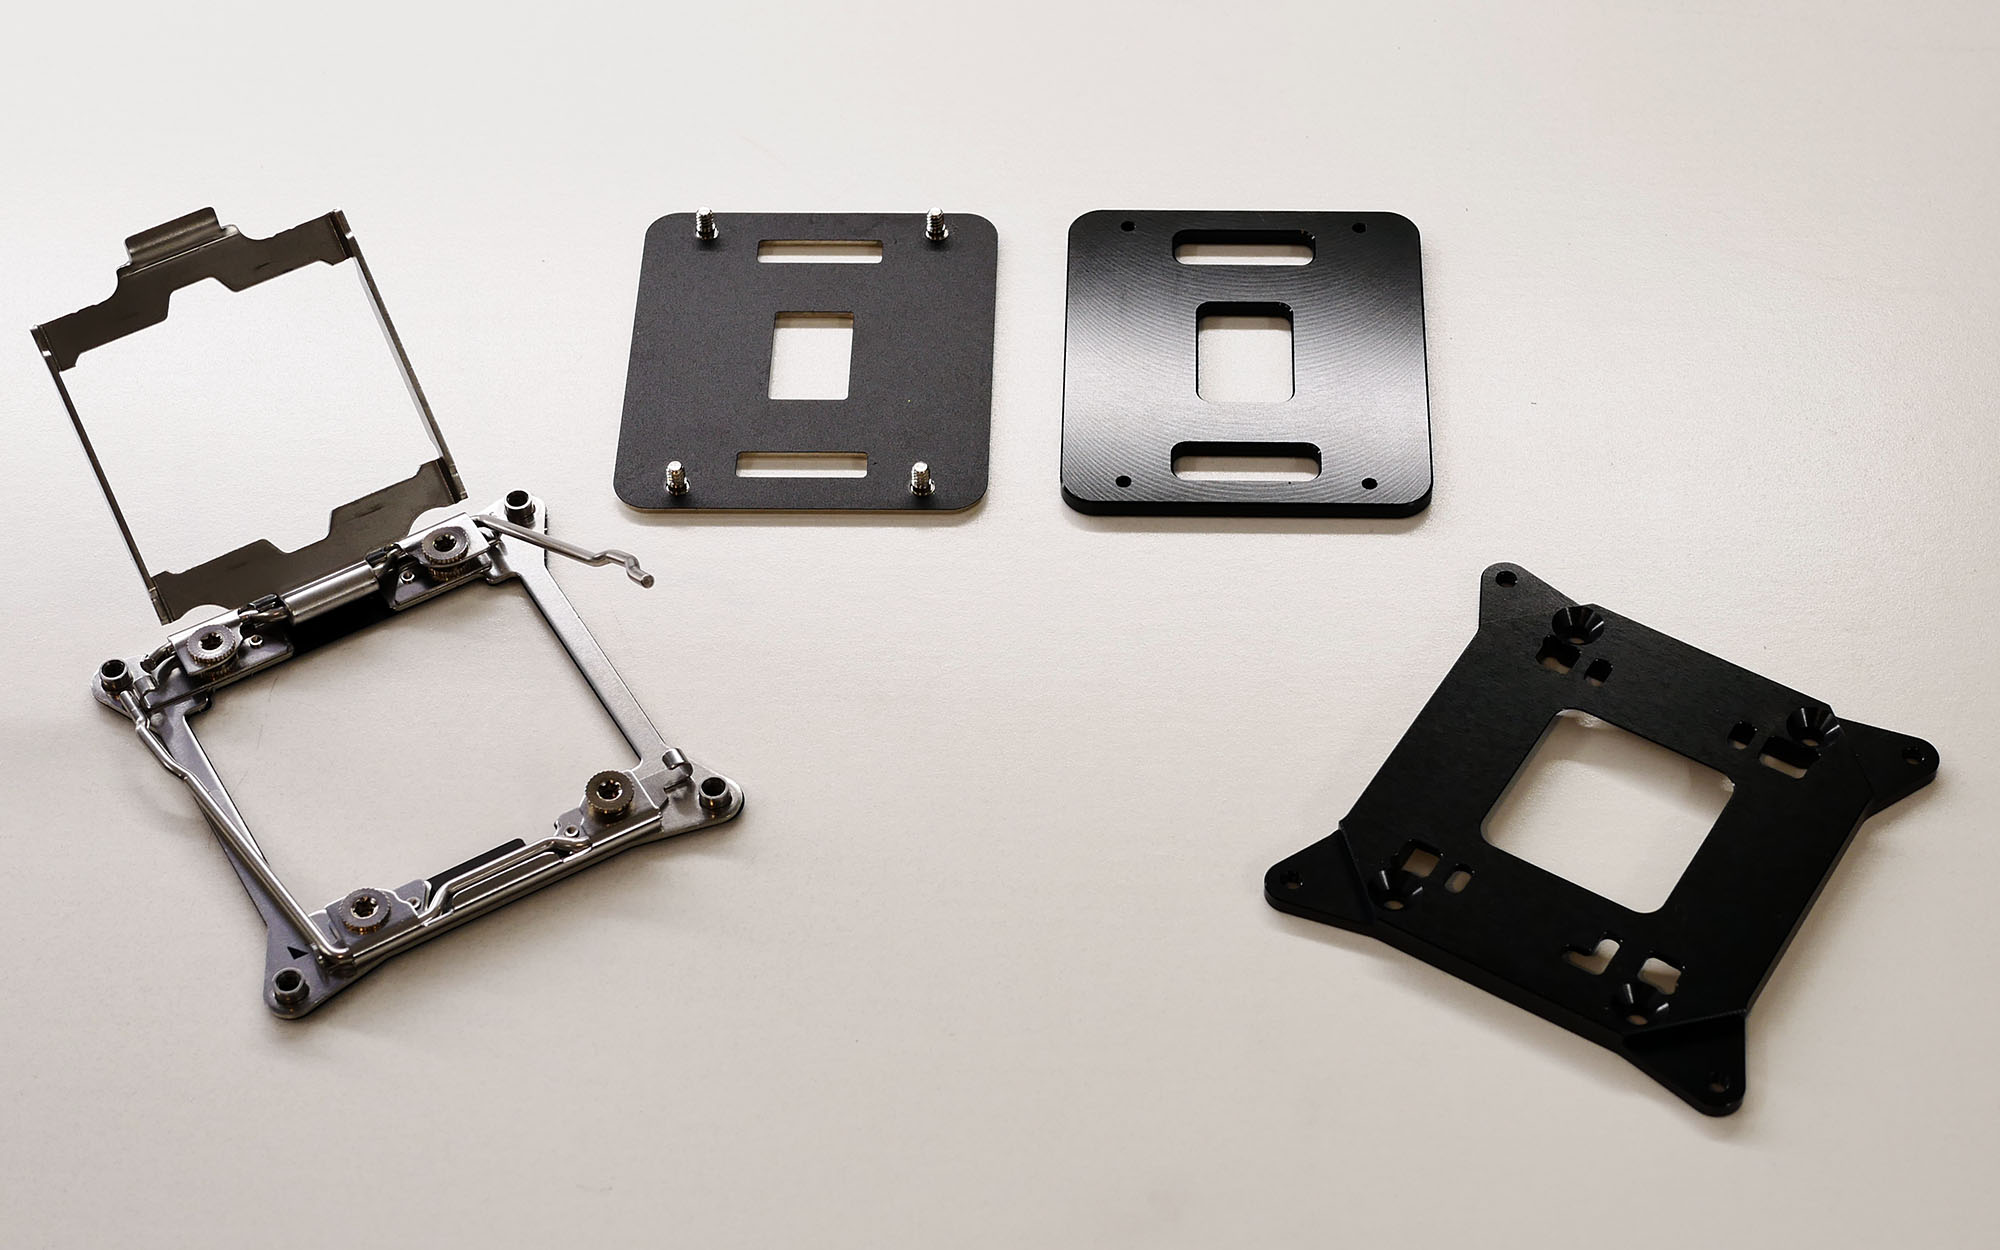
Without its IHS, the processor can no longer be held securely in its motherboard interface. Extreme overclocker Der8auer developed a tool for addressing this conundrum: the direct die frame. In the photo below, MSI's locking system is on the left, while Der8auer’s DDF is on the right.
- Step 1: Remove the four locking screws using the provided key.
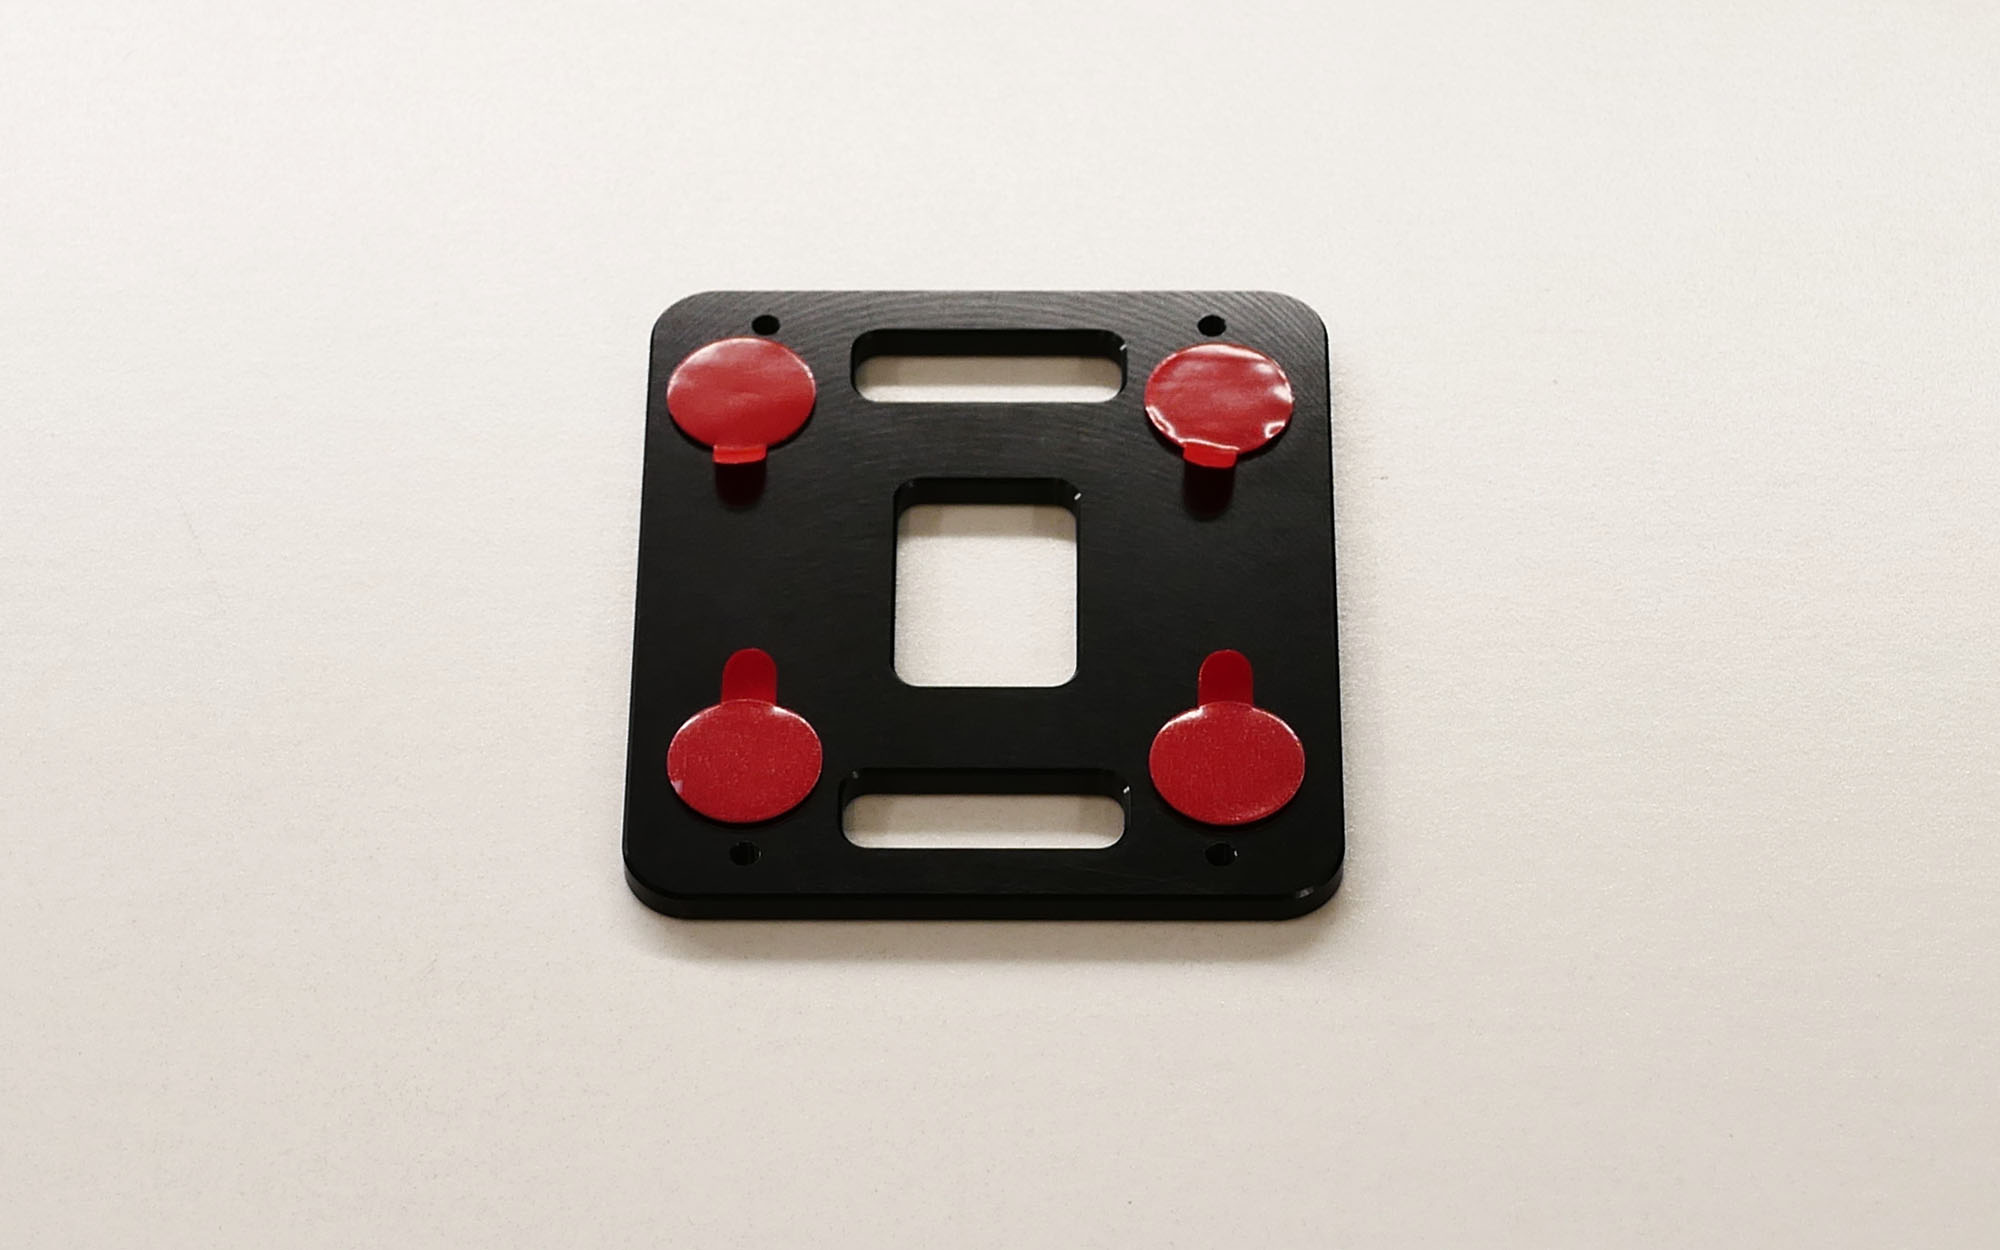
- Step 2 : Stick adhesive pads onto the back of the plate bundled with the DDF.
- Step 3: On the motherboard's back side, replace the original plate with the one you just prepared.
The adhesive pads are very strong. Der8auer advises that you put all four of them in place, but that you only expose one. Leave the red part on the three others, allowing you to remove the plate later on, if needed.
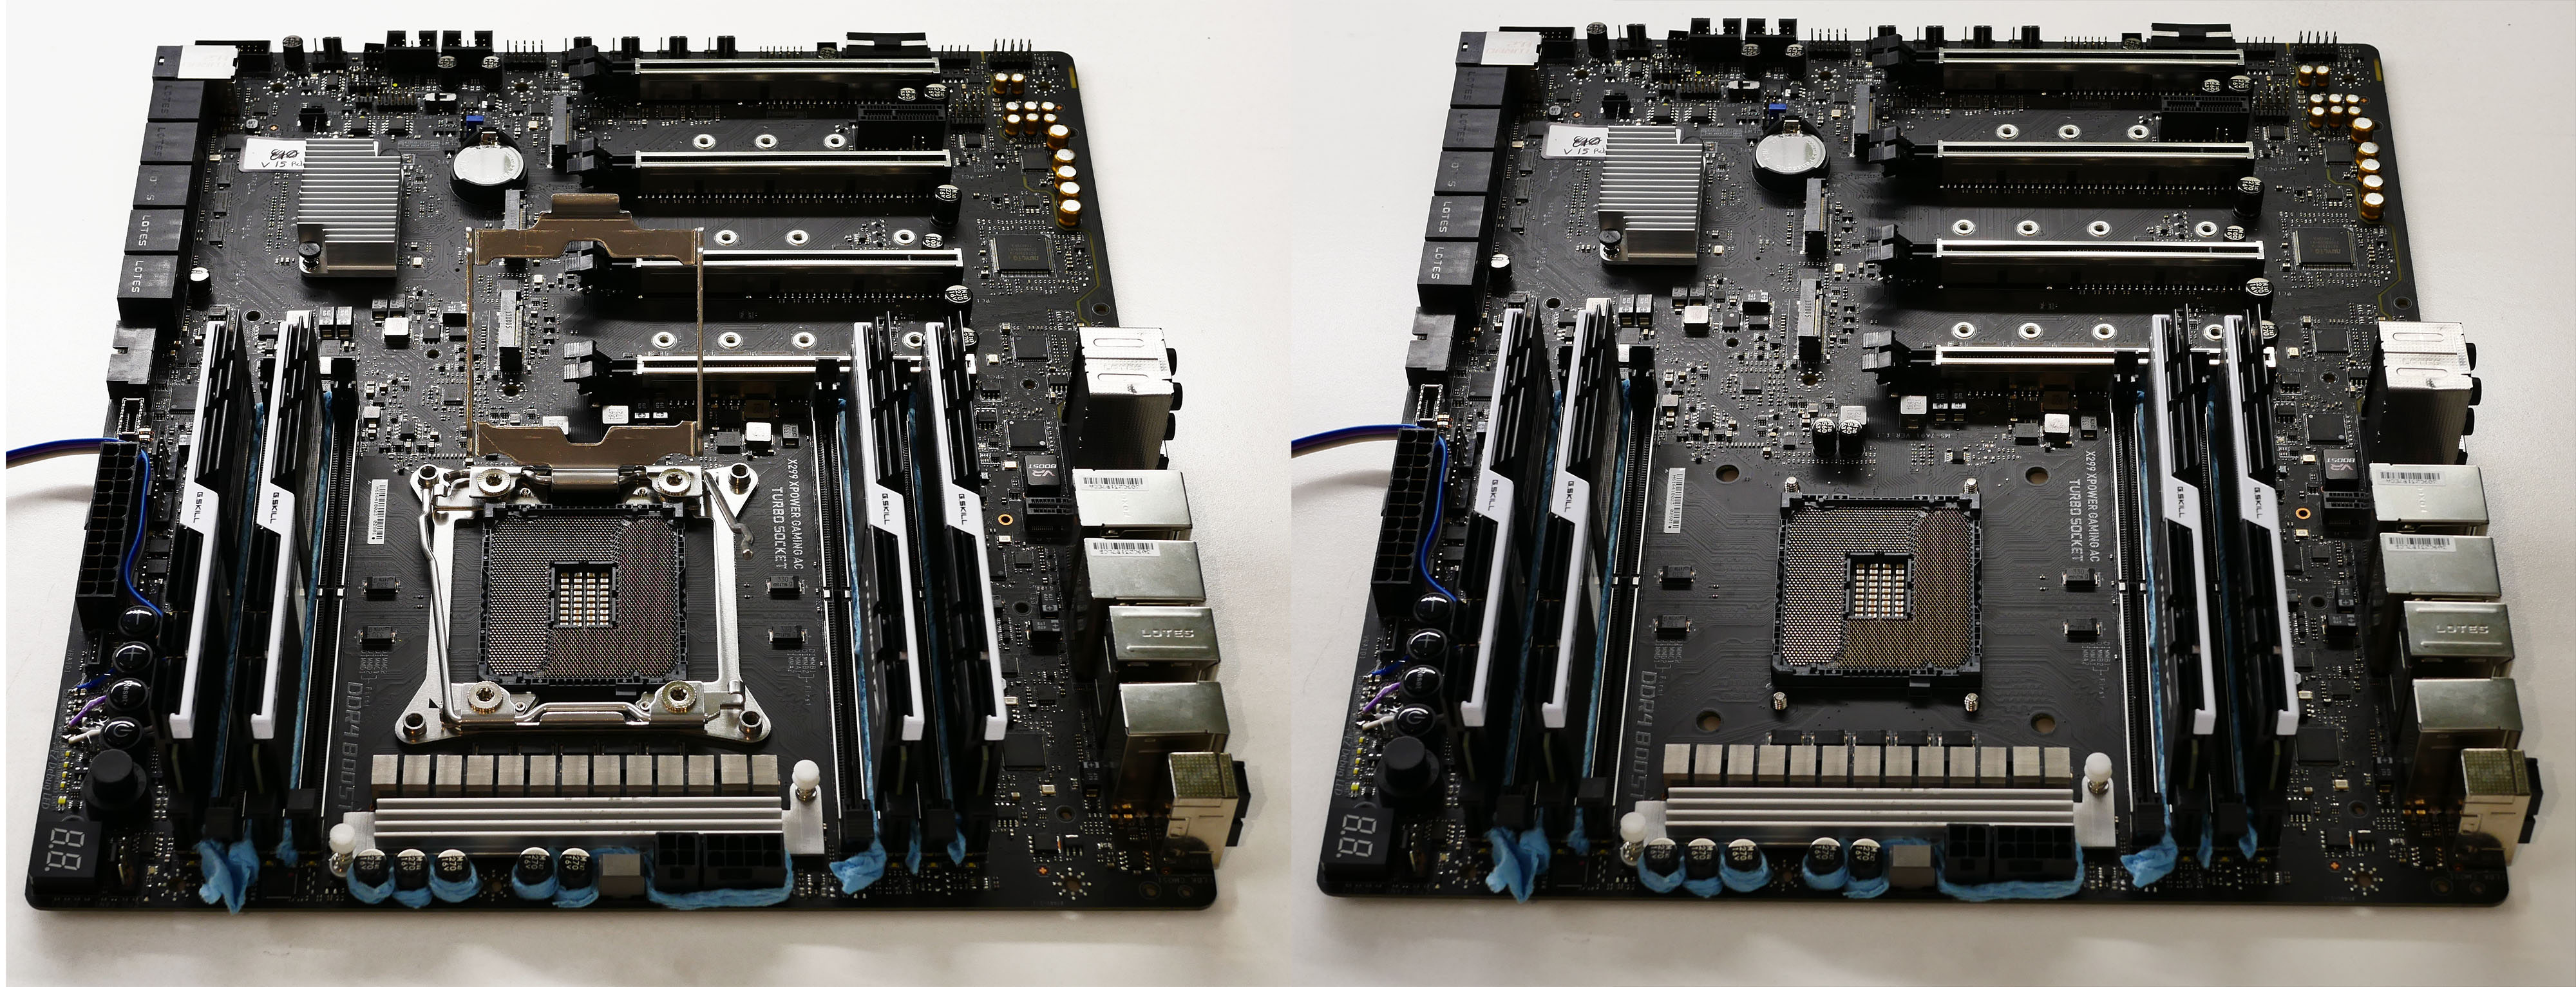
- Step 4: Place the processor in what is left of the socket.
When using the DDF, it is recommended that you remove all leftover adhesive from the IHS. To prevent damage to the processor’s PCB, do not use hard or sharp objects. Also, be careful not to tear off any of the surface-mounted components.
- Step 5: Place the DDF on your board and secure it into place using four screws and the provided key. It only fits one way. If you don't get it right, the DDF won't sit flat.
Tighten the screws in an X pattern, switching diagonally from one to the next, to ensure a secure fit.
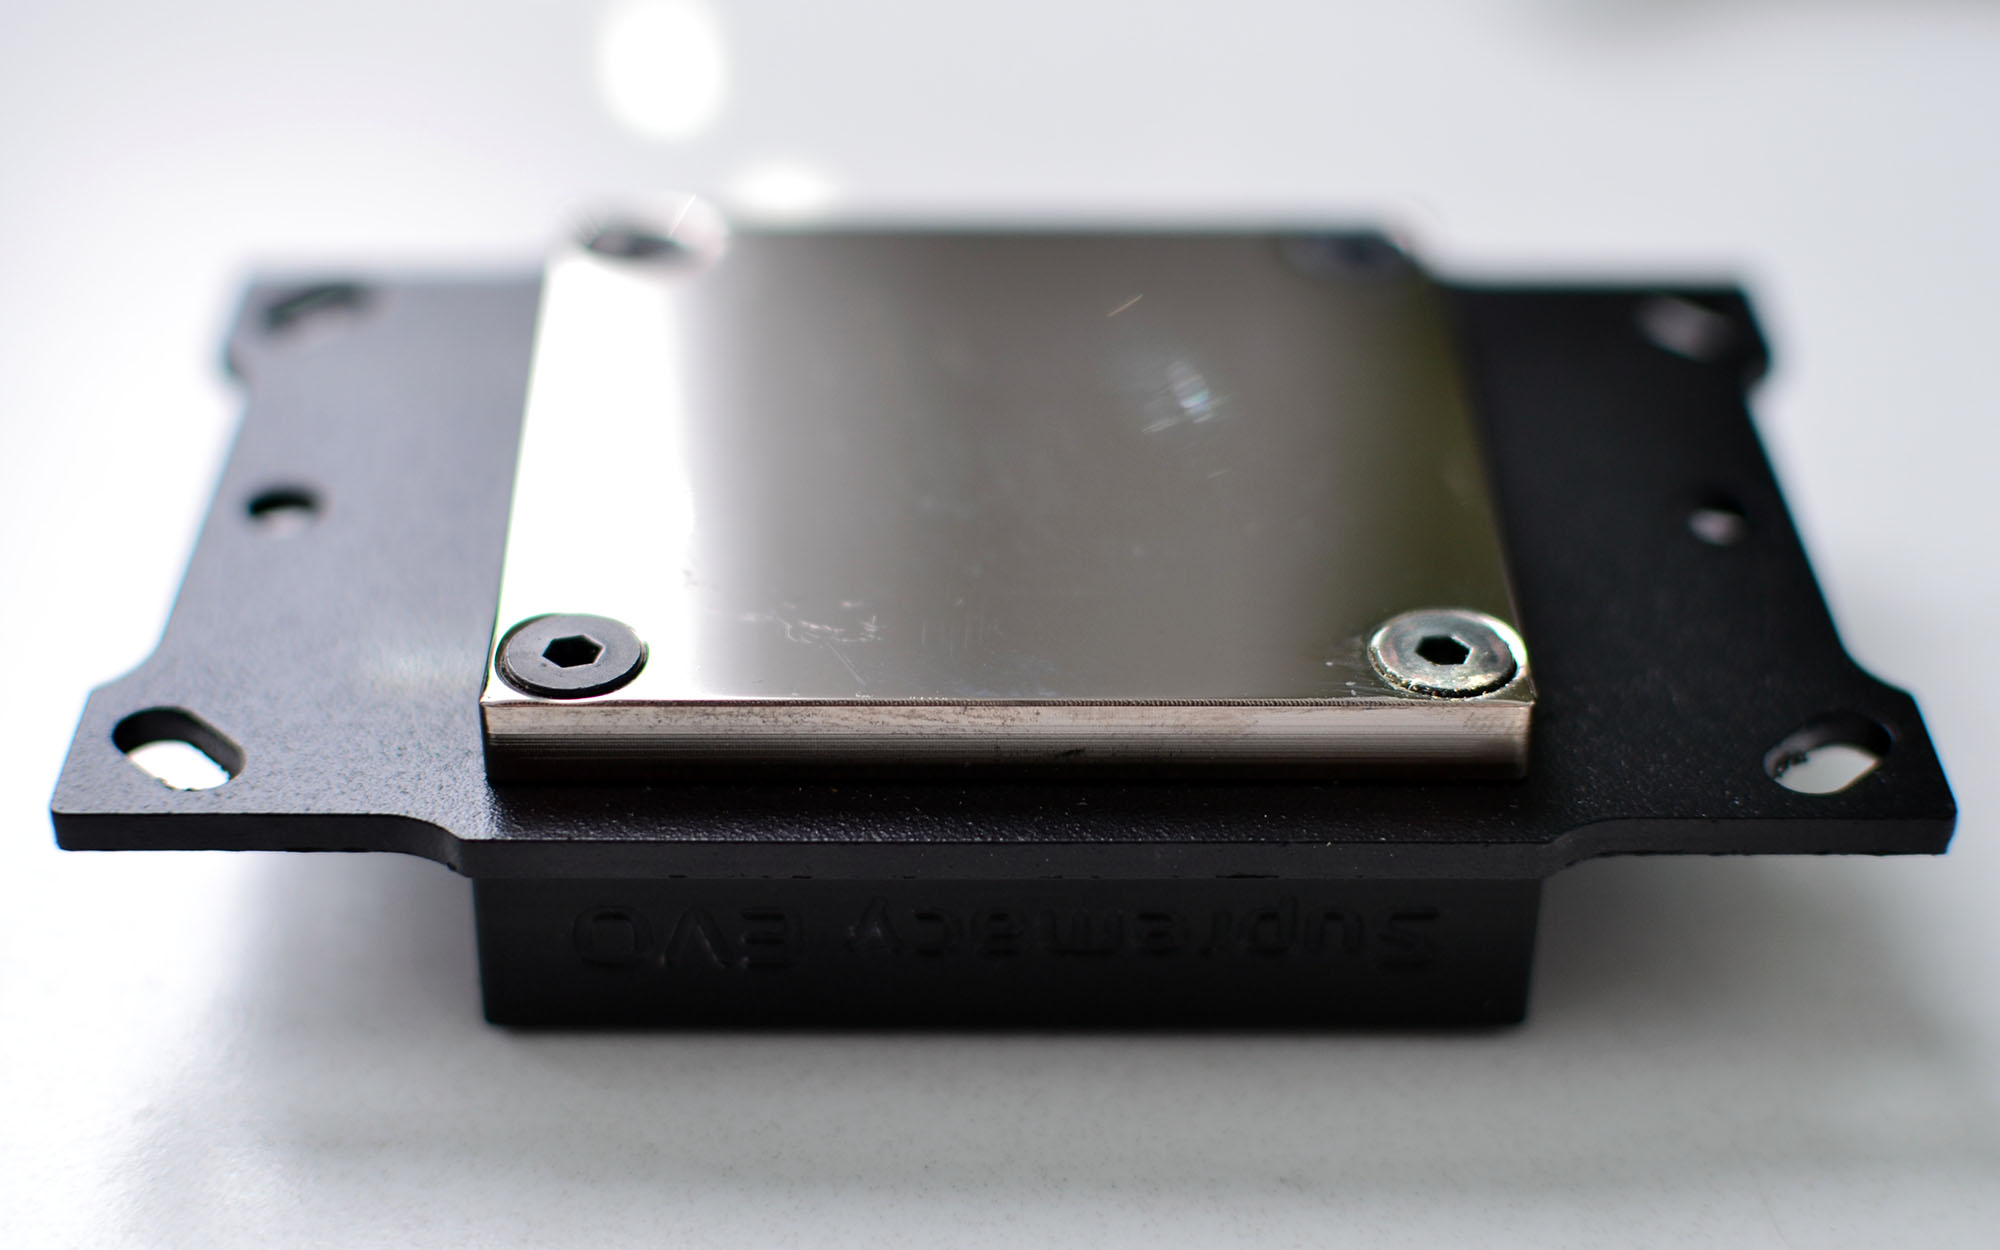
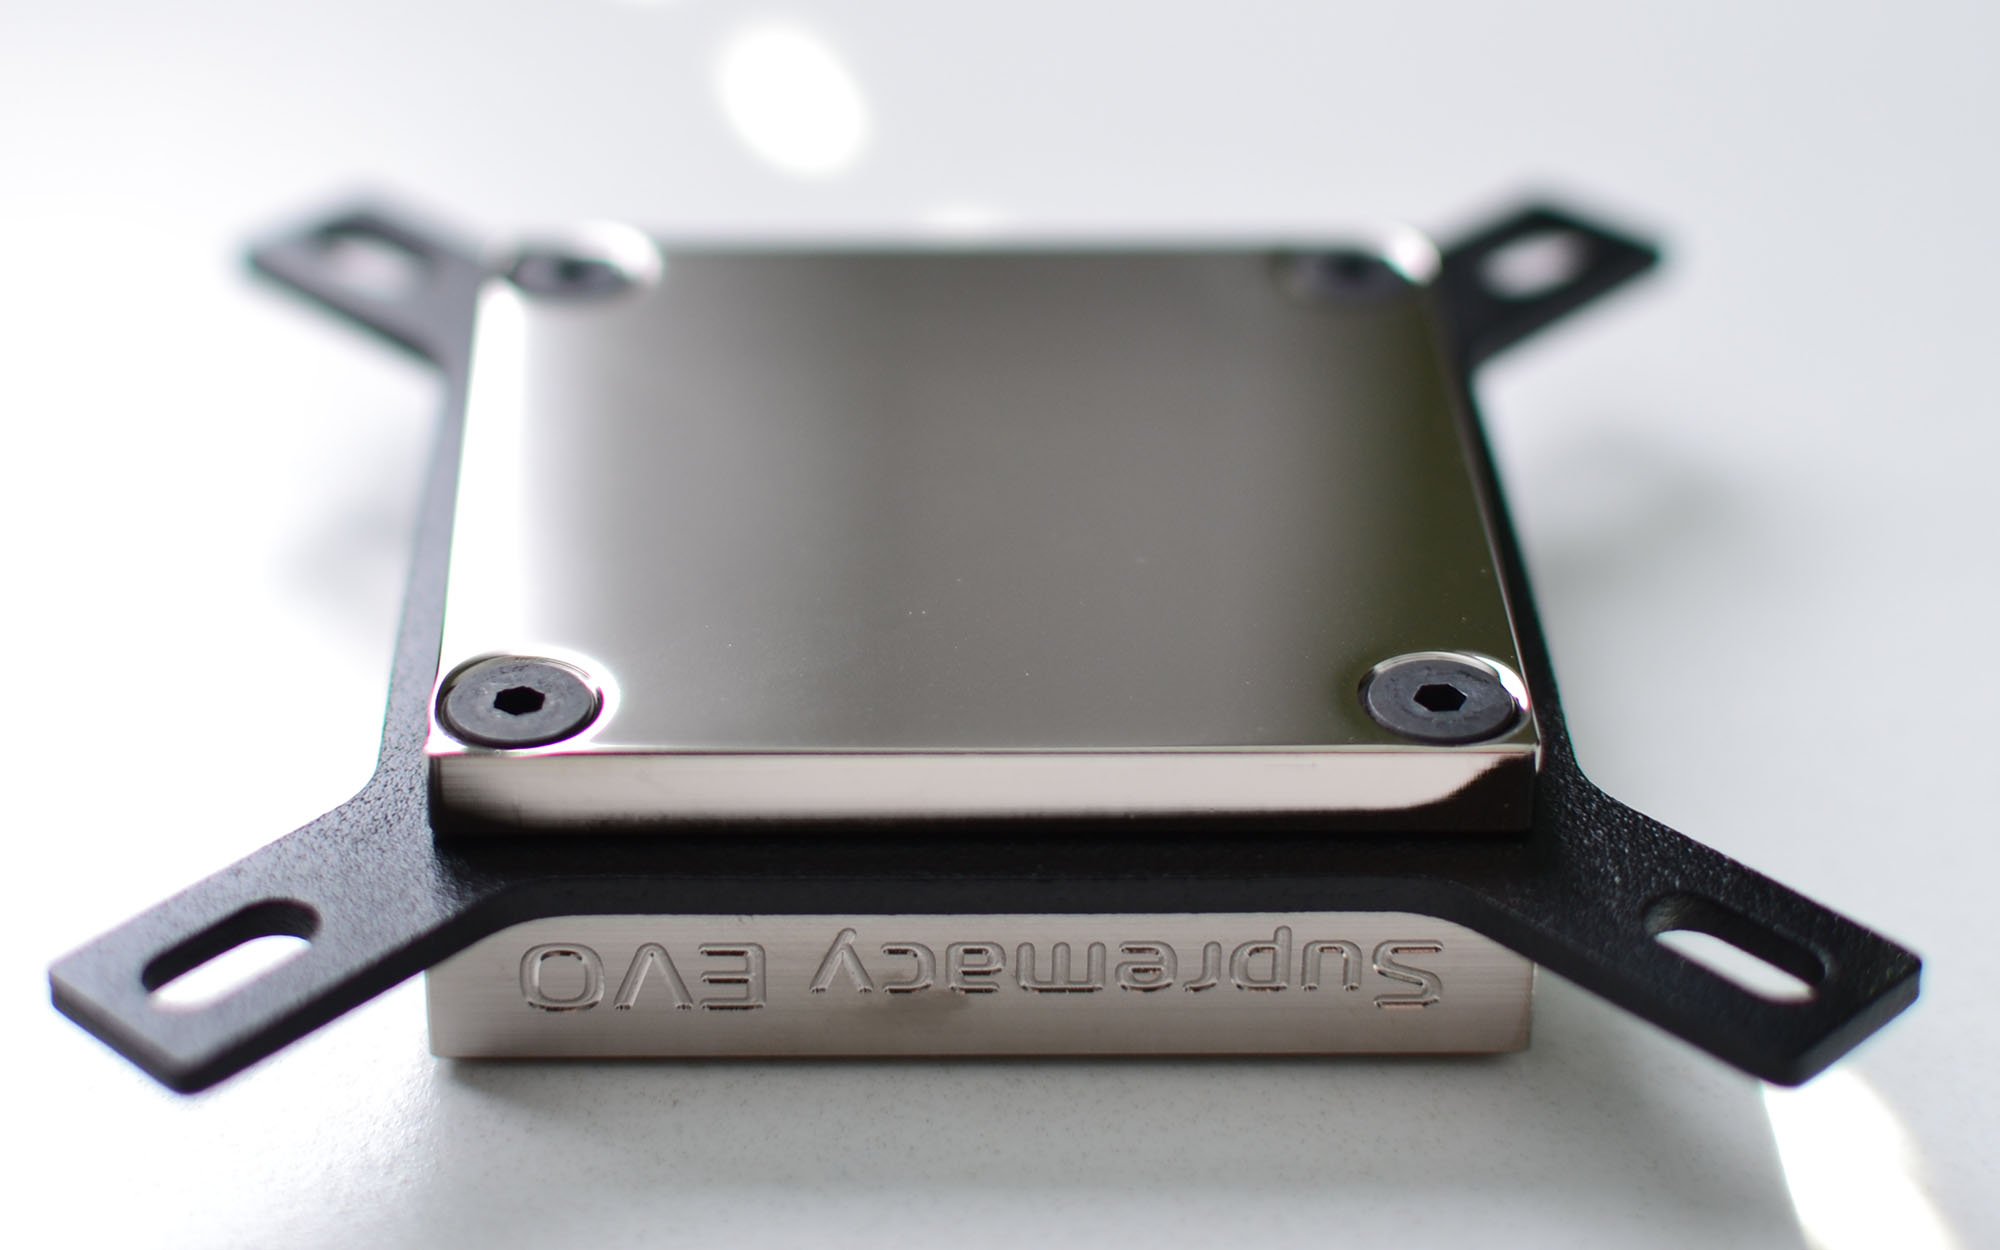
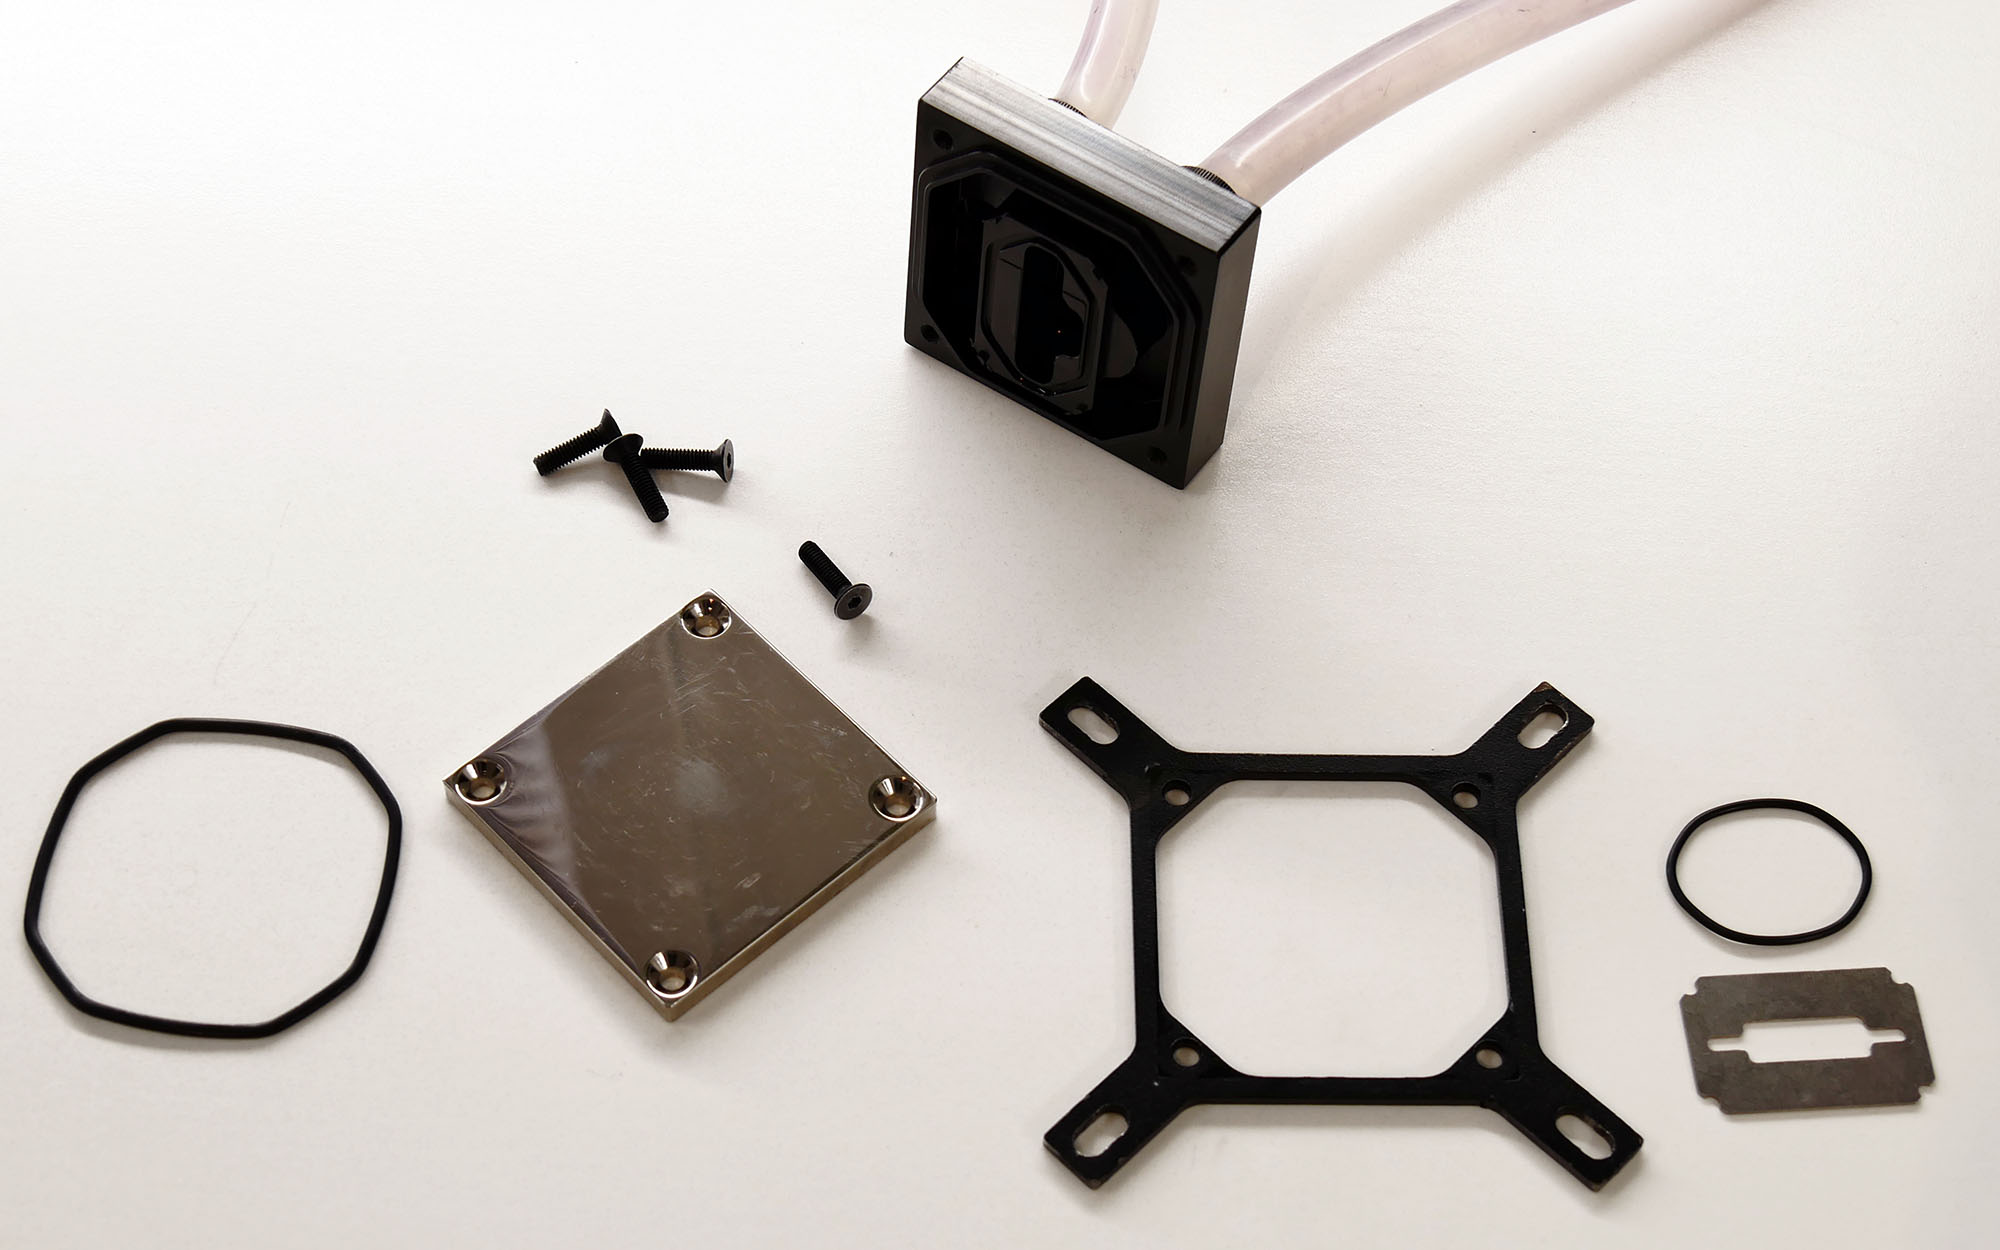
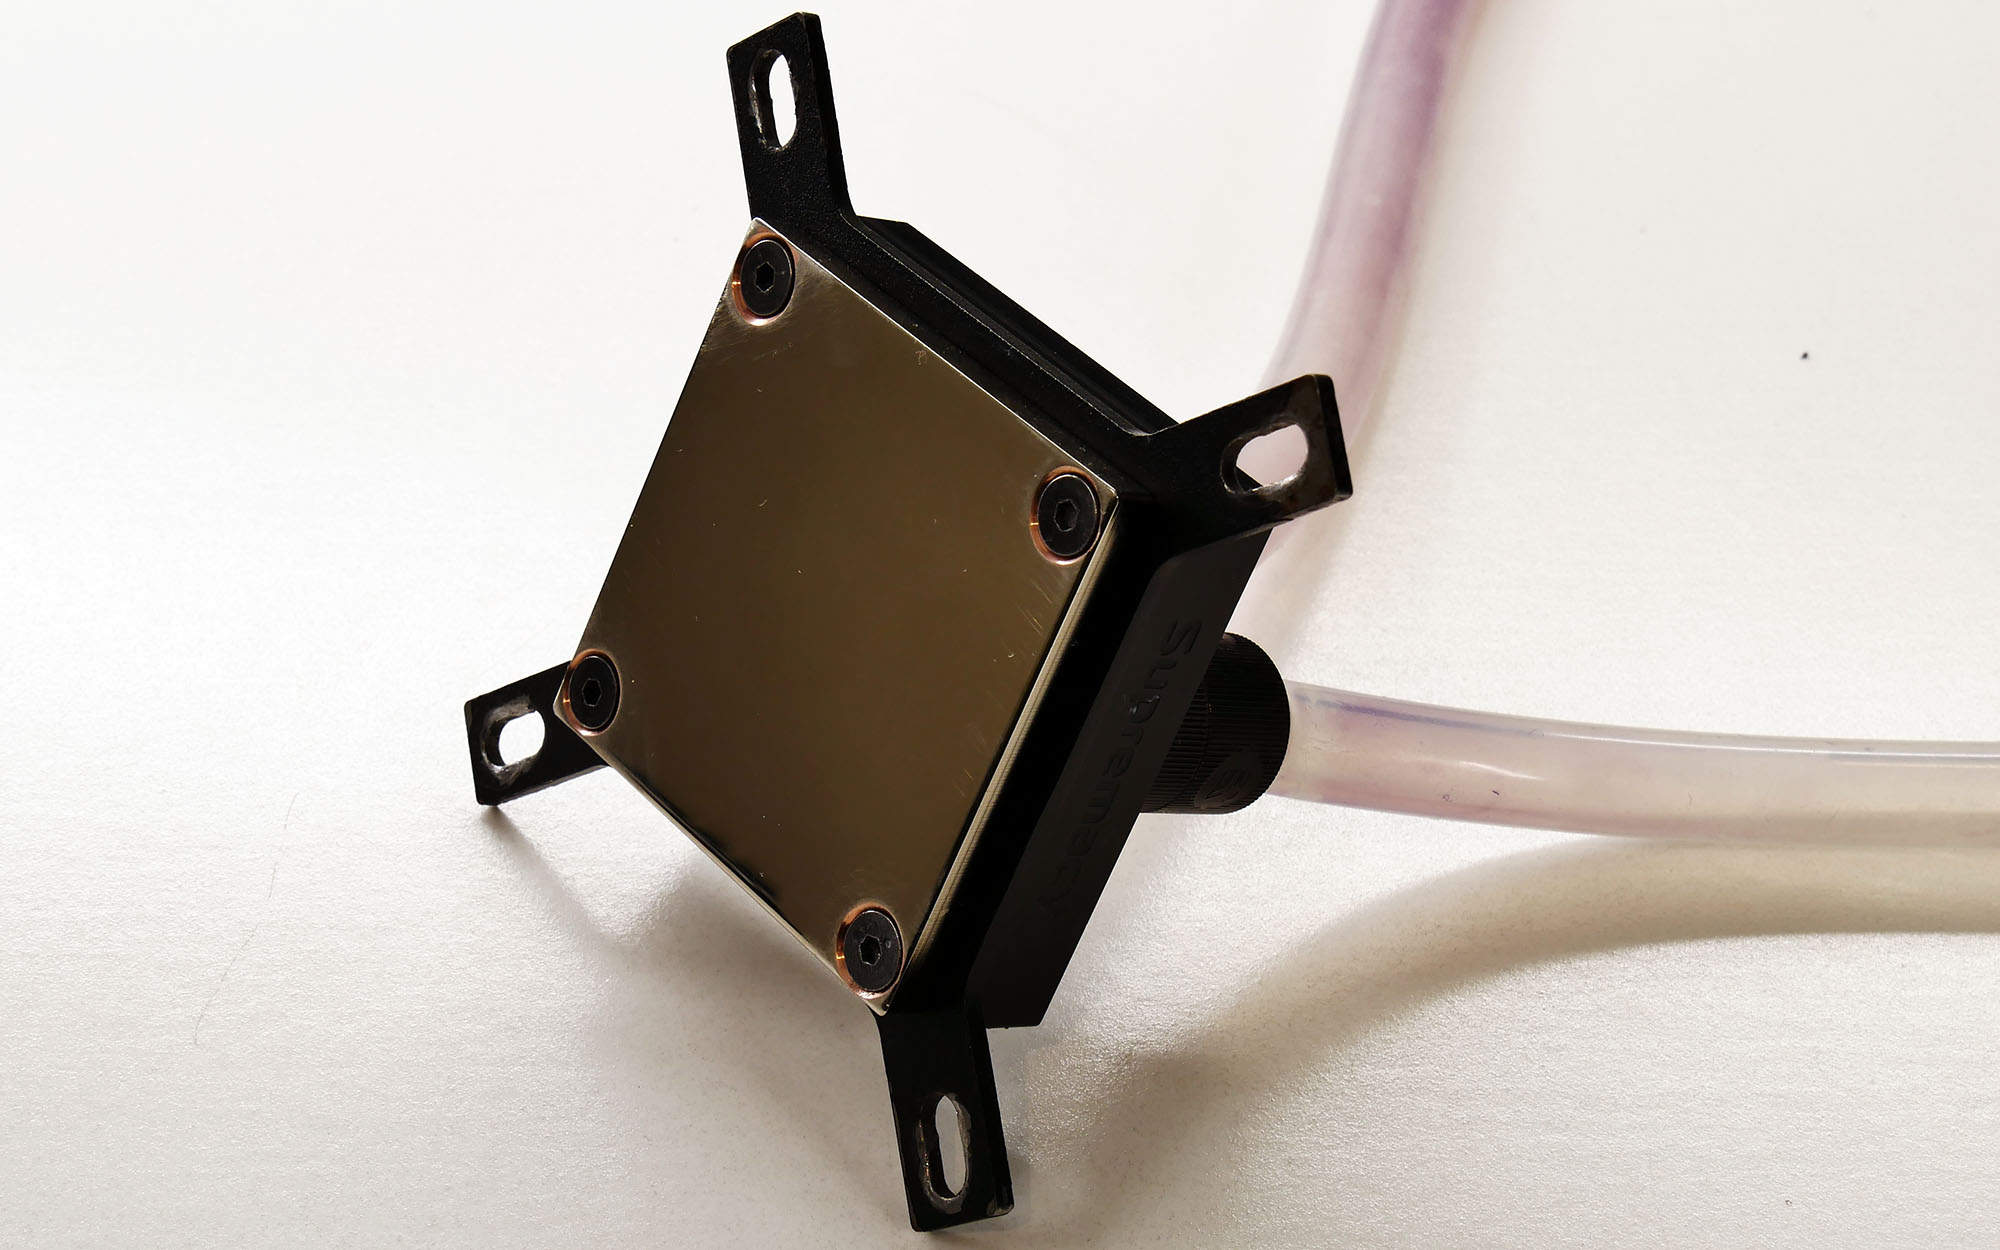
- Step 6: Assemble your cooler, which should theoretically be compatible. Sadly, the screws from our EK-Supremacy stuck out slightly from the cooling plate. As a result, the block wouldn't make contact with the die. It turned out that the screws on the bottom of the water block caused it to push on the DDF instead of the die.
After reaching out to EK about this issue, the company let us know that compatibility problems were limited to products it manufactured more than a year ago. We did get our hands on a more modern version of the Supremacy and can confirm the problem was resolved. The DDF didn't even exist one year ago, so we can't fault EK here.
Get Tom's Hardware's best news and in-depth reviews, straight to your inbox.
All the same, make sure that your water block is compatible before purchasing a DDF of your own. More than anything, it's best to check that nothing protrudes into the lower surface of your block.
Not wanting to wait for a fix (before we knew one was available), and not wanting to start over with another cooling solution, we decided to modify our water block and make it work with the DDF.
Conceptually, the operation was simple: use a counterbore to expand the four screw holes and completely countersink the screw heads into the base. Reality wasn't nearly that tidy, though.
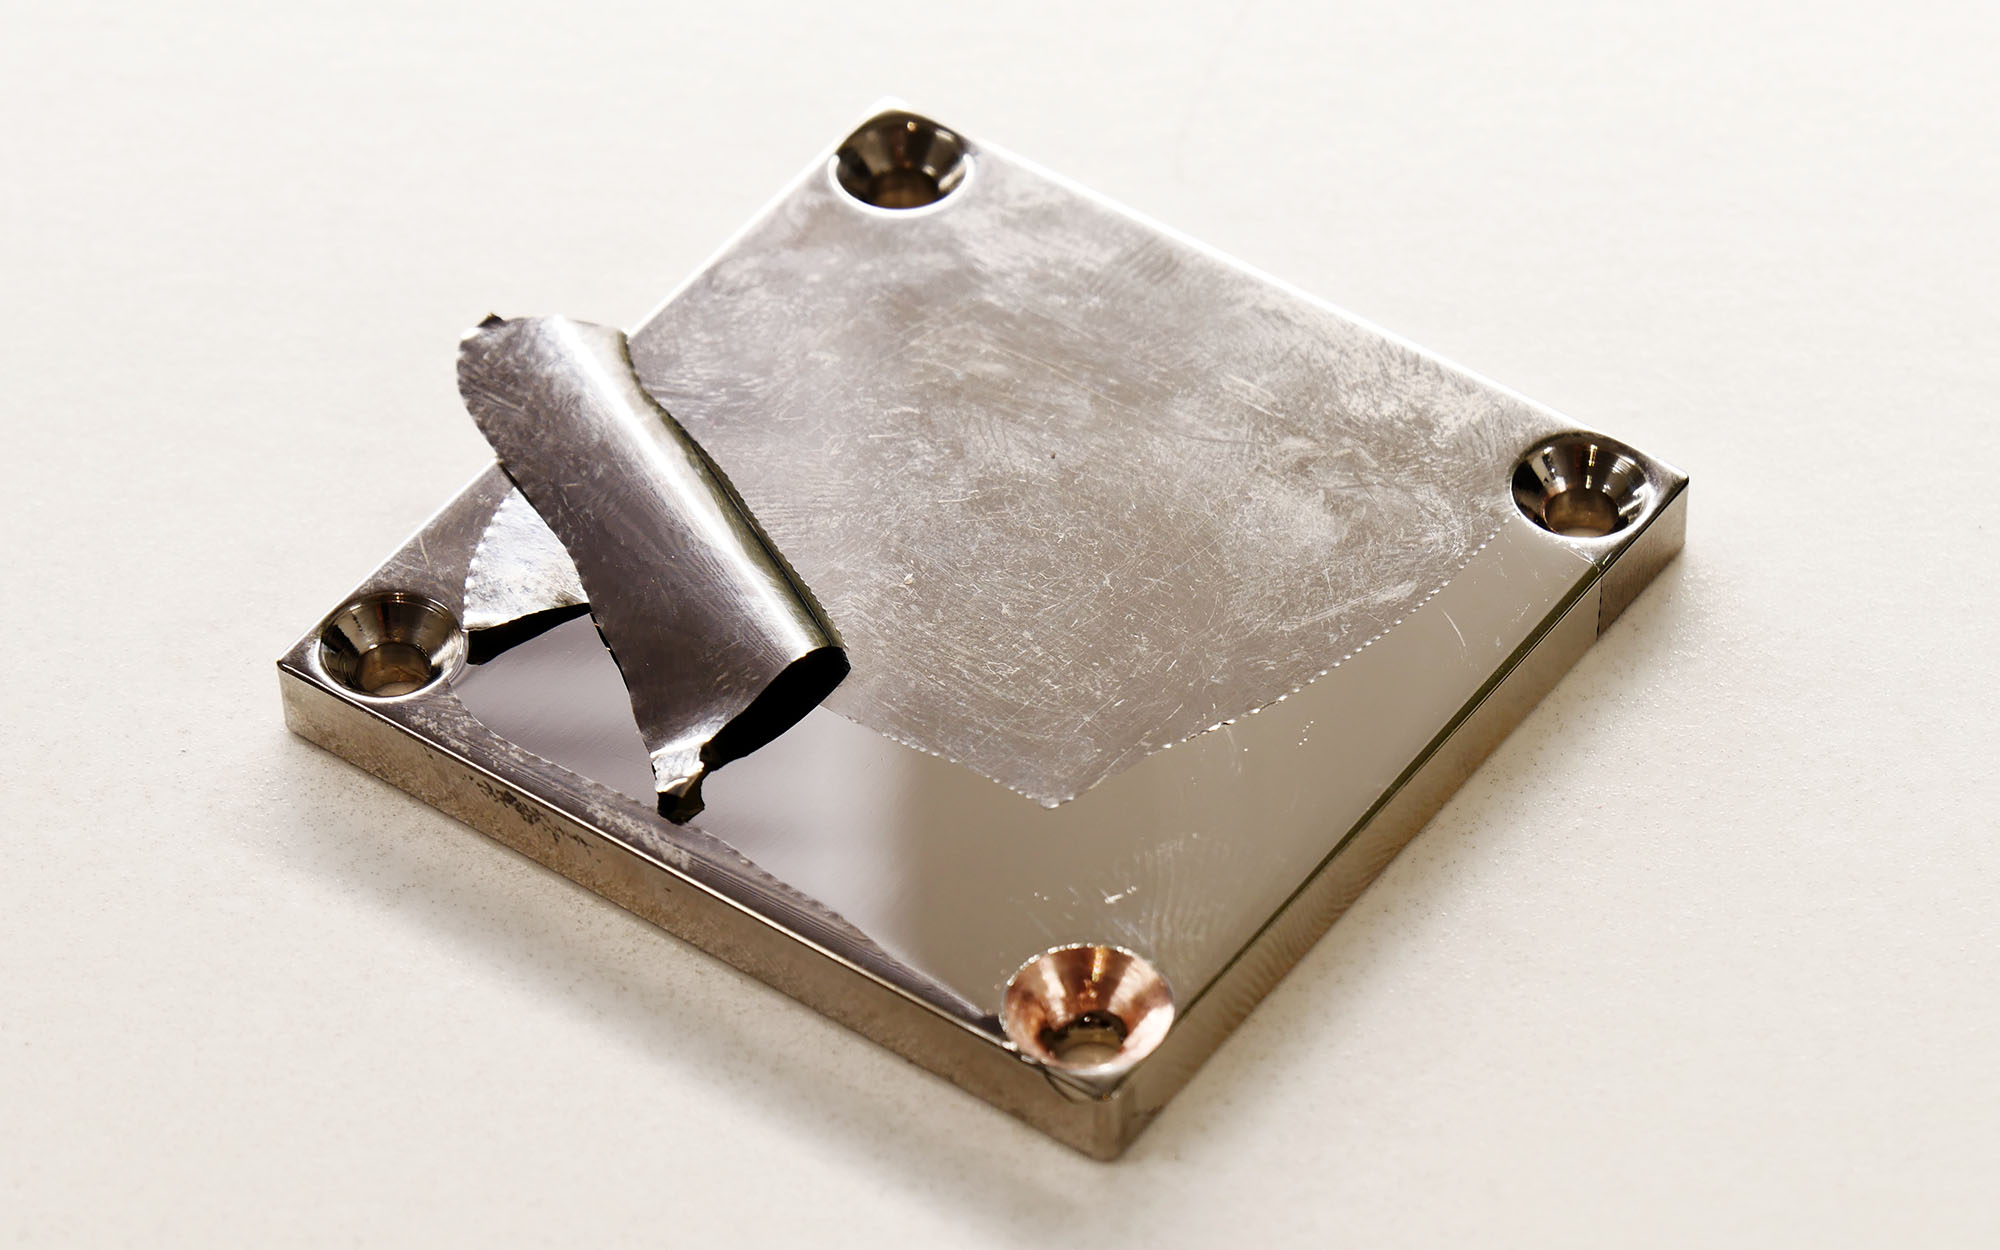
As soon as the first shavings appeared, the cooling plate's protective nickel layer came up. Of course, water blocks aren’t intended to be modified like this. But the outcome was still surprising, causing us to question the protective layer's quality.
With deeper holes dug and the nickel coating removed, our water block was ready for action. With a bit of Thermal Grizzly Conductonaut between our block and the CPU's die, we were ready to start testing.
MORE: Best CPUs
MORE: Intel & AMD Processor Hierarchy
MORE: All CPUs Content
Current page: Installing The Direct Die Frame
Prev Page Delidding An Intel Core i9 CPU Next Page Temperatures: Stock Vs. Delidded Vs. Direct Die Cooling-
vasras Another excellent article, with temp, power and voltage scaling at various cooling/contact methods. Thank you.Reply -
Reynod I bet crashman is spewing he didn't get this gig ... :) Well done ... nice work PresencePC!!Reply -
AgentLozen Very interesting article. I liked your explanations of the expert bios settings on the first page. I usually just ignore the stuff in the bios I don't understand.Reply
While I enjoyed reading all of this, it's not something that would help me personally. I leave my CPU underclocked to >1Ghz so I can feel like I'm back in the 90's again. -
10tacle Besides the obvious awesome overclock detail story and results, I like the fact articles remind us of Intel's failure to use the highest quality manufacturing/assembly principles on their top tier CPUs. Especially their x-Series chipsets. There is no excuse for a near-$1,000 chip to have such poor thermal management quality from the factory. I mean how stupid is that.Reply
One of Intel's strongest advantages over AMD for many years now has been their overclocking ability to push them beyond comparable AMD chips. But not only that, to allow future overclocking headroom for keeping the platform longer when newer and faster replacement generation chipsets are introduced. Poor thermals remove those advantages and not many people want to risk messing up their four-figure chip by de-lidding mods.
I hope Intel takes articles like these in notice and will step it up for their next generation of high end i7 and i9 models. -
g-unit1111 Reply21039131 said:Why didn't you just use the EVGA Dark?
I'm guessing because the RAM limit is only 64GB? Where every other X299 board the limit is 128GB. That would make a huge difference in getting the higher speeds. -
Giroro I don't know much about extreme overclocking, tell me more about this "cooling pot".Reply
It is there to hold the liquid nitrogen and separate it from the die? Is there a reason you don't submerge the entire die in liquid nitrogen instead and lose the thermal compound entirely?
It looks like it has a significant copper plate on it. If you are already going through such extreme lengths, then why not use silver and make the plate as thin as possible?
Also, it's pretty interesting that cleaning the processor did not help with the delid, considering that people delidding older i5/i7s say the thickness of that glue is the primary reason that a delid is effective. -
AgentLozen ReplyGiroro said:it's pretty interesting that cleaning the processor did not help with the delid
I thought the same thing. I was expecting the processor to benefit from the cleaning. -
Giroro Reply21039536 said:Besides the obvious awesome overclock detail story and results, I like the fact articles remind us of Intel's failure to use the highest quality manufacturing/assembly principles on their top tier CPUs. Especially their x-Series chipsets. There is no excuse for a near-$1,000 chip to have such poor thermal management quality from the factory. I mean how stupid is that.
One of Intel's strongest advantages over AMD for many years now has been their overclocking ability to push them beyond comparable AMD chips. But not only that, to allow future overclocking headroom for keeping the platform longer when newer and faster replacement generation chipsets are introduced. Poor thermals remove those advantages and not many people want to risk messing up their four-figure chip by de-lidding mods.
I hope Intel takes articles like these in notice and will step it up for their next generation of high end i7 and i9 models.
The cynic in me makes me think that the primary reason Intel switched to thermal paste is for planned-obsolescence and to prevent people from using old platforms for a long time. I'm pretty sure Intel wants to sell you a new processor as often as possible.
Cheaper manufacturing, reduced ability to overclock, Thermal paste that will probably dry out and slow down the CPU within a few years (which will make new models look faster by comparison) ... All these things are positives to a marketing executive.
Hopefully AMD becomes even more competitive, because workmanship isn't going to improve until Intel can correlate their drop in quality with a loss of profit. -
cryoburner Reply
Isn't that the point? If someone messes up their CPU, they have to buy a new one. And delidding voids the warranty, helping Intel more easily recognize and avoid paying for the replacement of chips that have failed as a result of high overclocks. And of course, if people are deterred from overclocking their CPU, they may have more reason to upgrade to a faster one a few years down the line. Intel doesn't want people "keeping the platform longer", and they know that those looking for the highest overclocks will currently go with them either way. Considering it can cost around $5 or so extra to solder a CPU, and most people won't be overclocking, they undoubtedly don't see much point in spending the money to do so.21039536 said:Poor thermals remove those advantages and not many people want to risk messing up their four-figure chip by de-lidding mods.
AMD is willing to, since they currently can't achieve quite the same level of clock rates on their CPUs at the high-end, and know they need to do other things to make their chips more competitive with the market leader, like adding extra cores and using solder.
