System Builder Marathon, June 2010: $550 Gaming PC
Assembly
Assembly
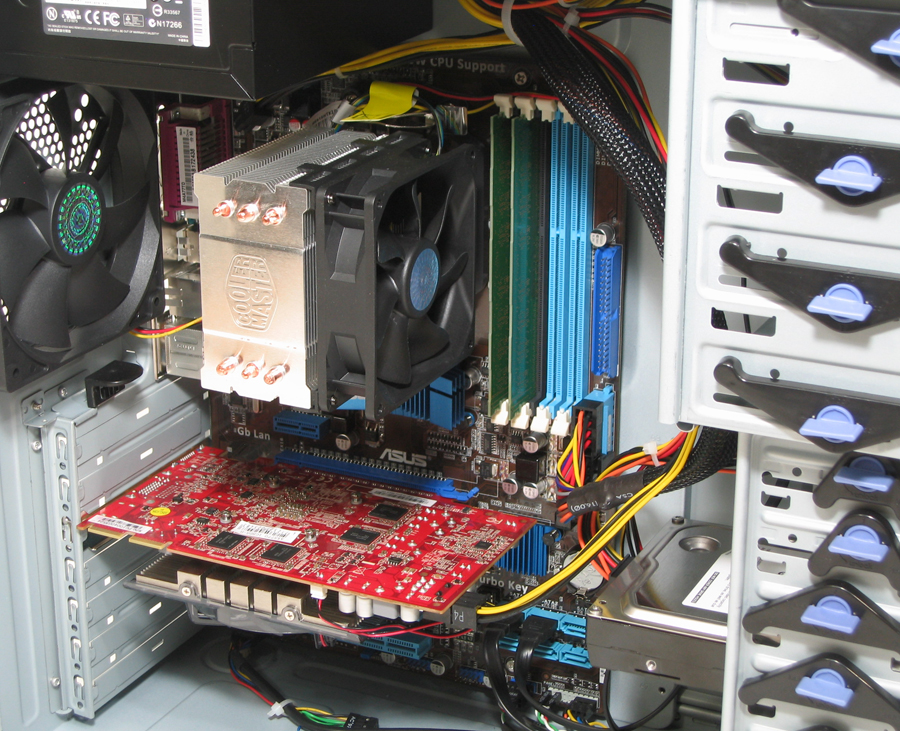
The Cooler Master Hyper TX3 is easy to mount as long as you properly assemble the two-piece Socket AM3 mounting clip and remove the clip-on fan when locking down the heat sink. Notice that, unlike the Xigmatek HDT-SD964, the TX3 mounts in a front-to-rear orientation on an AM3 motherboard.
There were no fan-clearance issues with our RAM, but sticks cooled by tall heat spreaders would not fit in the first DIMM socket without orienting the fan to pull air through the back of the heat sink rather than push air through the front.
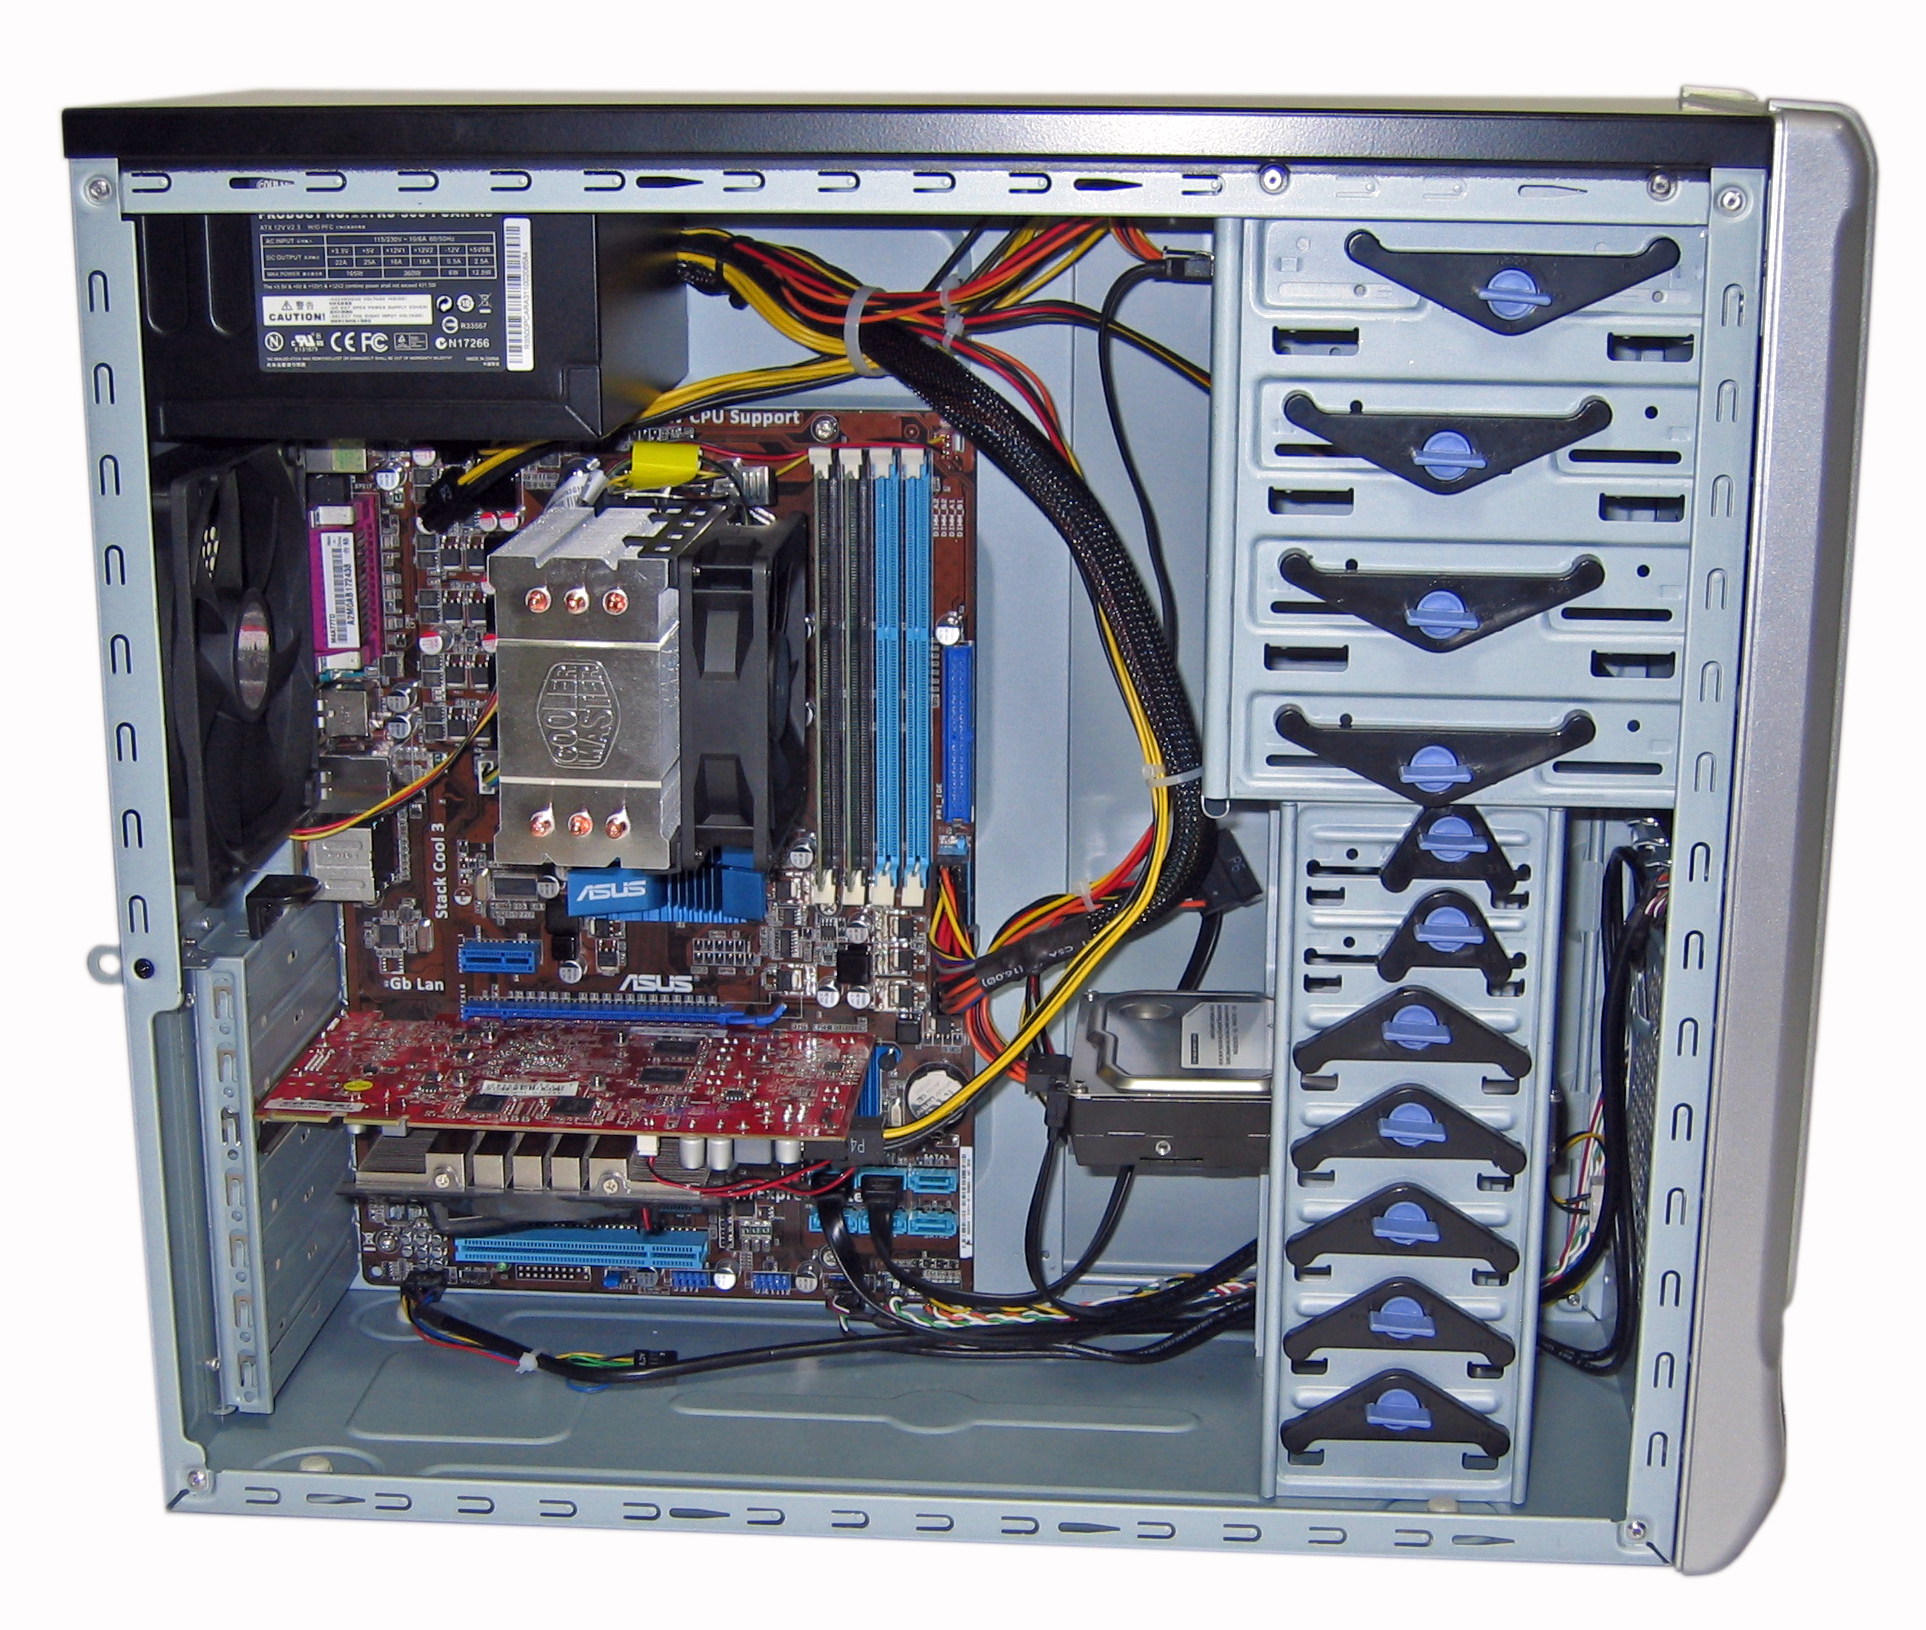
The Elite 330’s tool-less drive bay mechanisms are likely the first things you’ll notice when removing the enclosure’s side panel. Closer observation will also reveal a tool-less slot bracket. Honestly, I’m not a big fan of such mounting designs and would be one to quickly remove them and just use screws. Thankfully, Cooler Master makes this an easy option, but here we wanted to give its system a try to comment on the functionality of the design.
Removing the front bezel takes just a slight pull from the bottom and makes prepping the 5.25” bays a much easier task. There are no mounting clips supplied for the back side of the 5.25” drive bays, so it is unnecessary to remove the opposite side panel when swapping optical drives in or out. Once ready, twist and remove the mounting clips, which allows both the hard drive and DVD burner to be slid into place. The fit is very snug, which is crucial to the success of the mounting system. I was impressed by the security of these clips, although I wouldn’t rely on them when transporting the rig.
These mounting clips did not allow our DVD burner to line up completely flush with the front bezel, and for this you would need to revert back to screws. However, the amount of bezel indentation matched the 3.5” front IO ports, so overall appearance still looked in order. Lastly, the top 3.5” bay was inaccessible with our RAM installed, as the lower DIMM socket levers prevented the hard drive from lining up straight enough to slide into place.
The slot bracket looks a bit complicated, but it’s a very simple matter of flipping open the handle and inserting the graphics card into place. It was easy to mount the Radeon HD 5770, and the small card was held securely in place. Again, transportation would be a concern, and we can’t comment on whether the mechanism would be as easy with multiple expansion cards in place or secure enough to trust with a heavy, expensive graphics card.
Get Tom's Hardware's best news and in-depth reviews, straight to your inbox.
Our modest components are almost lost in the spacious interior of the Elite 330, making assembly of this system an easy task. However, the enclosure width is a bit narrow, so keep in mind the 166 mm mounting limit for tall CPU coolers. This was far from an issue with the Hyper TX3, although any cooler of this design requires removing the CPU intake duct from the case’s side panel. Just a small complaint: longer PCIe and main power leads would have allowed for an aesthetically cleaner installation.
-
gkay09 ^ I dont like the idea of using the CM eXtreme power PSUs...Reply
You could get a EA 430W for about $49 @newegg...
Just a thought - you could save money on the mobo by going with TOM's favorite brand ASRock board with the 770 Chipset...So with the money saved, getting a better PSU would have been a good idea... -
adbat I plan to build a similar machine so it's nice to see the numbers :-)Reply
Again unlocking was successful the 50-50 chance do not apply to your tests.
But no surprise this is a just enough machine. -
archange Buying the same components here, online, gets me to ~800 USD. That, including my 3% Diamond Customer discount at my favorite e-tailer. Granted, the Power Color was out of stock, which led me to Sapphire and i also had to exchange the RAM for Kingston HyperX CL7.Reply
People in the States have way to much... fun :P -
Crashman gkay09you could save money on the mobo by going with TOM's favorite brand ASRock board with the 770 Chipset...Wait, Tom's has a favorite brand? I've heard rumors in the past that Asus got all of Tom's Hardware's attention...and Gigabyte has been getting a lot of awards so maybe them...where does ASRock come into all of this favoritism, from its use in previous low-cost SBM machines?Reply -
noob2222 This one and the $1000 show some pretty impressive efficiency and power savings over the previous, more expensive builds. Save some dough now and in the long haul. Imo thats pretty important on a tight budget build, you don't want it costing more over its lifetime than what you saved in building it.Reply -
skora and liked the idea of incorporating a $100 Cooler Master trio in the build.CrashmanWait, Tom's has a favorite brand? I've heard rumors in the past that Asus got all of Tom's Hardware's attention...and Gigabyte has been getting a lot of awards so maybe them...where does ASRock come into all of this favoritism, from its use in previous low-cost SBM machines?Reply
No, this month its Coolermaster.
"and liked the idea of incorporating a $100 Cooler Master trio in the build."
No shame, we all have bills.
Very well balanced system. Very helpful to see a working system with just 2 gigs ram and break the stereo type that 4 is required. -
tacoslave ah i miss the days when you could buy 4 gigs of ram for $20. But now that only buys you about 1gig.Reply -
cangelini skoraand liked the idea of incorporating a $100 Cooler Master trio in the build.No, this month its Coolermaster. No shame, we all have bills.Very well balanced system. Very helpful to see a working system with just 2 gigs ram and break the stereo type that 4 is required.Reply
You're reading that completely out of context. -
ta152h At this price range, I think an Athlon II x2 or Pentium E6500 system would probably do better for pure gaming.Reply
Both have more cache, the Pentium dramatically so. The Athlon II x2 would almost certainly over clock better, since stock speed is much higher, and most sites show them generally able to get to 3.8 GHz at roughly 1.4v or lower with a stock heat sink. On top of this, they use less power. So, more cache, 250 MHz more with stock heat sink (maybe more with a better one), and more cache against an extra core. Probably for games it would be better, but not always.
The Pentium E6500 is probably better still. Getting it to around 4 GHz wouldn't be too hard, especially with an upgraded heat sink, and is generally faster clock per clock compared to an Athlon II x2. Power use is significantly lower too.
Neither are clearly better though. I would rather have a faster two core than a slower three core, but the latter certainly have advantages too.


