Gigabyte 970 Gaming SLI Motherboard Review
Why you can trust Tom's Hardware
How We Test
BIOS And Configuration
The motherboard's UEFI feels like a BIOS of old, with its text-based feel, which I prefer. As I was resolving the CPU fan speed issue, Gigabyte technical support was able to supply me with a beta release of the F2c BIOS for the board. This did not resolve my issue, but some people might be curious if they compare their version of this product to my photos.
With overclocking, the bulk of my time in the UEFI was focused on the frequency and CPU option settings, which are easily accessible from the home screen. For my unlocked processor, adjusting the multiplier was as easy as pressing the “+” key until I reach the desired ratio. Activating the XMP profile is also as easy as clicking Profile1 on XMP-enabled memory modules and memory configurations, at least in theory, but more on that in the overclocking section.
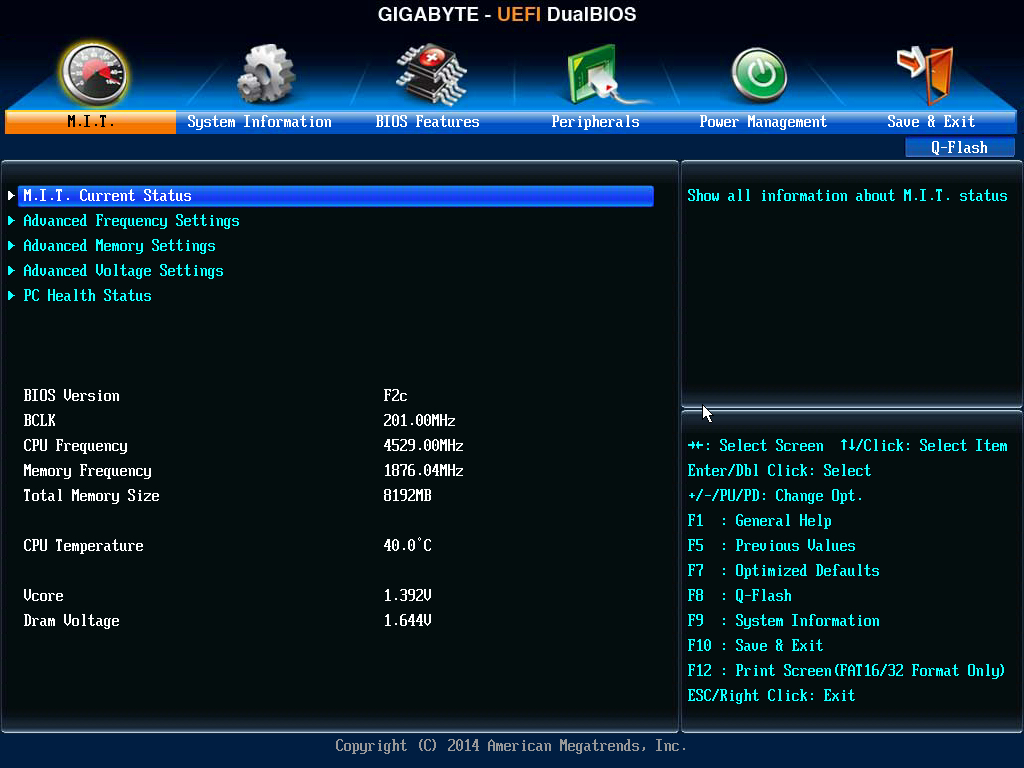
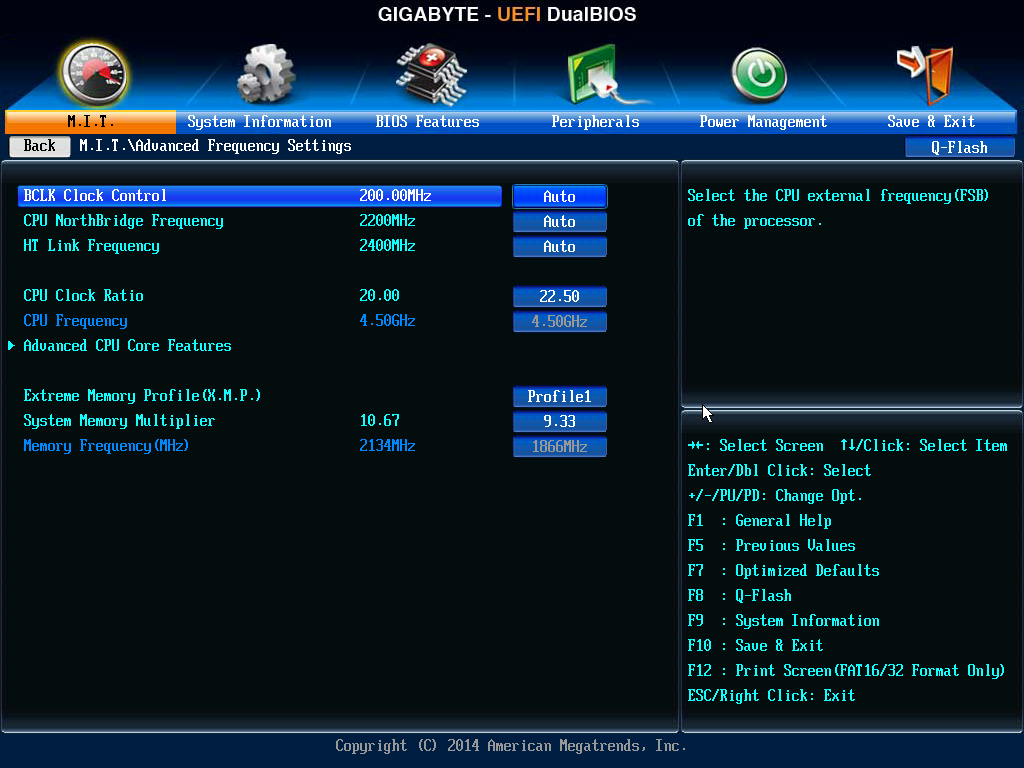
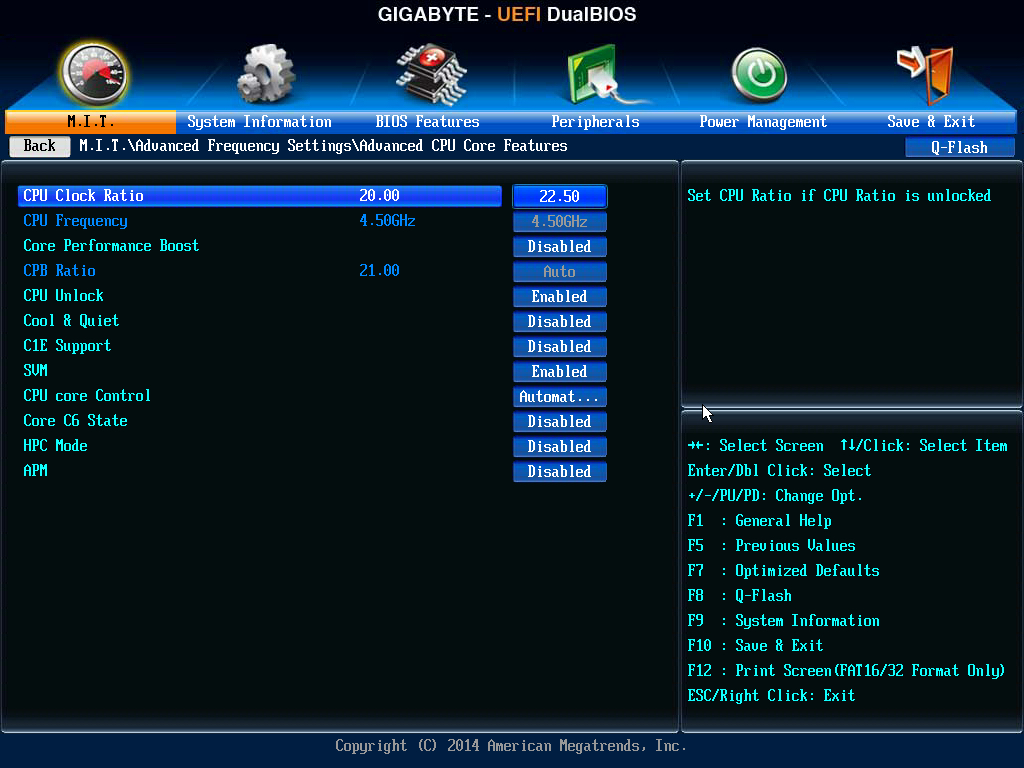
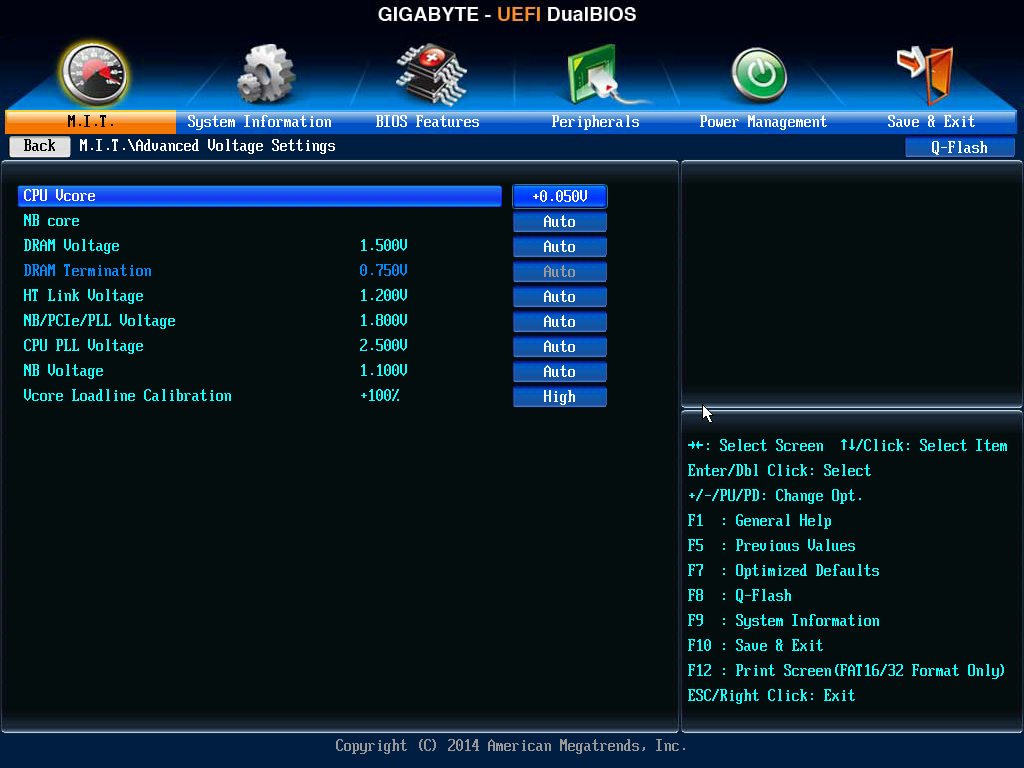
Drilling further into the CPU Advanced Frequency menu gave me access to the various power saving features of the AMD architecture, voltage settings, and what felt like 11 different load line settings. Overall, a pretty standard UEFI experience with just enough options to get this system rolling.
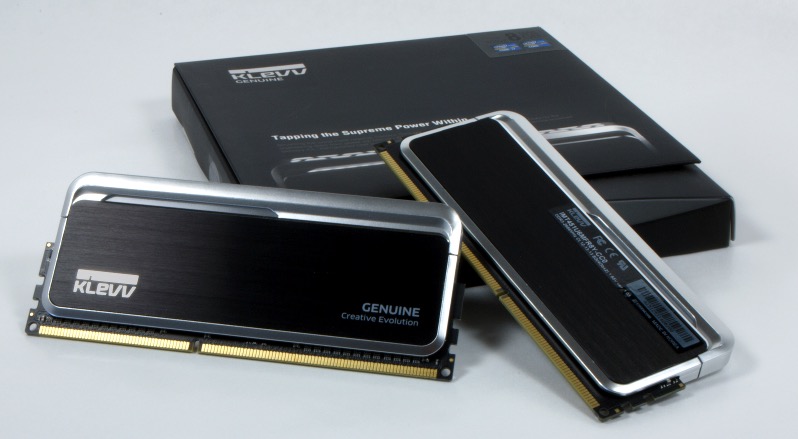
I ditched the DDR3-1600 modules from Mushkin based on community requests. Fortunately, Thomas had finished evaluating Klevv's 2800MHz kit in his DDR3 vs. DDR4 article, and he had access to the 2666MHz variant. Two 8GB kits now fully populate my system for initial testing.
The main downside to this addition is that they also emit an aura of their own. In order to implement the diodes, they have a taller heat spreader than standard DIMMs, and the increased height forced me to reverse the orientation of my Sunbeam heatsink; not a big deal but it did prove to be an airflow challenge when overclocking this specimen.
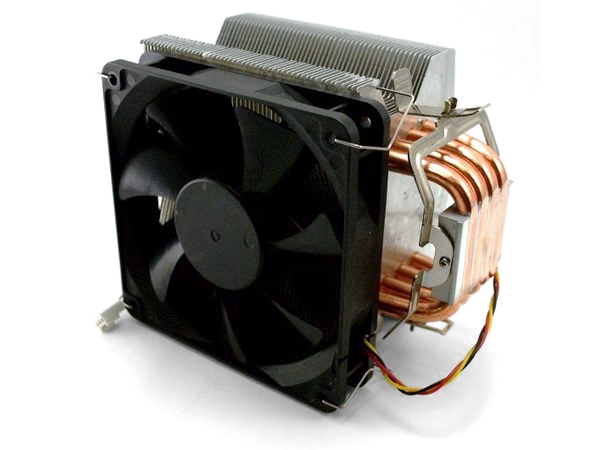
To keep the Vishera cores cool, I use a Sunbeamtech cooler for maximum air-cooling capacity across all of my AMD test platforms. I used Zalman’s ZM-STG1 thermal paste.
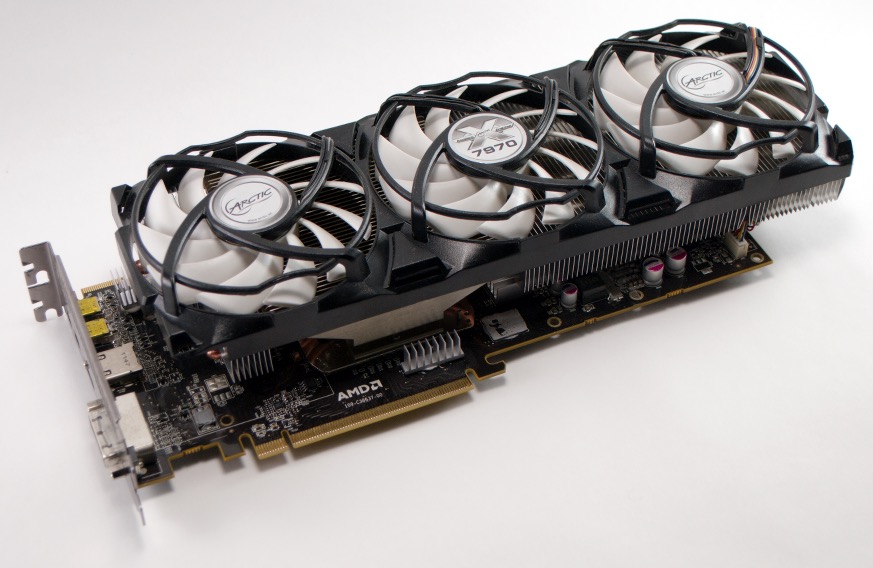
It isn't the latest generation, but this Radeon HD 7970 GPU has enough performance to play the latest games at decent settings. It is heavy and draws a lot of power, which makes it a good candidate for testing the power subsystem of my test samples.
Get Tom's Hardware's best news and in-depth reviews, straight to your inbox.
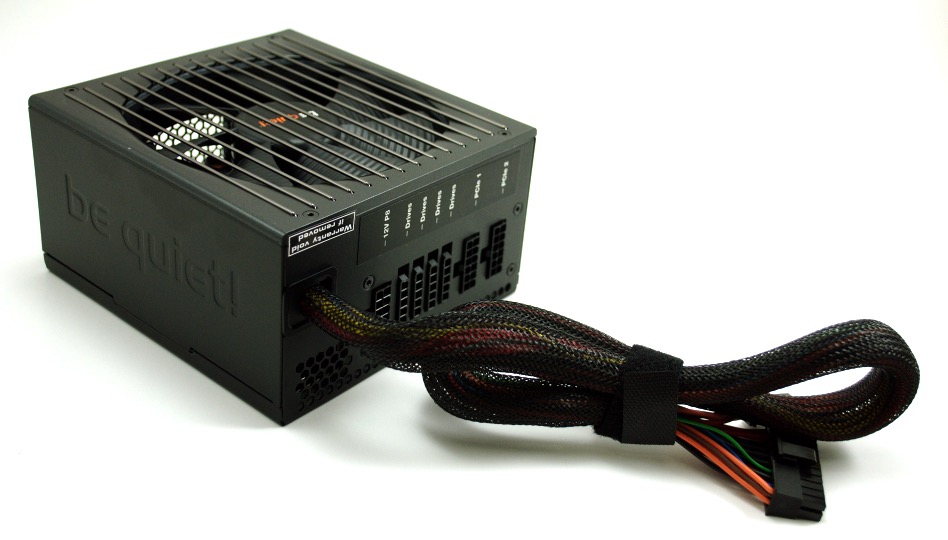
Even with these power-hungry components, this be quiet! 500W 80 Plus Gold-certified power supply has no problem keeping this system running with constant power while running the standard test suite and individual stress tests. However, these components will draw a little more than 500W of power when running both Prime95 and FurMark. Note to self: when performing a 100% stress test, get more power!
The Mushkin Chronos SSD is still running strong in this AMD test system. We are still finalizing our Windows 10 test image across our review teams so I am still using the same hard disk image from my previous review. However, I did implement two game benchmarks to please the crowd and provide some comparable reference points.
Test System Configuration
| Test System Configuration | |
|---|---|
| Sound | Integrated HD Audio |
| Network | Integrated Gigabit Networking |
| Software | |
| Graphics | AMD |
| Chipset | AMD 970 & SB950 |
Benchmark Settings
| Synthetic Benchmarks And Settings | |
|---|---|
| PCMark 8 | Version: 1.0 Work, Home, and Creative Benchmarks |
| SiSoftware Sandra | Version 2014.02.20.10 CPU Arithmetic, Multimedia, Cryptography File System Bandwidth Memory Bandwidth |
| 3D Tests ansd Settings | |
| 3DMark 11 | Basic Edition, Version 1.0.5.0, Default Preset |
| 3DMark 13 | Version 1.1 Test Set 1: Firestrike, 1920x1080, Default Preset Test Set 2: Firestrike Extreme, 2560x1440 Default Preset |
| Application Tests and Settings | |
| TotalCode Studio 2.5 | Version: 2.5.0.10677 MPEG-2 to H.264, MainConcept H.264/AVC Codec, 28 sec HDTV 1920x1080 (MPEG-2), Audio: MPEG-2 (44.1 kHz, Two-Channel, 16-Bit, 224 Kb/s), Codec: H.264 Pro, Mode: PAL 50i (25 FPS), Profile: H.264 BD HDMV |
| HandBrake CLI | Version: 0.9.9 Video from Canon Eos 7D (1920x1080, 25 FPS) 1 Minutes 22 Seconds Audio: PCM-S16, 48,000 Hz, Two-Channel, to Video: AVC1 Audio: AAC (High Profile) |
| iTunes | Version 11.0.4.4 Audio CD (Terminator II SE), 53 minutes, default AAC format |
| LAME MP3 | Version 3.98.3 Audio CD "Terminator II SE", 53 min, convert WAV to MP3 audio format, Command: -b 160 --nores (160 Kb/s) |
| Adobe After Effects | Version 12.0.0.404 Create Video which includes 3 Streams, 210 Frames, Render Multiple Frames Simultaneosly |
| Adobe Photoshop CC | Version 14.0 Test 1: CPU, Test 2: OpenCL Filter 15.7 MB TIF Image: Radial Blur, Shape Blur, Median, Polar Coordinates |
| Adobe Premiere CS6 | Version 6.0.0.0 6.61 GB MXF Project to H.264 to H.264 Blu-ray, Output 1920x1080, Maximum Quality |
| ABBYY FineReader 10 | Version 10.0.102.95 Read PDF save to Doc, Source: Political Economy (J. Broadhurst 1842) 111 Pages |
| Adobe Acrobat XI | Version 11.0.0 Print PDF from 115 Page PowerPoint, 128-bit RC4 Encryption |
| Blender | Version 2.68a Helicopter 2.6.1 Scene Render DirectX 11, Low Detail, 1920x1080, No AA, No Tesselation |
| Autodesk 3ds Max 2013 | Version 5.0.39.0 Space Flyby Mentalray, 248 Frames, 1440x1080 |
| 7-Zip | Version 9.30THG-Workload (1.3 GB) to .7z, command line switches "a -t7z -r -m0=LZMA2 -mx=5" |
| WinRAR | Version 5.00THG-Workload (1.3 GB) to RAR, command line switches "winrar a -r -m3" |
| WinZIP | Version 18.0 Test 1: OpenCL, Test 2: CPU THG-Workload (1.3 GB) to ZIP, command line switches "-a -ez -p -r" |
| Game Tests and Settings | |
| Fallout 4 | v 1.4.132.0.0 Ultra Preset |
| Battlefield 4 | Version: 0.9.9 Video from Canon Eos 7D (1920x1080, 25 FPS) 1 Minutes 22 Seconds Audio: PCM-S16, 48,000 Hz, Two-Channel, to Video: AVC1 Audio: AAC (High Profile) |
Comparison Motherboards
Overclocking
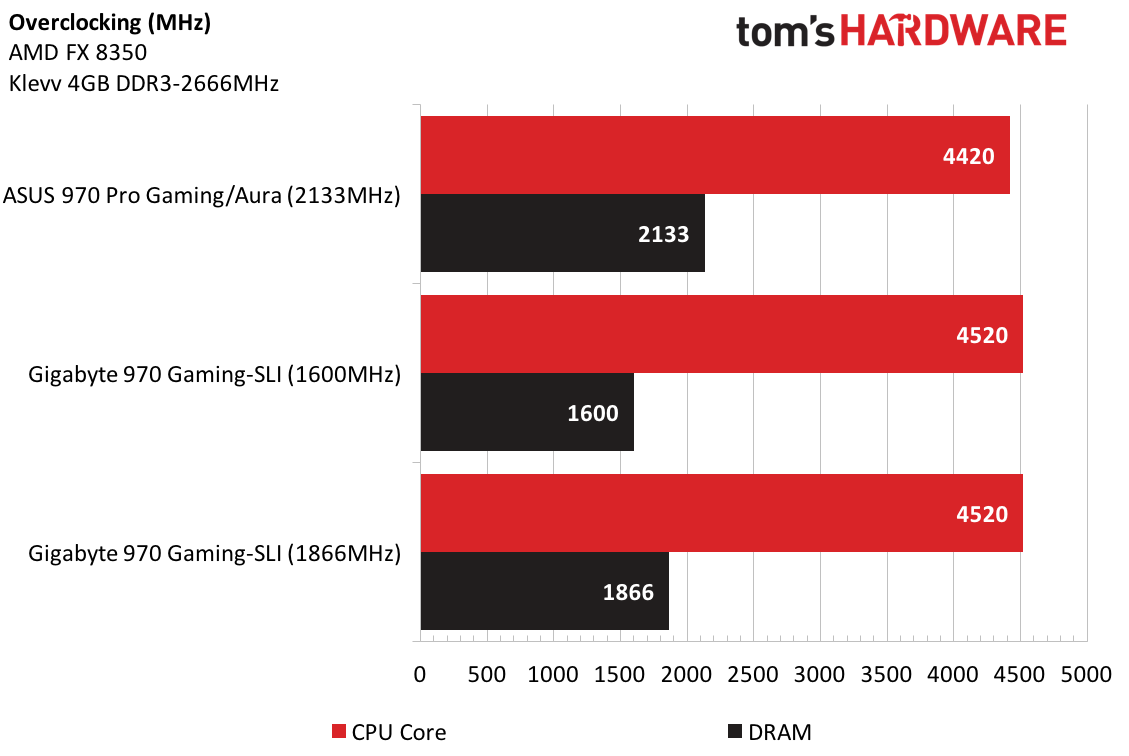
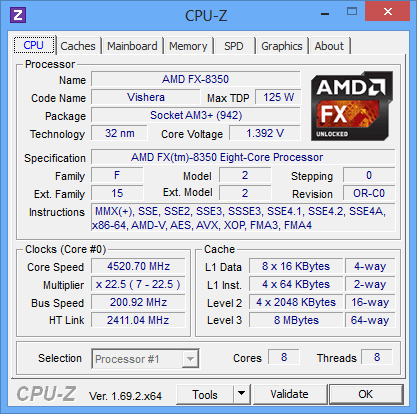
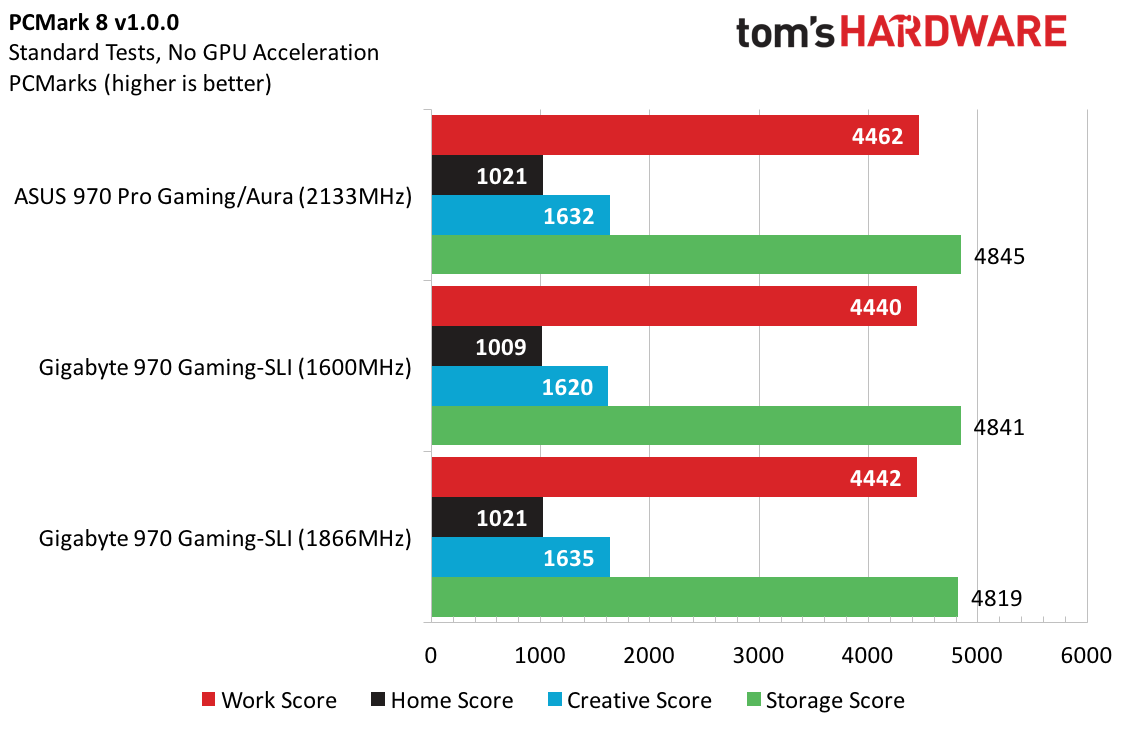
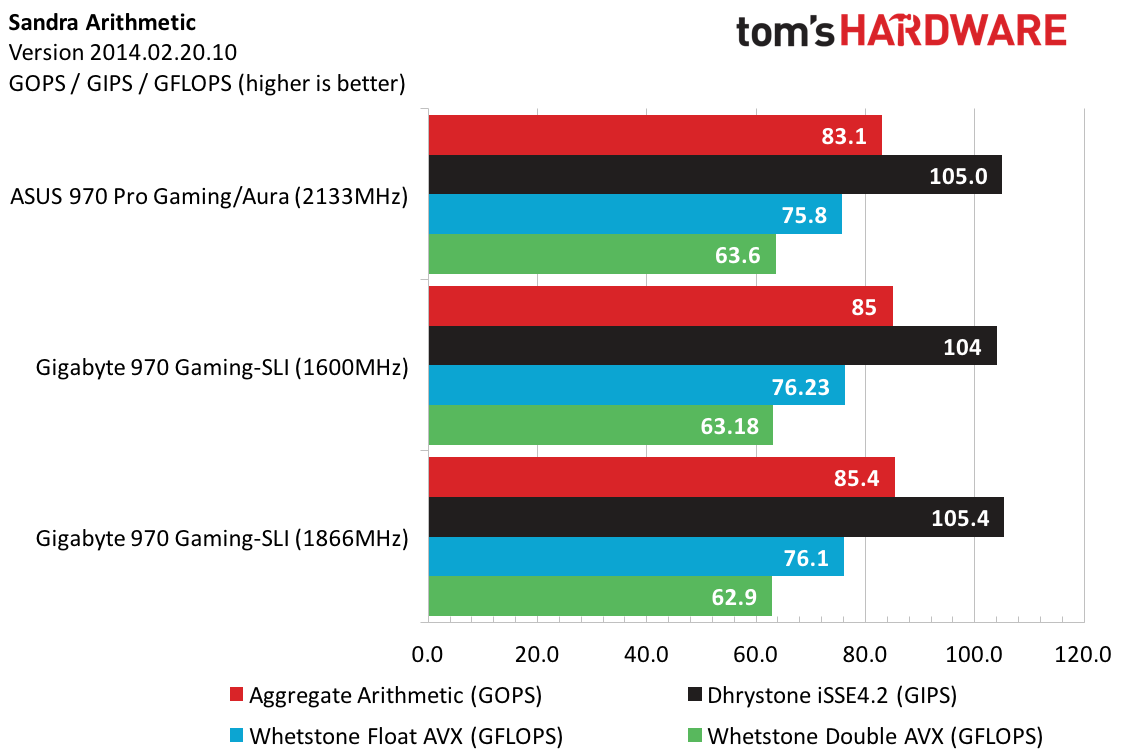
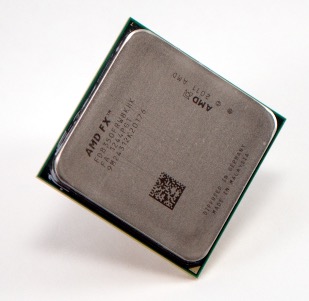
I am switching up the order of topics to get this off my chest. I finally built up the courage to hit 4520MHz on my sample AMD FX-8350. For those wondering why I didn't push it faster, the UEFI handcuffed me a bit. Traditionally, I like to walk my way up in frequency while maintaining reasonable temperatures and voltages. In this overclocking session, I started by increasing the multiplier to 21.5, resulting in a frequency of 4320MHz while running Prime95 for 12 hours without errors.
I bumped the multiplier to 22 and began getting Prime95 software errors, not calculation errors. Switching to the medium load line setting fixed the software errors, but Prime95 calculations began hitting rounding errors. Rounding errors still continued after changing the voltage to +0.025V. Decreasing voltage and then engaging the high load line setting did not help. Increasing the voltage back to the +0.025V setting while using the high load line setting finally gave me a stable 4420MHz overclock, resulting in a processor temperature 38C above ambient (61C) and a 321W power draw.
Since I was in a general realm of safety, I decided to go for 4500MHz, but the system failed to boot. Going with the next increment in voltage through the UEFI resulted in a +0.050V setting, and put me right at 1.512V according to CPU-Z. The overclock was stable for eight hours of Prime95 and only increased my temperature to 42C above ambient (or 65C) and 362W system power.
Normally, I would never recommend running a system at such high voltage for long periods, but I was pleased to see the overclock performance and still maintain reasonable temperatures and power measurements.
So here’s a conversation starter: would you rather see voltage adjustments in +0.0xx increments or in discrete voltage setting values? Not knowing what a processor’s voltage is, it might be hazardous to increase it too high while changing the load line setting. Not knowing what each of the load line settings means could also lead users towards damaged equipment. With such large granularity (~25mV) you could jump from an almost-stable setting to a damaging setting in just one increment. I like the Asus implementation and granularity for this task, but the Gigabyte certainly did its job.
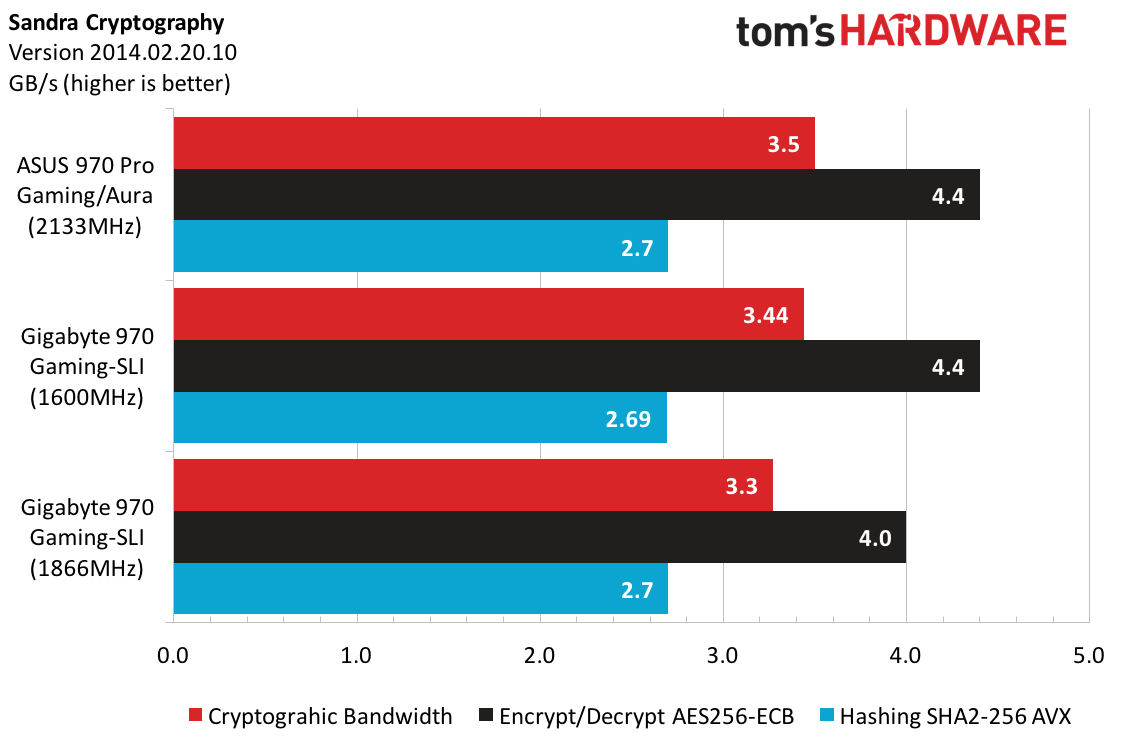
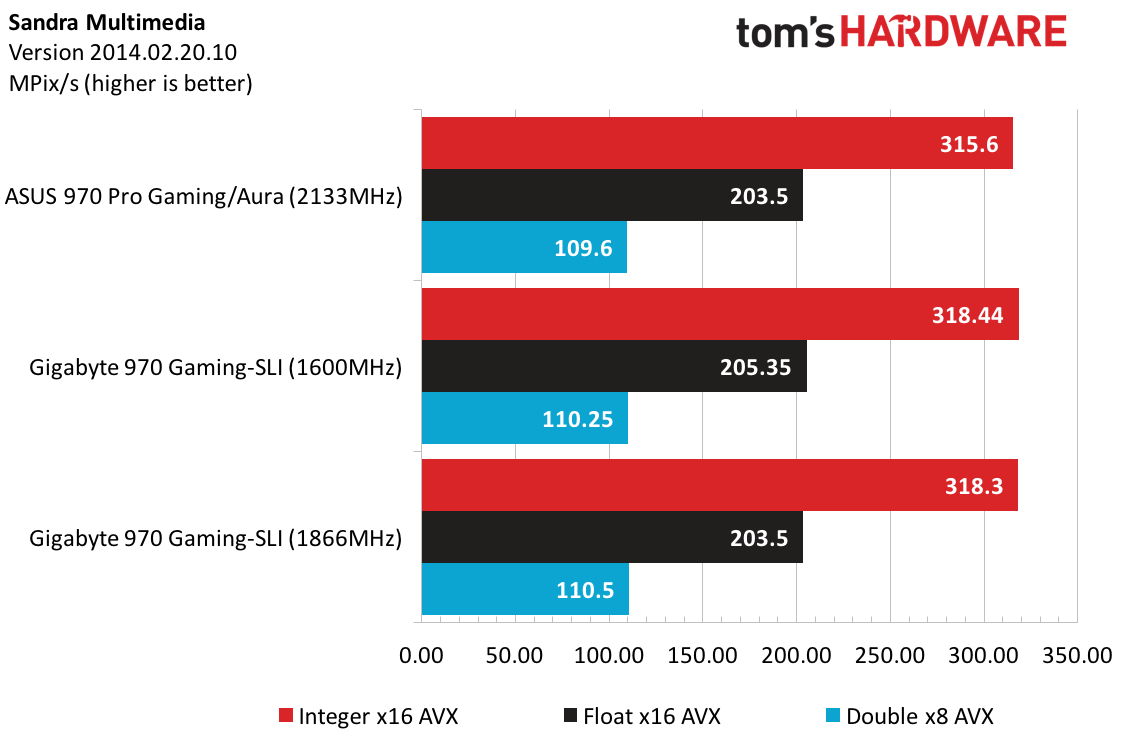
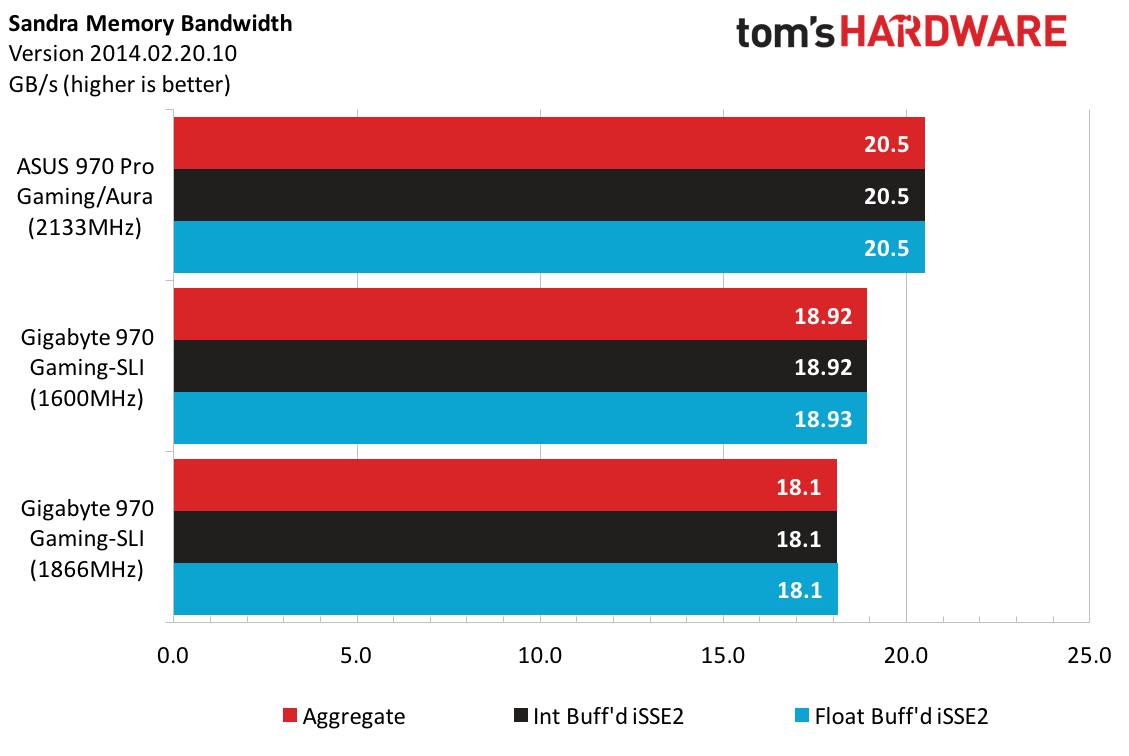
Overclocking memory was a sour experience, however. I might have been spoiled with the Asus board when overclocking the Klevv memory modules. With that sample, I was able to easily just switch to DDR3-2133 MHz and run with my system fully populated. After attempting to do the same with the Gigabyte GA-970-Gaming SLI, I just could never reach anything above DDR3-1600MHz when fully populated. Gigabyte technical support pointed me to their memory compatibility chart and sure enough, those speeds are just not compatible with fully populated configurations.
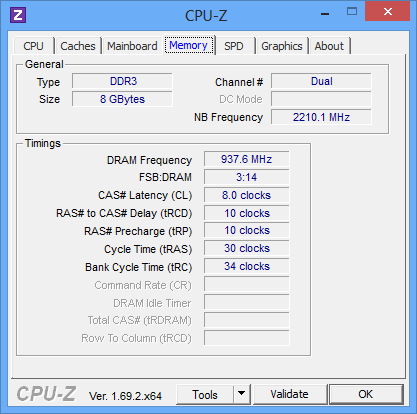
To pour salt in the wound, Gigabyte also pointed me to this AMD Frequency Guide, showing that 1600MHz is the fastest officially supported speed for fully-populated, four-slot motherboards. Even after removing two of the modules (data will be marked appropriately in the charts), DDR3-1866MHz 8-10-10-30 was the fastest I could tweak these modules.
To compound the confusion, configuration in the UEFI was very disjointed. I had to set the XMP profile, then manually tweak the memory multiplier to get the settings to gel consistently. Manually increasing the DRAM voltage and then increasing the frequency multiplier would not work. I could also change the DRAM frequencies from two different option menus, which led me to think that sometimes I wasn’t setting what I thought I was setting. Was the performance difference worth the hassle? No.
Current page: How We Test
Prev Page Specification And Features Next Page Performance, Value And Conclusion-
Joker41NAM Maybe I missed something, but it appears to say that you're going to compare it to the MSI 990FXA Gaming, but then none of the graphs appear to have that MB.Reply -
pjc6281 I appreciate your hard work but why are we still reviewing old dog platforms like this. I just got rid of my 1090T AMD Processor from many moons ago and upgraded to a Skylake that uses a fraction of the power and causes less heat. AMD needs to get a new flagship processor out with a better fab process asap....or go belly up.. CMON AMDReply -
Anarkie13 It's getting to be a very sad time. AMD needs to get back into the game. In a few more years, unless they do, Intel will have a complete monopoly and advances will be minimal at best.Reply
I'm a huge fan of competition in technology. That's the best way for technology to advance. -
Krnt Thanks for the reviews, these newly released motherboards for AMD doesn't seem to have anything better in terms of performance compared to the already known boards on the market.Reply
However some of those seem to have good value. -
TheTerk Reply
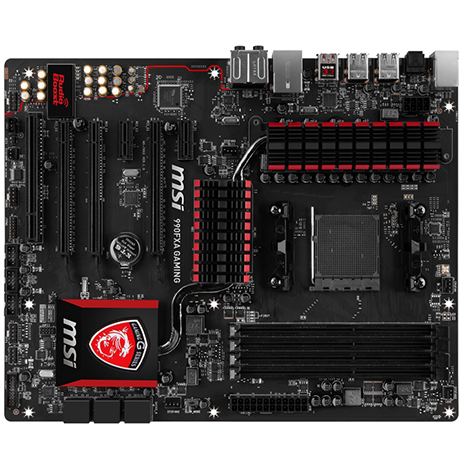
The comparison is more from a specification perspective, but feel free to open my MSI article and read that :)18276467 said:Maybe I missed something, but it appears to say that you're going to compare it to the MSI 990FXA Gaming, but then none of the graphs appear to have that MB. -
g-unit1111 Reply18276670 said:I appreciate your hard work but why are we still reviewing old dog platforms like this. I just got rid of my 1090T AMD Processor from many moons ago and upgraded to a Skylake that uses a fraction of the power and causes less heat. AMD needs to get a new flagship processor out with a better fab process asap....or go belly up.. CMON AMD
I hear that. I want AMD to succeed. Intel needs AMD because competition fuels the tech industry. But AMD just keeps shooting themselves in the foot with one disaster after another. I want Polaris to be good and I want Zen to be good but I'm not holding out much hope after the disastrous release of the RX480. -
elbert I take it this is last ditch effort to sale AM3+ motherboards and CPU's before AM4 and Zen launch. During AMD's rx480 steaming event the CEO show cased the ZEN and suggested a launch window of August.Reply -
iam2thecrowe For some reason when i saw the title I was expecting SLI benchmarks....Reply
I would have liked to have seen If AMD's aging rig can still push a pair of 970's or something, or if there is a significant bottleneck. -
Onus The 970 chipset normally doesn't provide a second x16 PCIe slot; it's x4. SLI requires a minimum of x8; please clarify that this board actually supports SLI in a x8/x8 configuration. Thanks.Reply
Also, when a M.2 drive is installed (of either type), are any other ports/slots disabled?
-
TheTerk Reply
This board drives 16 lanes to the first connector if only the first PCIe x16 is installed The board then switches to an x8/x8 if a card is installed in the 2nd x16 slot. The 970's x4 dedicated lanes go to the M.2 slot. 2 PCIe x1 slots round out the config totaling in 22 PCIe gen 2 lanes available.18281551 said:The 970 chipset normally doesn't provide a second x16 PCIe slot; it's x4. SLI requires a minimum of x8; please clarify that this board actually supports SLI in a x8/x8 configuration. Thanks.
Also, when a M.2 drive is installed (of either type), are any other ports/slots disabled?
http://www.gigabyte.us/products/product-page.aspx?pid=5779&dl=1&RWD=0#sp
