How To Build A $2,500 Gaming PC
Finishing Up
Remember those LED strips we set aside at the start of our build? Now is the time to lay them out and connect those lonely extension leads.
We were pressed for time to complete the entirety of the Best Builds series, so we didn’t take much time to really calculate the best way to connect the case’s RGB LED strips to the extensions we already ran. Our method leaves the majority of the extensions plainly visible along the edge of the motherboard and out to the support beam of the case. However, we feel the placement of the lighting is ideal, so if you can figure out a better way to lay the extensions coming from the control box in order to reach these strips (perhaps feeding it through the same hole as the front-panel I/O cables), feel free to share in the comments.
Peel off the protective plastic on the LED side of each strip. Find the best way to attach one strand of lights to each of the case’s three exposed edges. Once you have your layout figured out, plug each of the RGB LED light strips into the extensions at the bottom of the case.
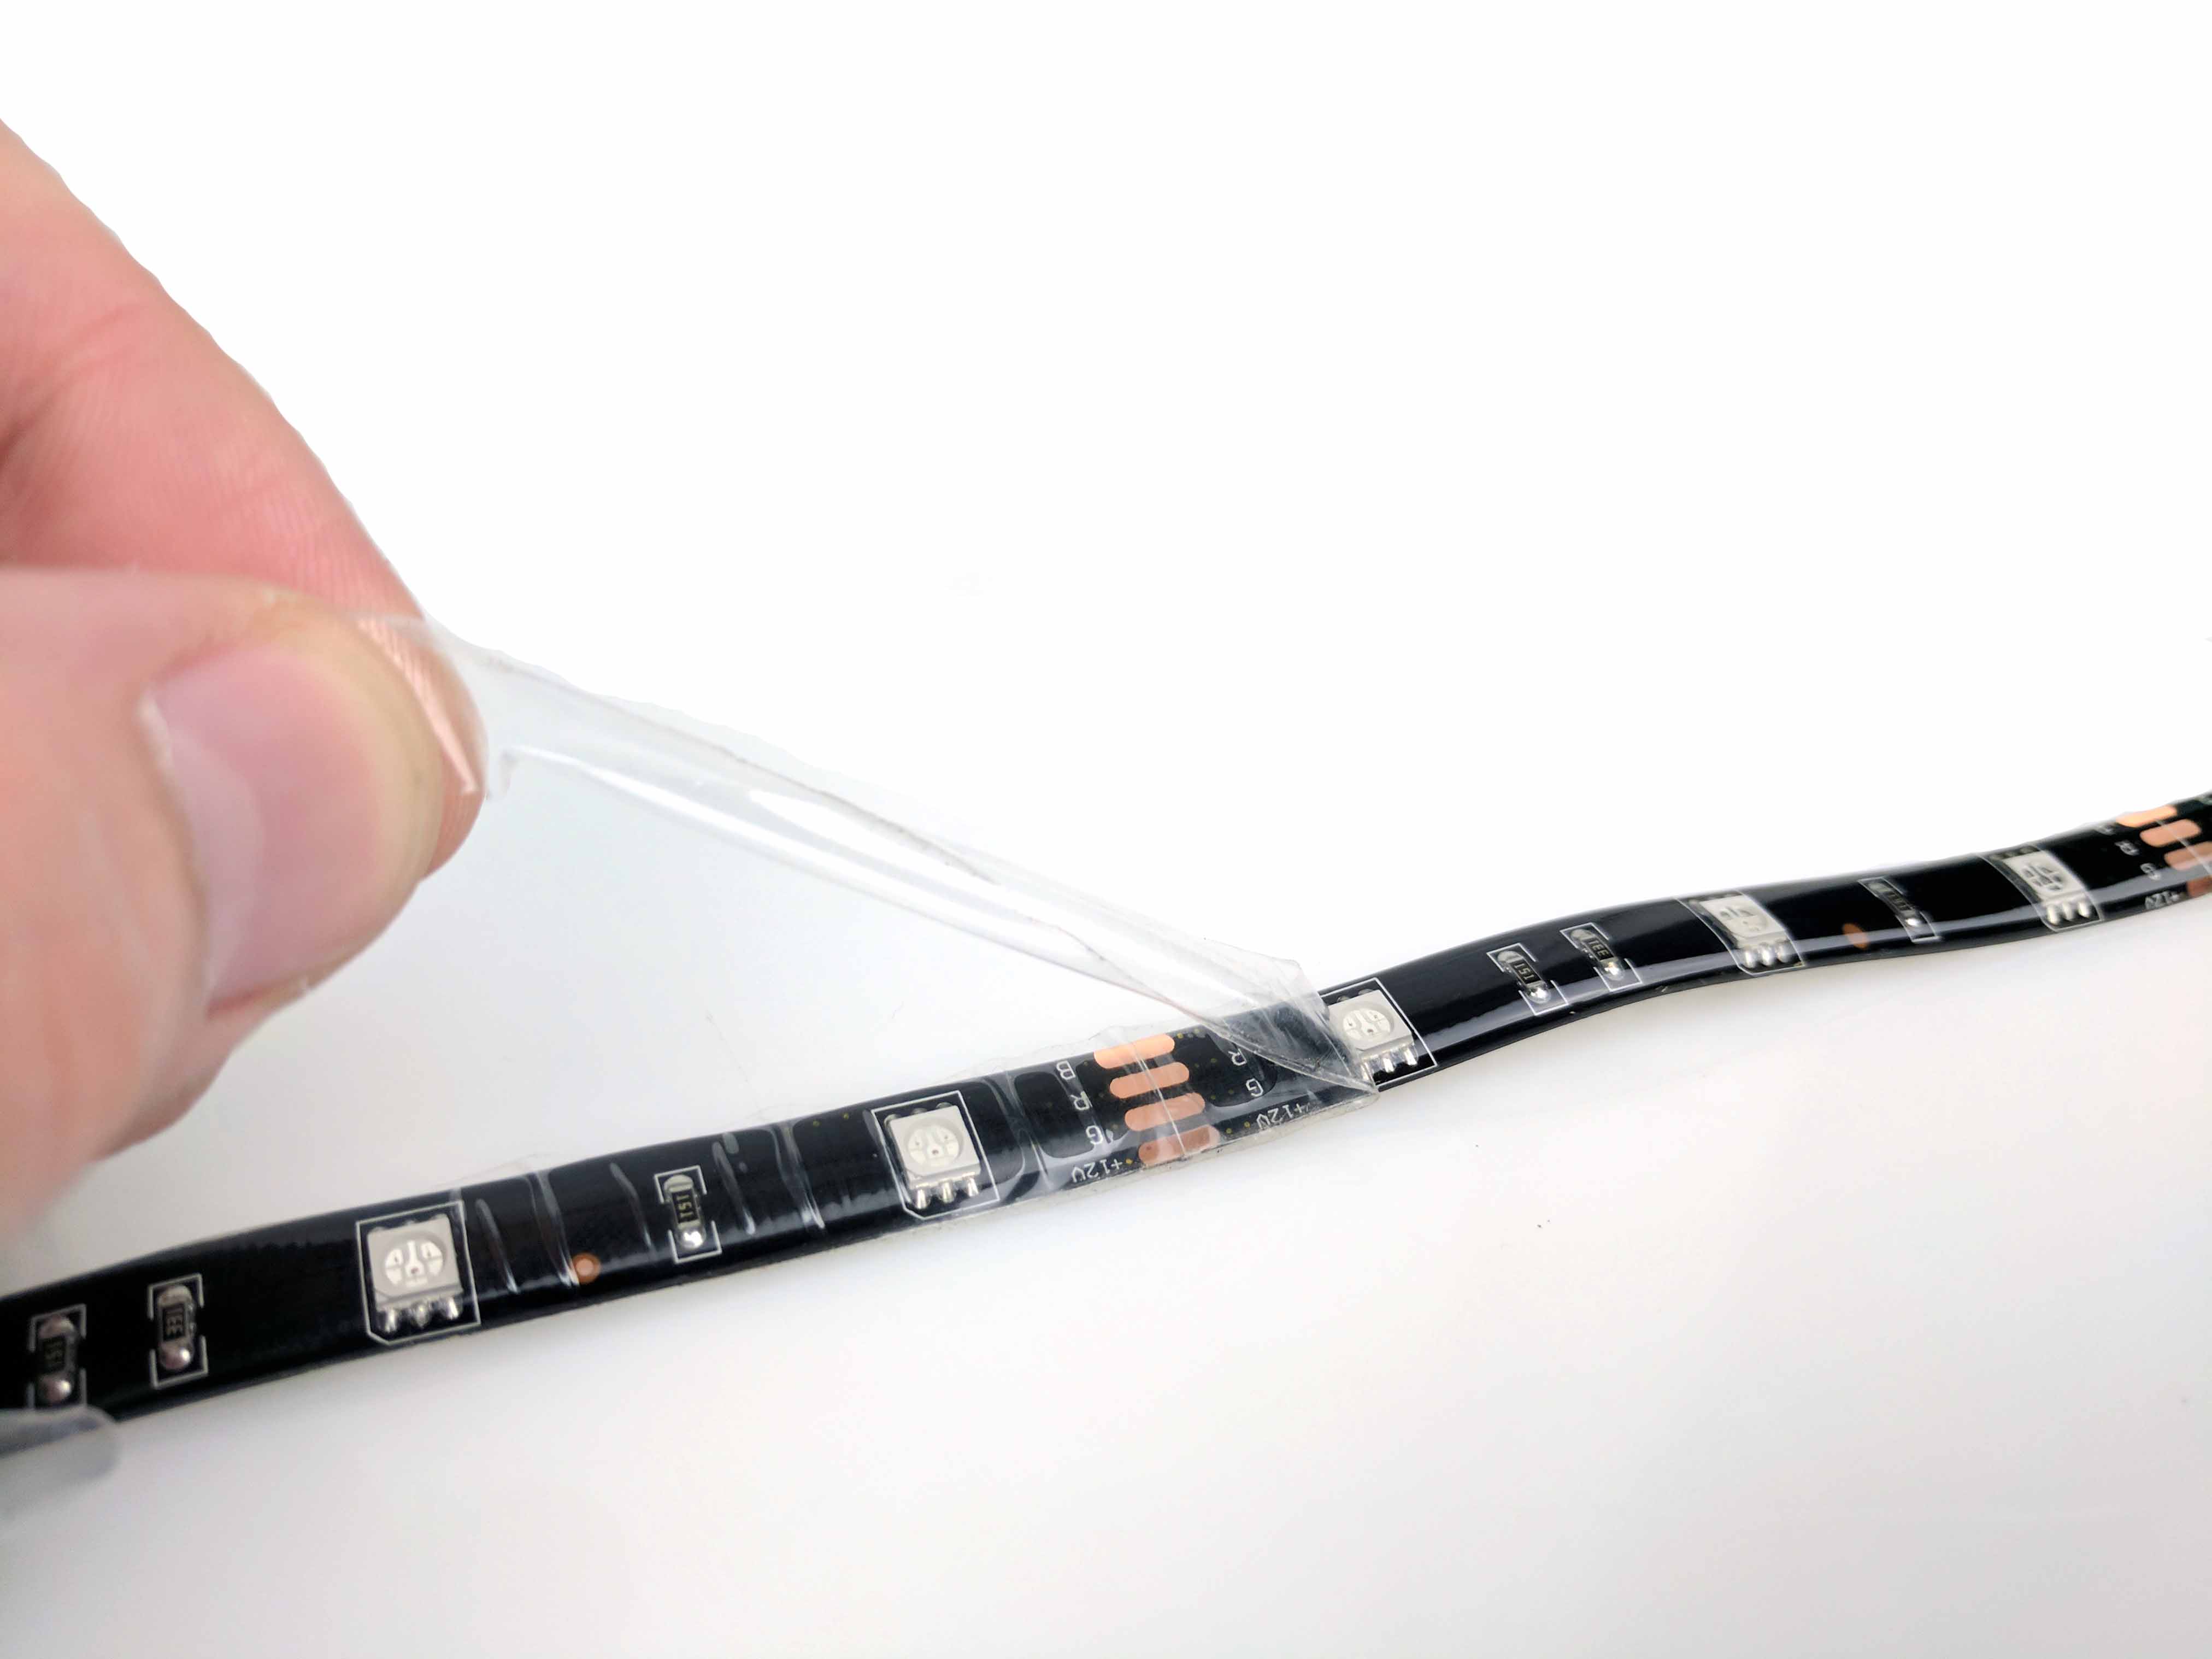
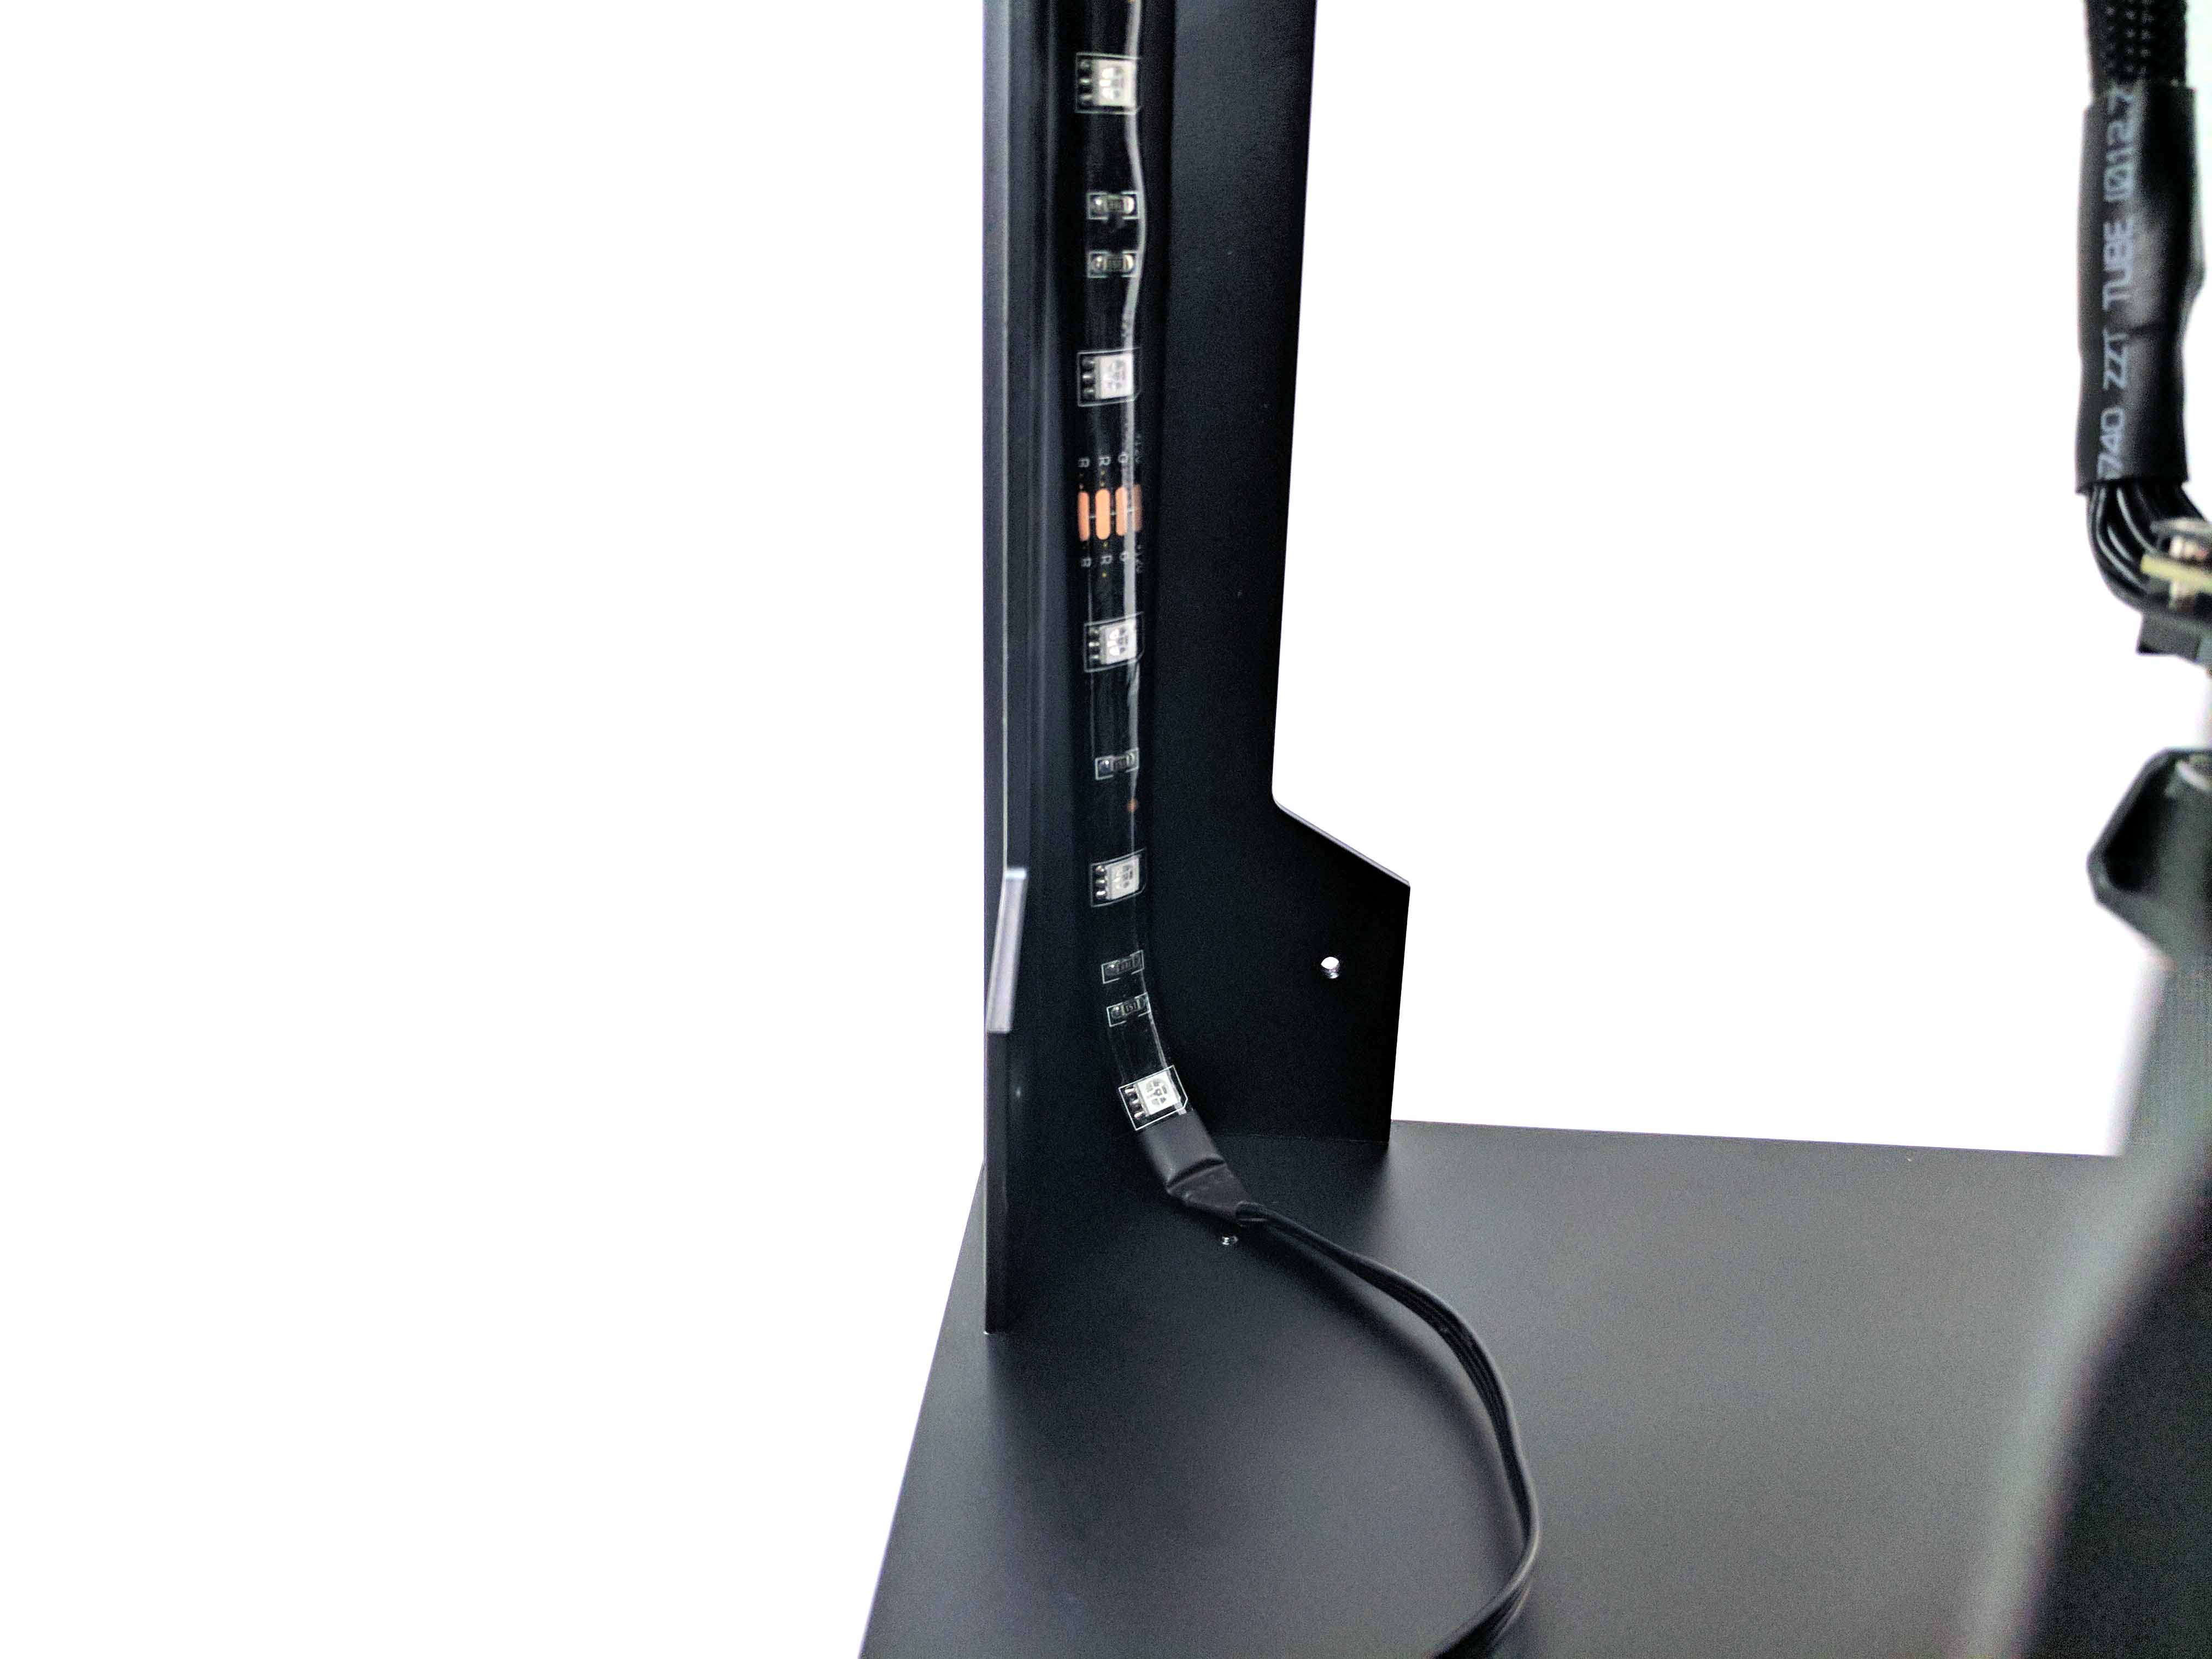
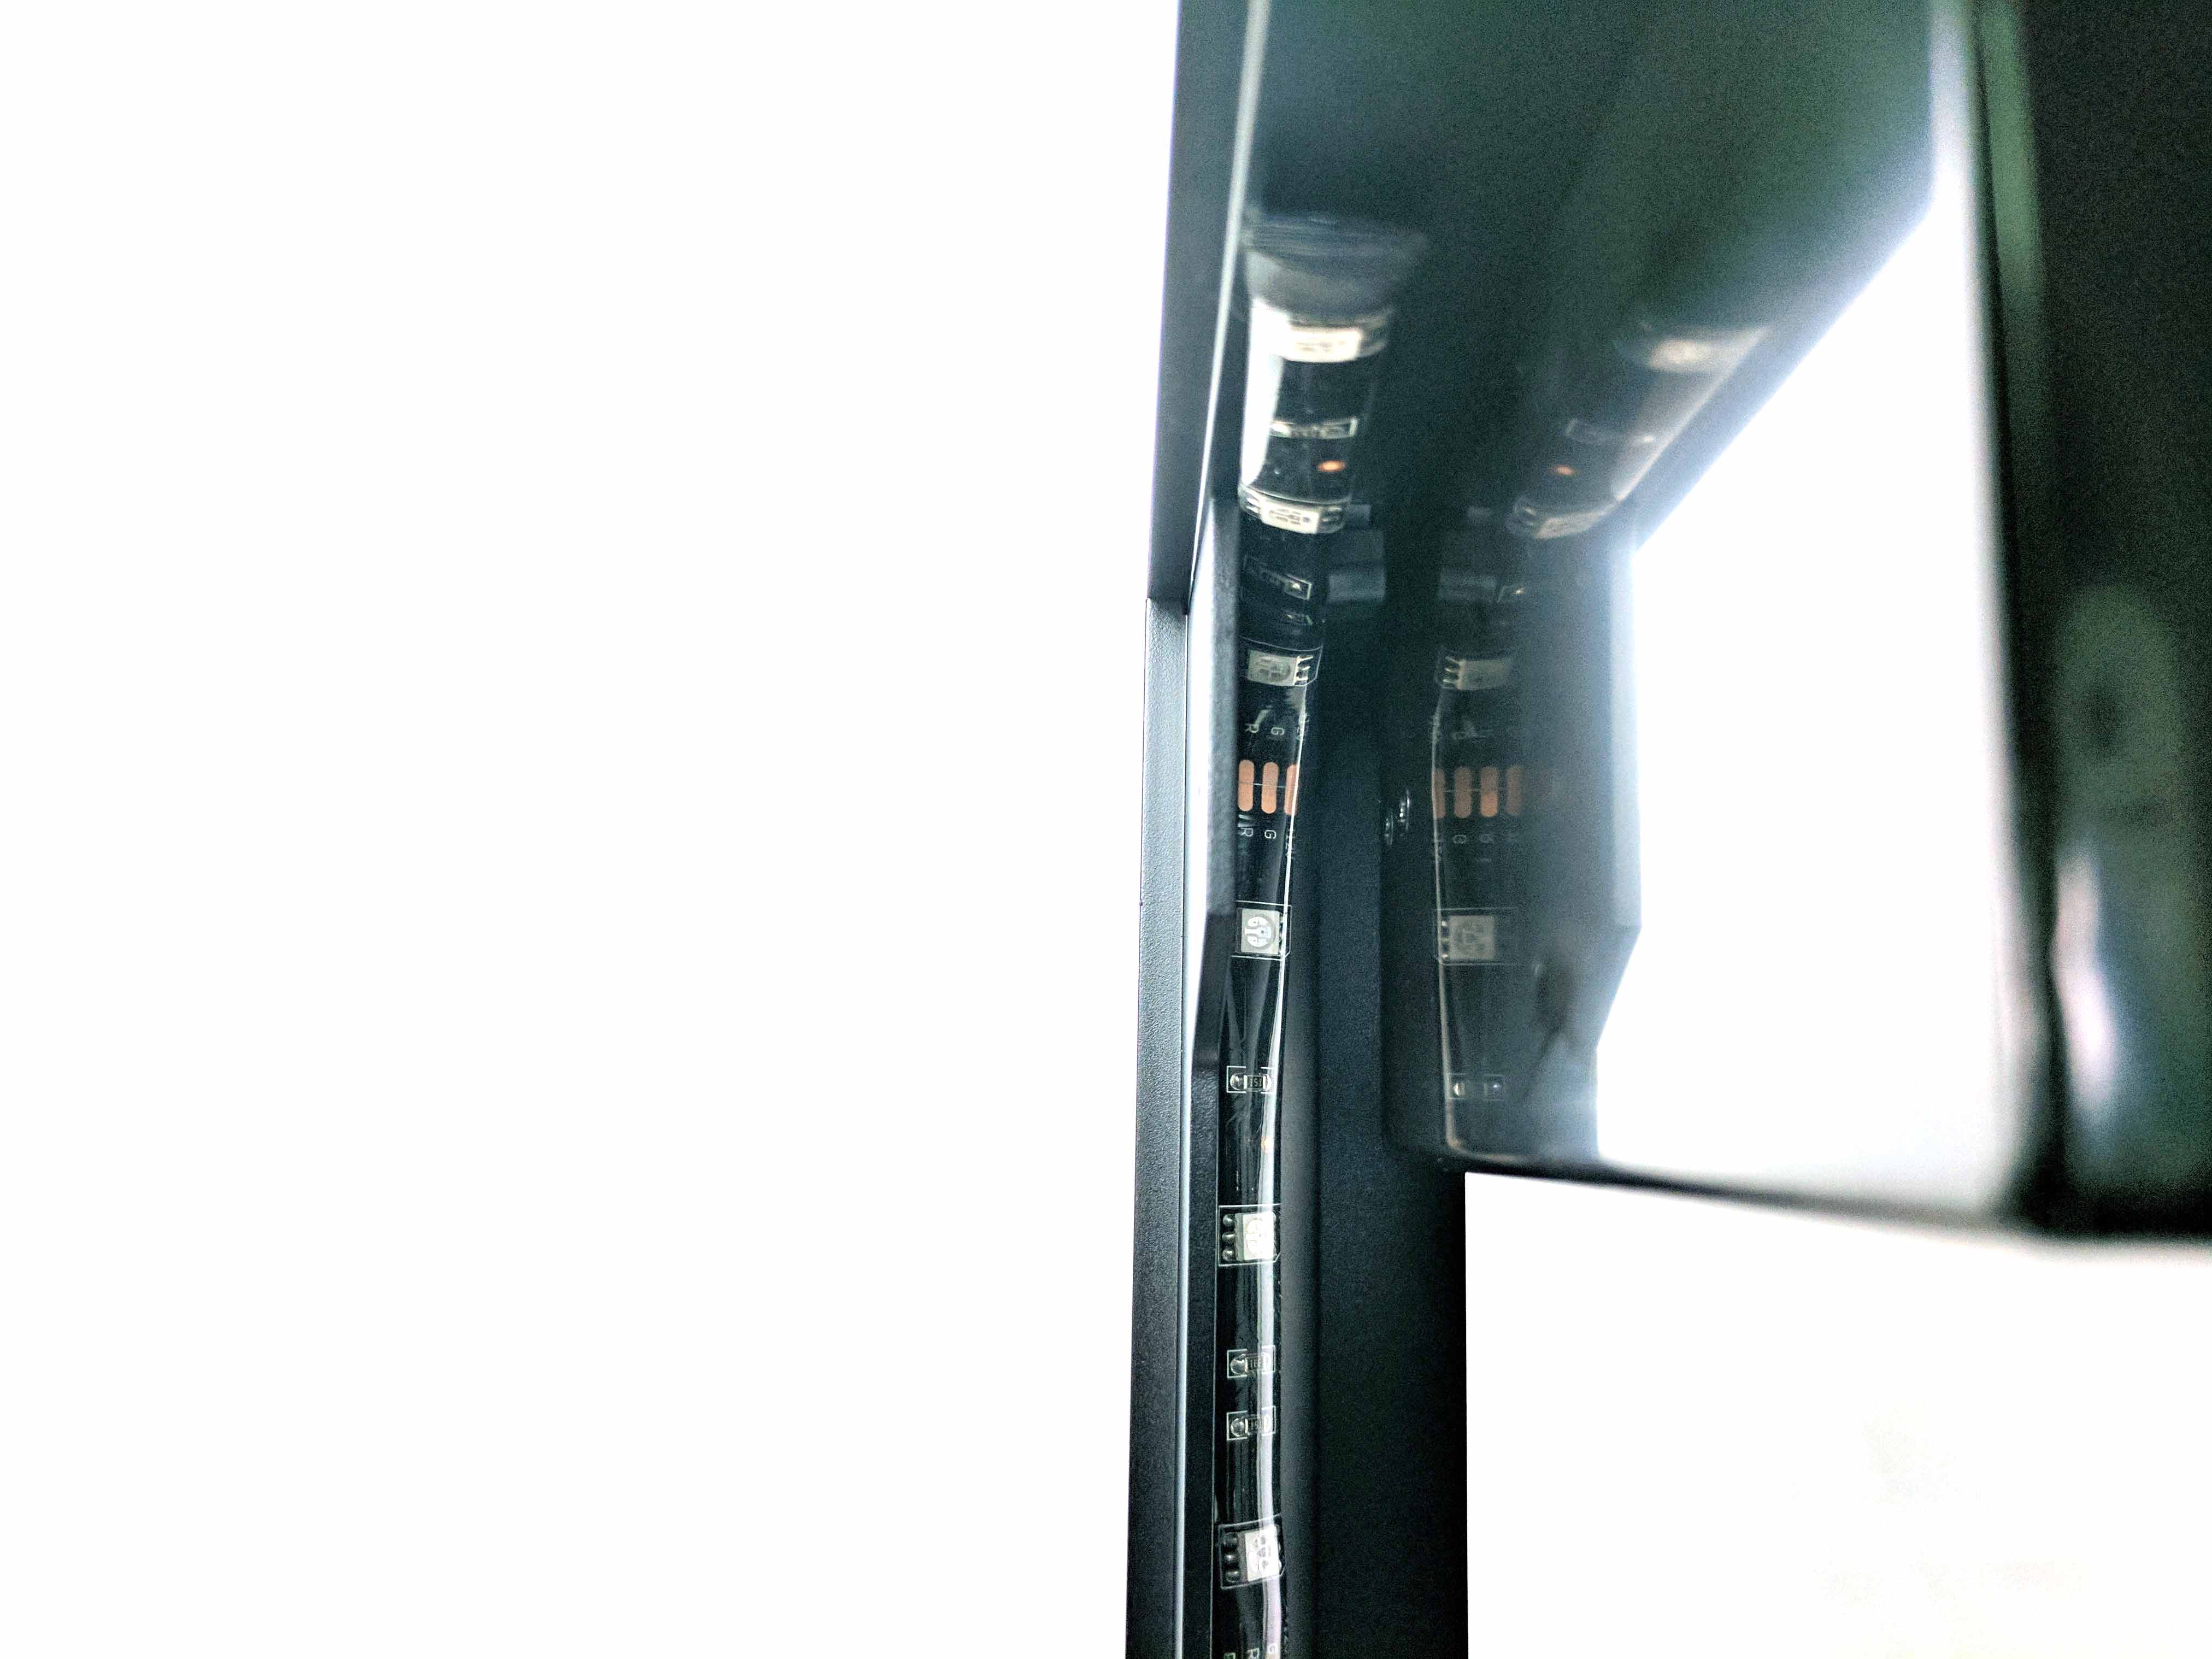
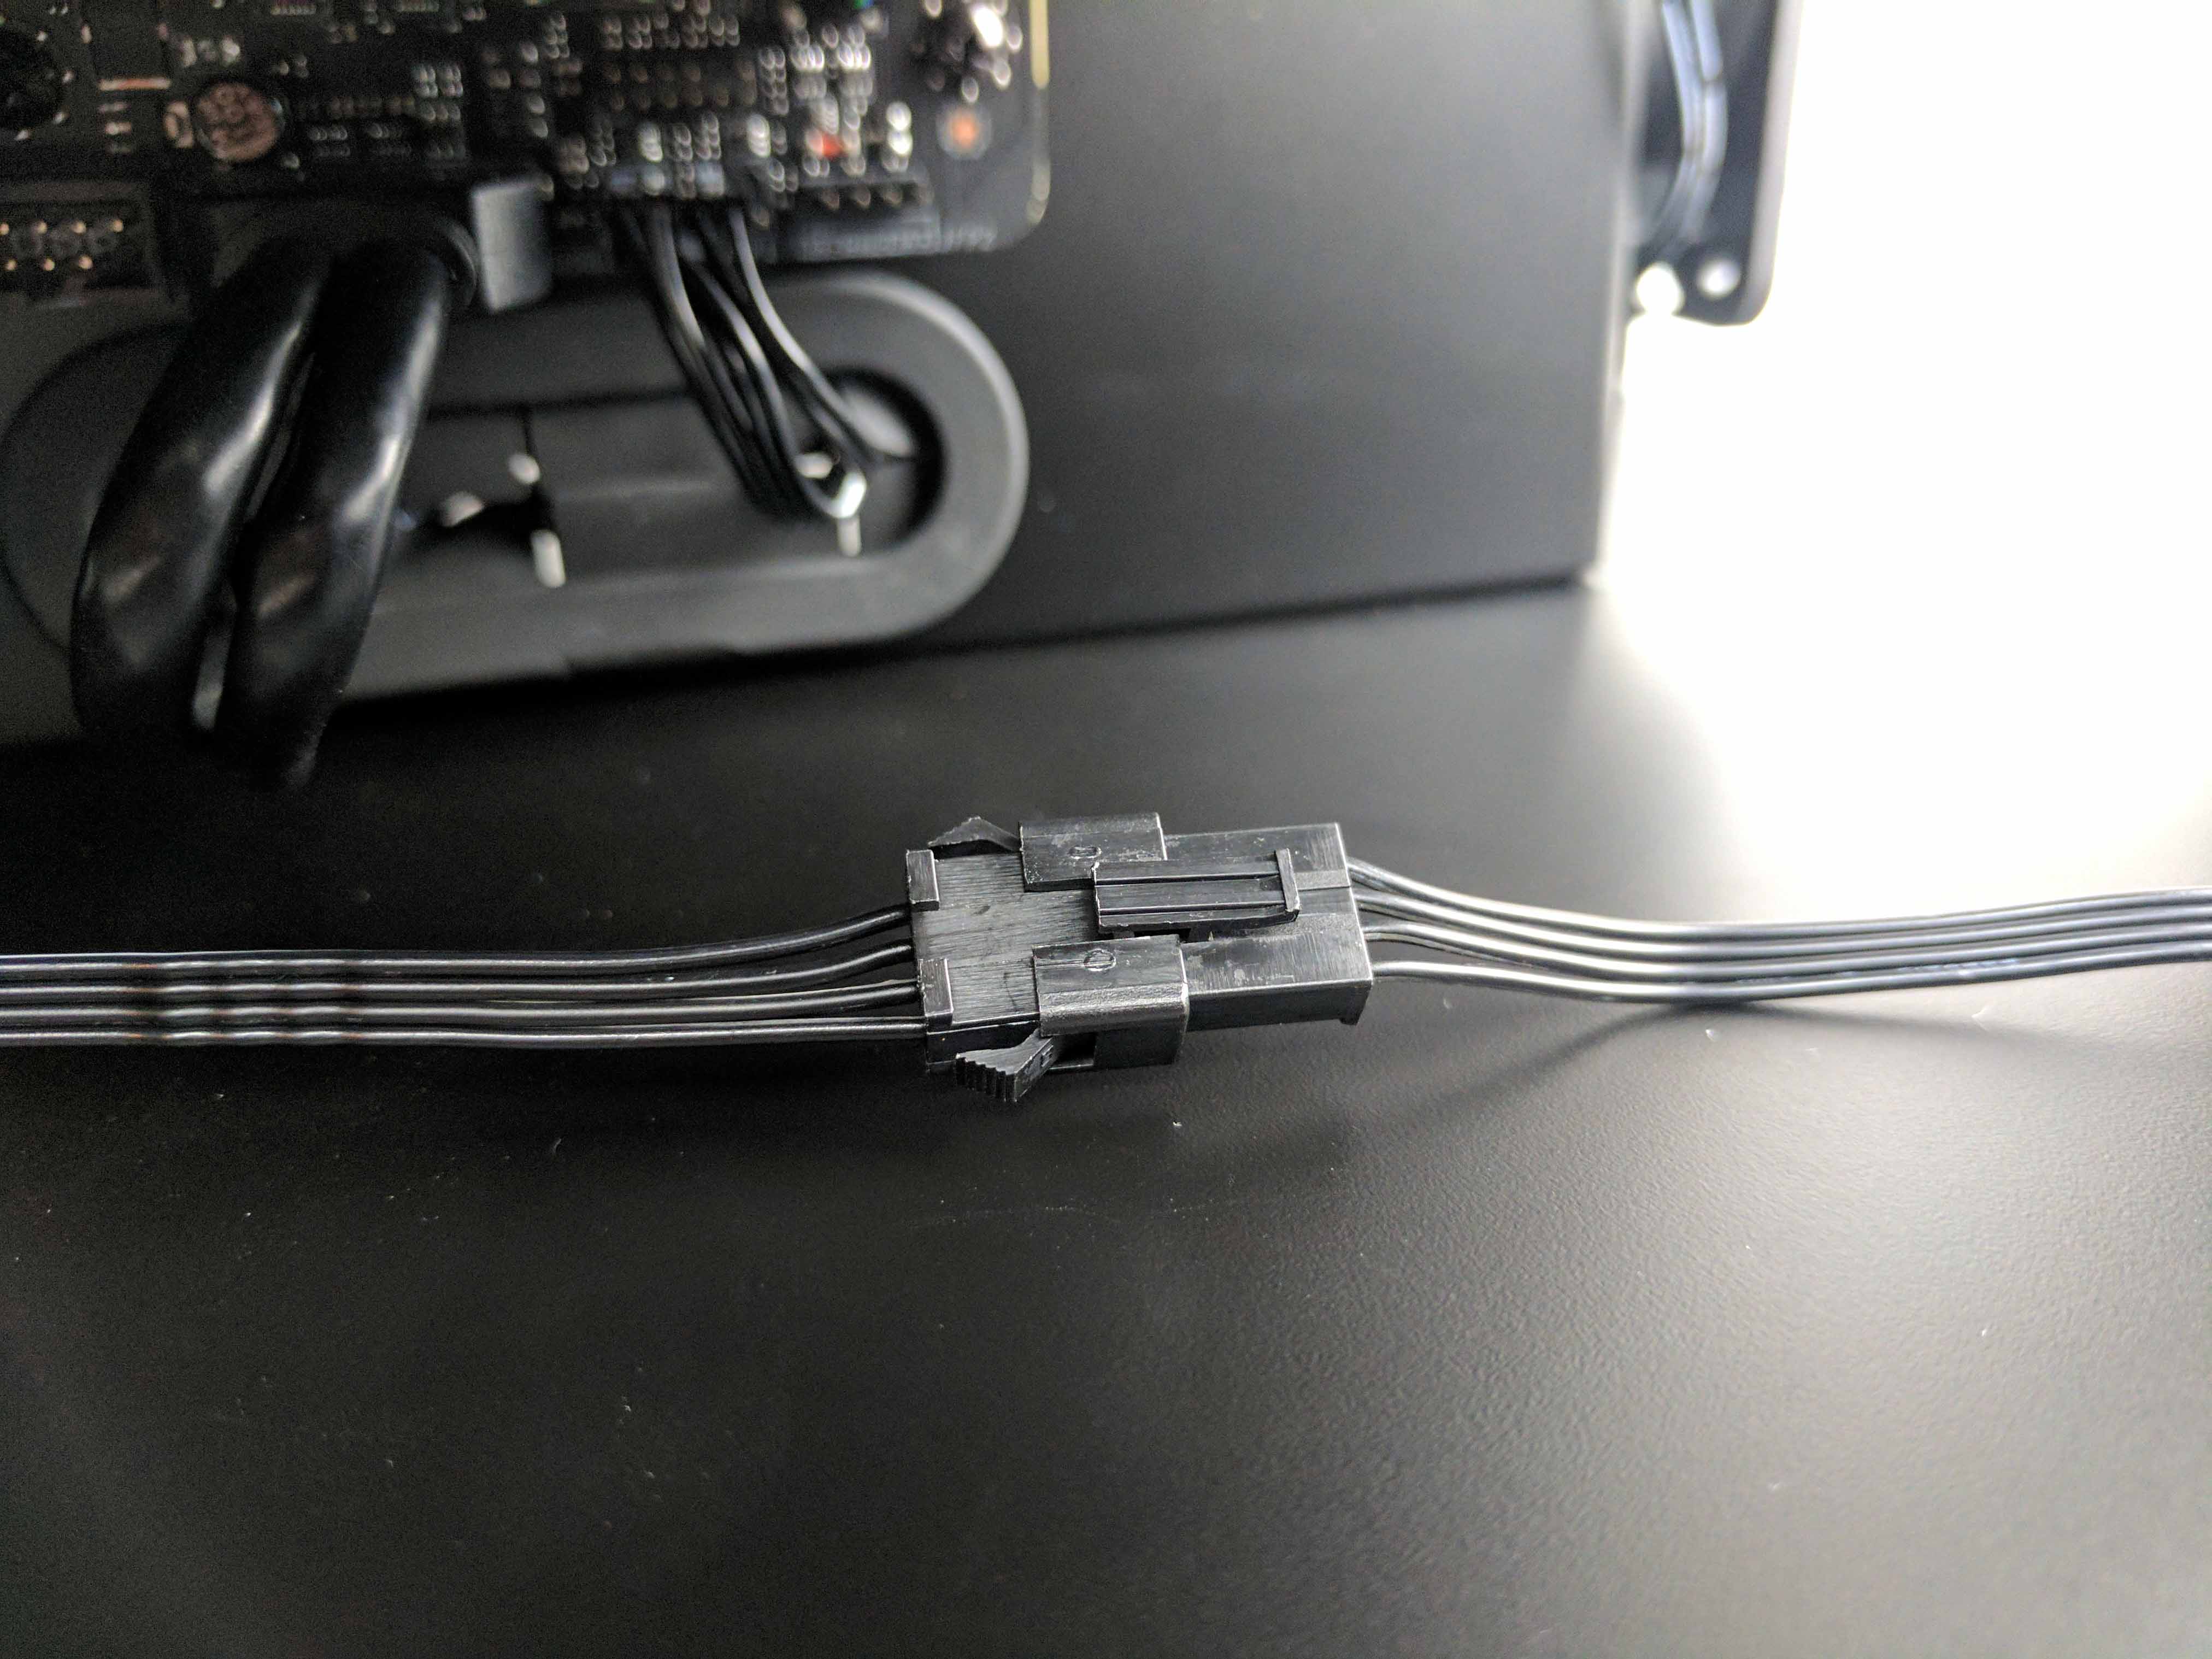
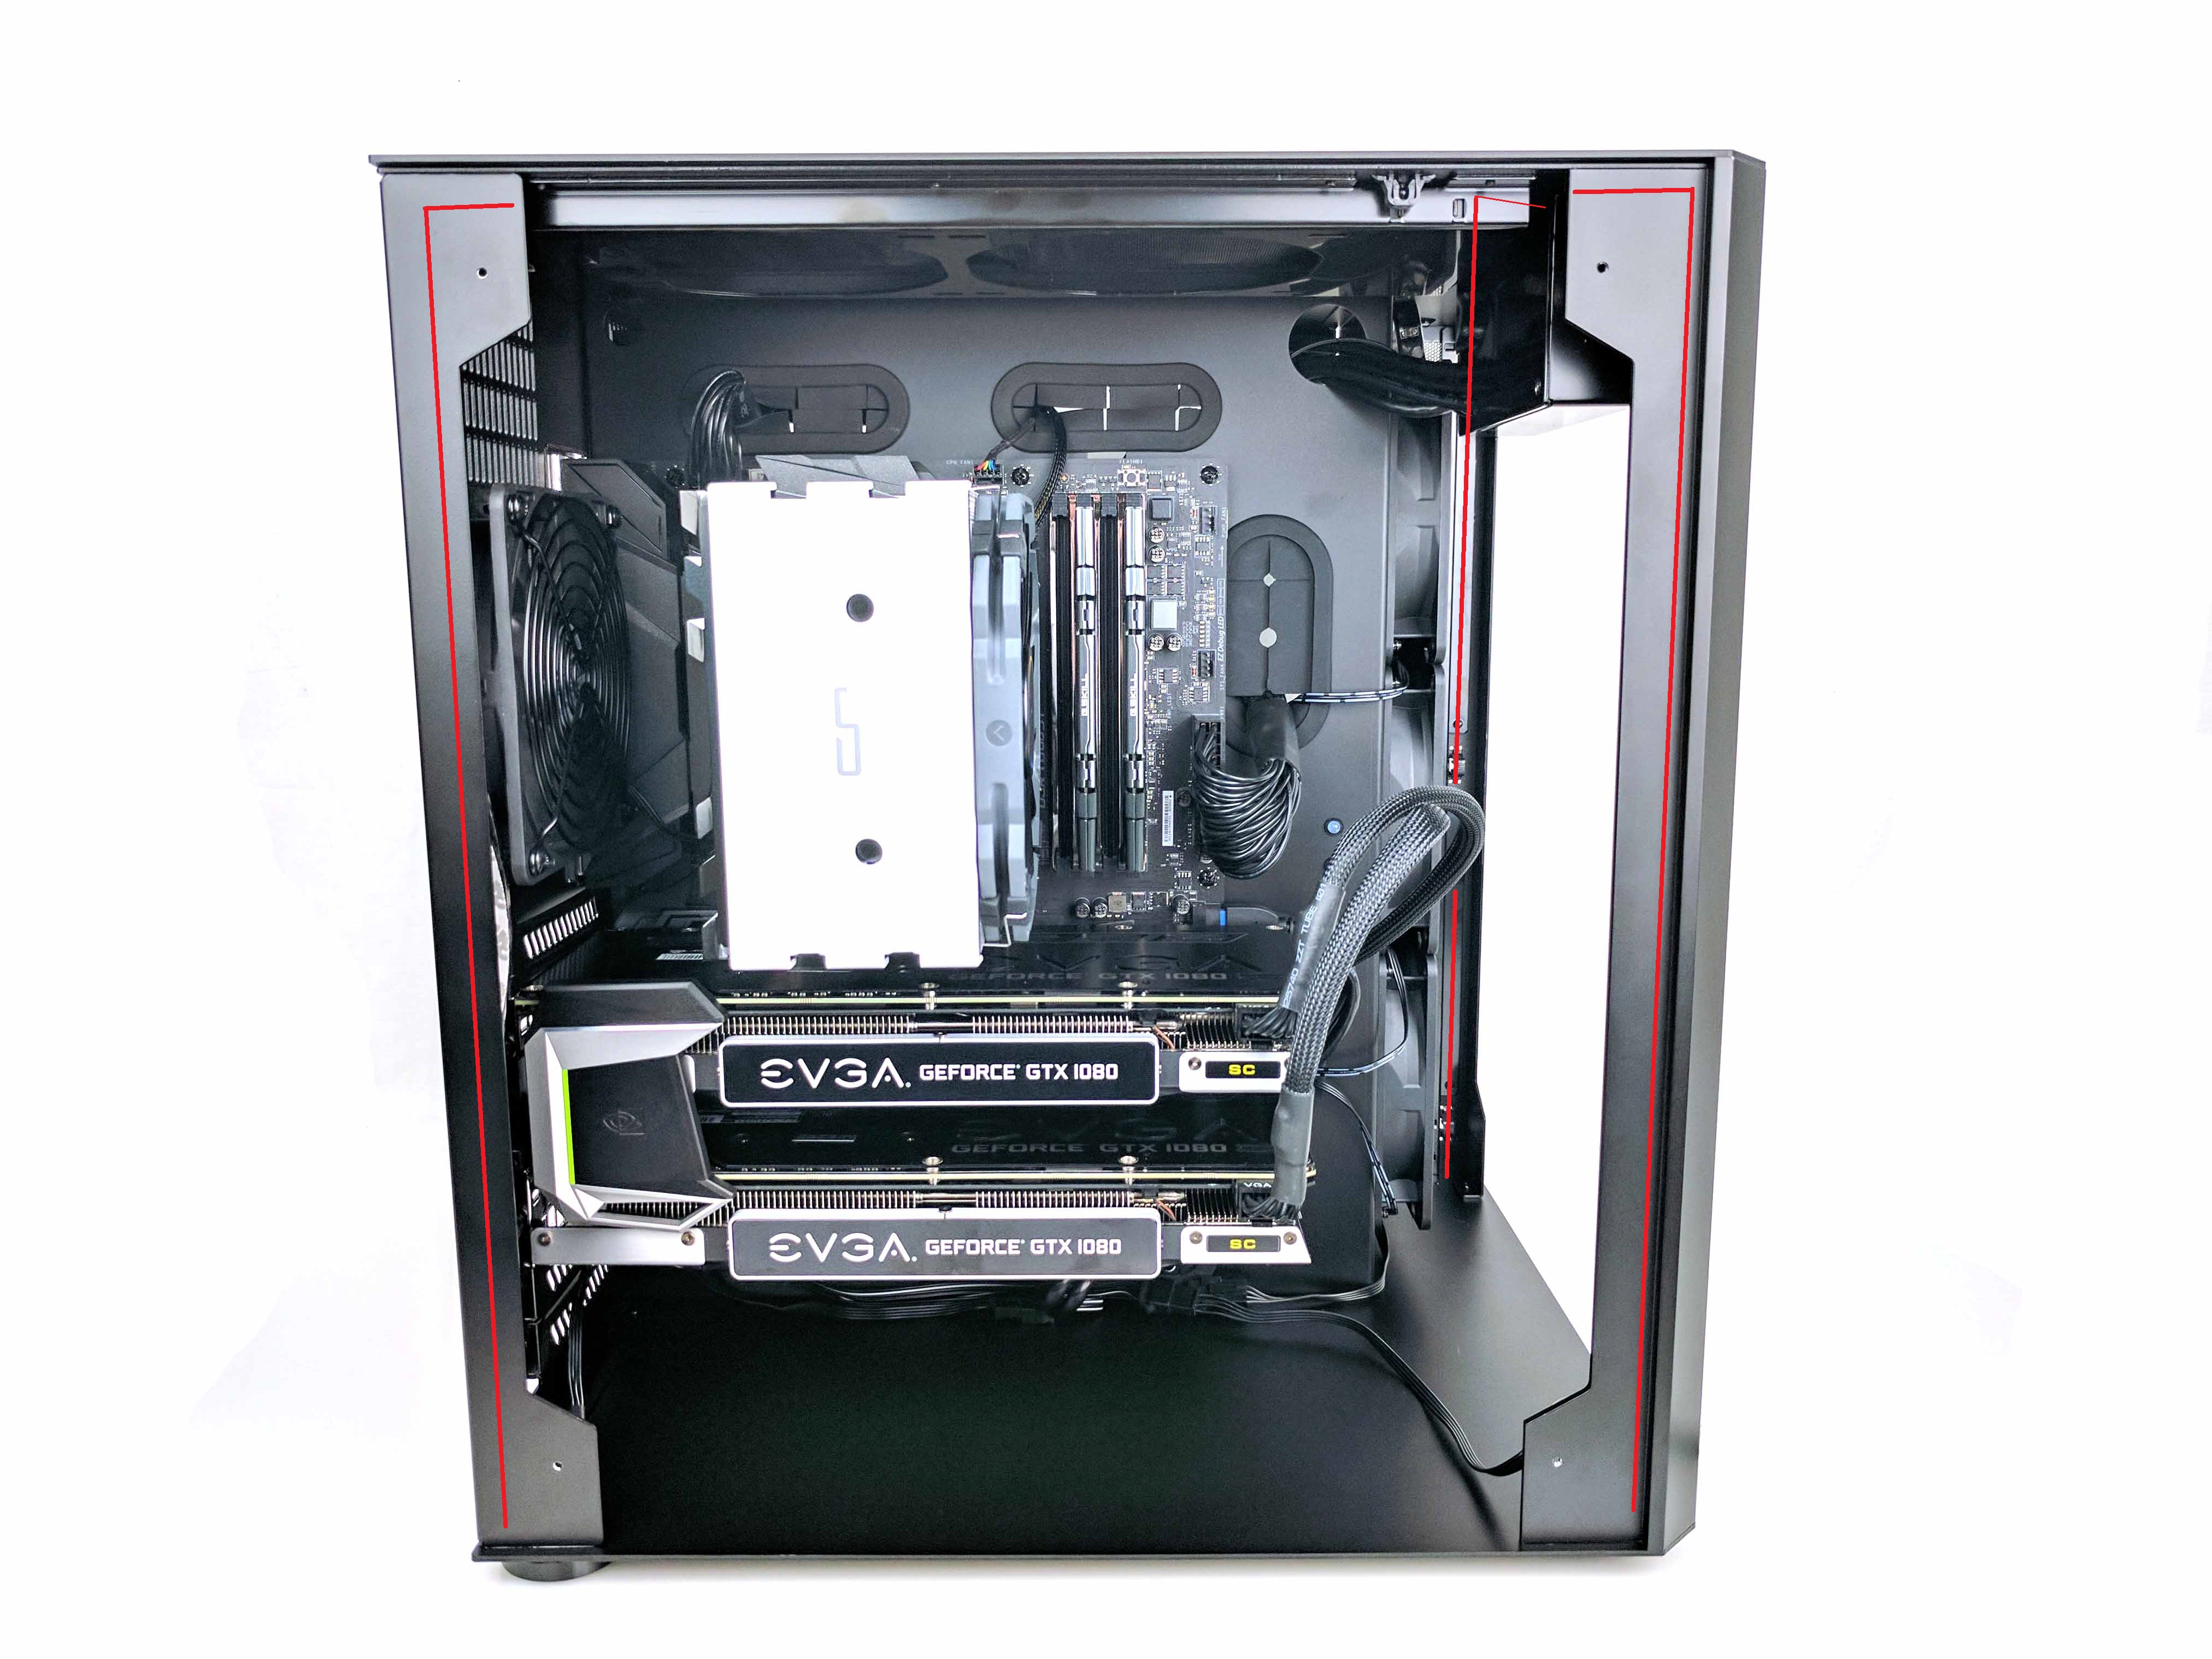
Peel off the adhesive strip and press the LED lights against the chassis to stick them in place. We opted to lay the excess length of each light strip against the ceiling (top) of the case.
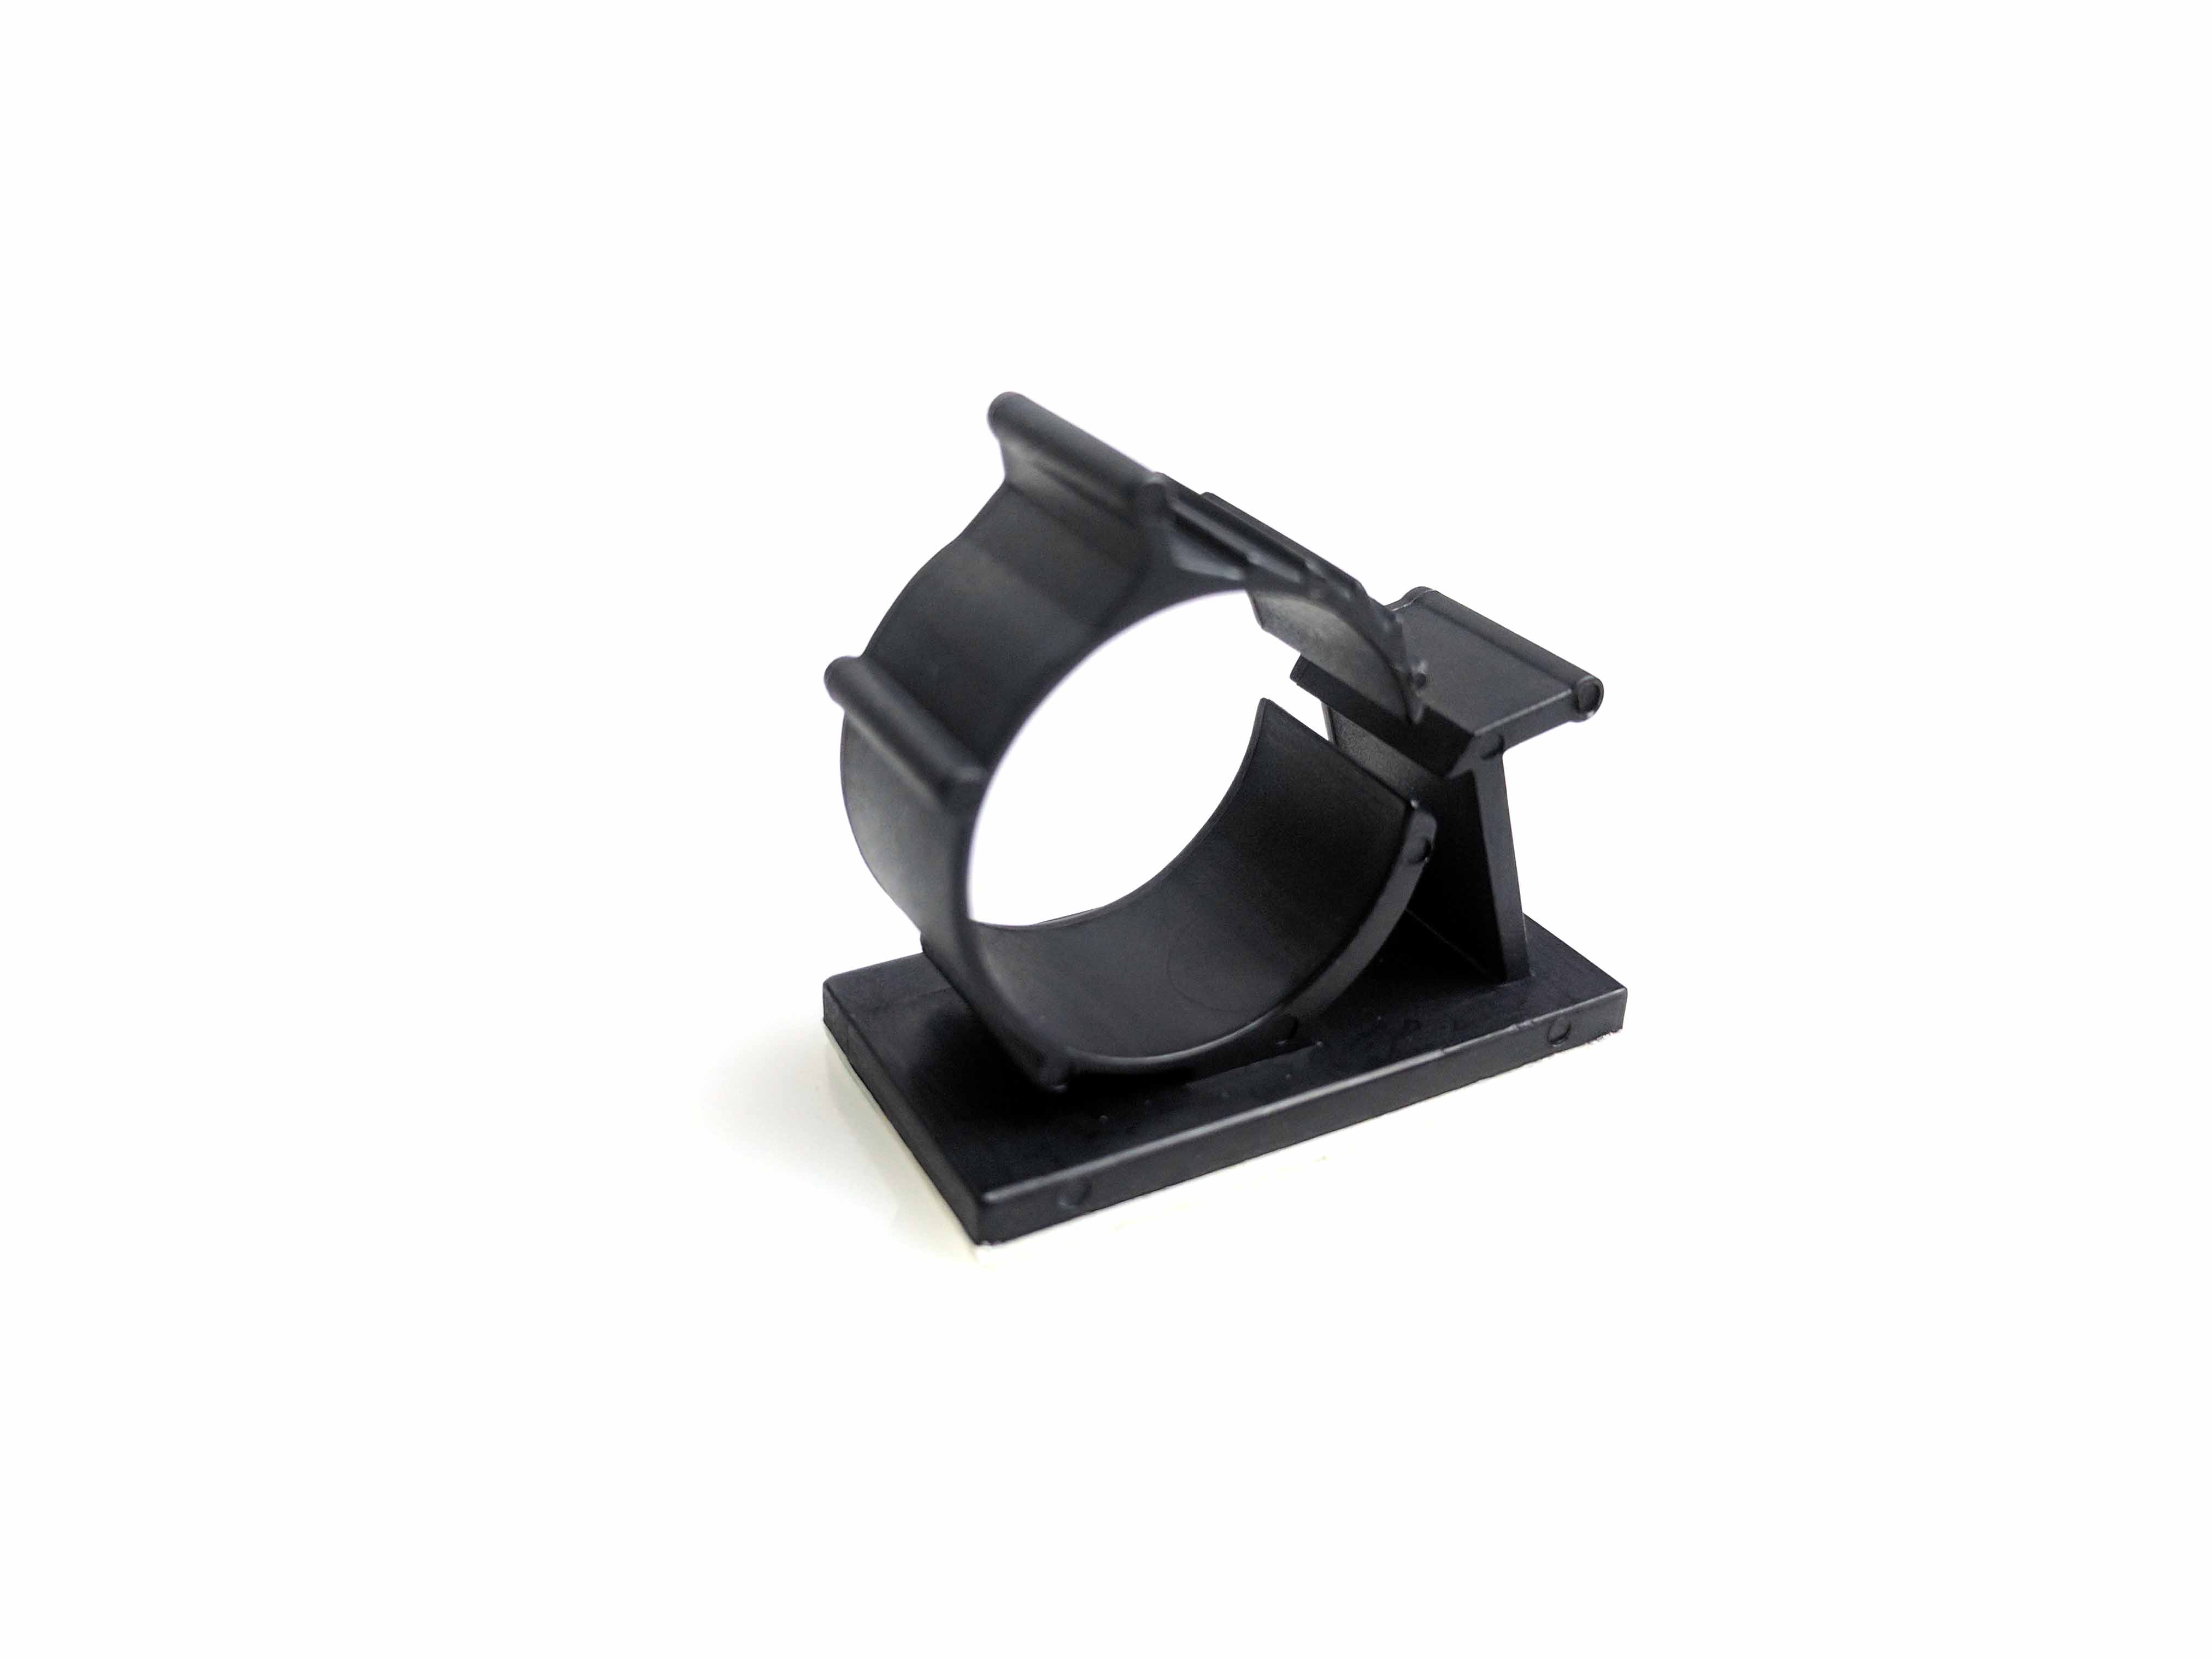
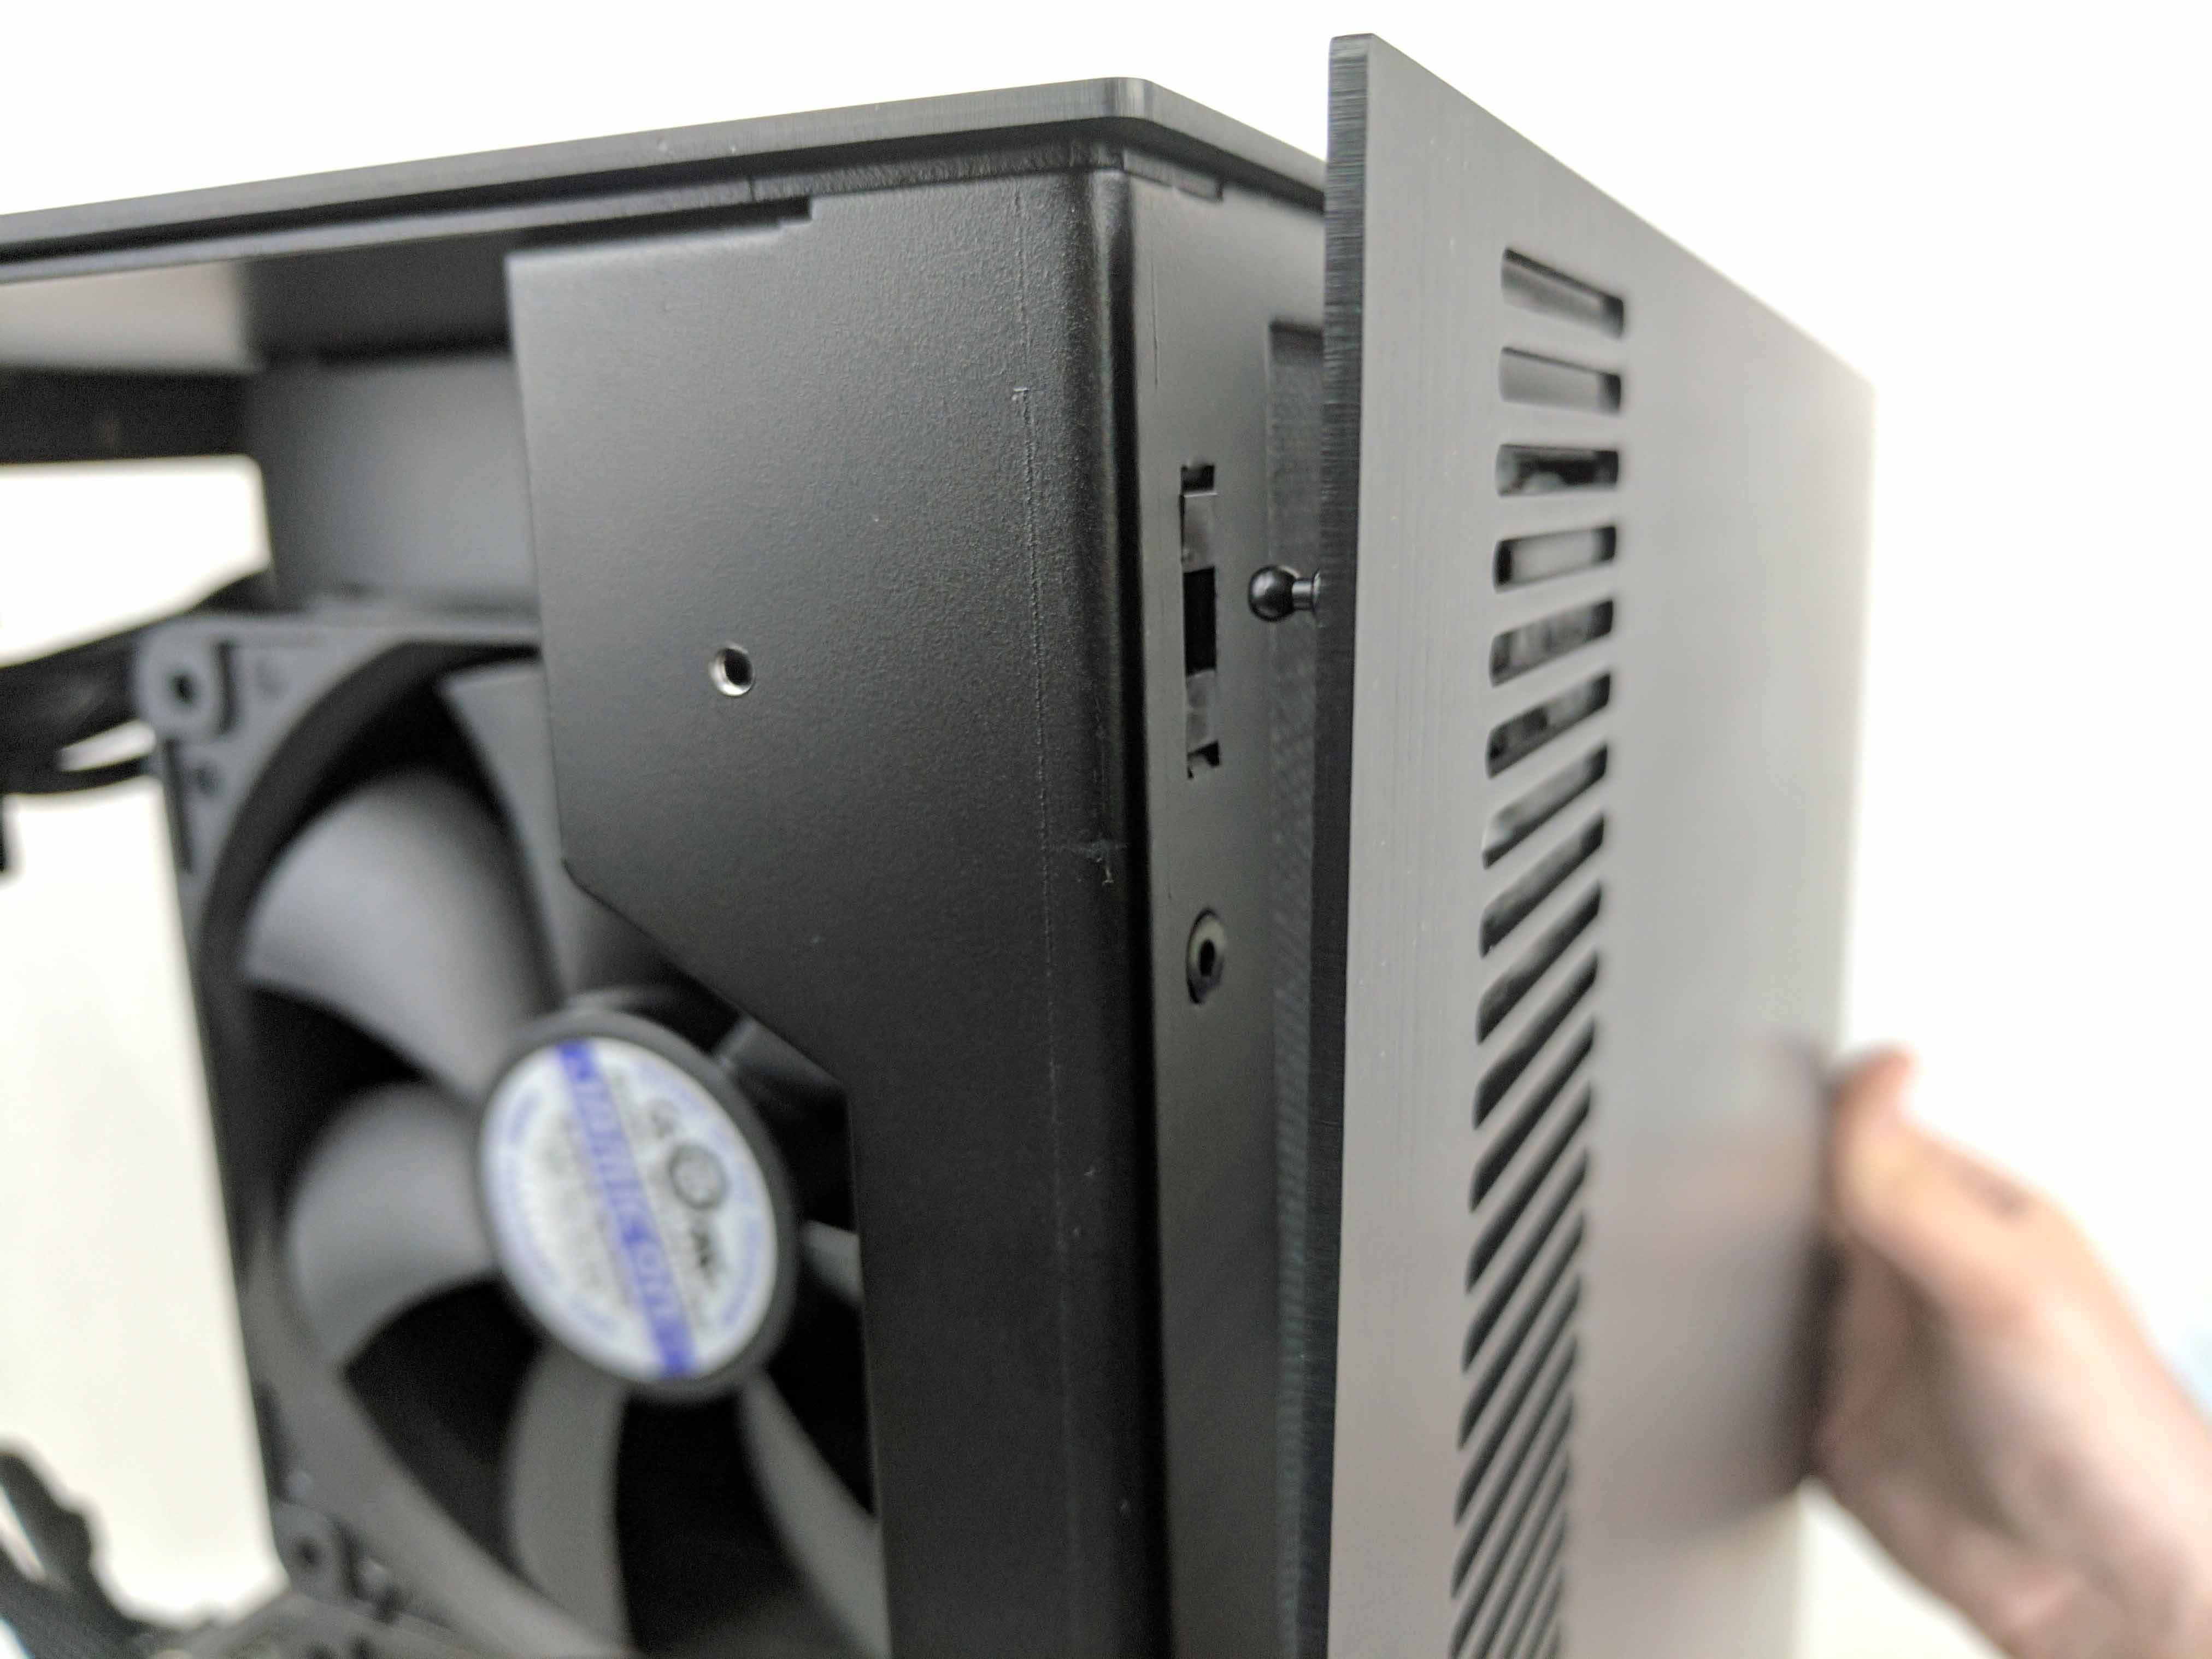
Once you are satisfied with your RGB LED placement, make sure all of the cables (primarily in the drive chamber) are organized as cleanly as possible and clear of any fan blades. You can use the case’s provided adhesive hooks (first picture above), which can hold a sizeable group of wires against the chassis. Use these at your discretion. Once your cables are organized, replace the case’s right side panel by lining up the panel’s posts to the receptors in the edges of the chassis and pressing down evenly.
The Glass House
Remove the two glass panels from their box. Clean them off (they will likely have debris) with some glass cleaner and smooth, lint-free cloth so as to not put streaks or blemishes on your new glass.
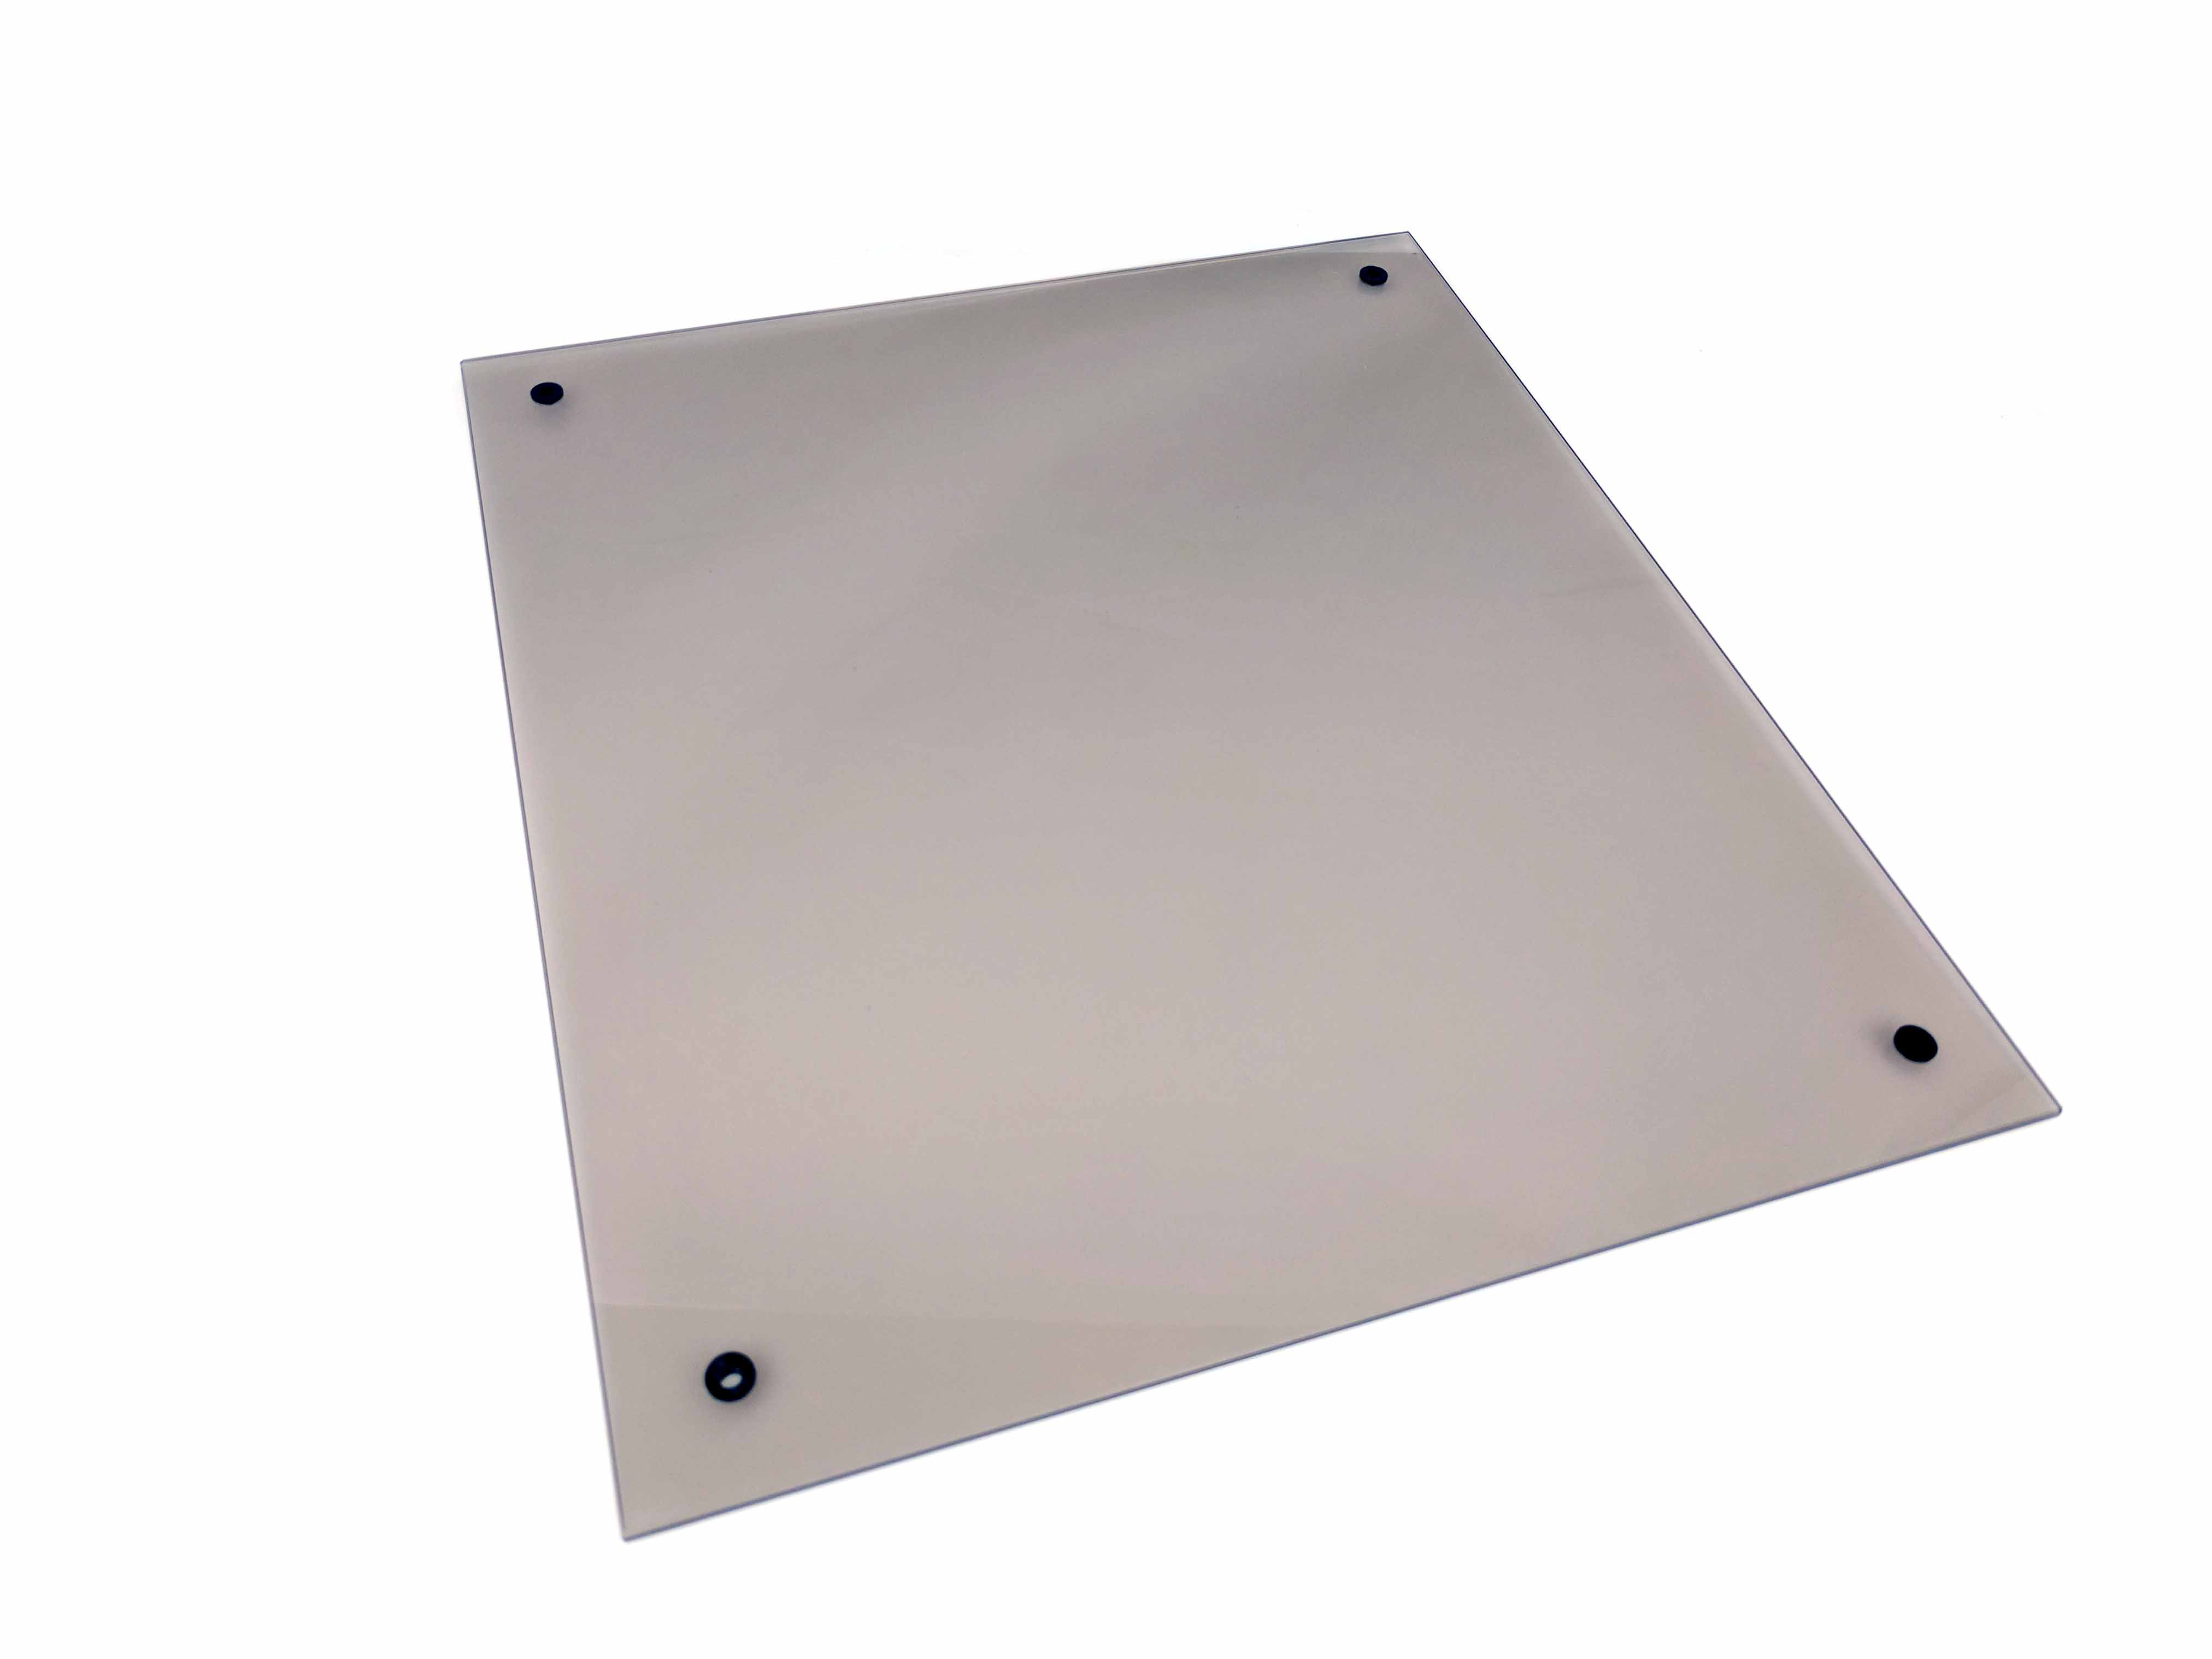
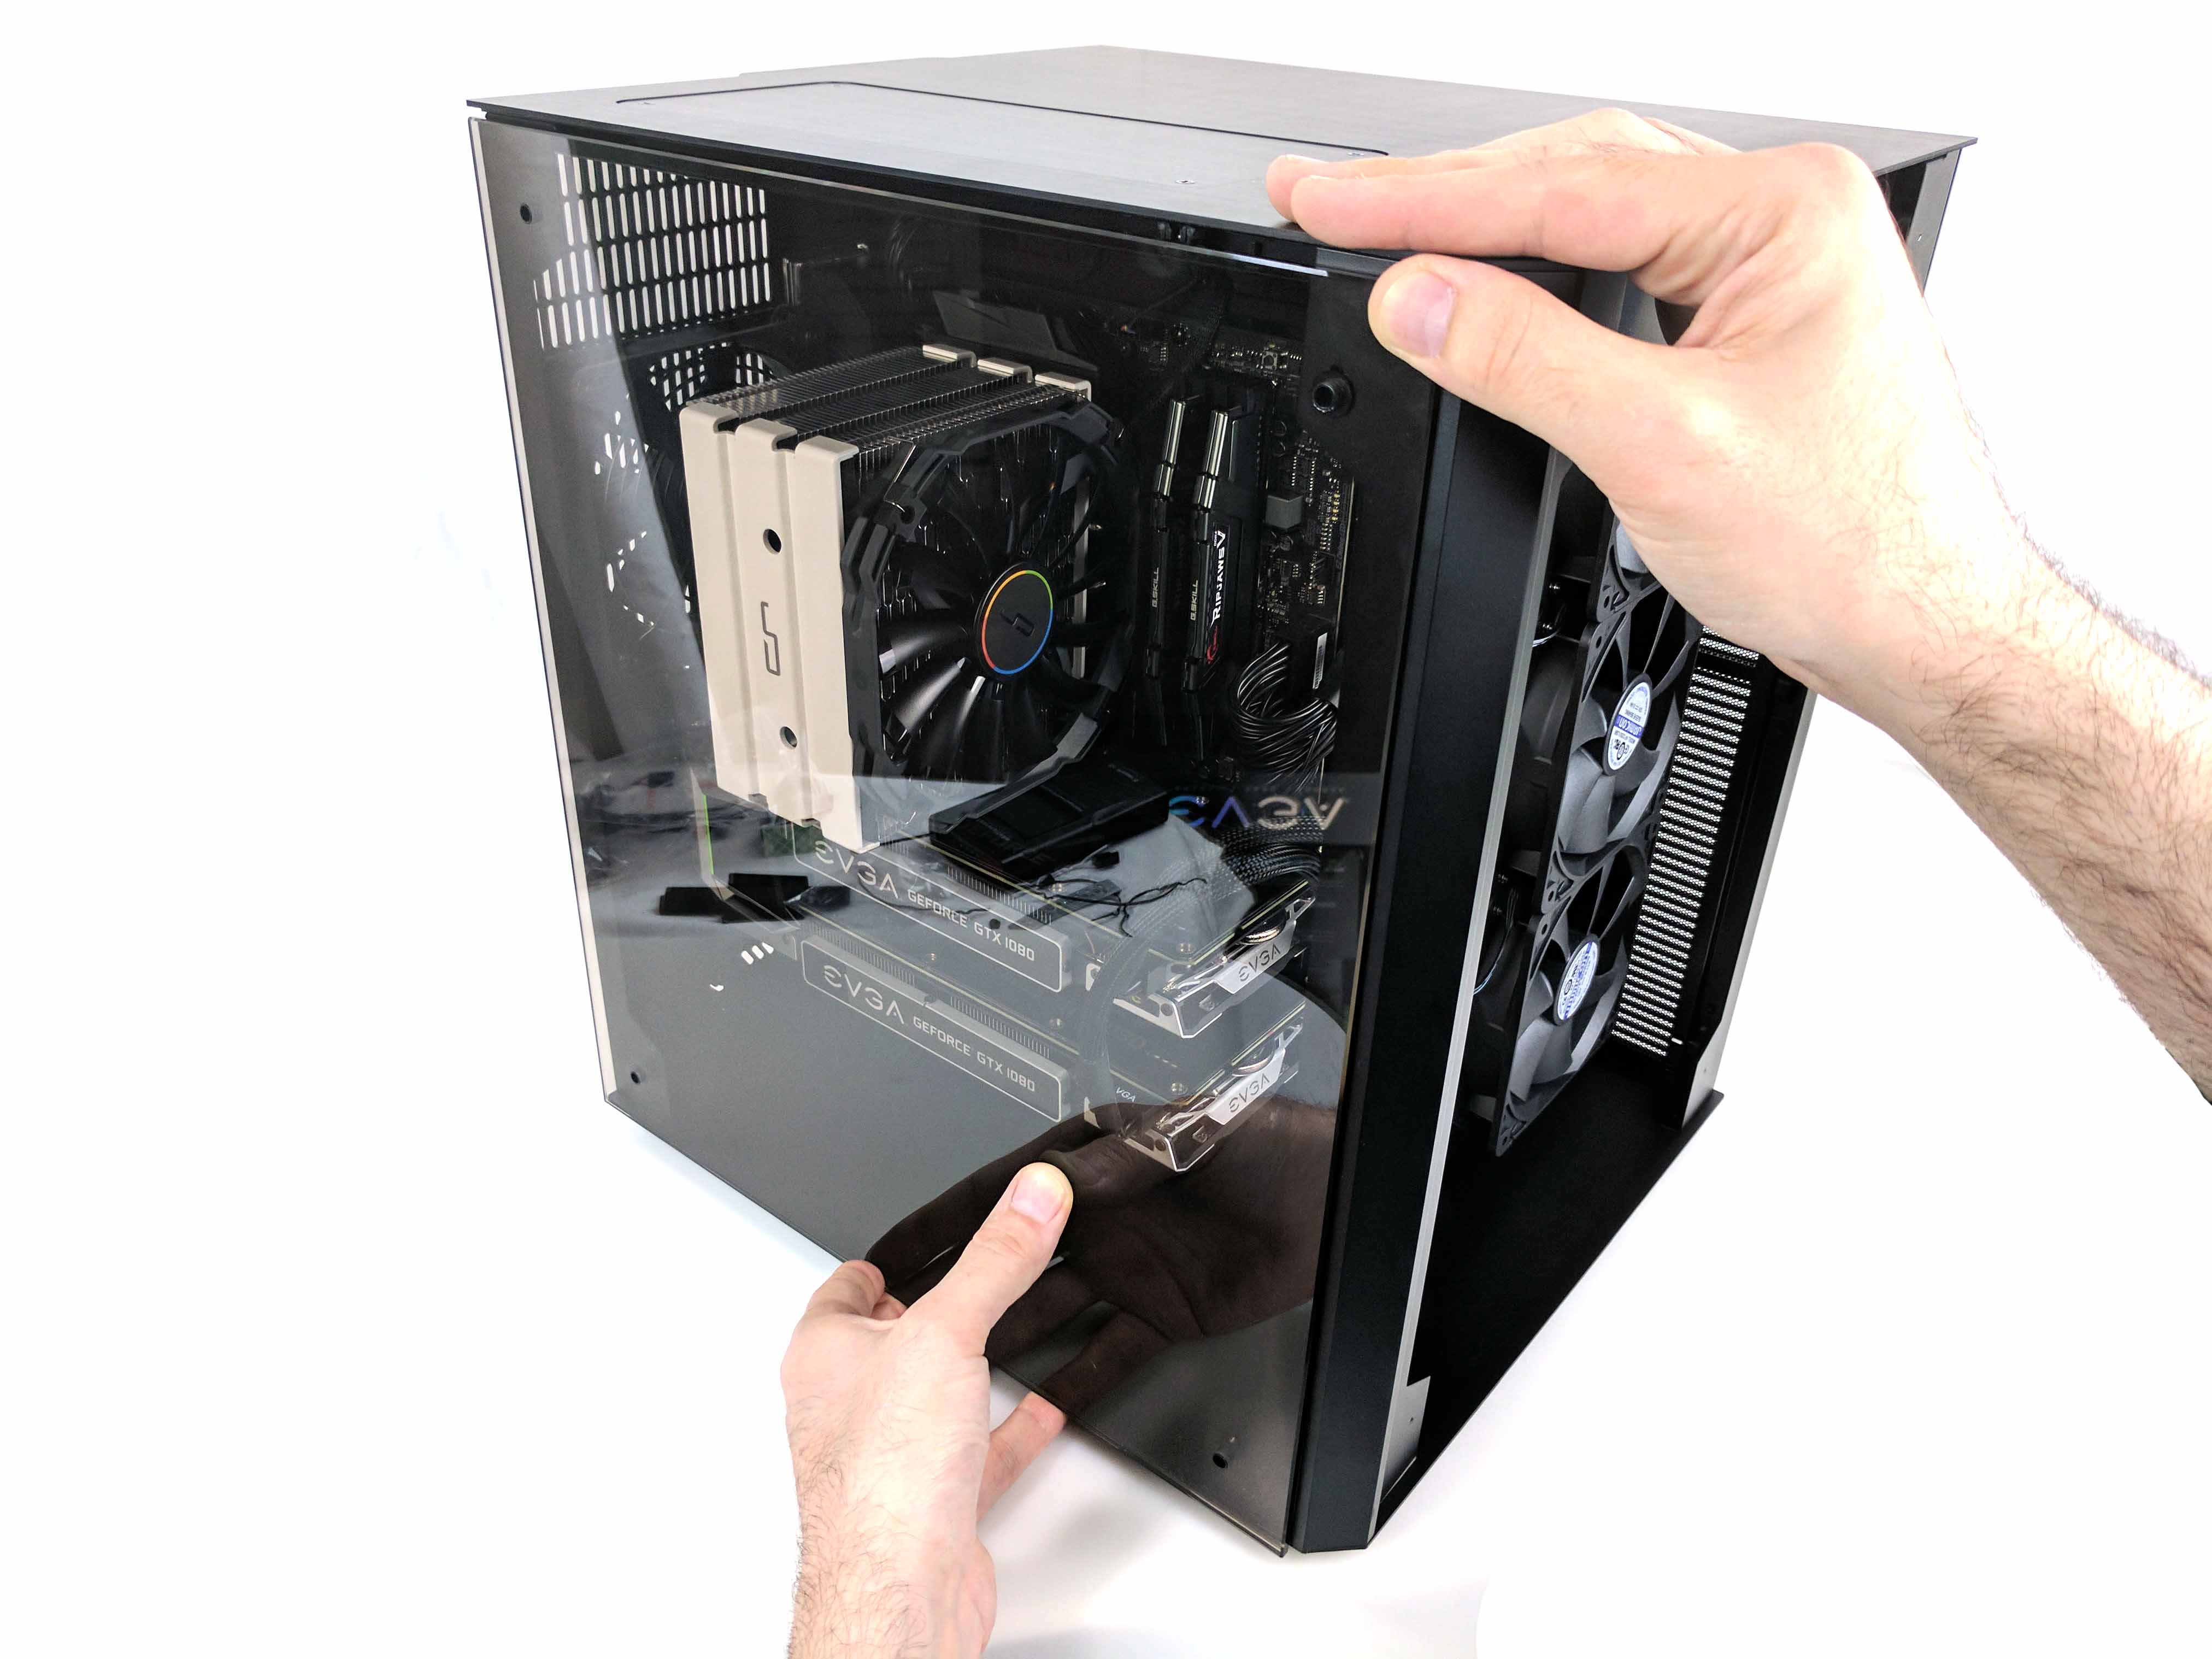
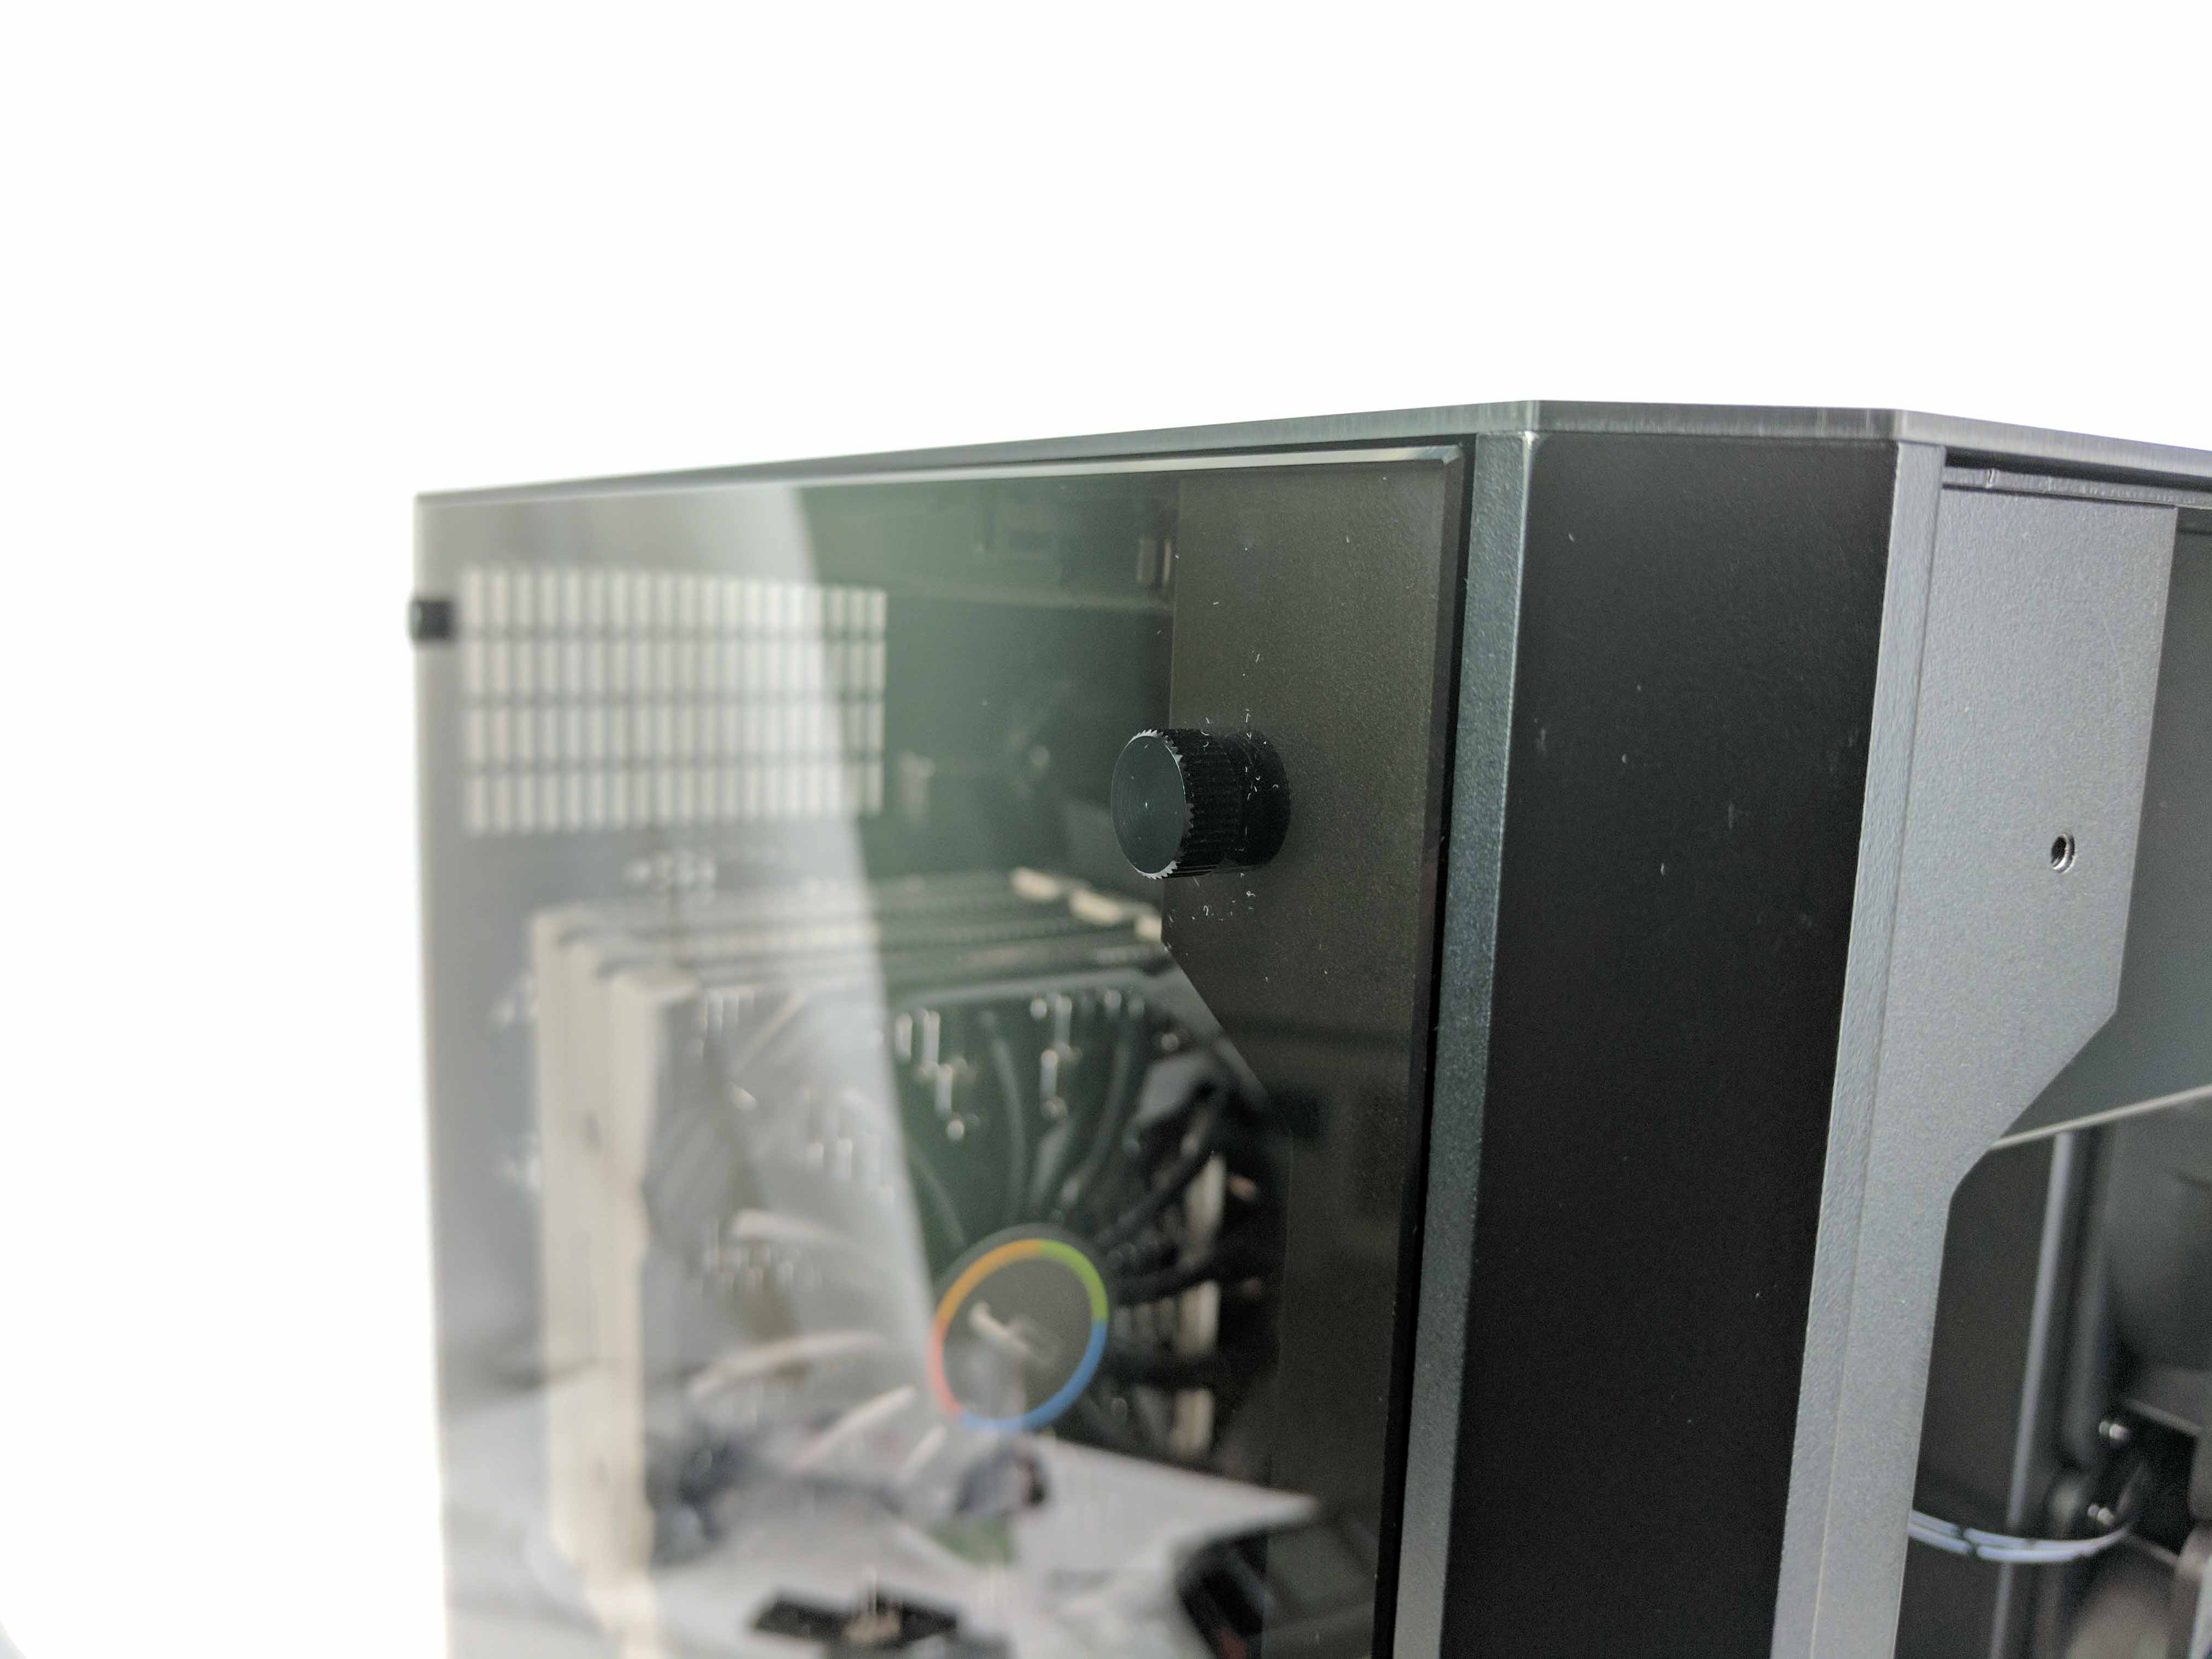
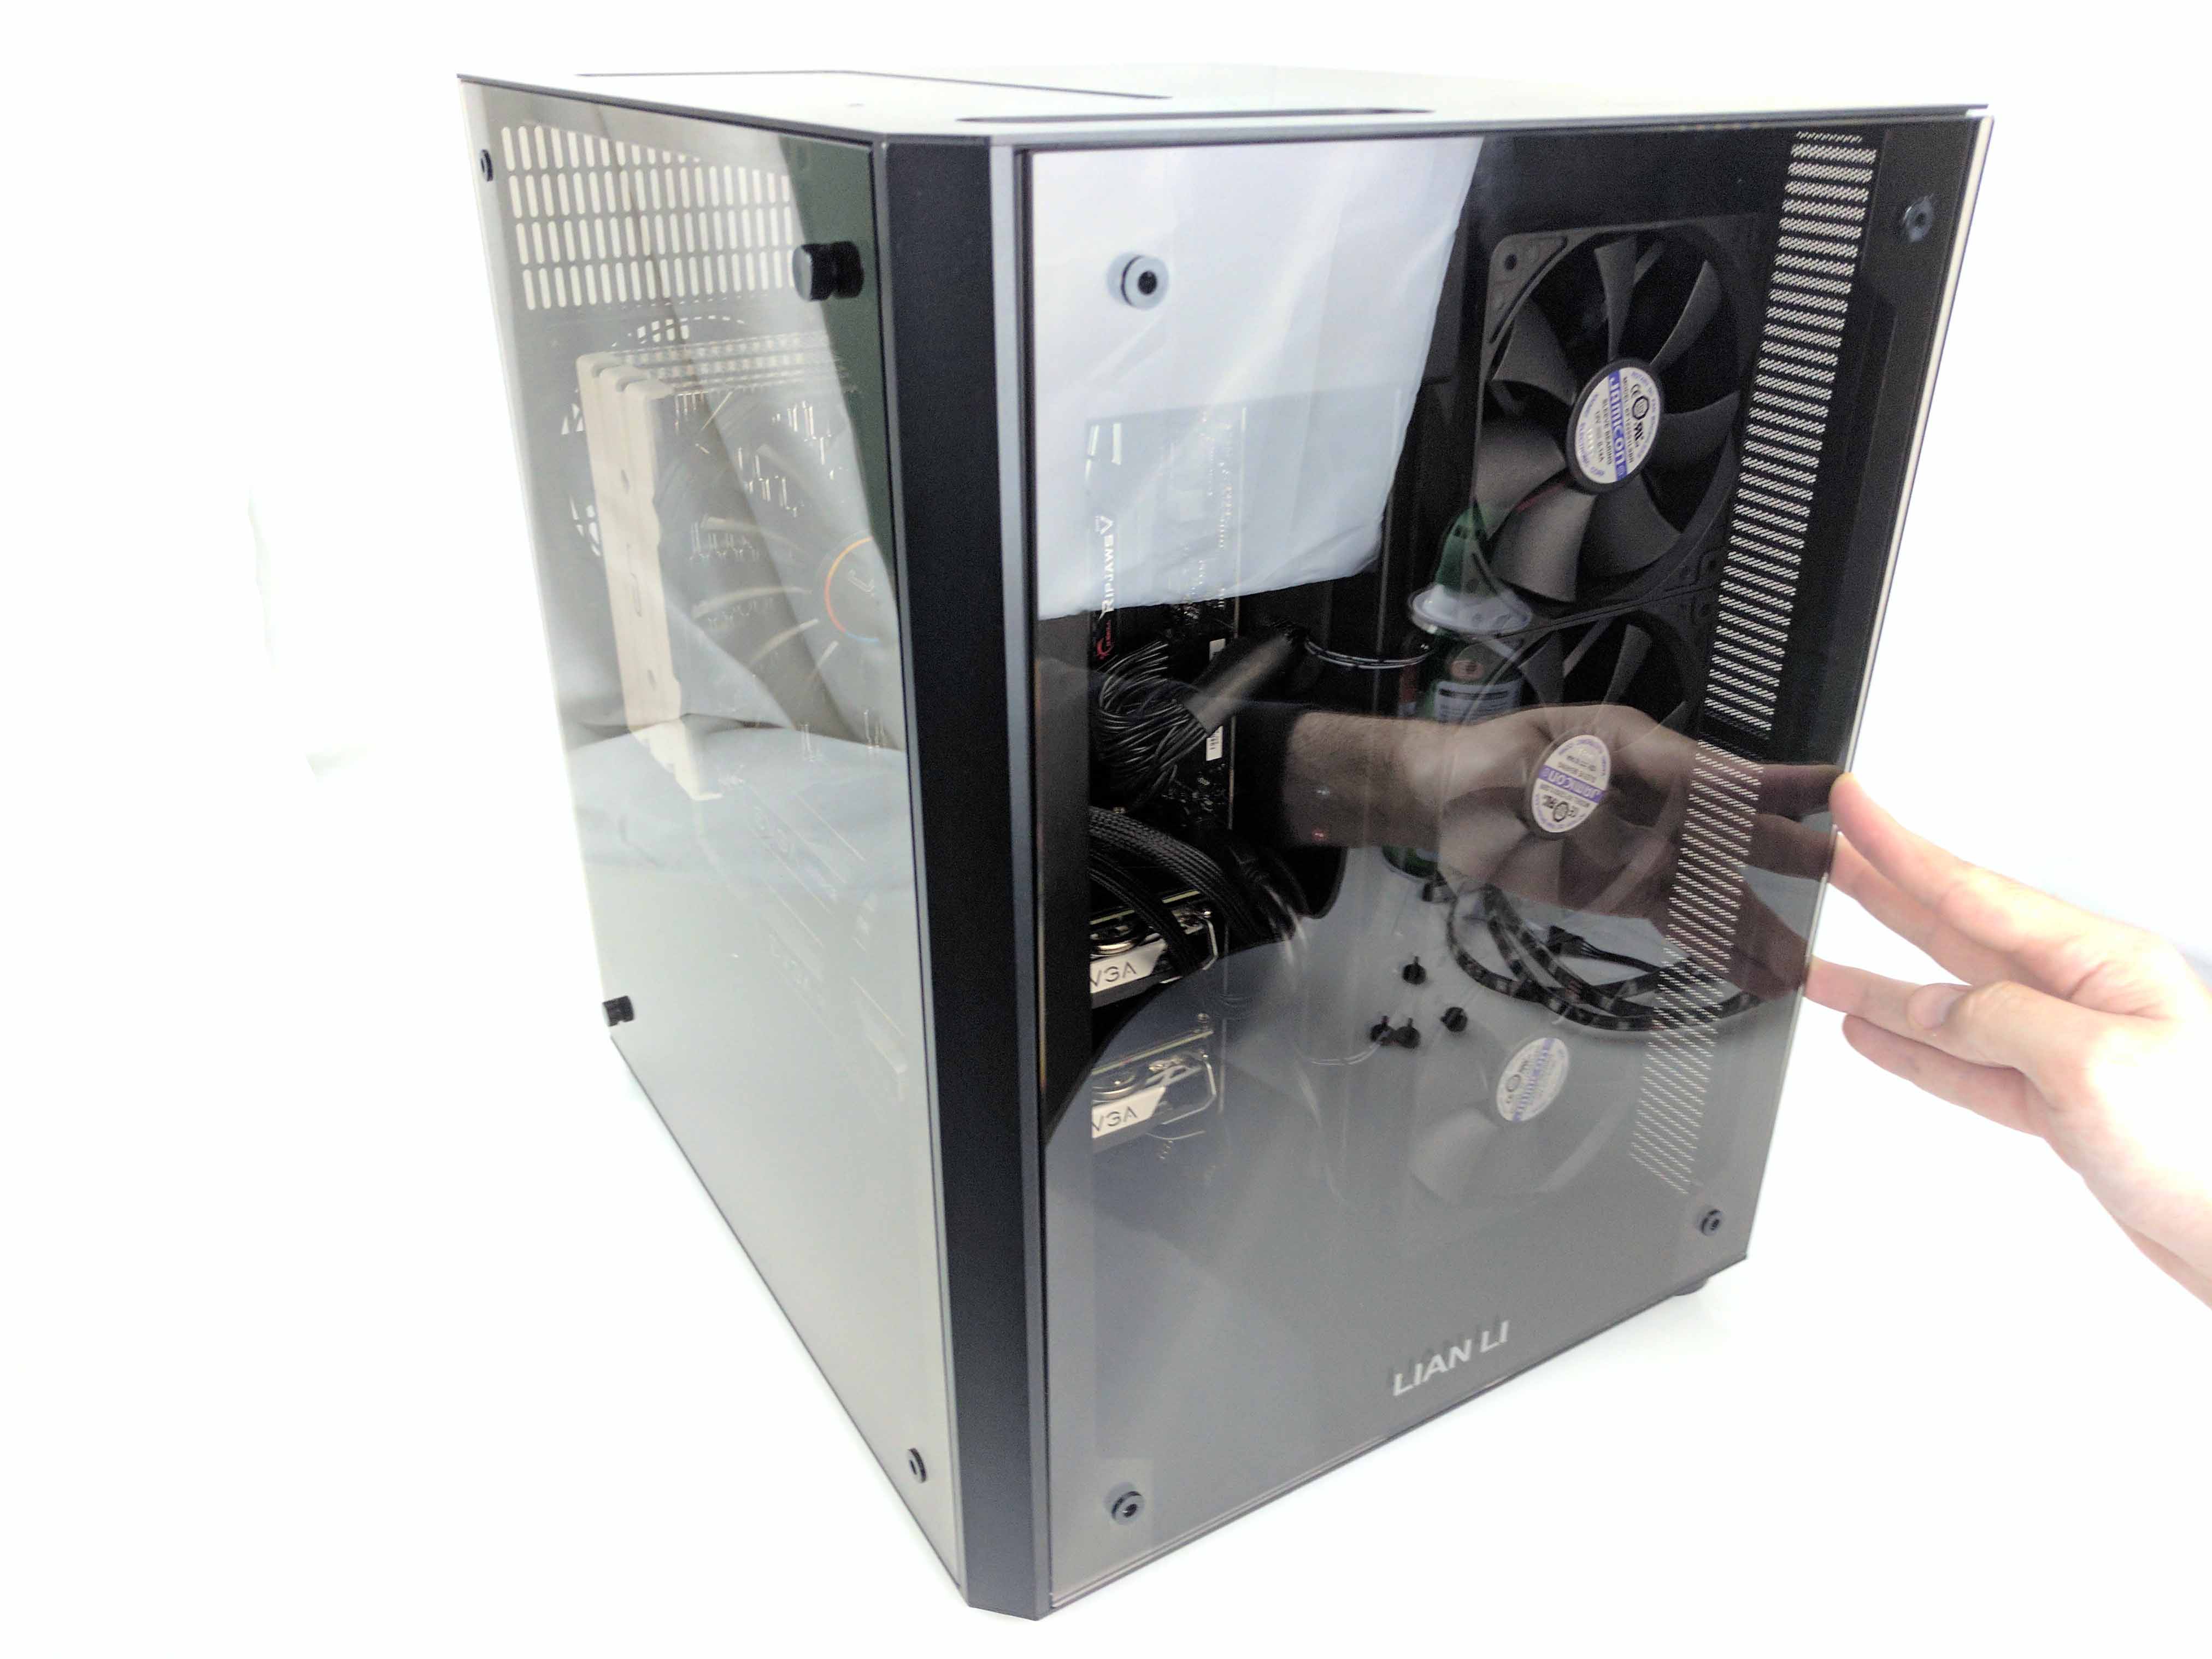
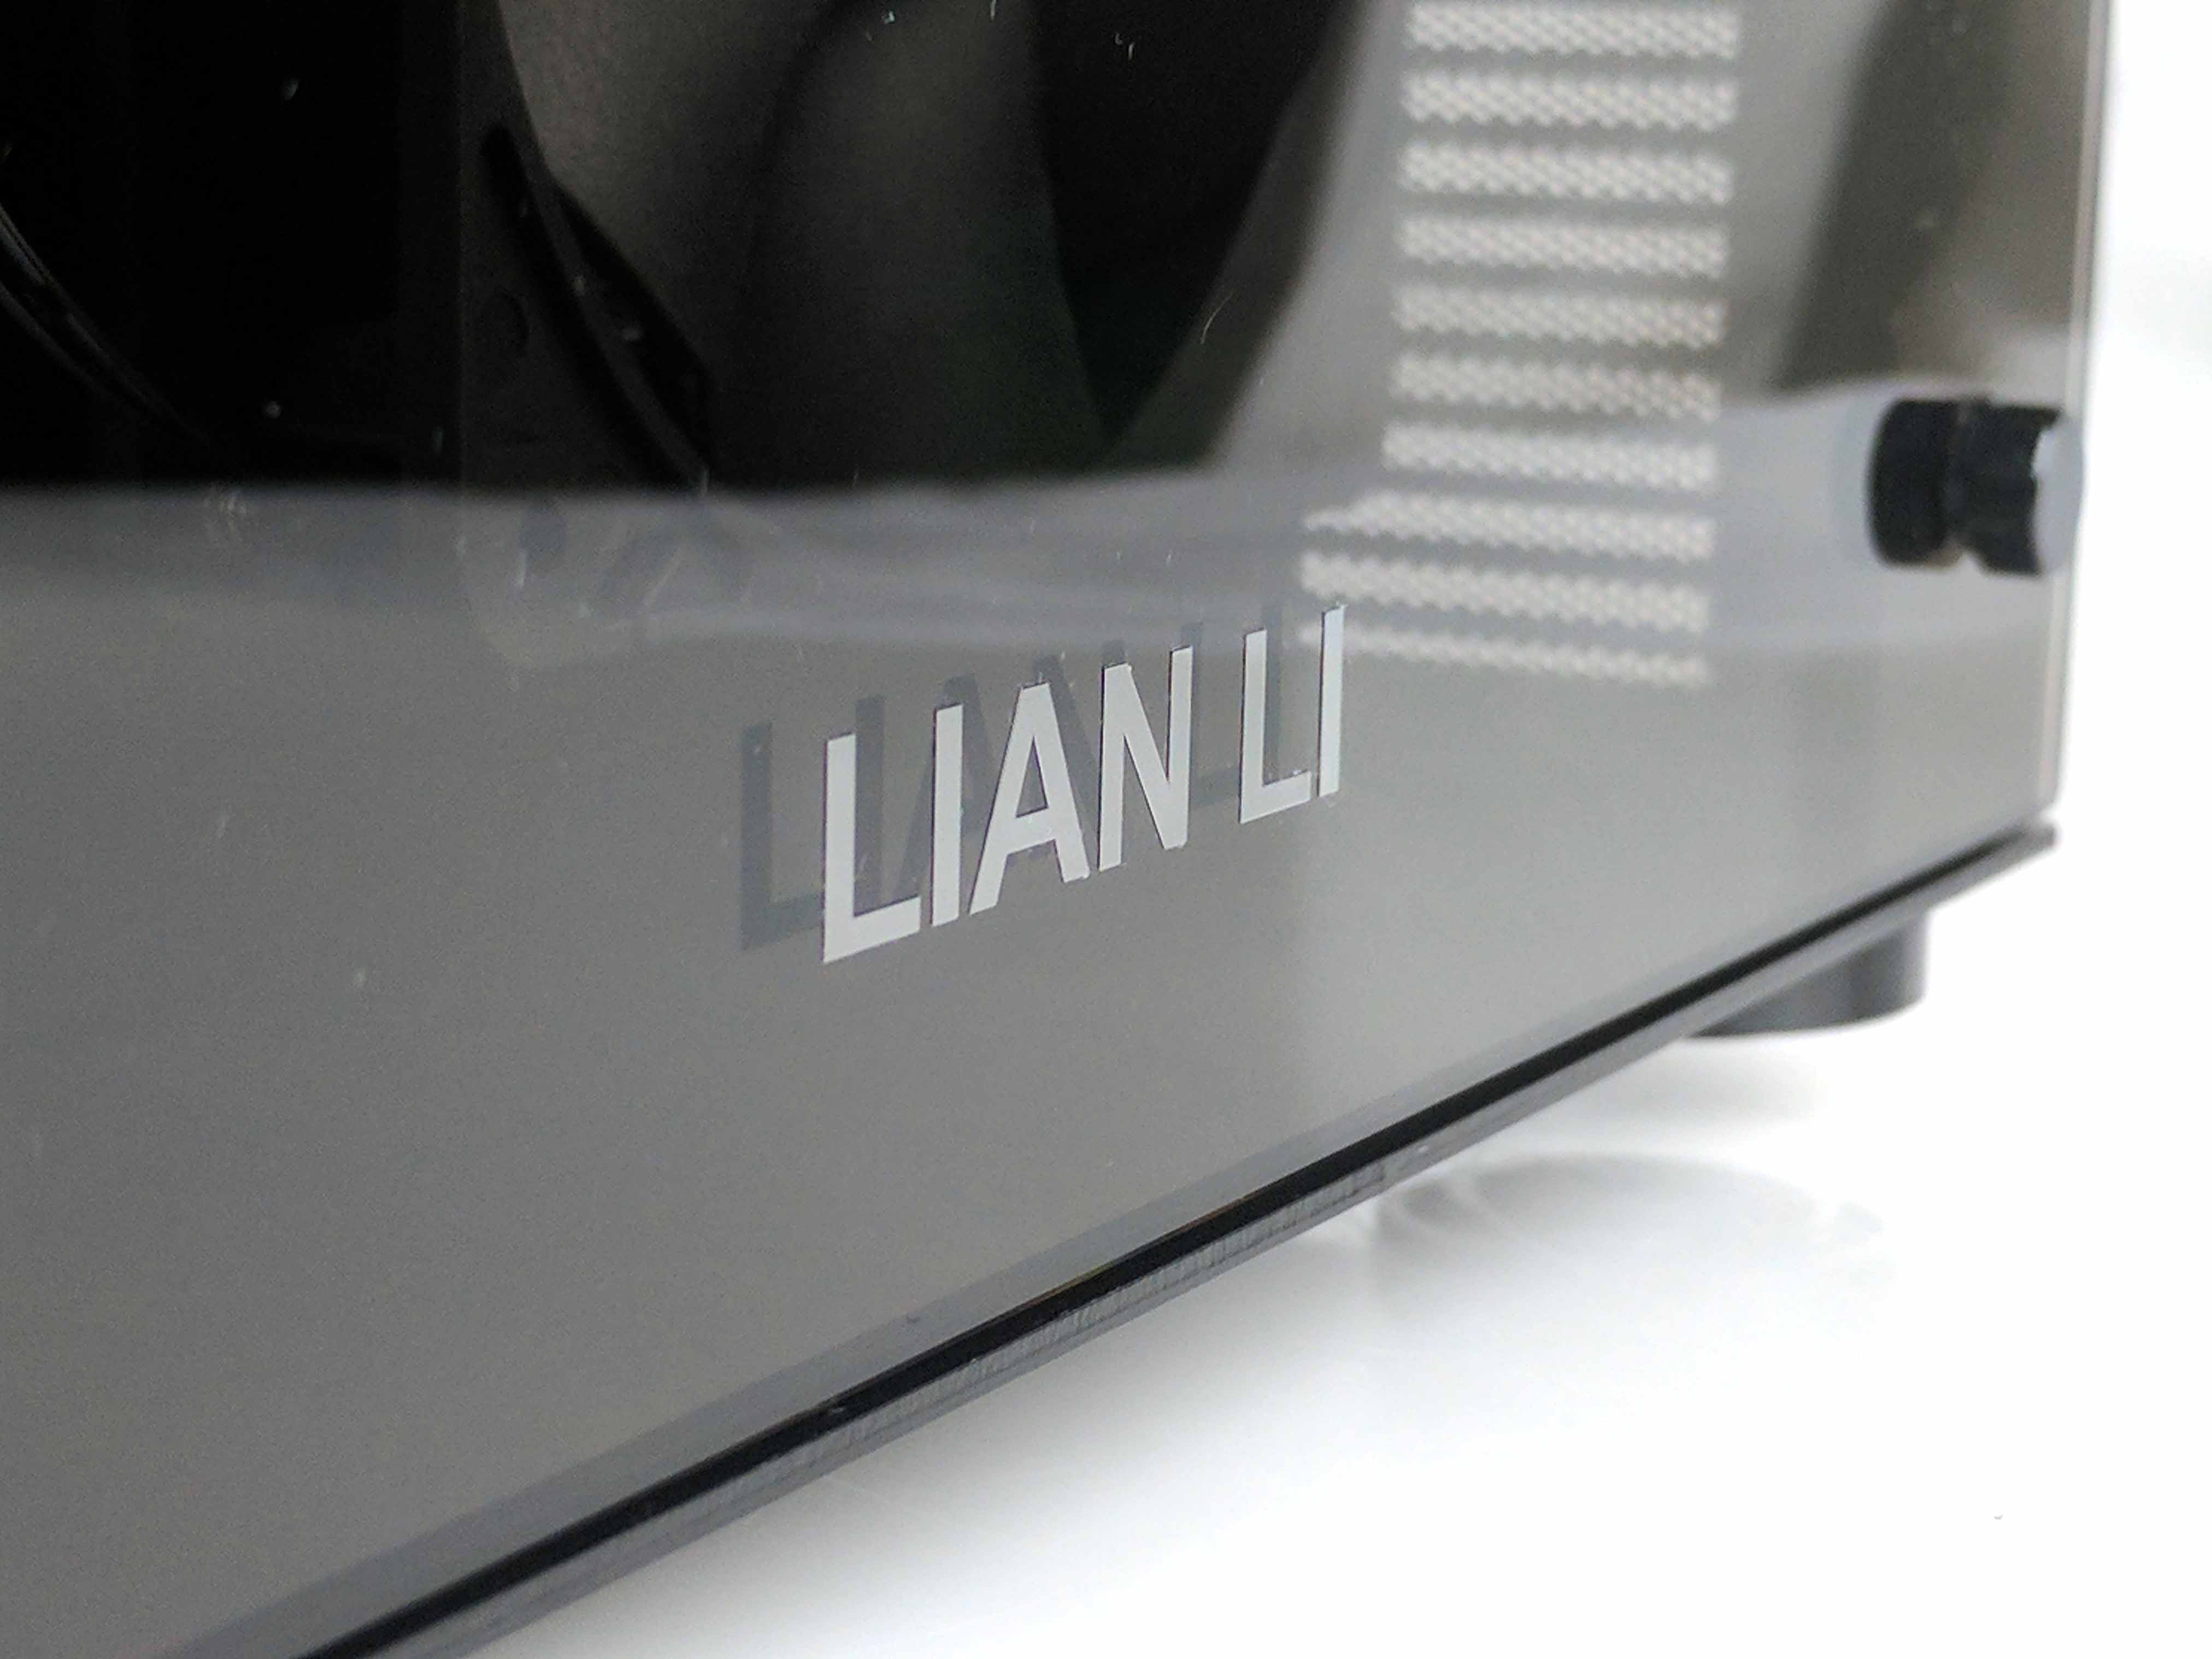
Start with the larger tempered-glass panel and line up the holes with the left side of the chassis, with the plastic grommets facing outward (towards you). Use the thin-threaded wide-capped thumbscrews that came with the case to secure the glass panel to the chassis. Follow suit with the front glass panel, laying it in with the Lian-Li logo and plastic grommets facing out.
Get Tom's Hardware's best news and in-depth reviews, straight to your inbox.
Setup & Overclocking Tips
First and foremost, download the latest BIOS and drivers from MSI's website using a different computer. Unzip the BIOS file to the root directory of a thumb drive and insert it into the Glass House build. When you first power on the machine it will prompt you to press F1 to enter the BIOS. The EZ UEFI BIOS provides easy ways to update the firmware, overclock, and set the XMP memory profile.
Begin by clicking on the M-Flash button on the bottom left side of the BIOS screen. It will ask if you want to enter flash mode. Click yes. The system will reboot and enter the M-Flash update utility. Select the thumb drive on which the BIOS file is stored, navigate to it, and click on it to begin loading the BIOS. The system may reboot several times.
Once you are met with the "Insert bootable media" command line, restart the system by pressing Ctrl+Alt+Delete. Hit the DEL key to enter the BIOS again, this time to set the CPU overclock and XMP memory profile.
MSI provides a quick and easy way to achieve a 4.8 GHz all-core overclock for the Intel Core i7-7700K. On the main screen, simply click on the Game Boost button at the top left of the menu. Then, click on the XMP button right next to that to turn on XMP memory profile. Press F10 to save and exit the BIOS. Now you can load an operating system.
Benchmark Results
The Intel Core i7-7700K is overclocked to an all-core frequency of 4.8 GHz, and the 16GB (2 x 8GB) G.Skill DDR4-2800 memory features a CAS latency of 16-16-16-36. The dual EVGA GeForce GTX 1080 Superclocked ACX 3.0 graphics cards are running at their stock base and boost frequencies of 1708 MHz and 1847 MHz, respectively.
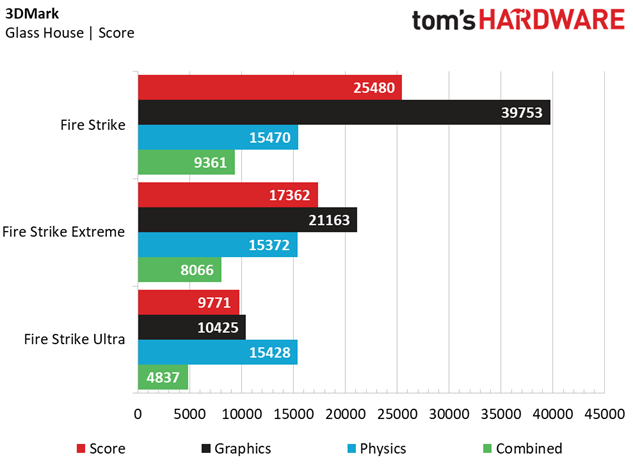
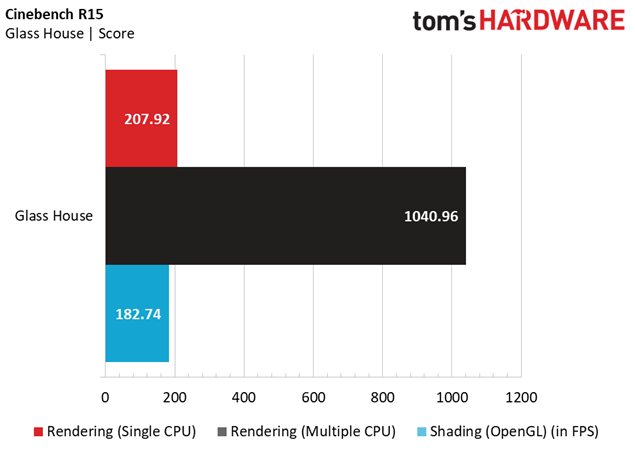
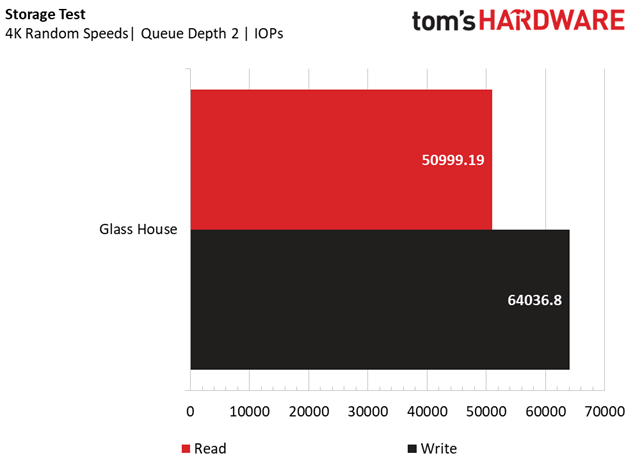
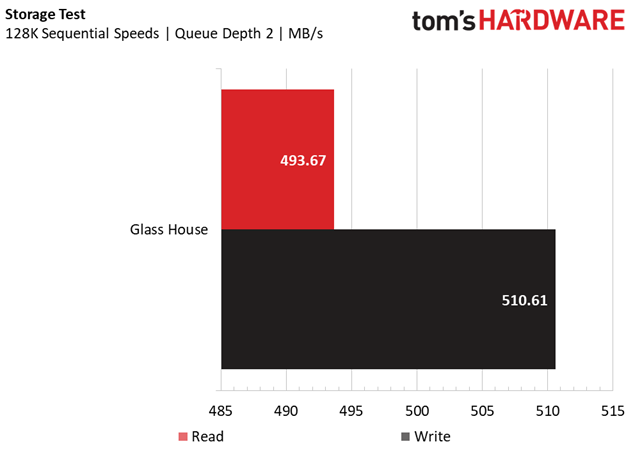
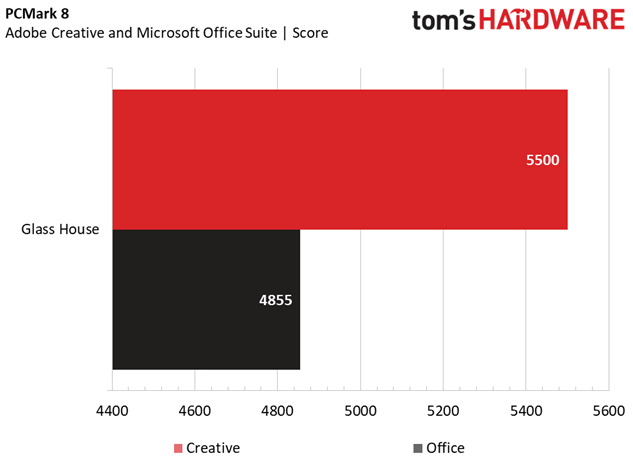
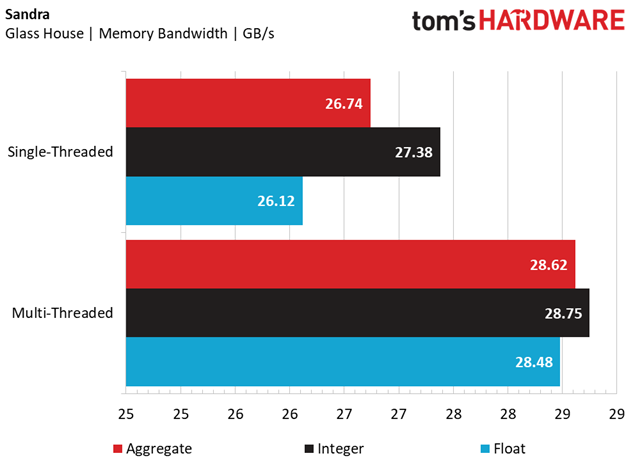
The Glass House showcases its gaming acumen in the 3DMark Fire Strike tests, with high graphics scores (higher than the $2,000 Best PC Build) thanks to the factory overclocked GPU setup. Physics scores were also high thanks to the beefy CPU overclock. The above-average memory bandwidth (see the Sandra results) and a speedy SSD (see our storage test results) give the Glass House a leg up on our productivity tests, with high PCMark 8 Adobe Creative and Microsoft Office application test scores and impressive Cinebench R15 results.
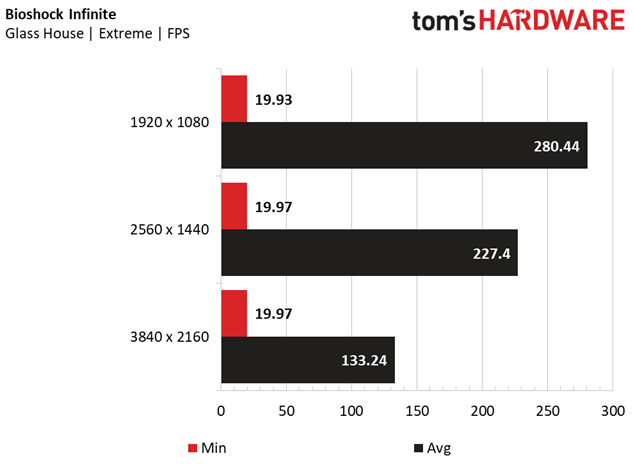
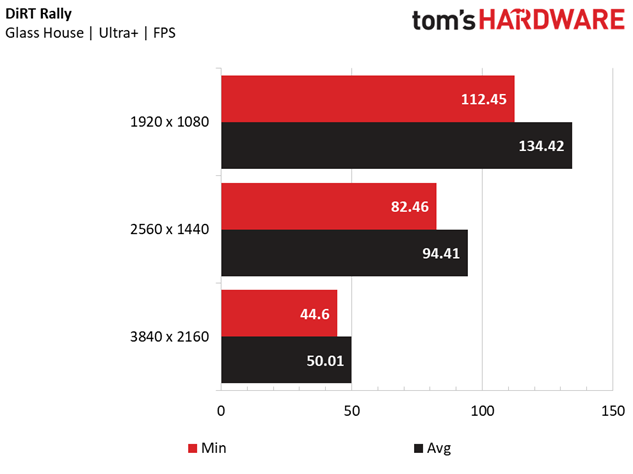
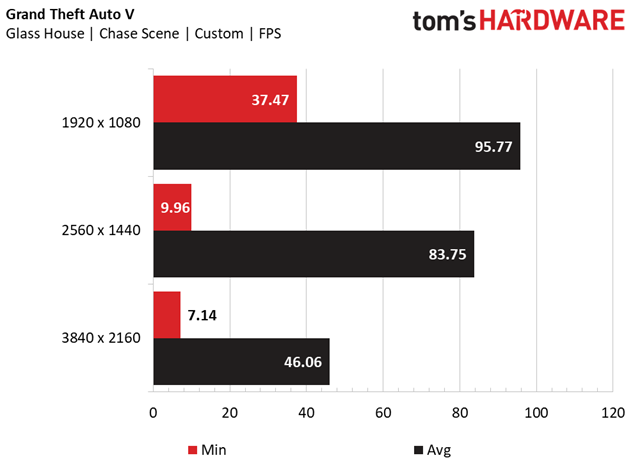
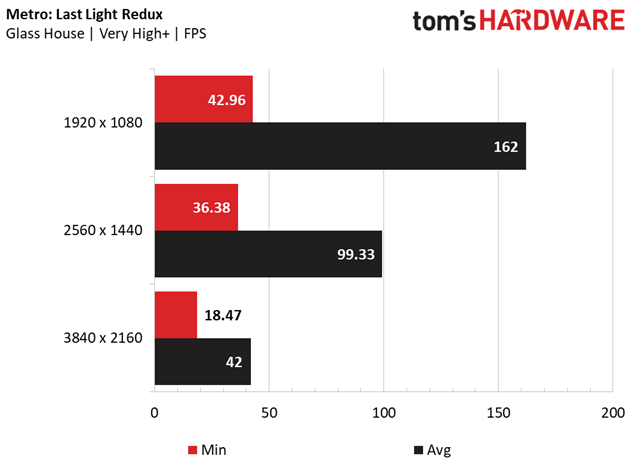
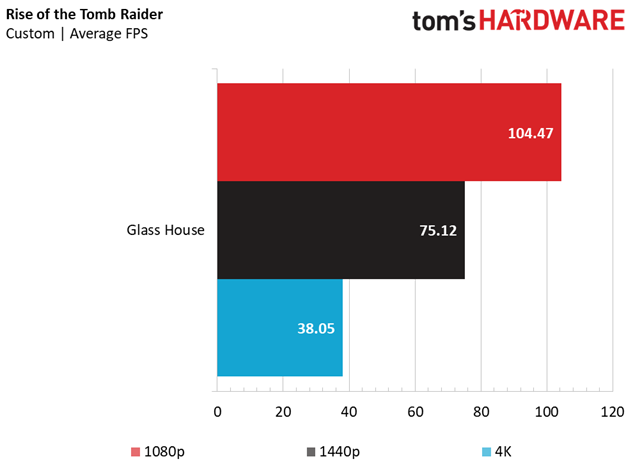
The Glass House is adequate for top-tier 4K gaming, evidenced by the impressively high average framerates it managed to produce in our array of game benchmarks. It has no issue keeping the average framerate in the triple digits in games like Bioshock Infinite, and it even gives hardware-punishing titles like Metro: Last Light Redux, GTAV, and Rise of the Tomb Raider a fair fight at 3840 x 2160, netting average framerates between 38 and 50 FPS. Backing down on some of the AA settings will alleviate much of the strain on the system, but with everything at the most demanding settings, the Glass House held its ground and proved it's among the best possible gaming setups money can buy.
Final Analysis
Our Best $2,500 PC Build is the culmination of top-tier gaming performance and aesthetics, with a Lian-Li PC-08WX case that features tempered glass panels on the front and left side, RGB LED lighting (with a built-in controller), and sleek black aluminum panels that give access to the hidden components and dust filters. My plea for a windowed case has been answered, perhaps over-zealously, as a large chunk of the budget goes to this monster of a case (over $325).
An Intel Core i7-7700K can easily be overclocked with a MSI Z270 Gaming M5 motherboard and a Cryorig H5 Universal CPU cooler, and 16GB of G.Skill Ripjaws V DDR4-2800 is enough memory to handle any of the latest AAA games, and two EVGA GeForce GTX 1080 Superclocked ACX 3.0 graphics cards can achieve excellent framerates at 4K with punishing settings in some of the most demanding games around. The EVGA Supernova 850 G2 offers plenty of juice to power this beast of a rig, with headroom for overclocking.
Similar to our Best $2,000 PC Build, the designer of the Glass House didn’t anticipate the premium MSI motherboard would lack a necessary high-bandwidth SLI bridge. When our community voted it the Best $2,500 PC Build, the added cost of the bridge would have pushed this over the budget limit by about $25. However, now that the GTX 1080 has dropped in price, you'd now have about $150 extra to play with until you reach the budget ceiling.
With that in mind, we have a few suggestions where the extra money could go.
Although the 525GB Crucial MX300 M.2 SATA SSD does indeed offer impressive speed, g-unit111 was somewhat ambiguous in his assertion that an M.2 interface portends faster performance. The SATA controller on the M.2 SSD limits it to the same 6Gb/s as a similar 2.5” SATA III SSD. If you have a few extra bucks, and want to take advantage of the upper limits of the socket, spring for an NVMe M.2 SSD around the same capacity.
A 525GB SSD, by itself (as it is in this configuration), is not an acceptable capacity for anyone with a sizeable game library. At the very least, a 1TB 7,200RPM HDD would support the 525GB SSD with the necessary storage space.
The graphics setup of the Glass House can achieve higher framerates than a single GTX 1080 Ti (which was not available when our community submitted these builds), but only on games and applications that take advantage of multi-GPU configurations. However, if you prefer the best possible single GPU performance, stepping up to one GTX 1080 Ti is definitely an option at this price point. The savings (about $250) from buying a single GTX 1080 Ti instead of two GTX 1080s could go into the storage (think big), if that’s something you’d like to improve.
Overall, we think that $2,500 is where the aesthetic value and price-to-performance ratio plateaus; spending more than this simply gives you more of everything—higher memory and storage capacities, more CPU cores, more RGB LEDs. These upgrades wouldn’t necessarily improve performance, and upgrades of this nature wouldn't be for the average gaming enthusiast (never mind anyone turning to this article for instructions on how to build it).
The Glass House guts a good chunk of the budget with its pricey Lian-Li case, but you could just as easily cut back on the aesthetics and opt for a more practical chassis, leaving room to improve the total storage capacity, SSD performance, memory capacity, or even a more robust platform (X299 recently became an option, along with X399 for Threadripper). However, none of these options would give you the sleek look and incredible aesthetic value that is the Glass House, and our community seems to approve of the classy and glassy chassis, making it our Best $2,5000 PC Build.
MORE: Best Deals
MORE: How To Build A PC
MORE: All PC Builds Content
Derek Forrest was a contributing freelance writer for Tom's Hardware. He covered hardware news and reviews, focusing on gaming desktops and laptops.
