Windows In Your Pocket
Adding Utilities
Windows XP normally requires more than 1 GB of storage space on a hard disk. To enable the operating system to fit on a 256 MB USB flash drive, all non-essential components must be stripped away. The freeware program PE Builder handles the selection of XP components in this case. It installs something called Bart PE, a much-reduced version of Windows XP that also includes system utilities.
PE Builder
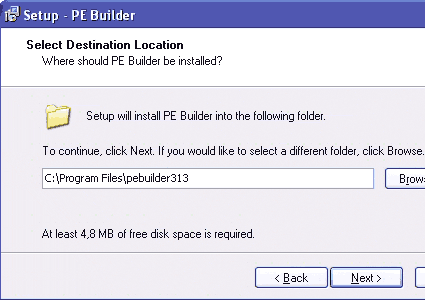
PE-Builder-Setup: If possible, install PE Builder in a folder called "C:\Program Files\pebuilder313"
Install PE Builder. You'll find the program listed under "Computer, USB-Stick-Windows". Accept the default installation path - namely "C:\Program files\pebuilder313". The PE Builder program includes many useful system tools, which it writes to the USB flash drive along with Windows XP. These appear in the sub-folder named "C:\Program Files\plugin" - among which, for example, you'll find the file manager a43 inside a further subfolder named "\a43\files". The file named "a43.inf" contains data otherwise found in the Windows Registry. For some such subfolders in the plugin folder, you'll find the program files to be missing. These belong to third-party tools such as Ad-Aware or Nero Burning ROM that PE Builder doesn't install by default. But these subfolders do contain the necessary INF files that PE Builder can use should you decide to include these programs in what's written to the USB flash drive yourself. Here's how that works:
Nero Burning ROM
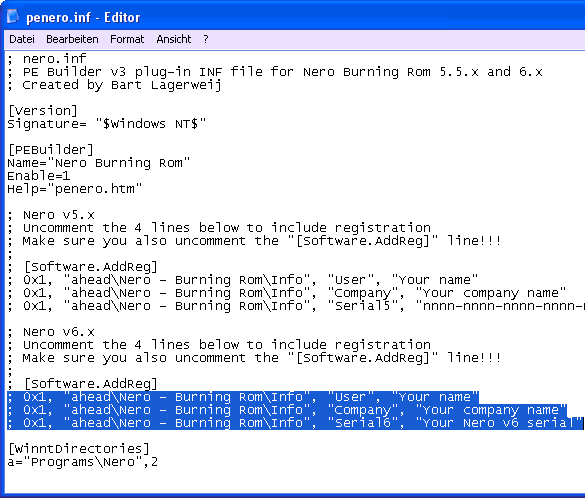
First, install the DVD burning program Nero on your PC. Next, copy all the files from the installation folder - usually this will be C:\Program Files\ahead\Nero" - into the PE Builder subfolder named "C:\Program Files\pebuilder313\ plugin\nero burning rom\files". Now, open the file named "penero.inf" with a text editor in the plug-in folder named "nero burning rom" and look for the area where the Nero version you've downloaded is identified: "5.x" or "6.x". Remote all semi-colons from the entry named "[Software.AddReg]" and delete all three numbers that follow as well. Replace those values with your user name, the company name and the serial number for your copy of the software. Save the file, then exit the text editor.
Get Tom's Hardware's best news and in-depth reviews, straight to your inbox.
-
you should try puppy linux on a usb stick, its not windows, but its got its benefits, its free, secure and we,, you'll might enjoy one of the fastest linnux distros aboutReply
-
follow above link, it works!!! only comment, in Step 3 it refers you to step 1, instead it should be referring you to Step 2 command prompt window. Also, there is no need to download their software, i haven't used it to create a boot key, just start with step 2 right away! Best of luck and Thanks for the link post!!!Reply
-
looking for a"FREE" Mini Windows XP ISO for install on a Mini Netbook with only 3Gb HD .. PLease AdviseReply
-
dvijaydev46 Have you tried SARDU? You can create a multi OS USD drive with that tool. It's not only limited to Wondows, but also can you add Linus, antiviruses and other troubleshooting tools.Reply -
dvijaydev46 Have you tried SARDU? You can create a multi OS USD drive with that tool. It's not only limited to Wondows, but also can you add Linus, antiviruses and other troubleshooting tools. http://mytechencounters.wordpress.com/2012/02/27/create-a-multi-bootable-usb-drive-with-linux-and-windows/Reply
-
gosim05 Step "Install Windows" the sentence "Open Windows Explorer and erase all files on the USB flash drive."Reply
DO NOT erase all files, leave BOOT.INI, NTLDR, and NTDETECT. Otherwise peinst.bat won't start the installation.

