Getting The Most Out Of Your TiVo
Remove The 'A' Drive
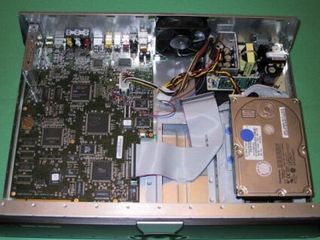
With the cover removed, you can now see where the hard drive is located. Remove the IDE cable and the power cable from the drive. With the cables unhooked, go to the other end of the drive and remove the two T15 Torx screws. The drive should now slide about 1/4" toward the power supply, and once it does, you will be able to lift it out of the case.

With the cover removed, you can see the Quantum hard drive and the unshielded power supply directly behind it.
Mount The 'A' Drive And Backup Drive In Your PC
There is a mounting bracket on the bottom of the drive. Depending on how comfortable you are with the drive dangling from the end of a ribbon cable, you may or may not want to remove the bracket. The jumper settings on the drive are set to "Master." We suggest that you leave the jumper alone and connect the drive to the end of the ribbon cable on the Secondary IDE channel of your PC. The utilities that we are going to use will not work if the drive is connected as a "Primary Master."

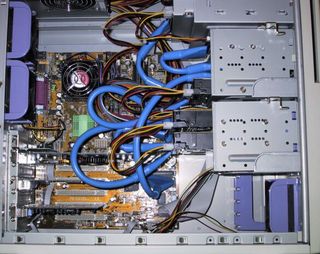
Inside the machine we used to back up the 'A' drive. The original Quantum is the 2nd drive down, the replacement Maxtor is the 3rd.
Set your backup drive to "Slave." If you are unsure of the jumper settings, refer to the drive manufacturer's documentation. Connect the drive to the middle connector on the Secondary IDE channel. For both drives, be sure that the red wire is closest to the power connector of the drives. (The red/ blue stripe on the IDE cable always indicates Pin One.) Verify that you have connected power to both drives, as well.
It is important to verify that the jumper settings are correct. Most of the problems we have seen are caused by the "Master/ Slave" jumper settings being set incorrectly. Below, we have provided links to some of the drive manufacturers' web sites:
Stay on the Cutting Edge
Join the experts who read Tom's Hardware for the inside track on enthusiast PC tech news — and have for over 25 years. We'll send breaking news and in-depth reviews of CPUs, GPUs, AI, maker hardware and more straight to your inbox.
Current page: Remove The 'A' Drive
Prev Page Now It Is Time To Remove The Cover And Get Started! Next Page Boot Your PCMost Popular

