Tom's Hardware Verdict
Anycubic manages the impossible by offering a resin MSLA 3D printer with an oversized build platform and best-in-class accuracy at an affordable price.
Pros
- +
8K LCD resolution and .0285mm XY resolution
- +
Large build volume
- +
Dual integrated air filters
- +
Failure-free printing with the NFEP resin vat film
- +
Stylish industrial design
Cons
- -
Upward-facing bolts on build platform are difficult to clean
- -
Photon Workshop software feels clunky and slow
- -
WiFi not enabled at launch
Why you can trust Tom's Hardware
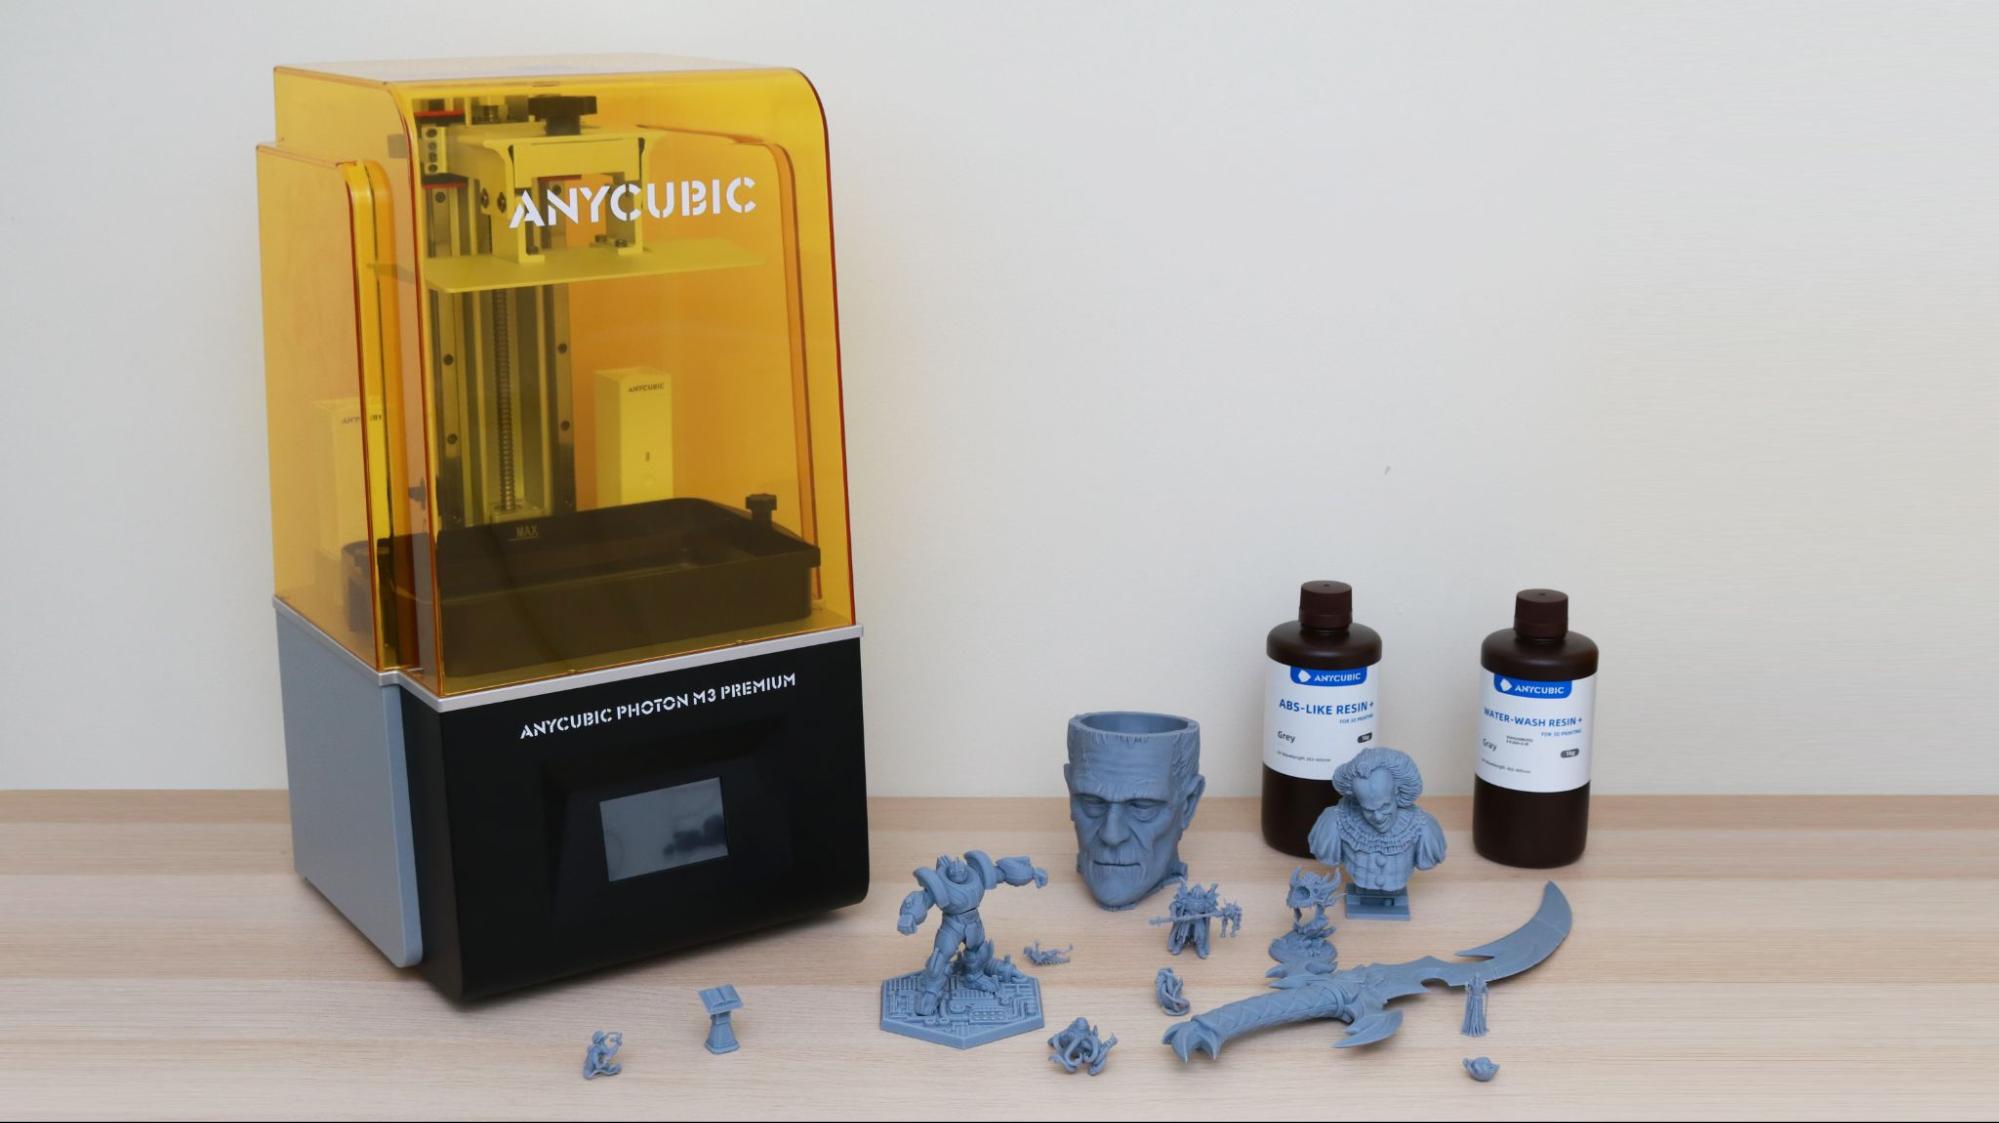
The Anycubic Photon M3 Premium is a workhorse resin MSLA 3D printer that is designed to offer uncompromising performance for serious hobbyists and small-volume part production. The .0285mm XY resolution makes the Photon M3 Premium one of the highest-resolution desktop resin MSLA 3D printers available while its 219mm x 123mm x 250mm build volume is one of the largest on the market.
Either of these two would be a notable accomplishment, but by combining the two into a single machine that also has integrated air filters, a modern and simple 4.3-inch LCD user interface, and a razor-thin NFEP film for easy part separation, Anycubic has created one of the best resin 3D printers on the market for large format printing. With a special intro price of $619 and a planned retail price of $639, the Anycubic Photon M3 Premium is a printer that will likely sell out quickly after launch.
Anycubic Photon M3 Premium Specifications
| Machine Footprint | 13.78 x 12.91 x 24.6 inches (350 x 328 x 626 mm) |
| Build Volume | 8.6 x 4.85 x 9.85 inches (219 x 123 x 250 mm) |
| Resin | Standard, Water-Washable, and ABS-like UV Resin |
| UV Light | Anycubic LighTurbo 2.0 |
| Masking LCD Resolution | 7680 x 4320 px (8K) |
| Masking LCD Size | 10-inch |
| Interface | 4.3-inch LCD Touchscreen |
| XY Resolution | .0285 mm |
Included in the Box of Anycubic Photon M3 Premium
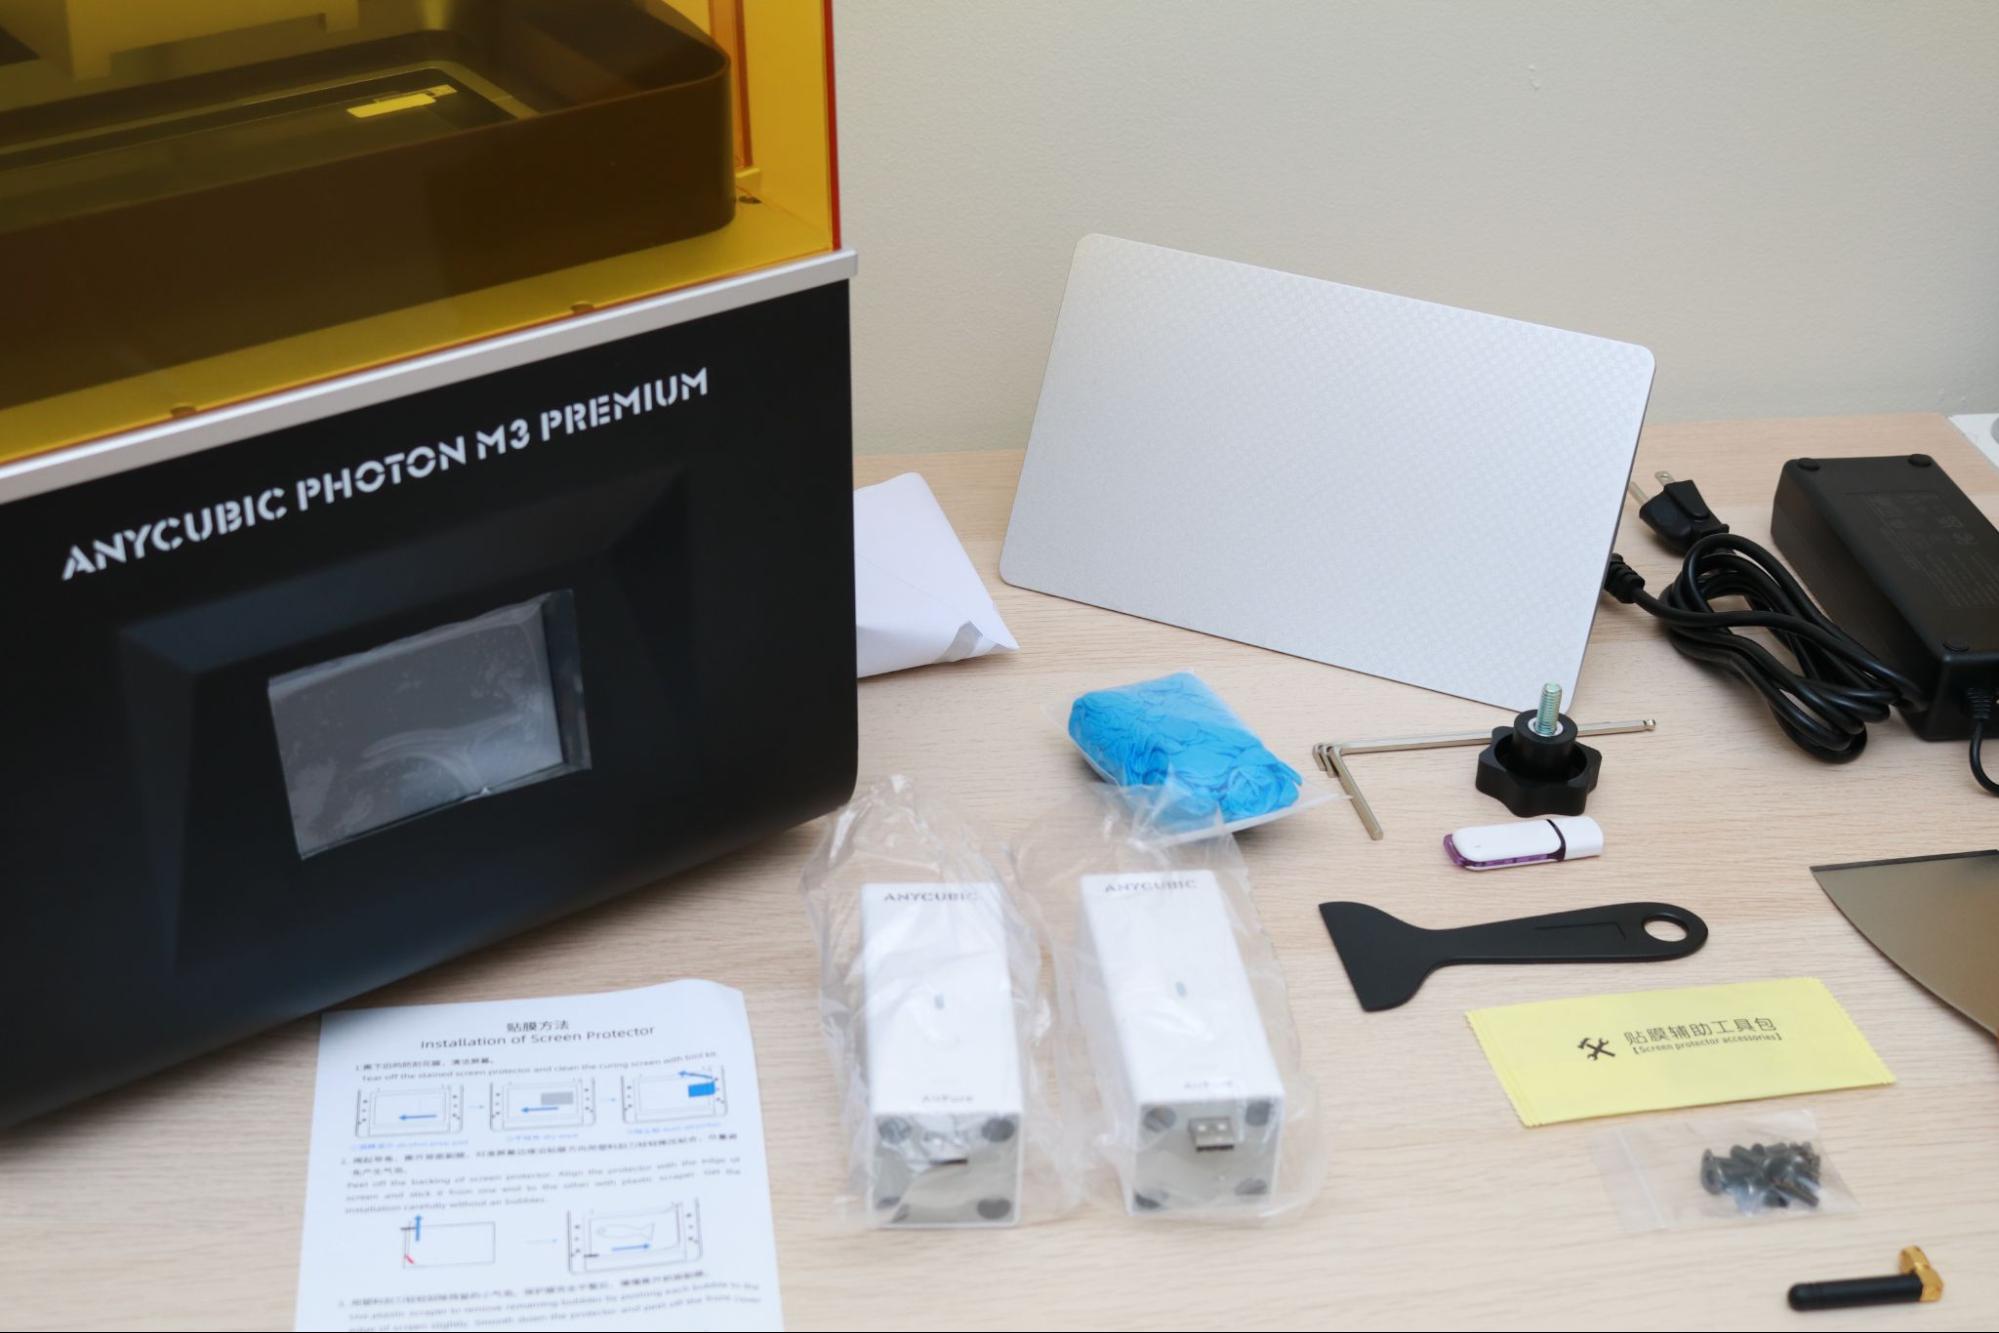
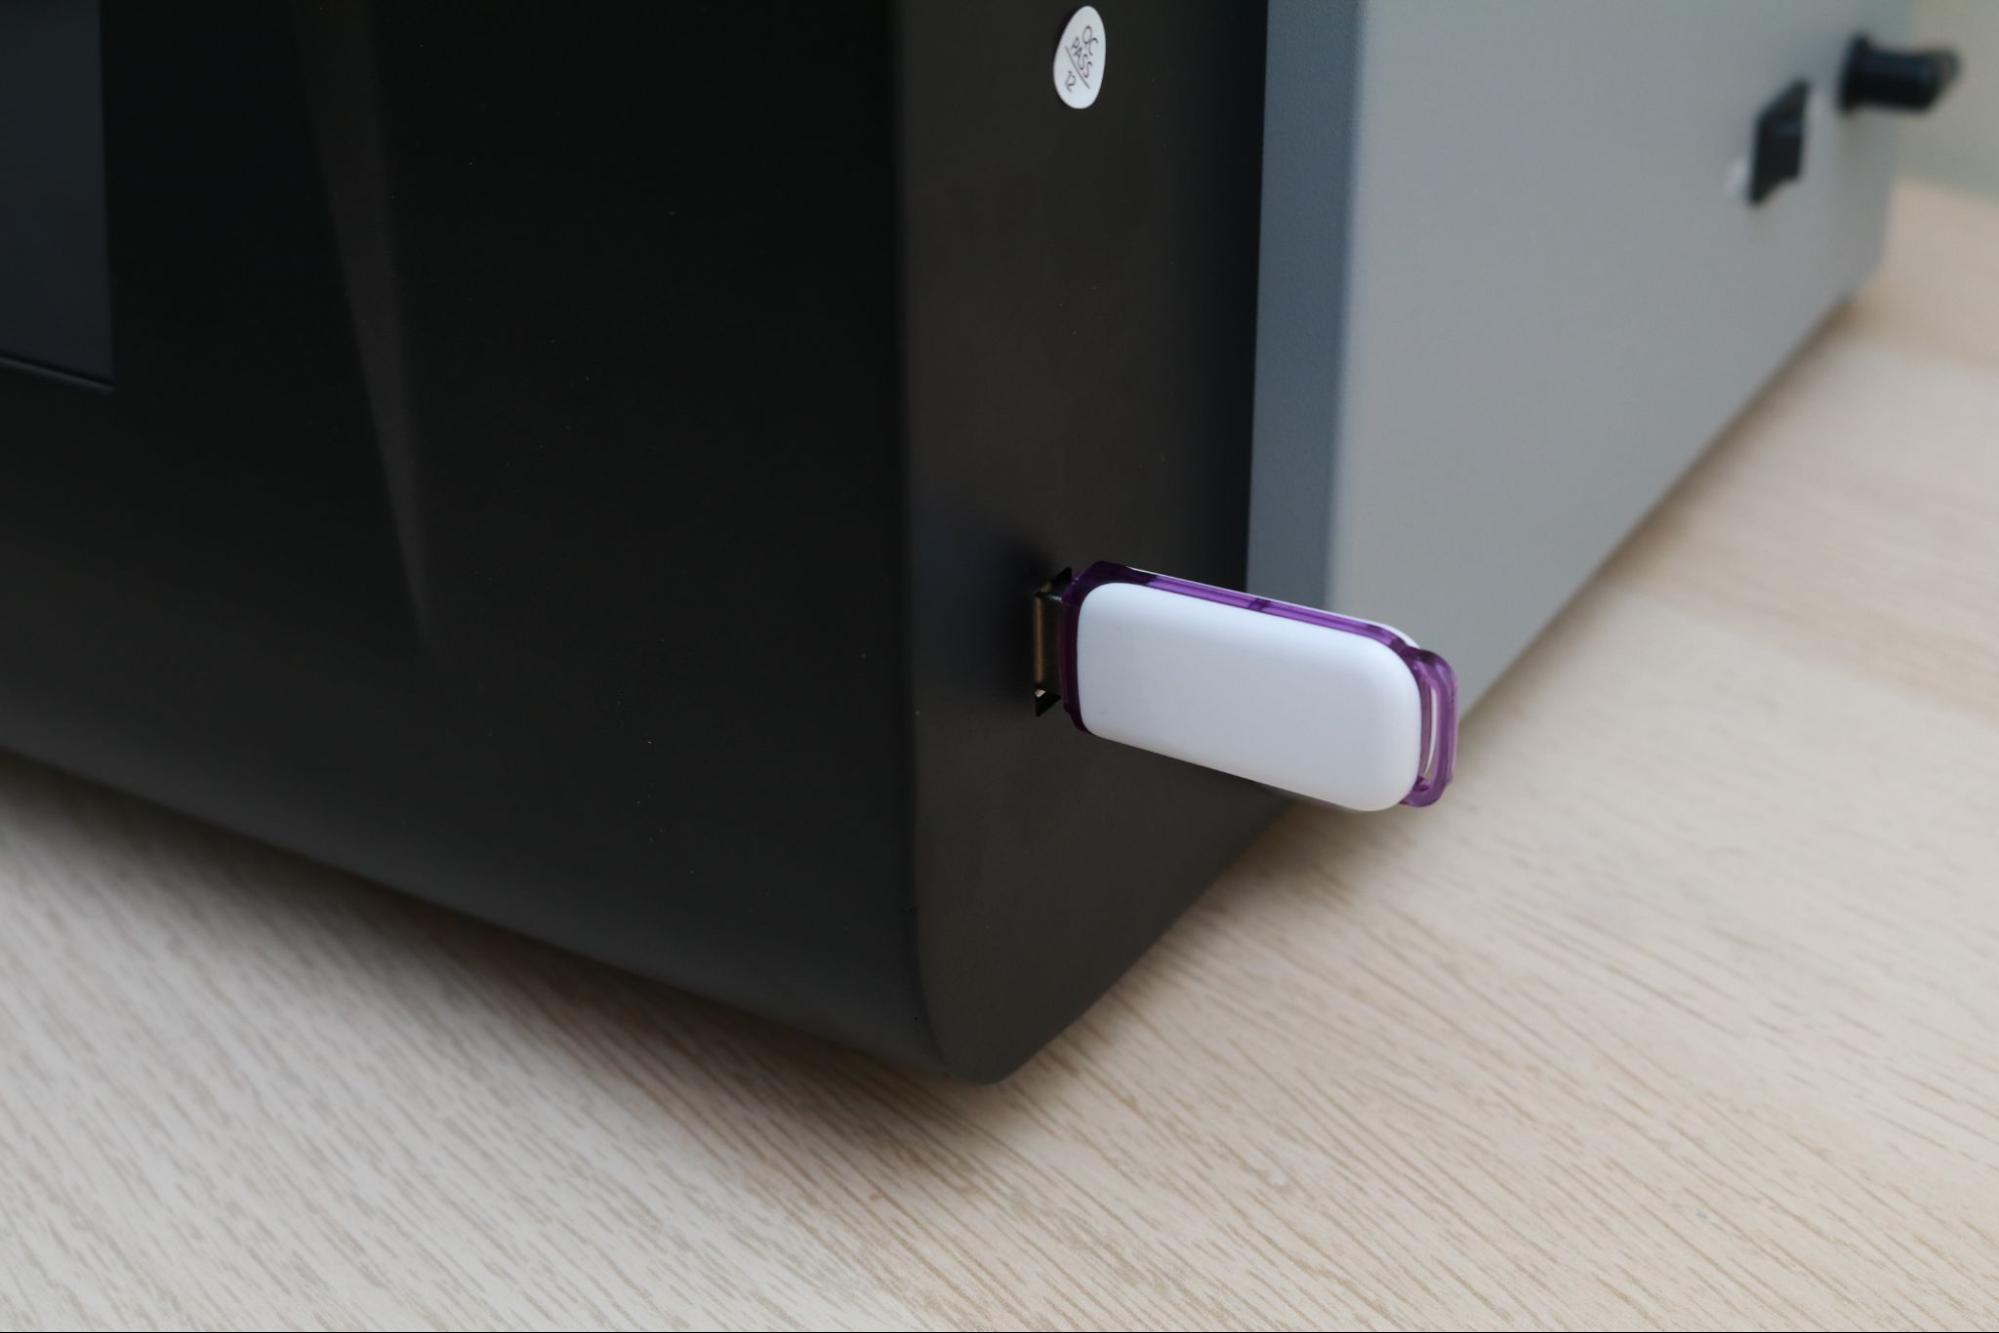
The Anycubic Photon M3 Premium arrives with minimal assembly required, and includes all the tools, consumables, and accessories you need to start printing. Included in the box are a metal scraper for the build platform, a plastic scraper for the resin vat, a set of Allen keys, and consumables like gloves, masks, and paper funnels for reclaiming resin from the vat. The yellow UV-resistant lid rests on top of the base of the machine, and the side-mounted USB port and power switch are easy to access during printing.
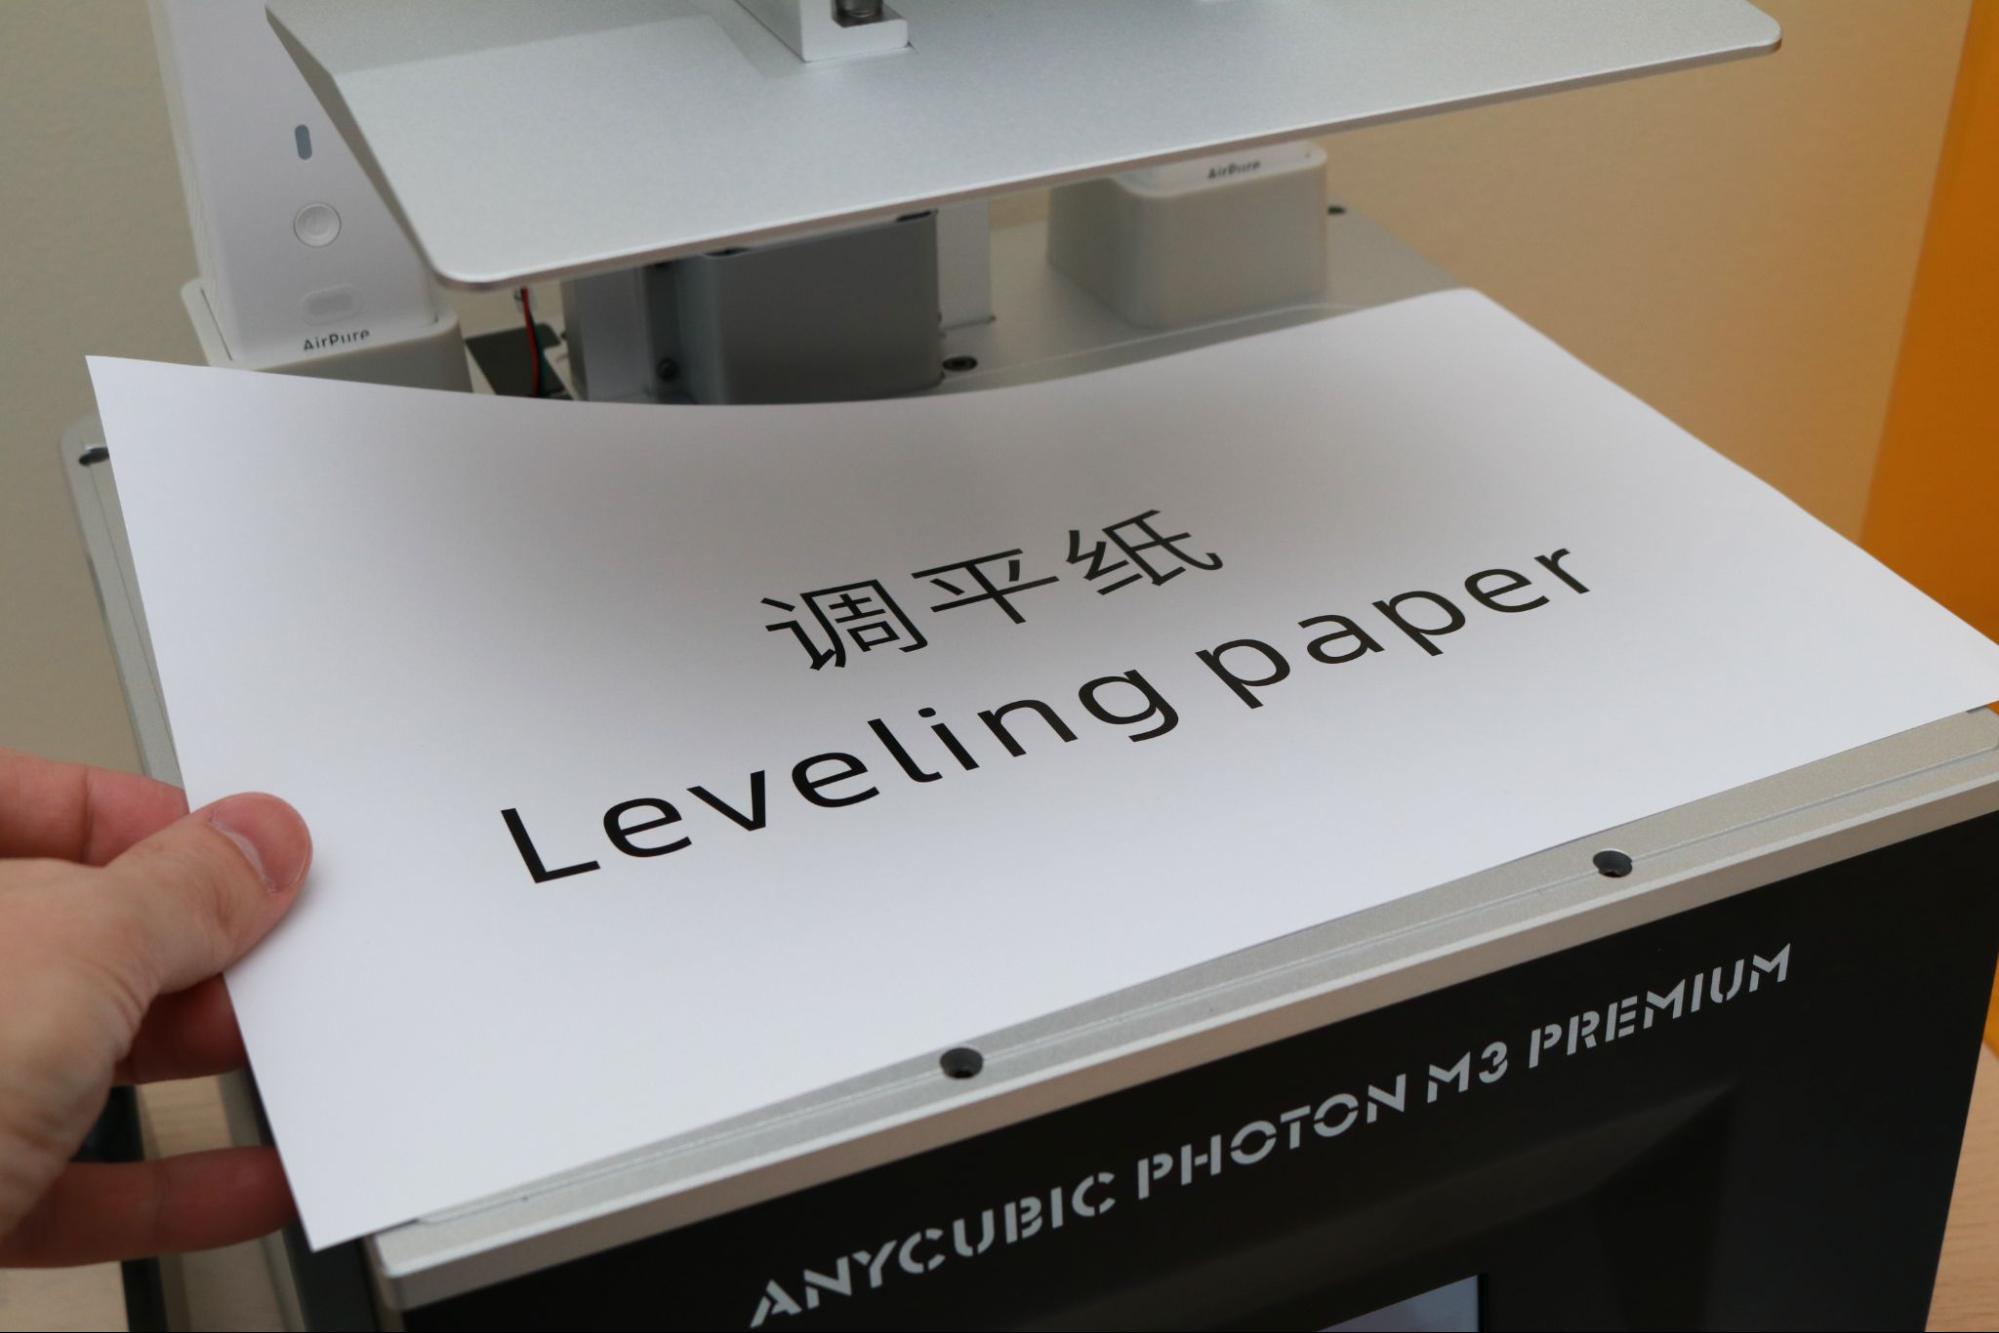
In addition to a paper manual and leveling paper, the Photon M3 Premium also includes a 4GB USB thumb drive loaded with a PDF copy of the manual, the Photon Workshop slicer app (for MacOS and Windows), and two print-ready sliced models.
Design of Anycubic Photon M3 Premium
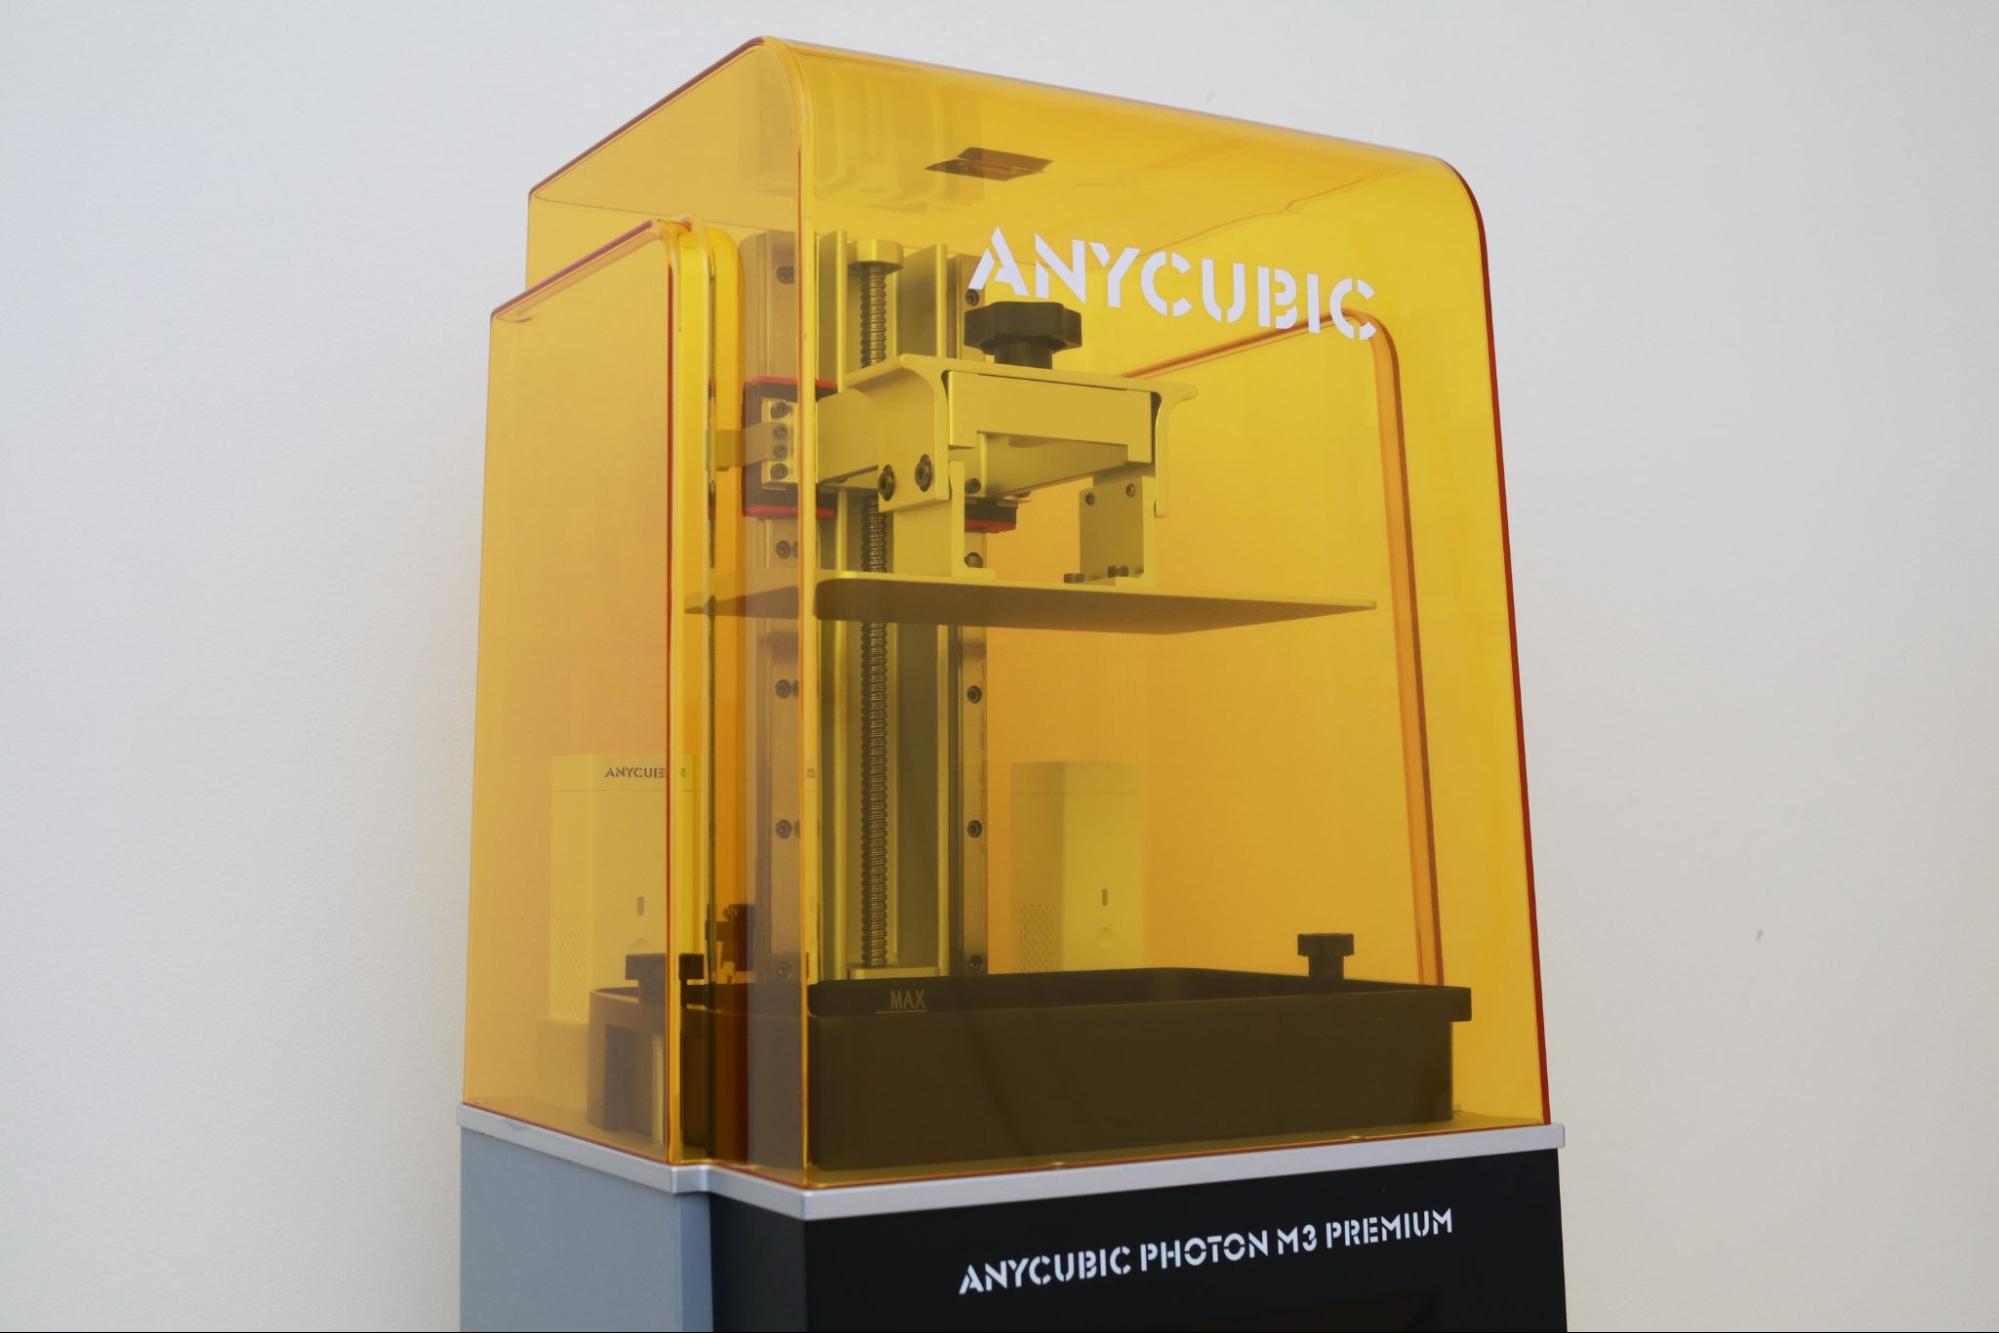
As the name implies, the Anycubic Photon M3 Premium is positioned at the top of the Photon M3 line of printers. The overall design of the Photon M3 Premium shares similarities to the smaller Photon M3 including the yellow UV lid, recessed and angled touchscreen, and Anycubic logo printed directly on the base.
However, the Photon M3 Premium still remains visually distinct from the larger Photon M3 Plus and Photon M3 Max. Unlike the rest of the Anycubic Photon M3 family of printers, the Photon M3 Premium has a curved UV lid that is reminiscent of an Art Deco building with offset sweeping curves and a gentle upwards taper.
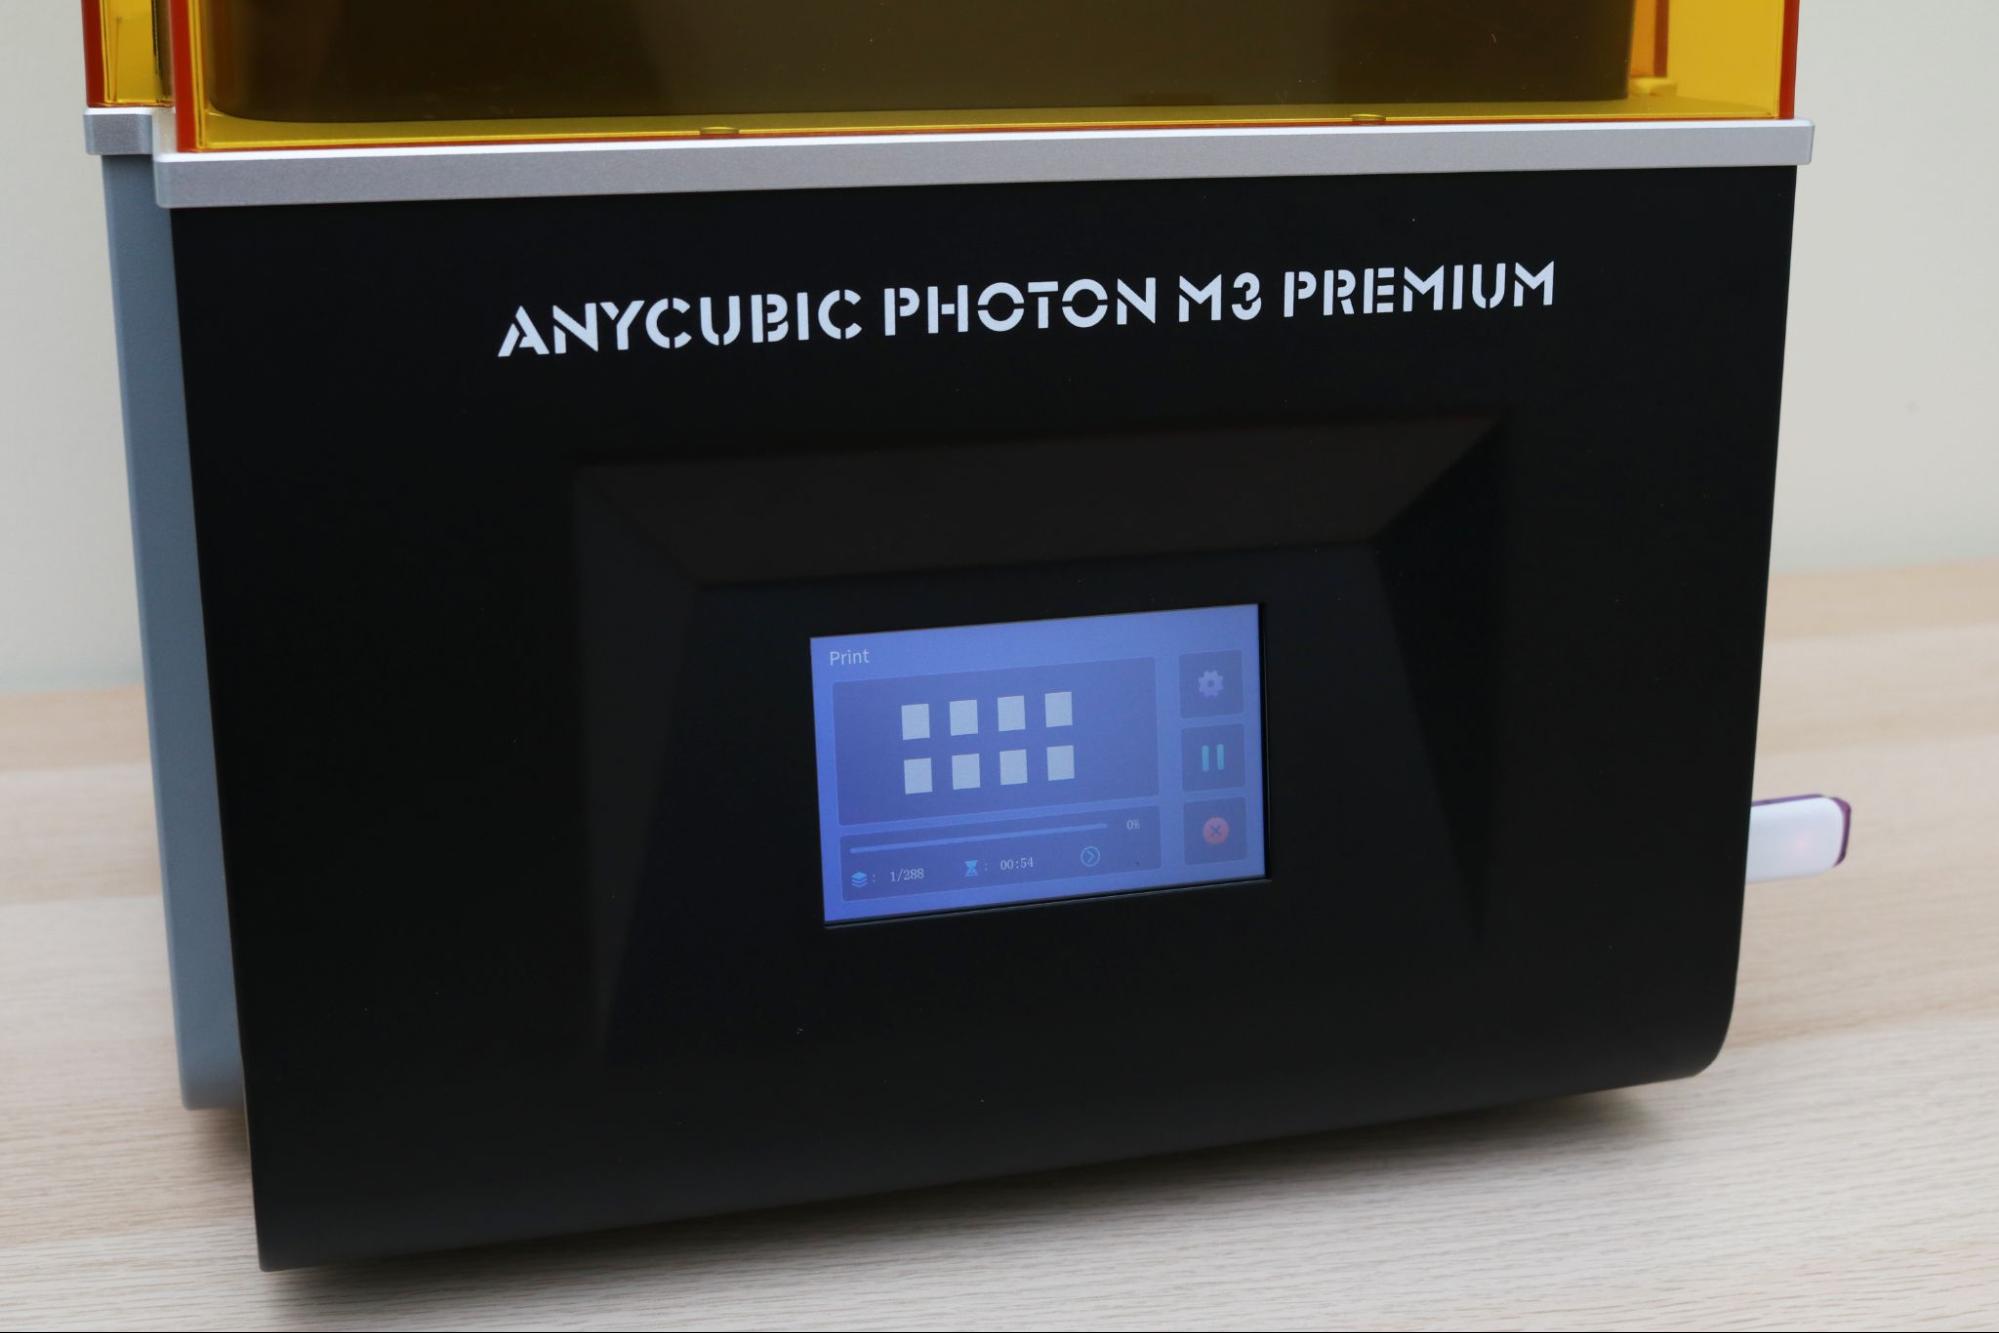
The 4.3-inch color LCD touchscreen is the primary interface for the Photon M3 Premium, and the menu is the same as the UI used on the Photon M3 Plus. The interface is simple and intuitive, with commonly used tools like Exposure Test and Z-axis homing being easy to find and use. The Print, System, and Tools menus are well laid-out and intuitive for beginners who are looking to get a print started.
Get Tom's Hardware's best news and in-depth reviews, straight to your inbox.
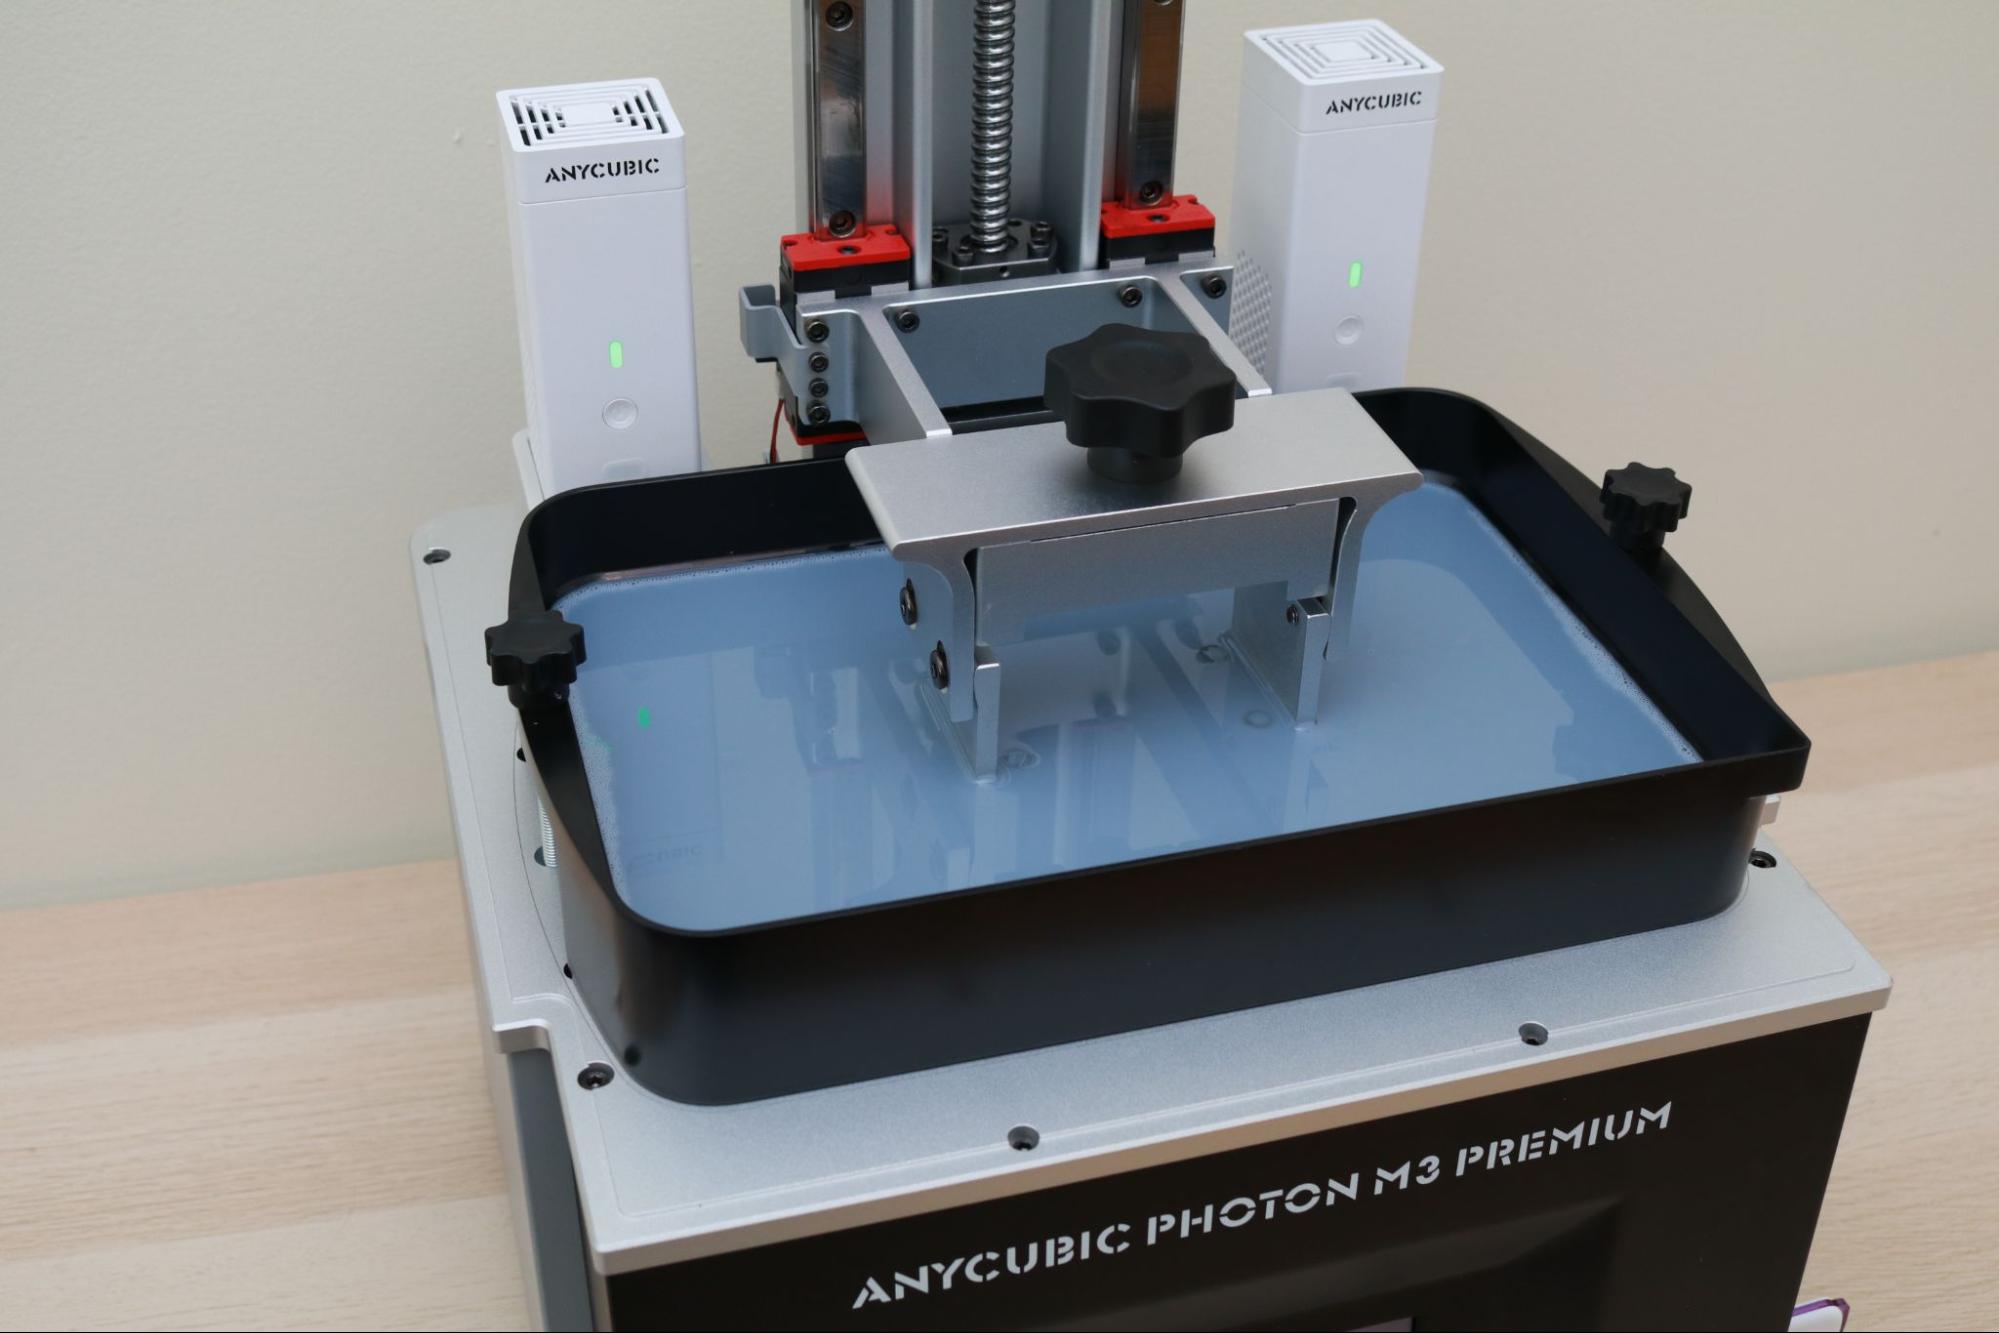
Just like the Anycubic Photon Mono X, the Photon M3 Premium has a triangular build platform that is designed to allow resin to flow back into the vat during printing. This taper makes cleaning the build platform between prints easy, but excess resin can pool in the recess between the mounting bracket and the platform. The large size of the platform means it should be removed using both hands, and the curved handles are ideal for the lifting from the sides.
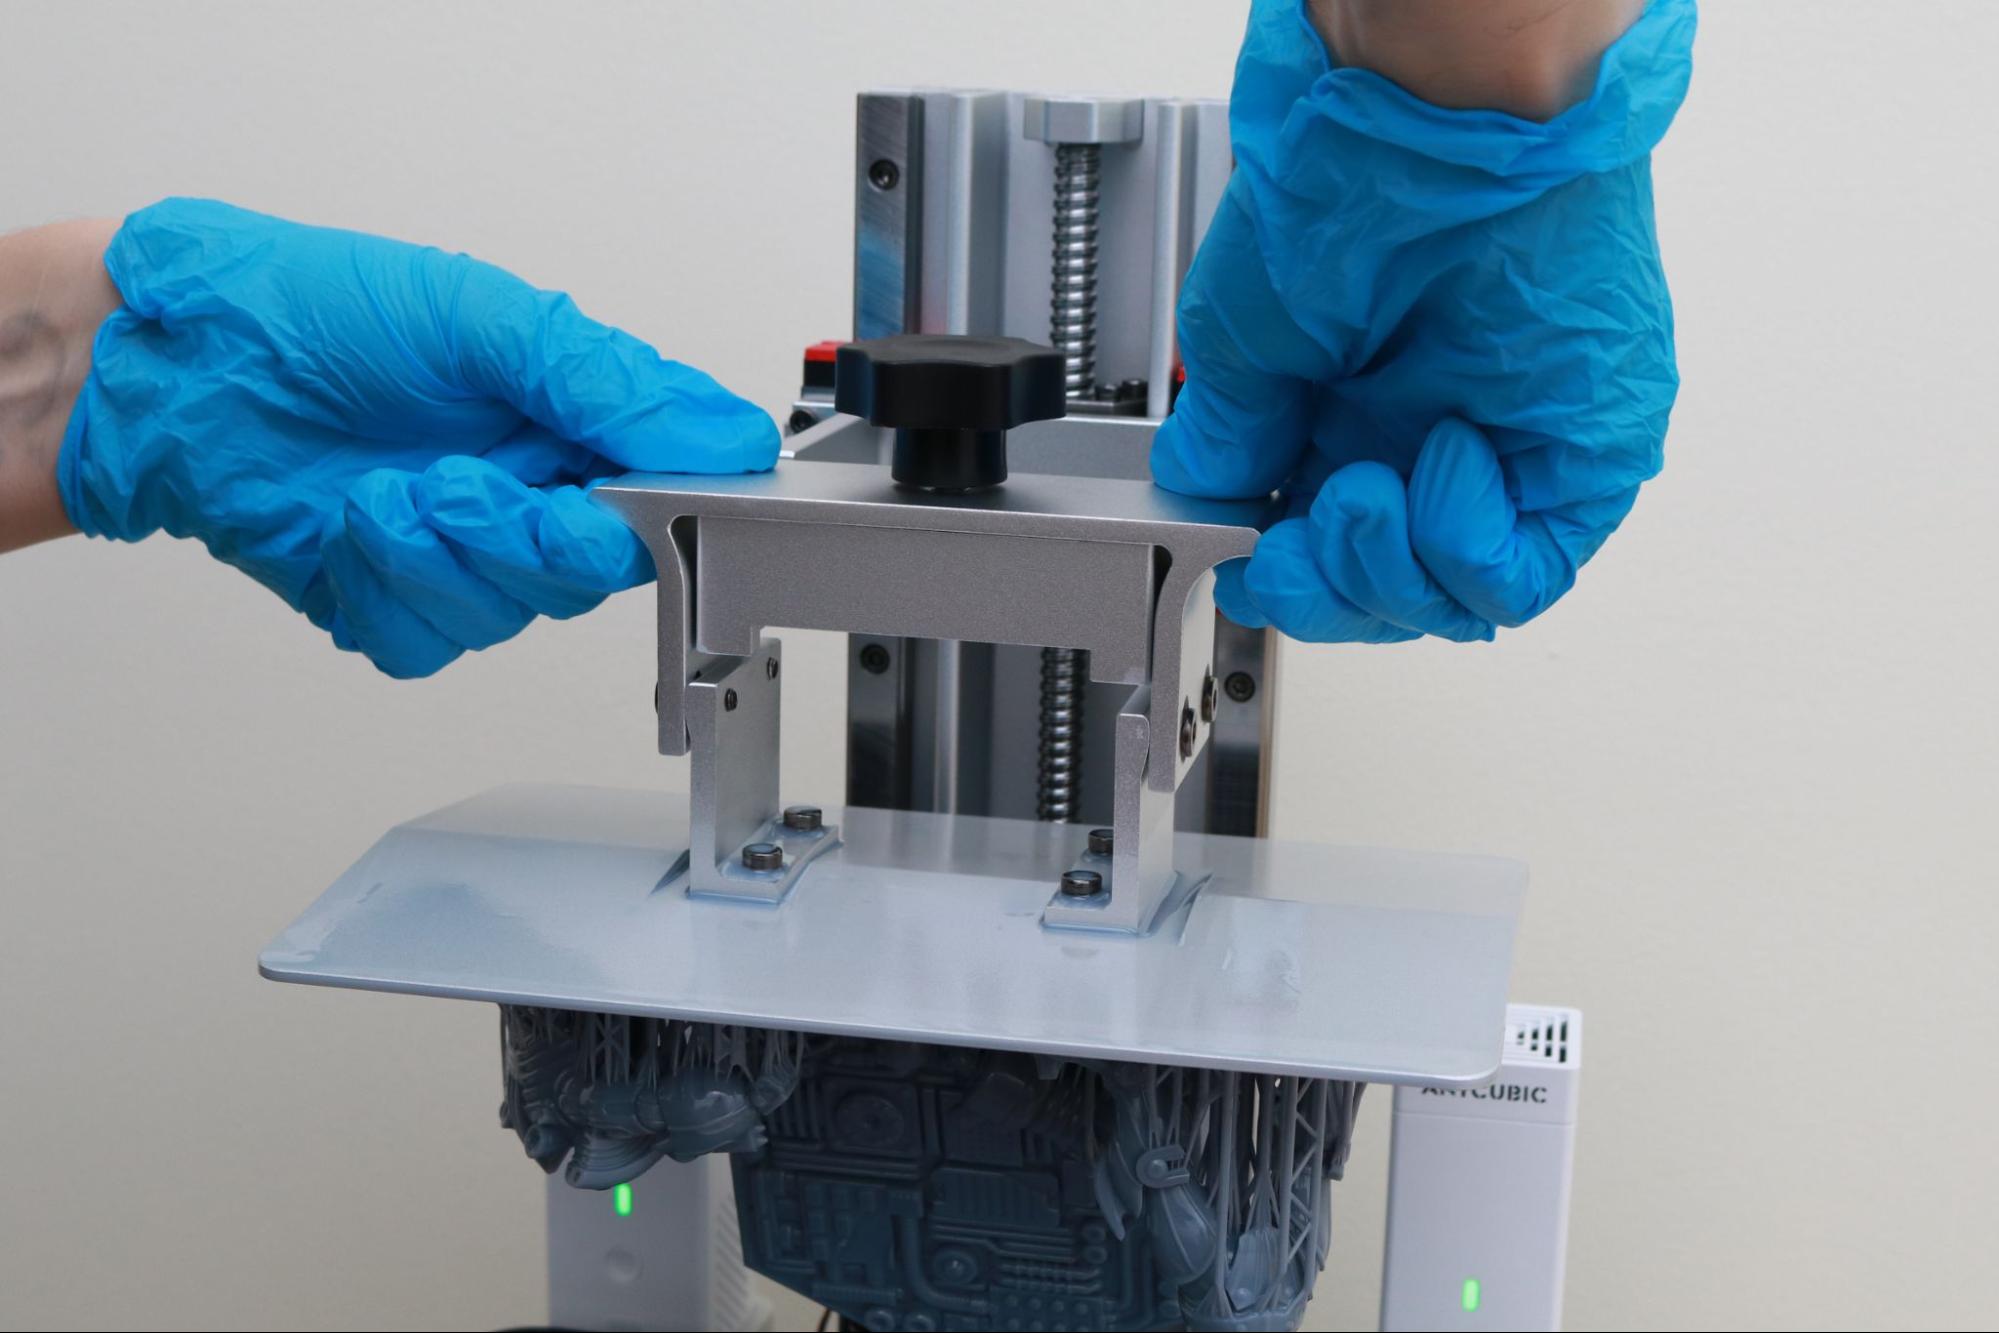
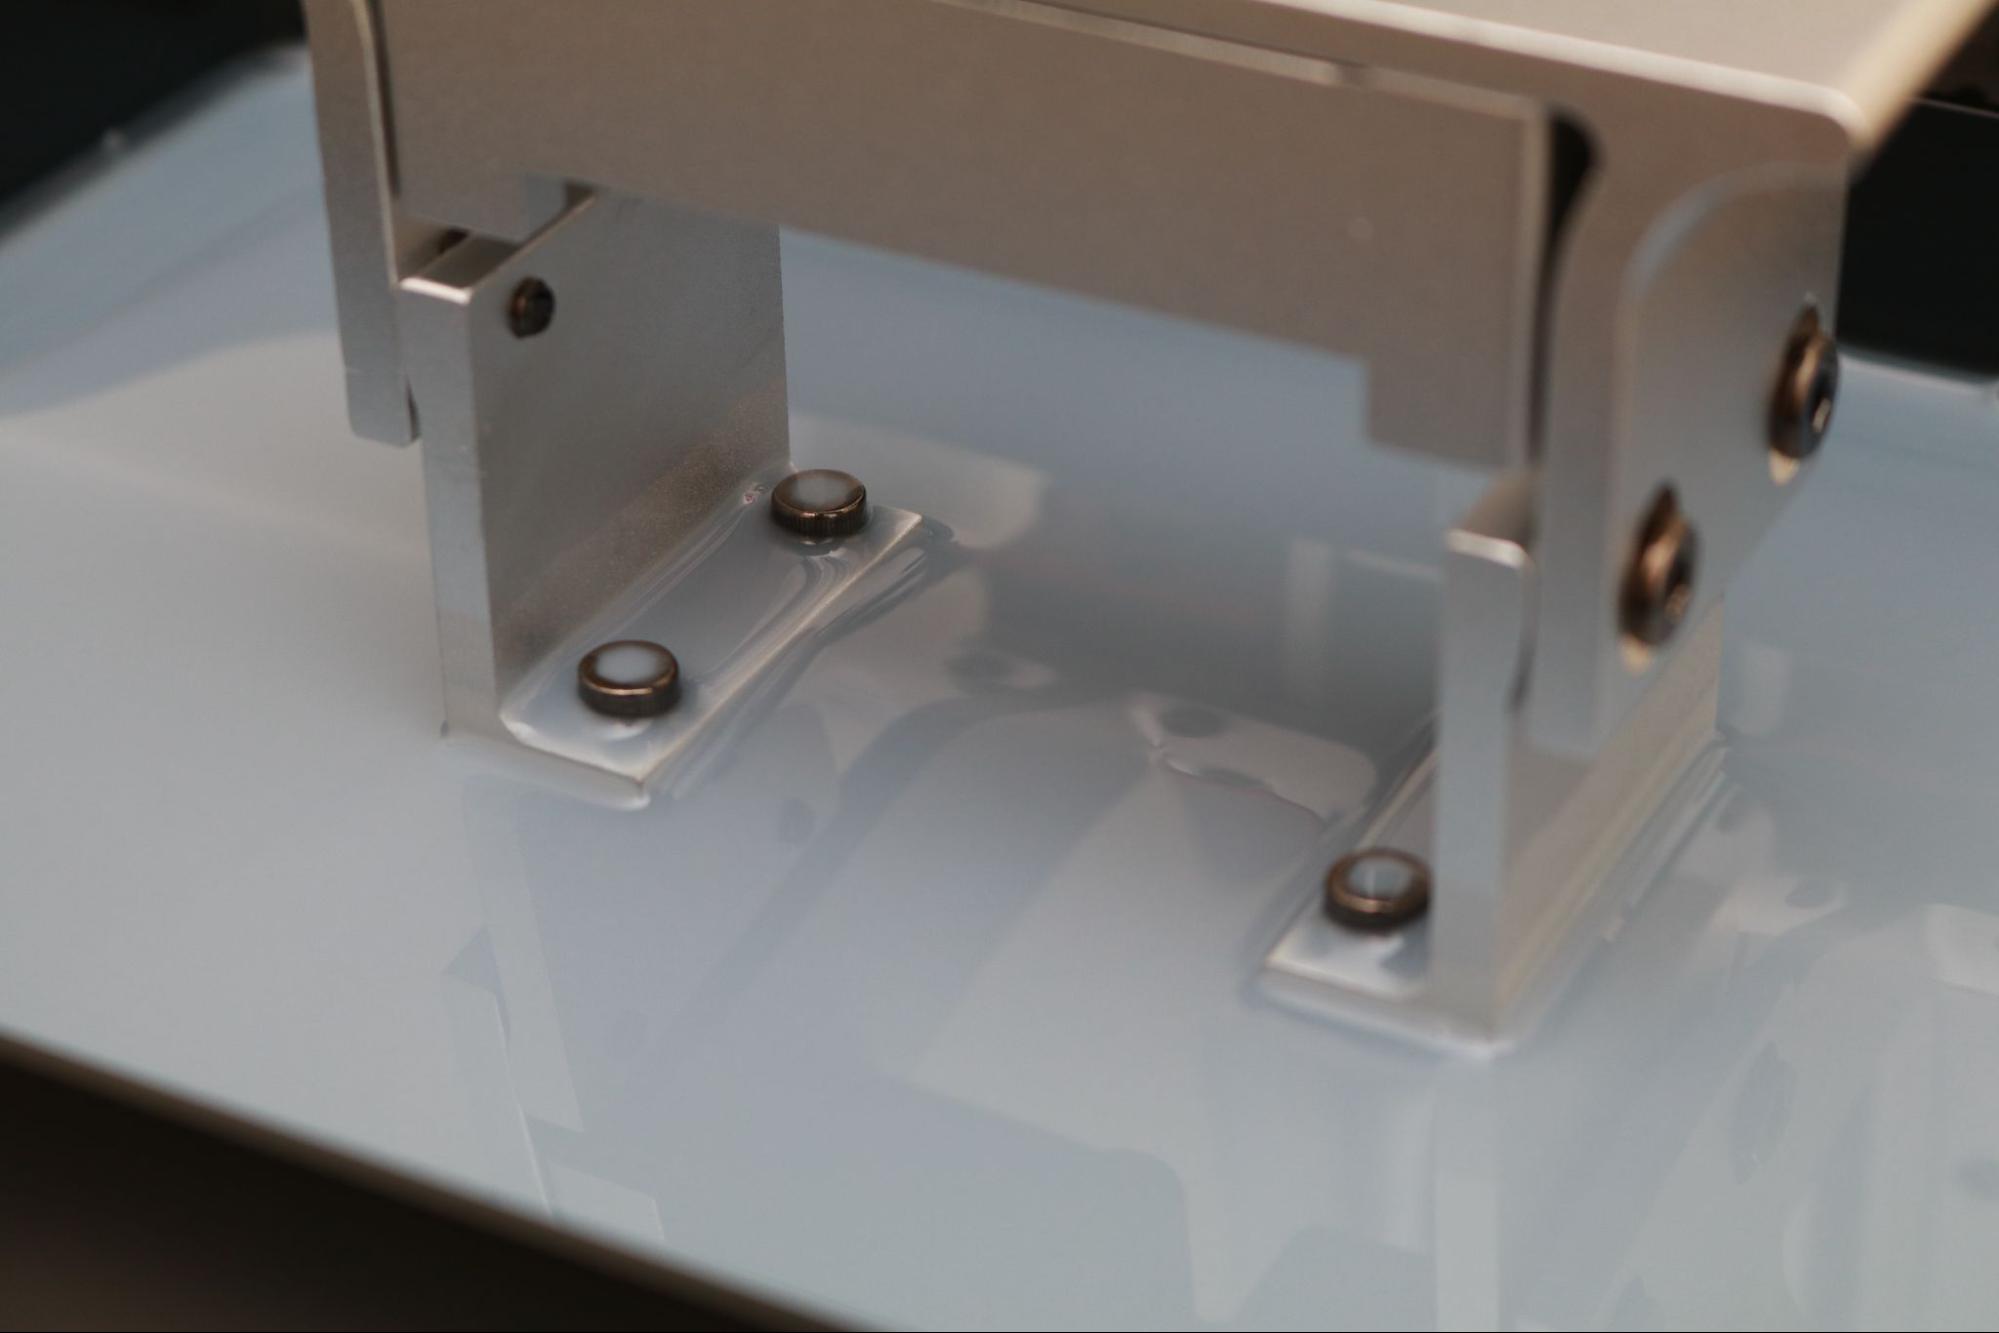
In addition, the upward-facing bolt heads will collect resin and can be difficult to clean fully. This is a minor issue but if you swap materials often and want to avoid any cross-contamination, cleaning these areas thoroughly will be very important.
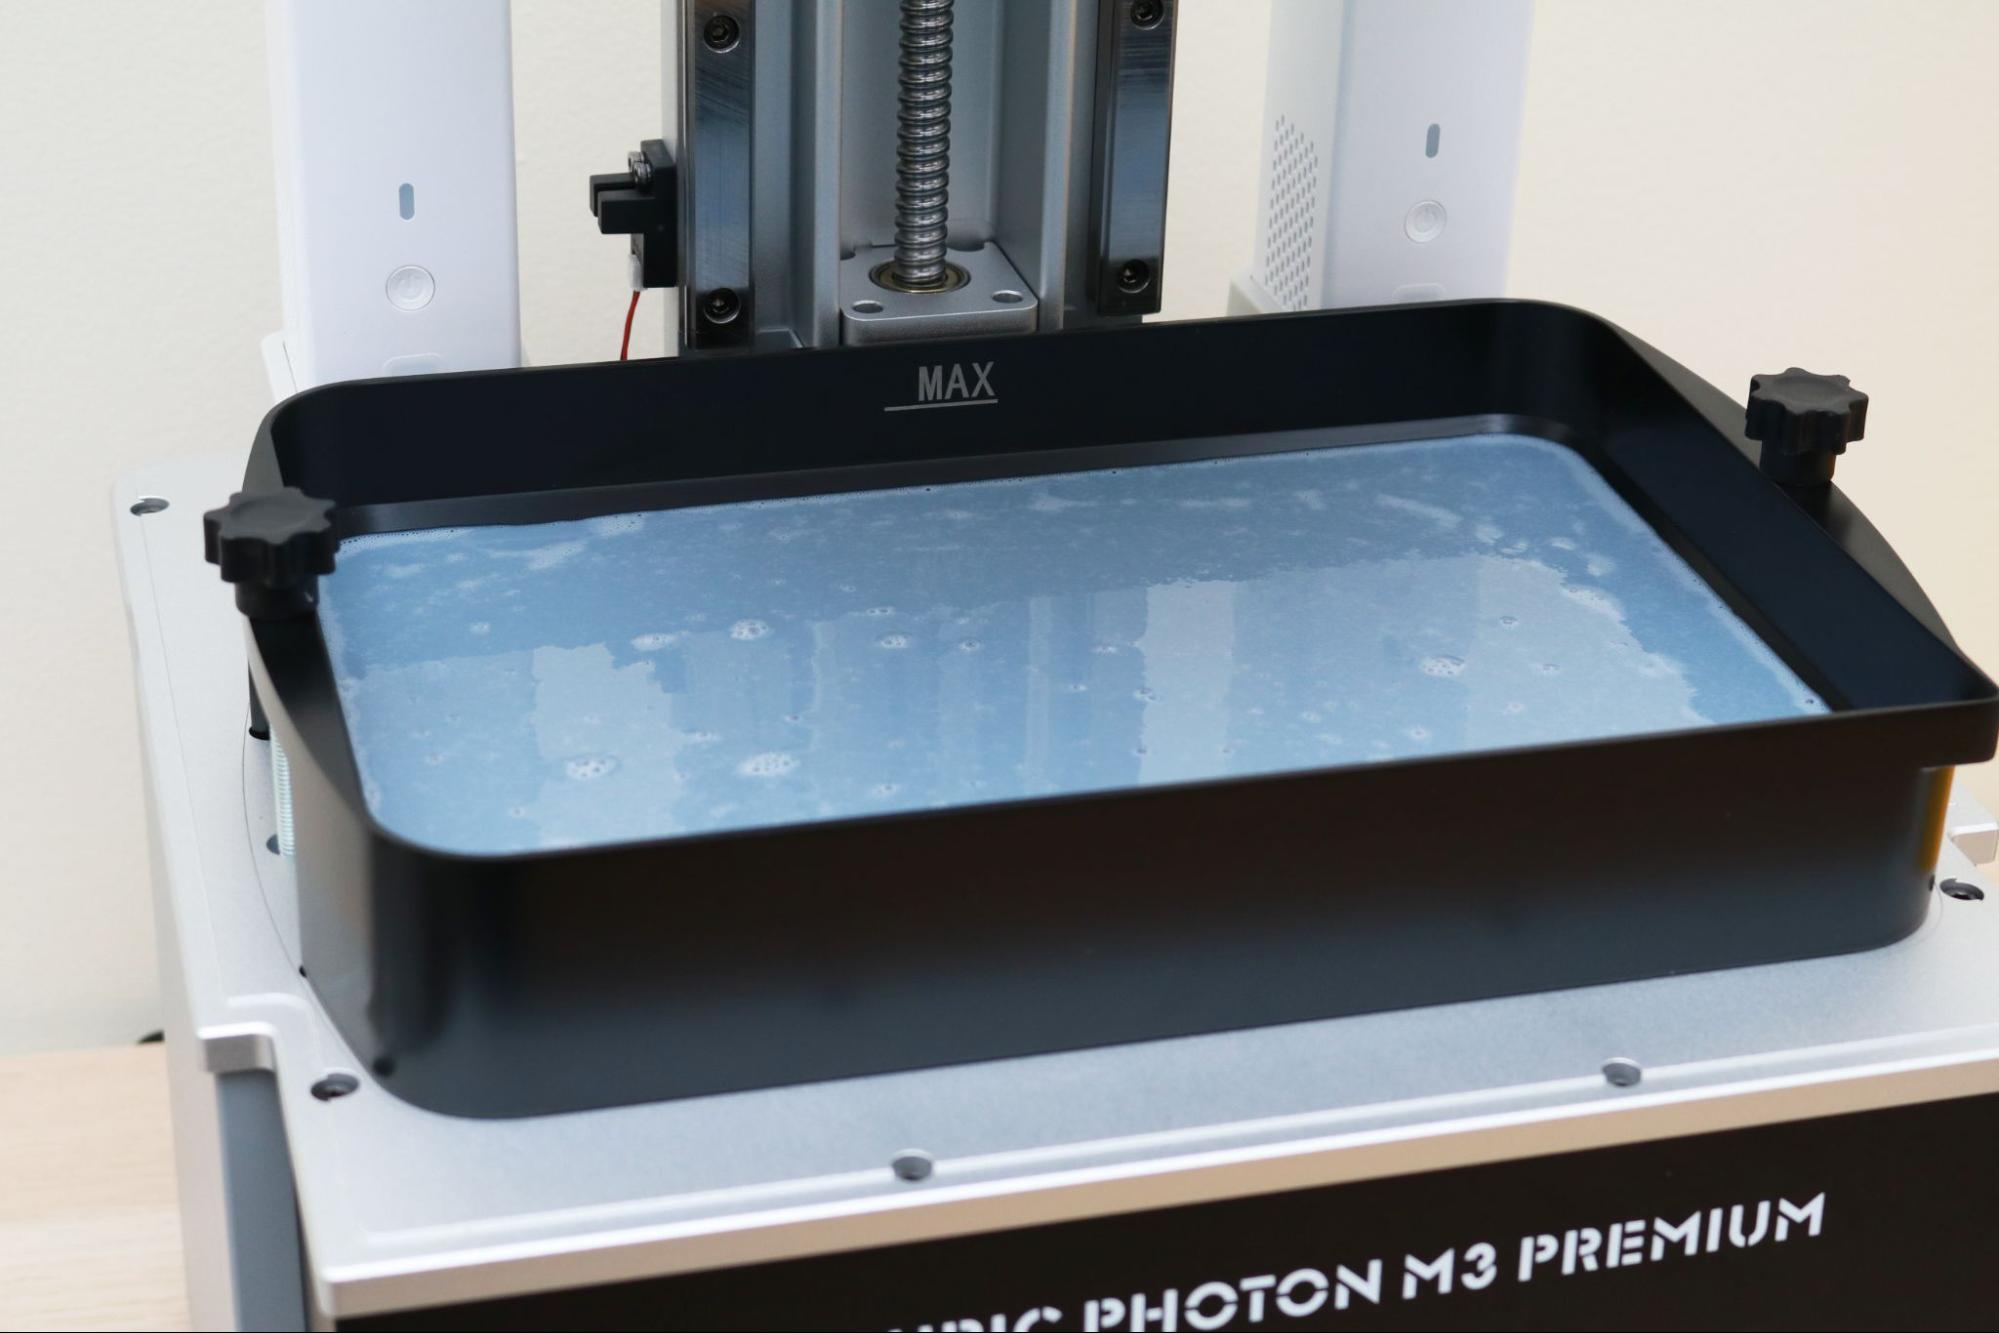
The Photon M3 Premium features the new “NFEP” vat film which is advertised as having a 10% higher success rate over standard FEP film films. The smooth surface of the NFEP film is designed to allow models to detach easily during printing, without delaminating from the platform. Models sticking to the film is a common failure mode with resin printing, a problem I did not encounter while using the Photon M3 Premium.
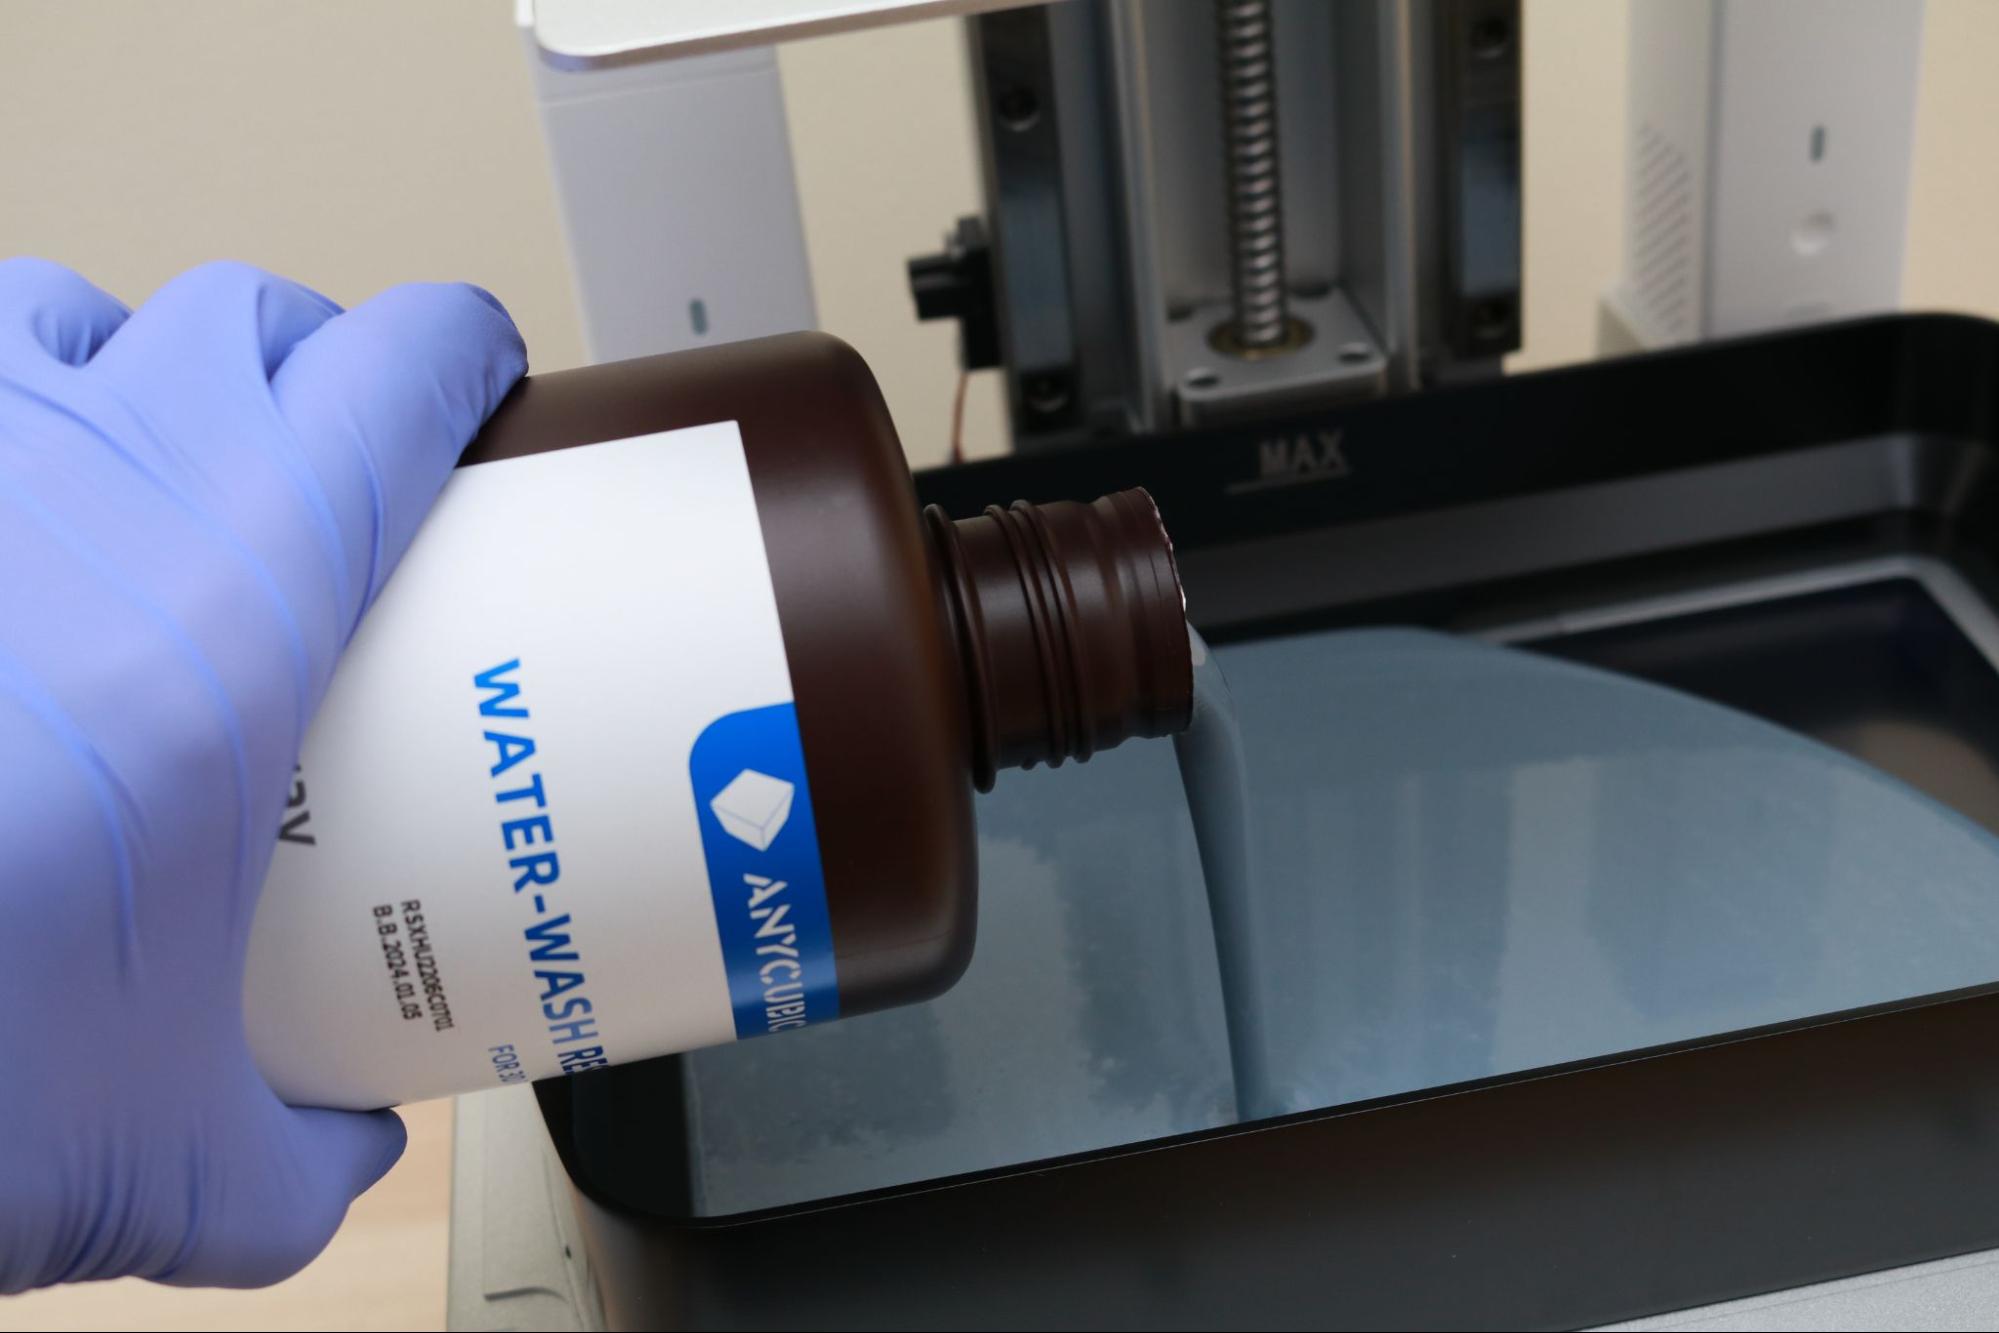
The resin vat itself is held down with two large thumb screws located on the edges of the vat, and there are four bolts that are used as locating features to help guide the vat into place. The vat is large enough to easily accommodate an entire bottle of resin and still have plenty of room for more, a feature which allows users to create large and dense parts without needing to pause and refill the resin during a print.
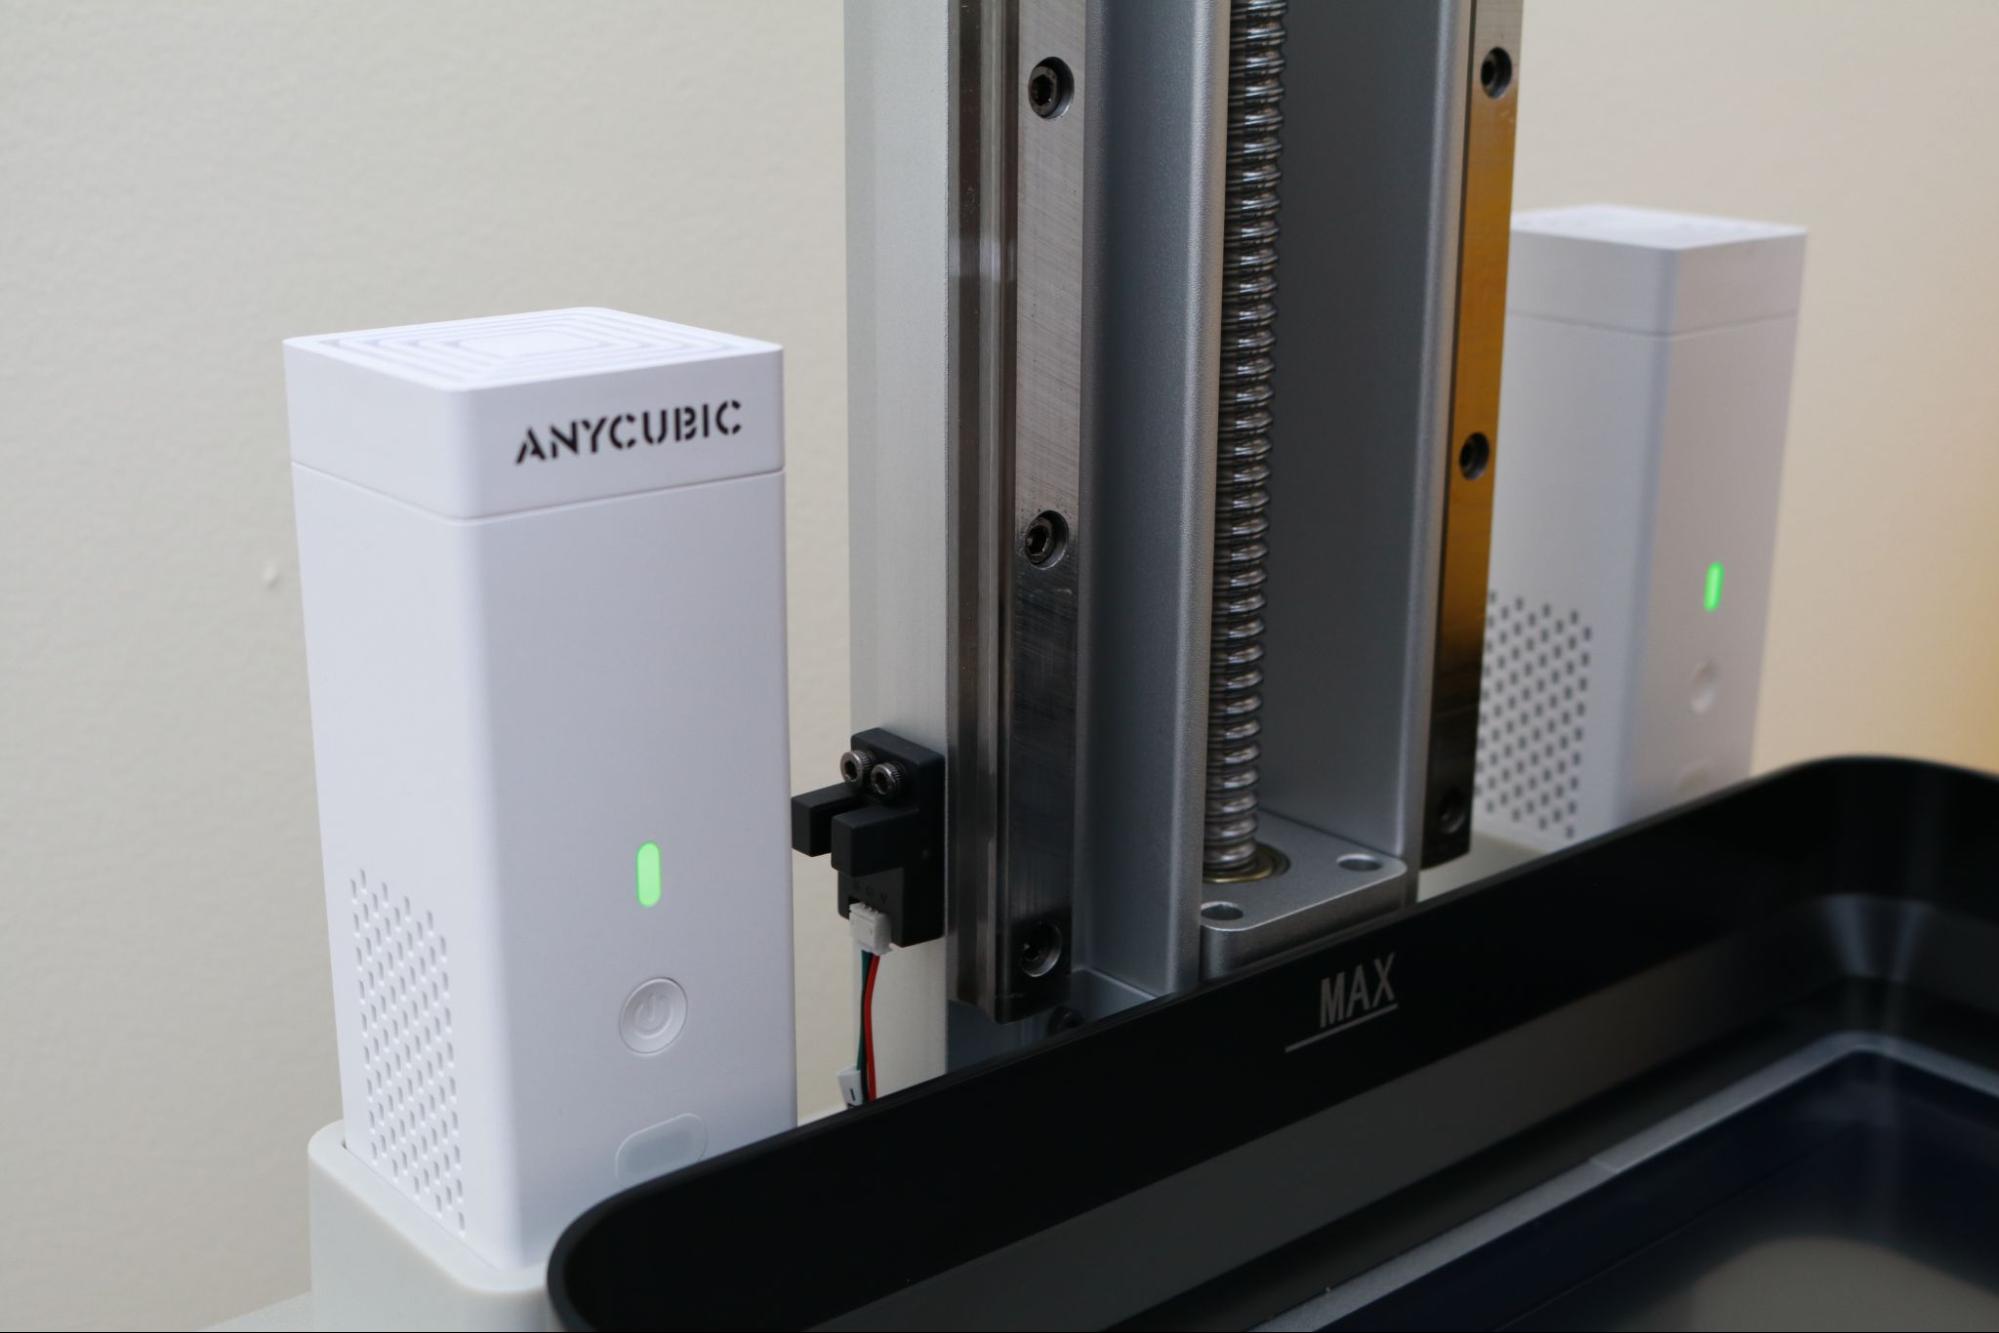
The Photon M3 Premium has dual air filters mounted behind the vat that plug directly into the base of the machine. I think that the addition of air filters on resin printers is an excellent idea, as they reduce the overall amount of odor that escapes during printing while actively filtering the air underneath the UV hood of the printer. Air filters like the ones included with the Photon M3 Premium are often sold separately as after-market accessories, but they are quickly becoming standard on large-volume printers like the Elegoo Saturn S, which also features an integrated air filter unit.
The build platform features a laser-etched pattern which is designed to improve adhesion of the bottom layer during printing. This pattern leaves a very delicate impression in the very first layer of every print, similar to the textured platform on the Prusa MK3S+. This texture helps to hide the typically glassy appearance of the platform-facing layer, and also gives models better adhesion by creating a more complex surface to stick to during printing. The platform itself feels large and substantial, and the 4 upward-facing mounting bolts and 4 leveling bolts are typical of other Anycubic machines, like the Anycubic Photon Mono and Anycubic Photon Mono X.
Leveling the Build Platform on Anycubic Photon M3 Premium
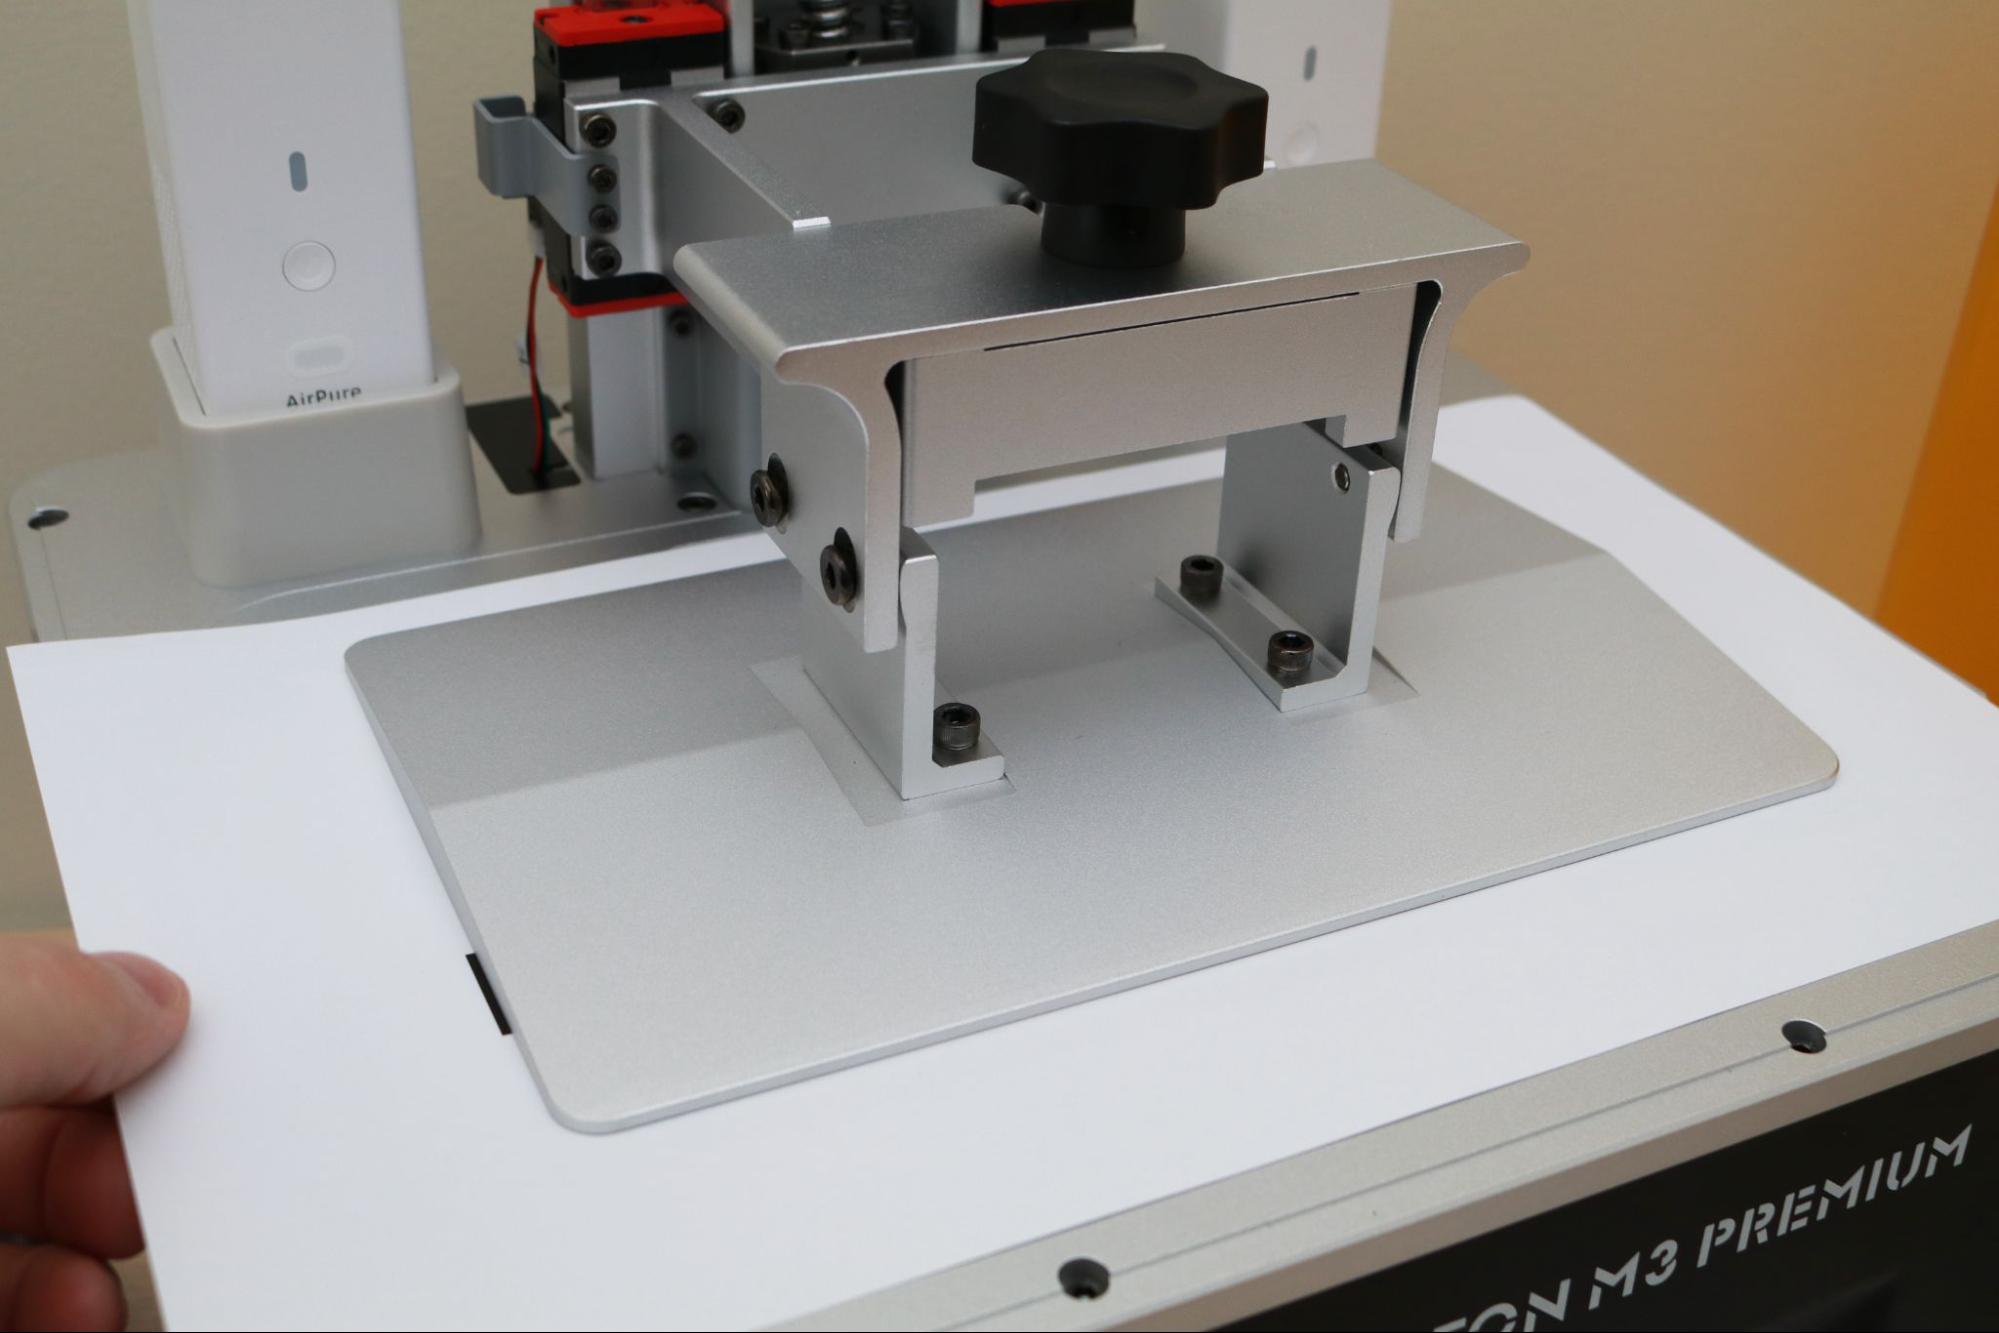
Leveling the build platform on a resin printer is a critical component of creating successful prints, and Anycubic has put effort into making this process easy and straight-forward for users. In order for parts to adhere correctly to the build platform, the surface of the platform needs to be planar with the masking LCD.
Just as with the other printers in the Anycubic Photon M3 and Photon families, the build platform is leveled by first loosening the four bolts holding it to the gantry, lowering it to the base with a piece of paper used as an offset, and retightening the bolts to lock it in position. This process should be done slowly and carefully the first time to avoid damaging the build platform and masking LCD. I didn’t need to relevel the build platform during my testing after the initial test, which means the platform didn’t shift or drift during printing.
Printing Safety with Anycubic Photon M3 Premium
The Anycubic Photon M3 Premium uses 405nm UV resin, a material that you need to handle safely when in an uncured state to avoid injury. The resin can be harmful when making contact with skin, so make sure to wear gloves when pouring, cleaning up, or handling uncured resin. I also make sure I’m wearing gloves when removing the build platform after a print, as the resin tends to pool on top of the platform and can drip off while the platform is being removed.
Make sure you use the Photon M3 Premium in a well-ventilated room to minimize the danger from inhaling fumes. Any spills or uncured resin stuck to a surface should be cleaned using 99% Isopropyl Alcohol and the container for the resin should be kept closed and secured when not actively pouring material.
Printing the Included Test Prints on the Anycubic Photon M3 Premium
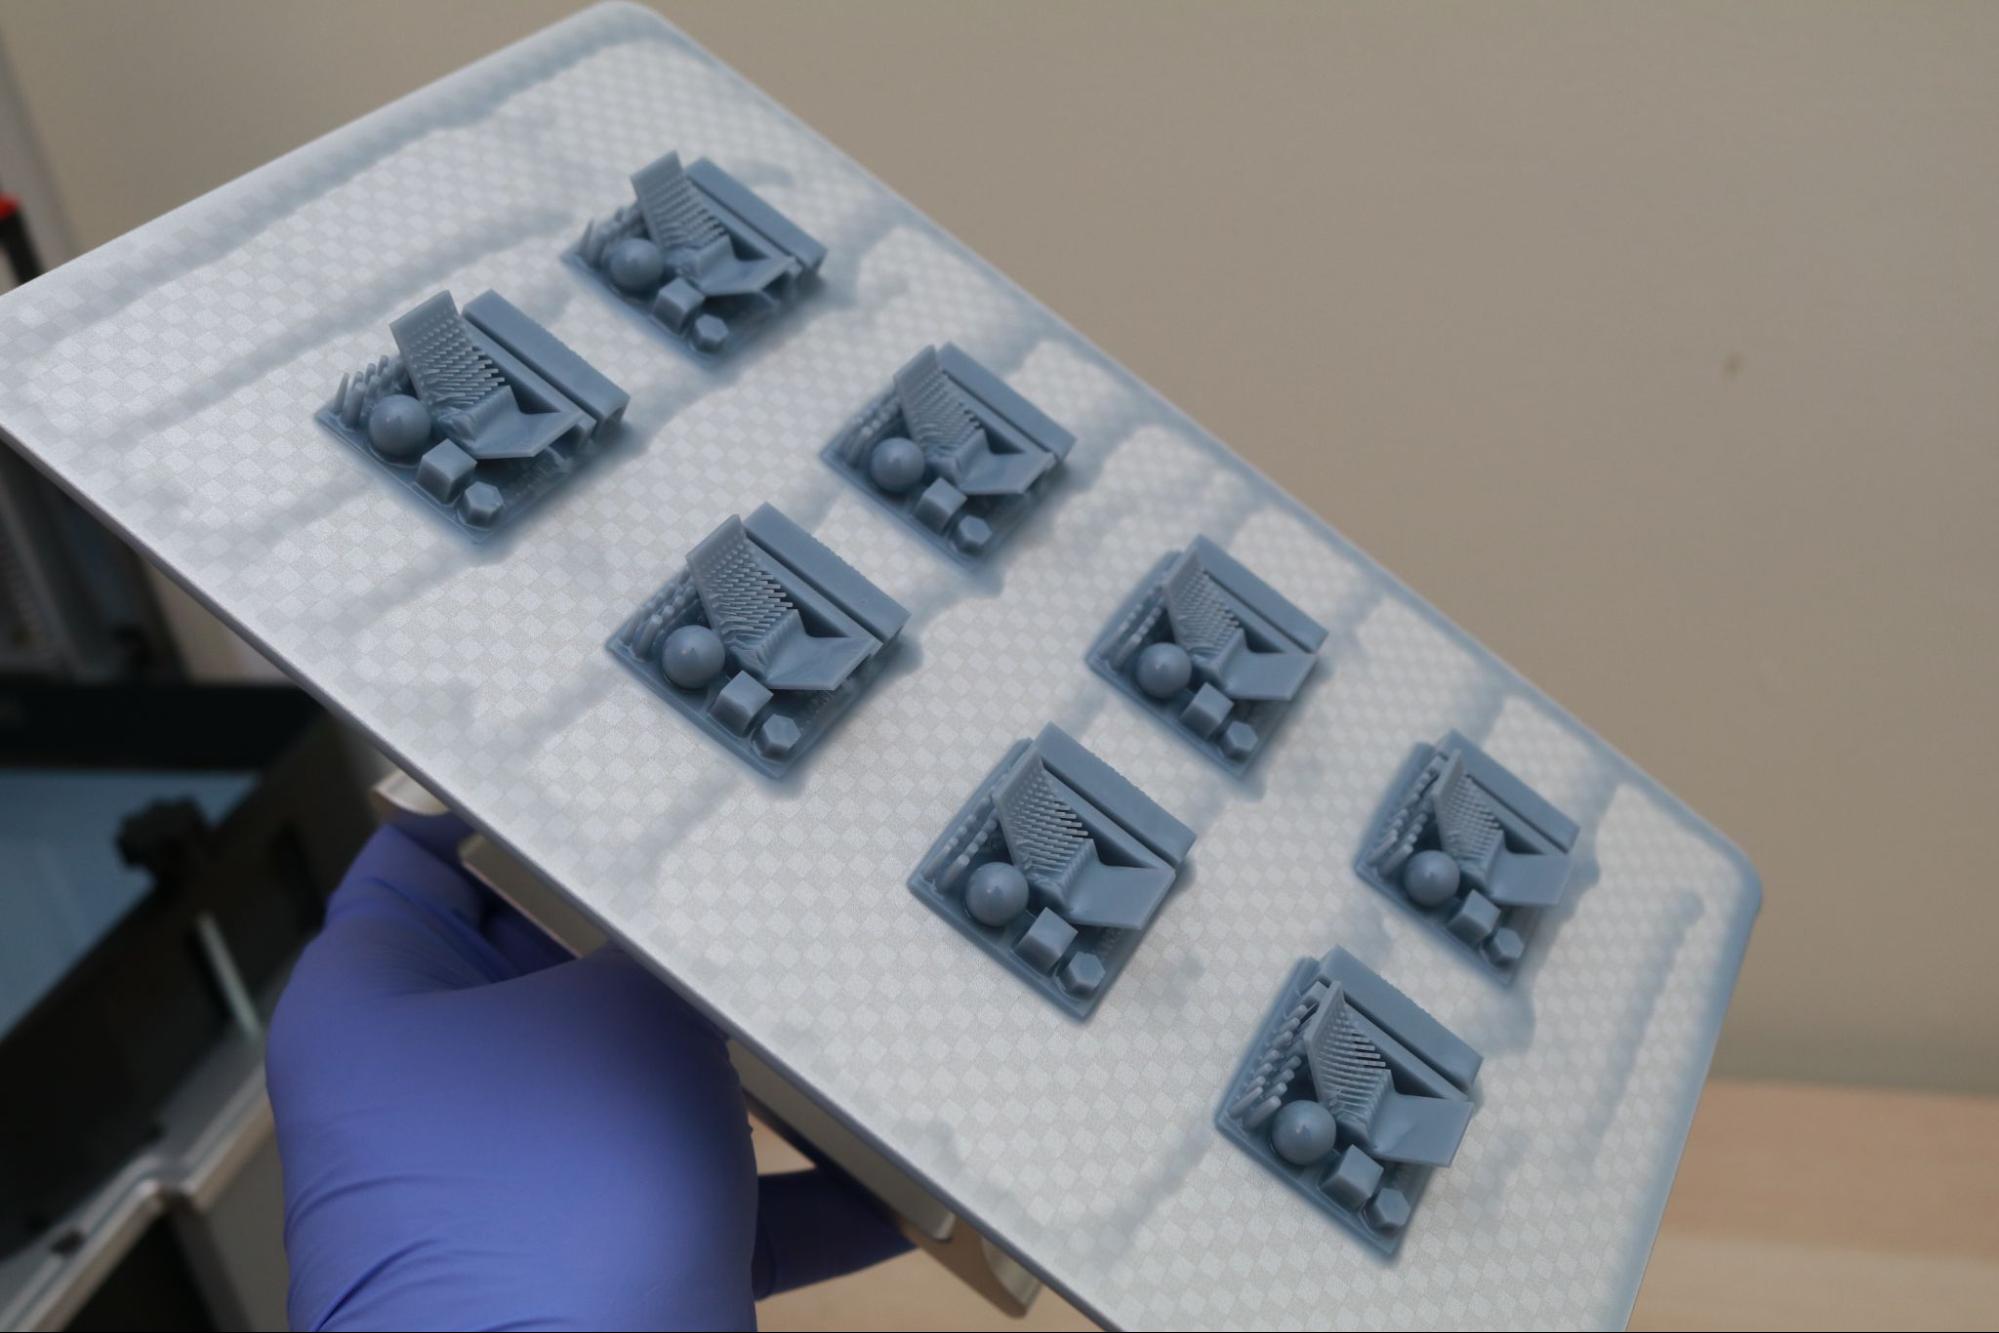
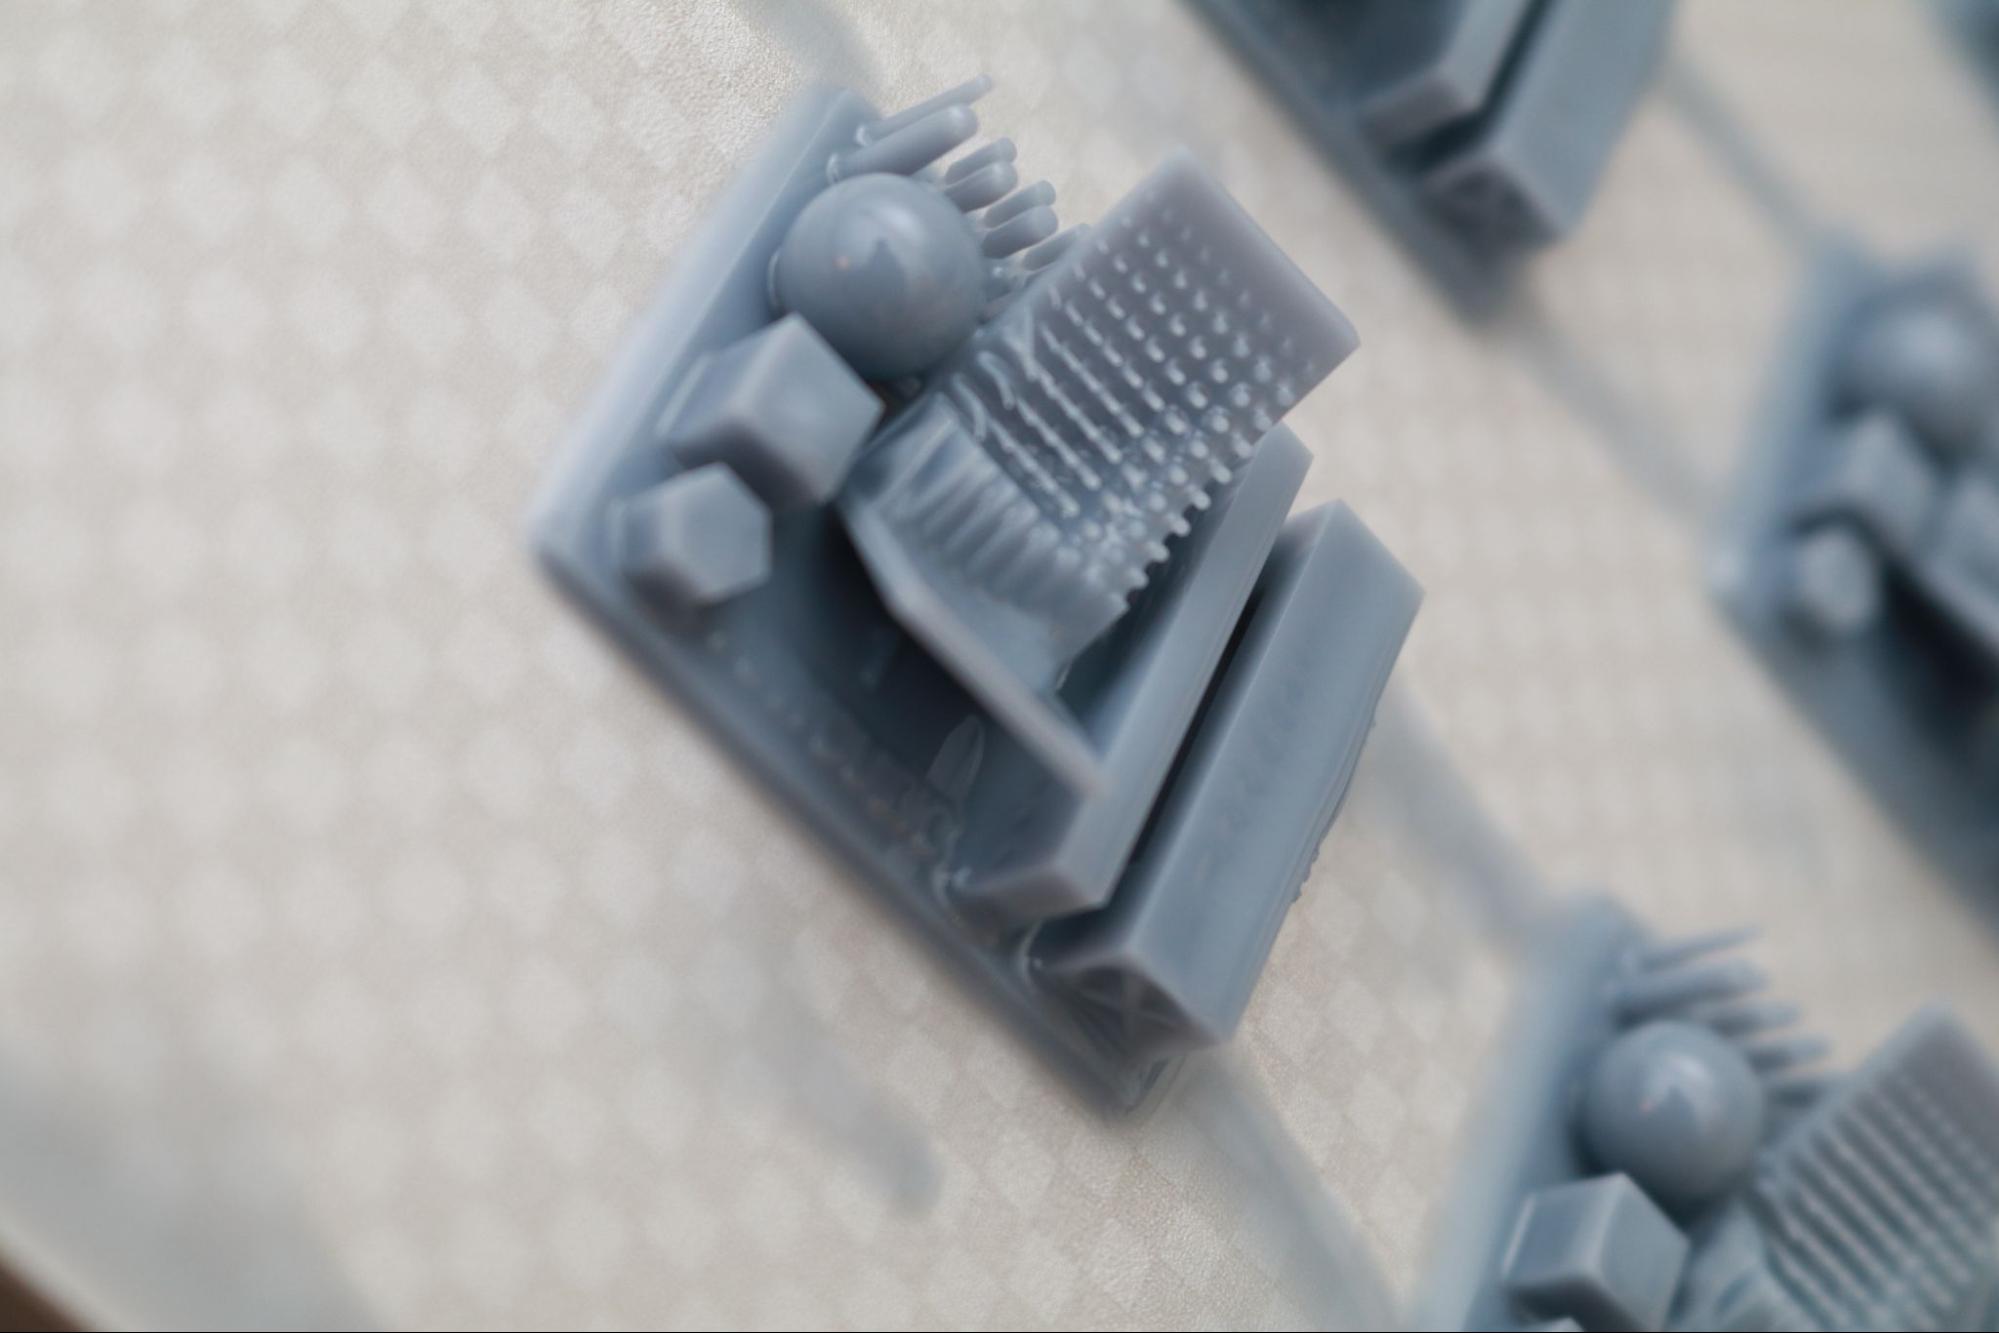
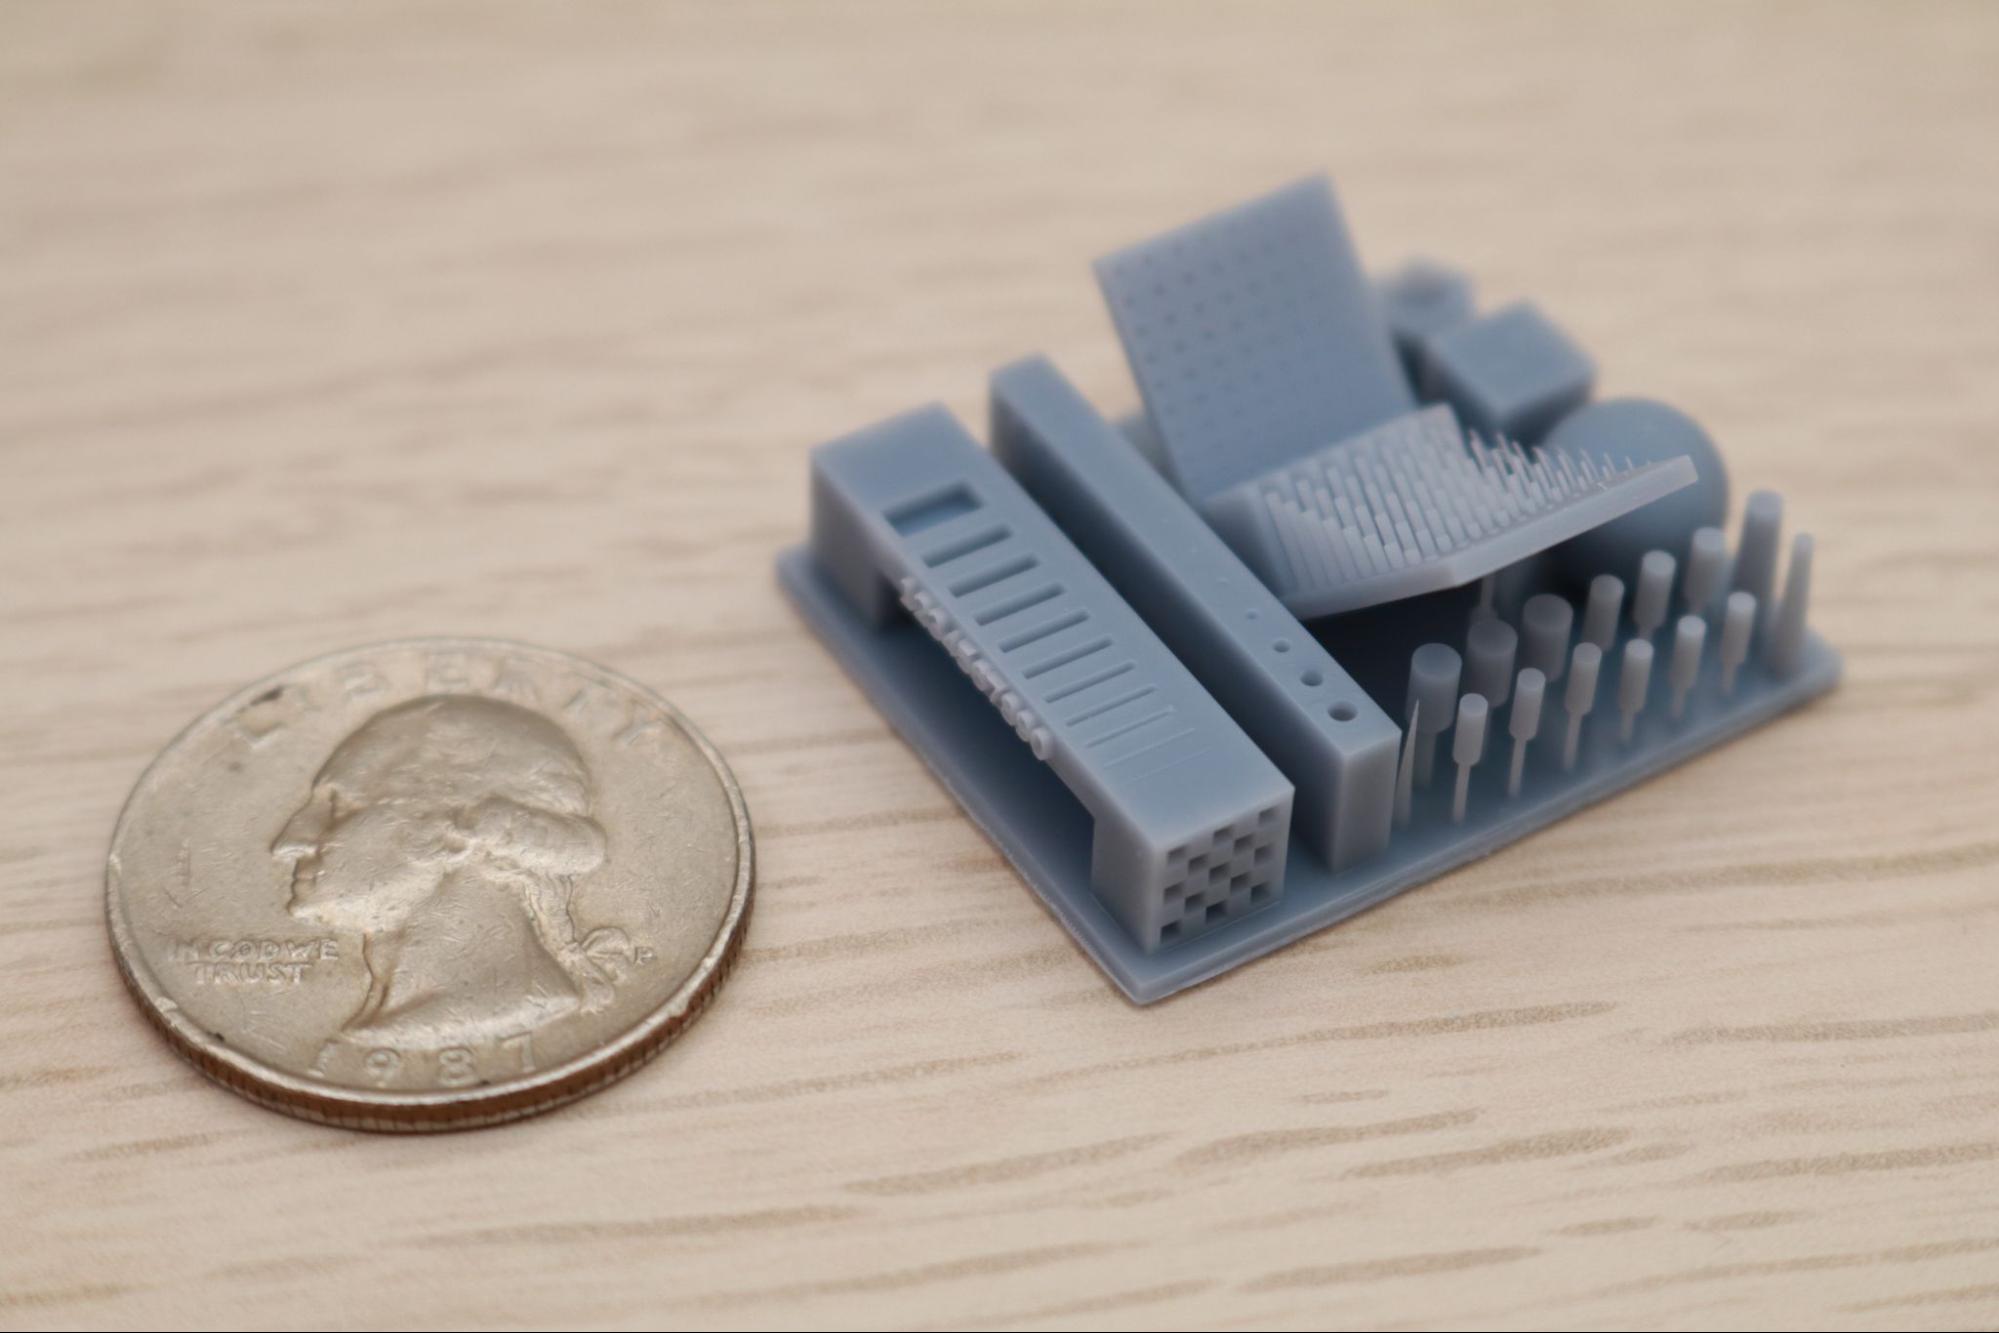
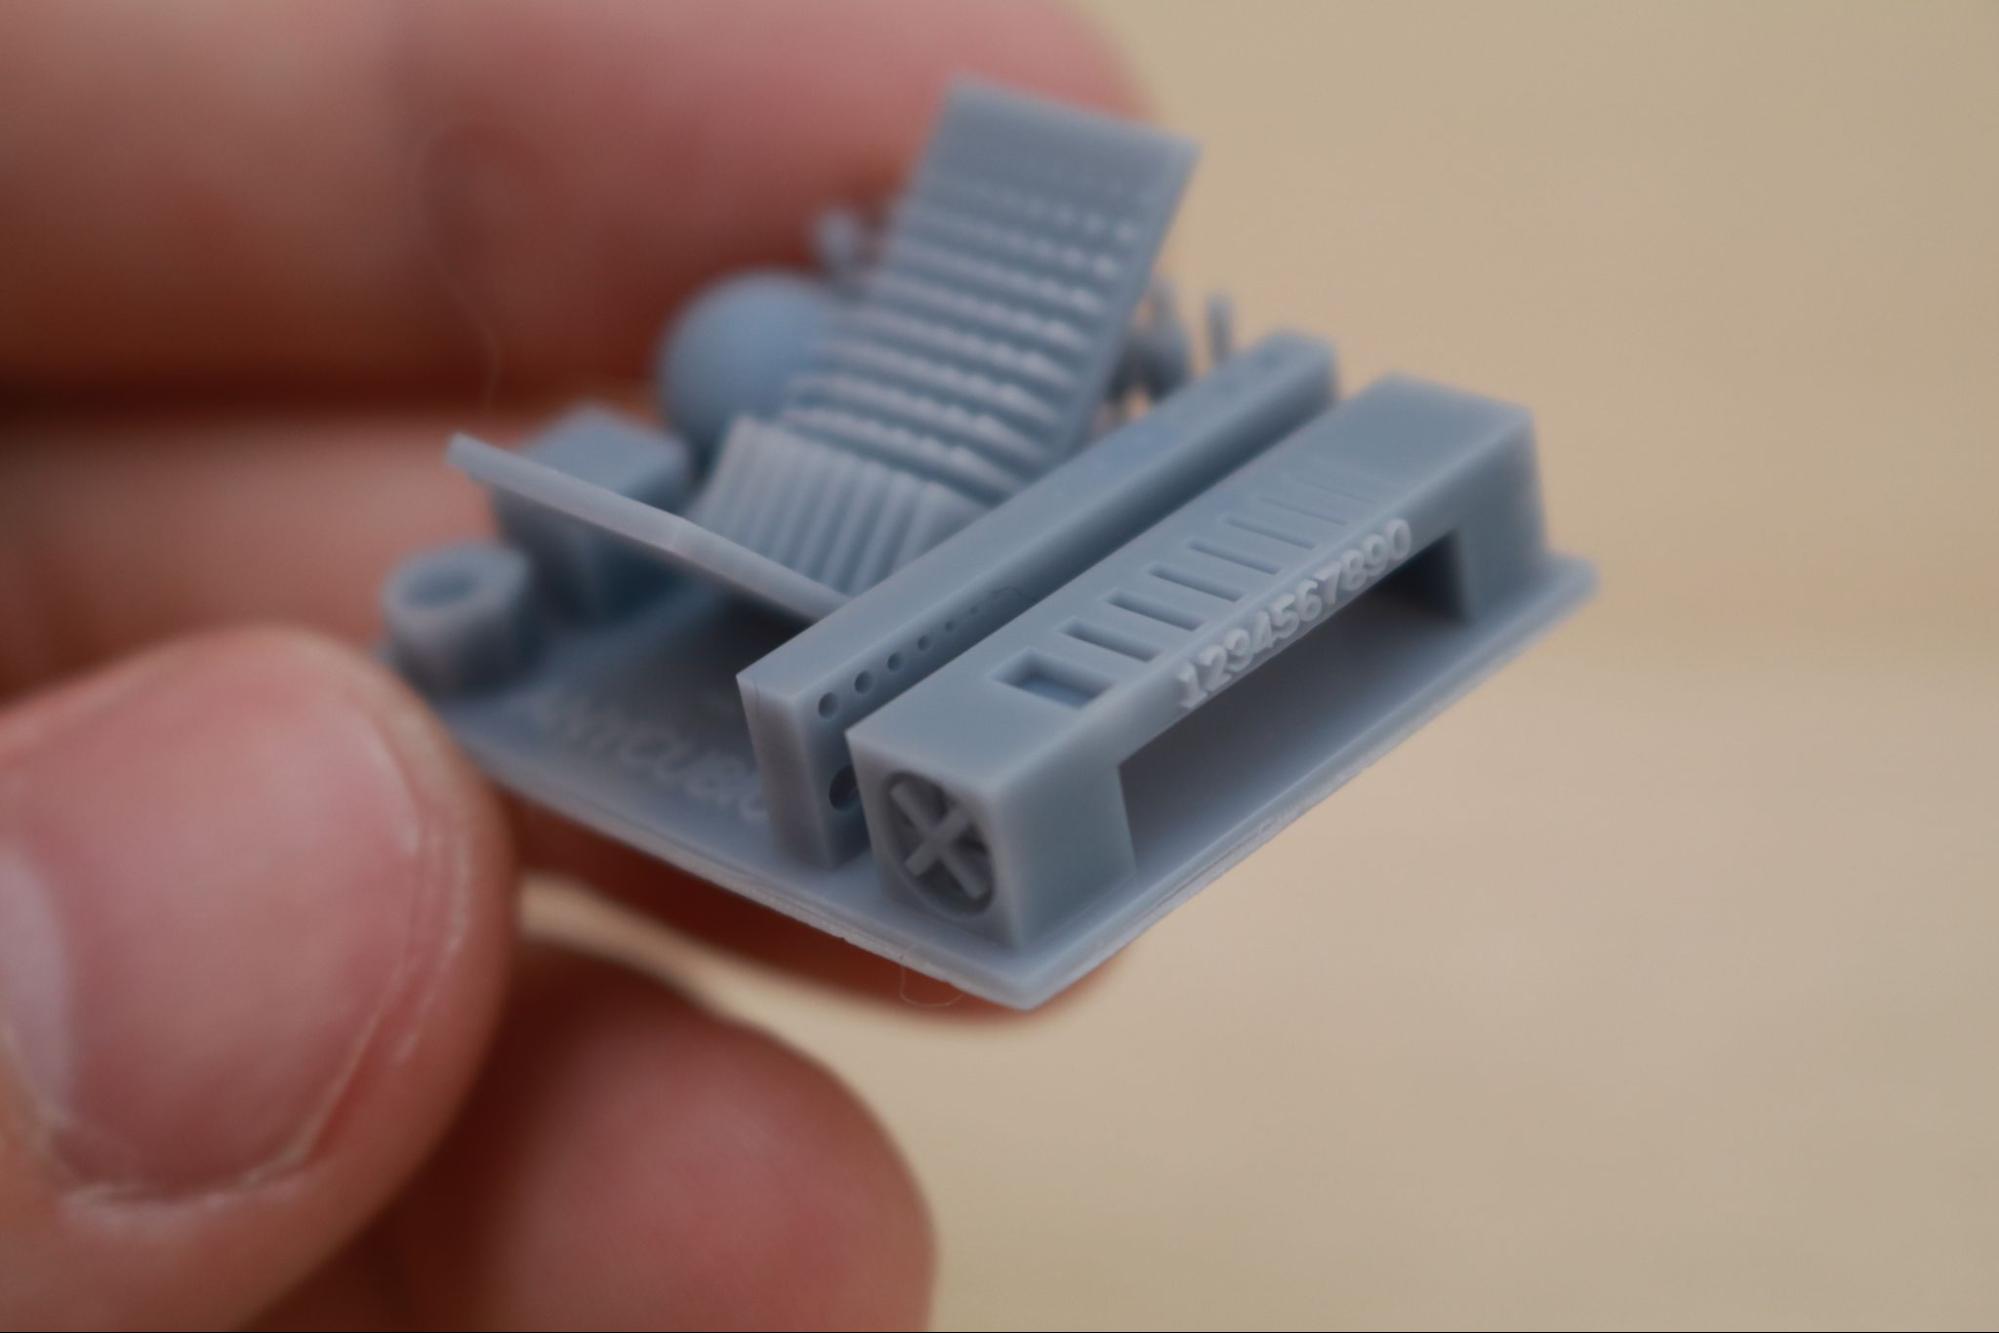
The Anycubic Photon M3 Premium includes two test prints on the thumb drive: a model named “R_E_R_F.pm3r'' and a model named “TEST.pm3r”. The first model is a detailed torture test that highlights some of the tiny features the Photon M3 Premium is capable of printing and prints as eight copies spread across the build platform simultaneously.
Some of the fine posts are so thin they fold under their own weight after printing and look more like fine thread than a printed model. The overhang test, unsupported top-heavy posts, and smooth curves all look flawless and highlight the fine features made possible by the LighTurbo 2.0 UV light source and 8K monochromatic masking LCD.
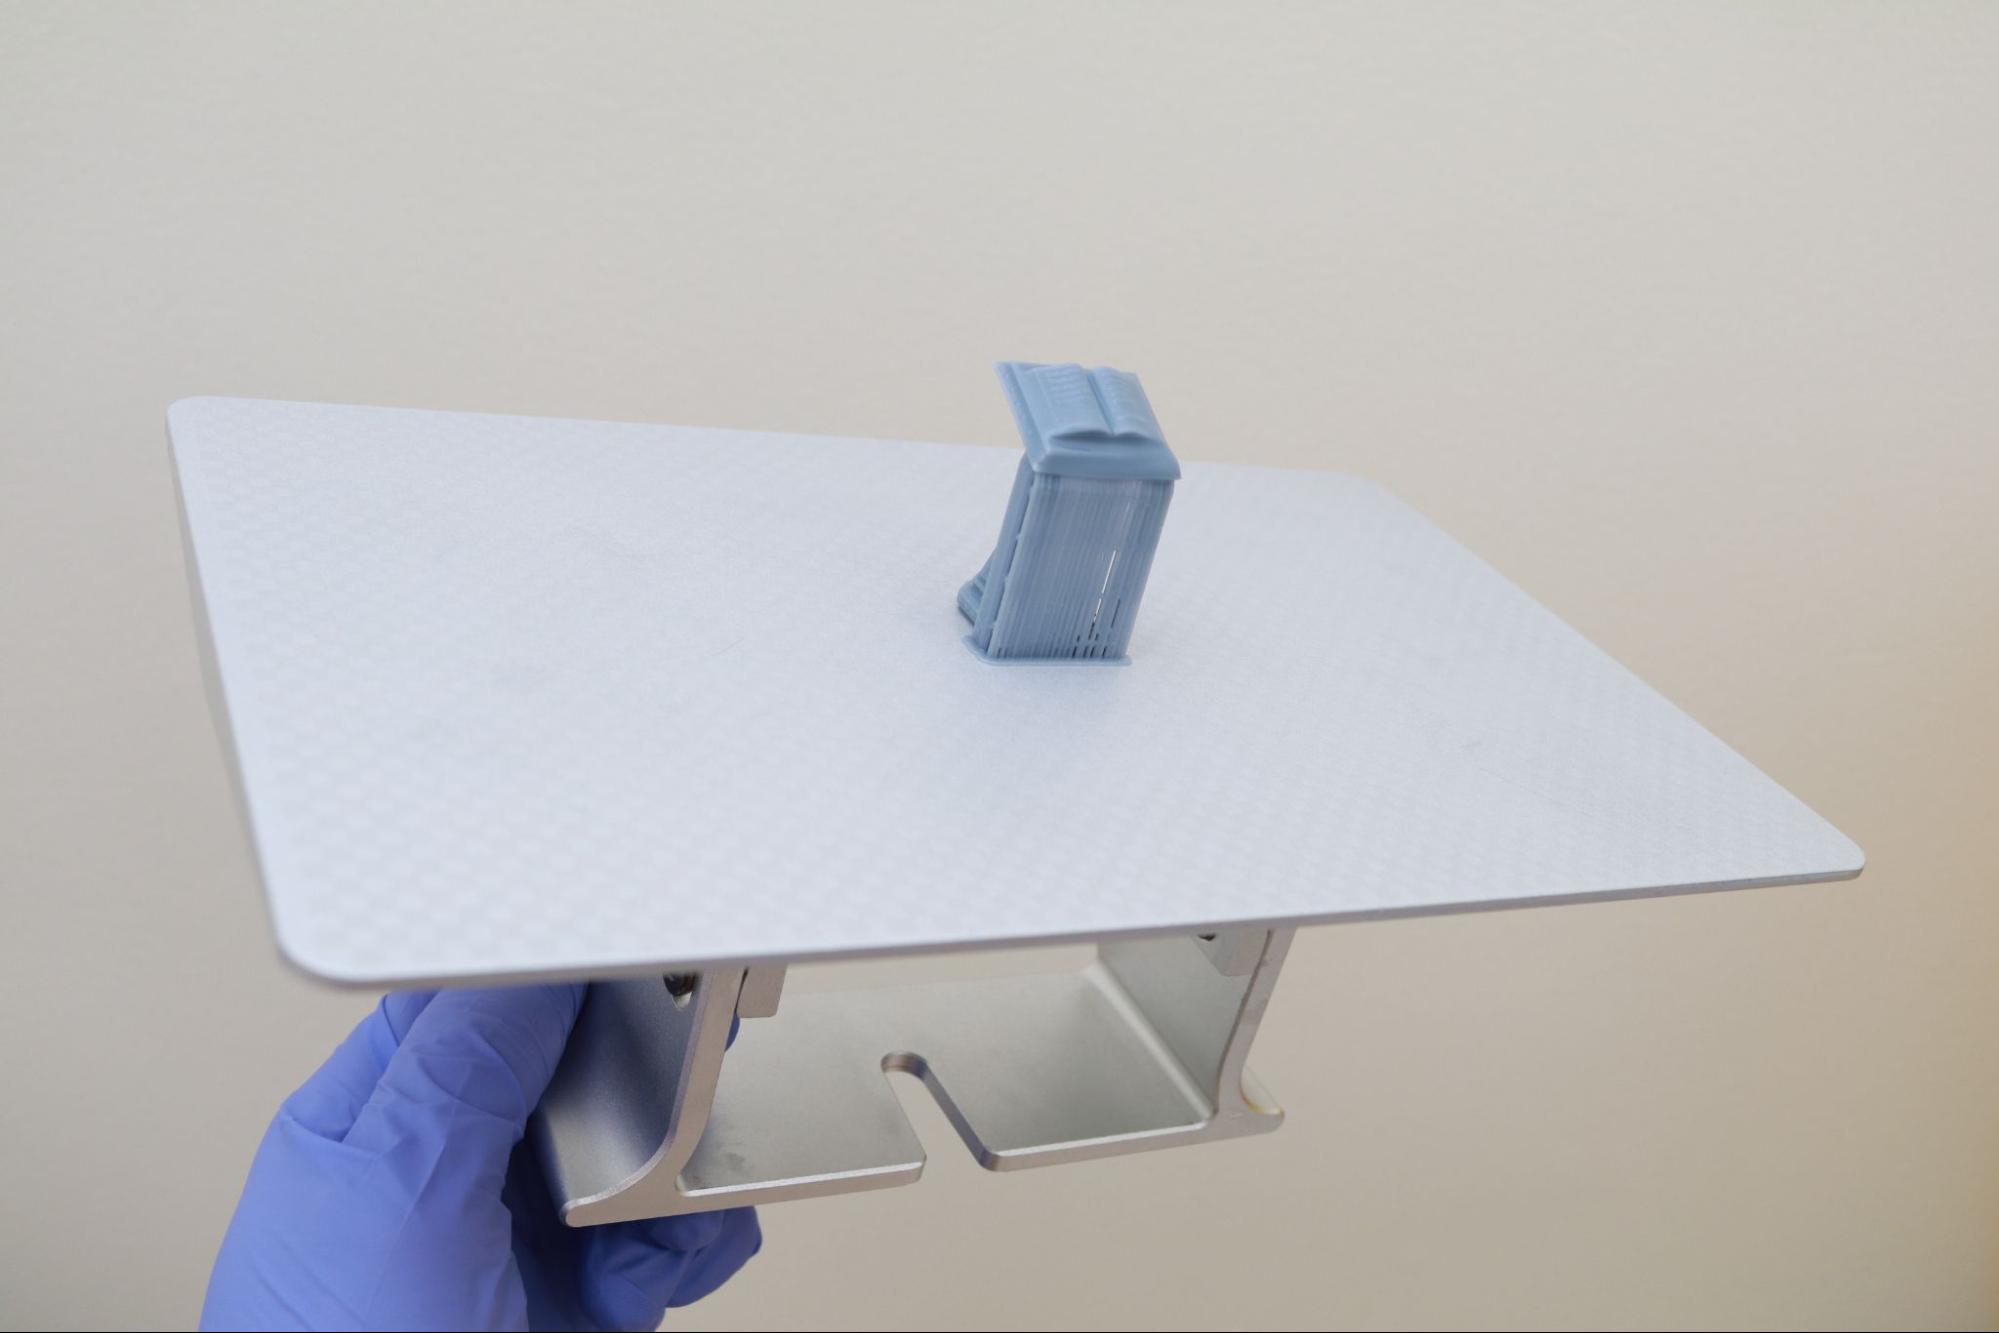
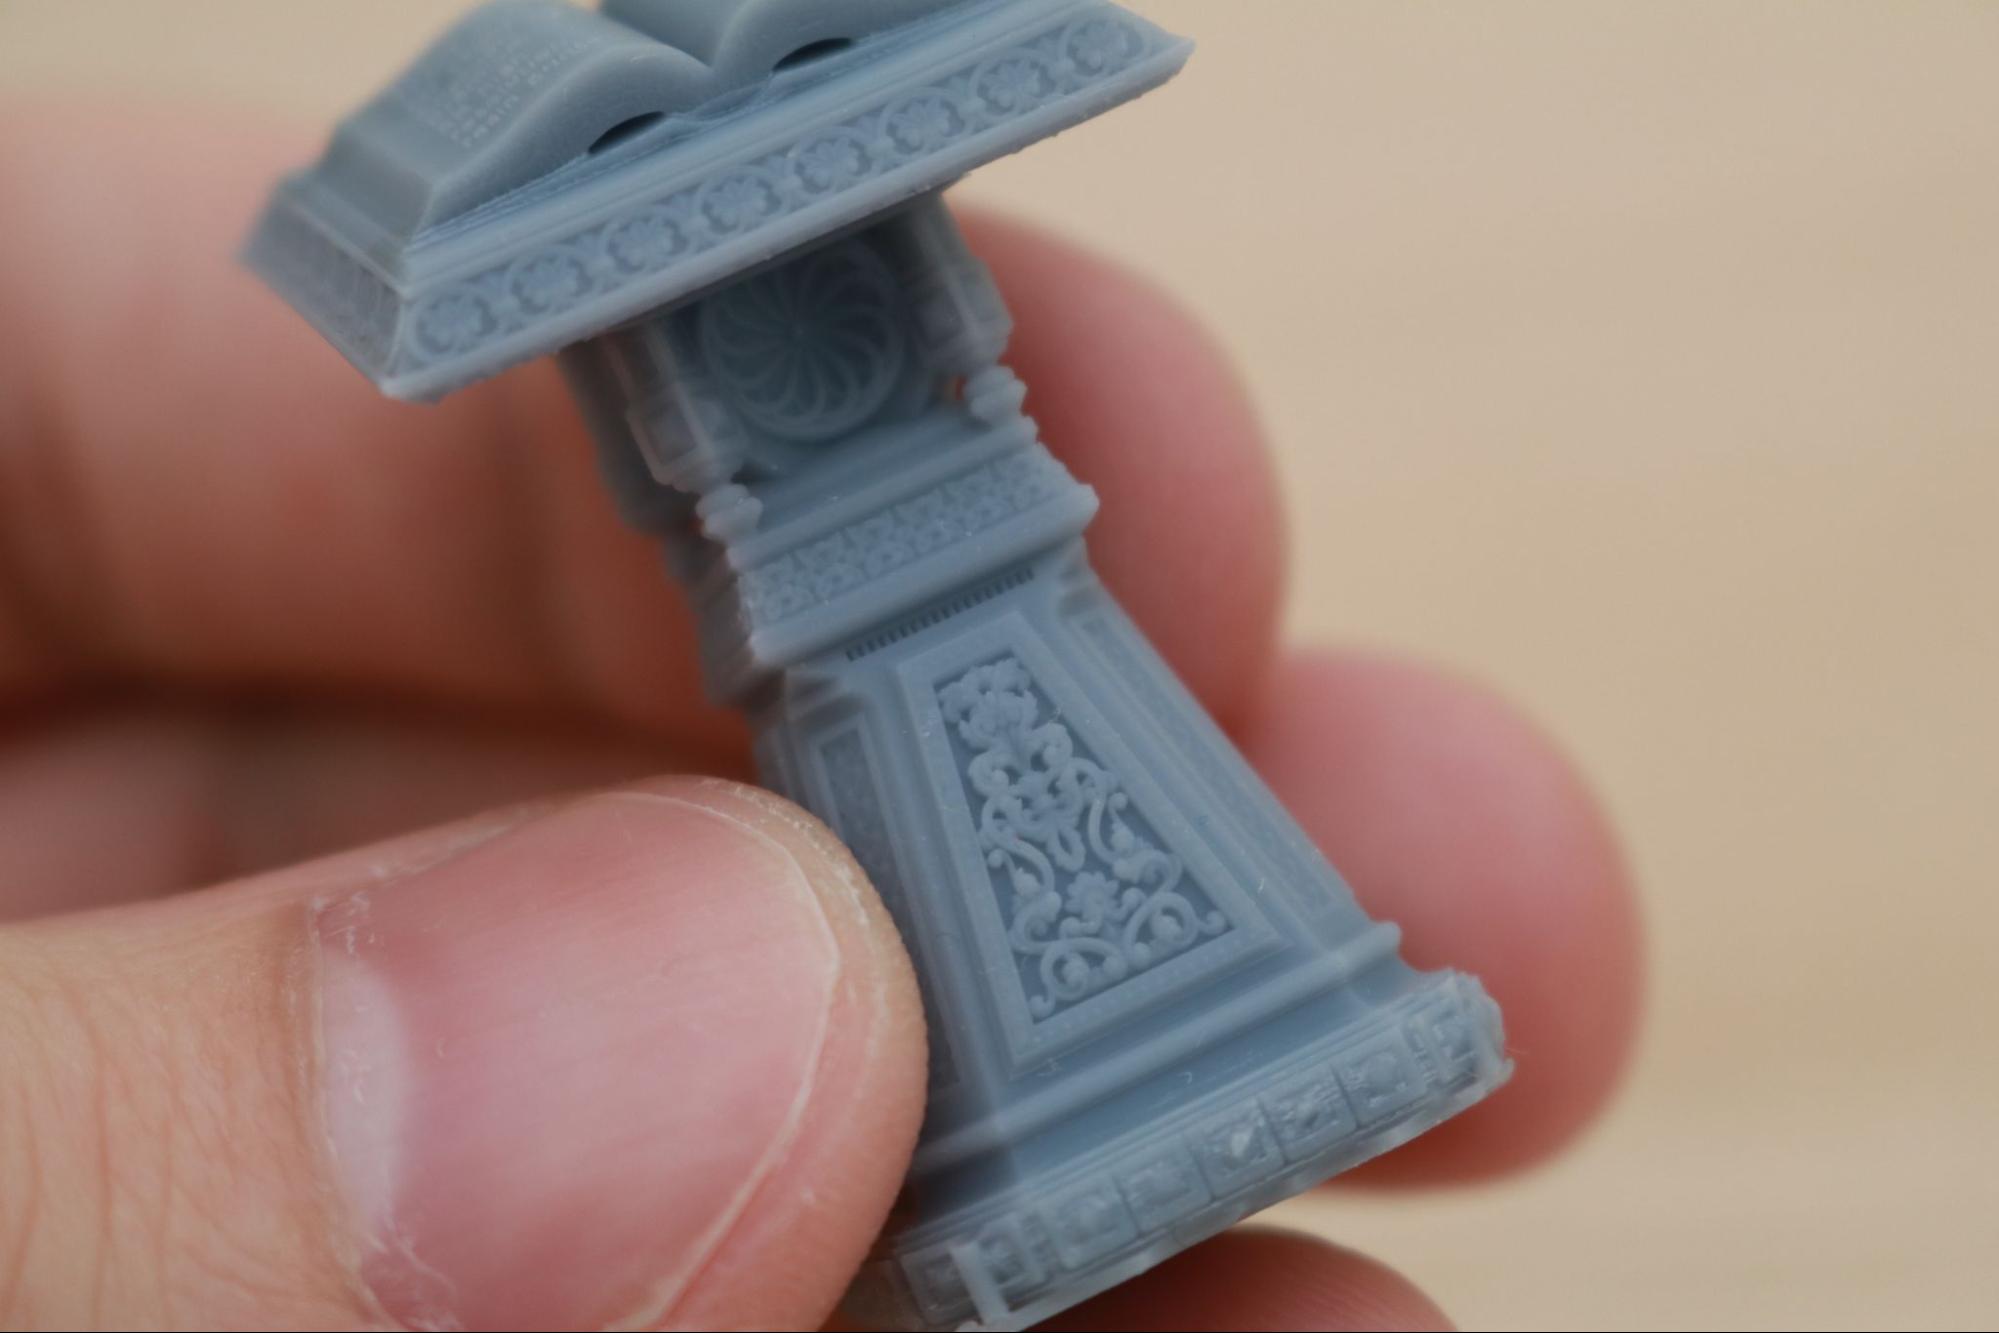
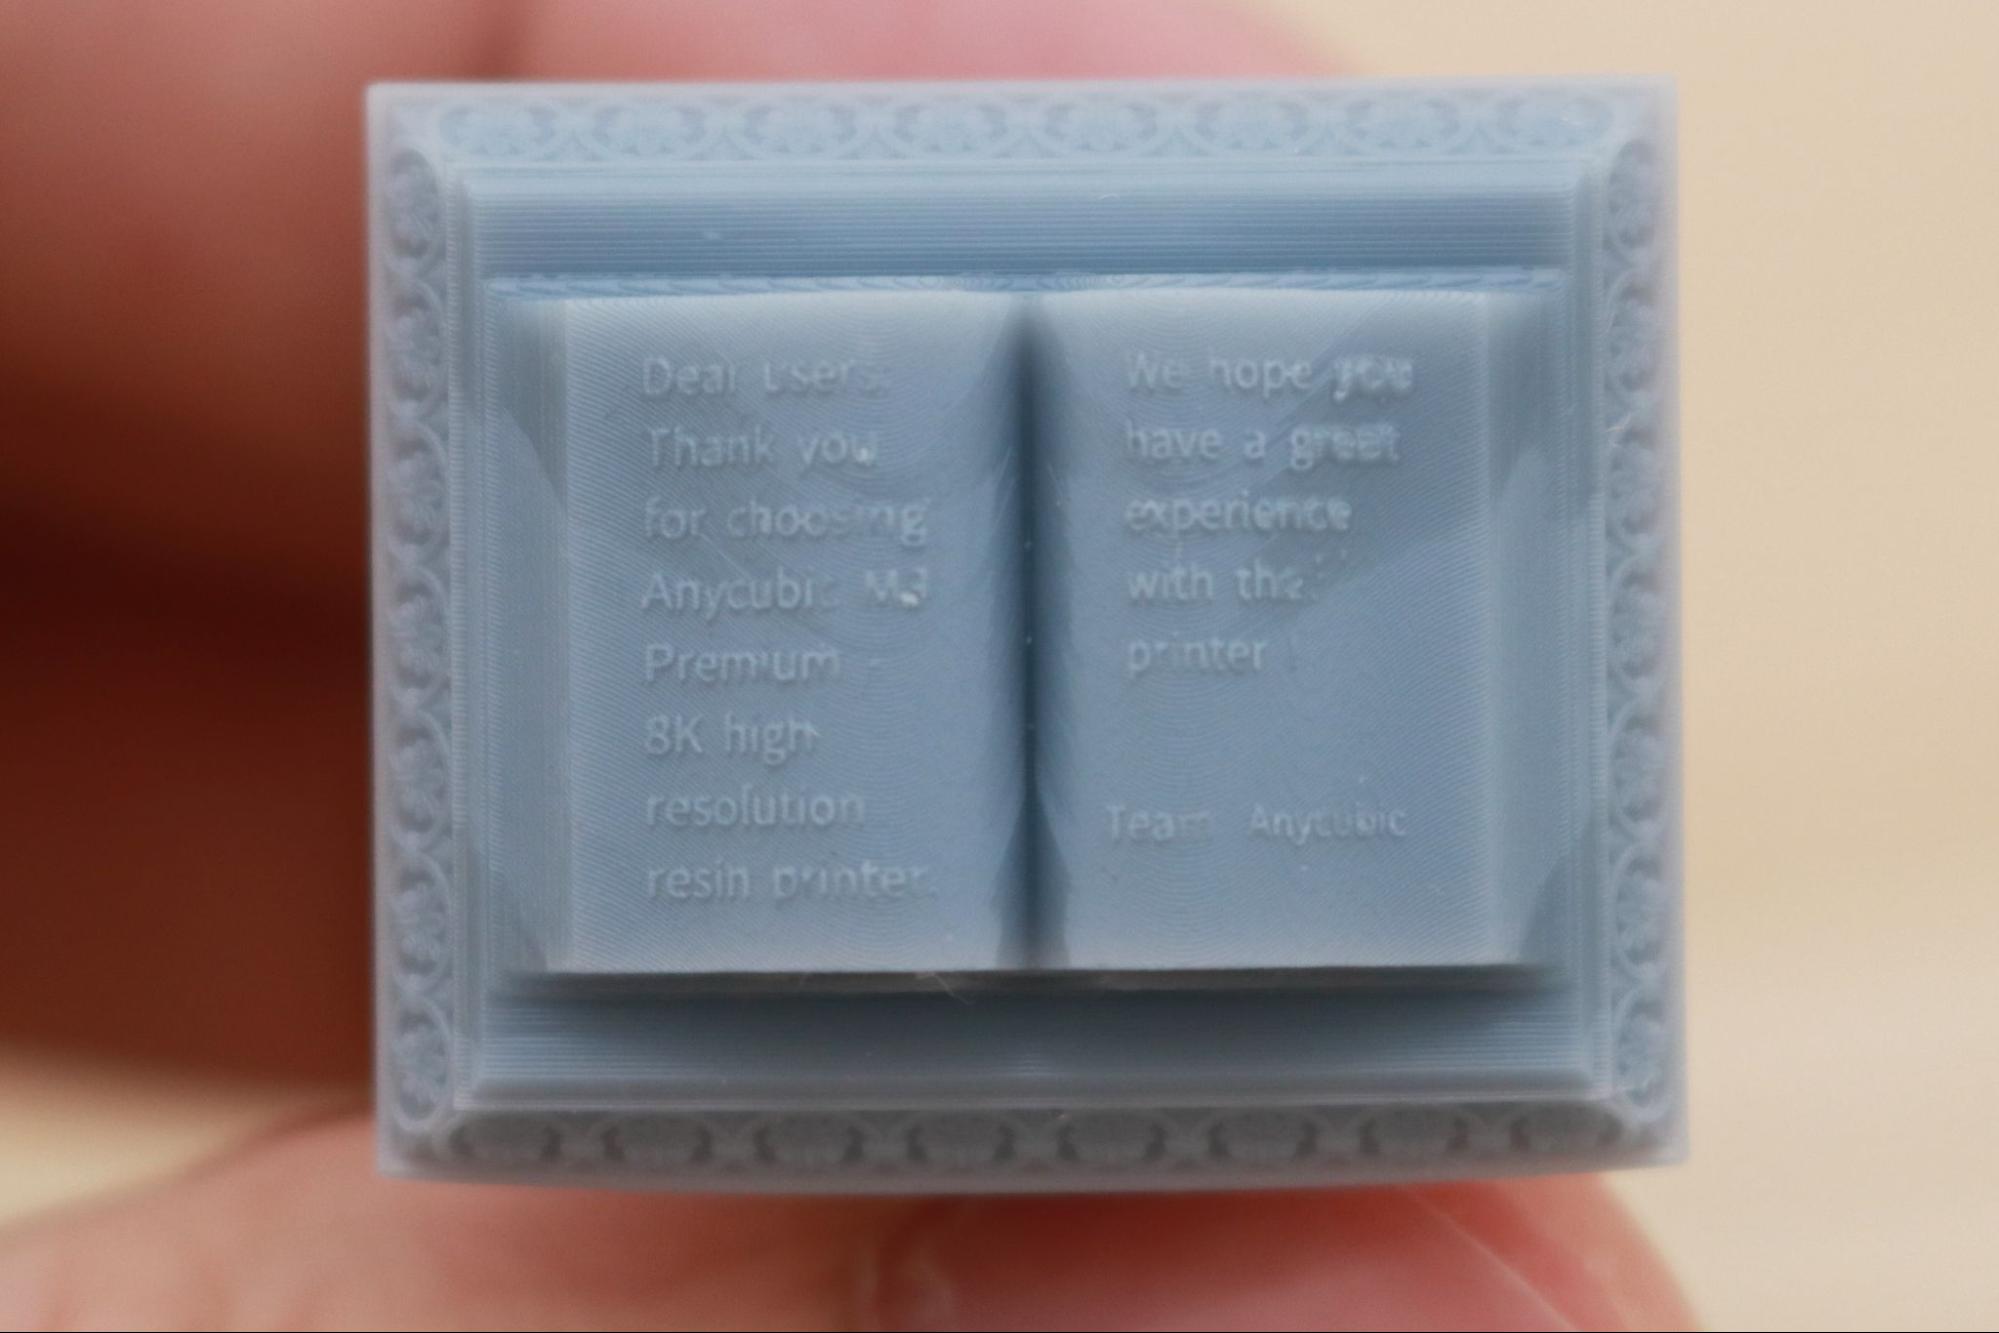
The second test print included with the Photon M3 Premium is named “TEST.pm3r” and is a single book on an ornate pedestal that takes about 2 hours to print. Printed using Anycubic Water-Washable+ resin at a 2 second/layer cure time, the support structure was easily detached from the pedestal and the model was easily removed from the platform. The intricate detail highlights the 8K resolution of the Photon M3 Premium, and the text on the book is crisp and legible. The letters are roughly half a millimeter tall, so you may need glasses or a macro camera lens to make out the text.
Printing with Anycubic Photon Workshop
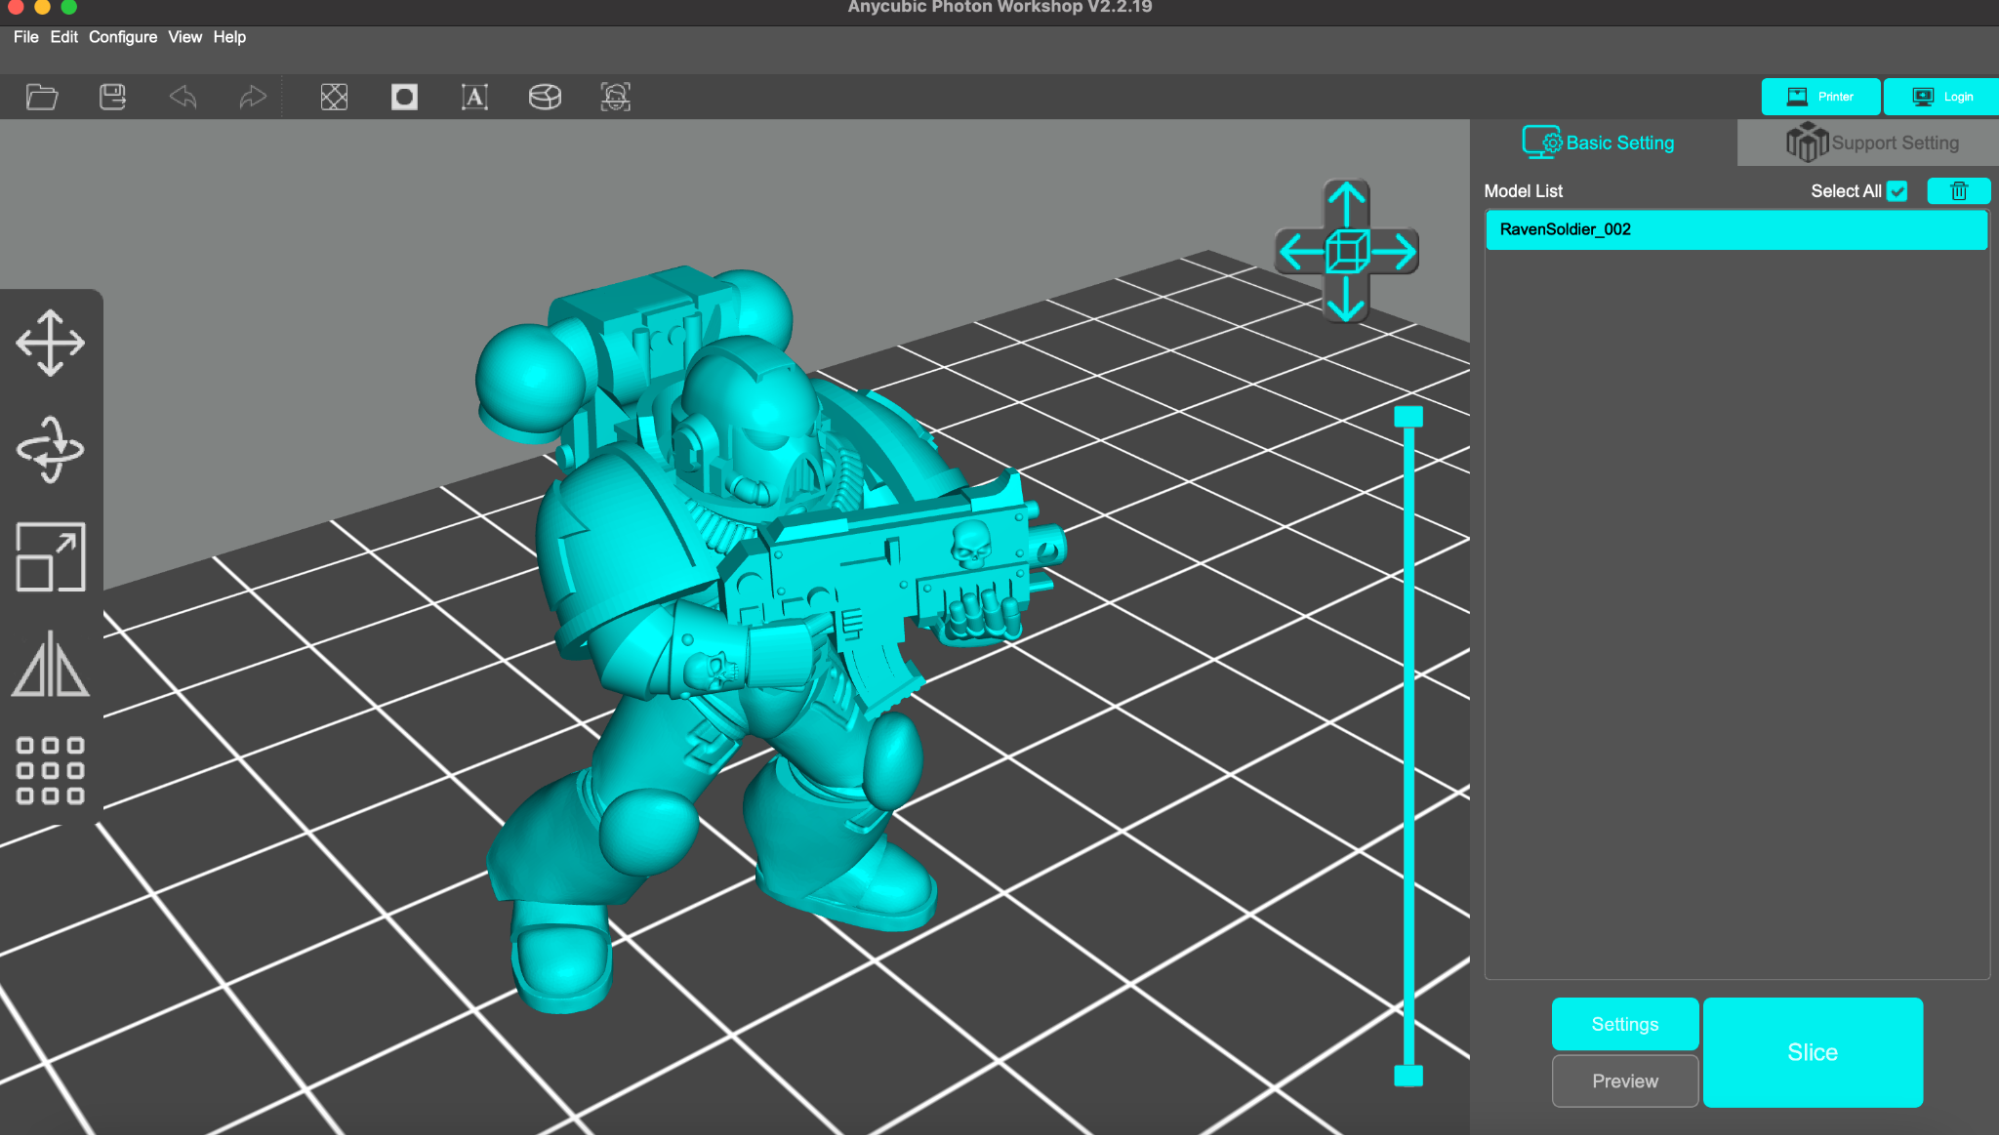
As of the writing of this review, the Anycubic Photon M3 Premium is only compatible with the Photon Workshop slicer app. Photon Workshop is a fully-featured app which is capable of generating support material, hollowing models, and adding vents for resin drainage and preventing suction forces. In my experience, Photon Workshop runs much more slowly than other apps like Chitubox and Lychee Slicer, which offer similar functionality with an easier-to-use interface.
Creating a support structure for a simple model could take up to five minutes to generate, even on a fast computer like my 2021 MacBook Pro M1 Max with 64 GB of RAM. Supporting the same model using the same computer with competing slicer app Chitubox takes under 30 seconds, which makes the Photon Workshop results even less attractive in comparison.
As of the writing of this review, the Photon M3 Premium is not compatible with these other apps, making it the only printer in the Photon M3 line-up that can’t be used with a third-party slicer. A representative from Anycubic confirmed that compatibility was currently in the works and we would be notified when the Photon M3 Premium is enabled on these other slicer apps.
Anycubic LighTurbo 2.0 UV Light Source
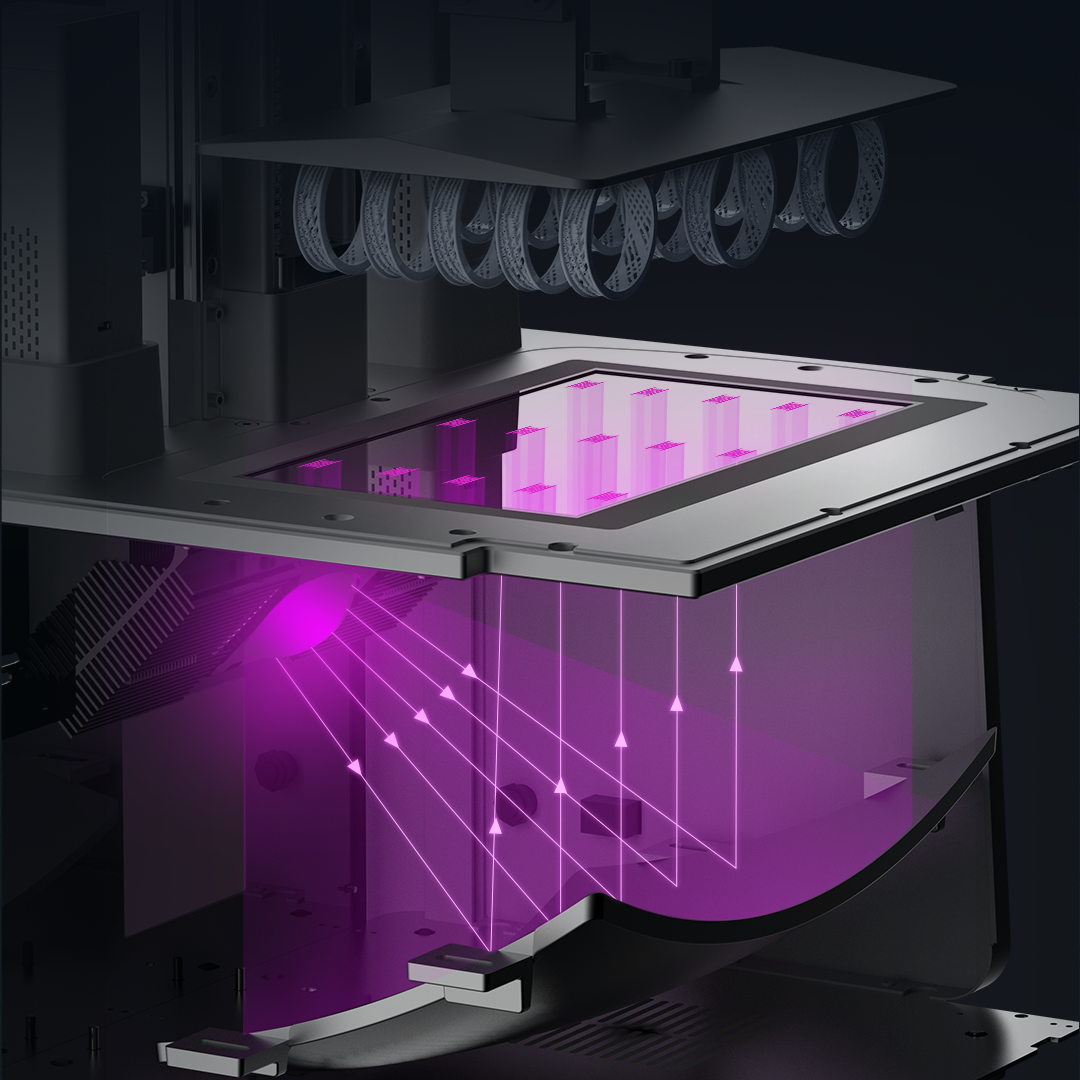
The 8K mono masking LCD allows for crisp detail on printed parts, and part of that detail is also due to the Anycubic LighTurbo 2.0 UV light source. The LighTurbo 2.0 uses a COB (chip-on-board) UV LED light source that projects into a concave reflector located below the masking LCD. Anycubic advertises this light as being collimated (made parallel) with an average light uniformity of over 90%. In addition, the Photon M3 Premium includes a temperature sensor that activates a fan-driven cooling system when the internal temperature exceeds 65°C, extending the life of the COB light source.
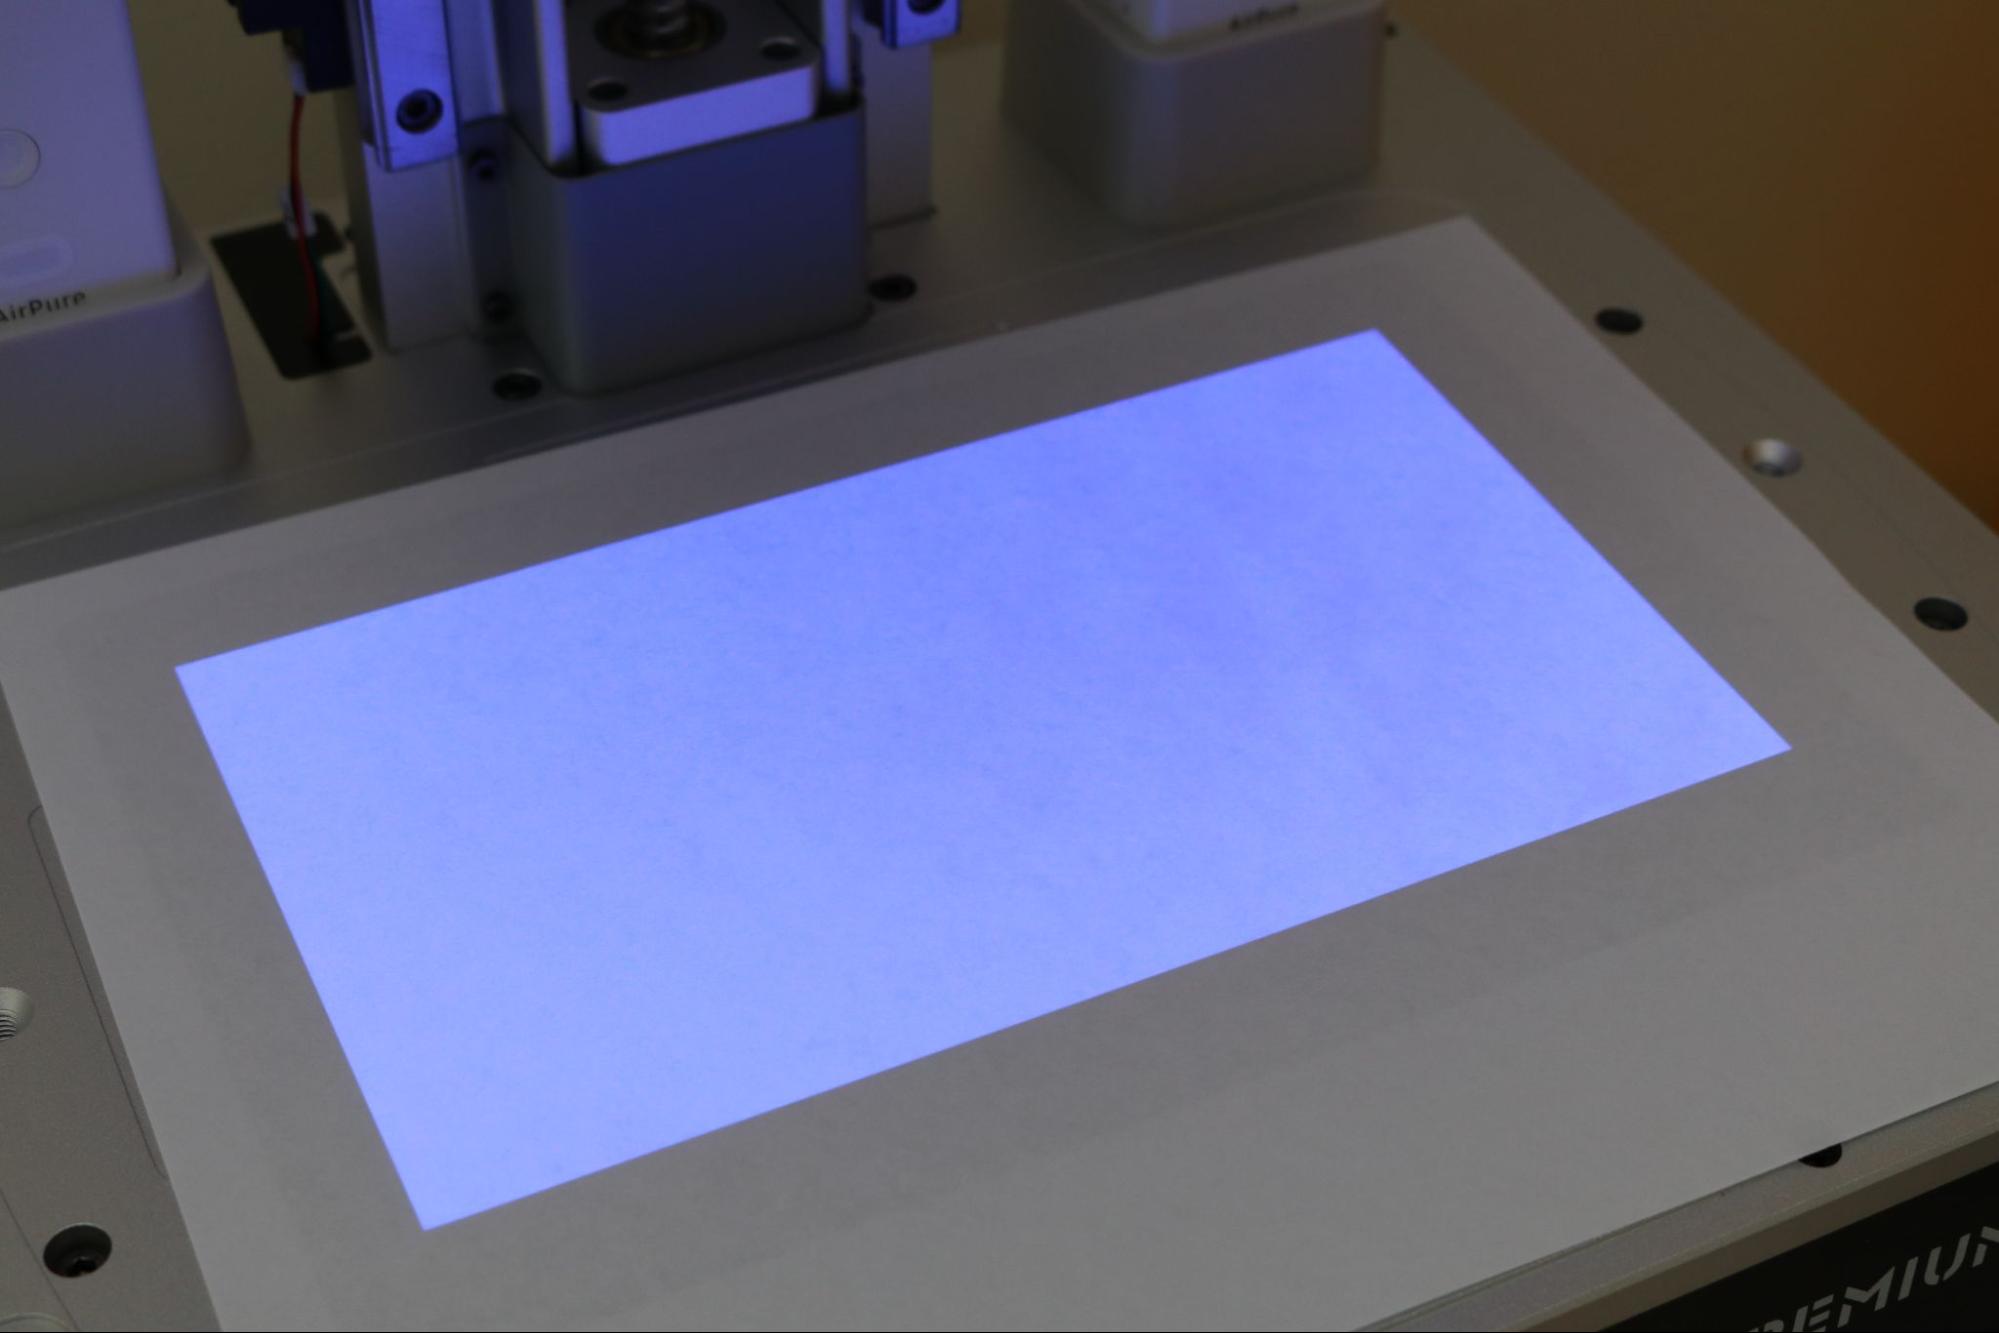
Running the exposure test with a piece of standard printer paper over the masking LCD shows the light is even and consistent, with no variations across the screen. The printer makes almost no noise while running, and the air filters are nearly silent when the lid is on the machine.
Printing ABS-like Resin+ on the Anycubic M3 Premium
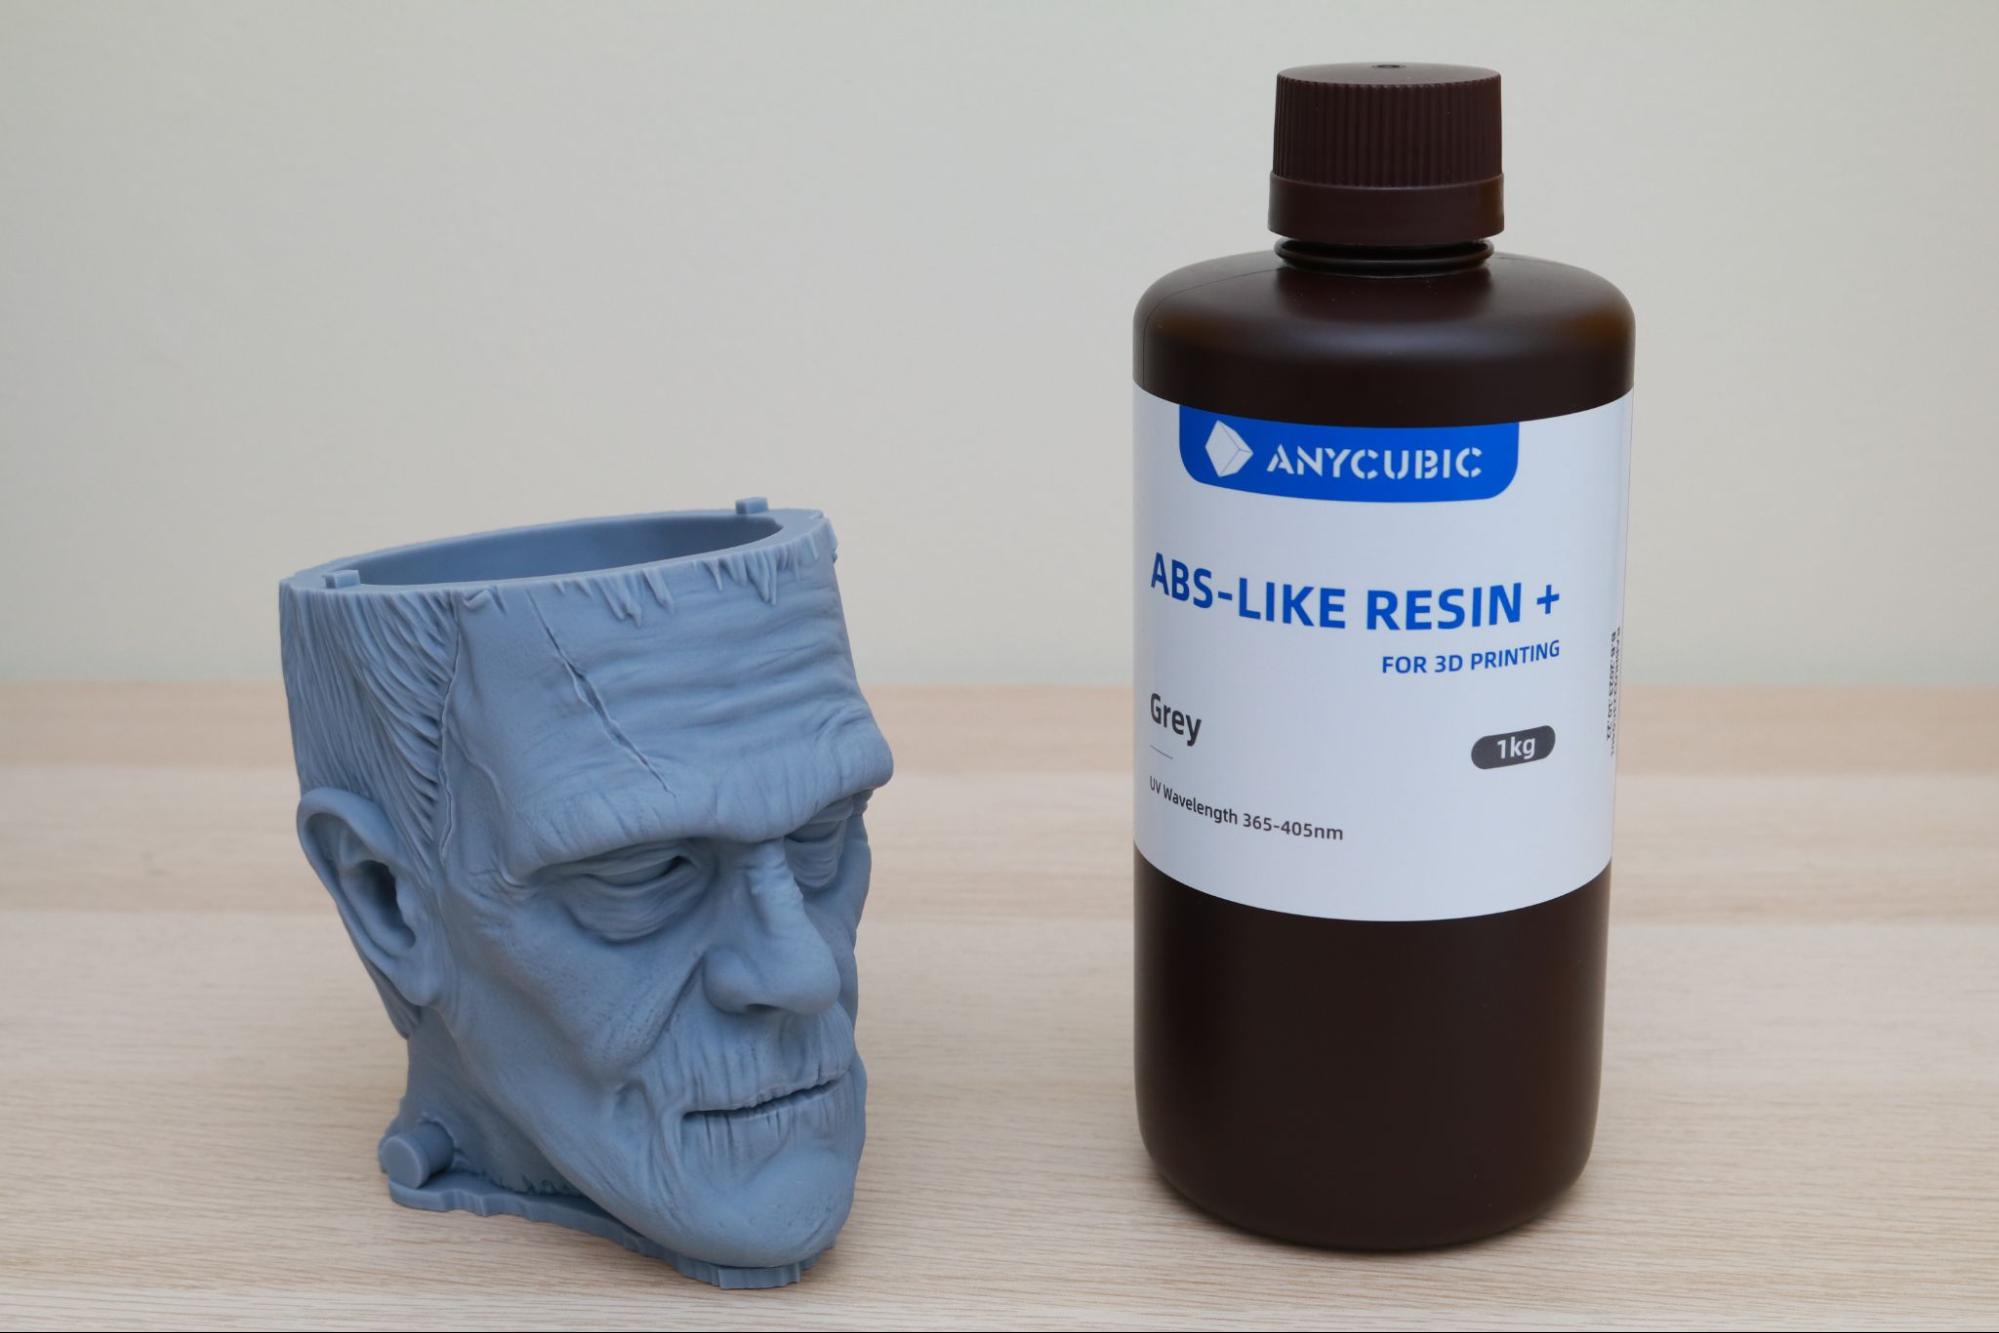
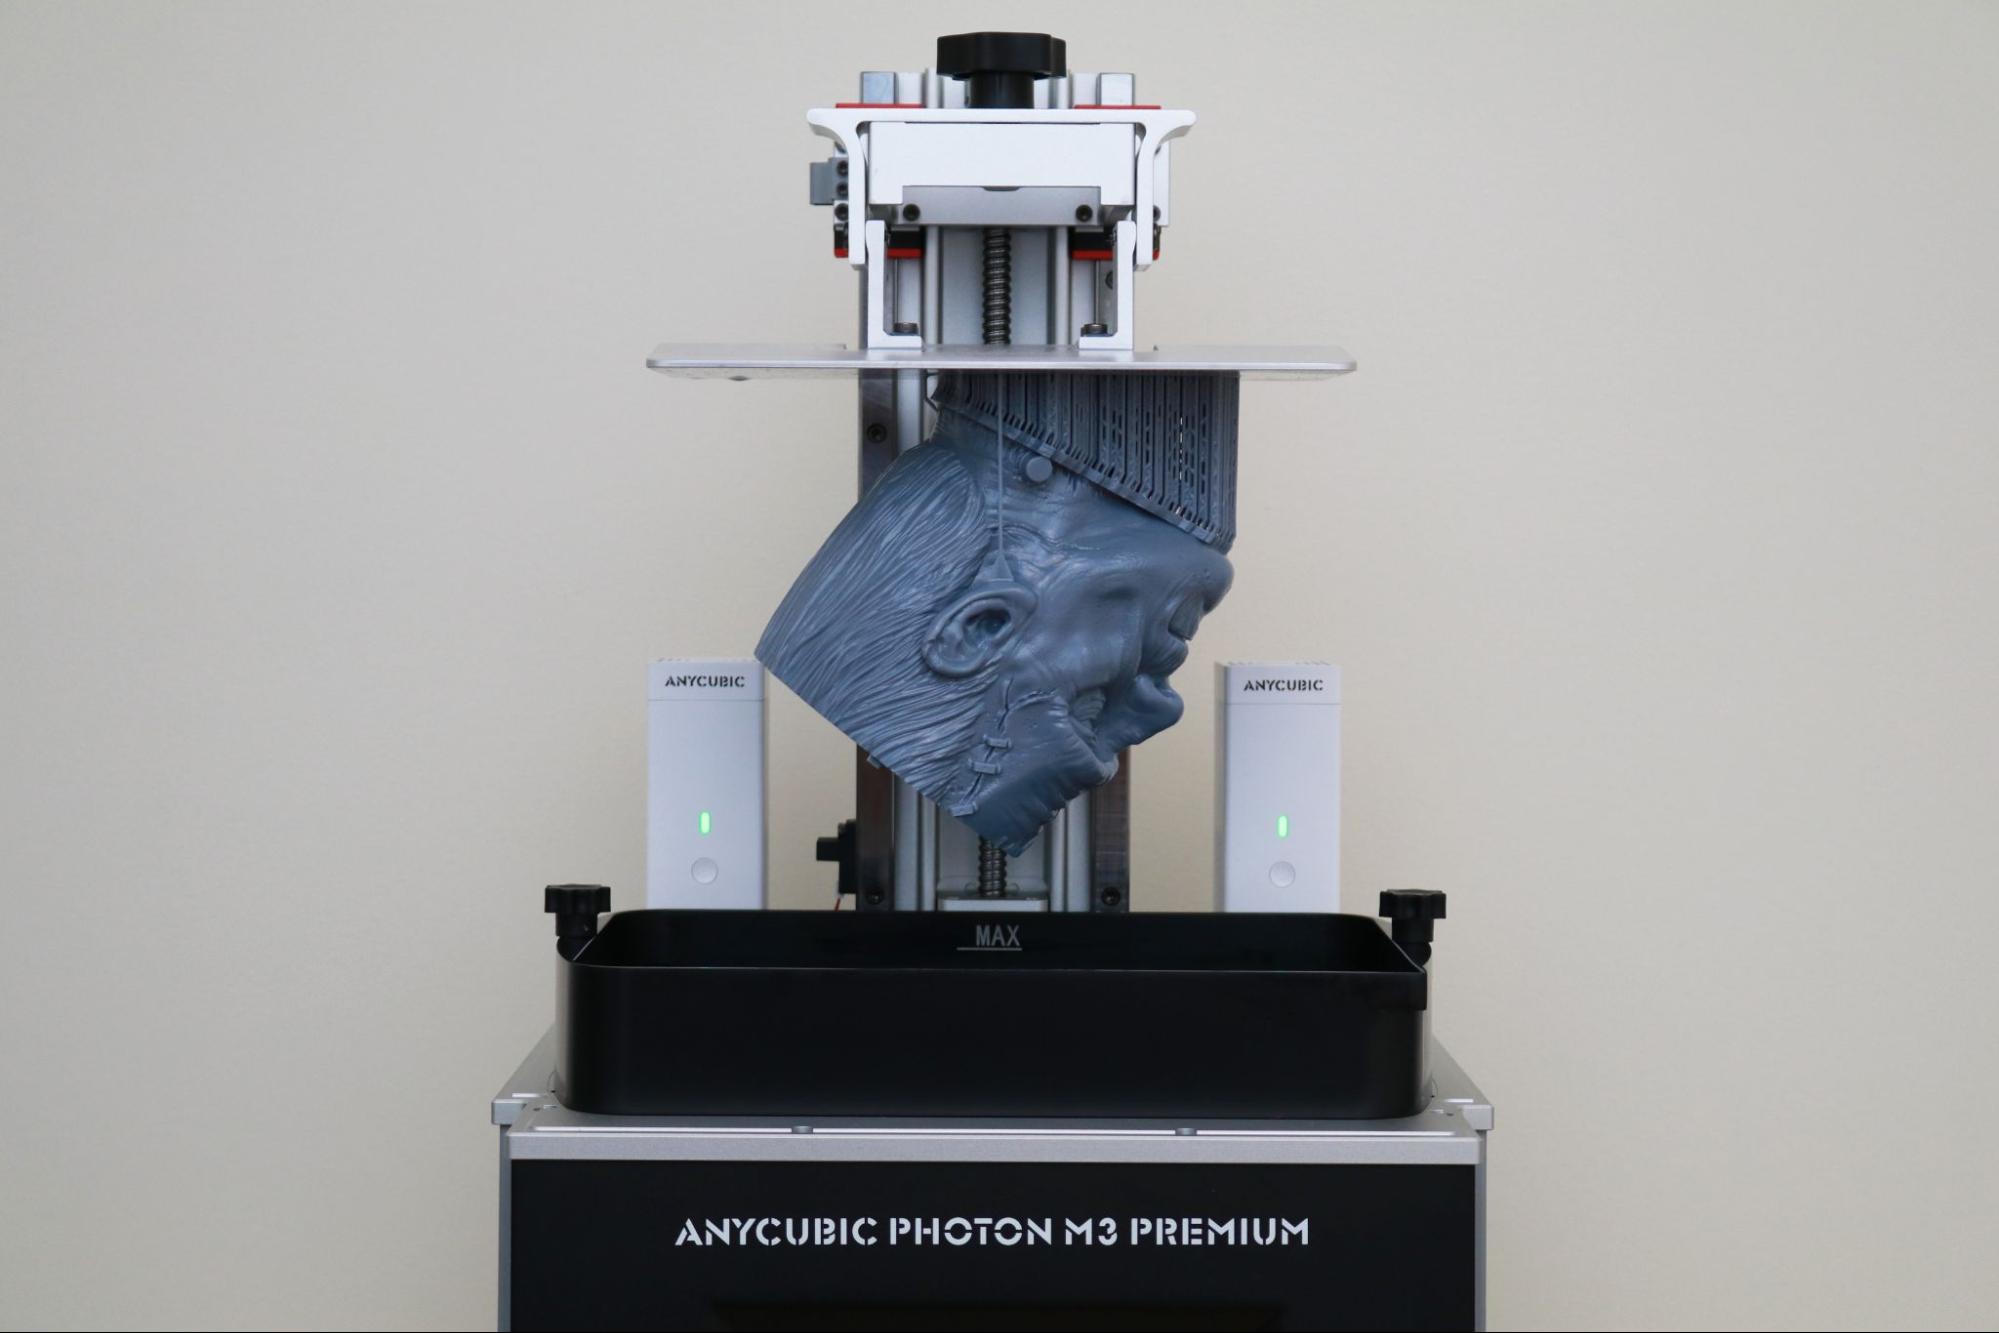
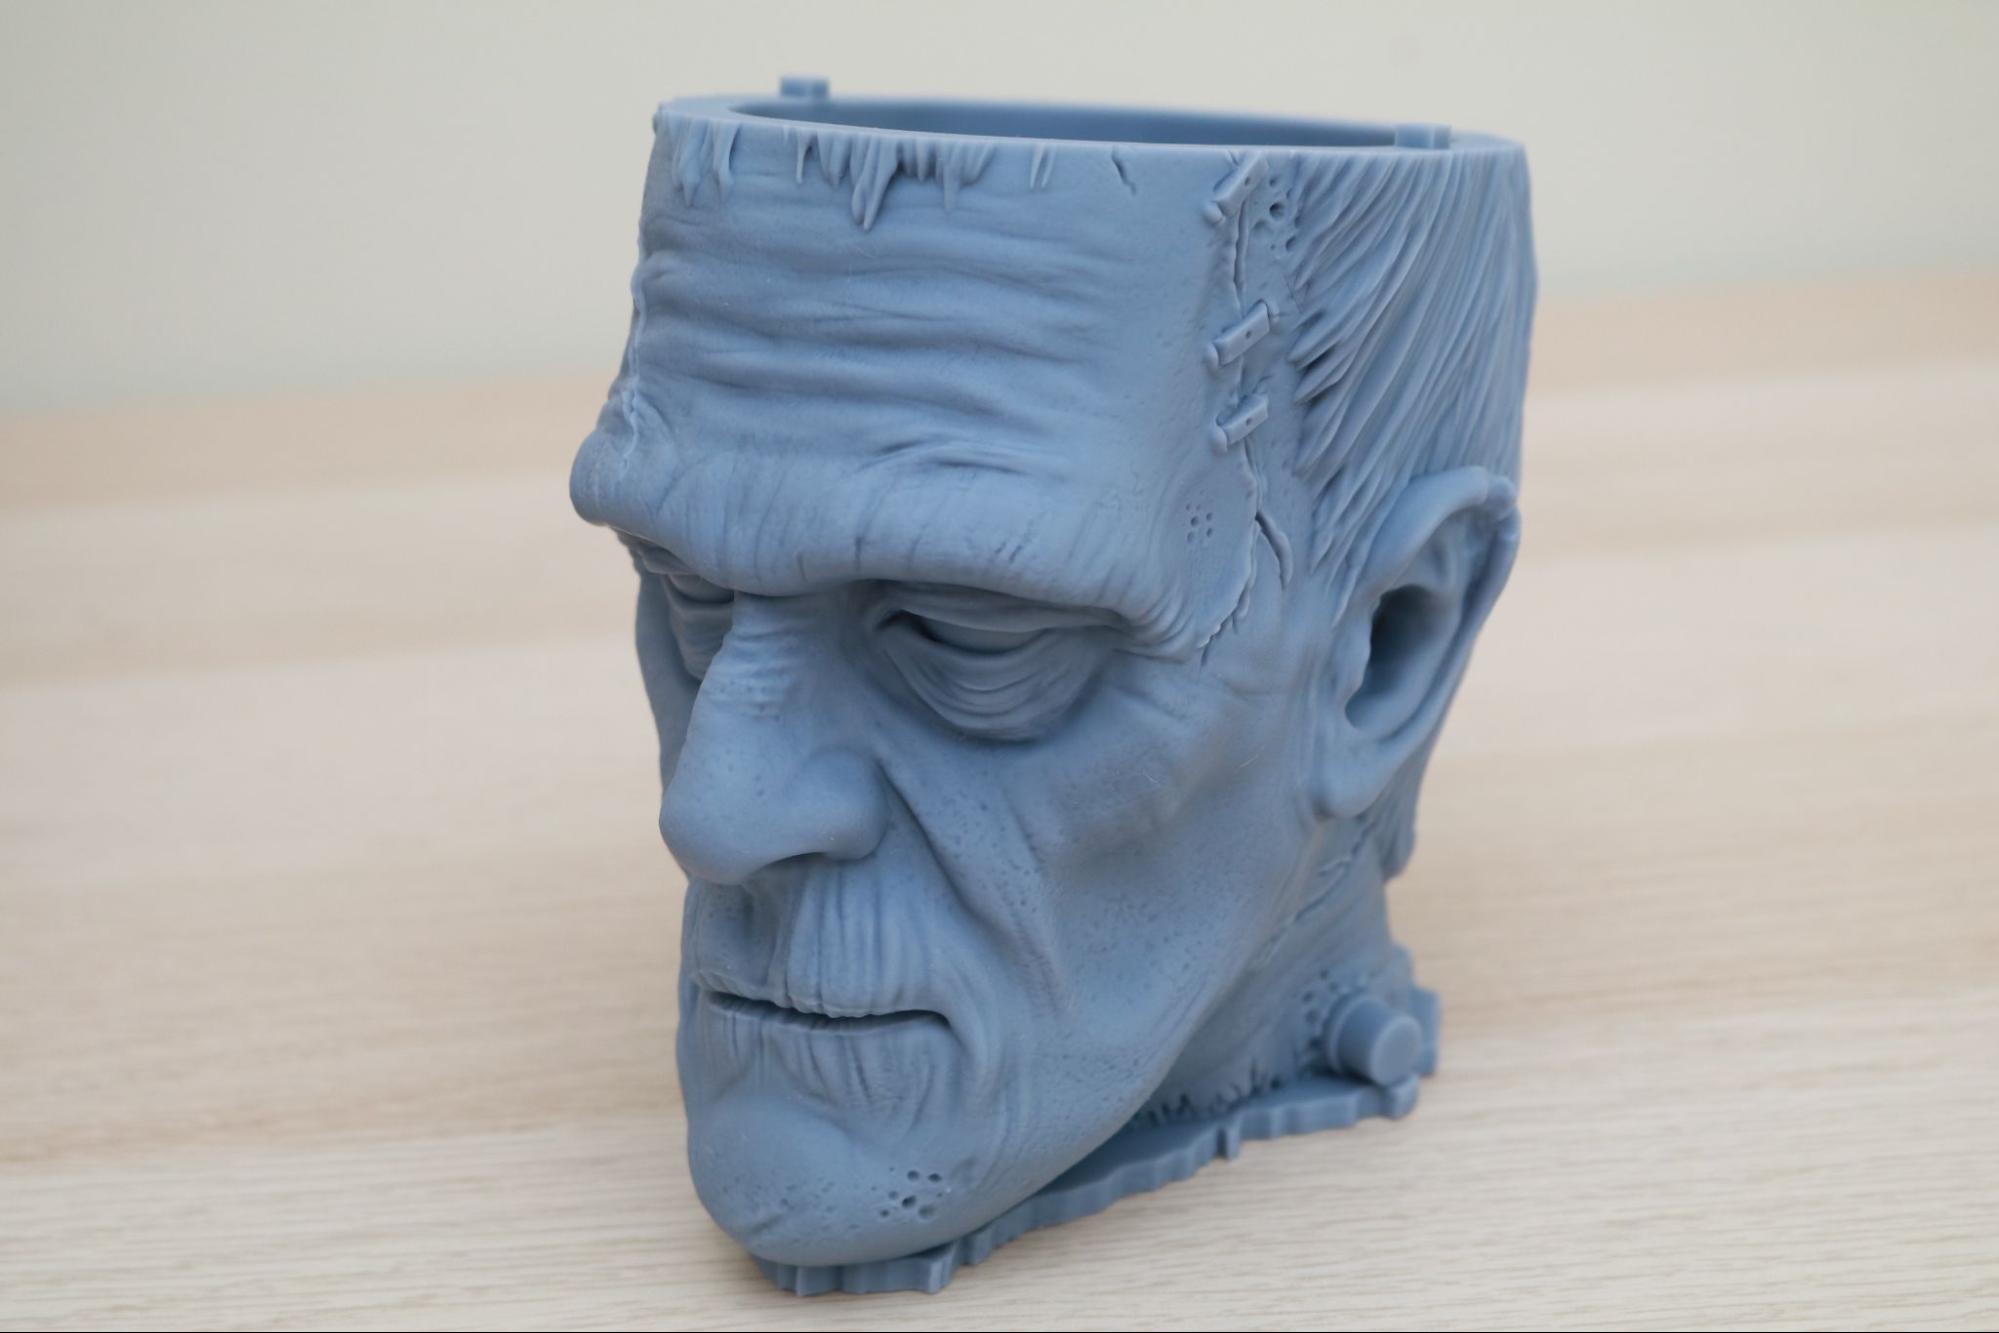
Anycubic included a bottle of ABS-Like Resin+ with the Photon M3 Premium, a resin that is designed specifically to mimic the mechanical properties of ABS. This tough resin is ideal for printing models that need a higher degree of mechanical toughness or resilience where a typically brittle standard UV resin wouldn’t be a good selection.
I was impressed with the parts made using this ABS-Like Resin+, which felt tough and durable after post-processing. The hollow head of Frankenstein’s Monster by Fotis Mint makes a perfect decoration for Halloween, and the walls of the model feel substantial and tough while still revealing a high level of surface detail.
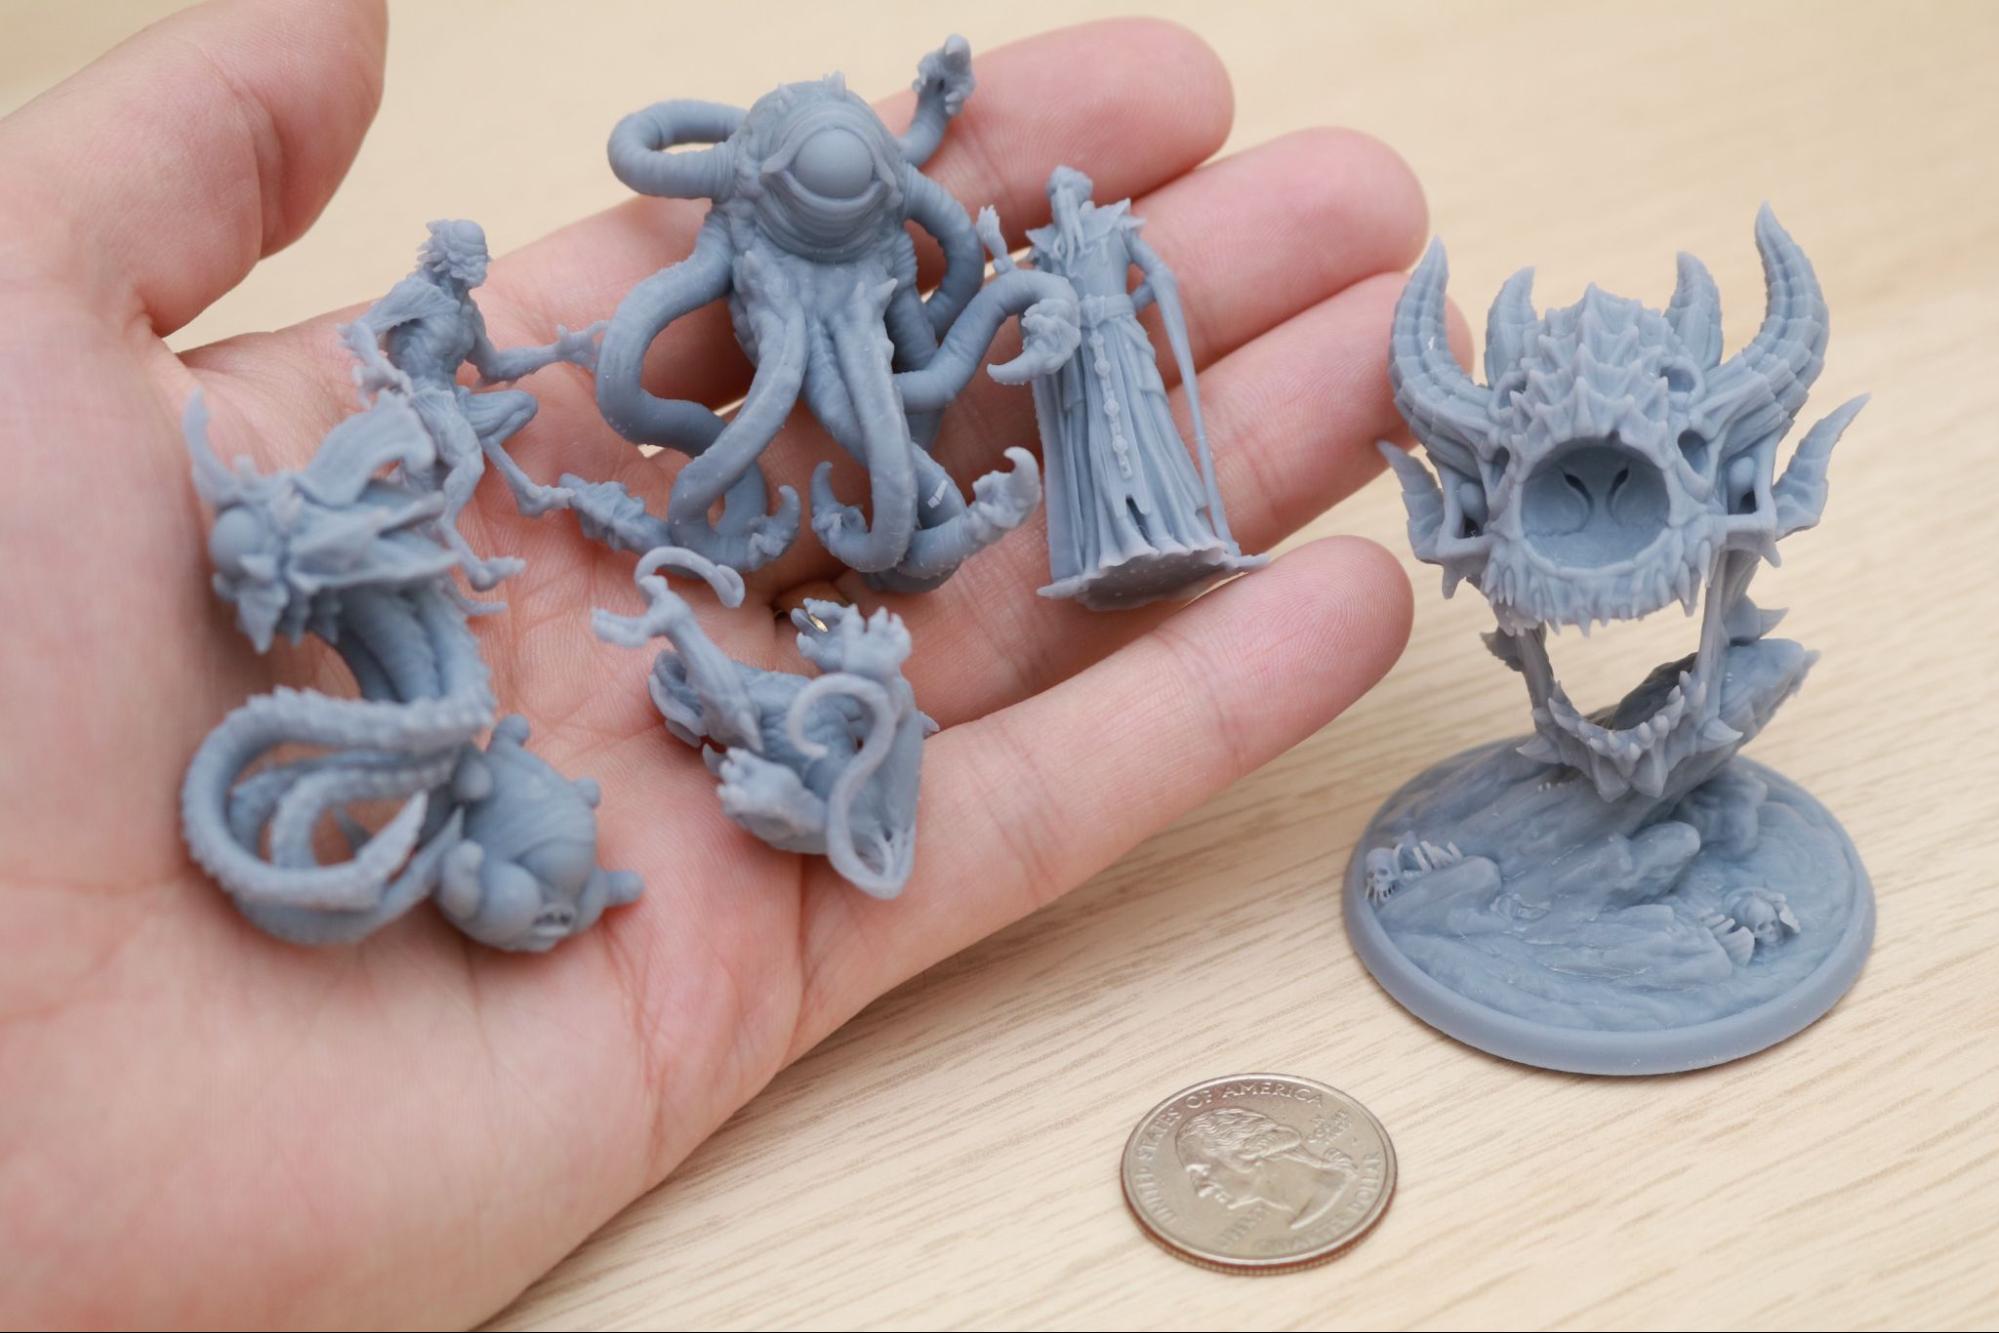
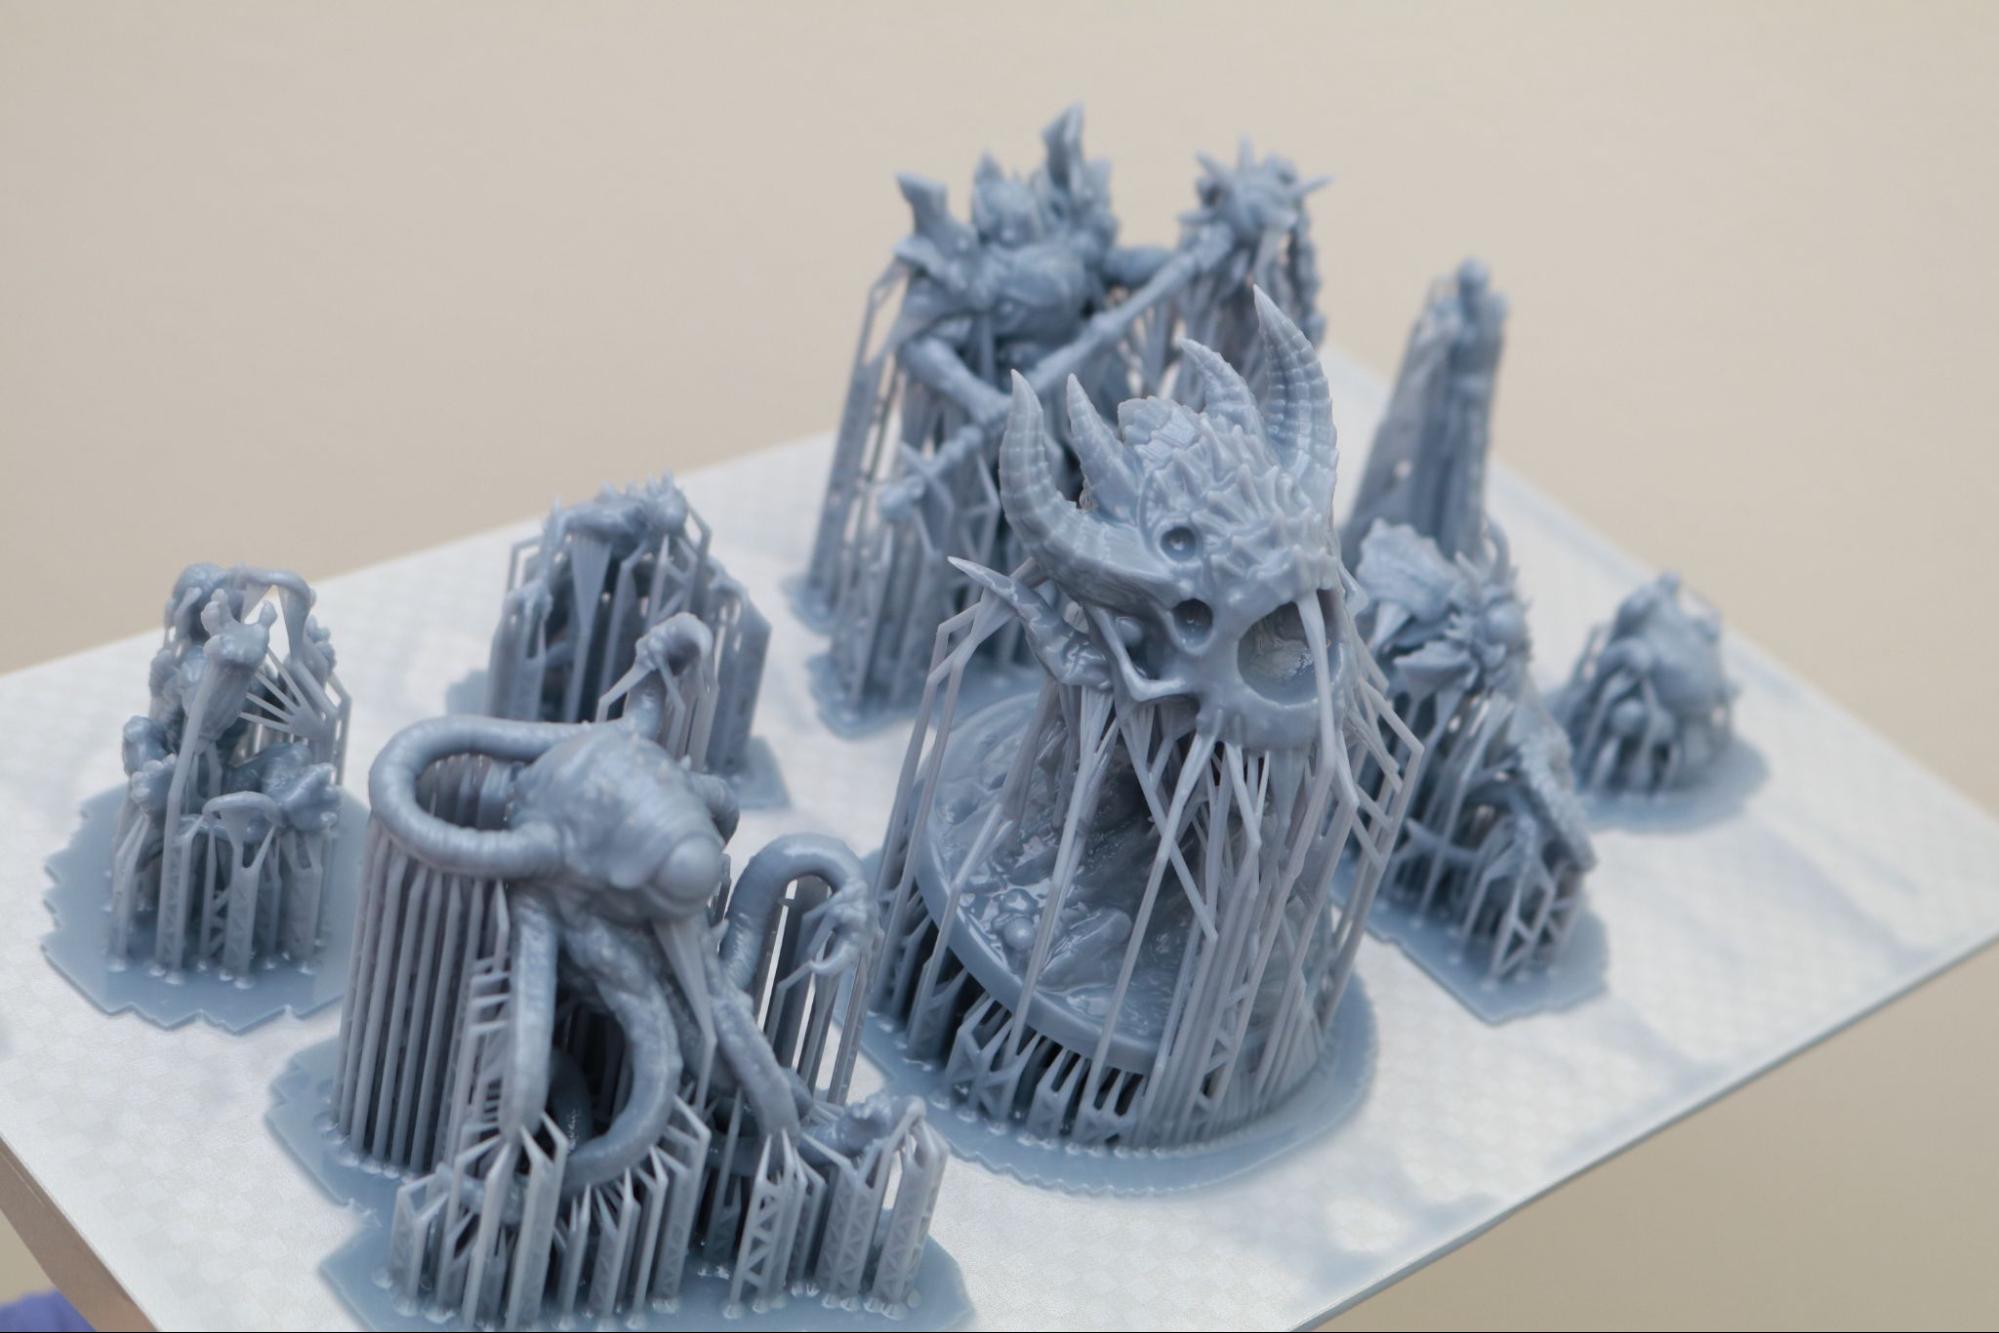
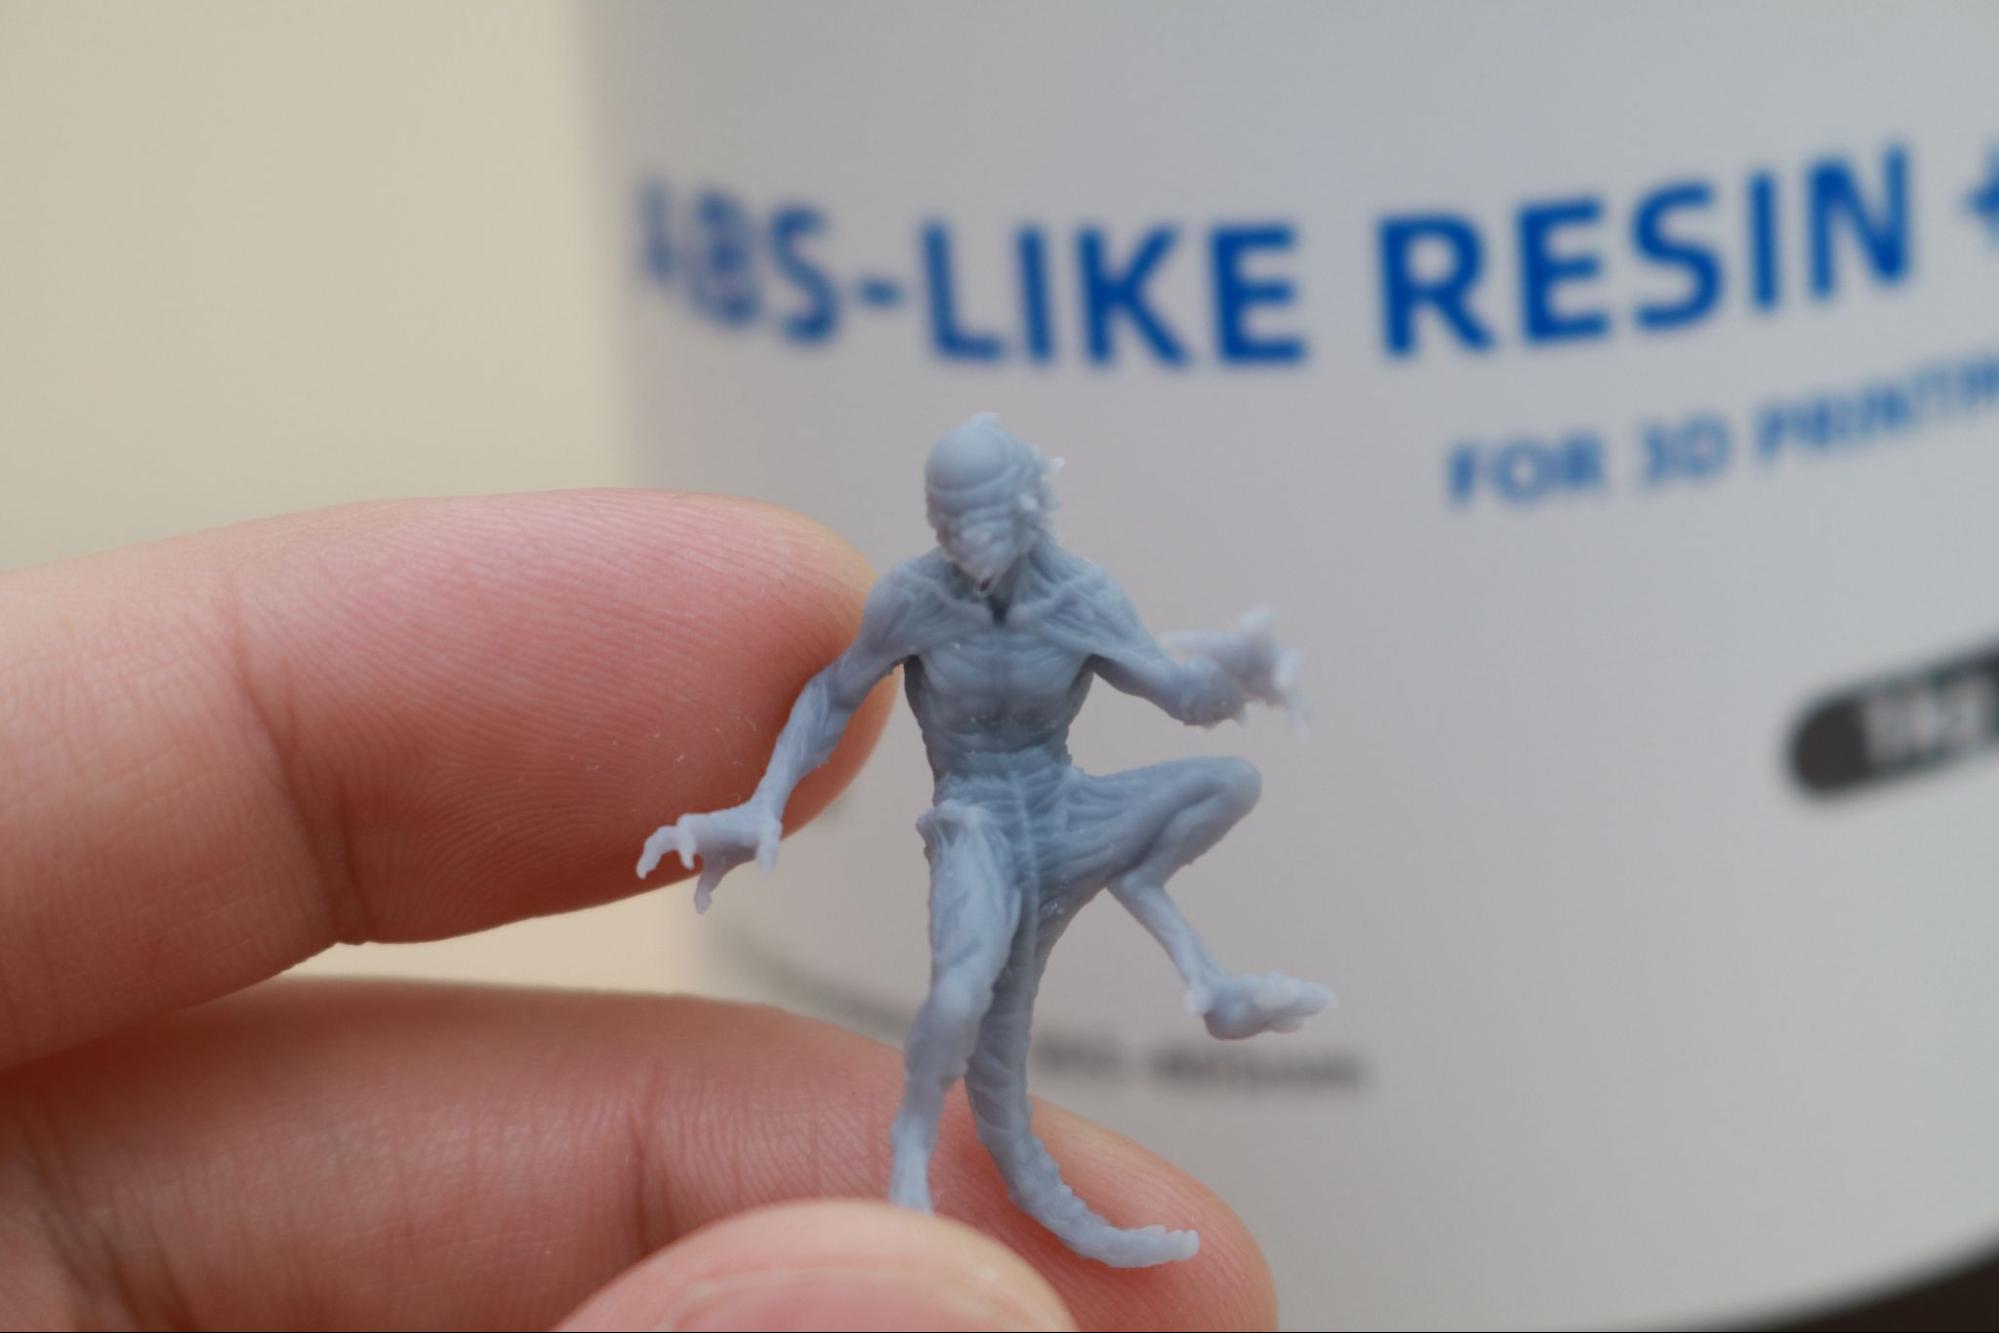
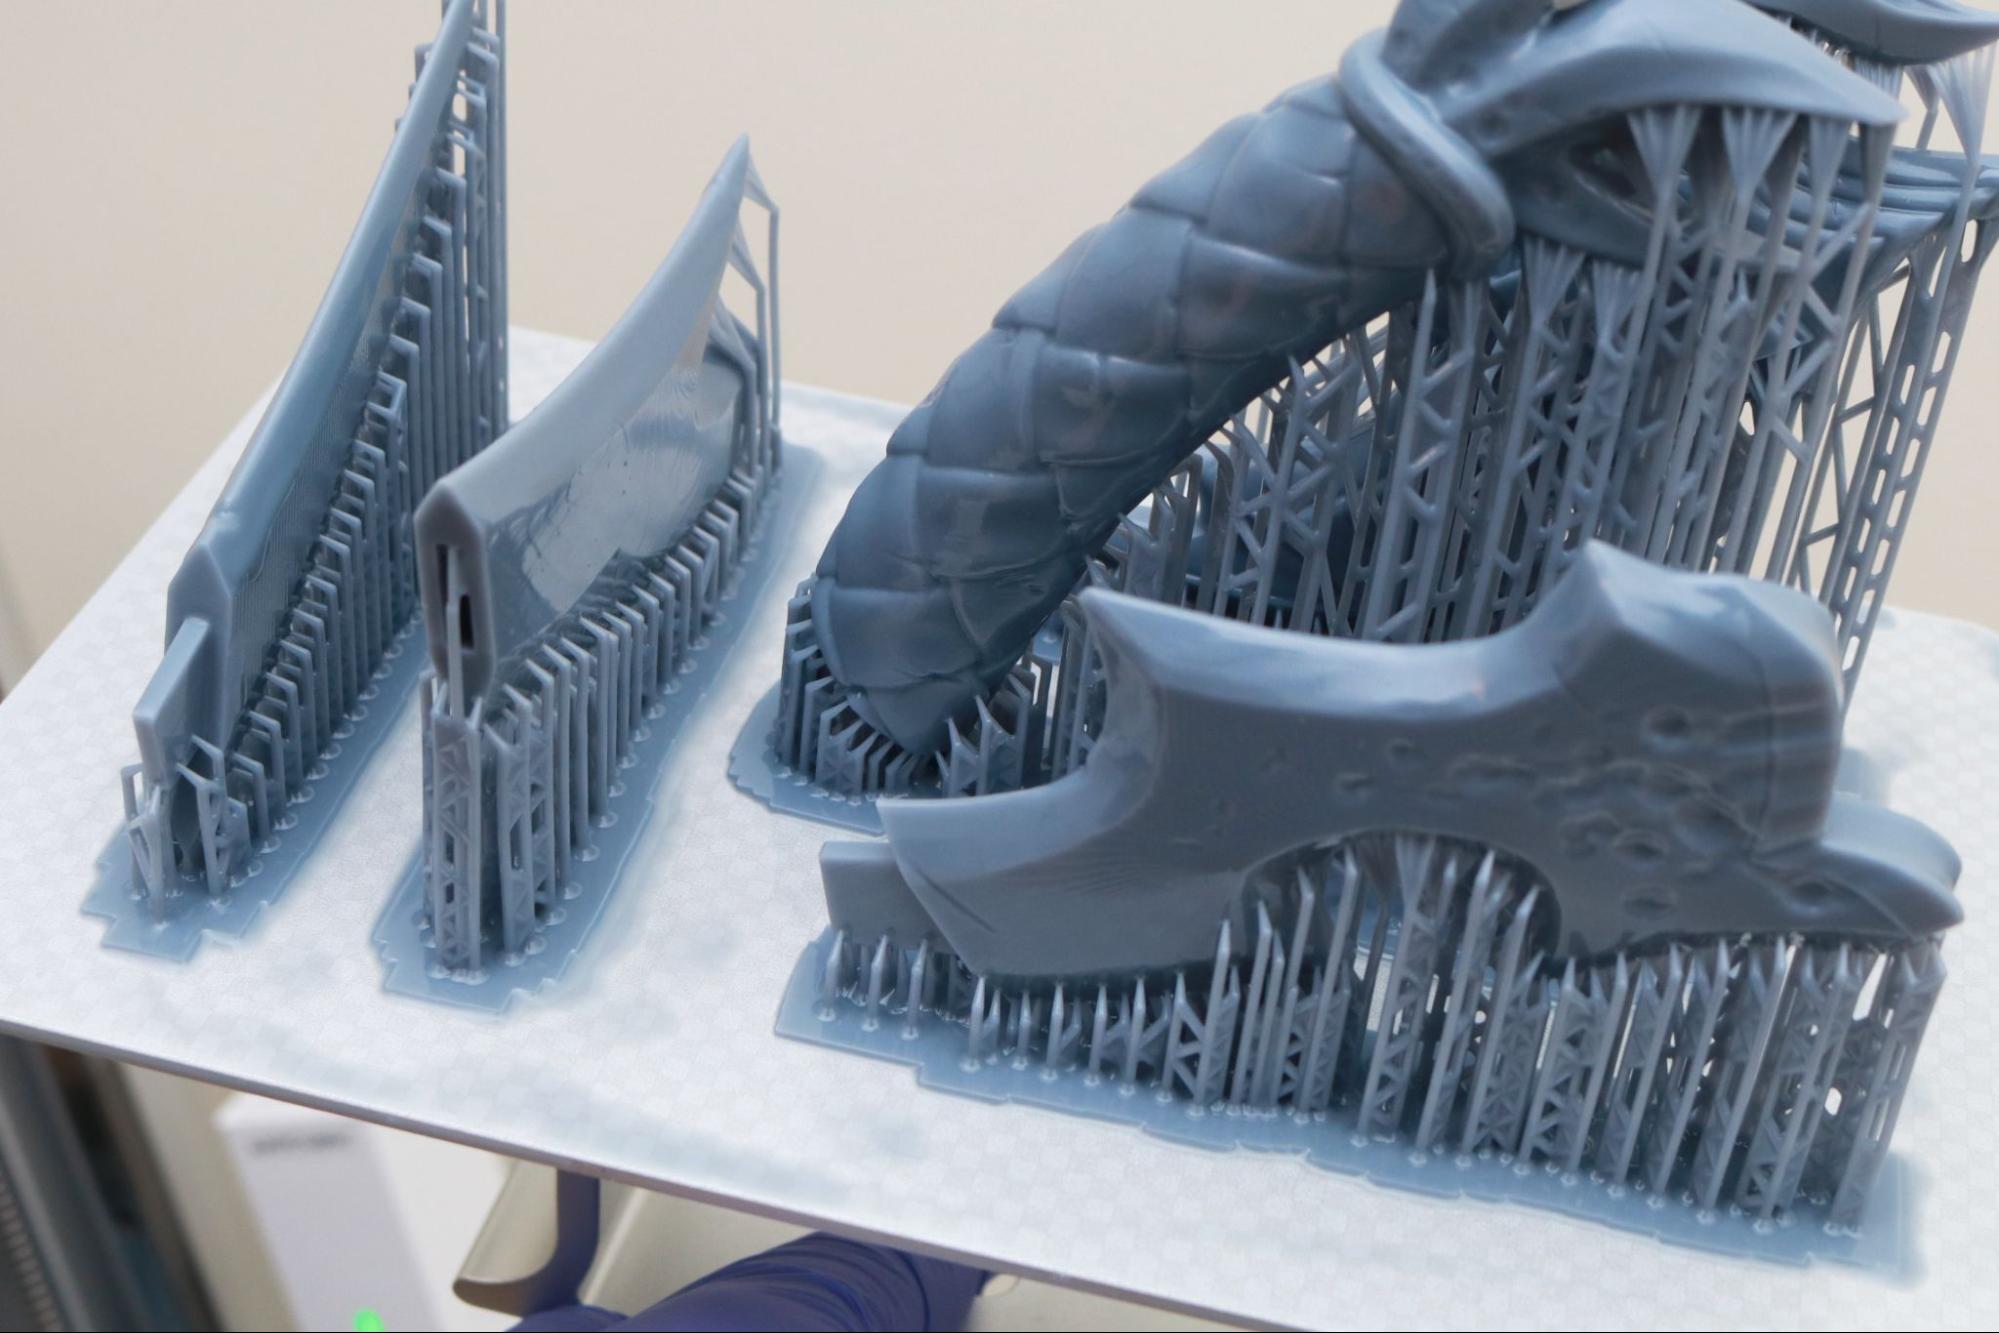
These miniature models from Loot Studios contain lots of small features that tend to snap or break when printed with standard UV resin. Printed with the ABS-Like Resin+, these fine features are able to deflect and bend slightly without breaking or shattering, a welcome feature for anyone looking for a print that can survive a drop test.
Printing Large Assemblies on the Anycubic Photon M3 Premium
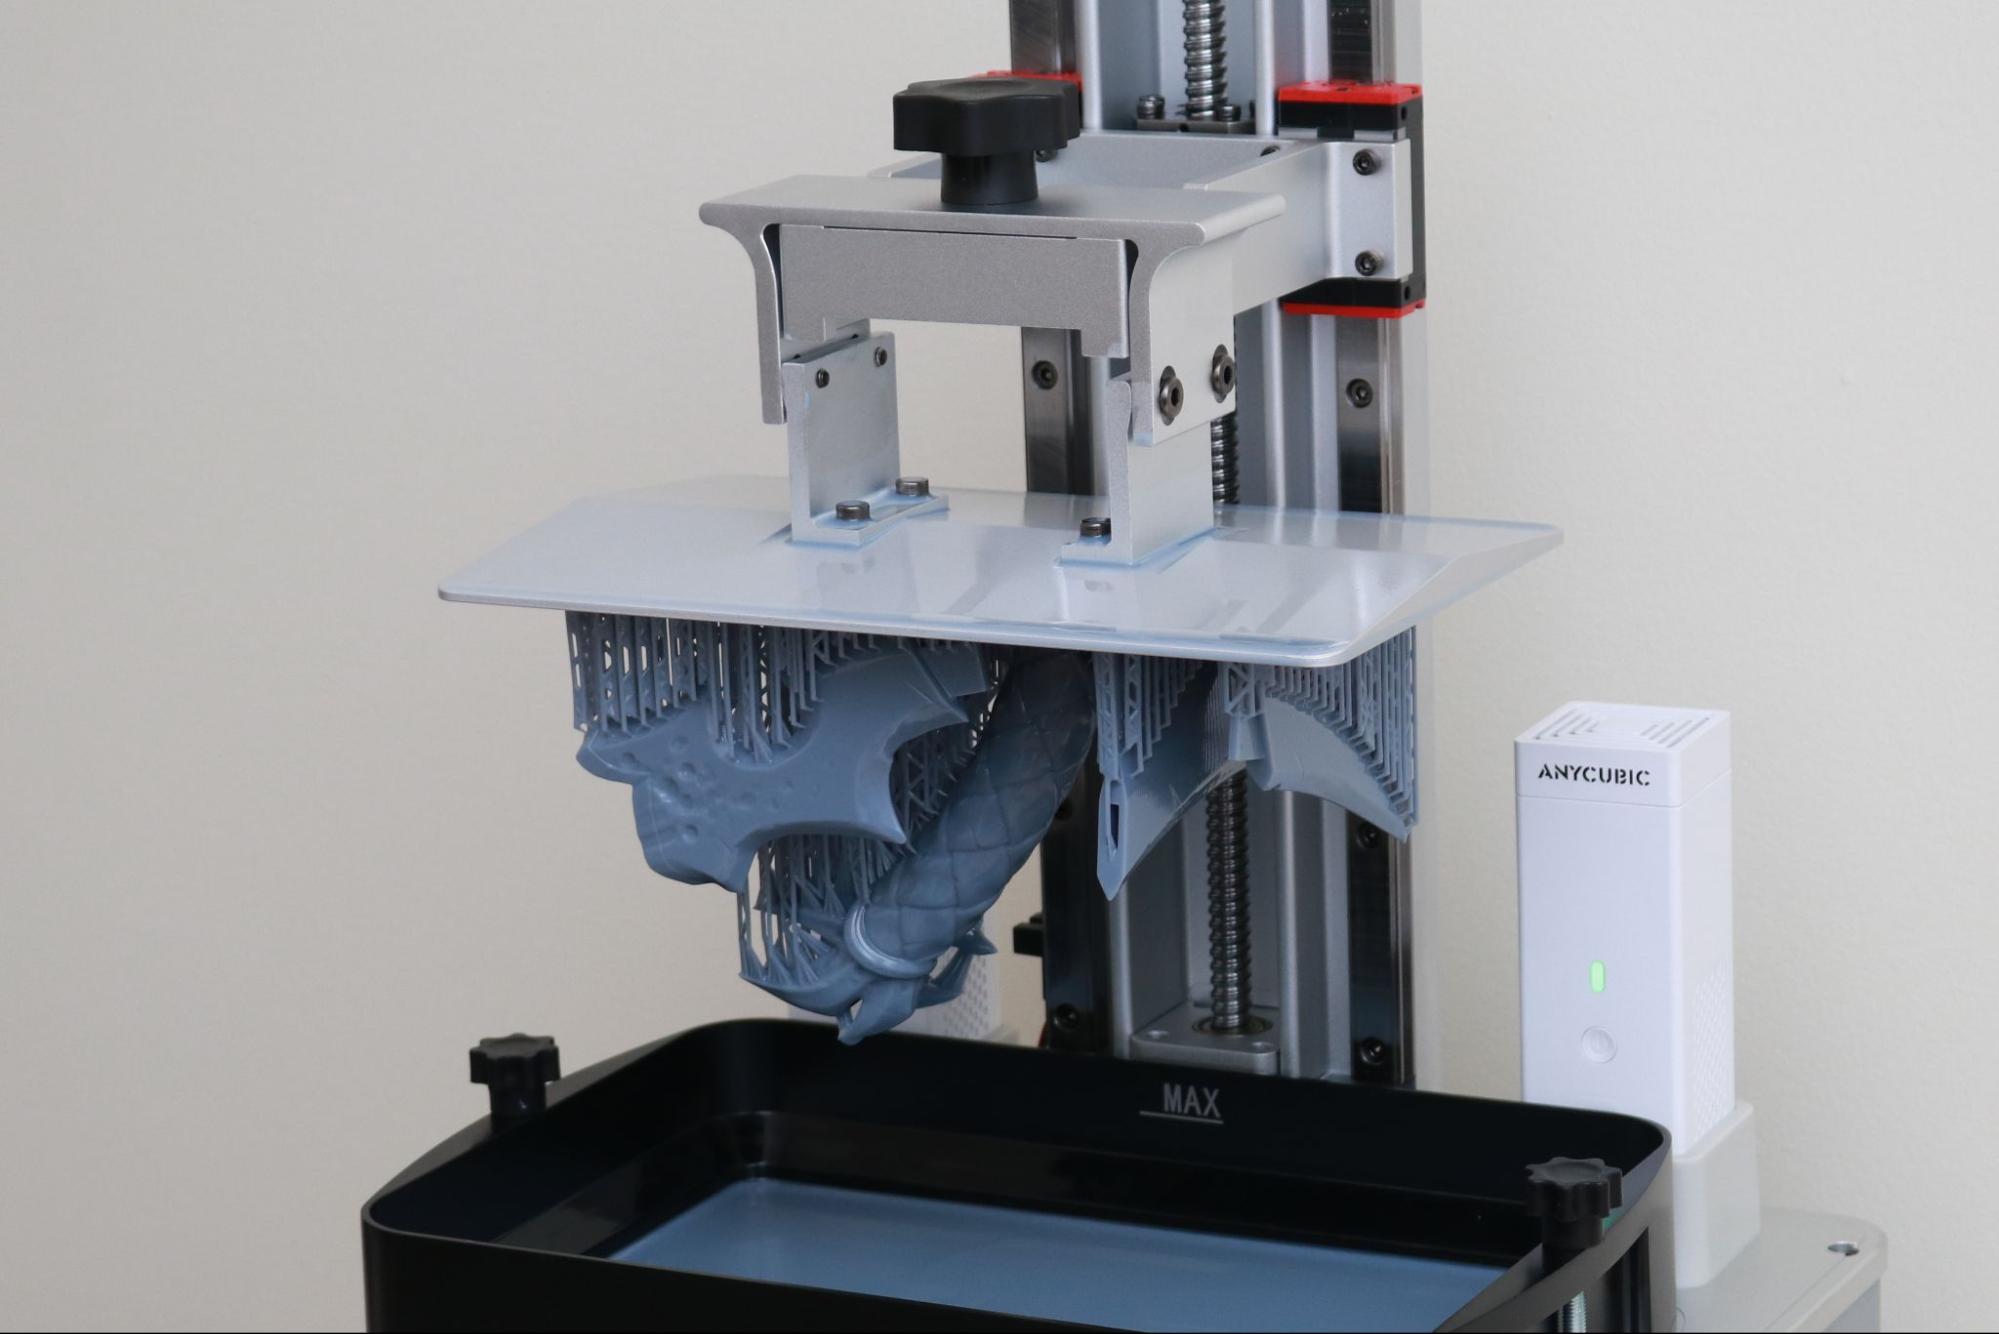
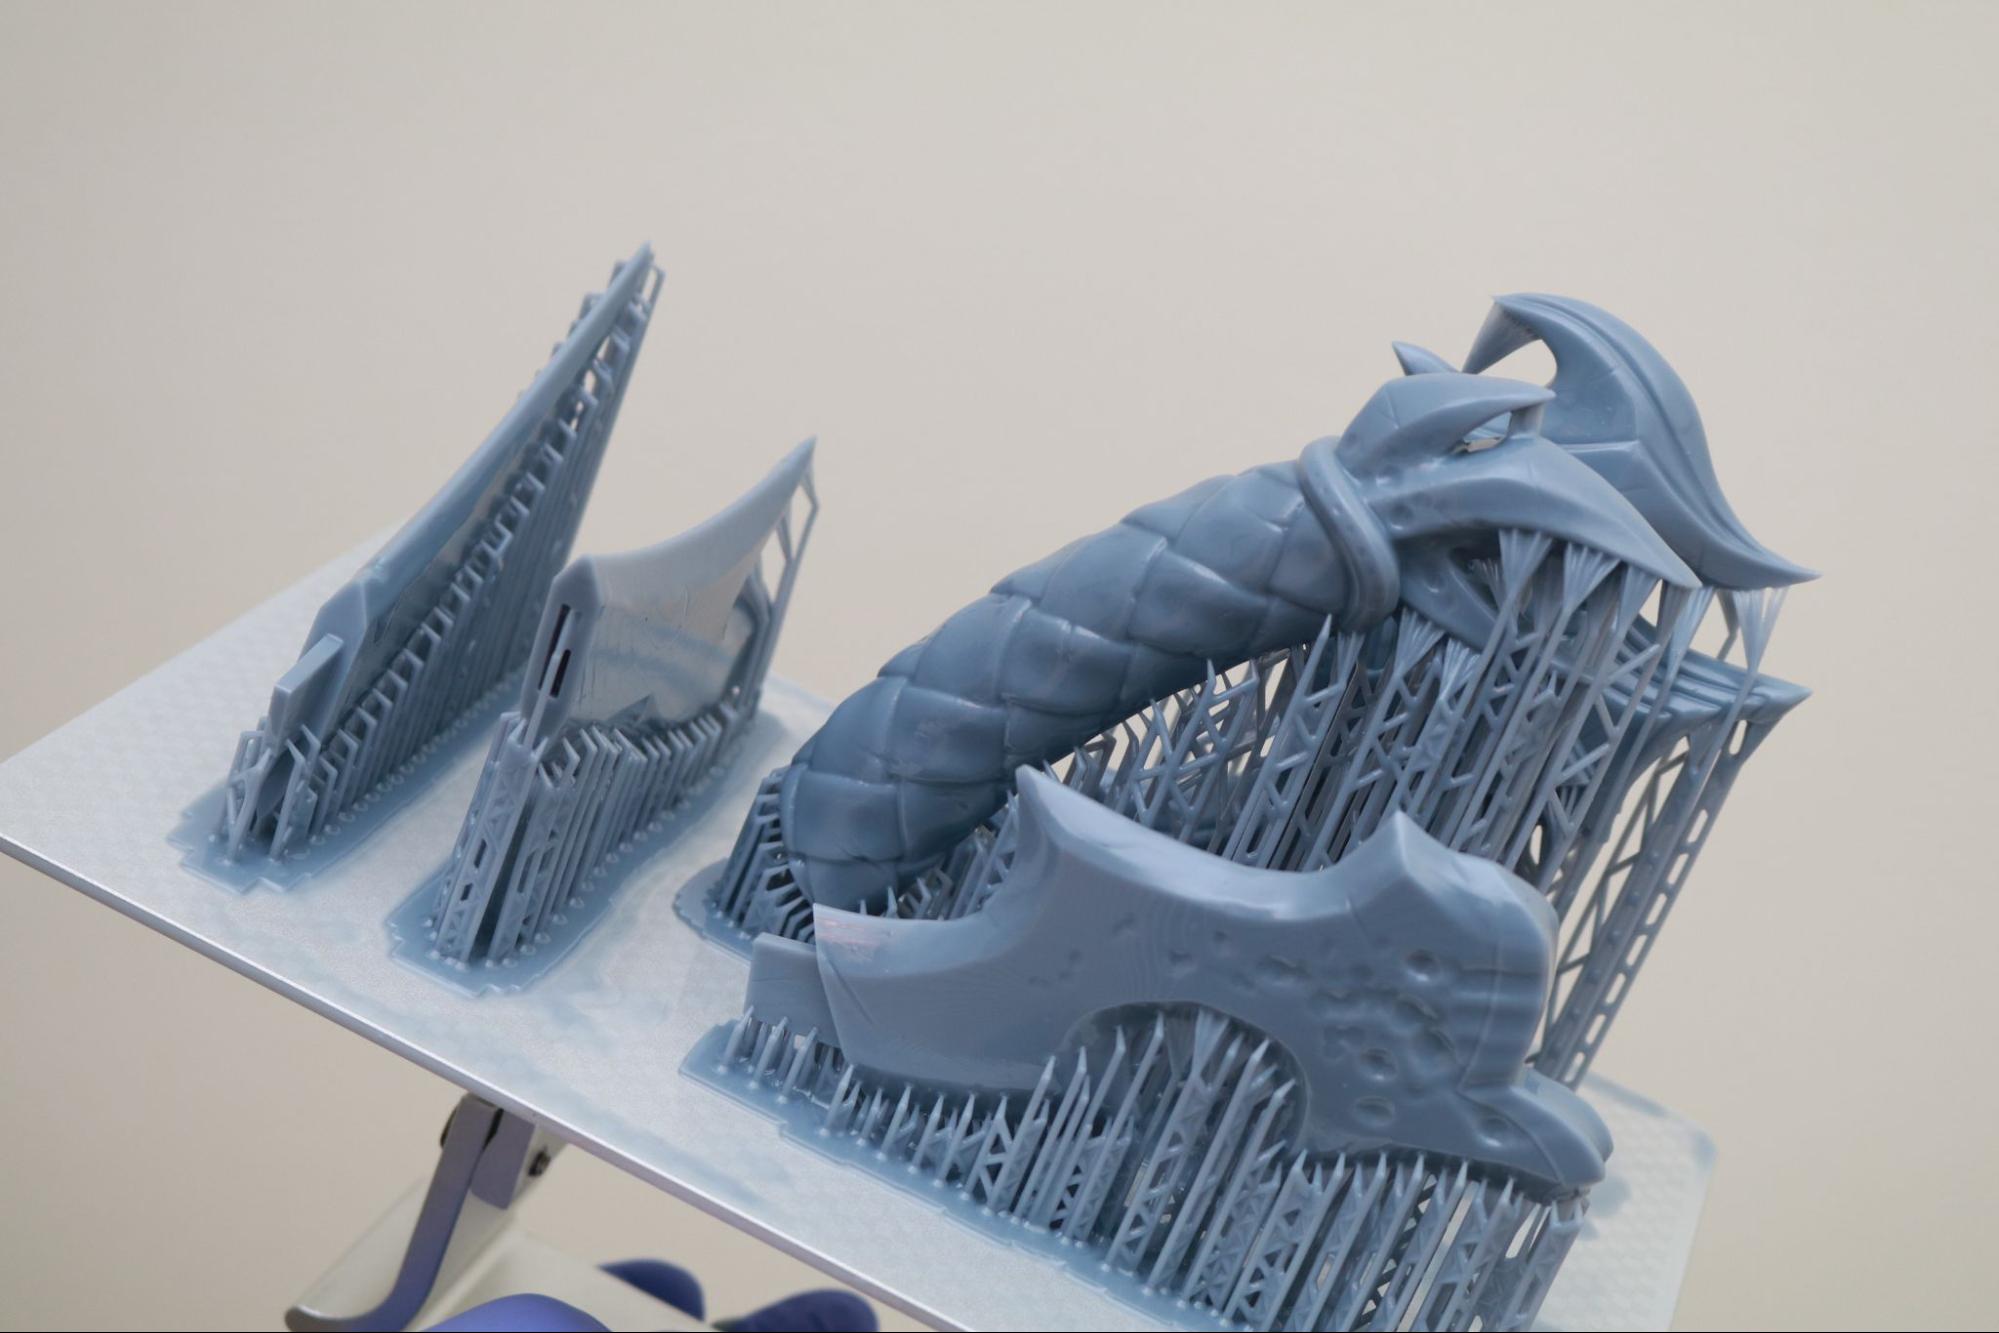
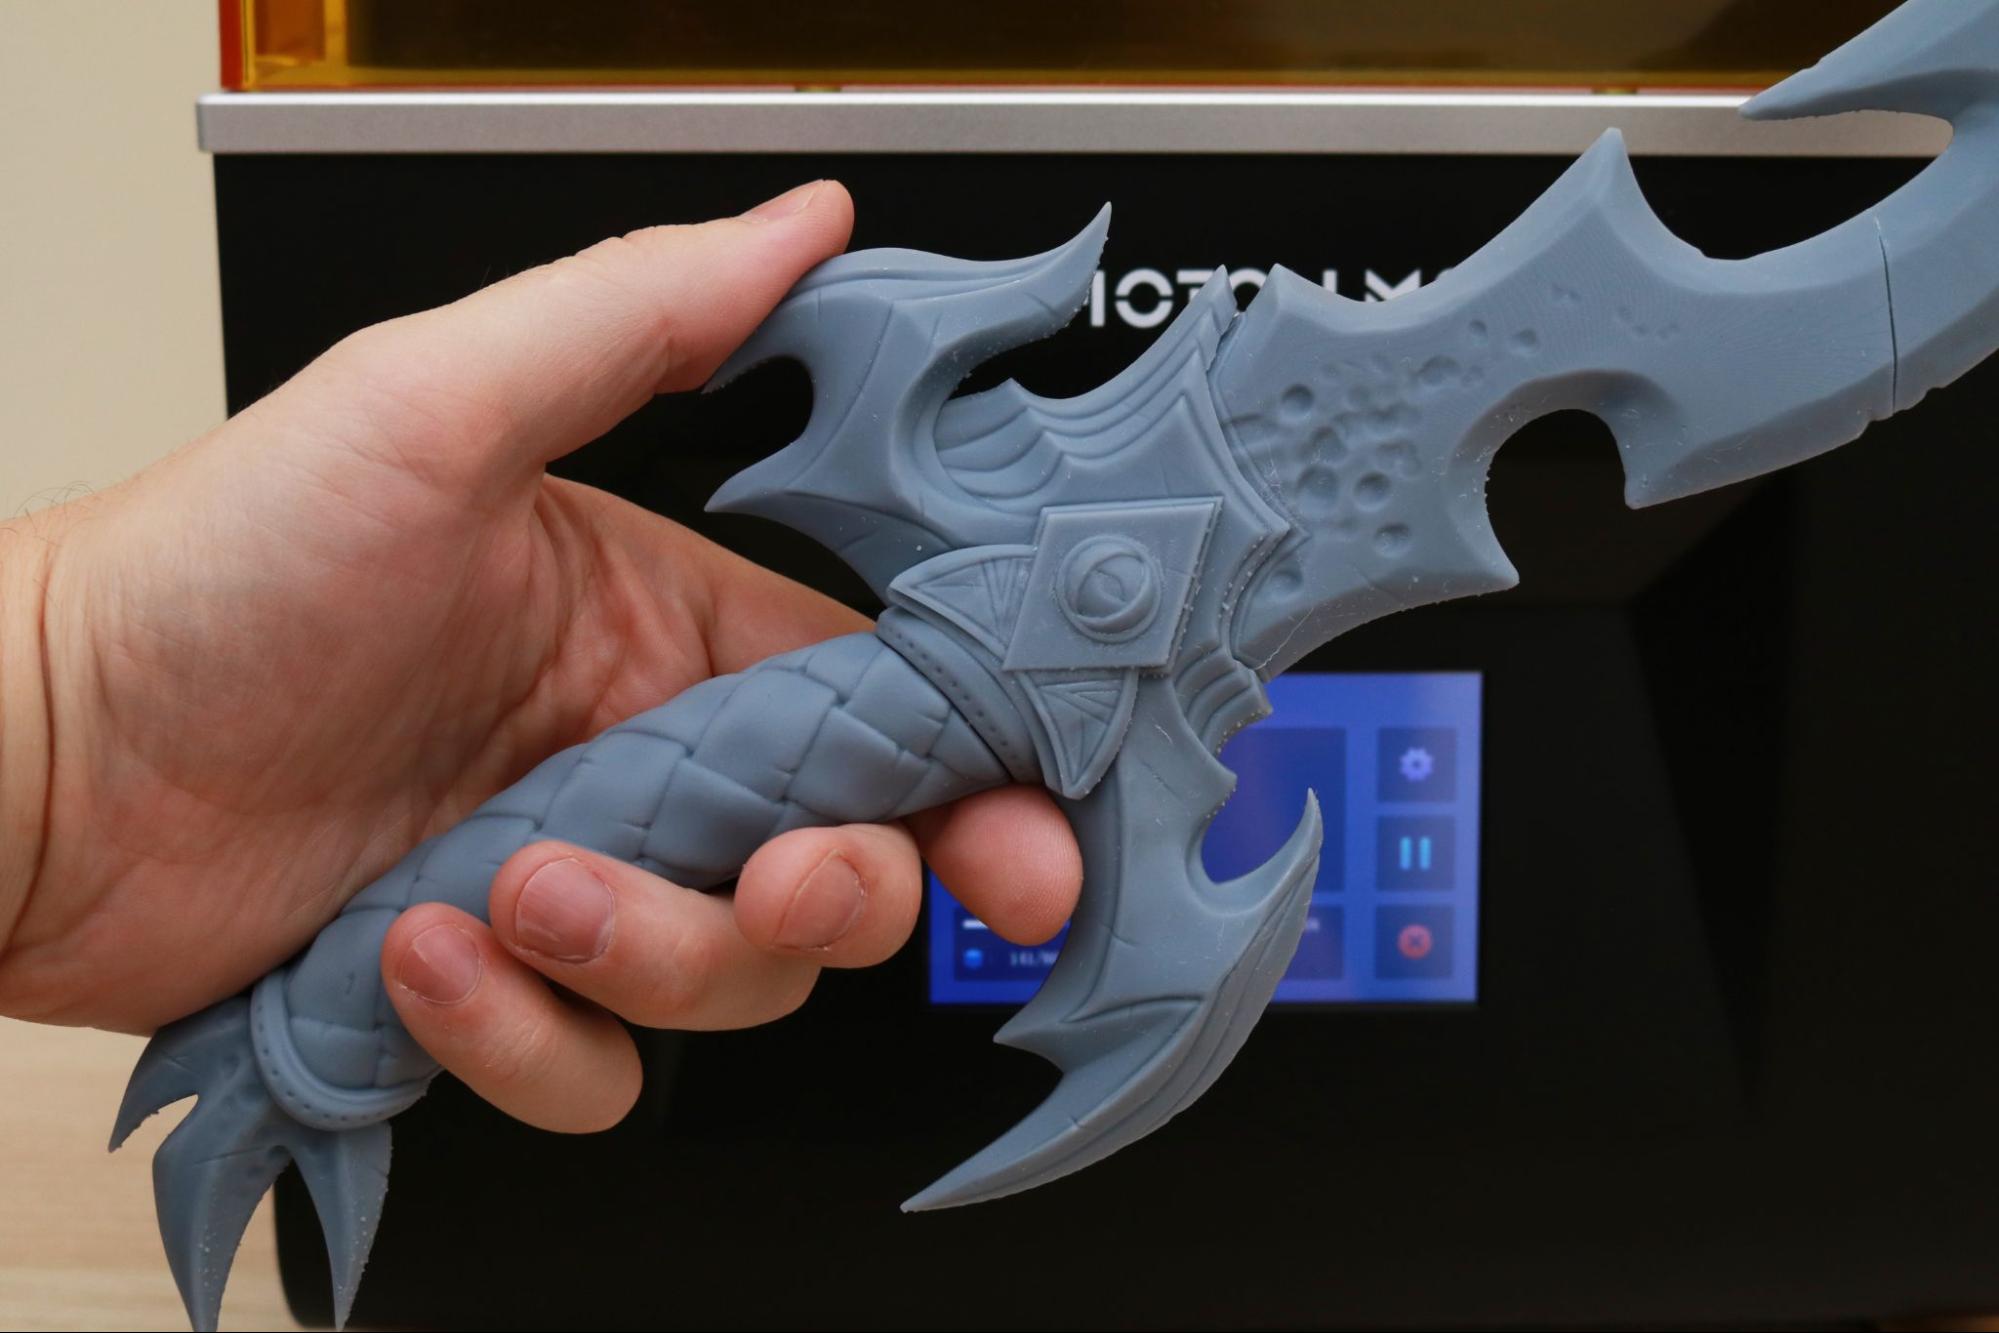
The large build volume of the Anycubic Photon M3 Premium is ideal for printing full assemblies on a single build platform, something that would typically require multiple prints on a smaller machine. The Blade of Alphariox by Loot Studios is a full-size dagger that is split into five parts and the entire model can be printed in a single print. Printed at a resolution of 0.05mm and a 2.5 second per-layer cure time, this model is 2562 layers tall and takes just under 8 hours to print.
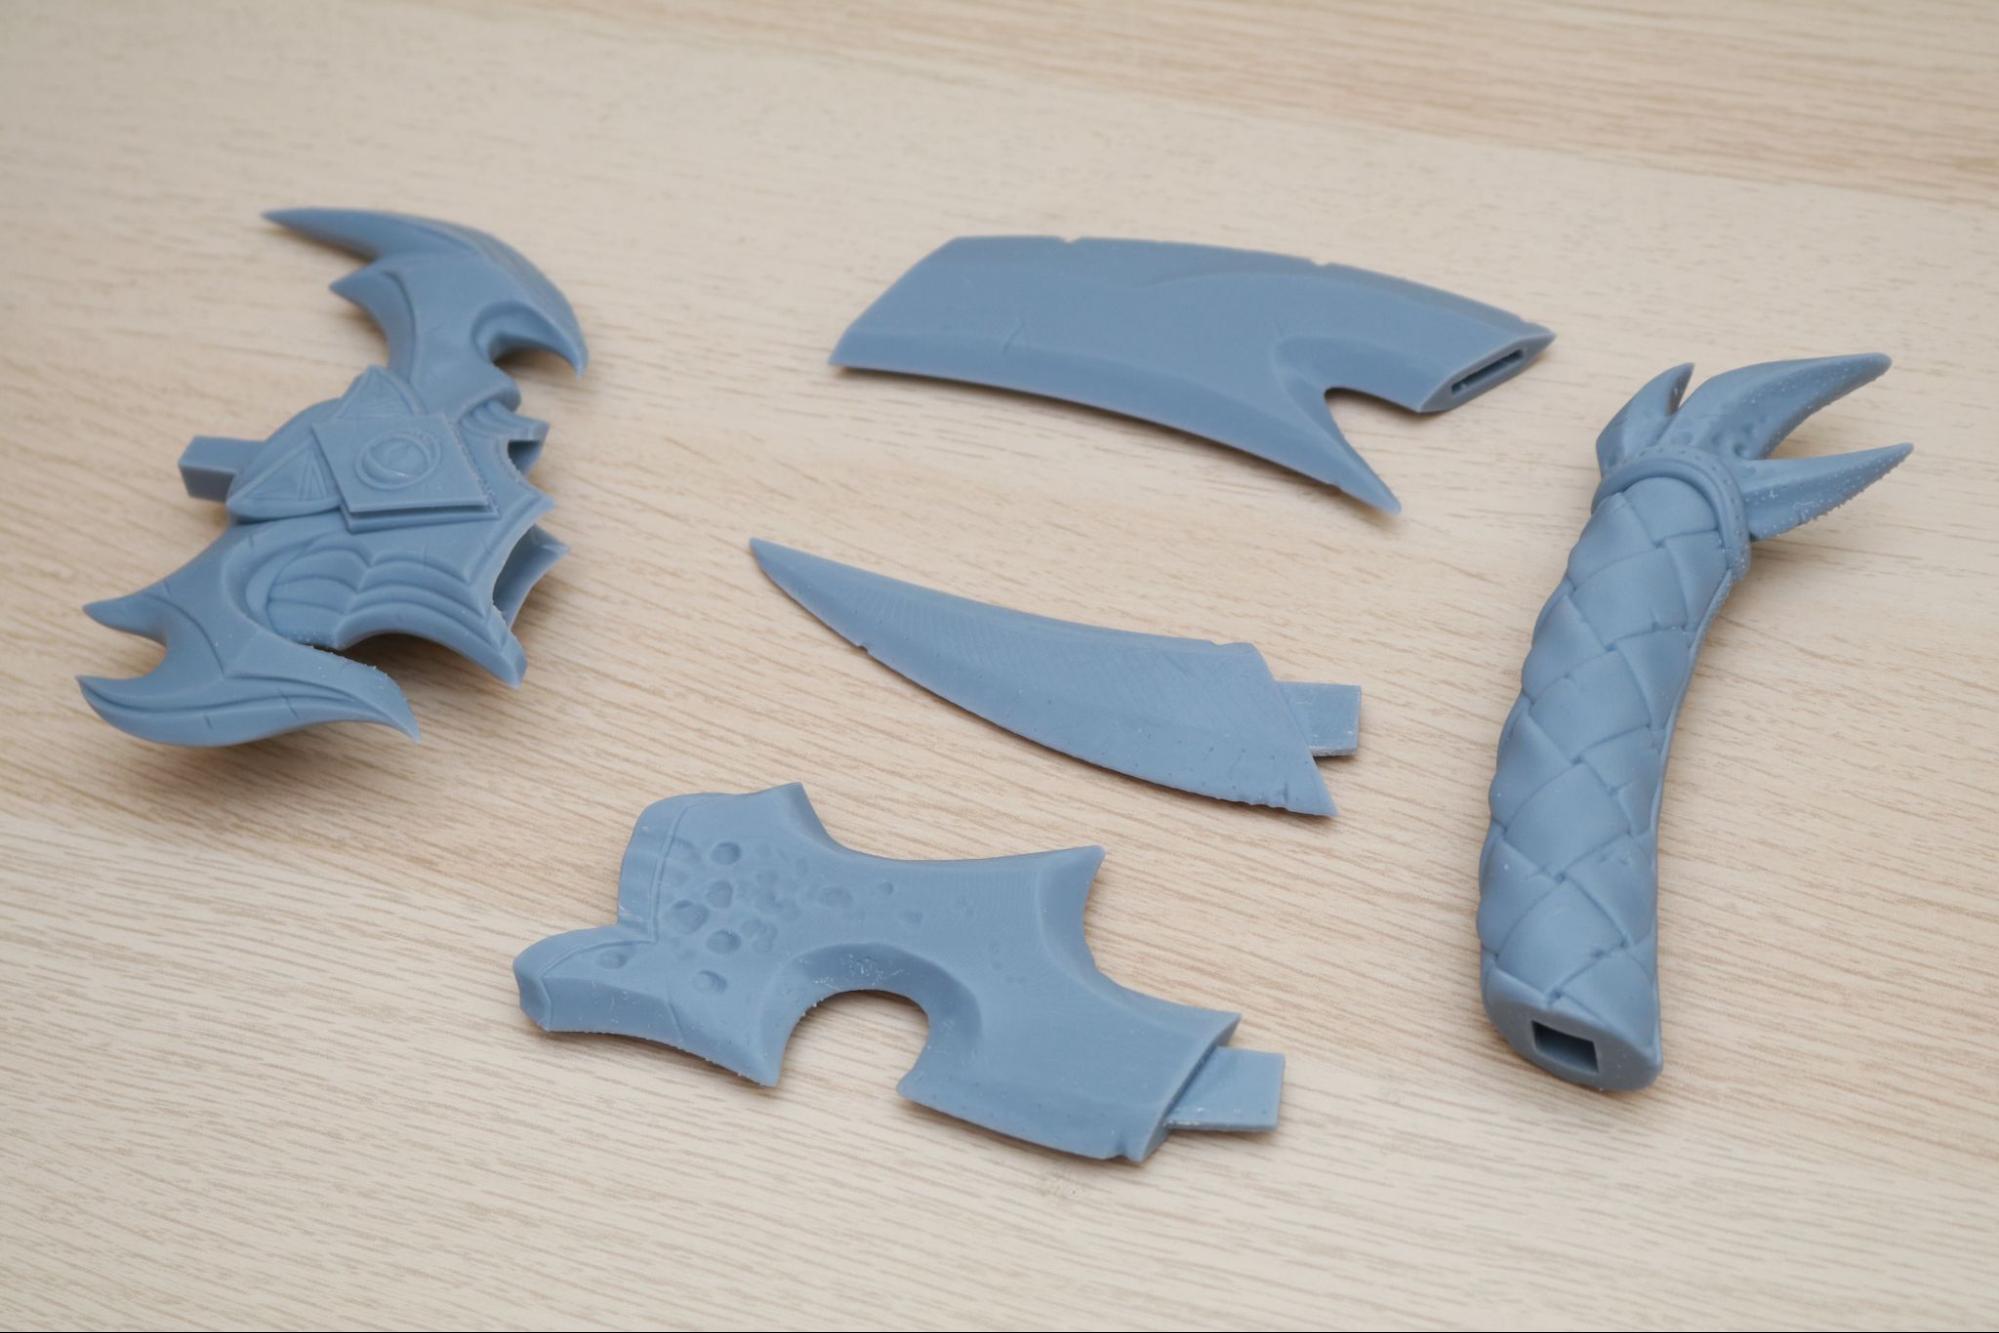
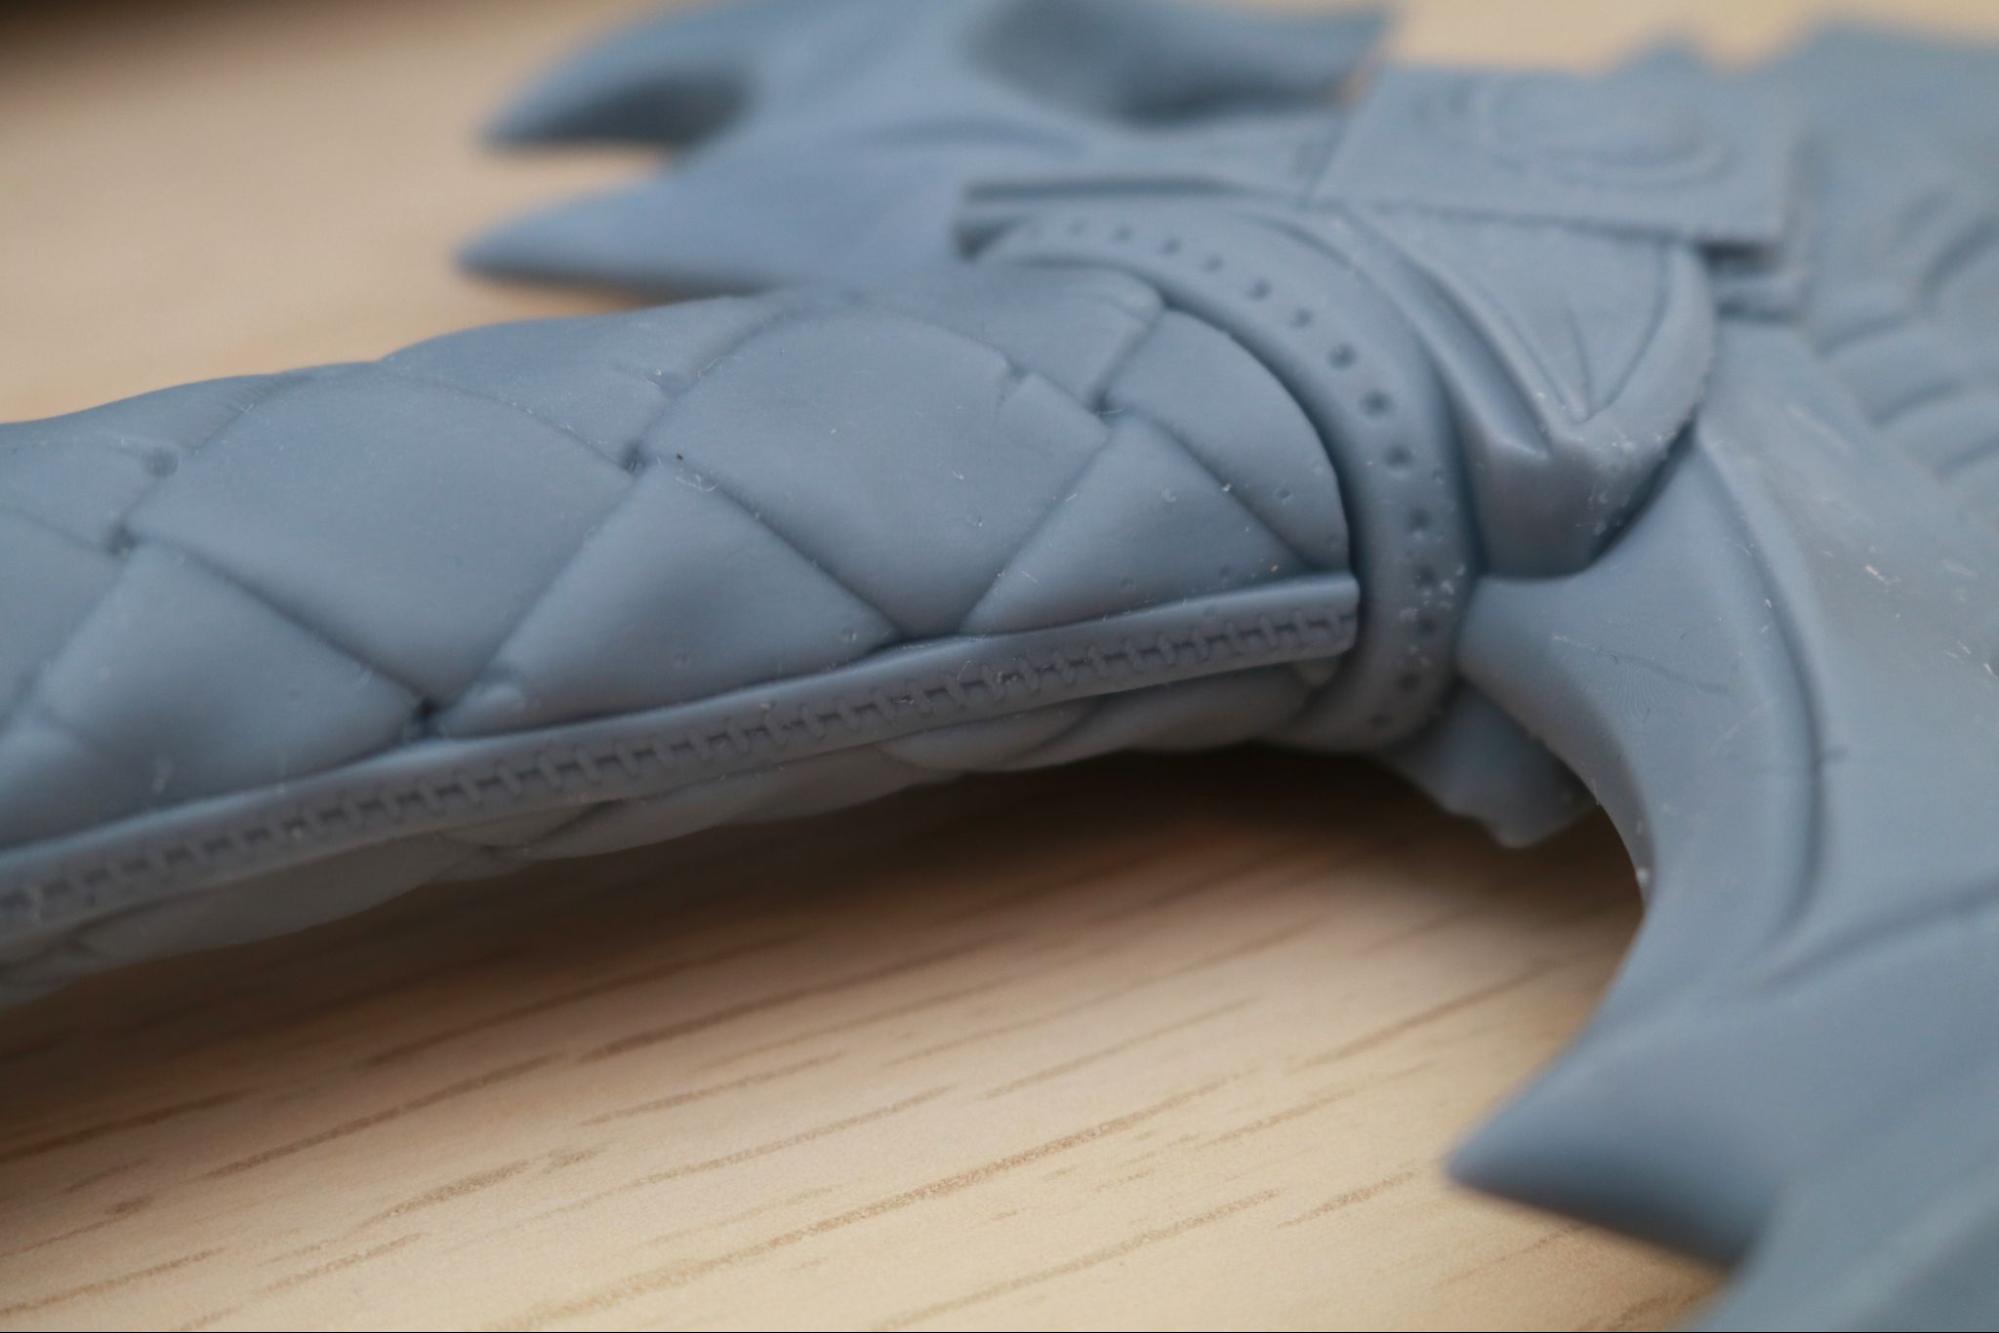
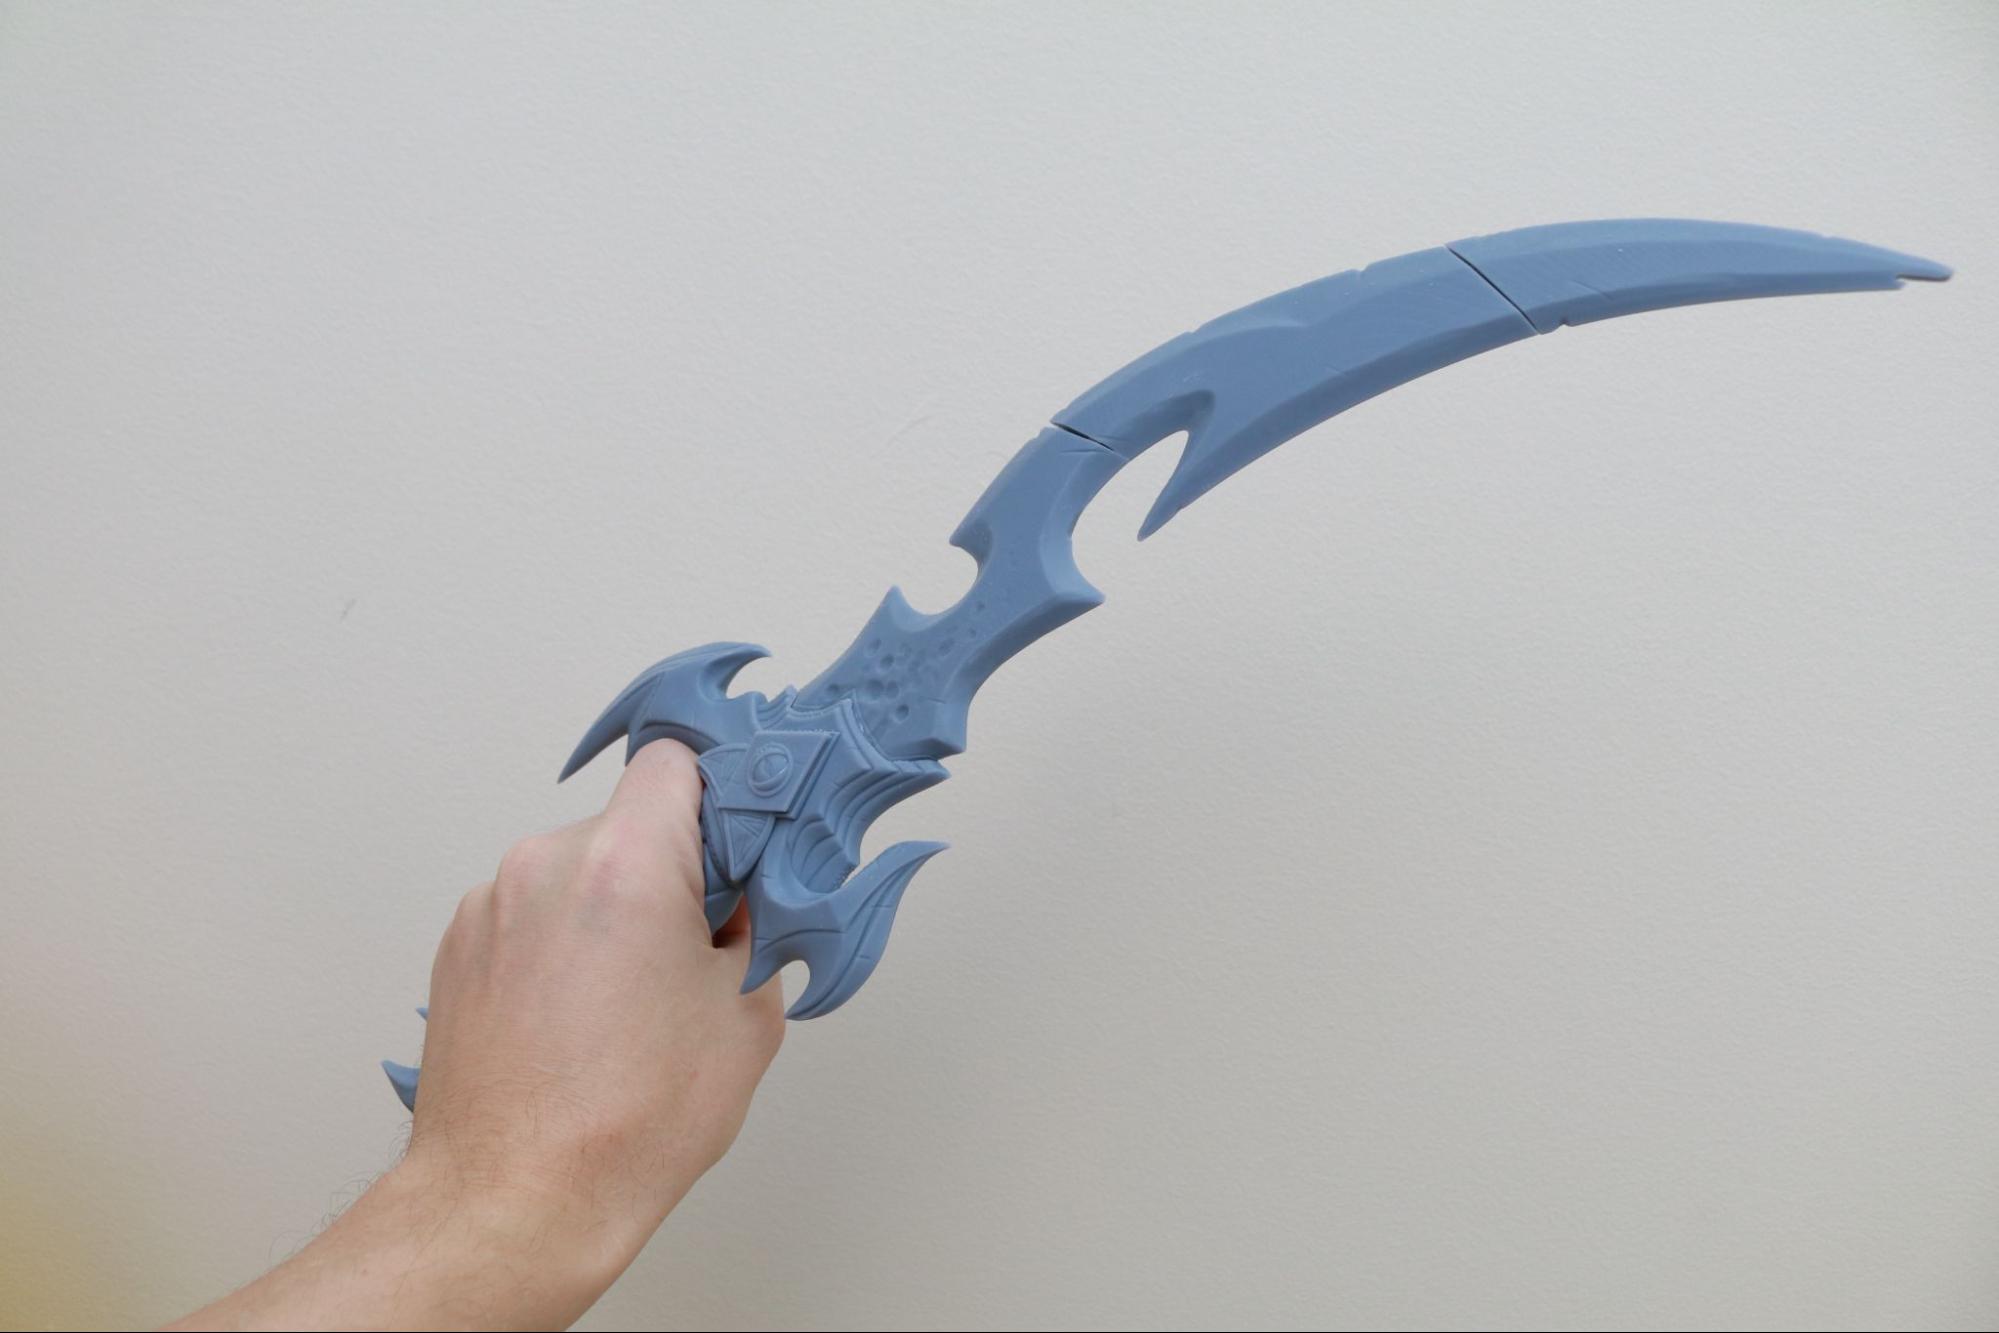
The model itself is highly detailed, and the leather texture on the handle even has a seam with stitching sculpted into the model which is clearly visible. The blade is made of three pieces which fit together using a rectangular registration feature. The handle locks into place on the crossguard, and the blade fits snugly on the other side. There is a slight gap between pieces, which anyone making this prop would likely fill and sand down before painting or post-processing.
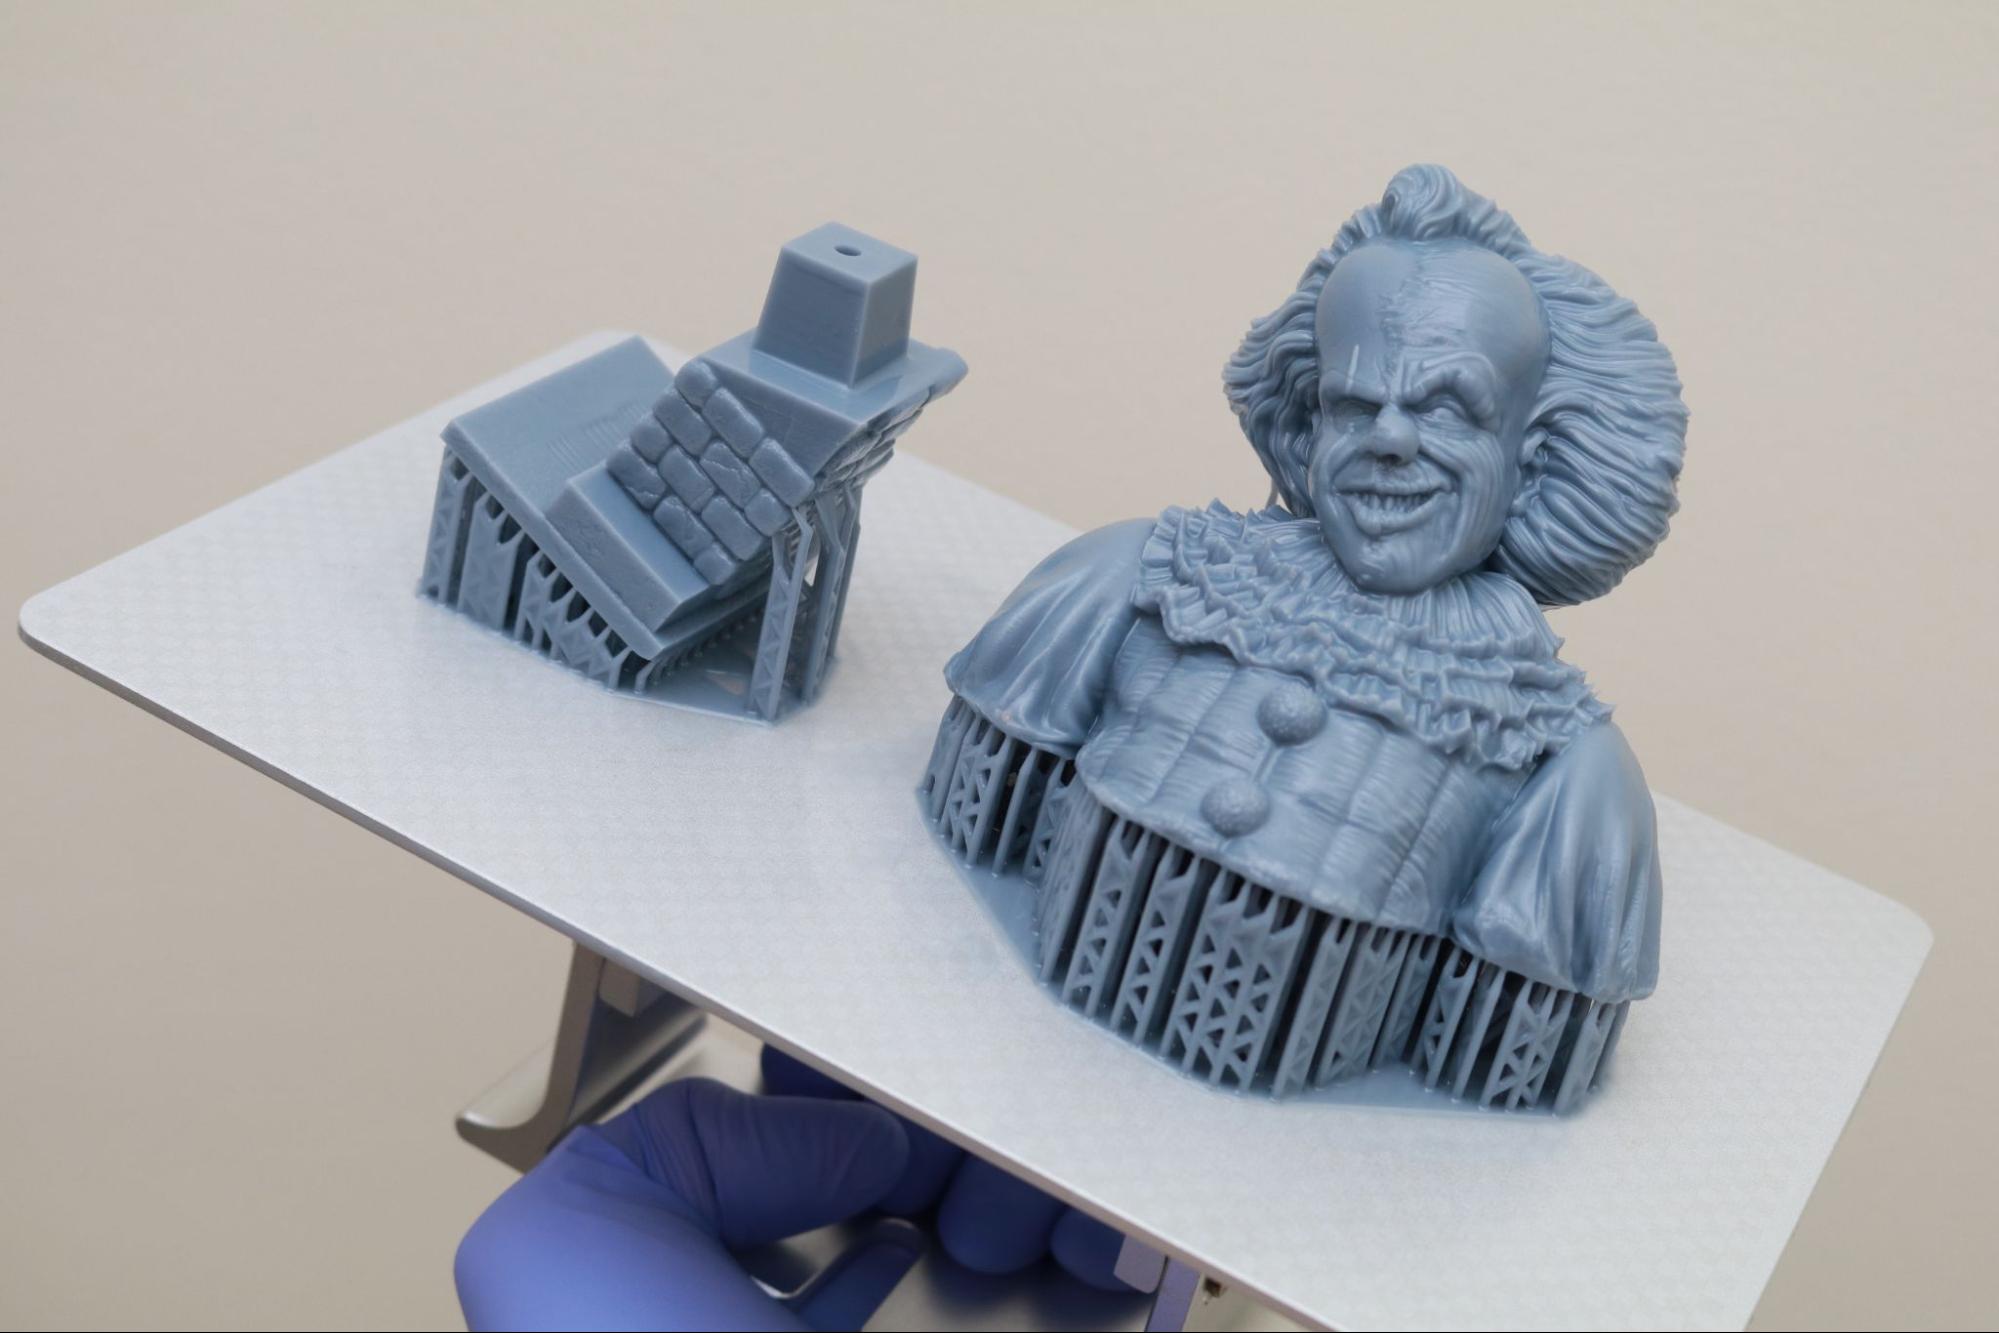
Large sculpted busts like Pennywise by Fotis Mint (another great Halloween decoration) are also ideal for the large build volume of the Photon M3 Premium, which can print both the bust as well as the base in a single print. This model includes lots of detail throughout the sculpt as well as a detailed base that has a worn brick texture.
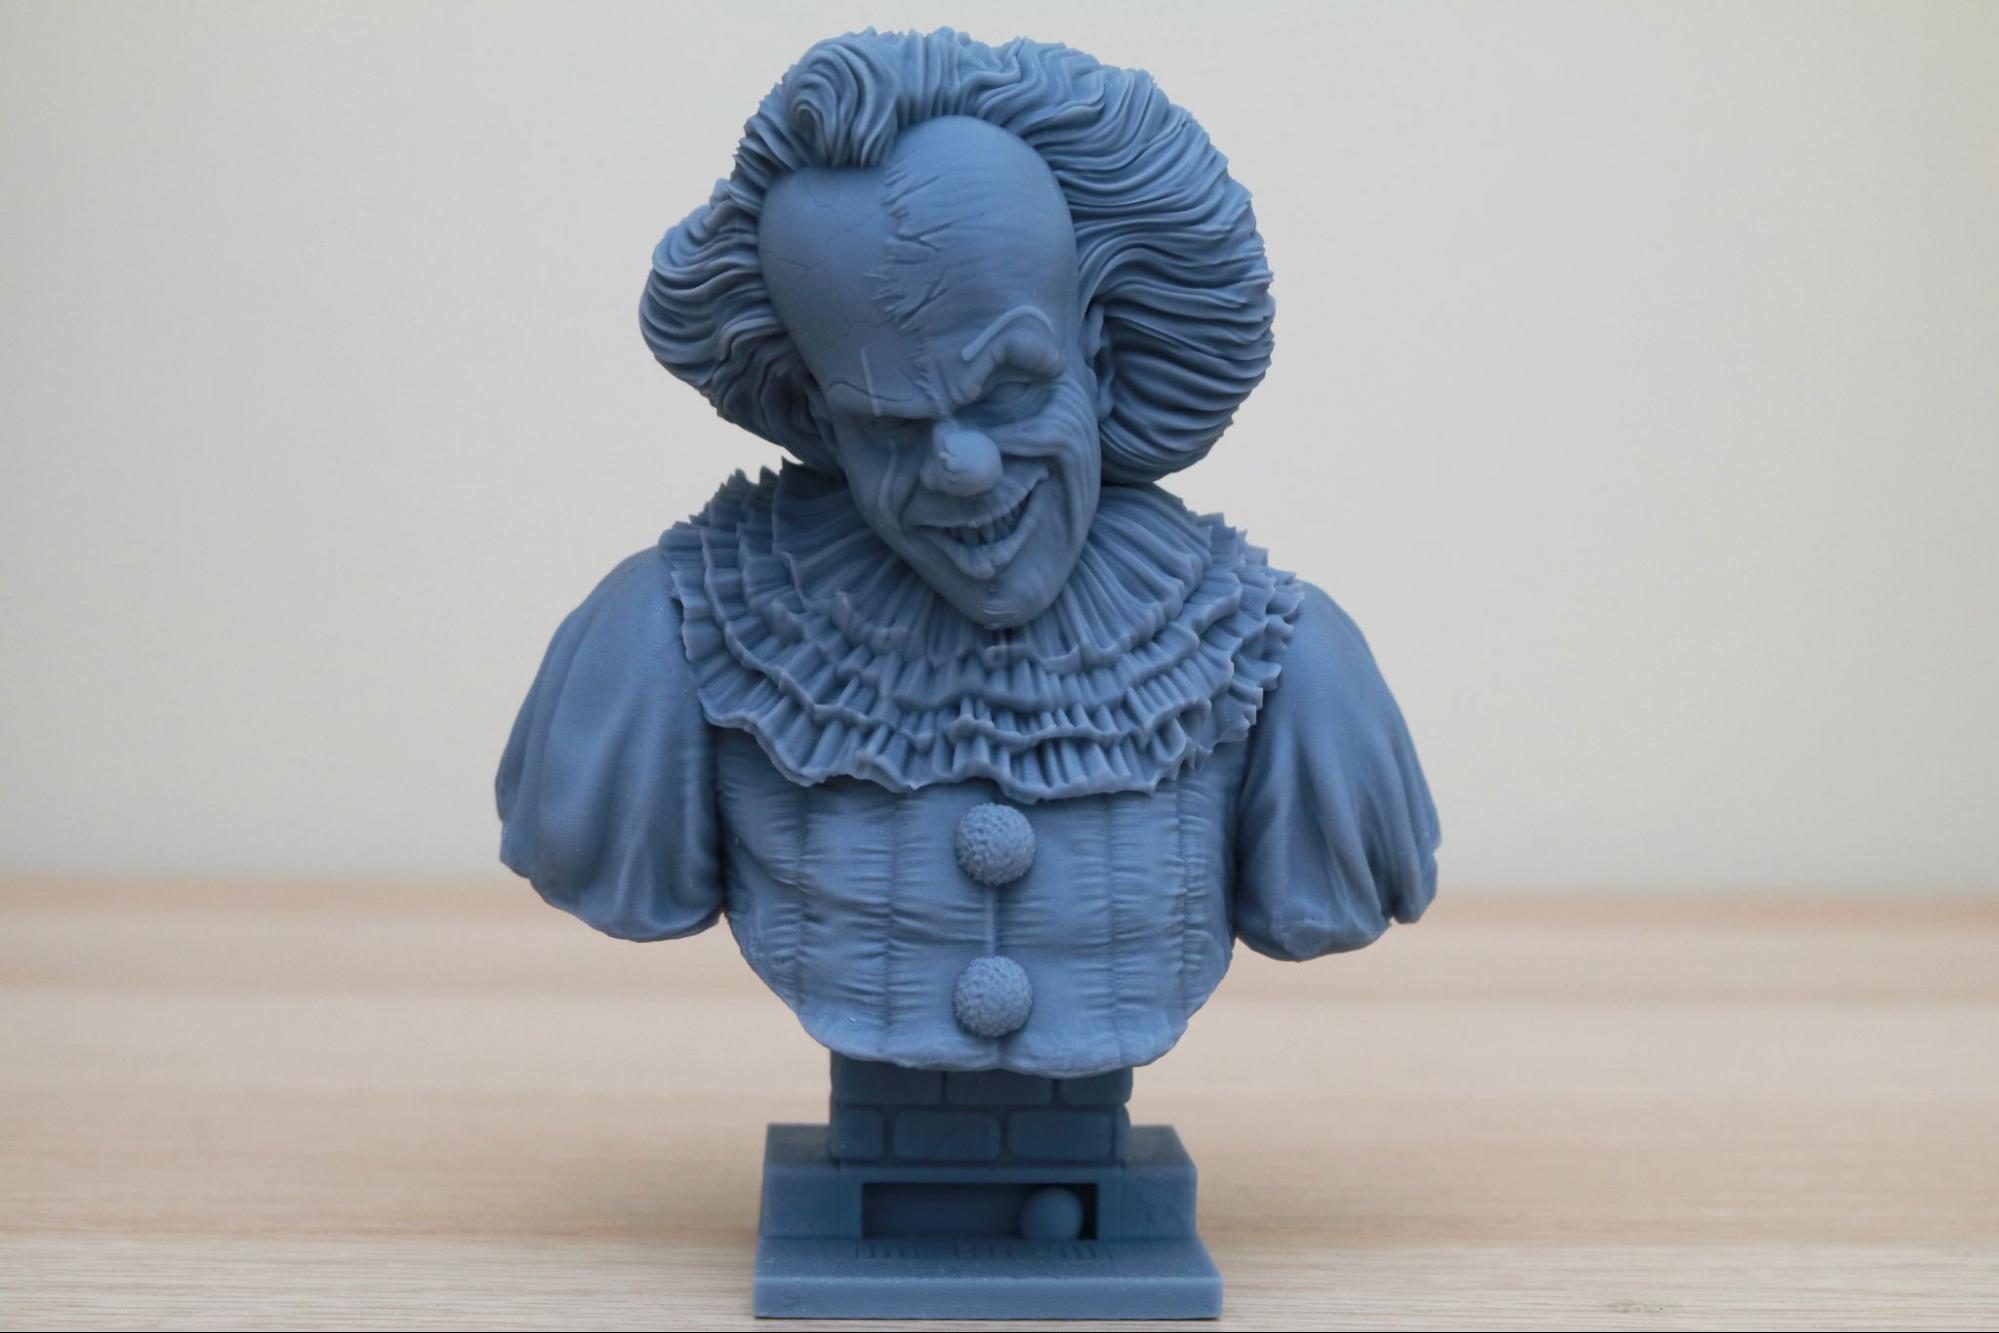
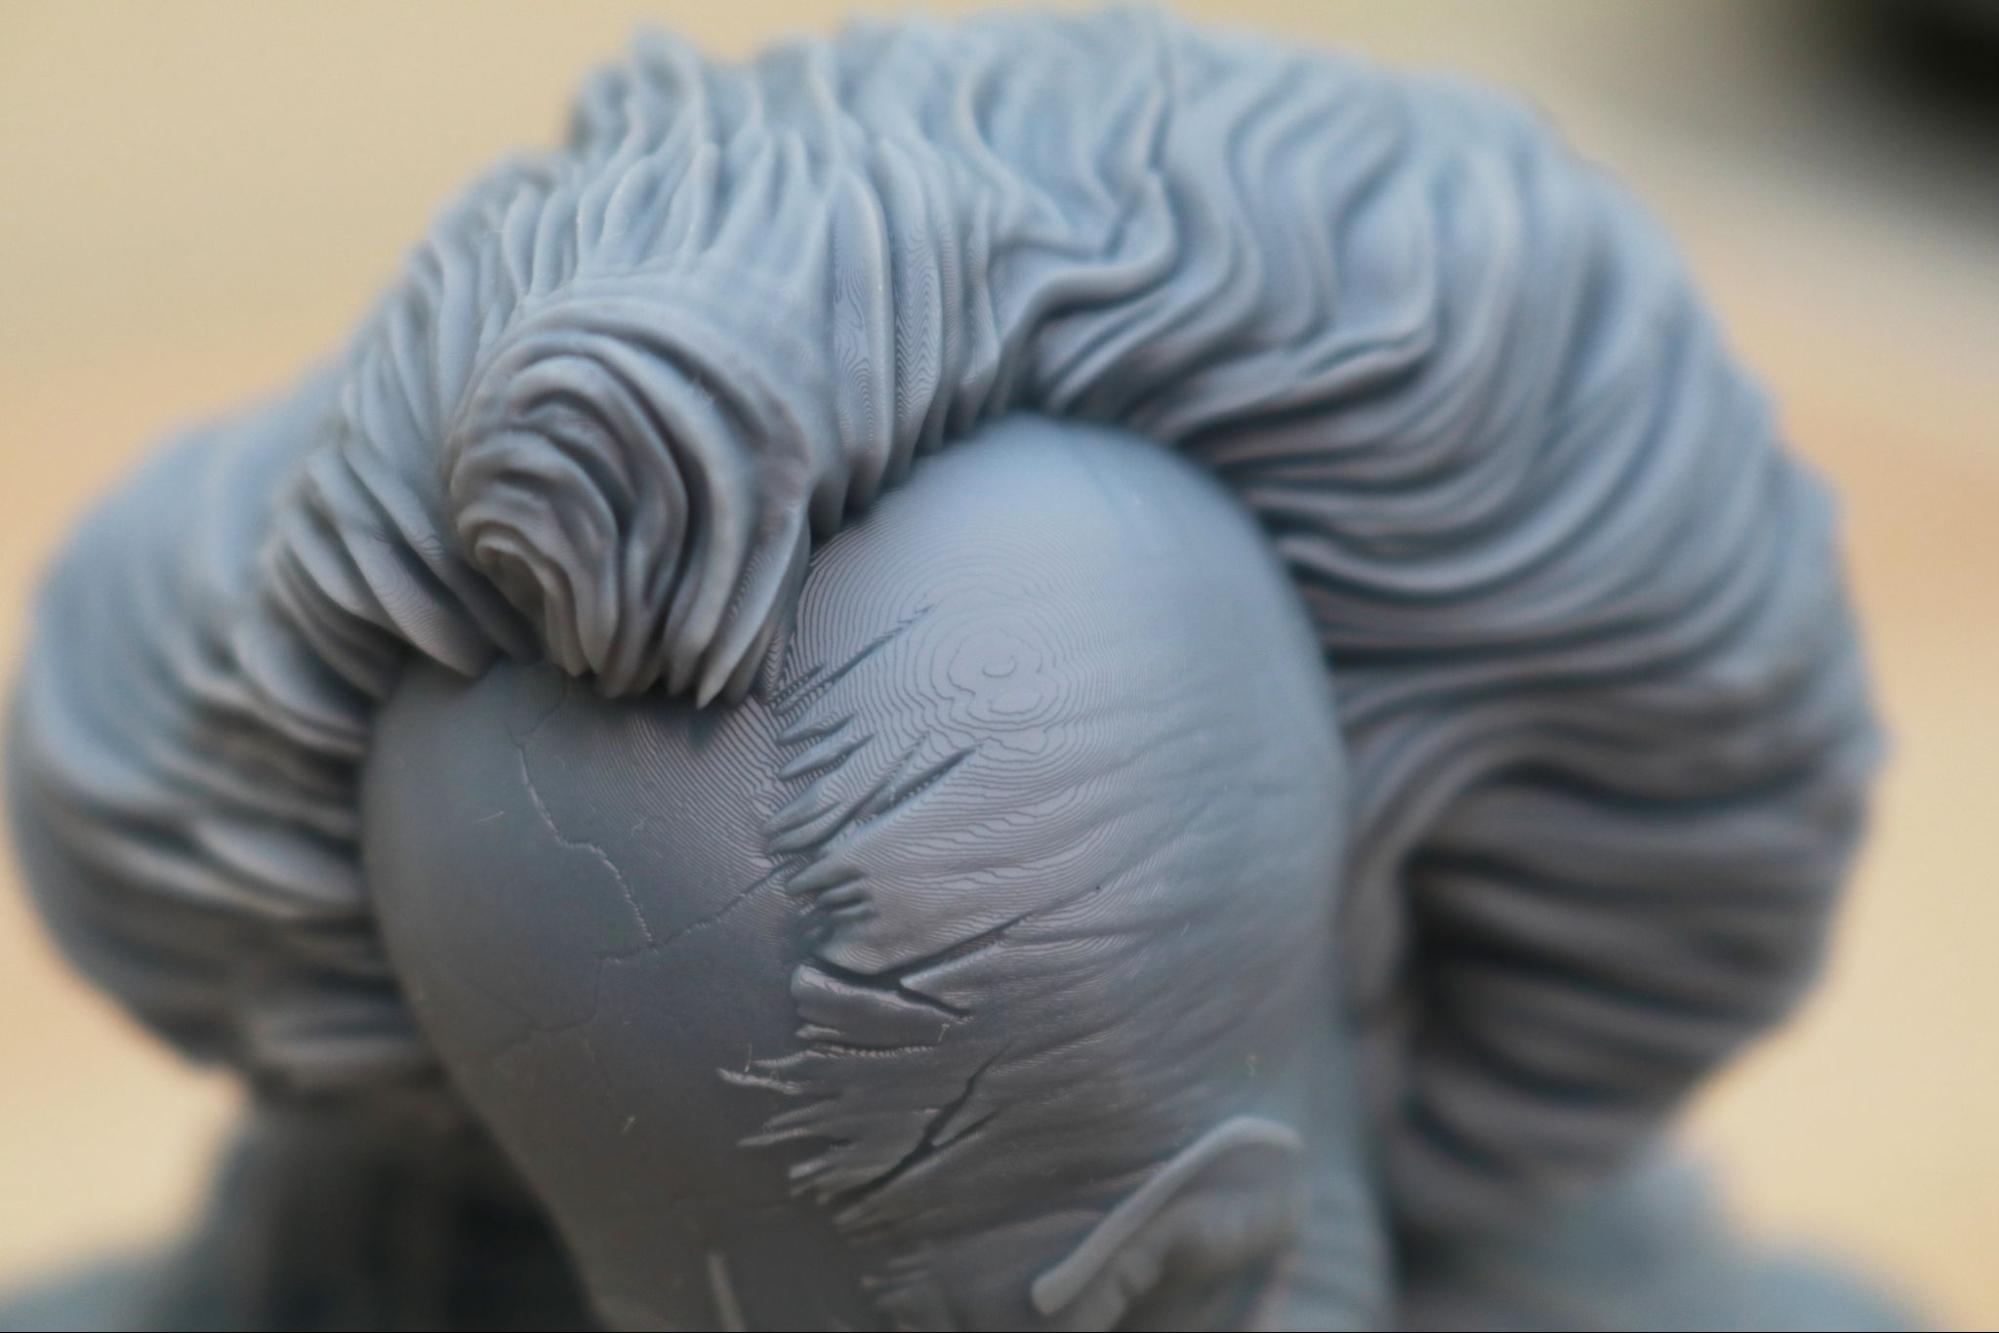
The 8K resolution of the printer is evident in the small details sculpted into the fabric and hair of the model. Inspecting the model carefully, you can see evidence of the .05mm layer height at the very top of the forehead. These steps are nearly imperceptible to the naked eye, and require direct lighting and a close-up photo to see.
Comparison of the Anycubic Photon M3 Premium vs. Anycubic Photon M3 Plus
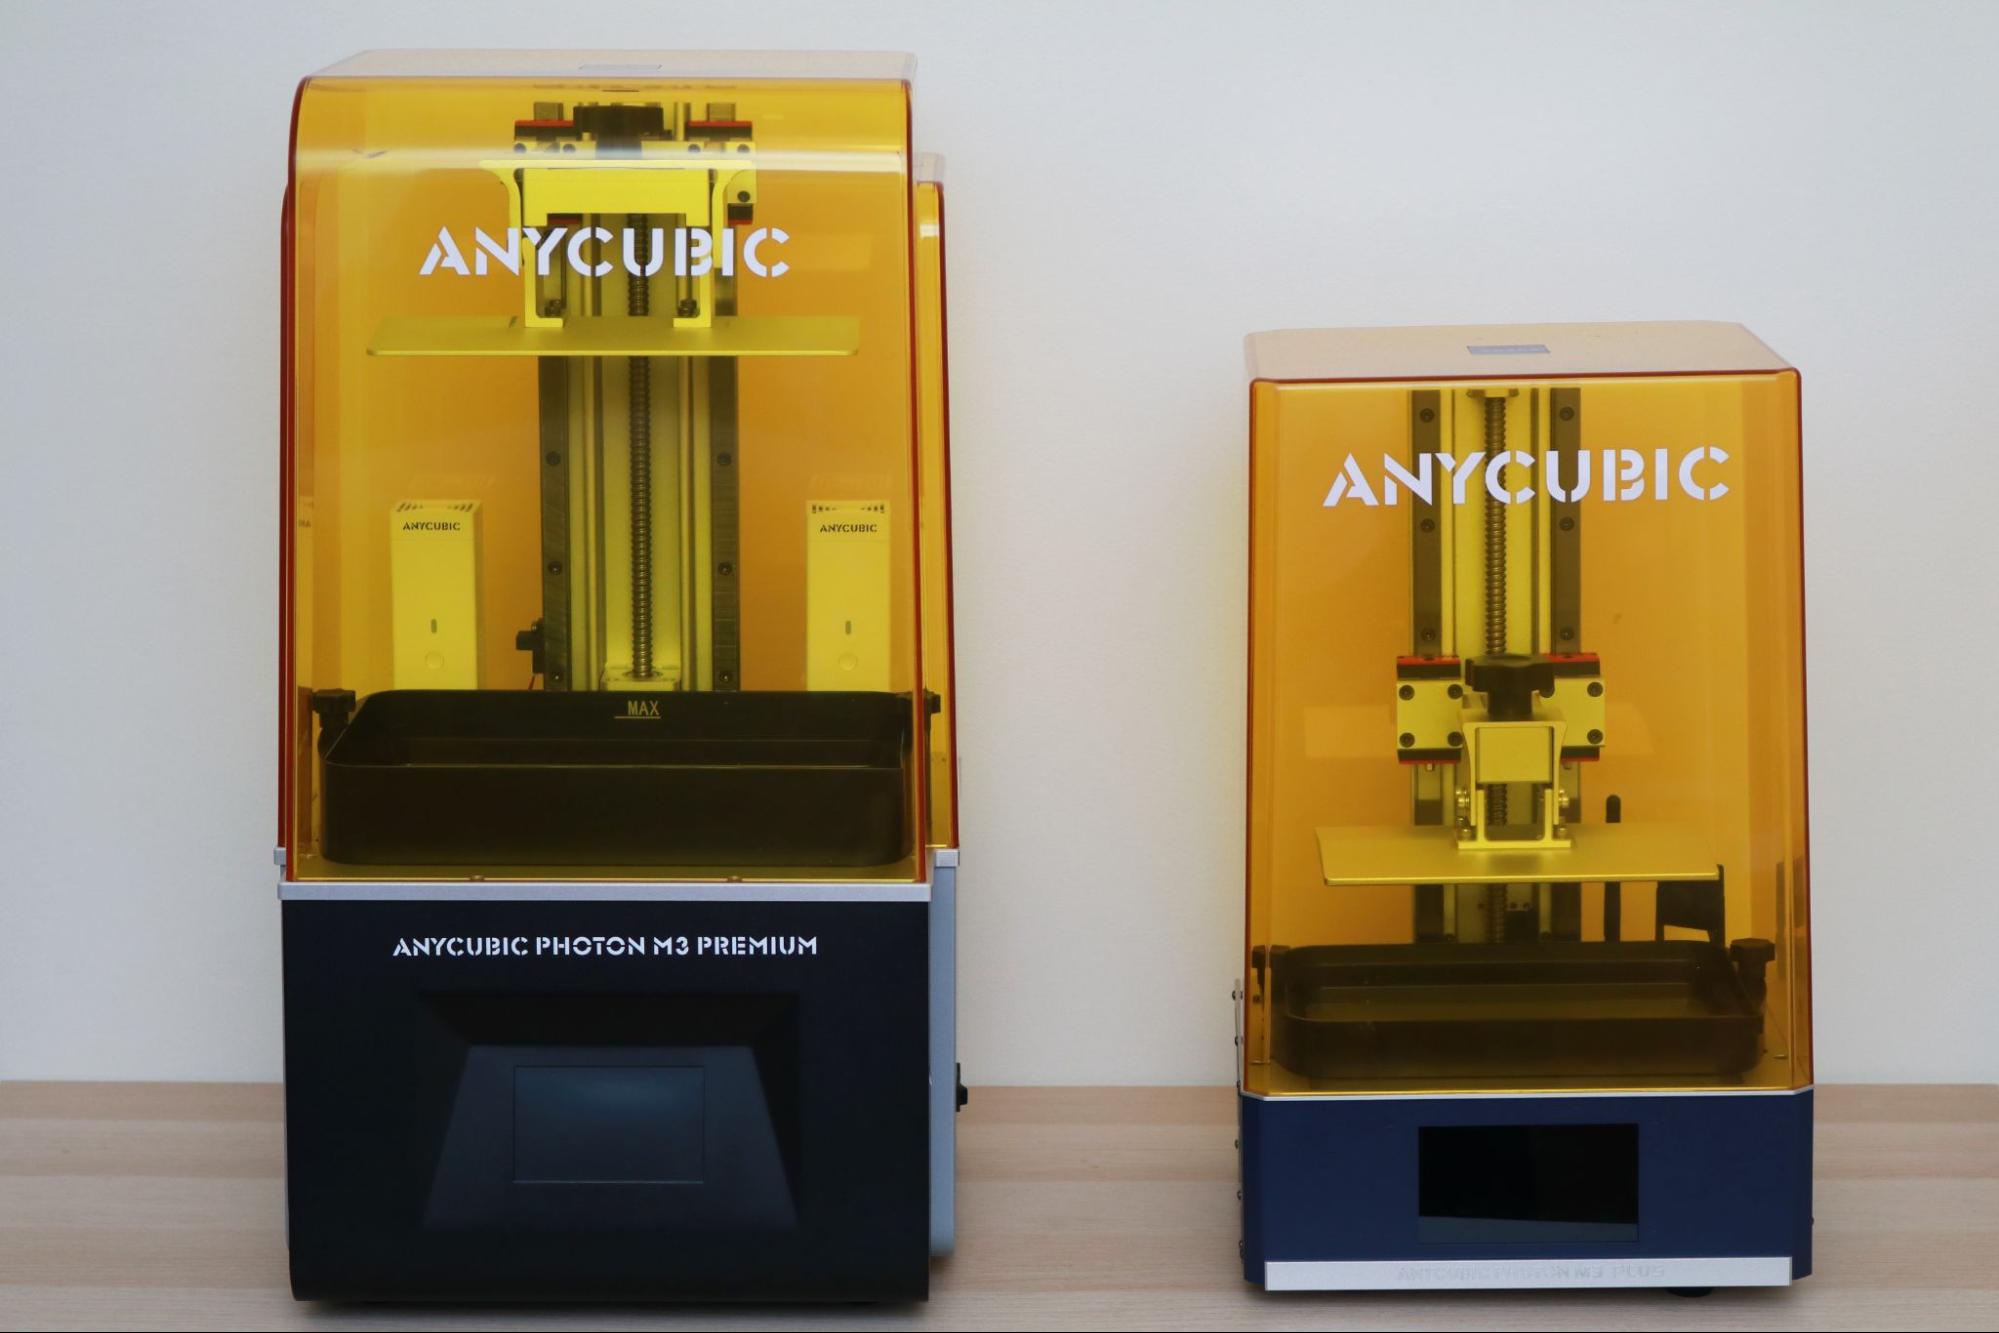
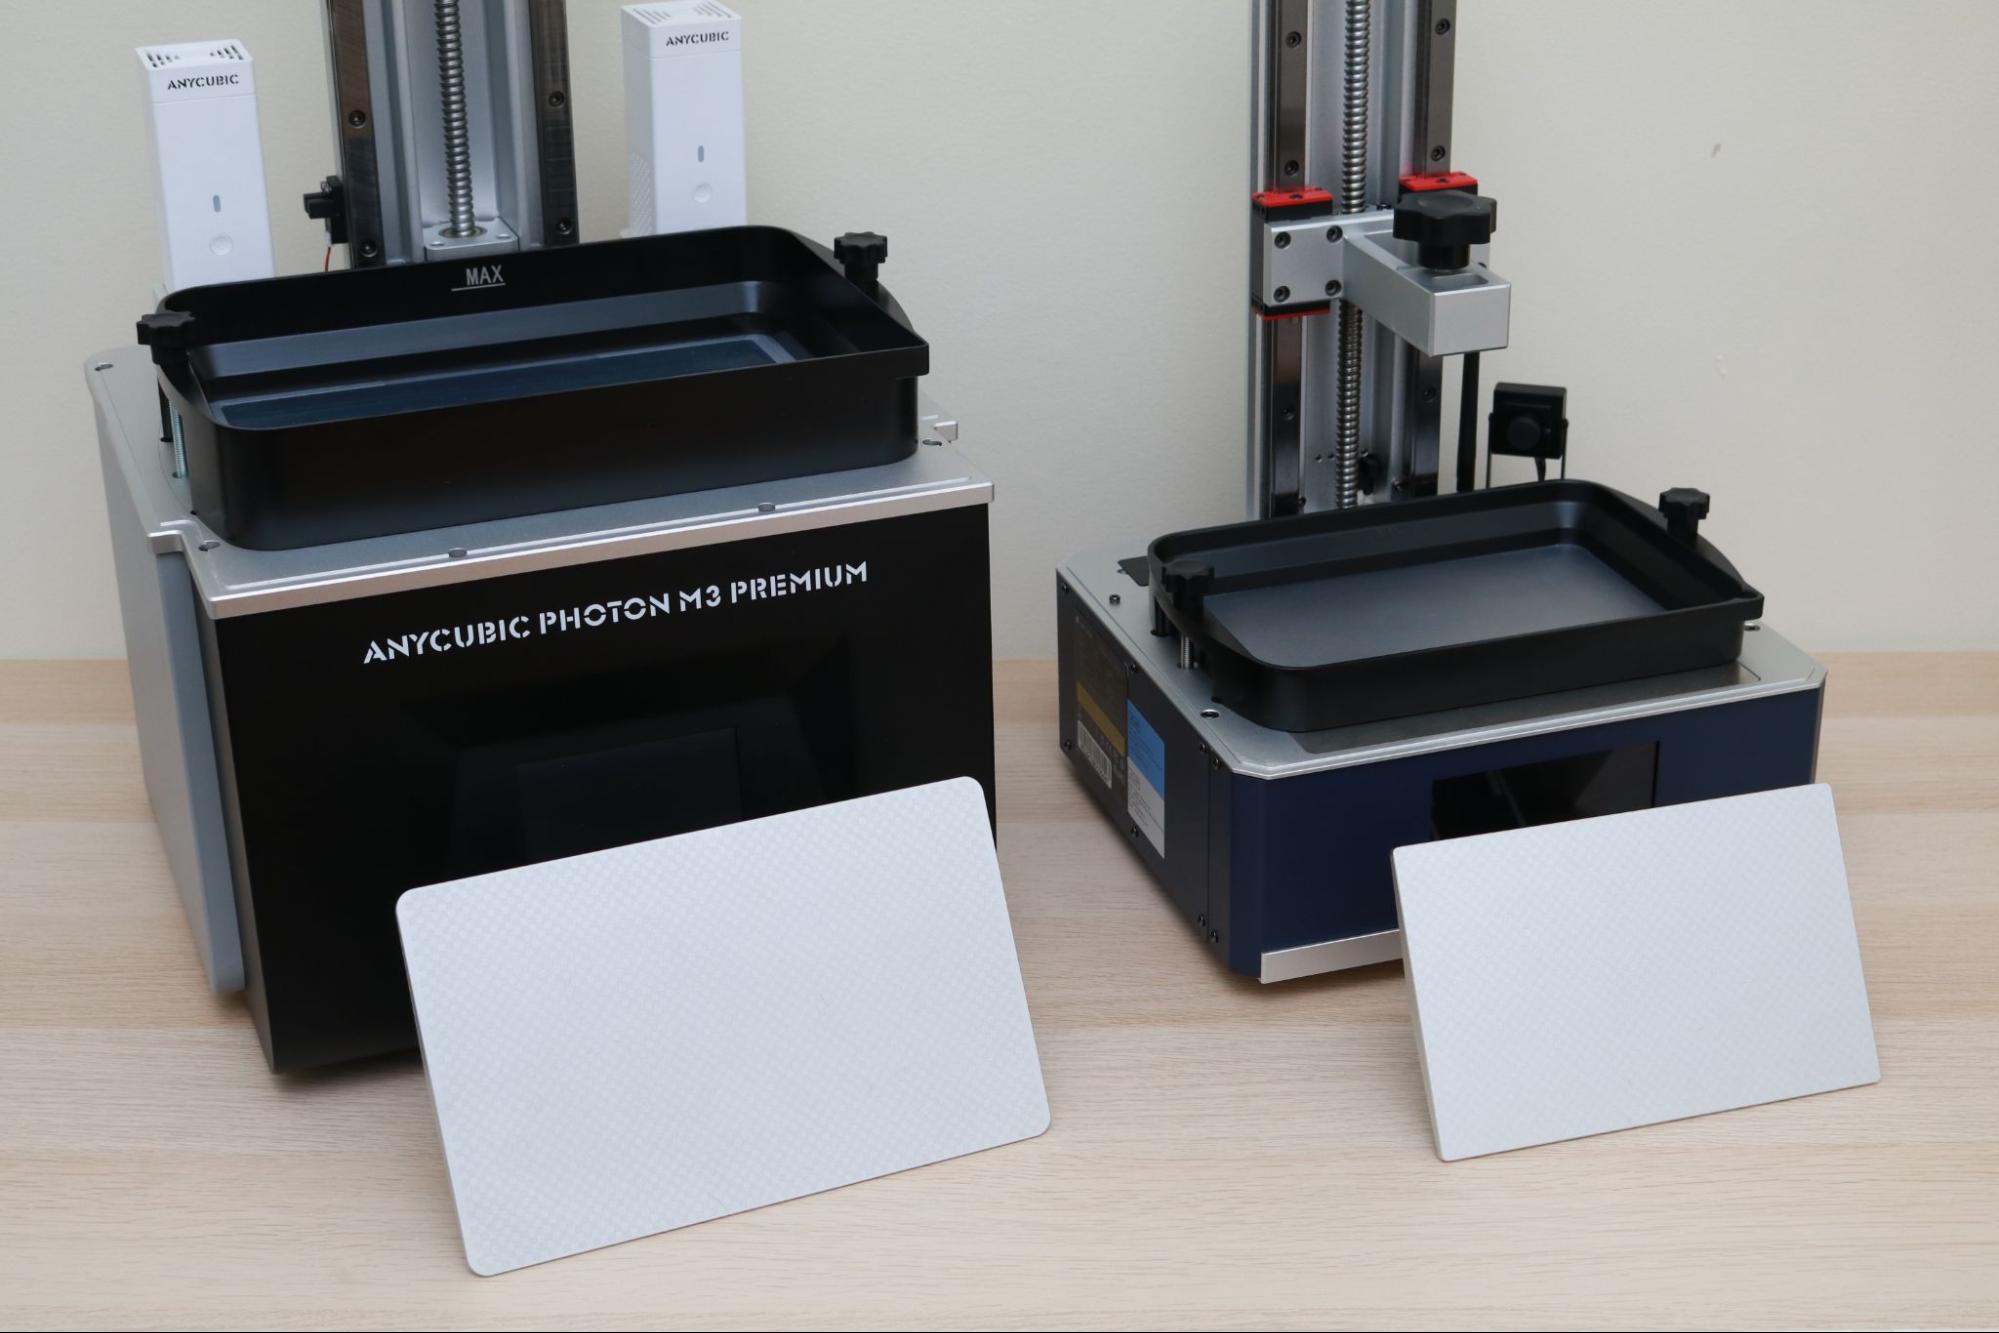
Interestingly enough, one of the closest competitors to the Anycubic Photon M3 Premium is another Anycubic printer, the Anycubic Photon M3 Plus. The Photon M3 Plus has a slightly smaller build volume than the Photon M3 Premium (359.42 vs 399.58 cubic inches) as well as a slightly lower XY resolution (34 microns vs. 28.5 microns). The price of these machines is very similar and deciding between the two will depend on the application of the user.
| Header Cell - Column 0 | Anycubic Photon M3 Premium | Anycubic Photon M3 Plus |
|---|---|---|
| Masking LCD Resolution (px) | 7680 x 4320 | 5760 x 3600 |
| XY Resolution (mm) | 0.0285 | 0.034 |
| Build Dimensions (in.) | 8.6 x 4.85 x 9.58 | 7.8 x 4.8 x 9.6 |
| Build Volume (in^3) | 399.58 | 359.42 |
| Webcam | No | Yes |
| Wi-Fi | No (as of launch) | Yes |
| Price | $619 at launch / $639 regular | $639 |
The Photon M3 Plus includes an automatic vat-filling system which will top off resin during printing without needing to pause the print and potentially create a layer shift in the printed model as well as a built-in webcam and Wi-Fi. These features are nice additions, but users who are focused on build volume and resolution will likely lean towards the larger and higher accuracy Photon M3 Premium.
In my opinion, the names of these two machines could probably be switched, with the “Premium” model including quality-of-life features that aren’t strictly related to size and accuracy, while the “Plus” model could be targeted at power users who are interested in the more “bottom-line” aspects of the printer.
Bottom Line
The Anycubic Photon M3 Premium is an easy printer to recommend, and the feature set makes it ideal for anyone looking for large build volume, high resolution, or just failure-free resin printing. During testing, the Photon M3 Premium performed flawlessly and the hardware of the machine didn’t have a single hiccup. Unfortunately, the buggy Photon Workshop slicer app, difficult-to-clean build platform, non-functional WiFi, and lack of compatibility with other slicer apps kept this printer from achieving a perfect store.
If you’re looking for the absolute highest resolution possible in a large format, the Phrozen Sonic Mighty 8K technically beats the Photon M3 Premium with an XY resolution of .028mm as opposed to .0285mm, an infinitesimal difference of half a micron (or 1/26,000 of a inch), but costs roughly $270 more. Similarly, the Elegoo Jupiter has a larger build volume (278 x 156 x 300 mm vs. 250 x 123 x 219 mm) but costs nearly twice as much as the Photon M3 Premium.
MORE: Best 3D Printers
MORE: Best Resin 3D Printers
MORE: Best Filaments for 3D Printing

Andrew Sink first used a 3D printer in 2012, and has been enthusiastically involved in the 3D printing industry ever since. Having printed everything from a scan of his own brain to a peanut butter and jelly sandwich, he continues to dive ever more deeply into the endless applications of additive technology. He is always working on new experiments, designs, and reviews and sharing his results on Tom's Hardware, YouTube, and more.
