Four LGA-1150 Motherboards Under $60
Here at Tom's Hardware, we have a lot of fun testing the most expensive, highest-end gear. So can we really get excited about $60 motherboards?
ASRock B85M-DGS
Why you can trust Tom's Hardware
Overview
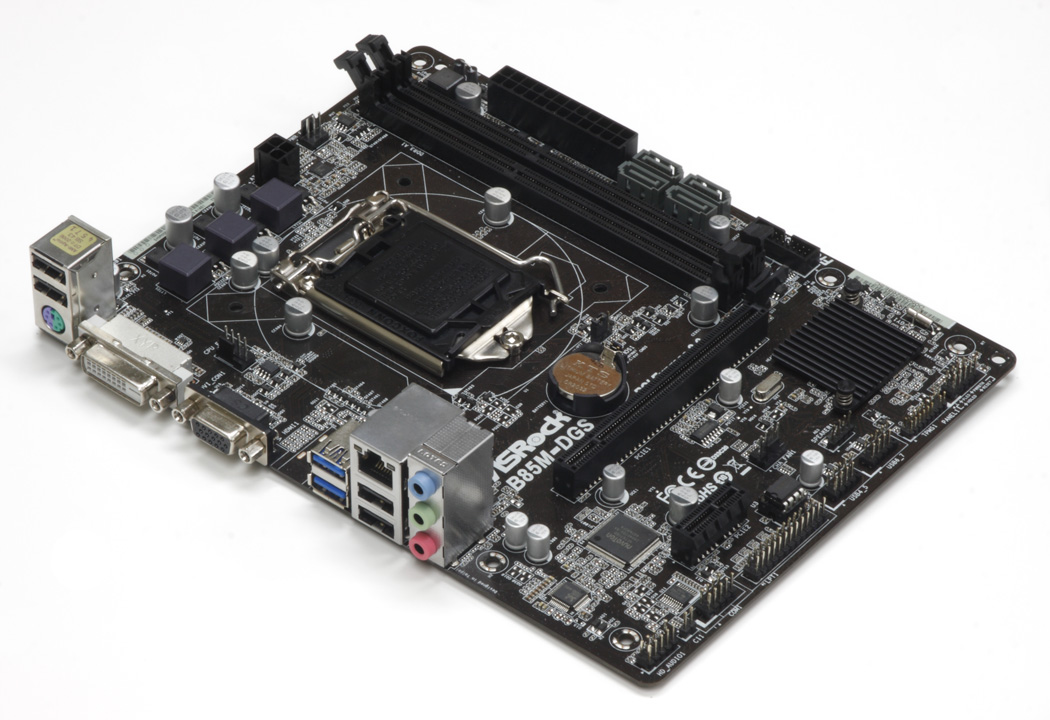
ASRock submitted two models; the first on our bench is the B85M-DGS.
While listed as microATX, this is actually a FlexATX board (which admittedly is an addendum to the microATX specification). It's no more difficult to build with a Flex board than a micro board, but it is smaller, meaning less space for extras. However, this board doesn't have near the number of features of its X99 and Z97 big brothers, so real estate isn't as much of a concern.
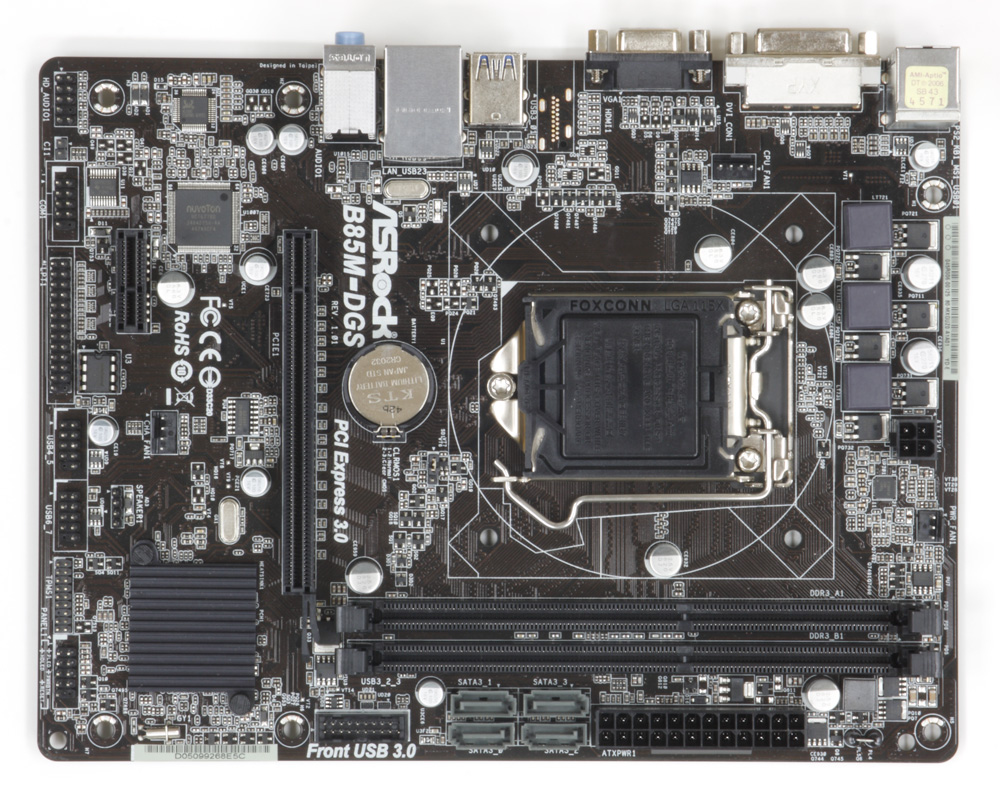
Starting up top, we see the VRM circuitry, a four-pin EPS plugand a three-pin fan header. Conveniently to the left of the LGA slot is a four-pin fan header for the CPU cooler. Not as conveniently located is the CLR_CMOS jumper, found between the battery and CPU interface. It's very difficult to reach once your CPU cooler and GPU are installed. Lesson learned: when experimenting with overclocks on this board, remove your graphics card first if you can.
Along the front edge you'll find the 24-pin ATX power plug and four SATA ports. Those ports are mirrored, which keeps all cable latches on the outside, readily accessible to be detached—at least in theory. The two DIMM slots butt right up against the second and fourth SATA ports. If you use latched cables, they're also difficult to detach when memory is installed. At least this is a B85-based board, so all four SATA ports are 6Gb/s-capable. Your modern storage will perform identically attached to any of the connectors.
Right beneath the SATA ports is a USB 3.0 header, which is positioned just above the PCIe slot so as to not interfere with an installed graphics card. The lone 16-lane slot is PCIe 3.0-capable for maximum bandwidth. Spaced two slots down is a PCIe 2.0 x1 interface for any other add-in cards you may want. Right above that is a four-pin fan header, which leaves me scratching my head.
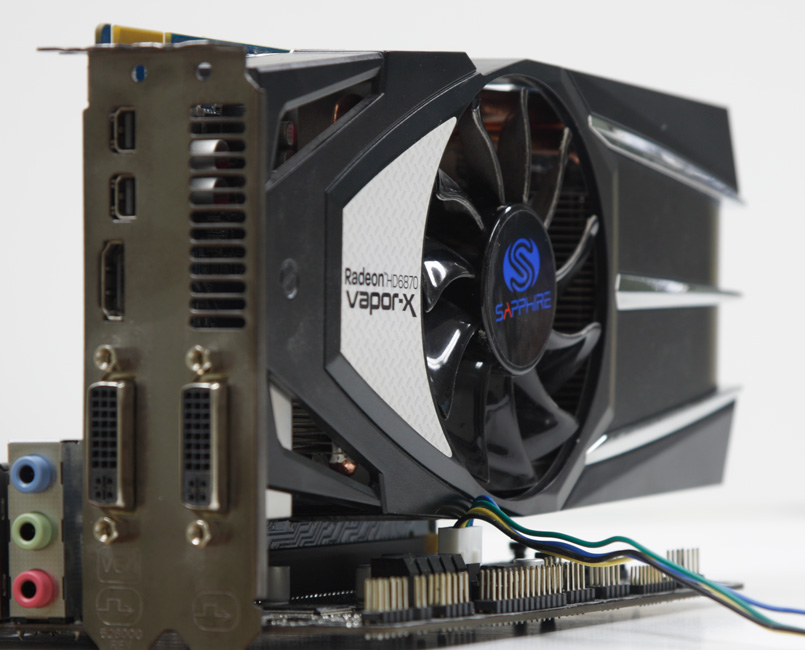
At first glance, it looks just far enough down that it shouldn't interfere with a dual-slot graphics card. I pulled out an old Radeon HD 6870 just to make sure, though. What I first thought was just enough clearance was actually a touch of overlap. The edge of the cooler shroud was right at the edge of the pins. I was still able to get the fan and card plugged in, but largely because this card has a small notch in the shroud at just the right place. Could I still plug in the fan without that notch? Yes. But why is the fan header located here at all? Even if it were 1/8-inch lower, I still wouldn't like my fan cables that close to an intake fan. It would be better on the front or bottom edge, or even above the PCIe slots by the CPU fan header.
The HD Audio header is in the lower-back corner. This usually irks Thomas, but because this isn't a full-size ATX board, you shouldn't have any problem with cable length in any case. Next, from left to right, you have a chassis intrusion header, serial and parallel port headers, two USB 2.0 headers, a TPM header and the front-panel pins in the bottom-front corner. A socketed BIOS chip is just above the parallel port, in case you take tweaking too far.
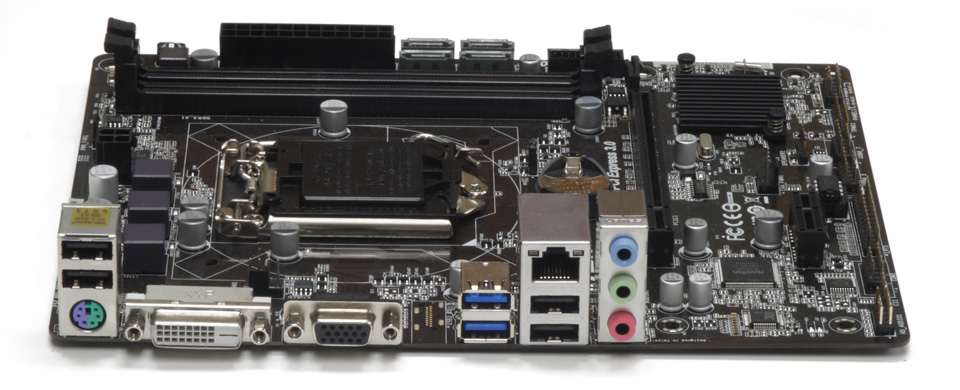
The I/O panel is sparse, but perfectly functional. The -DGS has a single PS/2 port, four USB 2.0 ports and two USB 3.0 ports for peripherals. A VGA and DVI-D connector are provided for anyone using integrated graphics. Realtek provides audio and networking functionality, including its ALC662 codec and RTL8111GR GbE controller.
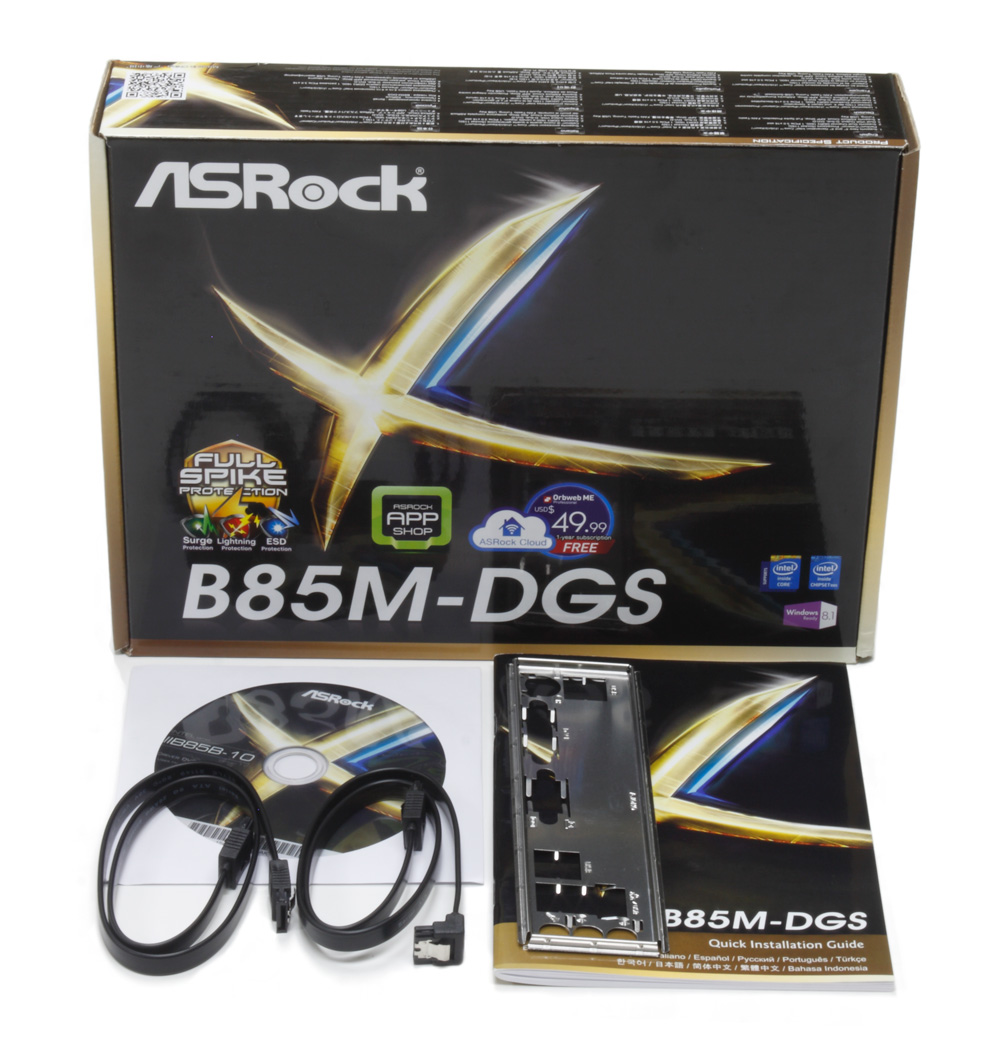
Inside the box, you'll find an instruction manual, an installation CD, an I/O backplate shield and two SATA cables, one with an angled connector. Four SATA cables would've been nice, but given this product's price range, we can't complain.
Overall, this competent board's only notable issue is the chassis fan header. How much that bothers you will depend on how large of a graphics card you plan to use. An HDMI or DisplayPort connection on the back panel would be welcome, but not necessary. DVI covers basic home and office users interested in HD Graphics, and any power user will almost assuredly use a discrete GPU. Some test bench–friendly buttons and voltage detection points would be nice as well, but we can't expect them in this price range.
Overclocking
I wasn't certain what to expect from B85-based overclocking, particularly with such limited power regulation circuitry. I didn't want to go easy on the board, but of course I didn't want to blow it up either. So, I imposed some limits: 1.2V and 75 degrees Celsius on the CPU were my goals, with 1.25V and 80 degrees as absolute ceilings. The VRMs don't have dedicated heat sinks, so I wanted to keep them under 65 degrees C if at all possible. Within those bounds, I set off to find the highest stable clock rate. Paul saw 4GHz and 4.2GHz on two of his SBM machines, so I felt confident I could do the same. Igor reached 4.4GHz, but of course that was on a Z-series board with liquid cooling, so that wasn't as likely.
I started off easy, manually setting the multiplier to 40 and leaving voltage on Auto. The board set a voltage of 1.201, and a few hours of Prime95 showed no problems. Temperatures barely cracked 70 degrees C, and the VRMs hovered in the mid-40s. Auto settings tend to be generous with voltage, so I figured I could get more performance. I incremented the multiplier to 41 and left the voltage on Auto; it stayed at 1.201V as the temp climbed a little (still well within my limits). I stepped the multiplier up to 42 and the voltage didn't budge. Apparently, the -DGS has some kind of voltage limit when Auto is chosen, which honestly can be a good thing. Stability became an issue at that point, so I knew it was time to start going manual and dialing in the voltage.
With Vcore set to 1.225V, load testing proved stable with a reading of 1.226V, and temperatures were relatively mild at 75 degrees C on the CPU and 52 degrees C on the VRMs. Could 4.3GHz be a realistic setting? Selecting a 43x multiplier resulted in a quick crash under load. Upping the voltage to 1.23V and then 1.245V didn't help. Saddened, I sought to minimize voltage for the best possible temperatures. After a bit of trial and error, a 1.215V setting (1.216V actual) yielded 74 degrees C peak CPU and 50.4 degrees C on the VRM.
Perhaps I could have coaxed a little more from the board. But if you can afford to blow a $60 motherboard for the sake of experimentation, you're better off buying a Z-series board from the get-go. As it was, I got better than a 30-percent overclock using a stock cooler and a three-phase VRM.
The RAM wasn't nearly as time consuming as it was confusing. My Mushkin XMP is good for 1600 MT/s at 9-9-9-24 timings. But again, the Pentium G3258 can't support anything faster than 1400 MT/s. The default voltage of 1.5V actually measured 1.54V, which isn't too surprising. Setting 7-7-7-21 was stable at the stock voltage settings, as ASRock's cheat proved enough to maintain stability. However, switching from 1333 MT/s to 1400 required switching over to the XMP profile, which reverted back to CAS 9. Picking the XMP profile and then manually overriding the timings yielded my desired results, all while running at the "stock" voltage.
Current page: ASRock B85M-DGS
Prev Page Can We Call A Sub-$60 Motherboard Enthusiast-Class? Next Page ASRock H81M-HDSGet Tom's Hardware's best news and in-depth reviews, straight to your inbox.
-
colinstu on the conclusion page, the the four motherboards with the pros and cons are all mixed up.Reply -
Crashman Reply
Gigabyte doesn't agree with your, or else they would have sent one.15641225 said:The best H81 board IMO, is the DS2V.
I think it's fixed now.15641336 said:on the conclusion page, the the four motherboards with the pros and cons are all mixed up.
Oh, and about his voltage comment in the article, I believe the board he tested is the first in several years on this site to not force a higher-than-set DIMM voltage. -
terion But there is still huge gap between $55 mobos here and 155$+ mobos in "Best Motherboards". Some recommendations in price range in between would be great.Reply
Something with solid power section, lasting capacitors, good component layout, silent, but intended for mainstream gaming, so no M.2, no SLI, single network interface etc. Basic features, but solid foundations. -
Crashman Reply
You mean $60 and $120 boards, right? Because that's the bottom of our current range of Z97 reviews. We get that. We have guys working on it. But to be honest, we wanted to get this article done first15641520 said:But there is still huge gap between $55 mobos here and 155$+ mobos in "Best Motherboards". Some recommendations in price range in between would be great.
Something with solid power section, lasting capacitors, good component layout, silent, but intended for mainstream gaming, so no M.2, no SLI, single network interface etc. Basic features, but solid foundations.
The plan from here is to cover Z97 Micro ATX, then $80 to $120 Z97 boards. We've also gone "sideways" with boards that aren't designed to overclock. And, there's a Z97 Mini ITX article in the publishing queue as we speak :)
And then, after all that has been done, we'd still like to get back to a $120-$160 segment repeat, to cover the new products that have been released since the last round of mainstream LGA 1150. motherboards -
vaughn2k I am still using Core2 Quad Q9650. I can still bear it's power hungry character though... Until I see that there is a big advantage to upgrade, I will stay this way.Reply -
CaedenV ReplyI am still using Core2 Quad Q9650. I can still bear it's power hungry character though... Until I see that there is a big advantage to upgrade, I will stay this way.
It all depends on what you are doing. I had to abandon my C2Q as my main machine a long time ago because it simply choked on bandwidth when doing HD video editing and some games... But it still had a few years left over as my wife's main computer and was perfectly adequate for audio editing, office apps, light games, etc. I eventually replaced her system with an i3 Ivy Bridge setup due to a GPU failure and complaints of the C2Q being too loud in general... so now the C2Q is running as my home server, and will probably remain as my home server for a few years yet until it is a 10 year old chip (and 10GbE becomes more affordable).
Point being, it is an extremely capable 8 year old chip, with a long life ahead of it still. But to say that there is no advantage to upgrading is a bit short-sighted. New chips allow for much smaller silent (or near silent) systems that literally sip power in comparison. New chips have enough iGPU power to compete with some of the midrange dGPUs from 8 years ago... and again as part of the 50-70W CPU package rather than a separate 150-250W GPU card. Not to mention the perks of being able to install faster/cheaper/more RAM with DDR3/4 compared to DDR2, or having lots of SATA3, USB3, and PCIe3 interfaces. Even running as a NAS the Core2Quad is limited to a max of 3TB HDDs where even the cheap motherboards listed here can take 8TB drives if you wanted to. Things like sound cards were still a necessity in the C2Q era, but now onboard audio is so good that even ardent audiophiles would be hard pressed to tell the difference. RAID was a costly feature back in the day, and now it is built into most motherboards (even the B-series chipsets, though it is listed as not having it on the charts here for some reason).
I guess what I am trying to say is: If the older platform still meets your needs, then great! Enjoy it as long as you can, because there is value in that. But saying that the chip and the platform are not starting to show their age, or that there are not lots of advantages in moving to a newer platform (granted those advantages may not directly apply to you) is overlooking a lot of considerations.
