Four LGA-1150 Motherboards Under $60
Here at Tom's Hardware, we have a lot of fun testing the most expensive, highest-end gear. So can we really get excited about $60 motherboards?
ASRock H81M-HDS
Why you can trust Tom's Hardware
Overview
Next up is ASRock's H81M-HDS.
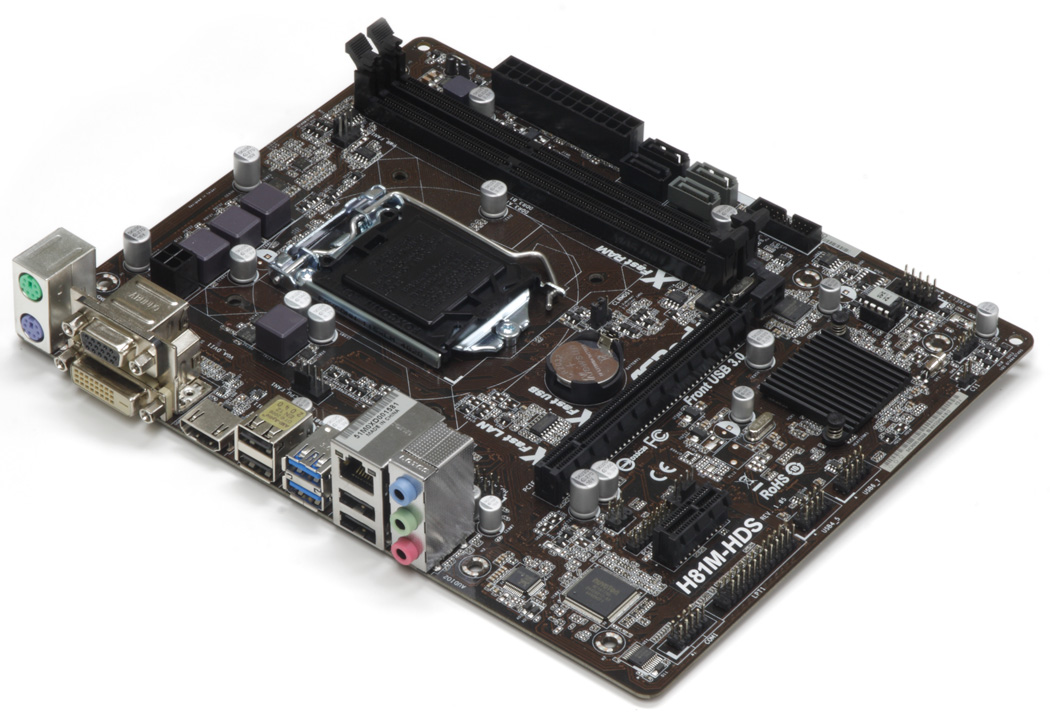
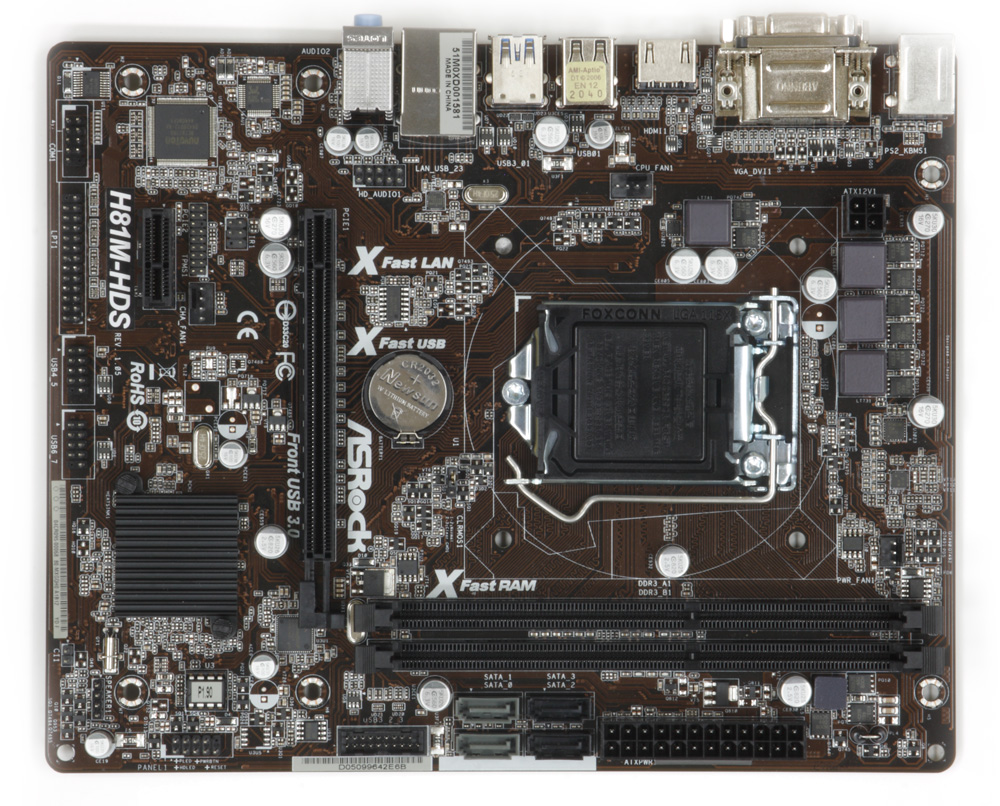
Like the B85M-DGS, this is also a FlexATX board. The -HDS is simply a little wider and longer. This puts the ATX power plug slightly outside the mounting screws. With no direct support under the ATX plug, the board flexes if you're not careful when connecting the PSU.
The big story here appears right at the top, next to the four-pin EPS jack. While the other three contestants in today's story only have three-phase power designs, the -HDS benefits from a fourth phase. Four phases may seem paltry compared to premium motherboards, but they may confer a notable advantage in the limited power envelope of this budget platform.
The -HDS shares a similar layout to the B85M-DGS. The three-pin fan header next to the two DIMM slots and the four-pin header for your CPU cooler are in similar locations. Unfortunately, so is the awkward CLR_CMOS jumper. Also odd is the HD Audio header's location in the corner, between the I/O panel and PCIe slot. You either run a cable down the back of the board or across the back of the graphics card. Enthusiasts obsessed with cable management won't be happy either way.
As with the -DGS, this board's ATX plug is located just above four SATA ports. Unlike the -DGS, the H81 PCH only supports two 6Gb/s links. Those faster ports are colored grey for easy distinction. Also different than the -DGS, all four SATA ports have their latches facing forward. To disconnect the rear SATA cable, you have to detach the front one. Still, this is easier than popping a DIMM from its slot. The USB 3.0 header is also just above the PCIe slot, just like the -DGS.
Continuing down, we find a socketed BIOS ROM chip, affording easy repair to any overzealous overclocker. Next to that is the system panel header. As Paul recently found out in his SBM story, it's too high to work with long, double-slot graphics cards. Sadly, Paul ordered his SBM parts the same time I received this board for review, so I wasn't able to warn him. If your graphics card measures seven inches or shorter, you won't have an issue. Perhaps ASRock's engineers assumed only entry-level cards would be used in such an affordable motherboard. But the four-phase VRM is a major marketing feature, and surely CPU tweakers also want larger, more powerful GPUs.
Due to the H81's limitations, the aforementioned 16-lane slot is only PCIe 2.0-capable. Even if your CPU supports PCIe 3.0, it won't run at those transfer rates attached to this chipset. You're still getting the equivalent of an eight-lane PCIe 3.0 x8 slot though, and that's plenty of bandwidth for any single GPU. Just to the right is an ASMedia ASM1042 chip that powers the nearby USB 3.0 header. A single-lane PCIe 2.0 slot is spaced two rows down from the x16 slot.
Between them, there's an IR module header, a TPM header and a four-pin fan header. While the -DGS' fan header was on the edge of a double-slot graphics card, this one is clearly still underneath. Along the bottom edge of the motherboard, you'll find headers for a system speaker, a chassis intrusion alarm and two USB 2.0 ports. The -HDS also has parallel and serial port headers.
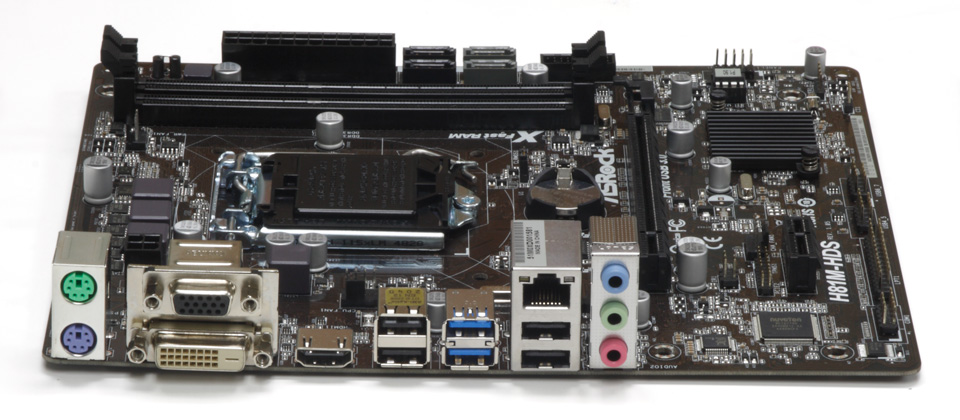
Like the -DGS, the -HDS has a modest (but adequate) I/O backplate. You get an extra PS/2 jack, adding up to two in total, and an HDMI port. Everything else is the same as the -DGS, including four USB 2.0 ports, two USB 3.0 ports and three 3.5mm audio jacks. Networking and audio are once again provided by Realtek, with the same ALC662 codec and a slightly different RTL8111G GbE chip.
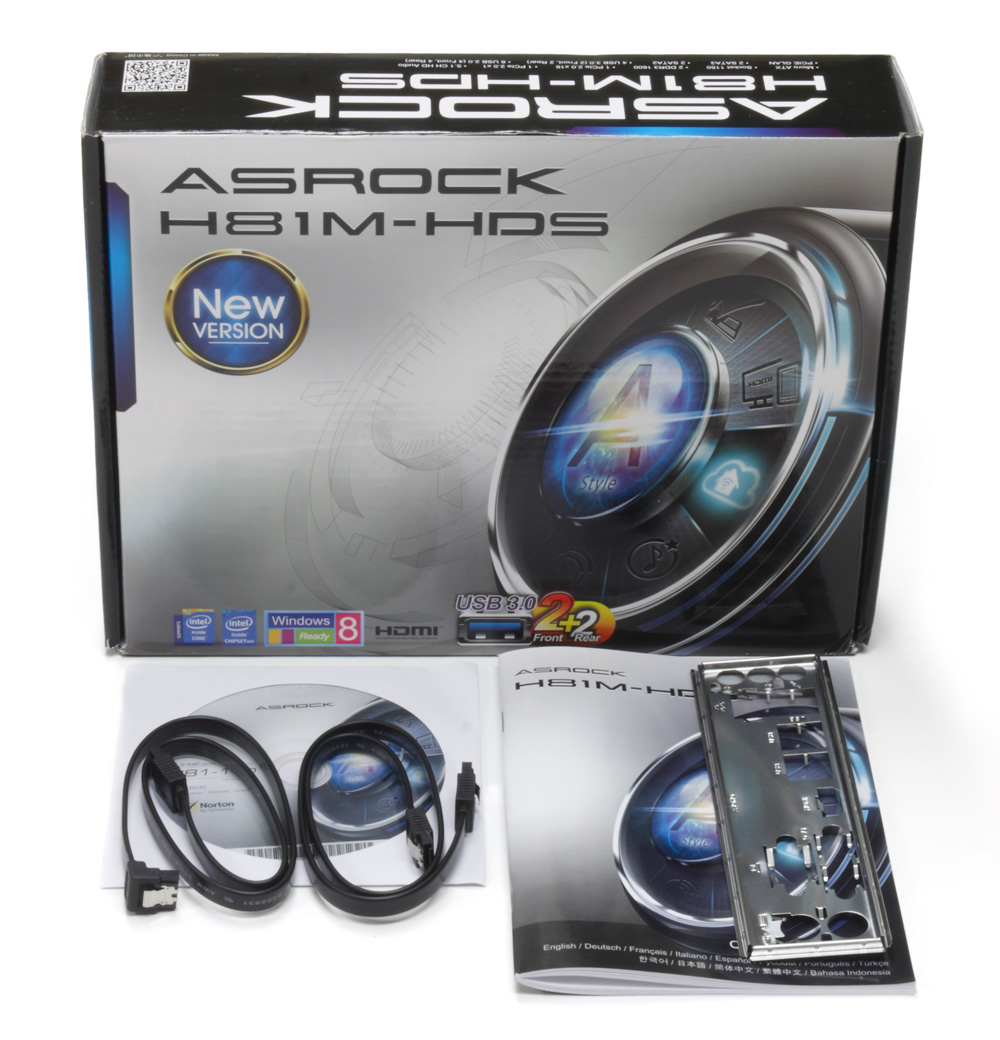
The box contents carry over, too. Namely, you get two SATA cables, one with an angled connector, a manual, an I/O shield and an installation CD.
Like the -DGS, the H81M-HDS doesn't have any big feature deficiencies, given its price point. But that front-panel connector is a big layout issue for anyone using a full-size graphics card.
Overclocking
Like the -DGS, I started slowly with a 40x multiplier and core voltage set to Auto. One load test showed no problems at the familiar 1.201V setting. I went for a 42x multiplier at 1.215V and found that combination stable here as well. The temperatures were notably higher though, especially on the VRMs, which were edging toward 60 degrees C. Still, I didn't want to let that extra power phase go to waste.
I ran the A-Tune auto overclock feature out of curiosity, and it suggested that 43x at the same 1.215V should be good. I ran some load tests, but stability suffered. Upping the voltage to 1.24V seemed promising, only to watch the PC crash at the end of long Prime95 runs. Going for broke, I tried 1.25V and saw success! The CPU was hot at 80 degrees C, but the VRMs stayed just under 60 degrees, so I wasn't worried about blowing them.
While this configuration was technically stable on the bench, it isn't something I'd recommend for long-term use. A better cooler might improve the thermal readings. But the extra expense of aftermarket cooling destroys the premise of dirt-cheap overclocking.
The RAM was once again quick and easy to tune. After a bit of fiddling, I was able to get 1400 MT/s working. Using 8-8-8-24 timings at the stock 1.5V was fine, but I had to dial in 1.55V to get 7-7-7-21 stable because this board doesn't cheat on RAM voltage. I need to confirm with Thomas, but this may be the first motherboard in Tom's Hardware's history with no RAM voltage bias. Stock voltage read 1.5V on my meter, and my overclock of 1.55V read true as well.
My elation quickly faded once I started a full system stress test to validate the stability of my overclocks. The CPU was now peaking at 87 degrees C, averaging 82 degrees C, and Windows was crashing. Throttling the CPU back down to 4.2GHz (but keeping the RAM maxed out) solved my issues, so I licked my wounds and called it a day.
Current page: ASRock H81M-HDS
Prev Page ASRock B85M-DGS Next Page ASRock B85M-DGS And H81M-HDS FirmwareGet Tom's Hardware's best news and in-depth reviews, straight to your inbox.
-
colinstu on the conclusion page, the the four motherboards with the pros and cons are all mixed up.Reply -
Crashman Reply
Gigabyte doesn't agree with your, or else they would have sent one.15641225 said:The best H81 board IMO, is the DS2V.
I think it's fixed now.15641336 said:on the conclusion page, the the four motherboards with the pros and cons are all mixed up.
Oh, and about his voltage comment in the article, I believe the board he tested is the first in several years on this site to not force a higher-than-set DIMM voltage. -
terion But there is still huge gap between $55 mobos here and 155$+ mobos in "Best Motherboards". Some recommendations in price range in between would be great.Reply
Something with solid power section, lasting capacitors, good component layout, silent, but intended for mainstream gaming, so no M.2, no SLI, single network interface etc. Basic features, but solid foundations. -
Crashman Reply
You mean $60 and $120 boards, right? Because that's the bottom of our current range of Z97 reviews. We get that. We have guys working on it. But to be honest, we wanted to get this article done first15641520 said:But there is still huge gap between $55 mobos here and 155$+ mobos in "Best Motherboards". Some recommendations in price range in between would be great.
Something with solid power section, lasting capacitors, good component layout, silent, but intended for mainstream gaming, so no M.2, no SLI, single network interface etc. Basic features, but solid foundations.
The plan from here is to cover Z97 Micro ATX, then $80 to $120 Z97 boards. We've also gone "sideways" with boards that aren't designed to overclock. And, there's a Z97 Mini ITX article in the publishing queue as we speak :)
And then, after all that has been done, we'd still like to get back to a $120-$160 segment repeat, to cover the new products that have been released since the last round of mainstream LGA 1150. motherboards -
vaughn2k I am still using Core2 Quad Q9650. I can still bear it's power hungry character though... Until I see that there is a big advantage to upgrade, I will stay this way.Reply -
CaedenV ReplyI am still using Core2 Quad Q9650. I can still bear it's power hungry character though... Until I see that there is a big advantage to upgrade, I will stay this way.
It all depends on what you are doing. I had to abandon my C2Q as my main machine a long time ago because it simply choked on bandwidth when doing HD video editing and some games... But it still had a few years left over as my wife's main computer and was perfectly adequate for audio editing, office apps, light games, etc. I eventually replaced her system with an i3 Ivy Bridge setup due to a GPU failure and complaints of the C2Q being too loud in general... so now the C2Q is running as my home server, and will probably remain as my home server for a few years yet until it is a 10 year old chip (and 10GbE becomes more affordable).
Point being, it is an extremely capable 8 year old chip, with a long life ahead of it still. But to say that there is no advantage to upgrading is a bit short-sighted. New chips allow for much smaller silent (or near silent) systems that literally sip power in comparison. New chips have enough iGPU power to compete with some of the midrange dGPUs from 8 years ago... and again as part of the 50-70W CPU package rather than a separate 150-250W GPU card. Not to mention the perks of being able to install faster/cheaper/more RAM with DDR3/4 compared to DDR2, or having lots of SATA3, USB3, and PCIe3 interfaces. Even running as a NAS the Core2Quad is limited to a max of 3TB HDDs where even the cheap motherboards listed here can take 8TB drives if you wanted to. Things like sound cards were still a necessity in the C2Q era, but now onboard audio is so good that even ardent audiophiles would be hard pressed to tell the difference. RAID was a costly feature back in the day, and now it is built into most motherboards (even the B-series chipsets, though it is listed as not having it on the charts here for some reason).
I guess what I am trying to say is: If the older platform still meets your needs, then great! Enjoy it as long as you can, because there is value in that. But saying that the chip and the platform are not starting to show their age, or that there are not lots of advantages in moving to a newer platform (granted those advantages may not directly apply to you) is overlooking a lot of considerations.


