Asus ProArt PA329Q 32-inch UHD Pro Monitor Review
If you’re in the market for a premium professional wide-gamut monitor, it makes sense to add high pixel density to your list of criteria. To that end, we’re looking at Asus’ PA329Q today. It’s a 32-inch IPS panel with Ultra HD resolution.
Why you can trust Tom's Hardware
OSD Setup & Calibration
Asus has included its excellent joystick navigation for the large OSD. There are many options but as we delved in a bit we found some odd limitations in the calibration department.
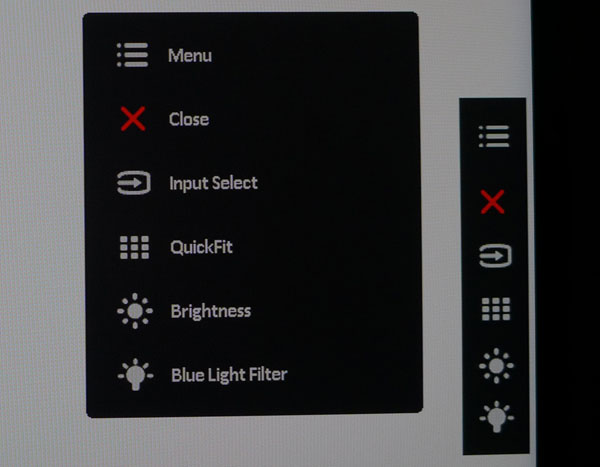
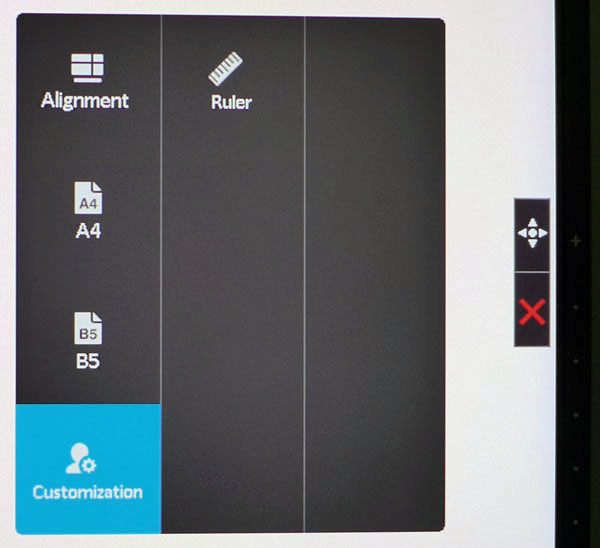
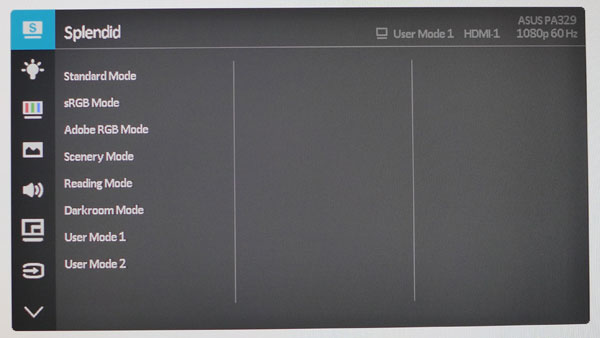
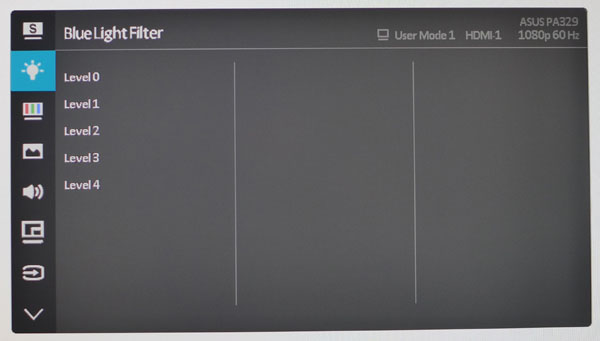
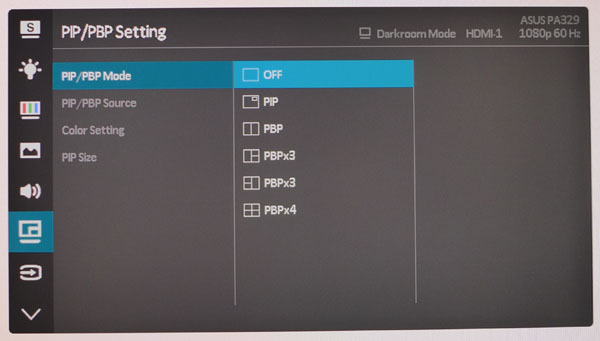
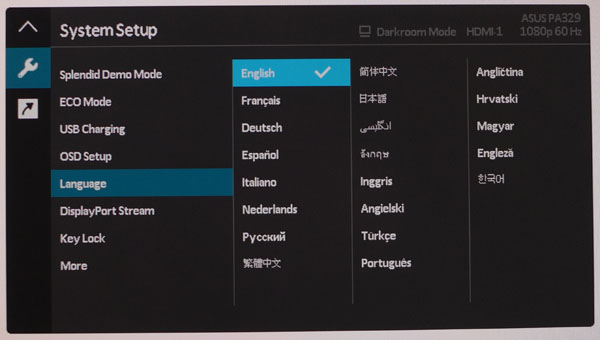
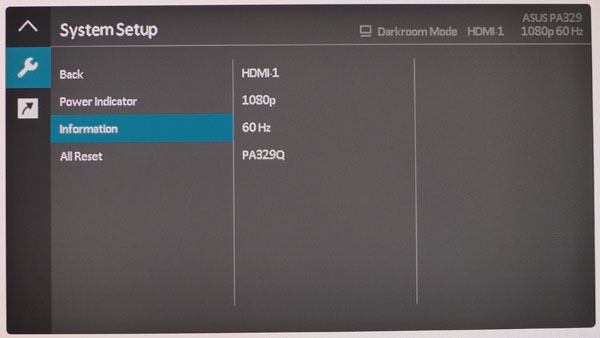
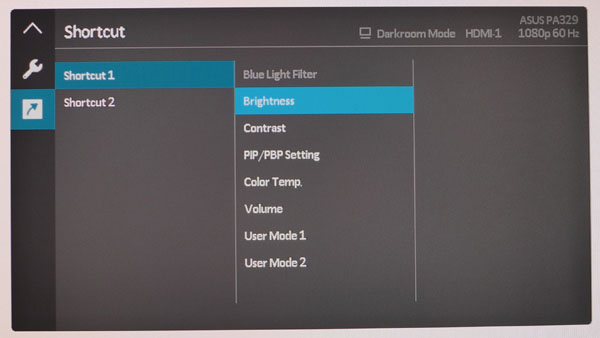
Pressing any key brings up a quick menu. The bottom two buttons can be programmed by the user. A second press of the joystick brings up the main OSD.
QuickFit returns on the PA329Q with a new addition: custom sizing. In addition to the fixed grid and paper sizes, you can create your own alignment square on the screen in any size using the joystick. The readout is in millimeters and like the other options, very precise. This is a great way to proof documents at their actual printed size. We know of no other monitor brand with this feature.
There are eight picture modes including the factory-calibrated Adobe RGB and sRGB presets. Selecting either of them locks out all other adjustments including brightness. Output is fixed at 170cd/m2. You might think full adjustments are available in the User modes but that is not the case. Those memories are for the included calibration software which we’ll talk about at the end of this page. The only selection that’s fully adjustable is Darkroom.
The BlueLight Filter has four levels; zero means off in this case. It’s best to leave this alone until you have the PA329Q calibrated. Then simply dial in as much compensation as you desire. As always, full accuracy is only seen at Level 0.
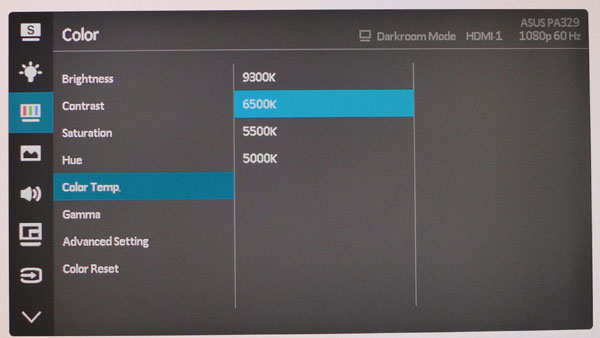
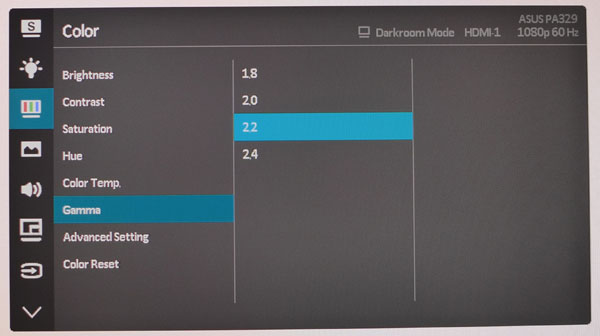
The Color menu has a complete selection of image adjustments but they’re only fully unlocked in the Darkroom mode. Color Temp has four fixed presets labeled in Kelvins. Our measurements showed them to be a little warmer than indicated. The gamma presets are spot-on and track perfectly regardless of the setting. This remains true in all image modes.
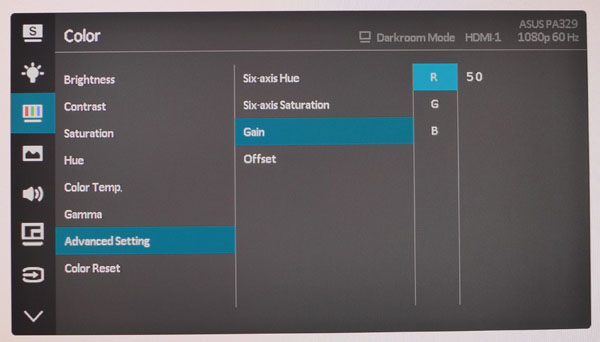
The Advanced Setting sub-menu (only available in Darkroom mode) offers two-point grayscale adjustments along with Hue and Saturation sliders for all six colors. They start at center range, which offers more flexibility and precision than most other monitors. When we tested the Saturation control, we found it actually controls luminance rather than moving the color points.
Get Tom's Hardware's best news and in-depth reviews, straight to your inbox.
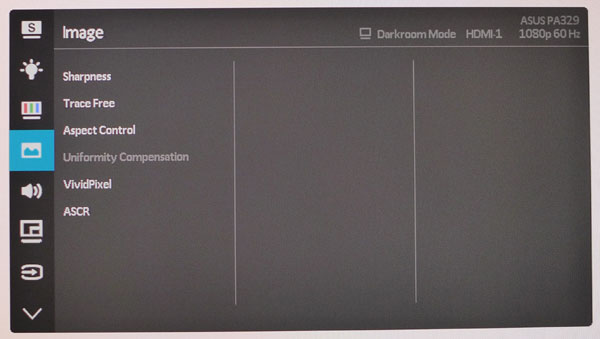
The remaining picture controls are in the Image sub-menu. Sharpness should be left at its default setting to avoid ringing. TraceFree is Asus’ term for overdrive and can be used to reduce motion blur. Aspect Control toggles between Full, 4:3 and OverScan modes. Uniformity Compensation works only in the Standard mode, which is unusual. We would have liked to use it in the Adobe and sRGB presets since that’s where most users will be working.
VividPixel is another clarity enhancement option that increases contrast between light and dark objects on screen. ASCR is a dynamic contrast feature that will increase the range from dark to bright at the expense of detail loss in shadows and highlights.
The PA329Q supports PIP and PBP to display up to four sources on the screen at once. The window layouts are indicated by icons next to each option. Each one can operate in a different image mode if you wish.
The OSD is available in 21 languages and can be left up for two minutes max. Other options here include USB charging while the monitor is powered off, DisplayPort Stream version (1.1 or 1.2), and a KeyLock that prevents tampering with menu settings. You can also turn the power LED off and view basic signal information.
The Shortcut menu lets you program two of the bezel keys to one of the listed functions for quick access to convenience options like brightness, contrast and the like.
MORE: Best Gaming Monitors
MORE: Best Professional Monitors
MORE: How We Test Monitors
MORE: How To Choose A Monitor
MORE: All Monitor Content
Calibration
While the PA329Q met its factory-certified calibration data during our tests, we had something of a challenge when we attempted a manual setup. The only picture mode that allows full adjustment is Darkroom. This wouldn’t be an issue except that the red primary is significantly over-saturated in that mode and cannot be fixed.
Asus includes a calibration application with the monitor but only the i1DisplayPro and Spyder5 meters are supported. We feel a pro-level calibration should include the use of an i1Pro spectrophotometer at minimum. A tri-stimulus probe cannot achieve the same level of precision. We were unable to test the software since we don’t have an i1DisplayPro on hand.
The best bet for users who aren’t calibrating is to select either the sRGB or Adobe RGB mode. Both measure well for gamut and gamma but are slightly warm in the grayscale metric. If an accurate white point is a priority, choose Darkroom and try our settings below.
Asus PA329Q Calibration Settings
| Splendid Mode | Darkroom |
| Brightness 200cd/m2 | 93 |
| Brightness 120cd/m2 | 44 |
| Brightness 100cd/m2 | 33 |
| Brightness 80cd/m2 | 19 |
| Brightness 50cd/m2 | 0 |
| Contrast | 78 |
| Advanced Setting Gain | Red 47, Green 52, Blue 52 |

Christian Eberle is a Contributing Editor for Tom's Hardware US. He's a veteran reviewer of A/V equipment, specializing in monitors. Christian began his obsession with tech when he built his first PC in 1991, a 286 running DOS 3.0 at a blazing 12MHz. In 2006, he undertook training from the Imaging Science Foundation in video calibration and testing and thus started a passion for precise imaging that persists to this day. He is also a professional musician with a degree from the New England Conservatory as a classical bassoonist which he used to good effect as a performer with the West Point Army Band from 1987 to 2013. He enjoys watching movies and listening to high-end audio in his custom-built home theater and can be seen riding trails near his home on a race-ready ICE VTX recumbent trike. Christian enjoys the endless summer in Florida where he lives with his wife and Chihuahua and plays with orchestras around the state.
-
IQ11110002 Now release a ROG Swift version 32inch 4k 120hz IPS G Sync.Reply
And make the LED ring and LED ROG logo RGB so people can match the rest of their system!
Their concept 27 inch 4k is too small(I own the 28inch Samsung UD590) and the ideal 40 inch is too big for most desk pc's, 32 is the sweet spot in my opinion and I would buy it. -
KenZen2B I could not find any mention of HDR for this product or did you forget to include that information ?Reply
For any future reviews for UHD monitors, please include information on HDR, WCG, and if the DP can be upgraded to 1.3.
Thanks for the info. -
nikoli707 Reply18507723 said:I could not find any mention of HDR for this product or did you forget to include that information ?
For any future reviews for UHD monitors, please include information on HDR, WCG, and if the DP can be upgraded to 1.3.
Thanks for the info.
clearly says rec2020 which is the standard hdr will get up to in the future. -
bit_user Reply
I haven't read the actual text of ITU-T Rec BT.2020, but I believe the HDR formats are optional. Is that not so?18507891 said:
clearly says rec2020 which is the standard hdr will get up to in the future.18507723 said:I could not find any mention of HDR for this product or did you forget to include that information ?
For any future reviews for UHD monitors, please include information on HDR, WCG, and if the DP can be upgraded to 1.3.
Personally, I don't even care about HDR, in a non-OLED display. The mere fact that you get 10-bit and an expanded color gamut is enough, for a display like this.
-
ngaio Did Asus send a hand-picked monitor for review? Or did Tom's purchase it retail? The uniformity results are very competitive indeed! My expectation with a mid-range 4K panel in 2016 is that panel uniformity will be uneven, given the reports of folks who have purchased this model from Asus and comparable other brands.Reply -
Light Illusion Without the ability to user true 3D LUT calibration such 'professional' displays really are not professional.Reply
Not being able to control gamut is the issue - for true volumetric colour accuracy you need 3D LUT based calibration.
As for UHD, that is really just resolution.
WCG is the colour gamut (Rec2020 for example)
And HDR is high dynamic range (high peak white values).
However, the UHDTV Alliance is attempting to link all three, via its 'Ultra HD Premium' specification.
(There is info on UHDTV, some of the issues, etc, as well as more about 3D LUT calibration here - please note this is our commercial website, but we have a lot of information there that is available for all to review: http://www.lightillusion.com/uhdtv.html) -
TeamColeINC What do I have to do for them to make 40" models? I know there are the Korean 40" UHD monitors, but they all have issues and about a 25% chance of getting a lemon....Reply -
ZippyPeanut A PROFESSIONAL monitor with a 16:9 aspect ratio?! This disqualifies it from consideration even if it were a third of its current price. 16:9 kills it as a professional monitor.Reply -
Ben Archer The Color Gamut And Luminance charts are nearly unreadable due to size and JPEG compression artifacts. The carousel is really unkind to these charts.Reply