Asus TUF Gaming X570-Plus Wi-Fi Review: Solid Features for $200
Why you can trust Tom's Hardware
Software and Firmware
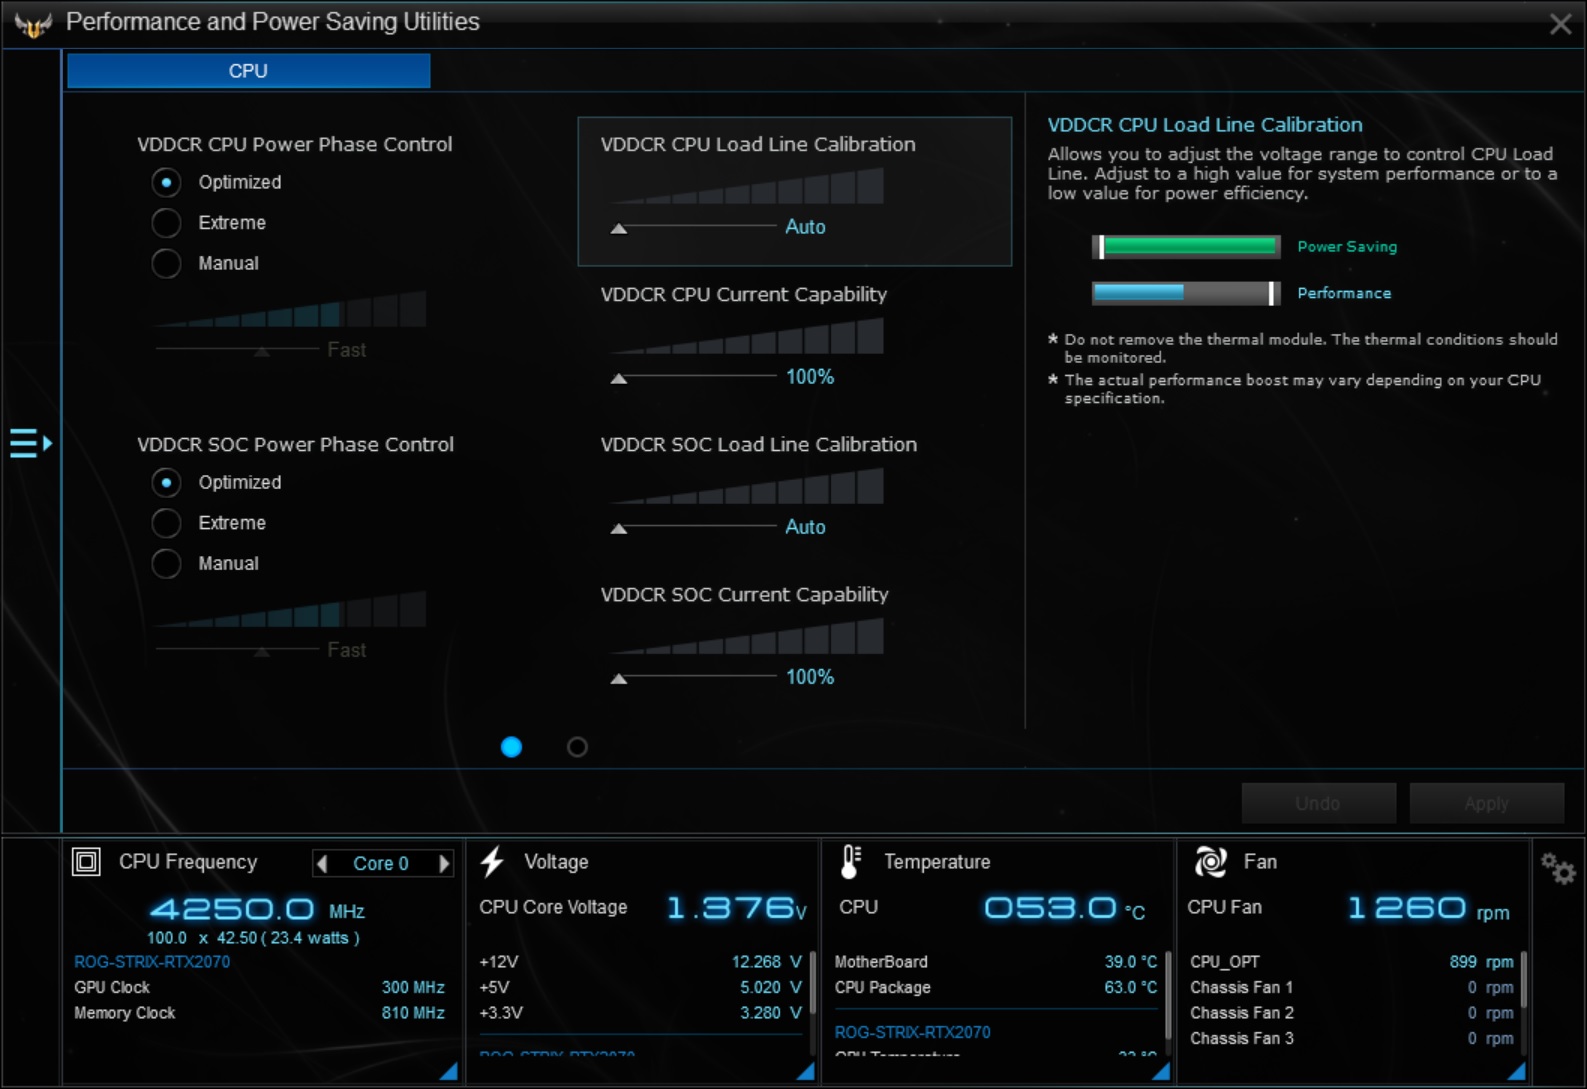
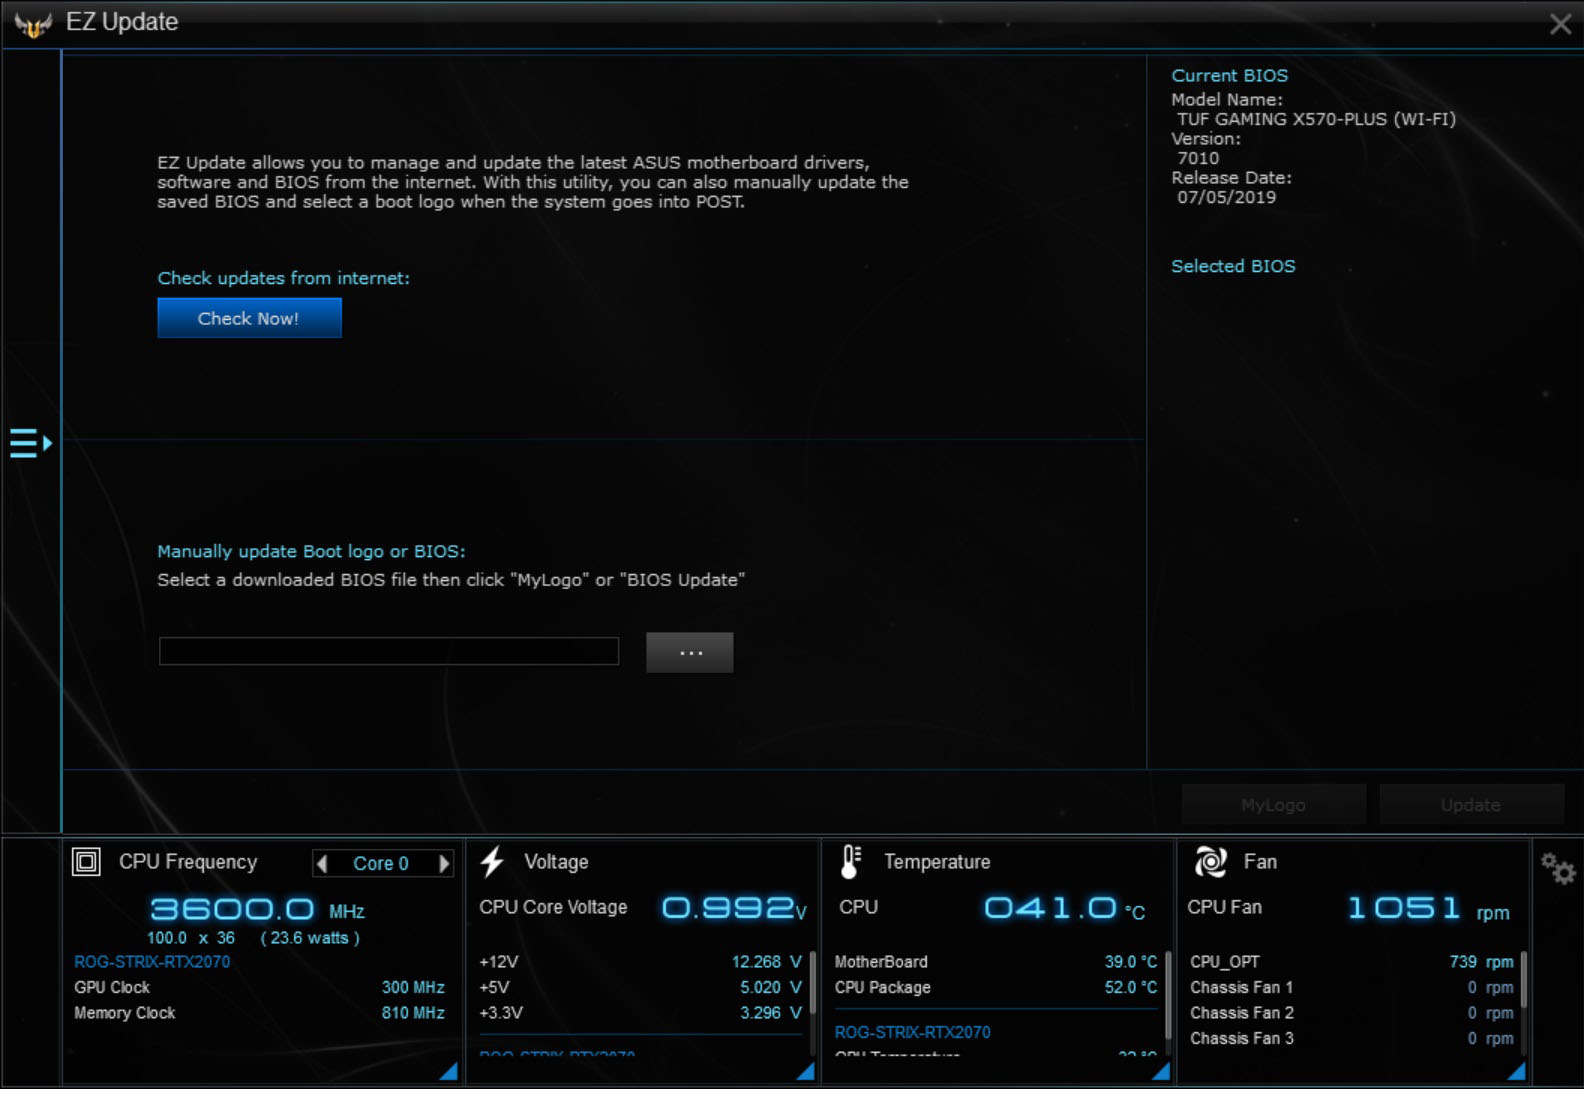
Asus’ software world revolves around AI Suite 3 (AIS3). AIS3 gives access to functionality such as system monitoring, power savings and overclocking as well as fan control and other fine adjustments. System monitoring is located across the bottom and covers CPU frequency, Voltage, temperature and fan speeds, giving the user a nice graphical readout of the state of their PC’s union.
AIS3 is divided up into different sections which cover different areas. These include Digi+ VRM, EPU, TurboV EVO, Fan Expert 4, and EZ Update. Users tend to have a love / hate relationship with this software, depending on who you ask. At times, for a hardcore enthusiast who works generally in the BIOS, AIS3 can get in the way of pushing things, so in general many advanced users will stick to the BIOS.
The Digi+ VRM section gives users access to control phases for the CPU and SOC as well as Load Line Calibration and current capability adjustments from within windows. These options help to stabilize the system when overclocking. What was entered is what was displayed so things here worked fine.
The EPU section is straightforward and displays options for power plans such as the amount of time it takes for the monitor to shut off as well as the time set for the PC to enter sleep mode. It includes three different modes to adjust -- Performance, Power Saving, and Away Modes. Users are able to tune what the fans do as well as how much the vcore lowers in power saving situations. This section is useful for those who may not want to dig into the power savings with a fine-toothed comb, but still need to make a few adjustments.
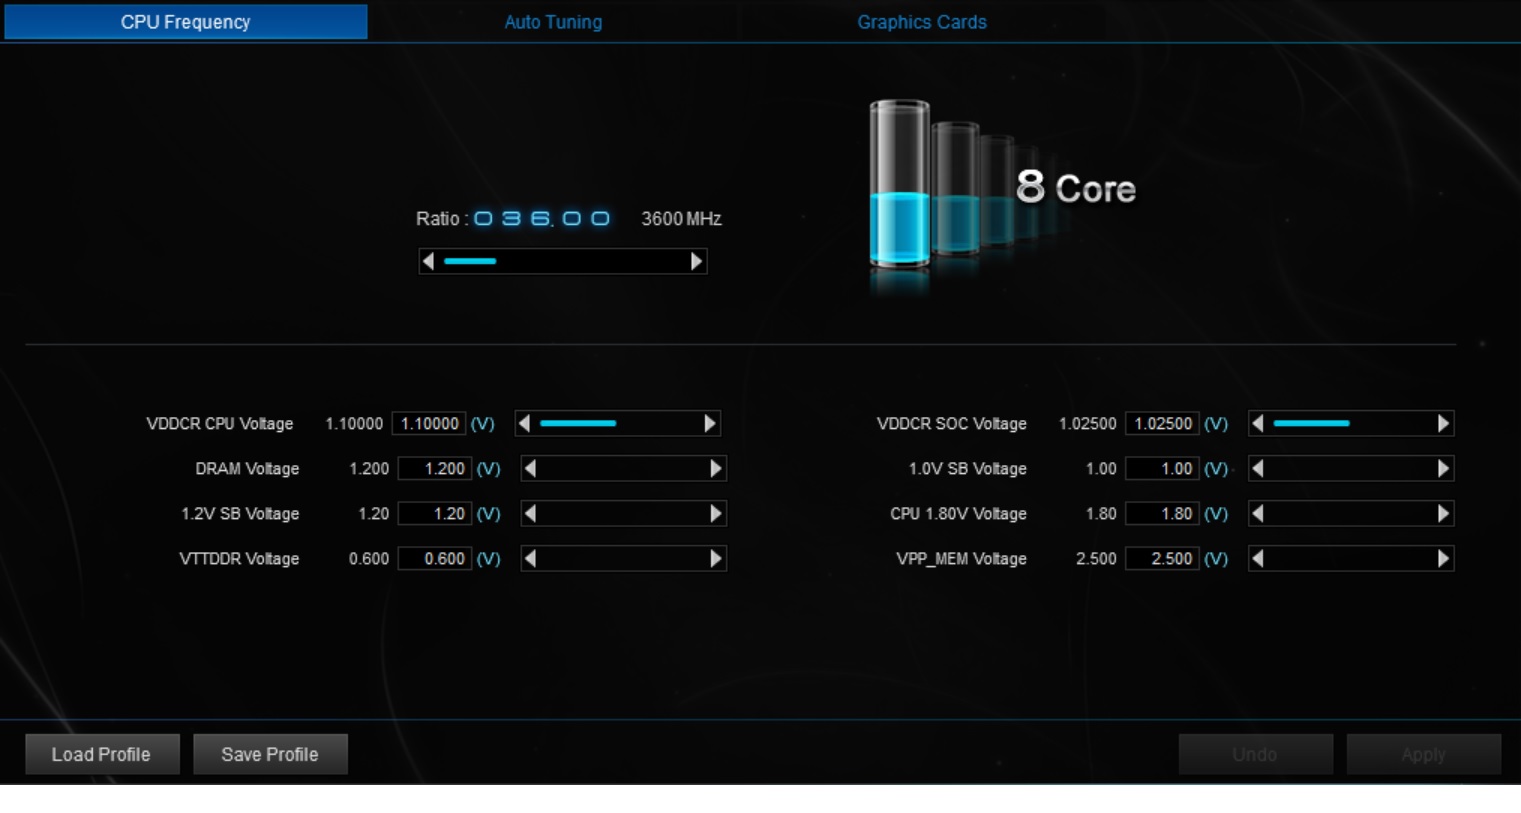
Next is the TurboV EVO section. Here you are able to adjust the CPU ratio and a multitude of voltages for overclocking purposes including VDDCR CPU and SOC Voltage, DRAM voltage and others. There is an auto-tuning tab which will automate the overclocking process with a touch of a button. A third tab allows for video card overclocking from here instead of a 3rd party application which some users can benefit from.
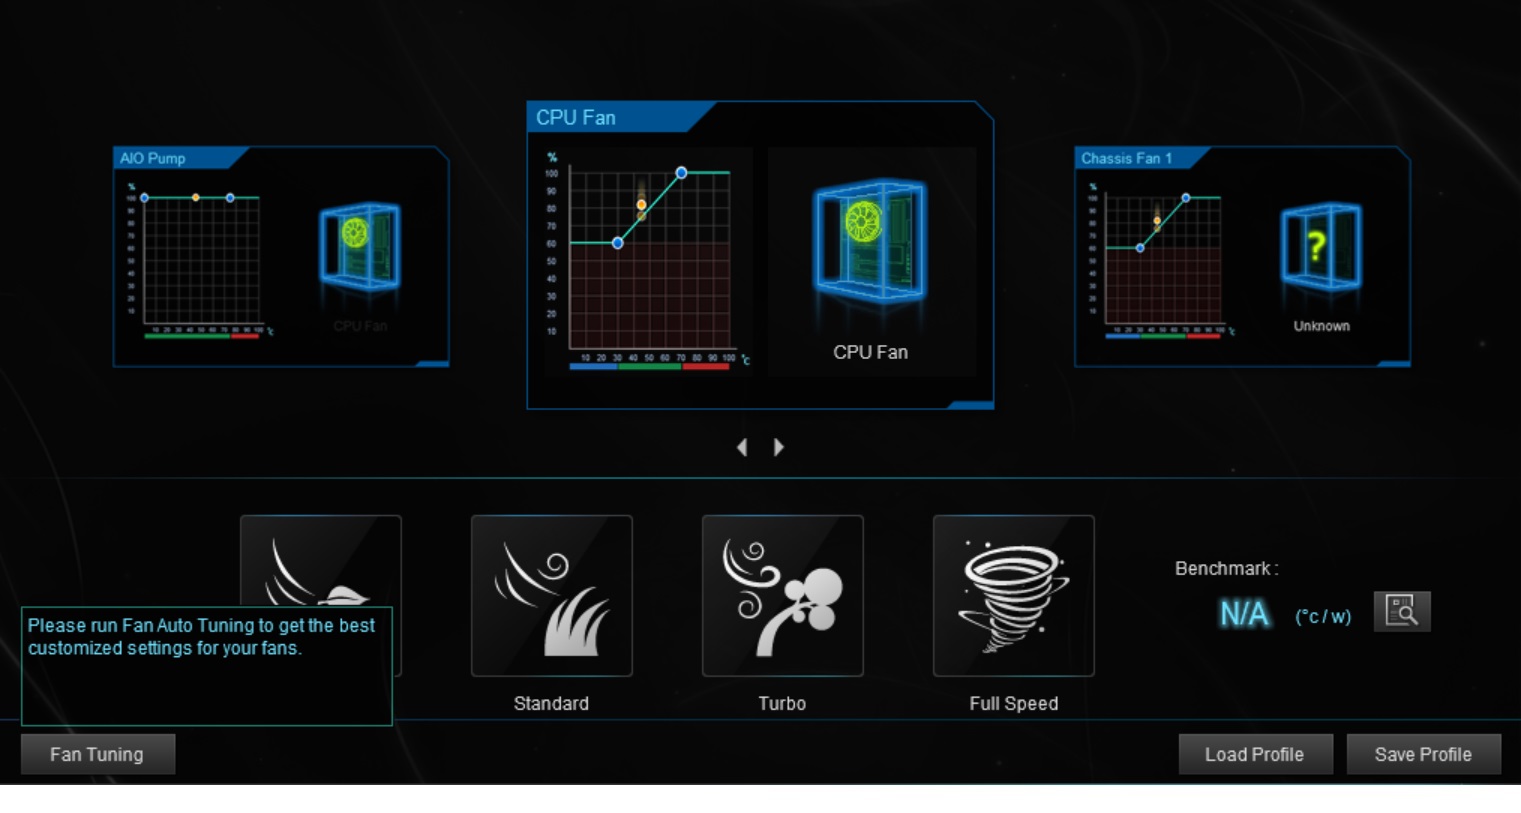
Next in up AIS3 is Fan Expert 4. As the name describes, this section is for fan control. It presents four preset options (silent, standard, turbo and full speed) as well as being able to set custom curves for each. I prefer using this utility as opposed to the BIOS if only for the better-looking interface. The BIOS offers a bit more fine-tuning, however.
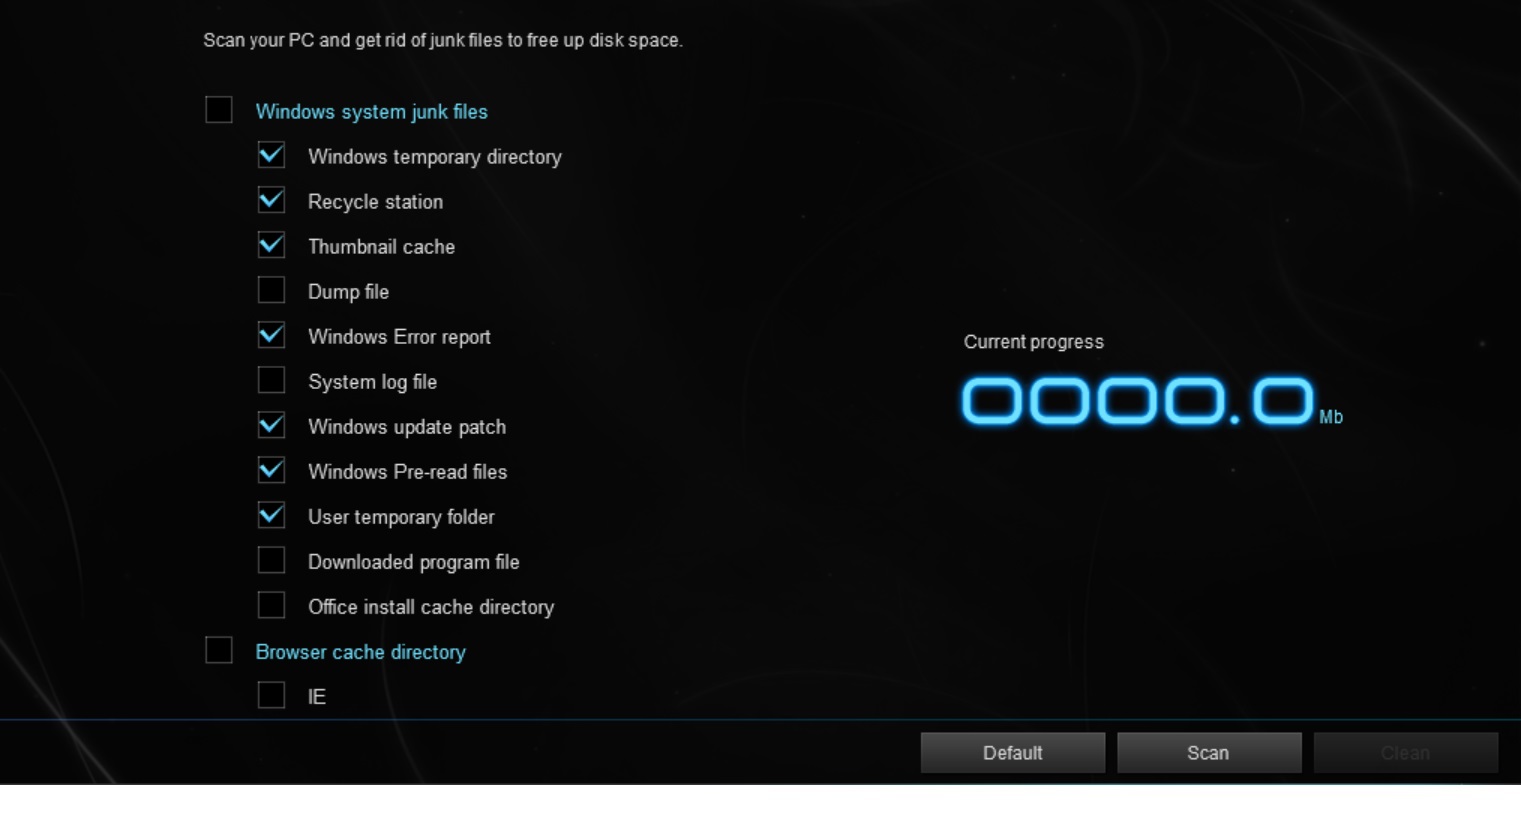
Also included in AI Suite 3 is PC Cleaner (works like disk cleaner), EZ Update to update for updating drivers, as well as a system information option.
Get Tom's Hardware's best news and in-depth reviews, straight to your inbox.
AI Suite 3 covers the gamut for monitoring and adjusting important functionality in your PC, sitting in the tray ready for use and isn’t much of a bother for most people. The application is a useful Windows-based tool and may provide some relief for those who may be intimidated working in the BIOS, though advanced users may skip it altogether.
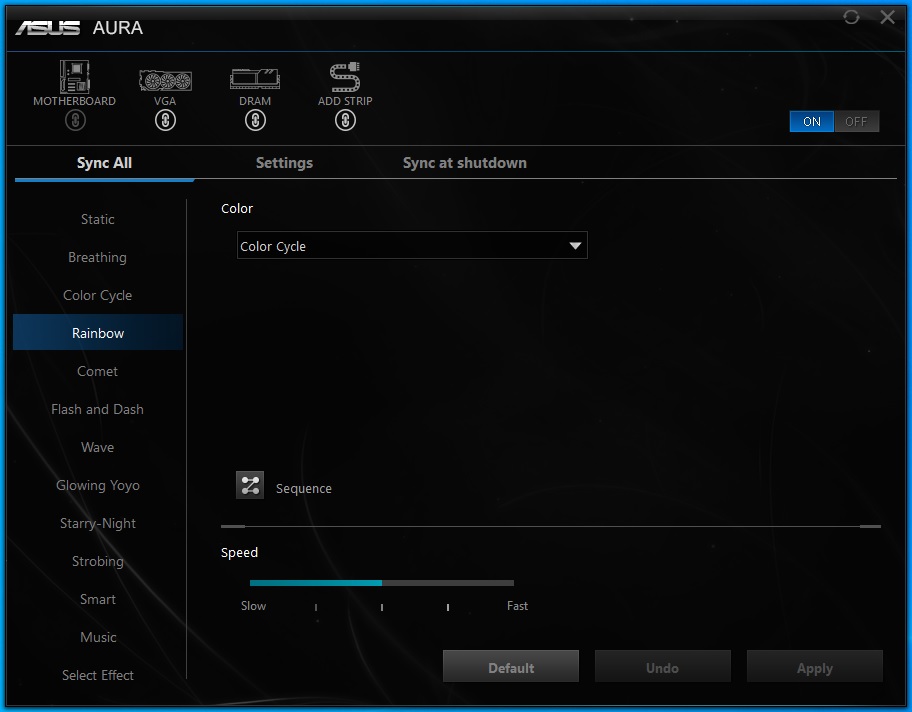
Asus’ application to control RGB LEDs is Asus Aura Sync. The program is able to control the integrated RGB LEDs on the motherboard along with any products attached which support Aura Sync including graphics cards, DRAM, and any LED strips using the motherboard headers. Users are able to control the LEDs using 12 preset patterns as well as customizing each to some extent, be it the speed of the effect or how the color is displayed. You can also quickly disable the lighting as well through the app (and BIOS).
Firmware
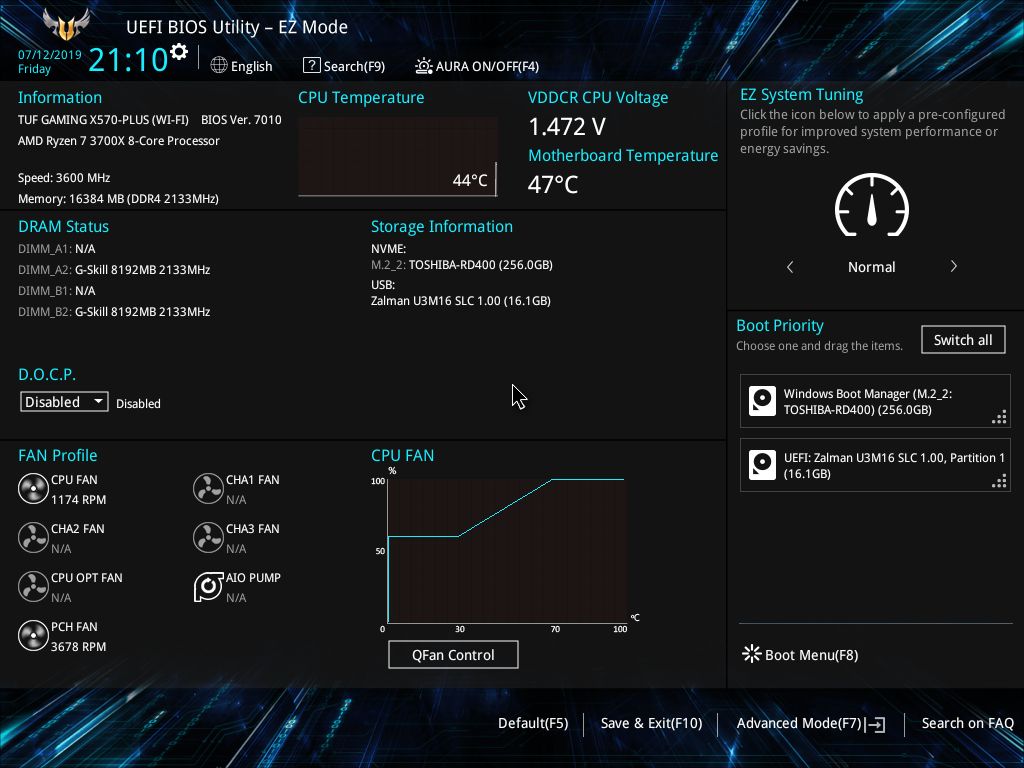
Asus’ BIOS on the TUF series starts off in EZ Mode which displays useful information as well as having a few options to edit. The BIOS scheme uses a black background with blue highlights, differing from their ROG themed boards which are black and red.
EZ Mode displays details on the installed CPU and memory, fan speeds, storage, temperature and voltage for the CPU as well as an option for adjusting boot order. Users are able to access QFan control to set up fan speeds and profiles and even enable XMP/DOCP profiles from here.
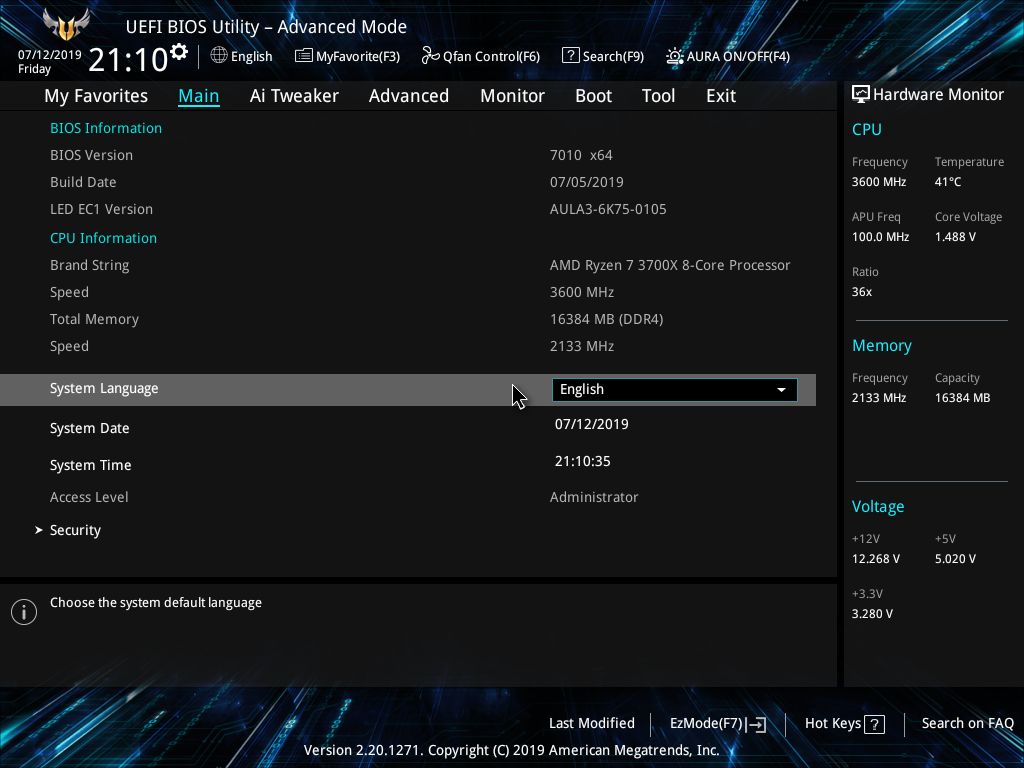
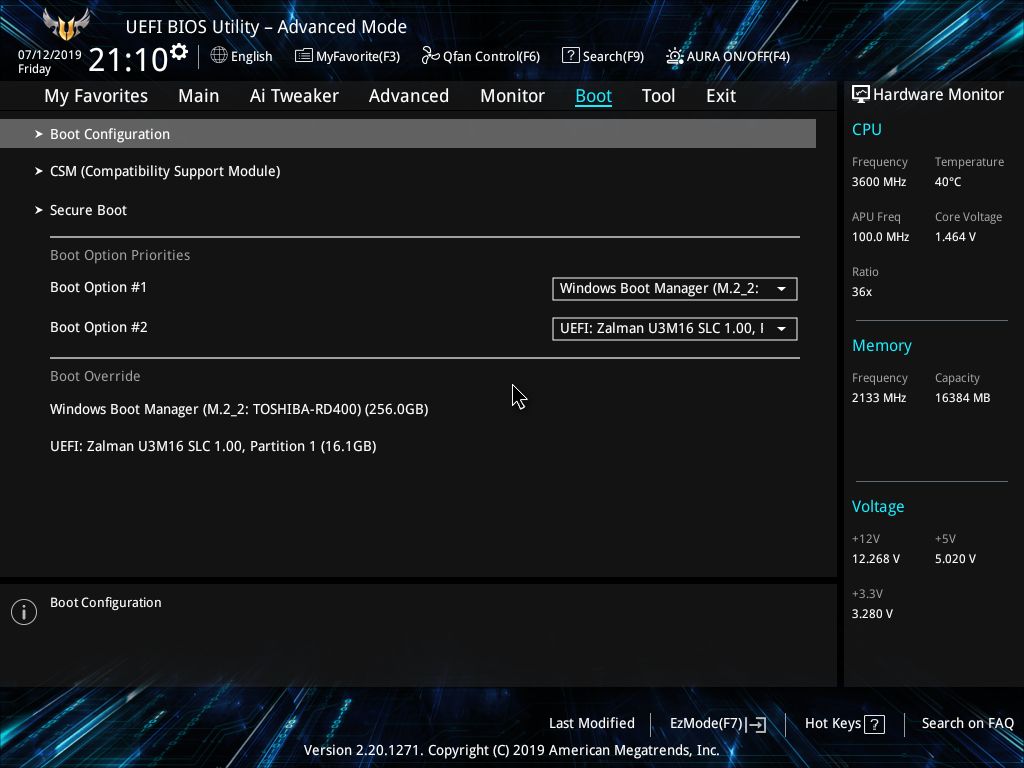
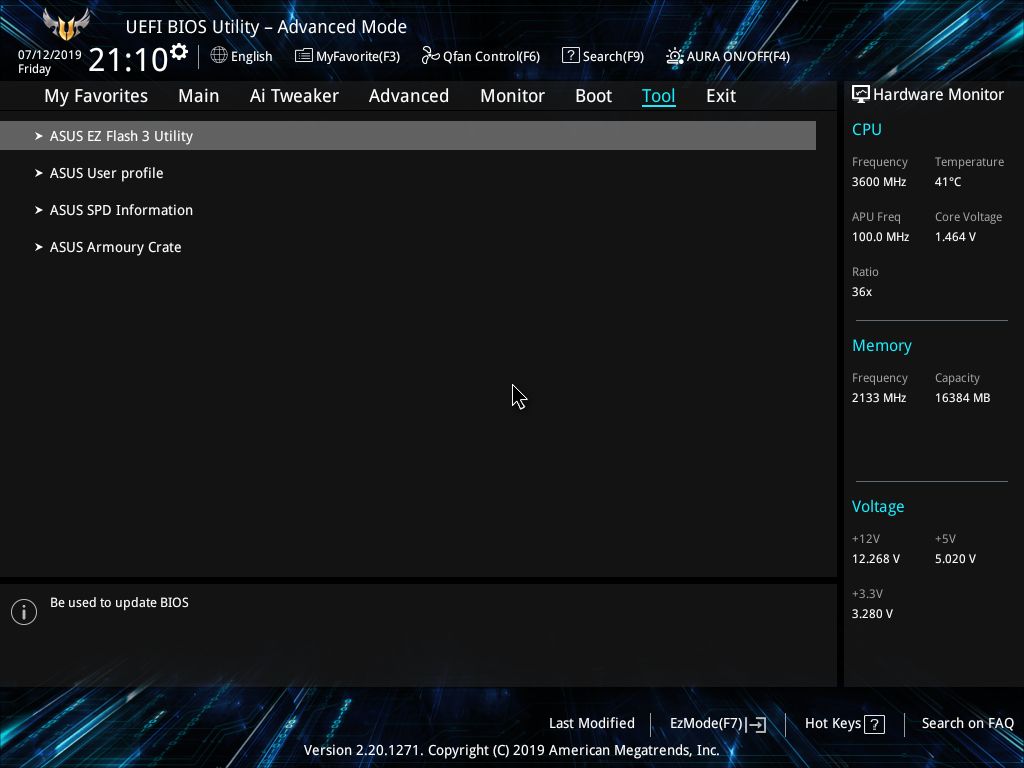
In Advanced mode, we’re greeted by the familiar setup of headings across the top, along with some monitoring on the right side. The headings are My Favorites, Main, Ai Tweaker, Advanced, Monitor, Boot, Tool, and Exit.
My Favorites section is a place where you can customize what’s on the page with your own options. By default, it comes populated with memory frequency, voltage options, SATA and Onboard device configuration as well as boot options. Many, especially overclockers who tend to manipulate the most options, will populate this area with the most frequently used options in the BIOS so the most common functions are on one screen.
The Main section is informational for the most part, displaying details about the BIOS and CPU. Additionally, this is where users are able to set the system language, date and time.
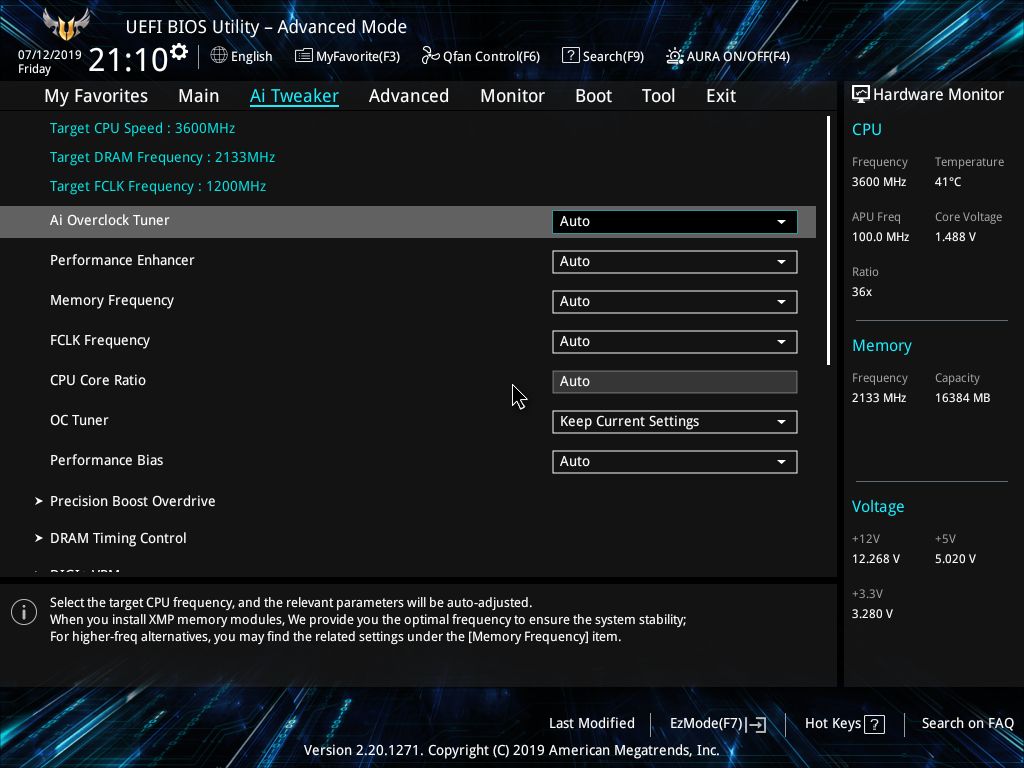
Ai Tweaker is where the fun starts and the overclocking options are found. While there is a bit of redundancy on some items throughout the BIOS, Asus does a good job of putting the more commonly used options in one place. Within the section, the main page gives easy access to the CPU and BCLK ratios along with the major voltage options used in overclocking. Inside this section are sub-headings for Precision Boost Overdrive, DRAM Timing control, as well as Digi+ VRM for managing power and load line calibration functions.
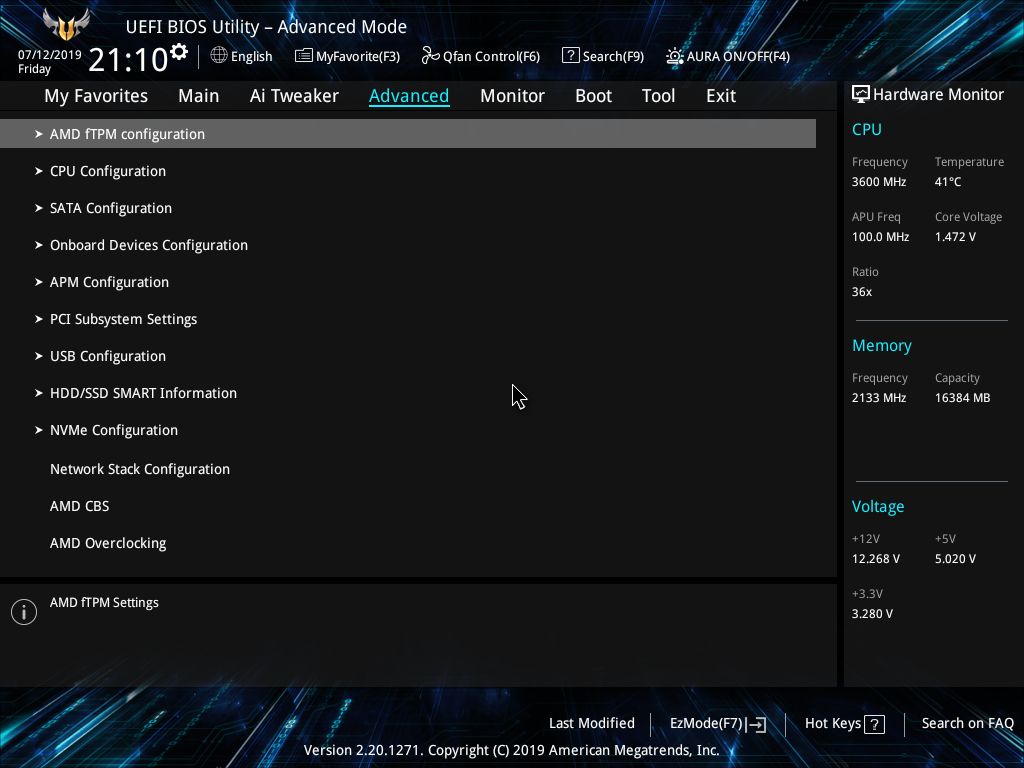
The Advanced heading is where we find CPU, SATA, Onboard device, USB, and NVMe configuration options. Also within this section is the redundant part of Ai Tweaker with AMD Overclocking. Both the Gigabyte X570 BIOS and the Asus BIOS had the same section and the same disclaimer about doing damage to the PC, making me wonder if this is something AMD had board partners add in the BIOS. Inside of this section is where users can change PBO, voltages, and the DDR/Infinity fabric frequency and timings as well.
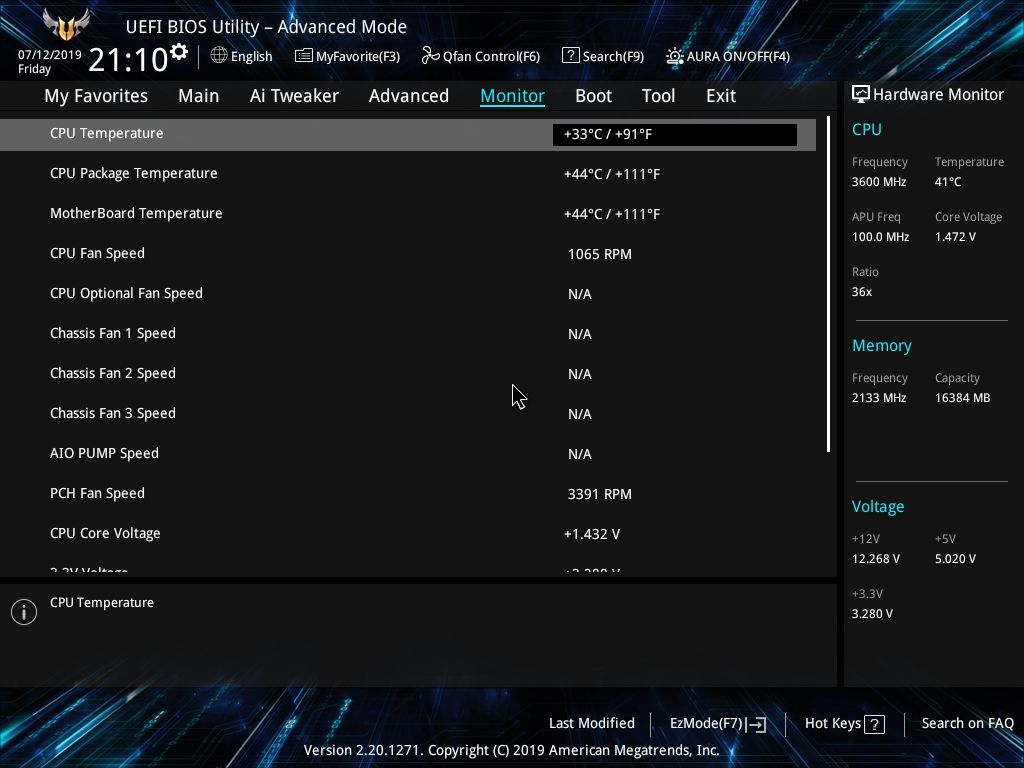
Inside the Monitoring section, we find information on the CPU temperatures (package and core) and motherboard temperature as well as fan speeds and voltages for the CPU and the major rails from the power supply. At the bottom of the page, we find Q-Fan configuration and is where to adjust fan speeds and profiles at the BIOS level.
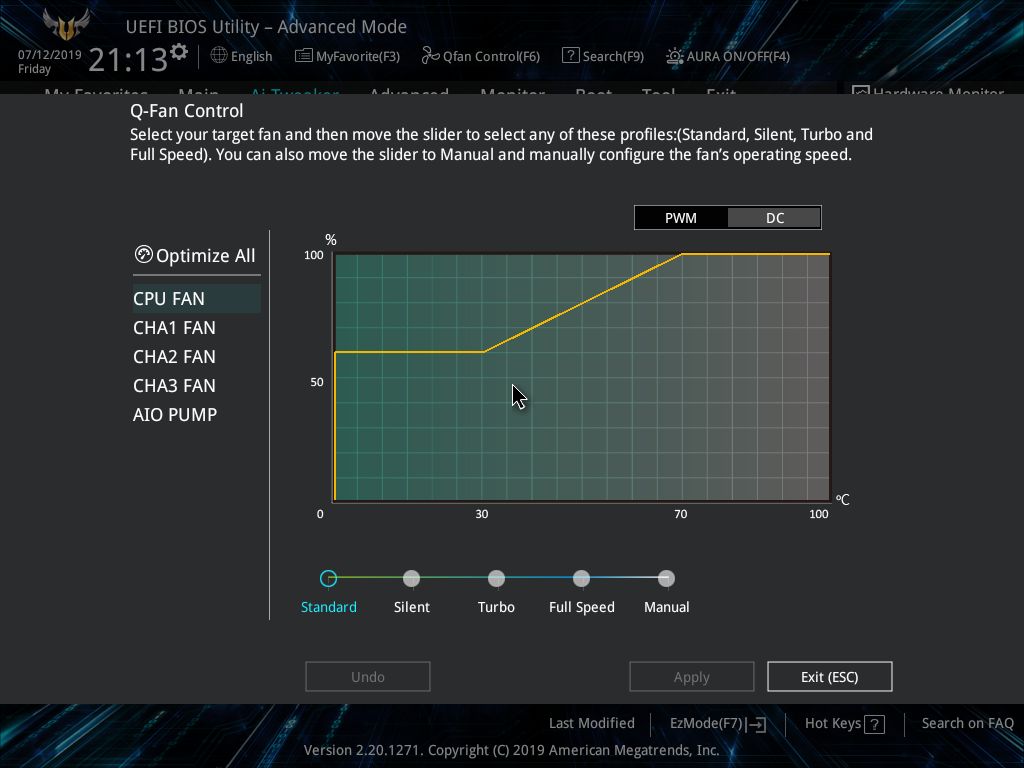
Inside Q-Fan control is where adjustments of all the attached fans or pump would be handled. It displays a fan curve with three preset modes: silent, turbo, and full speed to choose from. In addition to the presets, users can create their own custom curve for each header when selecting the manual option.
The Asus BIOS over the past couple of generations has been one of the better and most ergonomic UEFI’s. While there is always going to be some redundancy, it is kept to a minimum. Options for common functions are easily found and in logical places. We don’t have any complaints about this BIOS.
MORE: Best Motherboards
MORE: How To Choose A Motherboard
MORE: All Motherboard Content

Joe Shields is a staff writer at Tom’s Hardware. He reviews motherboards and PC components.
-
regs01 Worldwide it cost $220-$240. And wouldn't call it solid features. For $240 it should have USB 3.1 header, ALC1220-VB audio, two ethernet adapters 1 GbE + 2.5 GbE, BIOS Flashback, built-in I/O panel shield and many more features. The red price for this board is $160. It's way overpriced.Reply -
Lladnar Replyregs01 said:Worldwide it cost $220-$240. And wouldn't call it solid features. For $240 it should have USB 3.1 header, ALC1220-VB audio, two ethernet adapters 1 GbE + 2.5 GbE, BIOS Flashback, built-in I/O panel shield and many more features. The red price for this board is $160. It's way overpriced.
It's $200 in the US and that's where this site calls home. Where do you see another X570 chipset motherboard that has your list of "should haves" at this price point? Nowhere, that's where. Maybe you're comparing to X470 or lower boards' specs. Solid features don't mean all the bells and whistles you'd personally like to have. Most people have no need for 2.5 GbE ethernet for example. This board has the best DRMs at this price point, runs cooler than even the Aorus Elite during full workload, and can easily handle the 3900X and lots of fast RAM. Any currently existing X570 board other than this or the Aorus Elite, at or below $200, is not worth considering for a serious build. IMO it's lacking some USB ports on the back, like the additional 4 USB 2.0 ports the Aorus Elite has (and I do agree about the lack of an integrated I/O plate), and would prefer Intel LAN over Realtek, but I'm getting this board anyway. It's on G.SKILL's QVL list for the Trident Z Neo DDR4-3600MHz CL16-19-19-39 64GB (4x16GB) kit I have coming, and the Aorus Elite isn't, which sealed the deal for me. -
TJ Hooker ReplyVoltage Regulator12+2 phase (doubled - 7 phase, actual)
This is incorrect, which is actually mentioned further down the page. It's a 4+2 phase with each of the 4 Vcore phases containing 3 sets of components (but no doublers). -
Soaptrail Replyregs01 said:Worldwide it cost $220-$240. And wouldn't call it solid features. For $240 it should have USB 3.1 header, ALC1220-VB audio, two ethernet adapters 1 GbE + 2.5 GbE, BIOS Flashback, built-in I/O panel shield and many more features. The red price for this board is $160. It's way overpriced.
This board does have CrashFree BIOS 3 but since i have yet to use it i cannot confirm it works. I could care less about the I/O shield. I chose it over the Gigabyte since it has debug LEDs or as Asus calls it QLED's. Even the Qcode 2 digit code is lame, you need a decoder book to understand it. Debug LED's should be on every mobo!
But what is annoying is when the windows software AI Suite 3 app is broken by Windows 10 updates and Asus does not update the motherboard download page. For my Z97 board i found it under new motherboard downloads but i had to hunt for it.
Also the price has been dropping, it is down to $180 at Micro Center. -
Soaptrail Replyadmin said:With a solid feature set including USB-C and Wi-Fi at a budget price for this platform, Asus’ TUF Gaming X570 Plus WiFi is a solid choice for a mid-range AMD build.
Asus TUF Gaming X570-Plus Wi-Fi Review: Solid Features for $200 : Read more
In the article it says there are 6 fan headers, does that include the AIO pump header? If not there are only 5.
along with another (of six) fan headers.
also when do we need to use the additional 4 pin power plug for the CPU? It does not state in the manual. -
uwhusky1991 So, there are 2 M2 slots but only one has a heat sink? Seems like a significant miss there. I was planning to run 2 M2 nvme drives in Raid 0. Can you buy a heat sink for an M2 drive?Reply -
cat1092 Reply
There are a few M.2 NVMe PCIe 4.0 x4 SSD's which ships with a heatsink. More does than doesn't in fact, I presume due to extra heat buildup.uwhusky1991 said:So, there are 2 M2 slots but only one has a heat sink? Seems like a significant miss there. I was planning to run 2 M2 nvme drives in Raid 0. Can you buy a heat sink for an M2 drive?
One can also obtain a DIY NVMe heatsink. The best ones are copper based, these has been on the market for 2-3 years. :)
This MB looks to be a great deal, I keep looking with an itchy finger. Yet my Z97-i7-4790K system which has served me well for 5 years continues to do so. Also have a same of the same MB (ASRock Z97 Extreme6), only with it's little brother (i5-4690K).
I need to see advances in GPU's, like not just memory, rather moving on from the same old HDMI 2.0(b) & Displayport 1.4 & into HDMI 2.1 & DP 2.0 territory before doing a build. There would be no need to add such a card to this system, as will be bottlenecked.
So for one looking to do a X570 build, I'd recommend this MB w./out hesitation.:D
EDIT: Watch out when buying on Amazon, some are complaining of receiving used, open box or inoperable MB's, this should be stated in description.
Cat -
Yukoncorny Reply
How do you update the bios on this board then without flashback?regs01 said:Worldwide it cost $220-$240. And wouldn't call it solid features. For $240 it should have USB 3.1 header, ALC1220-VB audio, two ethernet adapters 1 GbE + 2.5 GbE, BIOS Flashback, built-in I/O panel shield and many more features. The red price for this board is $160. It's way overpriced.
