System Builder Marathon, Q4 2013: A $2400 PC That Costs $2700
Finishing The Build
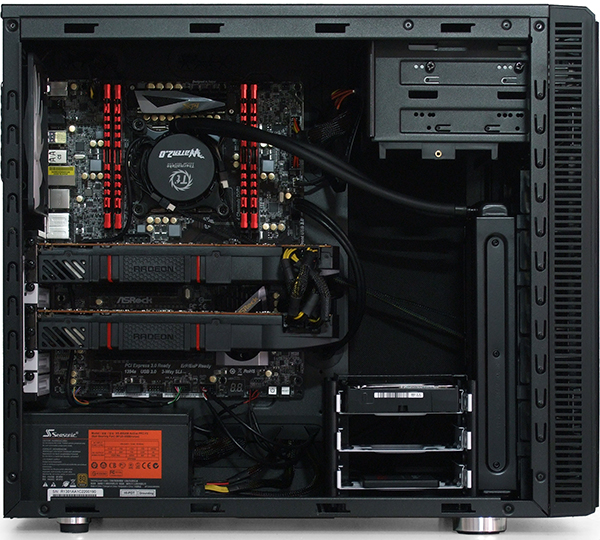
With the radiator installed onto the bracket and the hard drive cages removed, it’s time to pop the assembly back into the case.
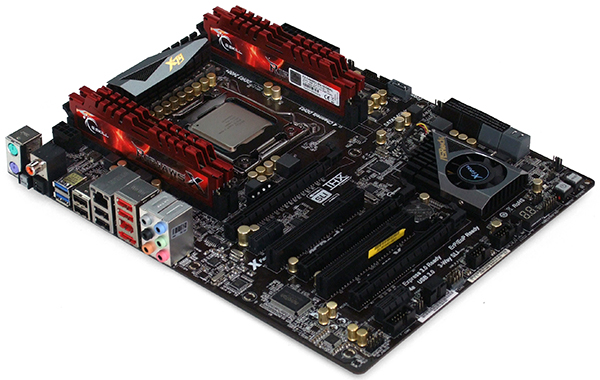
I usually install heat sinks before securing the motherboard. However, my closed-loop system is already attached to the radiator, which we just mounted to our chassis. Although the CPU and memory modules could have been dropped in after getting the board into place, I added them first out of habit.
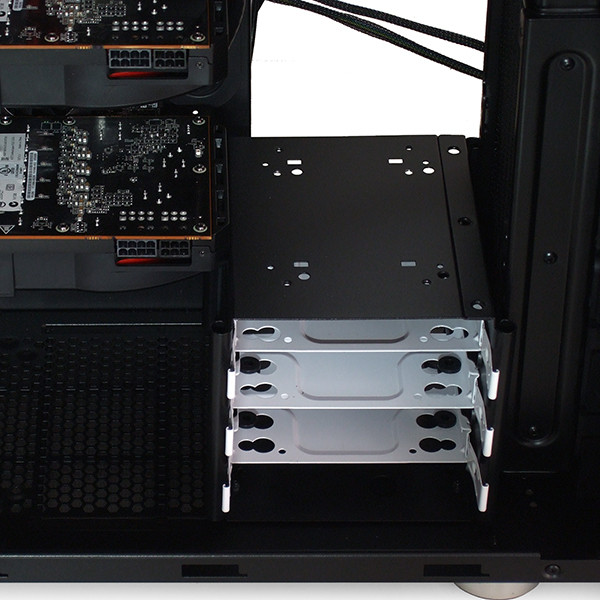
Designed for three-way SLI, the third PCIe x16 slot on ASRock’s X79 Extreme4 borrows eight lanes from the second slot. That’s still fast enough for every card we’ve tested, and enjoys the advantage of better spacing and, consequently, cooling. The only potential problem is that the hard drive cage I relocated overlaps the space consumed by these cards by less than 1/8”.
The cage is flexible enough that this installation would have worked, but it probably would have transferred noise from the card's fan through the rest of the enclosure. Rather than sticking a strip of foam between the two components, I decided to instead use the motherboard’s middle slot for my second Radeon R9 290.
The pump body is upside down because that's the cleanest way to run the hoses. My only concern was that the air bubble present in all closed-loop coolers might be recirculated. It should get trapped in the radiator, but the upside-down radiator doesn’t leave much room for the air bubble either. The best way to find out if the bubble is small enough to trap within the top of the radiator tank is to start the system and listen for noise that lasts more than a few minutes.
Another alternative would have been to mount the radiator on top of the chassis. That probably would have worked well in an exhaust configuration, especially with the blower-style coolers used on our graphics cards, since they push GPU heat out of our case. Mounting the radiator up top also provides more room for the cooler’s air bubble and would have firmed up the case’s somewhat-flexible roof.
Current page: Finishing The Build
Prev Page Radiator Installation Next Page Overclocking Through FirmwareGet Tom's Hardware's best news and in-depth reviews, straight to your inbox.
-
Vorador2 "It’s a shame that a digital gold rush is taking these out of the hands of so many gamers."Reply
Seeing that it is impossible to break even doing bitcoin mining with GPUs, i expect sooner than later a flood of barely used cards will hit the used market. -
spentshells Alright guys terminator the terminator 2 cd has been in the program since like 2003 let's retire it shall we? Maybe use meatloaf bat out of hell.Reply -
SessouXFX We'll see how this all ends up with the Litecoin and bitcoin miners. Either they were smart for getting ahead of the game, or they were idiots for believing they could make more than they spent.Reply
But in the case of the Bitcoiners, there's a better method to mine, why bother with the GPUs? Seems to me they lose out no matter how they end up. -
Crashman Reply
You can't break even due to power bills, let alone hardware prices. But wait, there's more!12306031 said:We'll see how this all ends up with the Litecoin and bitcoin miners. Either they were smart for getting ahead of the game, or they were idiots for believing they could make more than they spent.
But in the case of the Bitcoiners, there's a better method to mine, why bother with the GPUs? Seems to me they lose out no matter how they end up.
Forum members often call a machine that burns far too much energy for the amount of useful work we get out of it a "space heater". But if you compare THIS machine to an ACTUAL space heater, you can clearly see the benefit of using THIS machine RATHER than an actual space heater to heat your workspace. Let mining pools pay a portion of this winter's heating bill!
I'm completely against the CONCEPT of crypto-currency mining because they produce no USEFUL data. We're producing GARBAGE data of increasing difficulty generation-by-generation and wasting all those resources to do it. It's worse than raising cattle for the leather and throwing away the meat. It's more akin to raising cattle for photographs of the cow and throwing away the cow!
These machines might actually benefit society if they were using a program like F@H, and we'd at least have a solid argument between their cost to society and their benefit to society. Someone should have beat the bitcoin guy to the punch and developed F@H coins.
Or take a look at cloud servers. Large companies are renting out their excess computing resources during low-traffic periods. Now look at PC-based, self-serving distributed computing platforms like Skype. The per-user cost is low but the number of users is high, so hosting the program across those same "clients" makes sense.
Why don't we have companies knocking down our doors begging for our excess data resources? Someone with a great marketing plan AND excellent technical knowledge should set up a distributed computing platform that pays individuals for their contributions. Environmentalists should praise that move as reducing the number of data centers needed world-wide, but me?
I'm just trying to reduce waste. I even collect my small bits of scrap metal (broken car parts, etc) and give them away to scrap metal collectors because it costs more to take these in than these are worth. Those guys collect enough small batches to make it worth the 15-mile trip. And you don't need to be a tree hugger to see that everyone benefits from that type of effort.
-
realibrad While it is true that most miners wont break even do to electricity cost, it does not mean that a profit wont be made. One big draw of crypto currency is the black market. Silk road was and is huge. If you want to launder money, then crypto mining is a great way to go. If the current return on laundering money is a 75% return, and trypto mining is 85% then why not? Further more, its safer than keeping piles of cash around in a safe house. For the avg. user mining wont make a return, but for others, it can better than other alternatives.Reply -
RazberyBandit Crash, you forgot your soapbox! :)Reply
If we're to believe what we're told and crypto-currency mining is to blame for retailer spikes in the highest-tier AMD cards, then I expect to see AMD make some changes in its next generation of cards, especially if AMD isn't cashing in on the rush for its cards and the price hikes are solely due to merchant mark-ups. Considering AMD's business concerns over recent years, I don't expect AMD to make any such profitability mistake ever again. Instead, I think AMD will follow nVidia's example.
When nVidia capped GPGPU performance on the majority of its cards, then went on to produce the Titan and Tesla cards without such GPGPU restriction at higher prices, I was OK with that. It meant gamers could buy cards built for gaming at a reasonable price, people who used their cards for both gaming and GPGPU-related tasks could buy a card built for both for a premium, and researchers could buy cards that were fully-optimized for GPGPU use for an even higher premium. If AMD had done that with the R9-series, we'd have quite a few more gamers sporting brand new AMD cards this holiday season.
And back to the article... Heckuva build! It's an improvement over the previous build in just about every way, with the exception of its current cost. -
Crashman Reply
The article's my "soap box". At any rate, I've given AMD's options a few considerations too. It's made a commitment to end users and the only way to profiteer without having people call you out on it is to sell these through a "back channel". The other problem is supply and demand: They can't ramp up production very quickly, and who's to say that this expanded market wouldn't evaporate before they had the extra cards to fill it? The BEST thing for AMD to do is stick to its guns and let retailers take the blame for profiteering.12306778 said:Crash, you forgot your soapbox! :)
If we're to believe what we're told and crypto-currency mining is to blame for retailer spikes in the highest-tier AMD cards, then I expect to see AMD make some changes in its next generation of cards, especially if AMD isn't cashing in on the rush for its cards and the price hikes are solely due to merchant mark-ups. Considering AMD's business concerns over recent years, I don't expect AMD to make any such profitability mistake ever again. Instead, I think AMD will follow nVidia's example.
When nVidia capped GPGPU performance on the majority of its cards, then went on to produce the Titan and Tesla cards without such GPGPU restriction at higher prices, I was OK with that. It meant gamers could buy cards built for gaming at a reasonable price, people who used their cards for both gaming and GPGPU-related tasks could buy a card built for both for a premium, and researchers could buy cards that were fully-optimized for GPGPU use for an even higher premium. If AMD had done that with the R9-series, we'd have quite a few more gamers sporting brand new AMD cards this holiday season.
And back to the article... Heckuva build! It's an improvement over the previous build in just about every way, with the exception of its current cost.
I figure there will be a flood of used cards on the market in three months as it gets more difficult to mine the most profitable currencies. But someone mentioned that before I responded. It would be REALLY REALLY bad for AMD to spend 6-weeks increasing production volume, only to see a flood of cheap used cards knock the market out from under their new card sales. Once again, AMD is probably doing best to stick to its plans. Nobody remembers when Intel blamed overproduction by AMD for the CPU market collapse of 1999..in fact those news articles were buried within three months. But I remember :)

