HP EliteDisplay E271i Review: Solid Performance From A 27" Screen
Can a business-class monitor work well for the entertainment-oriented? We discover the answer is yes if you’re using HP’s new EliteDisplay E271i 27-inch AH-IPS screen. Not only does it perform well, but it also offers some unique features and great value.
HP Display Assistant: Monitor Control From The Desktop
Included on the E271i’s CD-ROM is a copy of HP Display Assistant. This monitor management software puts all the controls from the OSD onto the desktop, and adds a few extras. You can also do a calibration by eye with the app’s internal test patterns and wizard feature.
Install it once you have the E271i connected though, because the tool looks for a compatible monitor before it activates. Once installed, you can access HP's utility through a right-click on the desktop.
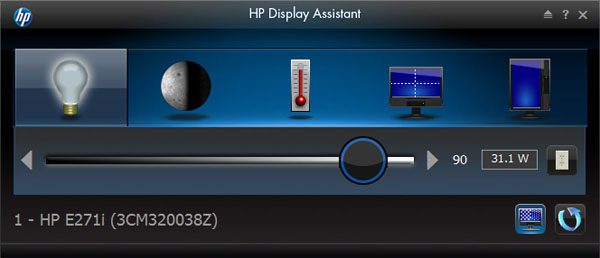
Here’s the Basic Mode. From left to right, the icons represent brightness, contrast, color temp, desktop partitions (very cool, more on that below), and portrait mode. In the portrait mode options, you can have the monitor flip the screen automatically when you rotate it.
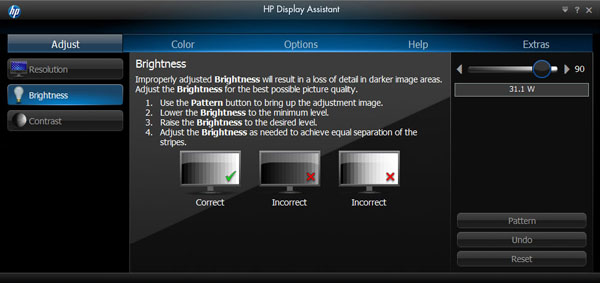
Switching to the Advanced Mode opens up a lot more features. The menu across the top is the gateway to the different adjustment categories. The Adjust screen contains Brightness and Contrast sliders, as well as the means to adjust your video card’s resolution to the E271i’s native 1920x1080 pixels.
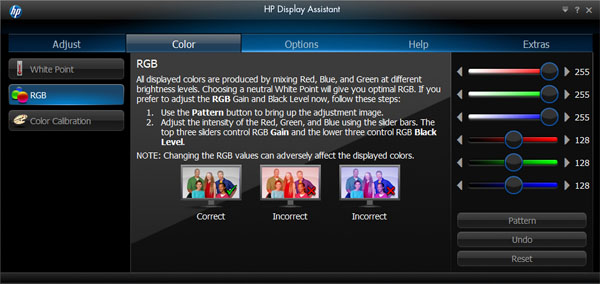
This is our favorite. Here you get high and low RGB controls. Very few computer monitors have these in their OSD. With them, you can adjust grayscale at the upper and lower ends of the brightness range. This typically gives you much more accurate grayscale tracking. In practice, the E271i doesn’t need the extra adjustment because it already tracks extremely well. If you want to try them out with your calibration gear, we recommend adjusting an 80 percent brightness signal with the high controls and a 30 percent signal with the lows.
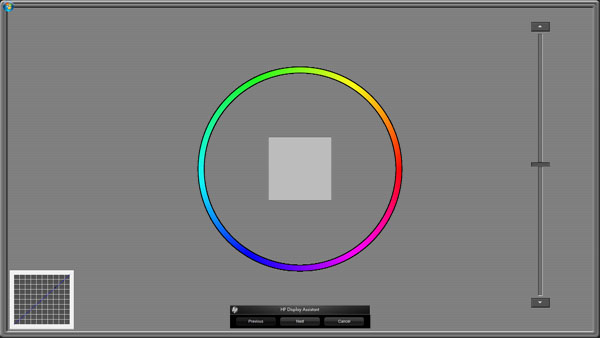
Selecting the Color Calibration button brings up a special pattern for calibration by eye.
You need to consult the manual to use this pattern properly. The slider on the right adjusts brightness, and the center square can be moved with the mouse to change the white point. Move the square until the color white appears neutral. Then, adjust the slider until the square blends into the background. What you’re actually changing here is the gamma preset. The little graph in the lower-left corner shows you the changes you’ve made. Again, this monitor is so close to solid right out of the box that we'd recommend leaving things alone if you don’t calibrate with a meter.
Get Tom's Hardware's best news and in-depth reviews, straight to your inbox.
You can also do a by-eye calibration using the built-in wizard, which is found on the Options tab.
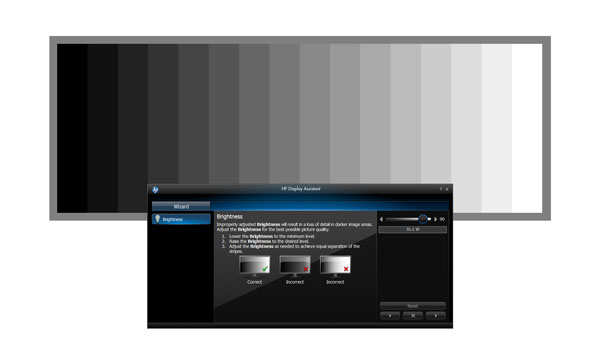
First up is the brightness test pattern. Move the slider until you can see a difference between the left two bars. This gives you the deepest black level possible without losing any low-level detail. If the darkest bars blend into one another, you’re clipping blacks and you need to move the slider further to the right.
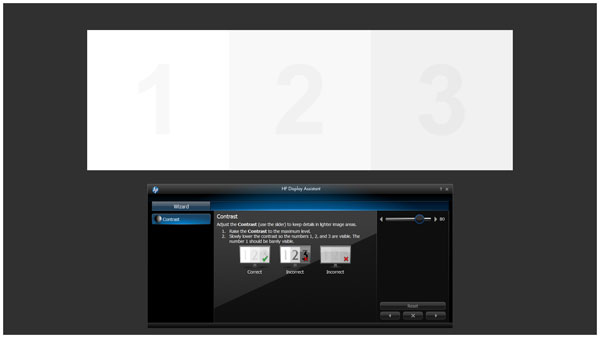
Next is a similar pattern to set contrast. Again, you want to adjust the control to its highest possible setting while still keeping the numbers visible. As soon as the one disappears, you went too high.
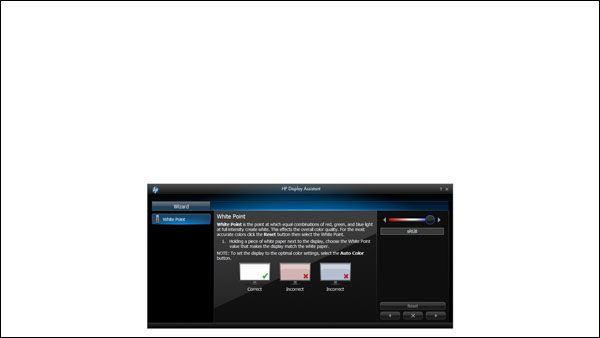
Step three sets the white point. You simply change the presets with the slider until the white field appears neutral. While this method can’t replace an instrumented calibration, it’s a step in the right direction.
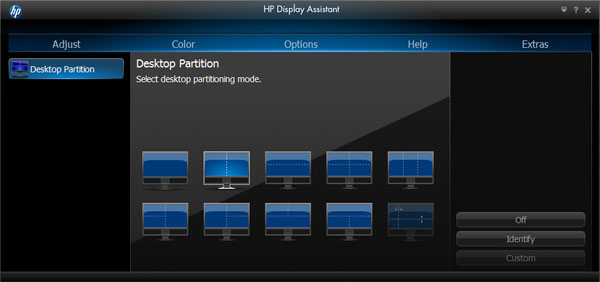
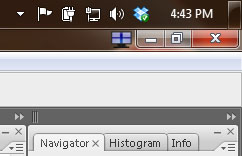
The Desktop Partition feature is especially cool. Choose one of the screen configurations shown, or create your own with the Custom button. From there, a purple multi-monitor icon shows up in the title bar, right next to the minimize button, of any active window. You can use this feature across multiple HP displays too.
Clicking on the icon pops up a little window that lets you select the screen or partition to place the window in. It's then resized and moved. This is a great way to arrange windows quickly without moving and resizing them.
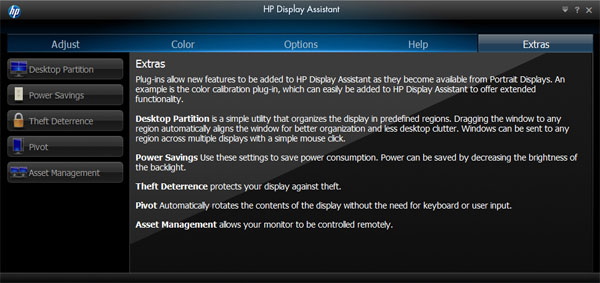
The last screen is called Extras. We already explained Desktop Partitions. Power Savings lets you do things like dial down the backlight, engage a preset brightness, or set sleep timers in order to reduce power consumption. Theft Deterrence is a security measure that requires the user to enter a PIN when the display is disconnected and reconnected to another computer. Pivot lists the options for rotation (Auto works just fine). And Asset Management allows the monitor to be controlled remotely.
While we preferred to calibrate the E271i in the menu, HP's Display Assistant is a very handy tool for making adjustments and accessing the monitor’s feature set. Doing everything from the Windows desktop is far easier than manipulating the physical buttons up front.
Current page: HP Display Assistant: Monitor Control From The Desktop
Prev Page Packaging, Physical Layout, And Accessories Next Page OSD Setup And Calibration
Christian Eberle is a Contributing Editor for Tom's Hardware US. He's a veteran reviewer of A/V equipment, specializing in monitors. Christian began his obsession with tech when he built his first PC in 1991, a 286 running DOS 3.0 at a blazing 12MHz. In 2006, he undertook training from the Imaging Science Foundation in video calibration and testing and thus started a passion for precise imaging that persists to this day. He is also a professional musician with a degree from the New England Conservatory as a classical bassoonist which he used to good effect as a performer with the West Point Army Band from 1987 to 2013. He enjoys watching movies and listening to high-end audio in his custom-built home theater and can be seen riding trails near his home on a race-ready ICE VTX recumbent trike. Christian enjoys the endless summer in Florida where he lives with his wife and Chihuahua and plays with orchestras around the state.
-
Someone Somewhere I'd like to see what the difference in the actual manufacturing costs/panel prices are for QHD vs FHD for large screens - pixel density is certainly not a problem.Reply
I'd guess it's merely a chicken/egg issue - people won't buy high-res screens until they are cheap and they won't be cheap until lots of people buy them. -
realibrad Reply11518024 said:I'd like to see what the difference in the actual manufacturing costs/panel prices are for QHD vs FHD for large screens - pixel density is certainly not a problem.
I'd guess it's merely a chicken/egg issue - people won't buy high-res screens until they are cheap and they won't be cheap until lots of people buy them.
That is the beauty of Capitalism. The rich have more than enough money, and will be more likely to spend money on something new. Companies wanting to maximize profits, try and make production cheaper. When company X makes production cheaper than company Y, then Y undercuts X and yay cheaper products.
-
rolli59 I wonder if they will come out with a similar IPS 23-24" monitor, I find that is the perfect size for me.Reply -
rezzahd Honestly from what I can tell this display is worth the money you pay. I might just have to pick up two of these and see what I can't do with them.Reply -
clownbaby meh, meh, meh, meh, meh. Toms, please leave these bland, generic products on the shelves of staples and office max where they belong. There is NOTHING impressive, interesting, or even noteworthy about a 27" 1920x1080 monitor today. I don't care if it makes gremlins when wet. At that resolution and size, it's just not going to be a good looking screen. Reading text on 27" 1920x1080 monitors SUCKS.Reply
Aside from the fact that compared to the QHD monitors you can pick up for under $300 this is garbage, it's just a silly format. Dated resolution on a cheap panel that's too big. -
Bondfc11 I have 3 2560x1440 Overlord Tempests. Would NEVER use a 1080 panel again - especially an IPS. And TN panels? Forget it - IPS is so pretty at 1440.Reply -
rezzahd Reply11519571 said:meh, meh, meh, meh, meh. Toms, please leave these bland, generic products on the shelves of staples and office max where they belong. There is NOTHING impressive, interesting, or even noteworthy about a 27" 1920x1080 monitor today. I don't care if it makes gremlins when wet. At that resolution and size, it's just not going to be a good looking screen. Reading text on 27" 1920x1080 monitors SUCKS.
Aside from the fact that compared to the QHD monitors you can pick up for under $300 this is garbage, it's just a silly format. Dated resolution on a cheap panel that's too big.
I understand where you are come from bot not every is looking for an extreme like that. If I had one of those I wouldn't complain. The monitor I currently have is better than this one, but that doesn't mean I wouldn't use this monitor. Tom's I believe is just trying to cater to everyone they can. So i say this kind of review is good for everyone. -
jn77 This is a massive 27 inch monster sitting with in 12-18 inches of your face while sitting at a desk.Reply
Why on earth would anyone want 1920x1080 on a screen 27 inches diagonal? Are you looking for pot holes between the pixels?
The reason I say this is, I work with media all day, We currently create, edit and produce 4k video and store it for transfer to quad layer blu-ray disc's (200GB).
Also, if you use any digital camera over 8MP, you will get close to a 1:1 pixel ratio at 4K resolutions.
We want to see a continuous image and seeing the gaps between the pixels is distracting.
24 inch monitors should have a minimum 4k pixel resolution, 708 might be able to get away with 4k on a 27 inch, but 8k would be better.
Now, lets look at the other side, How much would a 24 inch 1920x1080 flat trinitron cost you back in the day? $6,000 ? $12,000?
