HP EliteDisplay E271i Review: Solid Performance From A 27" Screen
Can a business-class monitor work well for the entertainment-oriented? We discover the answer is yes if you’re using HP’s new EliteDisplay E271i 27-inch AH-IPS screen. Not only does it perform well, but it also offers some unique features and great value.
OSD Setup And Calibration
The E271i, unlike other HP monitors we’ve reviewed, has a full user menu with a typical set of calibration adjustments. There is only one picture mode, but settings do vary by input. You’ll need to calibrate each one you plan to use.
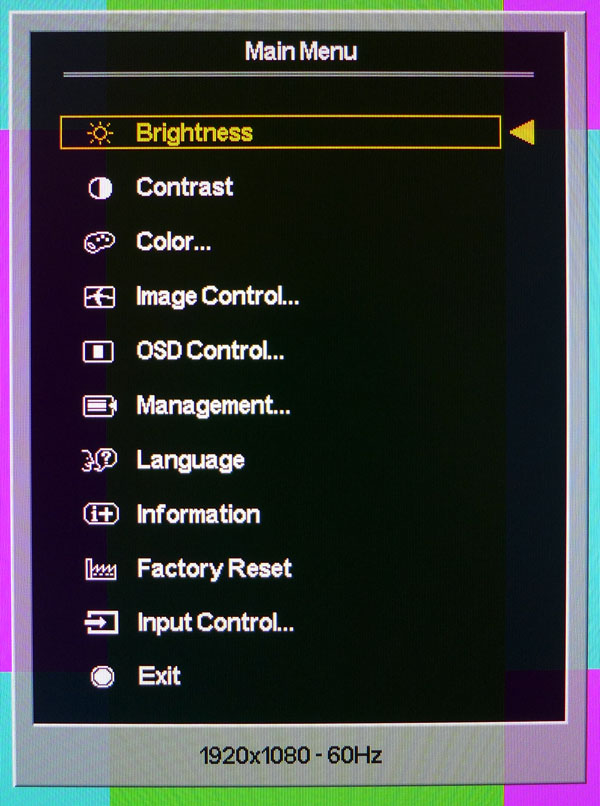
From the main menu, you can adjust brightness and contrast. The default settings correspond to around 280 cd/m2 of light output. Contrast is good at its default of 80, but you can increase it to 91 before any loss of information (clipping) occurs. This improves the E271i’s contrast ratio greatly, as you’ll see in our tests.
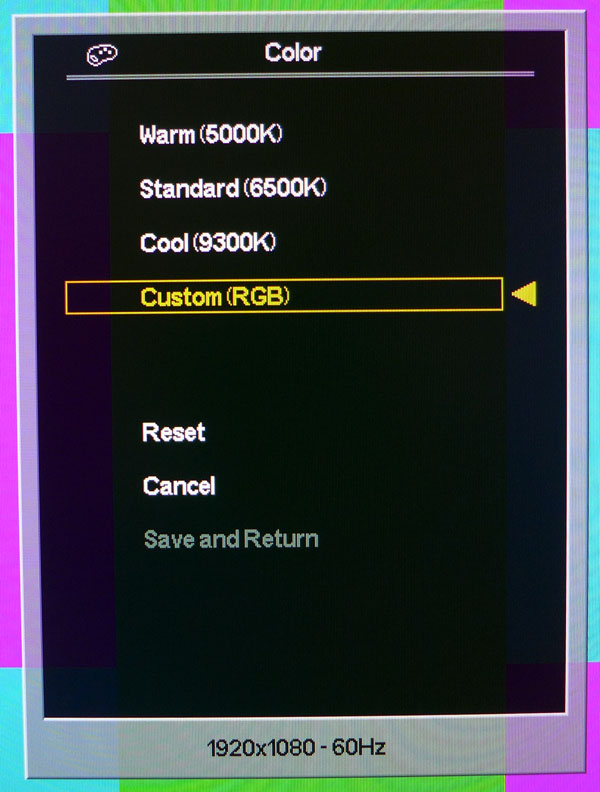
The Color menu has the temperature presets. Standard is very close to the correct 6500K white point. If you plan to calibrate, Custom mode matches the 6500K preset, making it a good starting point.
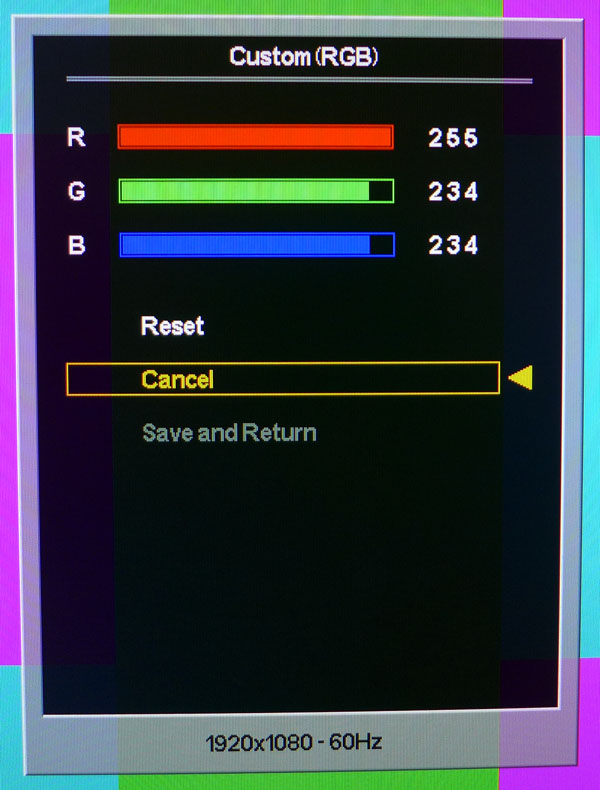
Here are the RGB sliders for setting the white point. They begin at their maximum settings, which is only slightly inconvenient. It's easier to calibrate when the sliders start at their midpoint, giving you more flexibility in dialing in a precise color temperature.
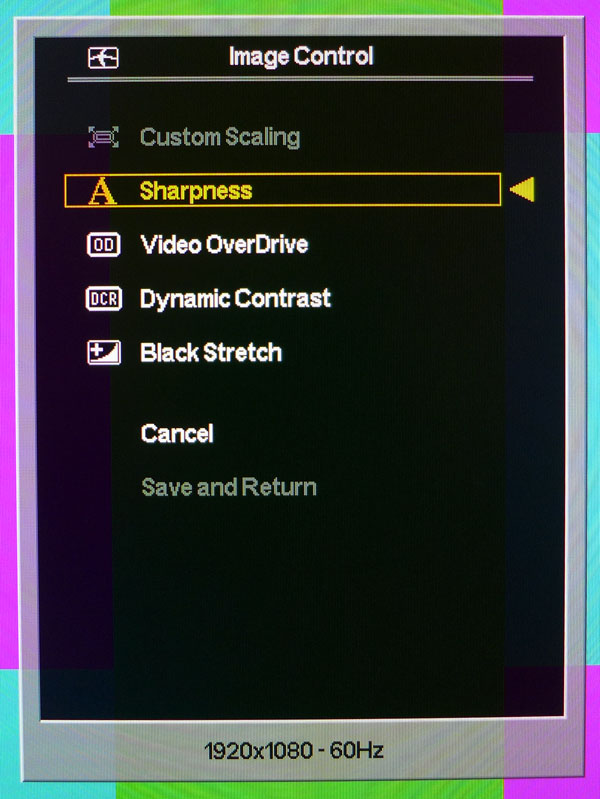
There is a Sharpness adjustment in the Image Control menu, which isn't very common on computer monitors. We would typically set it to zero, but in this case, that actually softens the image. We returned it to its default setting of four. Higher settings caused obvious ringing and edge enhancement in the picture. This is most easily seen as white outlines around black objects. Black Stretch simply raises the minimum black level as you turn it up (there are three settings, plus Off). We got the best gamma results with that control set on Low. Video Overdrive reduces the screen draw time, so it’s best to max it out at 100. Dynamic Contrast plays havoc with gamma and brightness, and not in a good way. In the rapidly shifting content common to movies and games, you can see light levels shift as the image changes. Although this feature is a great way to pump up a contrast ratio measurement, it has no performance benefit in actual use. It’s turned off by default and we recommend leaving it that way.
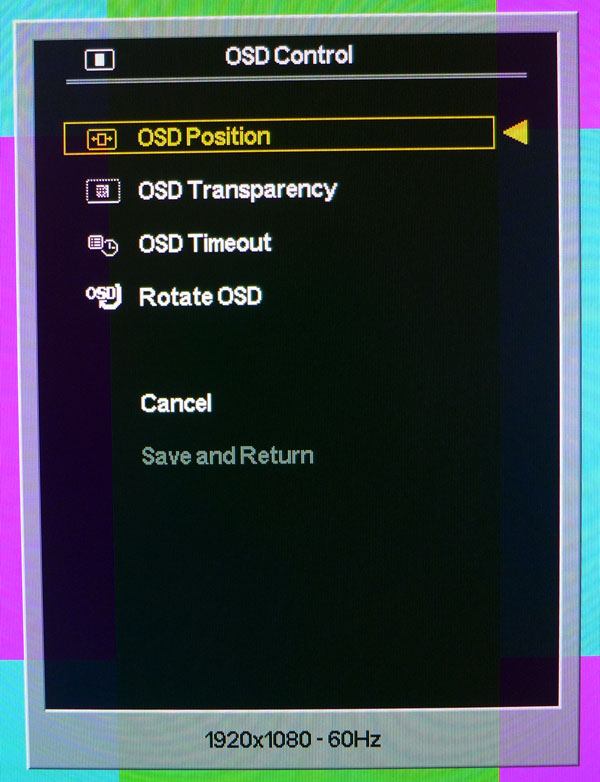
These are the typical controls for the OSD found on most monitors. If you plan to measure at the center of the screen, you can move the menu to a corner, getting it out of the way of your test patterns. It’s also helpful to max the timeout so the menu stays visible as you're making your adjustments. If you want to leave the E271i in portrait mode, you can rotate the OSD as well, since it won't turn with the monitor's physical orientation.
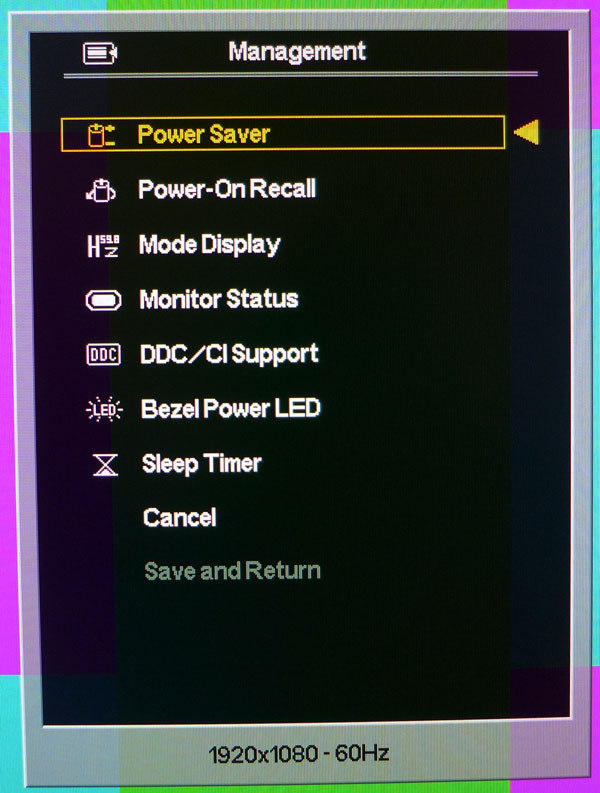
The Management menu contains everything else not already addressed in the other menus. Power Saver is either on or off, and shuts down the monitor when no signal is detected. Power-On Recall (on by default) restores settings every time you power up. Obviously, you don’t want to turn that one off! Mode Display toggles the signal information that pops up when you change resolutions or refresh rates. Monitor Status tells the E271i where to display the info window that appears at start-up. DDC/CI stands for Display Data Channel/Command Interface, and it allows your video card to change image parameters. This should be left on to allow calibration adjustments, rotate commands, and other instructions to come from your computer. If you want to turn the power LED off, you can do that as well. And Sleep Timer shuts down the panel after a user-specified time period.
Get Tom's Hardware's best news and in-depth reviews, straight to your inbox.
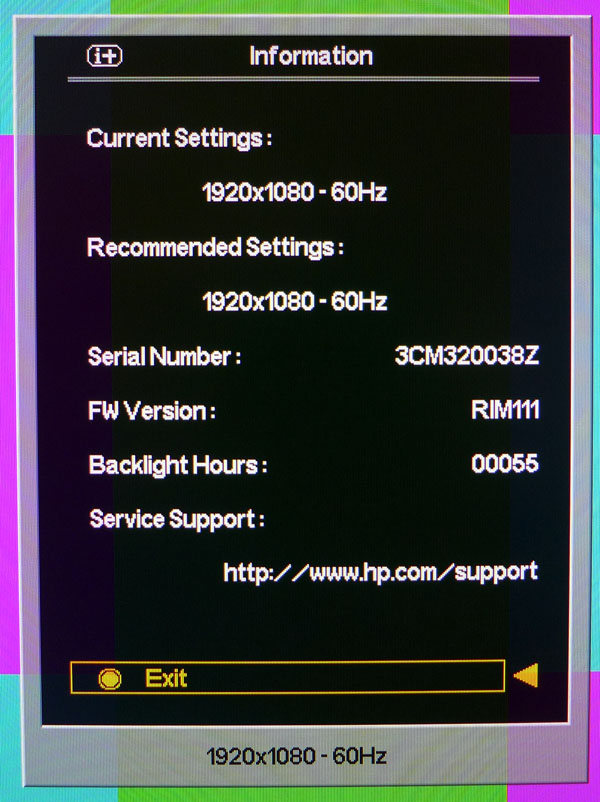
This is the E271i’s signal information screen. A similar window pops up when you power on or change inputs.
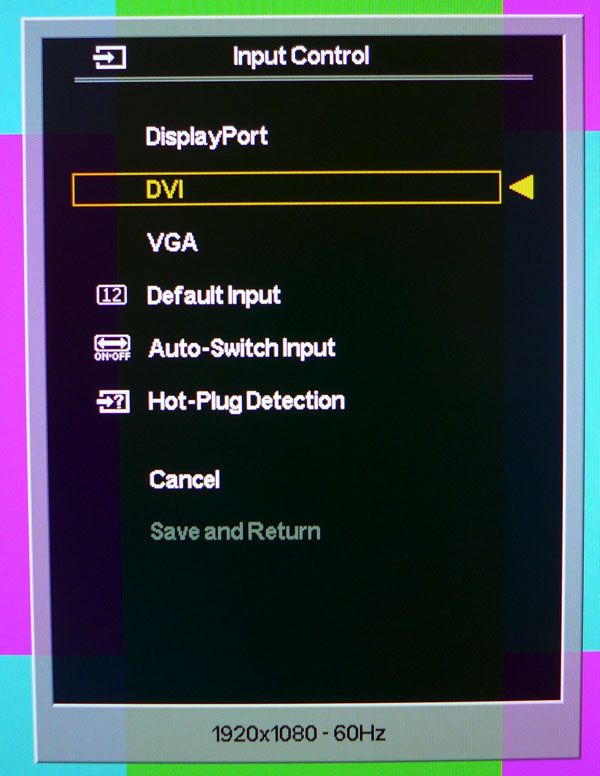
You can change inputs manually through the menu, too. Auto-Switch is on by default, and the feature didn't have any trouble detecting the sources we used. Or, you can lock a single input as the default. And Hot-Plug Detection senses a video signal when you plug into an input. You can set this to Low Power or Always On. For us, the Low Power mode worked fine.
Calibration was pretty easy on the E271i. The RGB sliders required very little adjustment to dial in a white point with a Delta E error under one. In fact, the only thing we missed was a gamma control (which, it turns out, is sorely needed). We hoped that Black Stretch might improve the below-average gamma measurements we observed, but it didn’t. Here are the settings we ended up using:
| HP E271i Calibration Settings | |
|---|---|
| Contrast | 91 |
| Brightness | 57 |
| Color Temp | User |
| RGB | Red 255 / Green 234 / Blue 234 |
| Sharpness | 4 |
| Black Stretch | Low |
Current page: OSD Setup And Calibration
Prev Page HP Display Assistant: Monitor Control From The Desktop Next Page Measurement And Calibration Methodology: How We Test
Christian Eberle is a Contributing Editor for Tom's Hardware US. He's a veteran reviewer of A/V equipment, specializing in monitors. Christian began his obsession with tech when he built his first PC in 1991, a 286 running DOS 3.0 at a blazing 12MHz. In 2006, he undertook training from the Imaging Science Foundation in video calibration and testing and thus started a passion for precise imaging that persists to this day. He is also a professional musician with a degree from the New England Conservatory as a classical bassoonist which he used to good effect as a performer with the West Point Army Band from 1987 to 2013. He enjoys watching movies and listening to high-end audio in his custom-built home theater and can be seen riding trails near his home on a race-ready ICE VTX recumbent trike. Christian enjoys the endless summer in Florida where he lives with his wife and Chihuahua and plays with orchestras around the state.
-
Someone Somewhere I'd like to see what the difference in the actual manufacturing costs/panel prices are for QHD vs FHD for large screens - pixel density is certainly not a problem.Reply
I'd guess it's merely a chicken/egg issue - people won't buy high-res screens until they are cheap and they won't be cheap until lots of people buy them. -
realibrad Reply11518024 said:I'd like to see what the difference in the actual manufacturing costs/panel prices are for QHD vs FHD for large screens - pixel density is certainly not a problem.
I'd guess it's merely a chicken/egg issue - people won't buy high-res screens until they are cheap and they won't be cheap until lots of people buy them.
That is the beauty of Capitalism. The rich have more than enough money, and will be more likely to spend money on something new. Companies wanting to maximize profits, try and make production cheaper. When company X makes production cheaper than company Y, then Y undercuts X and yay cheaper products.
-
rolli59 I wonder if they will come out with a similar IPS 23-24" monitor, I find that is the perfect size for me.Reply -
rezzahd Honestly from what I can tell this display is worth the money you pay. I might just have to pick up two of these and see what I can't do with them.Reply -
clownbaby meh, meh, meh, meh, meh. Toms, please leave these bland, generic products on the shelves of staples and office max where they belong. There is NOTHING impressive, interesting, or even noteworthy about a 27" 1920x1080 monitor today. I don't care if it makes gremlins when wet. At that resolution and size, it's just not going to be a good looking screen. Reading text on 27" 1920x1080 monitors SUCKS.Reply
Aside from the fact that compared to the QHD monitors you can pick up for under $300 this is garbage, it's just a silly format. Dated resolution on a cheap panel that's too big. -
Bondfc11 I have 3 2560x1440 Overlord Tempests. Would NEVER use a 1080 panel again - especially an IPS. And TN panels? Forget it - IPS is so pretty at 1440.Reply -
rezzahd Reply11519571 said:meh, meh, meh, meh, meh. Toms, please leave these bland, generic products on the shelves of staples and office max where they belong. There is NOTHING impressive, interesting, or even noteworthy about a 27" 1920x1080 monitor today. I don't care if it makes gremlins when wet. At that resolution and size, it's just not going to be a good looking screen. Reading text on 27" 1920x1080 monitors SUCKS.
Aside from the fact that compared to the QHD monitors you can pick up for under $300 this is garbage, it's just a silly format. Dated resolution on a cheap panel that's too big.
I understand where you are come from bot not every is looking for an extreme like that. If I had one of those I wouldn't complain. The monitor I currently have is better than this one, but that doesn't mean I wouldn't use this monitor. Tom's I believe is just trying to cater to everyone they can. So i say this kind of review is good for everyone. -
jn77 This is a massive 27 inch monster sitting with in 12-18 inches of your face while sitting at a desk.Reply
Why on earth would anyone want 1920x1080 on a screen 27 inches diagonal? Are you looking for pot holes between the pixels?
The reason I say this is, I work with media all day, We currently create, edit and produce 4k video and store it for transfer to quad layer blu-ray disc's (200GB).
Also, if you use any digital camera over 8MP, you will get close to a 1:1 pixel ratio at 4K resolutions.
We want to see a continuous image and seeing the gaps between the pixels is distracting.
24 inch monitors should have a minimum 4k pixel resolution, 708 might be able to get away with 4k on a 27 inch, but 8k would be better.
Now, lets look at the other side, How much would a 24 inch 1920x1080 flat trinitron cost you back in the day? $6,000 ? $12,000?
