Razer BlackWidow Chroma (Origin PC Edition) And BlackWidow Ultimate 2016 Review
We review the full-featured Razer BlackWidow Chroma (Origin PC Edition) and the slightly less full-featured Razer BlackWidow Ultimate.
Why you can trust Tom's Hardware
Teardown
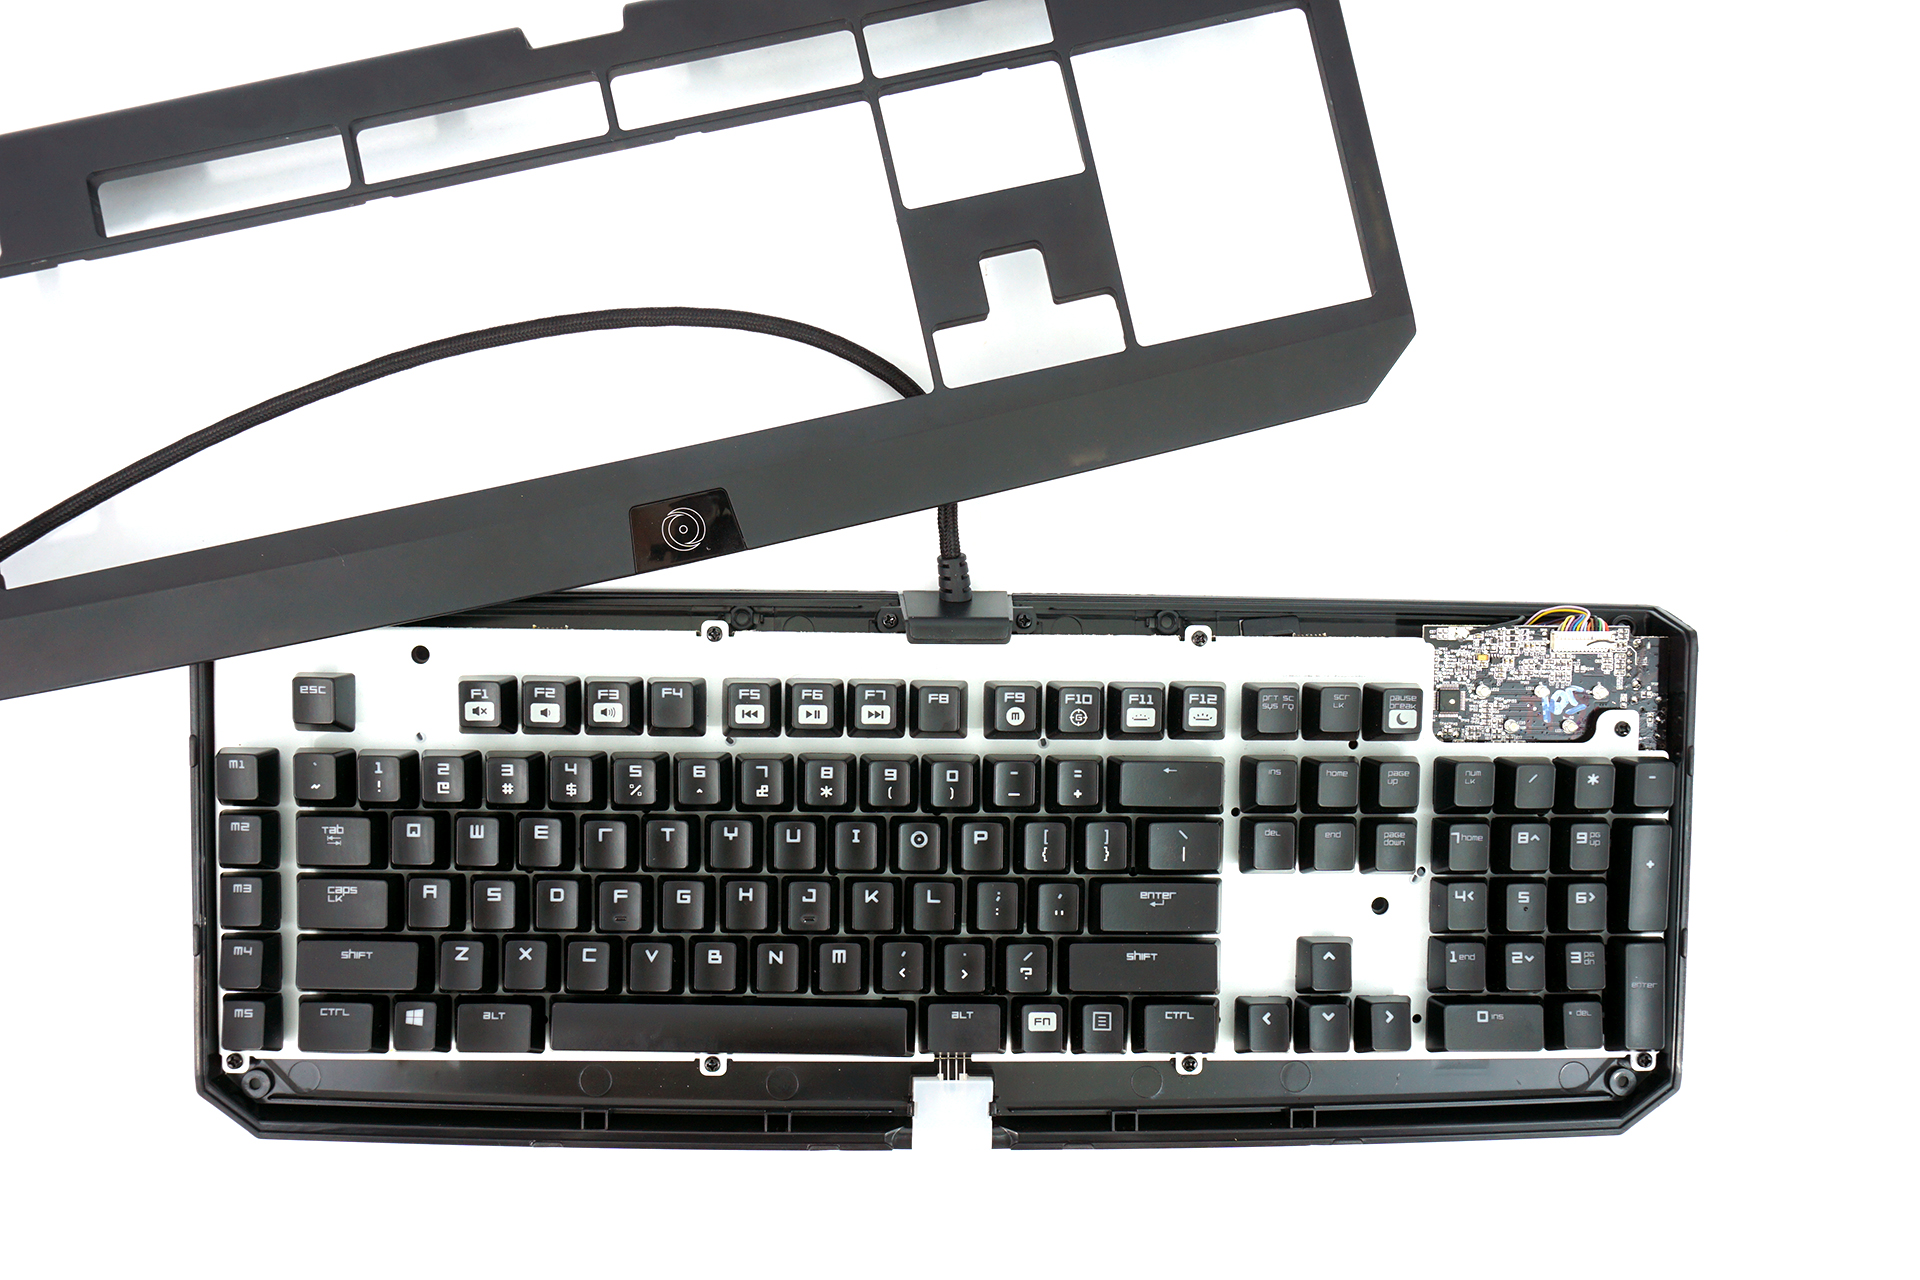
We take apart all of the keyboards we review to have a closer look at their build quality. Some keyboards are more friendly to teardown than others (which is neither positive nor negative), and the BlackWidow Chroma is one that you should not disassemble at home. The risk for breakage of the top cover is high. But we did it anyway, because it's what we do, for you our dear readers.
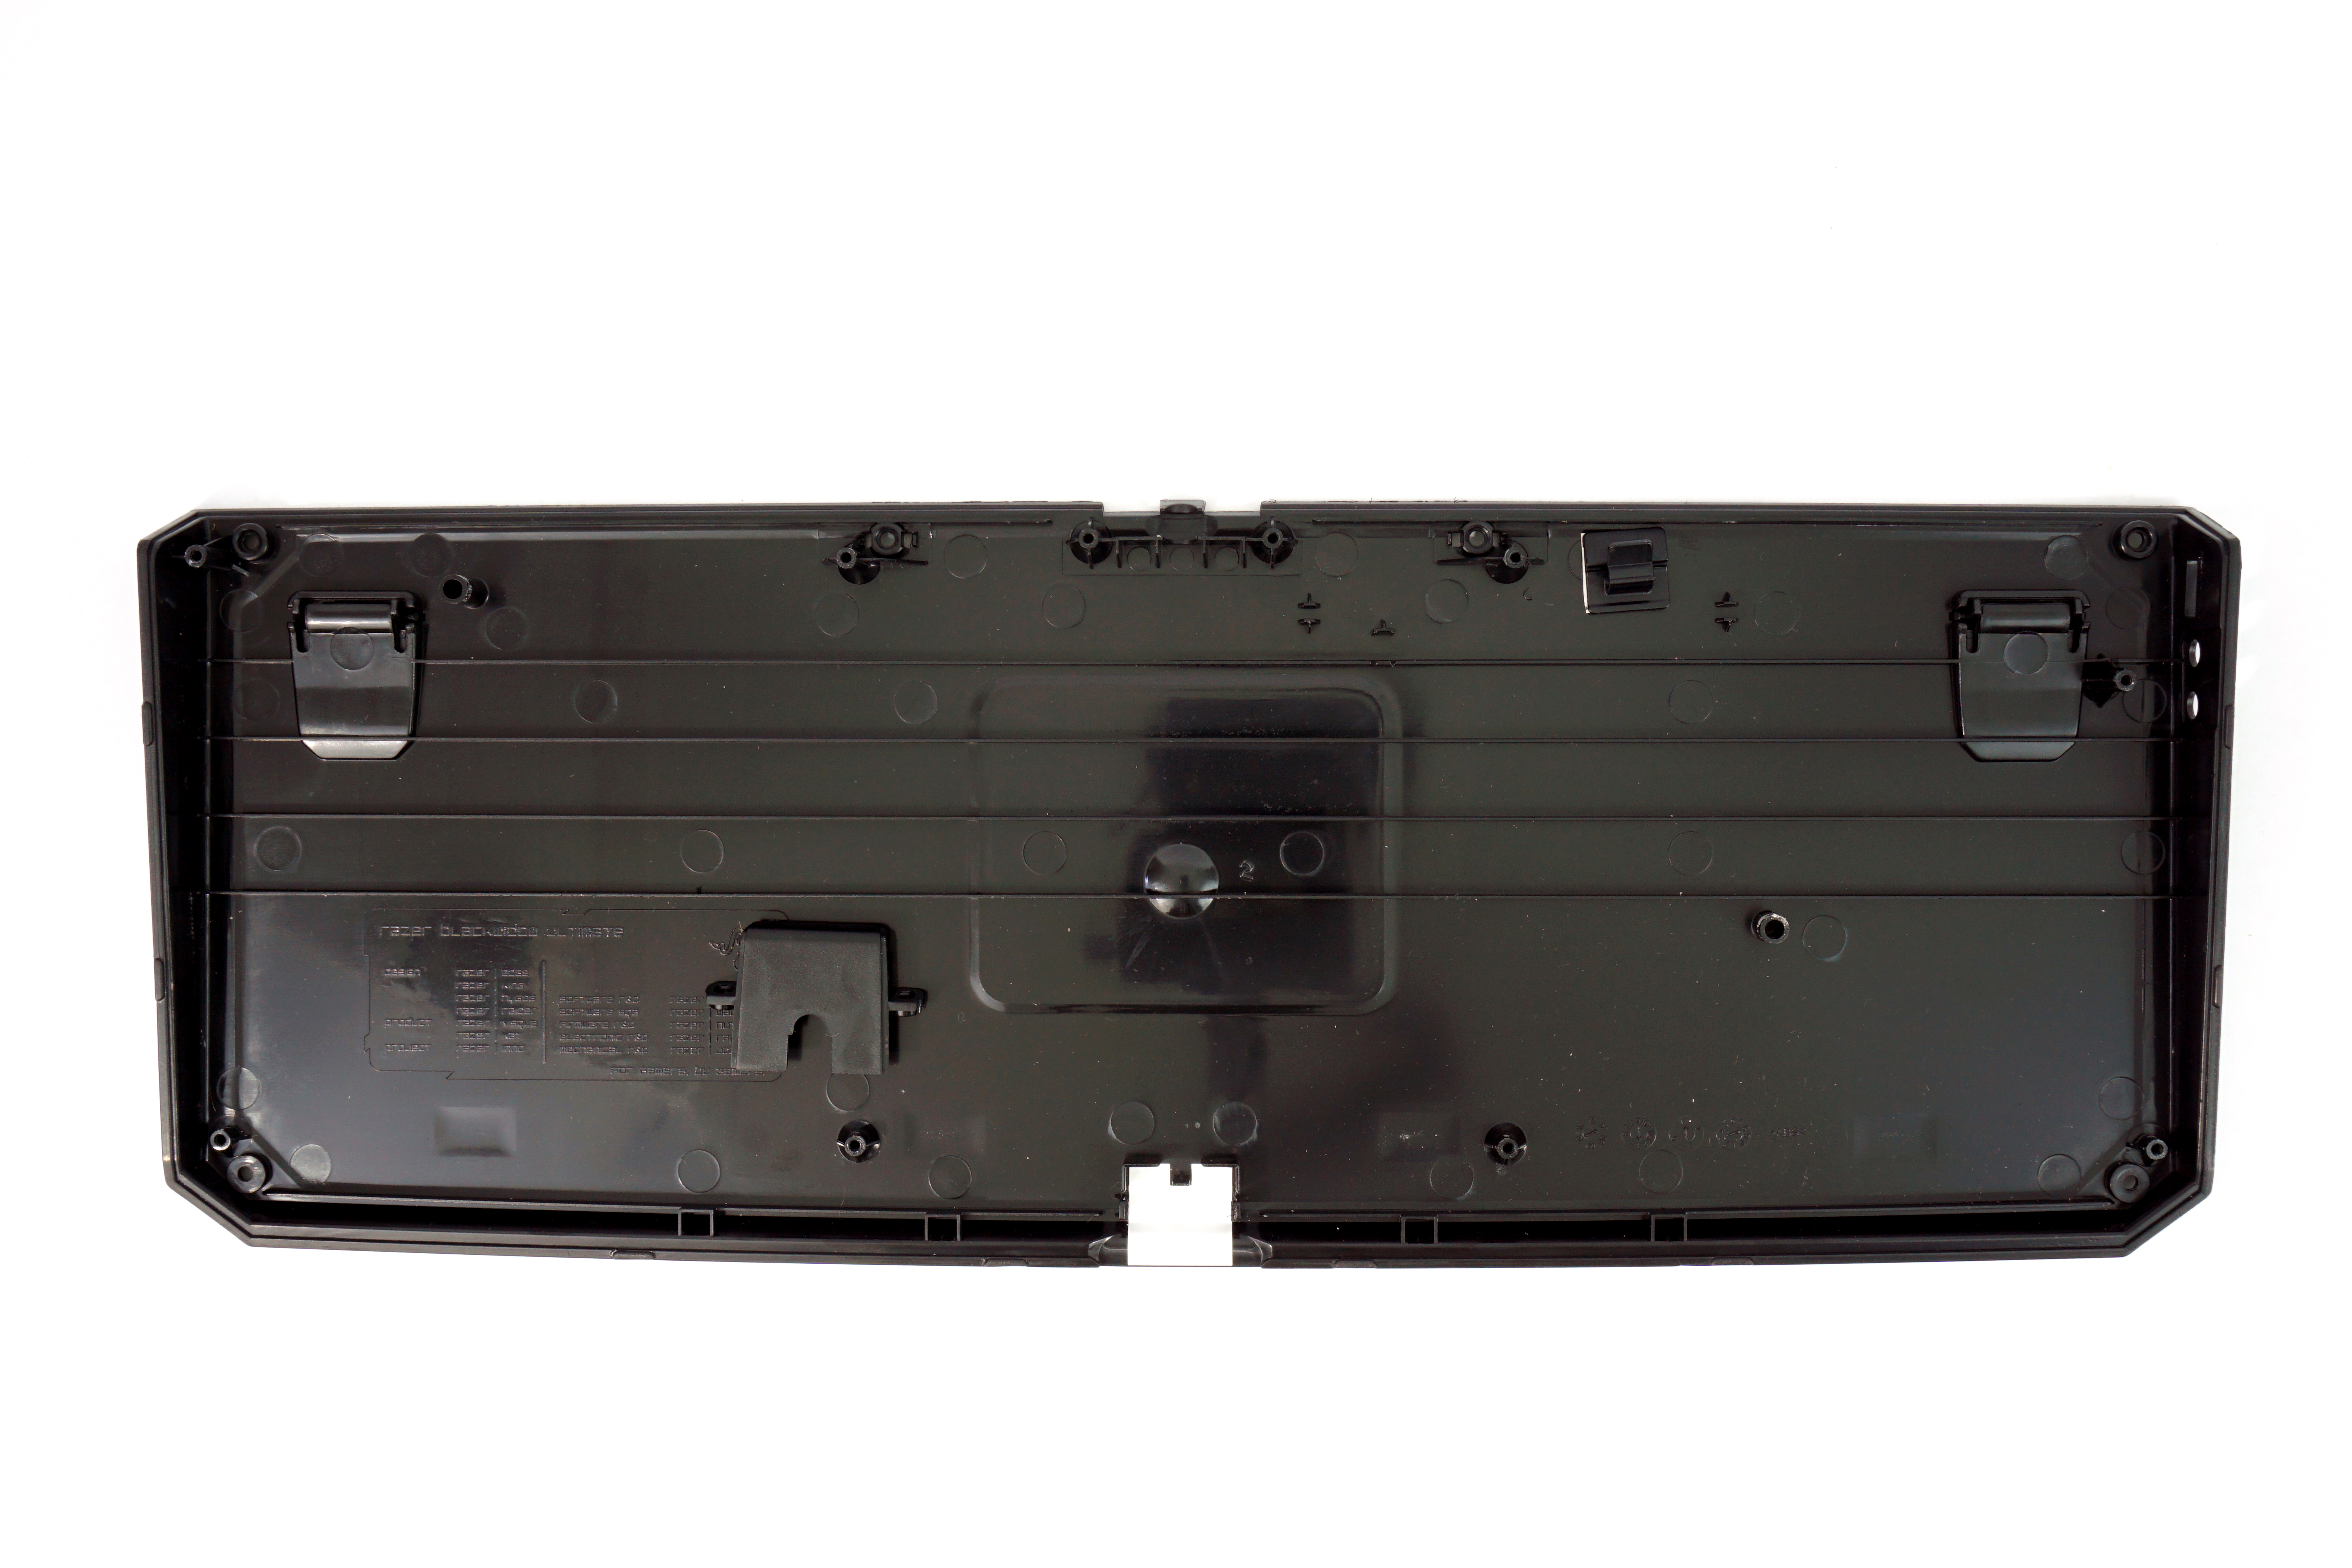
First, we located the screws. Razer kept them cleverly hidden under the rubber feet, presumably for aesthetic reasons, so you have to pry them off to get to the screws. The adhesive used to keep the little feet attached is strong.
There are six screws total holding on the top panel. Even with them removed, it's tricky surgery to wiggle the top panel off without breaking it. However, there are barely-perceptible notches dotting the edge of the panel that will let you slide in a small flathead screwdriver (or knife blade, whatever works for you) and leverage things loose.
With the top panel gone, I had to remove eight more screws and apply some gentle wiggling to get the full switch assembly unattached from the back of the chassis. Two more screws freed the cable assembly, which uses a piece of plastic that's screwed into the back of the chassis to hold the cable in place.
Bless Razer for using screws throughout that are all the same size.
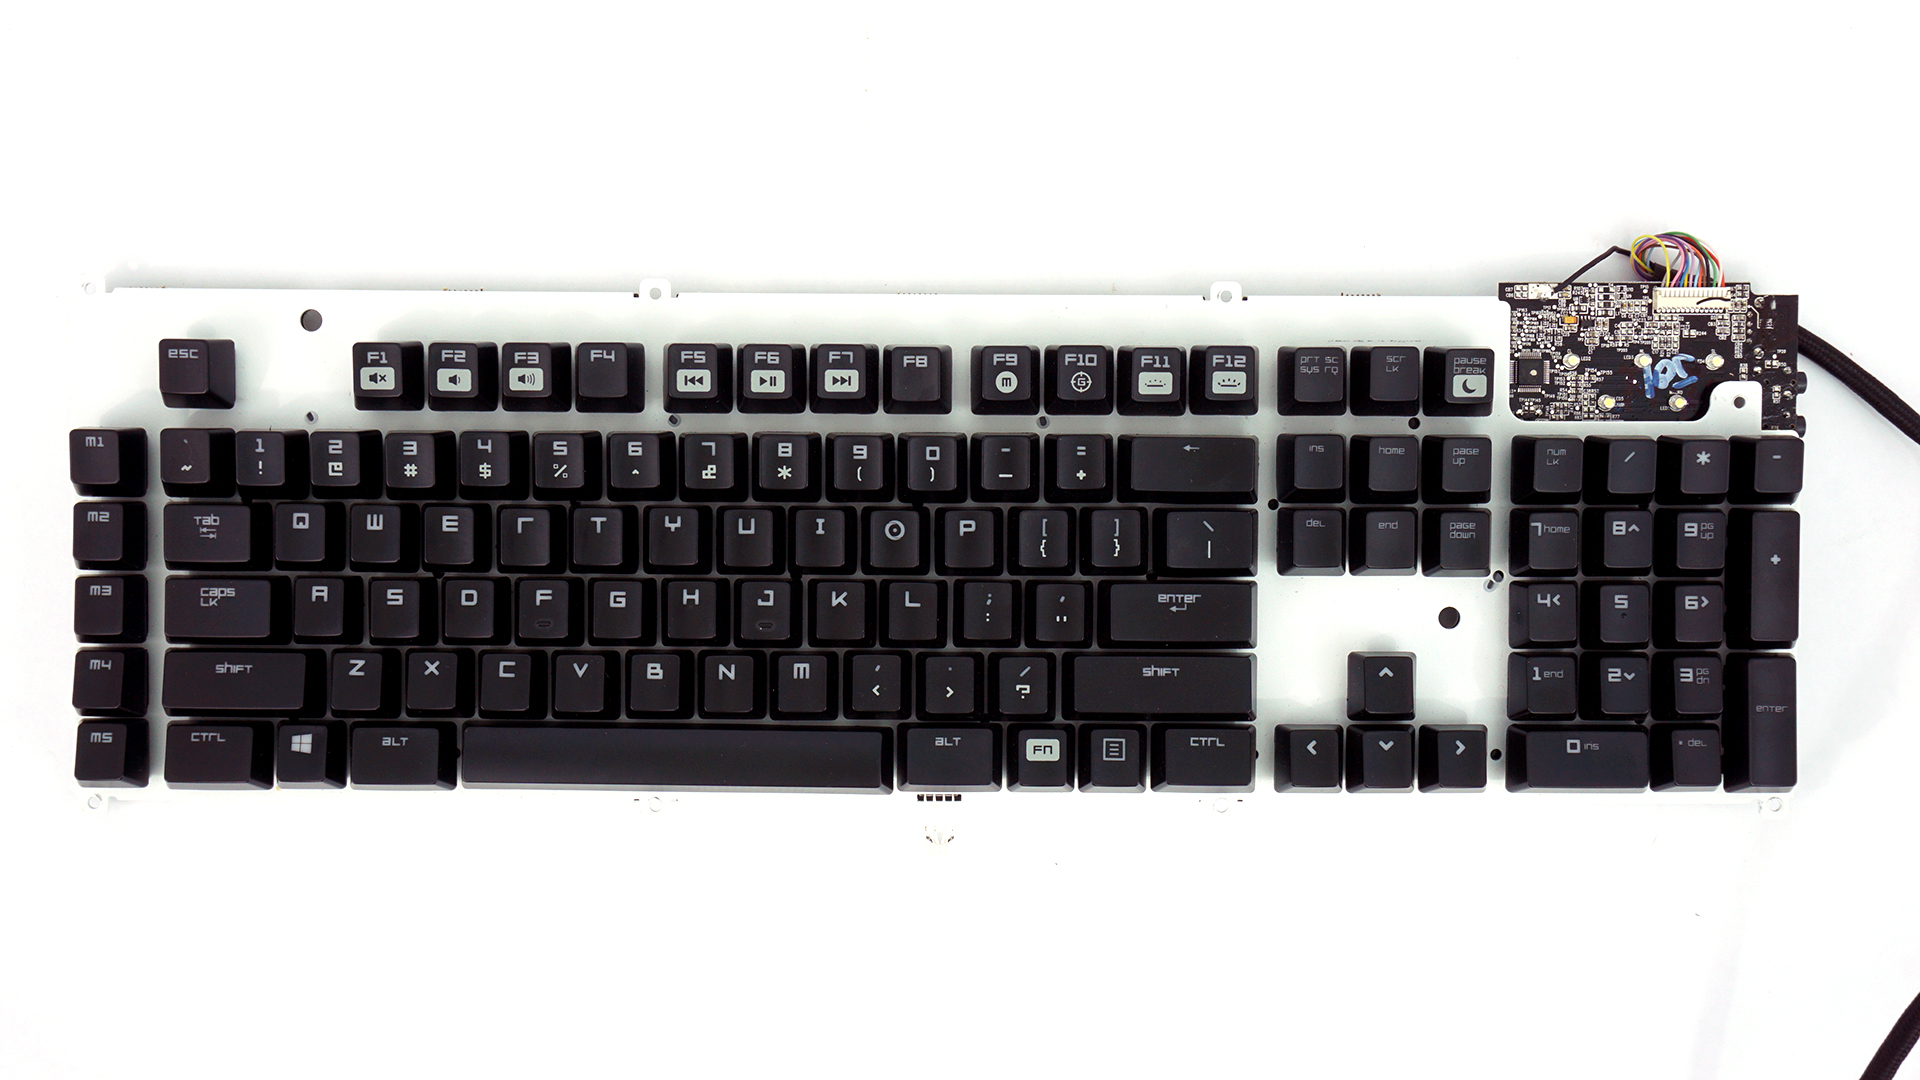
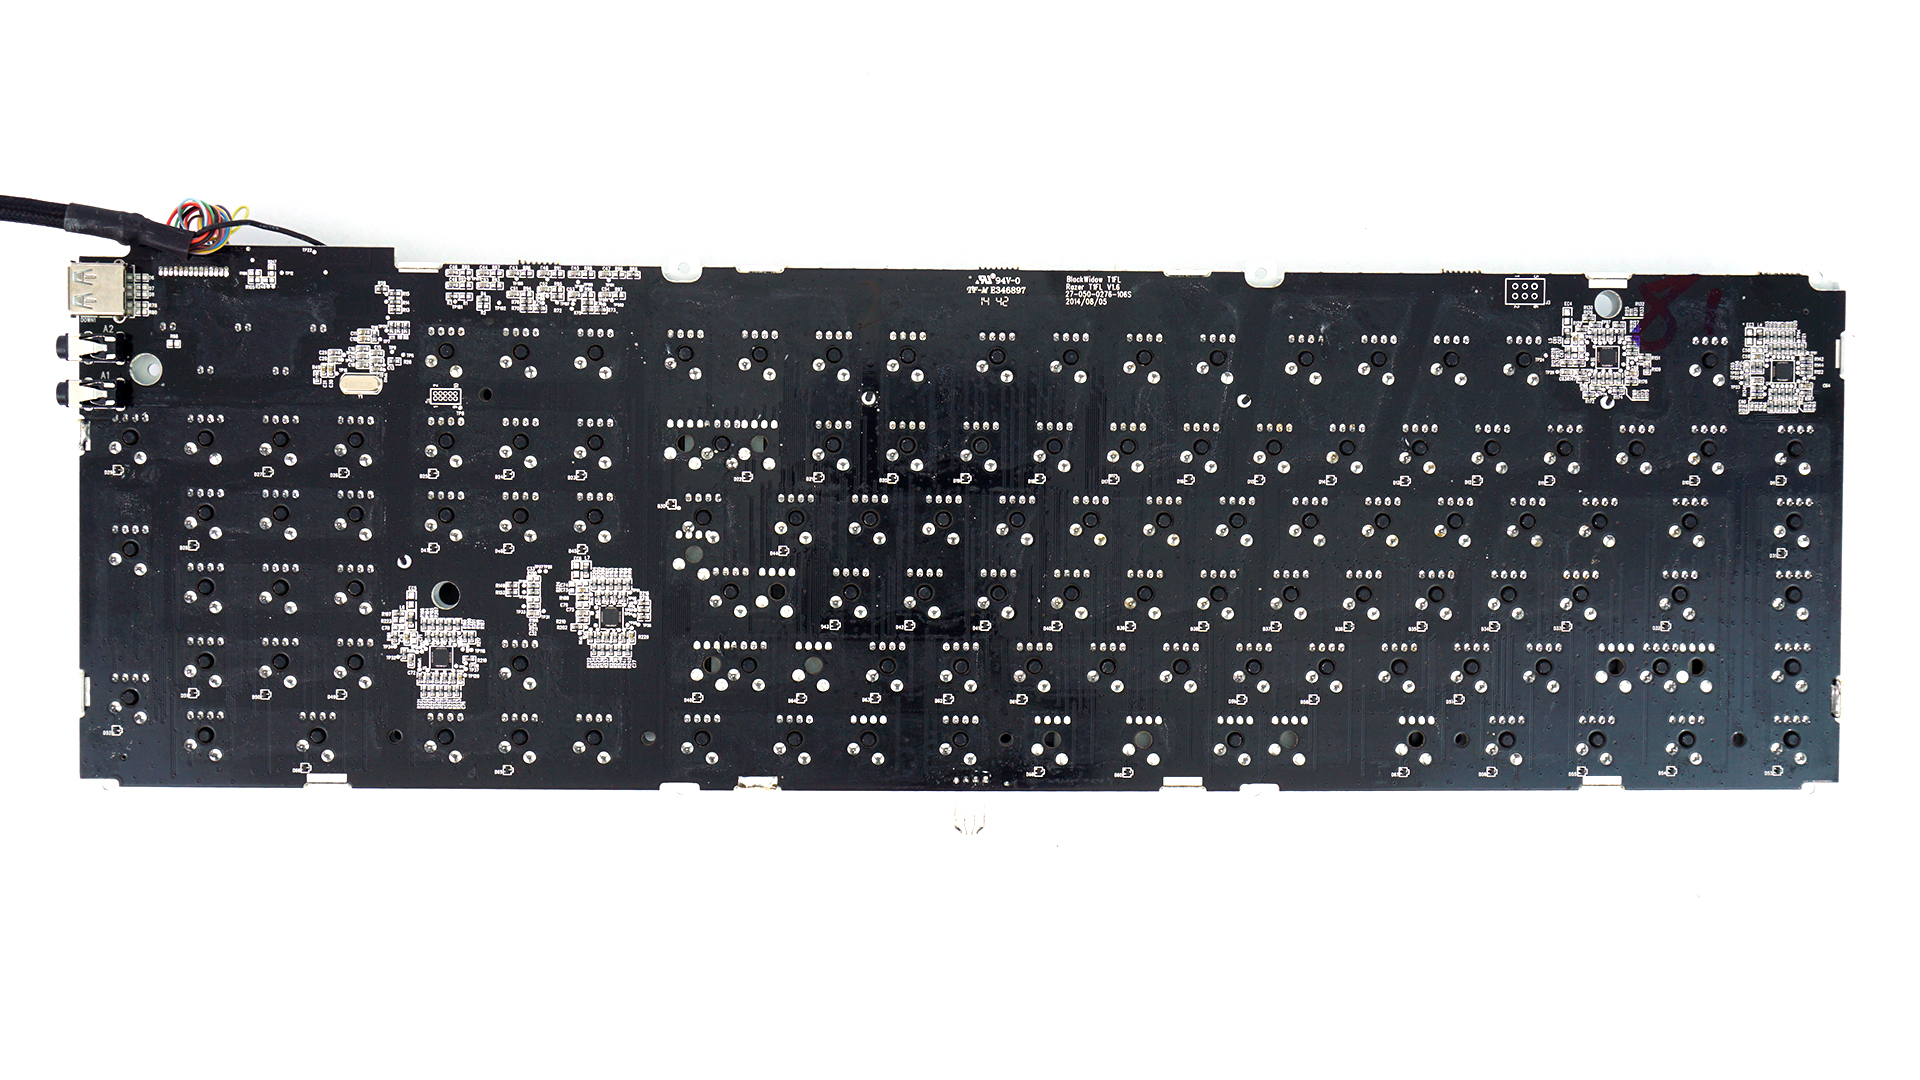
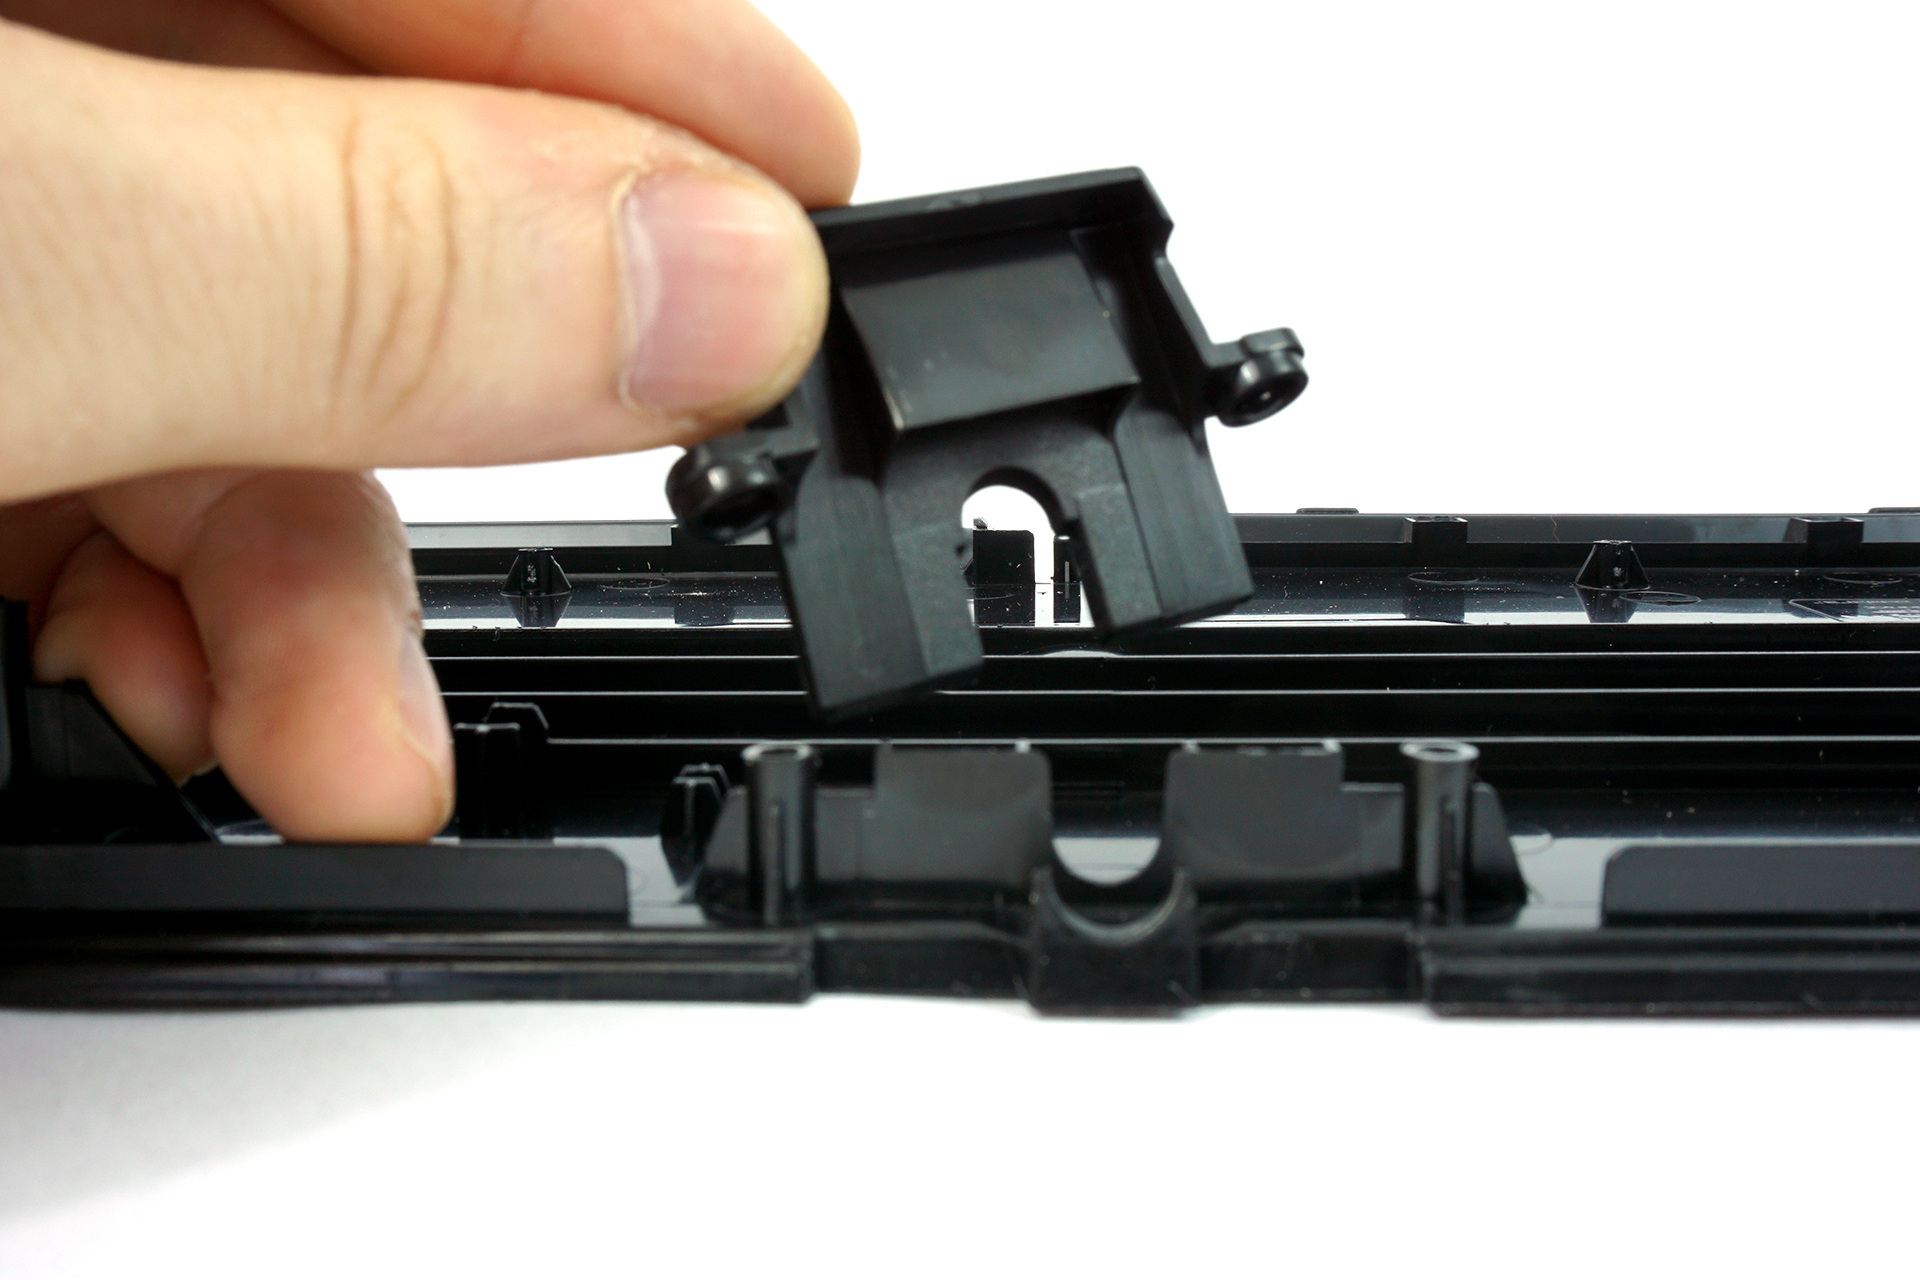
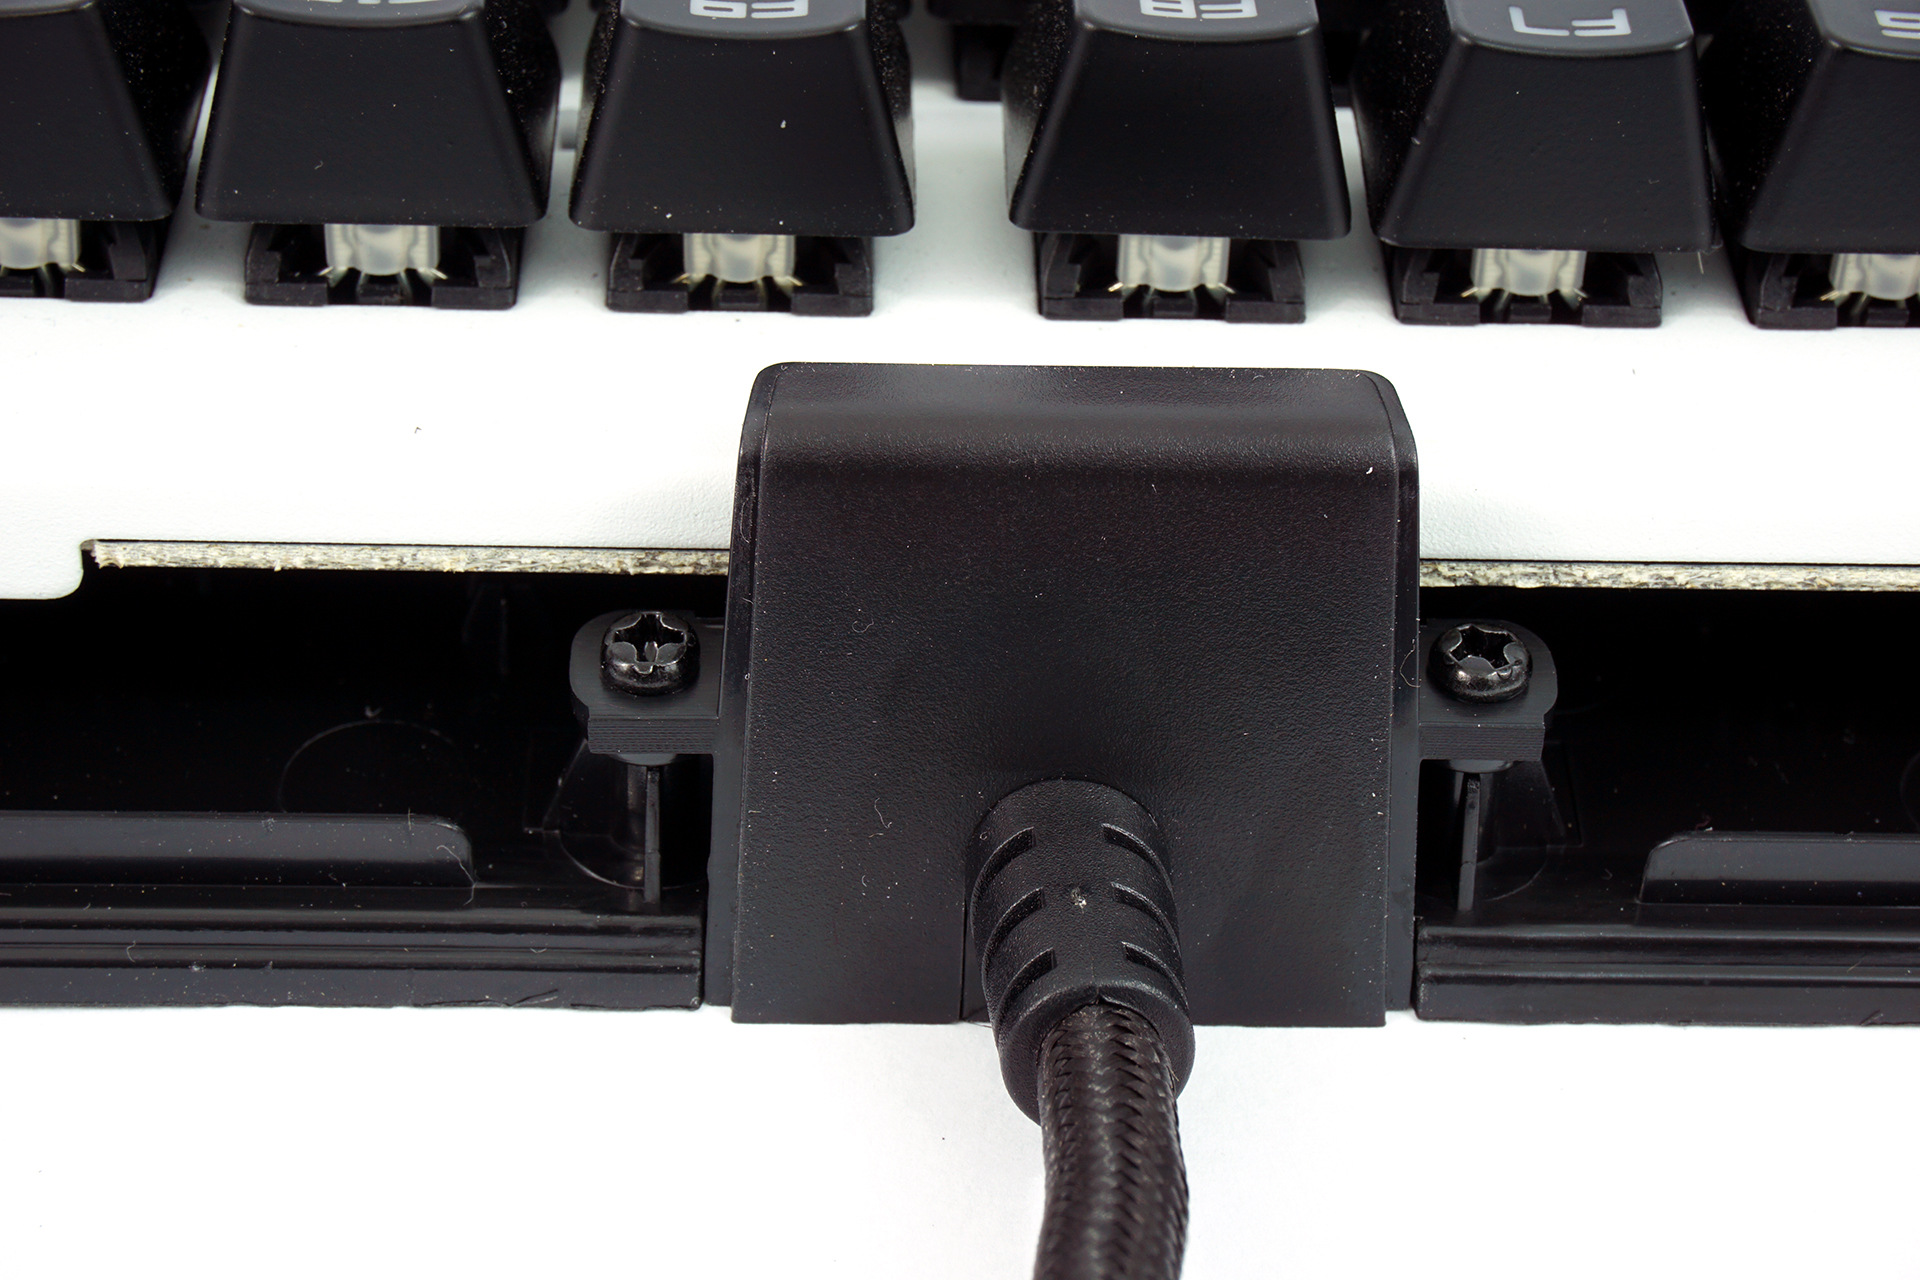
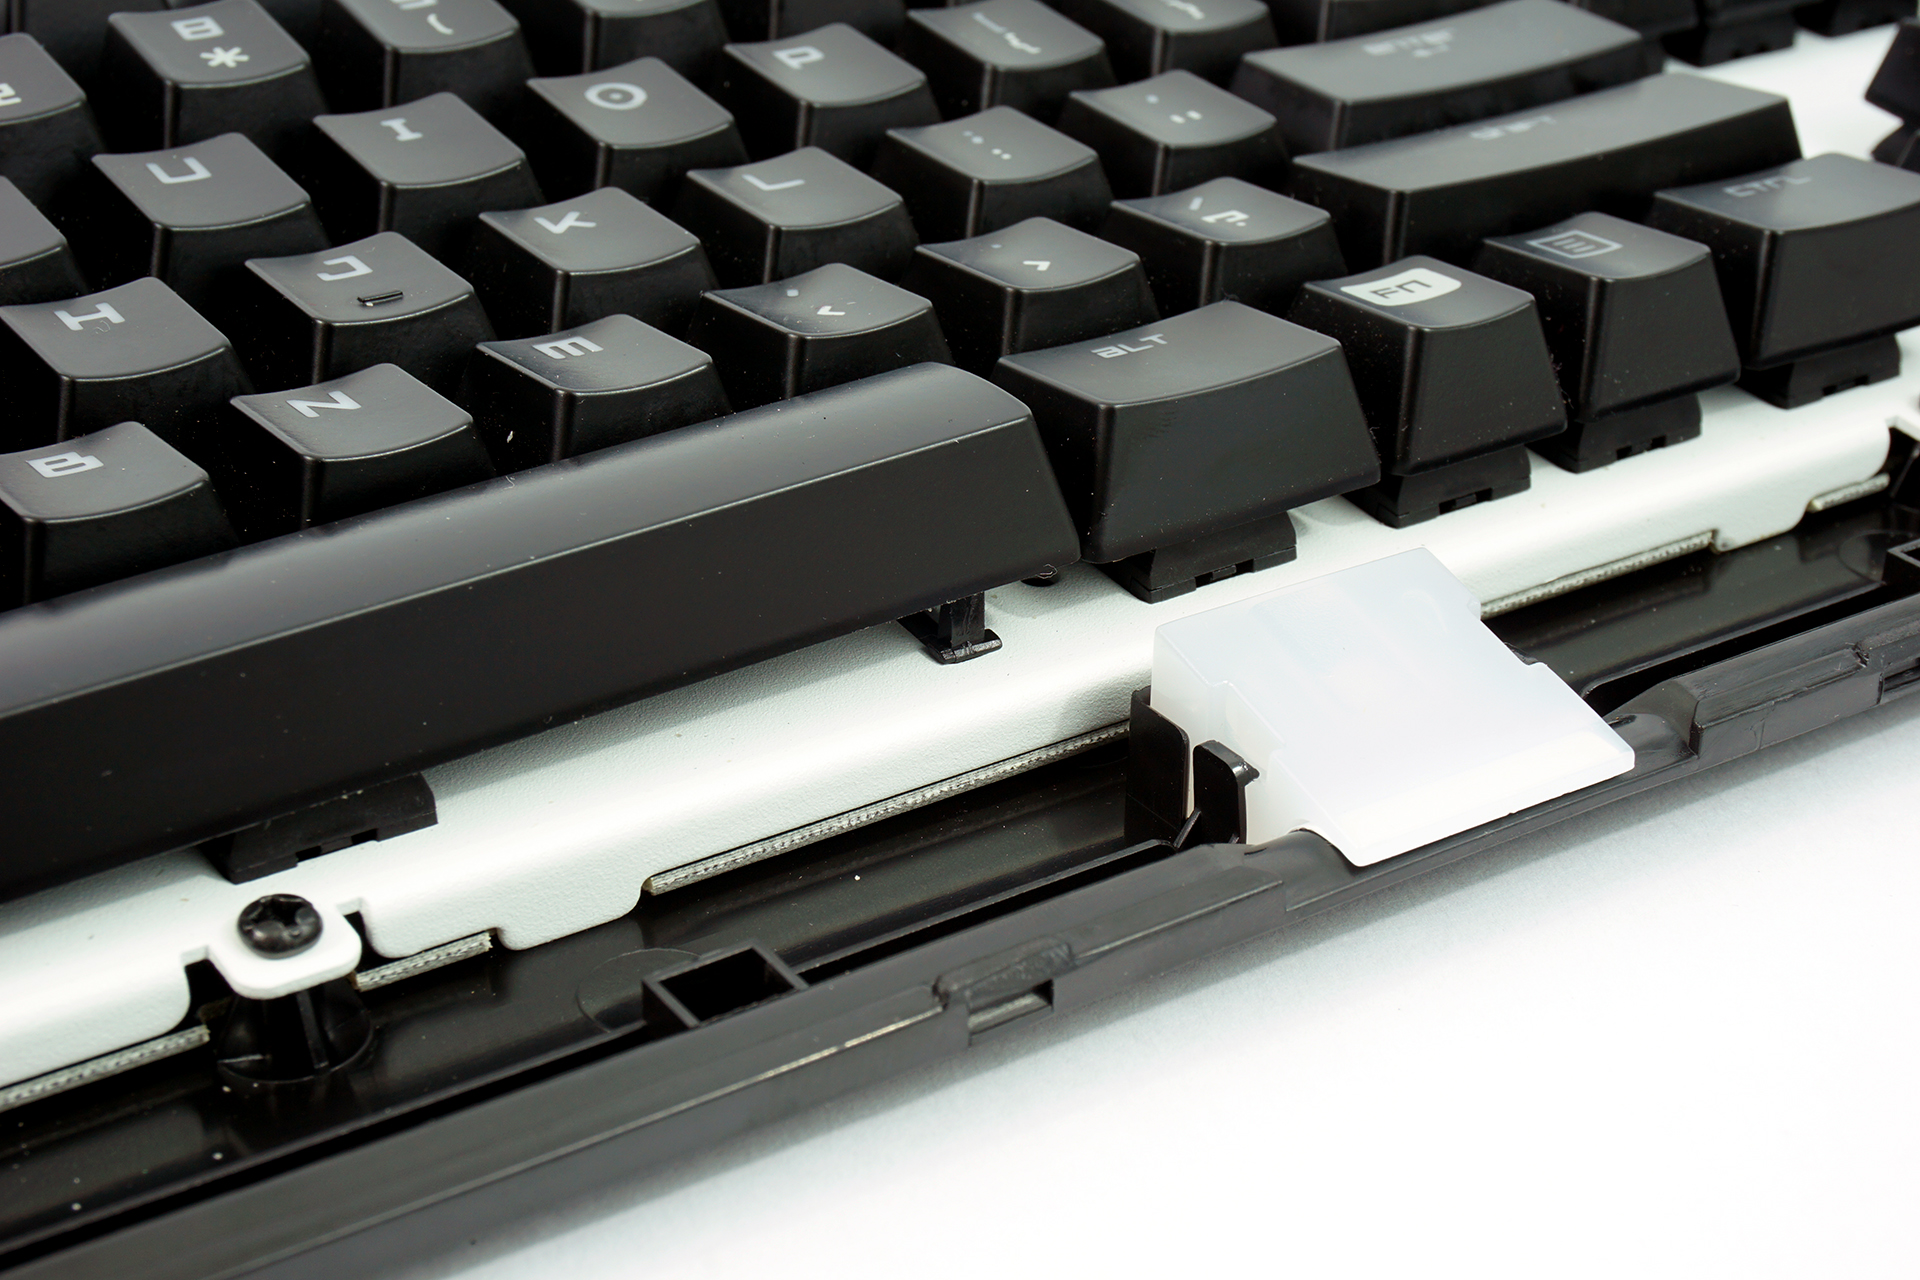
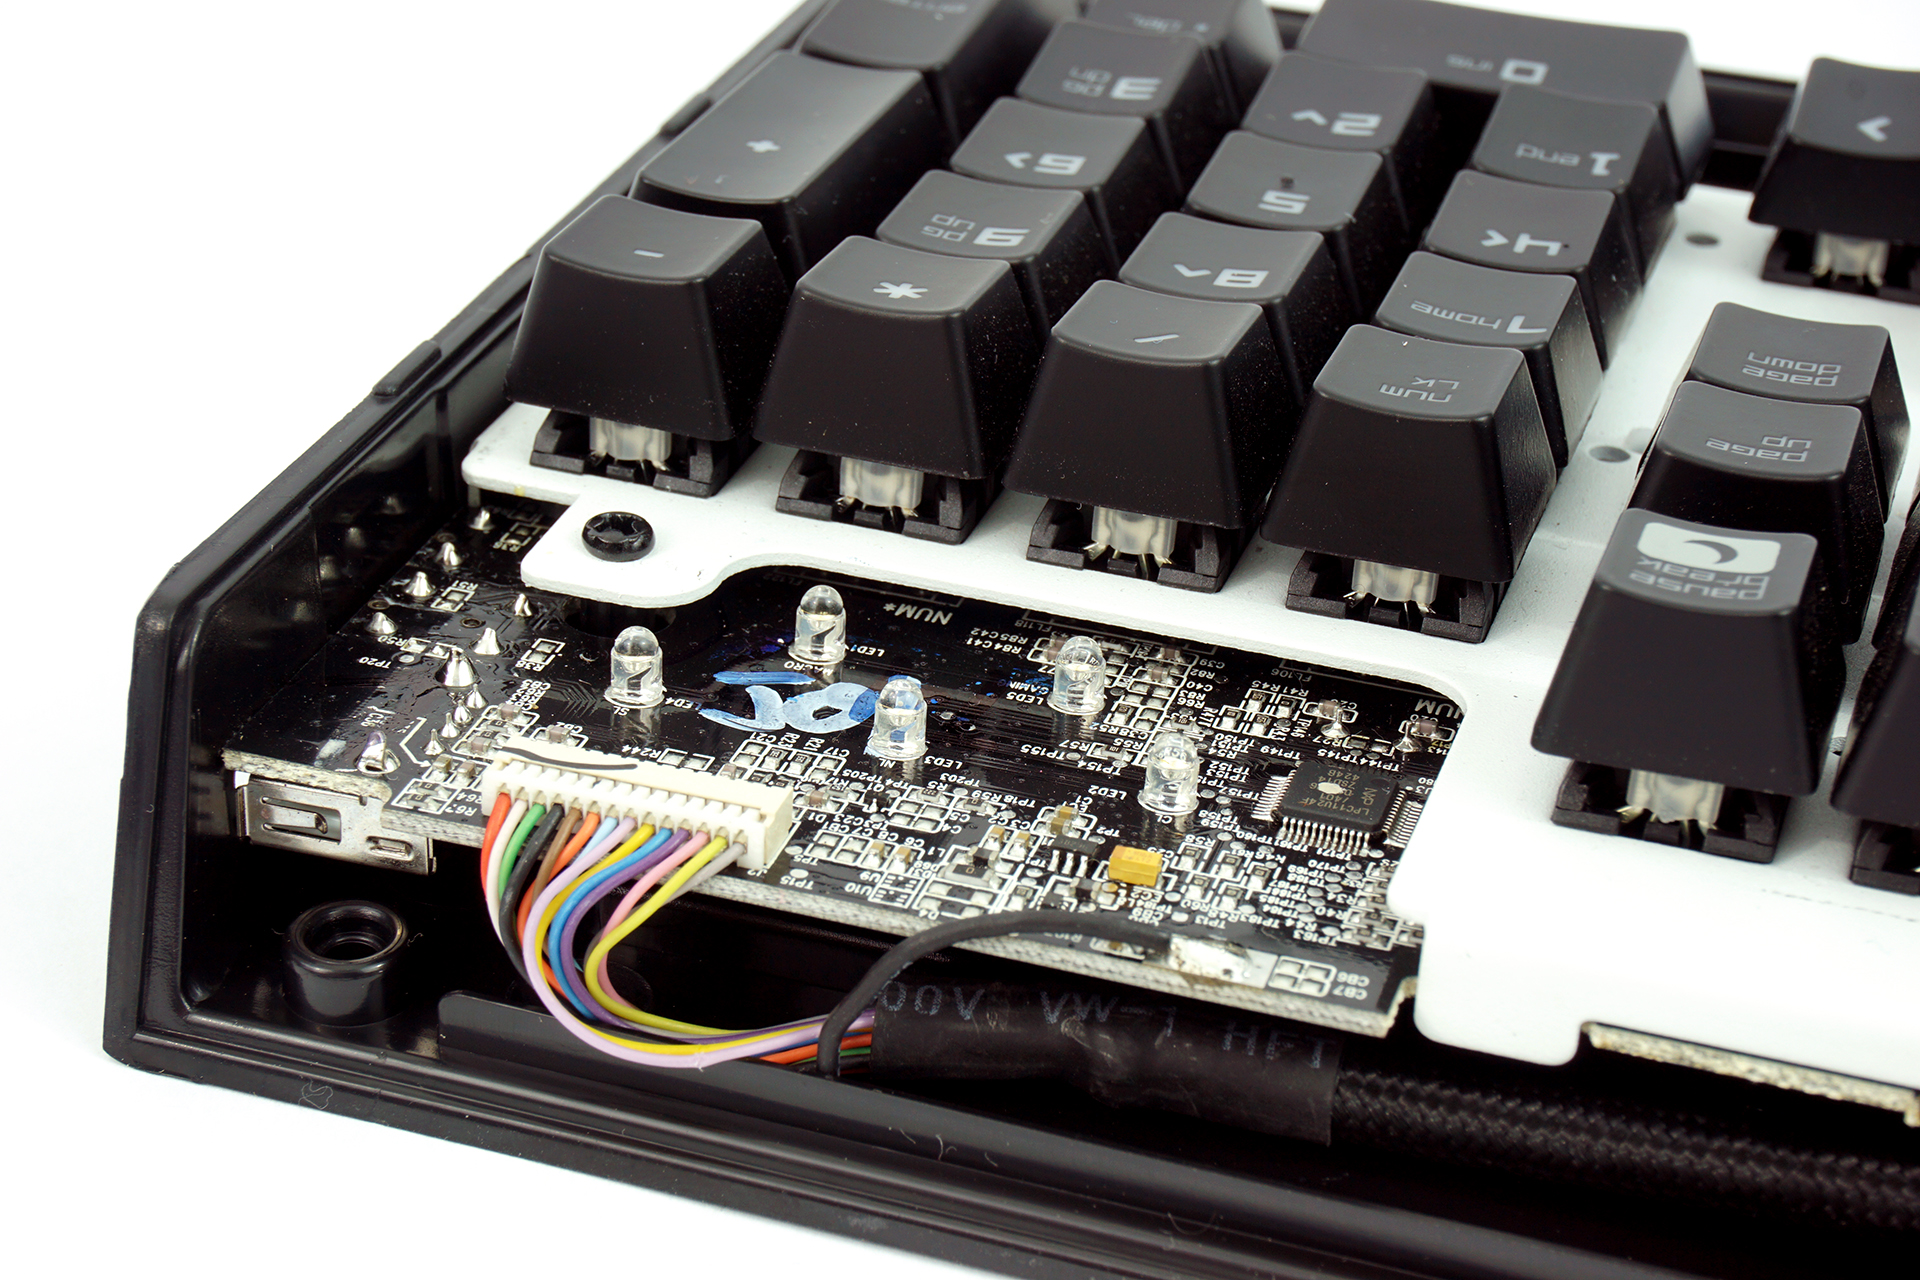
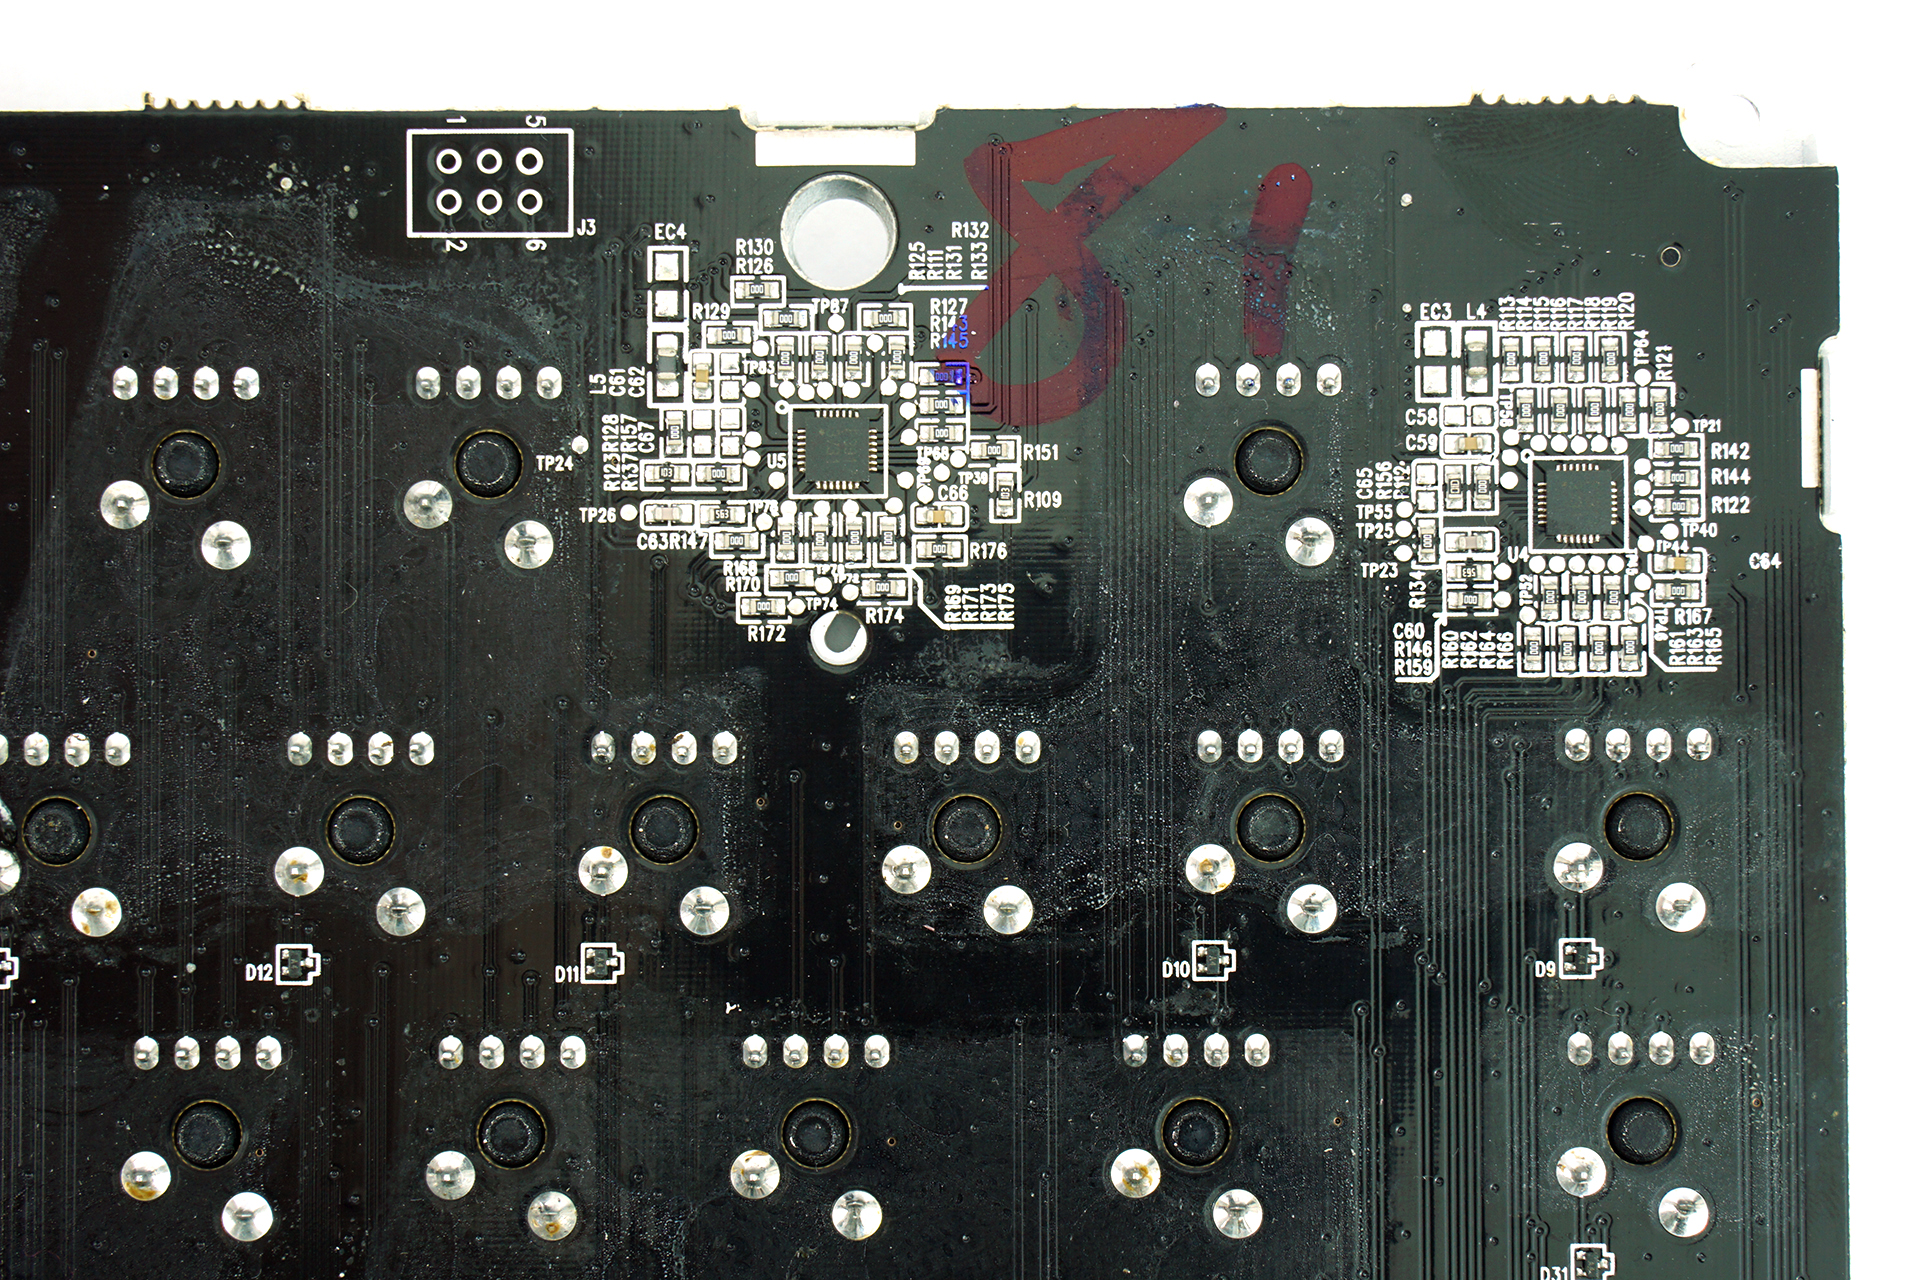
On the rear of the switch assembly, there's a black PCB with four chips embedded. These are P3917 3731 microcontrollers, which handle all the LED lighting. The welds under the switches are mostly clean, but there are several that look sloppy.
Flipped back over, the keyboard's microprocessor is visible on the upper right corner. It's the NXP LPC11U24F ARM Cortex-M0/M0+, which features 256 KB of flash and 32 KB RAM. This chip also handles the USB passthrough.
Get Tom's Hardware's best news and in-depth reviews, straight to your inbox.
Seth Colaner previously served as News Director at Tom's Hardware. He covered technology news, focusing on keyboards, virtual reality, and wearables.
-
nycalex what a bunch of cheap chinese plastic garbage.Reply
$169 for a 9 year old spaceship keyboard? rubbish.
LOOK MA! my keyboard looks like a spaceship and lights up in colors, i'm the coolest kid on the block!
Language edited by moderator
Please maintain a humble etiquette when on a family friendly site
Moderator
Lutfij -
ZippyPeanut Replywhat a bunch of cheap chinese plastic garbage.
$169 for a 9 year old spaceship keyboard? rubbish.
LOOK MA! my keyboard looks like a spaceship and lights up in colors, i'm the coolest kid on the block!what a bunch of cheap chinese plastic garbage.
$169 for a 9 year old spaceship keyboard? what a hump of sh1t.
LOOK MA! my keyboard looks like a spaceship and lights up in colors, i'm the coolest kid on the block!
Wait! nycalex is right: it's "cheap chinese plastic garbage"! We should all trust this guy, right? And not the professional reviewers at Tom's, PCWorld, TechRadar, PCPerspective, Maximum PC, overclock.net, AnandTech, the customers' reviews on NewEgg, and PC enthusiasts everywhere who praise Razer's keyboards for their excellence.
-----------
i7 3770K OC @ 4.2Ghz / ASRock Extreme 4 Z77 / evga FTW 670 2X-SLI / Creative SB Audigy SE PCI Sound Card / 32 GB Corsair Vengeance 1600 / 500GB Samsung EVO 850 (boot) / 128 GB OCZ Vertex 4 / 2 TB WD Caviar Black / 2 TB Seagate Barracuda / Asetek 510LC Liquid Cooling System / LG 14X Blu-ray R/W / Corsair 1000w PSU / AzzA Genesis 9000 full tower / Windows 7 Professional 64 / 144hz 1ms 24-inch Asus monitor / Logitech Z906 Surround Sound / Razer Ultimate Stealth keyboard /Deathadder Chroma mouse
-
Lutfij I've had a Razer Marauder Keyboard and that failed after 3 years of use. I can't say I wasn't disappointed but like almost everything electronics and pretty much anything in this world, some things don't last forever. Nice write up and a comprehensive write up on that! I just wished they didn't flood the market with their own reverse engineered switches. That just adds more confusion to the consumers who are eager to jump onboard the mechanical keyboard wagon.Reply -
nycalex Reply17658438 said:what a bunch of cheap chinese plastic garbage.
$169 for a 9 year old spaceship keyboard? rubbish.
LOOK MA! my keyboard looks like a spaceship and lights up in colors, i'm the coolest kid on the block!what a bunch of cheap chinese plastic garbage.
$169 for a 9 year old spaceship keyboard? what a hump of sh1t.
LOOK MA! my keyboard looks like a spaceship and lights up in colors, i'm the coolest kid on the block!
Wait! nycalex is right: it's "cheap chinese plastic garbage"! We should all trust this guy, right? And not the professional reviewers at Tom's, PCWorld, TechRadar, PCPerspective, Maximum PC, overclock.net, AnandTech, the customers' reviews on NewEgg, and PC enthusiasts everywhere who praise Razer's keyboards for their excellence.
-----------
i7 3770K OC @ 4.2Ghz / ASRock Extreme 4 Z77 / evga FTW 670 2X-SLI / Creative SB Audigy SE PCI Sound Card / 32 GB Corsair Vengeance 1600 / 500GB Samsung EVO 850 (boot) / 128 GB OCZ Vertex 4 / 2 TB WD Caviar Black / 2 TB Seagate Barracuda / Asetek 510LC Liquid Cooling System / LG 14X Blu-ray R/W / Corsair 1000w PSU / AzzA Genesis 9000 full tower / Windows 7 Professional 64 / 144hz 1ms 24-inch Asus monitor / Logitech Z906 Surround Sound / Razer Ultimate Stealth keyboard /Deathadder Chroma mouse
says the guy that needs to post his system specs as a signature on his posts. Do you need a self-esteem boost?
Btw, it's called an opinion. I thought forums was all about reading eachother's opinions.
-
nitrium "However, the noisy Green switches won't appeal to some users,"Reply
Razer of course does also offer the "Stealth" version of this keyboard that uses Razer's version of Cherry browns (not sure if there is a 2016 version yet, but you can be sure it's coming). -
Jay_29 Having owned 4 Razer Keyboards, these ARE cheap plastic garbage. Filco, Topre, Corsair, Logitech, Steelseries all make much superior keyboards as far as quality is concerned.Reply -
ingtar33 Replywhat a bunch of cheap chinese plastic garbage.
$169 for a 9 year old spaceship keyboard? rubbish.
LOOK MA! my keyboard looks like a spaceship and lights up in colors, i'm the coolest kid on the block!what a bunch of cheap chinese plastic garbage.
$169 for a 9 year old spaceship keyboard? what a hump of sh1t.
LOOK MA! my keyboard looks like a spaceship and lights up in colors, i'm the coolest kid on the block!
Wait! nycalex is right: it's "cheap chinese plastic garbage"! We should all trust this guy, right? And not the professional reviewers at Tom's, PCWorld, TechRadar, PCPerspective, Maximum PC, overclock.net, AnandTech, the customers' reviews on NewEgg, and PC enthusiasts everywhere who praise Razer's keyboards for their excellence.
The problem with reviews is rarely can a reviewer play with a product long term. This results in things like Tesla cars winning car of the year rewards when by all counts they're one of the least reliable vehicles on the road. Razer keyboards generally look nice, but tend to be overpriced and unreliable. Will everyone get a keyboard that fails in a year? of course not, if that was the case Razon wouldn't sell anything. But their keyboards/mice do tend to break down in a very short period of time. Even this reviewer had a "dead key" issue, which as anyone who seriously games will tell you is a deal breaker. Frankly I'm not a serious gamer, but I would return or replace any keyboard which had a key suddenly stop responding, and I assume this happened in the first few hours the reviewer was playing with that keyboard
If that's not a red flag then you've either got more $$ then you deserve to have or you simply don't care how you waste your money. All i know is i wouldn't spend a dime on a keyboard that stops functioning properly in a product review. -
Top Cooler I bought a Razer 3 years ago. After one week I bought a competitor and eagerly gave it away. The font is so cool that it's absolutely unusable. R is 2 lines? They put the numbers and symbols side by side instead of up and down. It was loud and felt cheap. Yeah, not a fan. Since then I've tried 3 competitors with various results. They all have one similarity: much better than Razer.Reply -
scolaner ReplyEven this reviewer had a "dead key" issue, which as anyone who seriously games will tell you is a deal breaker. Frankly I'm not a serious gamer, but I would return or replace any keyboard which had a key suddenly stop responding, and I assume this happened in the first few hours the reviewer was playing with that keyboard
It didn't. It happened when I was fiddling with the on-keyboard macros. (Emphasize "playing.") But it DID happen.
Also, we spend as much time with each keyboard as possible. Bare minimum of a week, work and play (and we tend to work a lot of hours!), but often more, depending on X and Y and Z. (HWT: http://www.tomshardware.com/reviews/how-we-test-mechanical-keyboards,4400.html).
This one, I ended up using for quite a while, as it happened.
