Display Calibration 101: Step-By-Step With Datacolor's Spyder4Elite
In every monitor review, we recommend that enthusiasts calibrate their screens. The benefits are many, but how can achieve this without spending thousands of dollars on exotic gear? Today, we’ll show you how, and for less than the price of your monitor!
Spyder4Elite How To: Getting Started
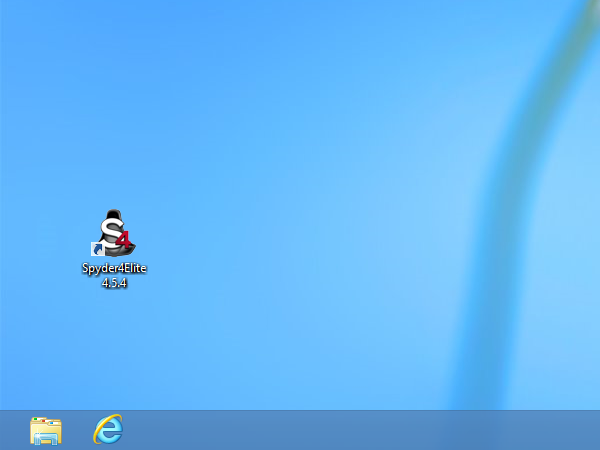
Since the Spyder4Elite software is entirely wizard-based, we’re able to capture the full sequence of screenshots to show you the process. Begin by opening the Spyder4Elite application from the desktop (OS X users open the main Spyder4Elite app from Launchpad).
The first few windows simply ask you some questions about your monitor and its capabilities.
Welcome
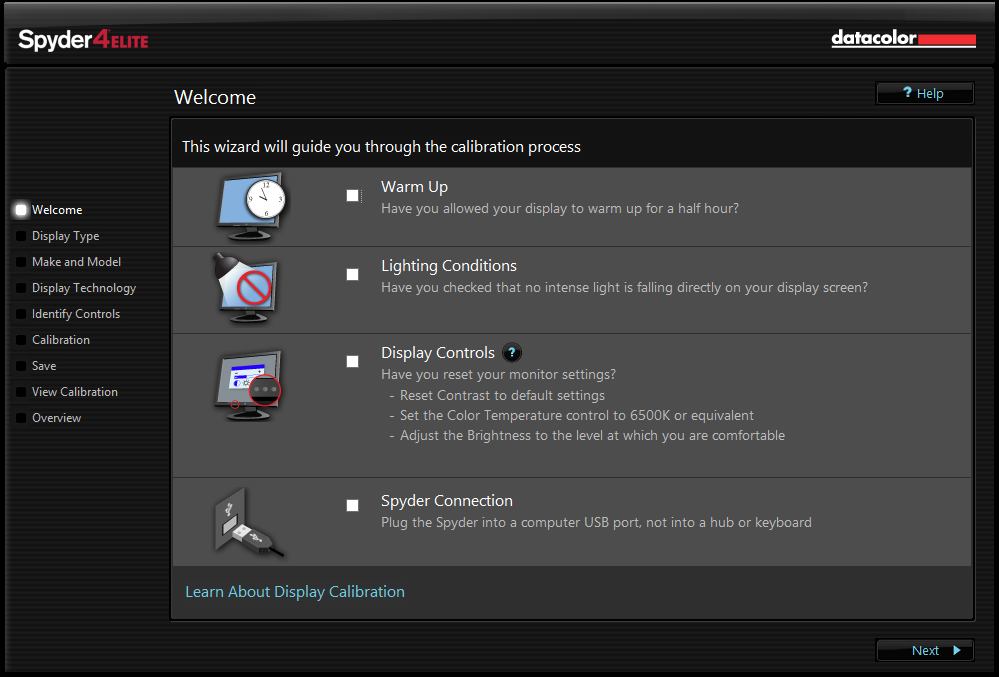
The process begins with a little pre-flight checklist. Warming up any display is important to calibration accuracy, since light sources change as they come up to temperature. At least 30 minutes powered on before beginning any calibration is highly recommended.
If you haven't already, take this opportunity to adjust the room lighting to your preferred level and explore the controls that are available on your particular display before clicking Next.
If this is your first time running the Spyder4Elite software, the next screen will not appear until the second time you run it.
Select Workflow
Get Tom's Hardware's best news and in-depth reviews, straight to your inbox.
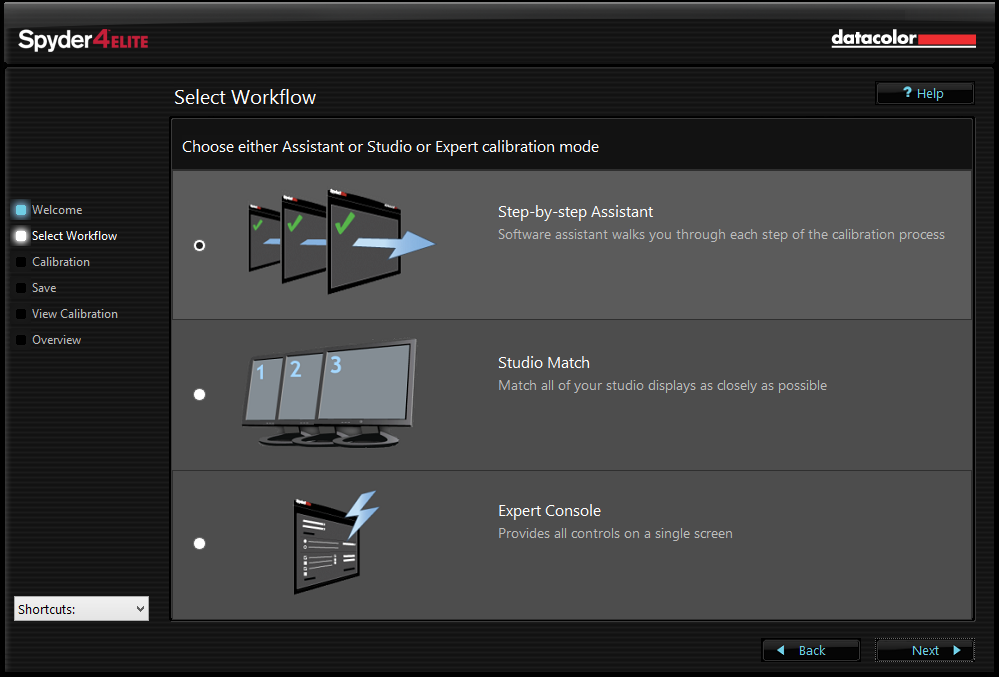
If you've performed a calibration using the Spyder4Elite at some point in the past, this screen gives you three options: Step-by-step Assistant, Studio Match, and Expert Console.
Studio Match is a simple utility for synchronizing your calibration settings across multiple displays. Expert Console is the Spyder4Elite's "advanced mode" calibration, which contains the entire contents of the multi-screen wizard inside a single window. In order to continue following this guide, select Step-by-step Assistant.
Display Type
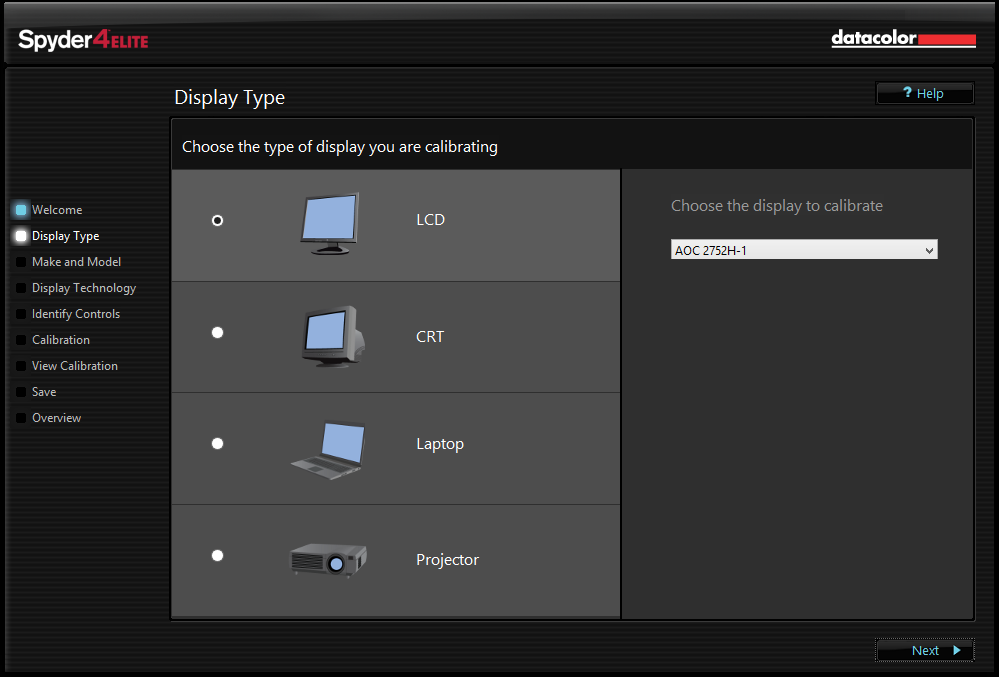
Selecting the appropriate display type is also important. Since each screen technology transmits light differently, any meter needs to use special offsets for the type of display being calibrated. The Spyder4 software has options for LCD, CRT, Laptop, and Projector.
Select the option for your display and then select Next.
If you have multiple displays connected to your computer, select the monitor you wish to calibrate in the drop-down menu to the right.
Make and Model
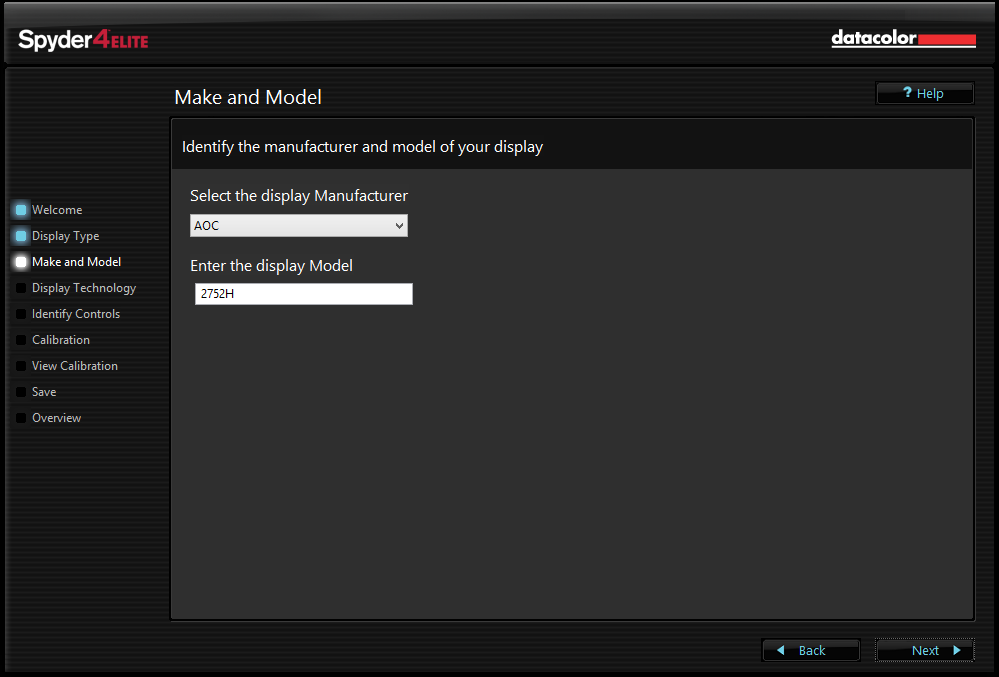
The next screen asks you to identify your display’s manufacturer from a drop-down list, and enter the model number into a text box.
Because the Spyder4Elite software has model information built-in, the next couple of screens will likely appear different than ours, depending on your monitor's options. In order to simplify how the wizard branches out, and to show as much of the process as possible, for the next few screenshots we've chosen an Unknown make and model instead of using the Spyder4Elite's automatic detection of our AOC I2757H.
Display Technology
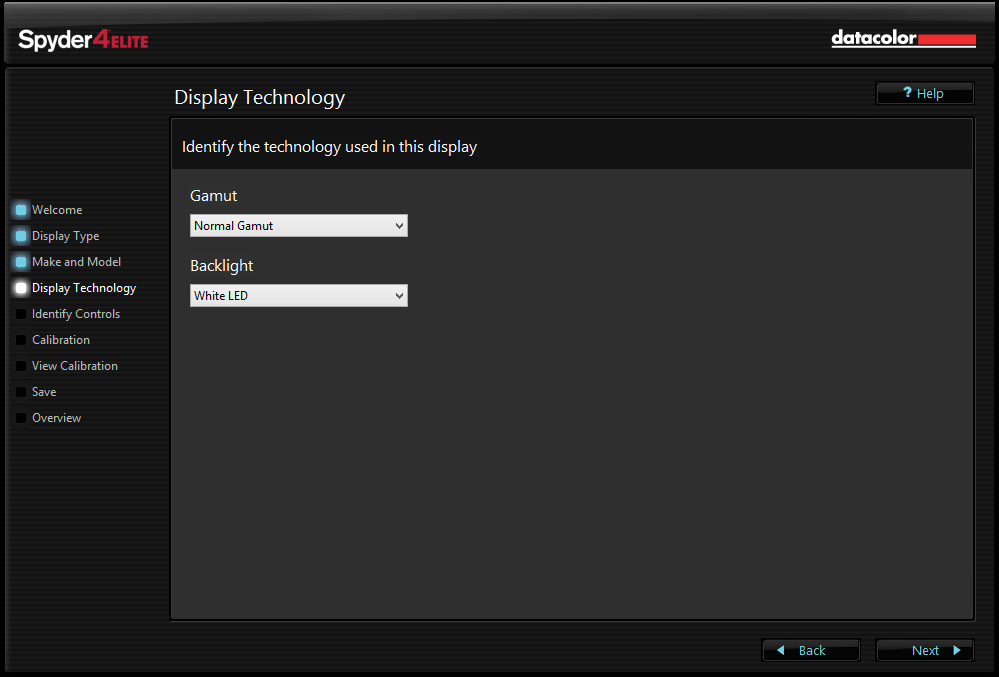
After clicking Next, you’re asked to specify the native color gamut and what kind of backlight your display has.
The options available for Gamut are Normal (sRGB) and Wide (AdobeRGB 1998), while the options for Backlight include Flourescent (CCFL), White LED, and RGB LED. If you’re unsure of either one of these, both have an option labeled Unknown.
After making your selections, click Next.
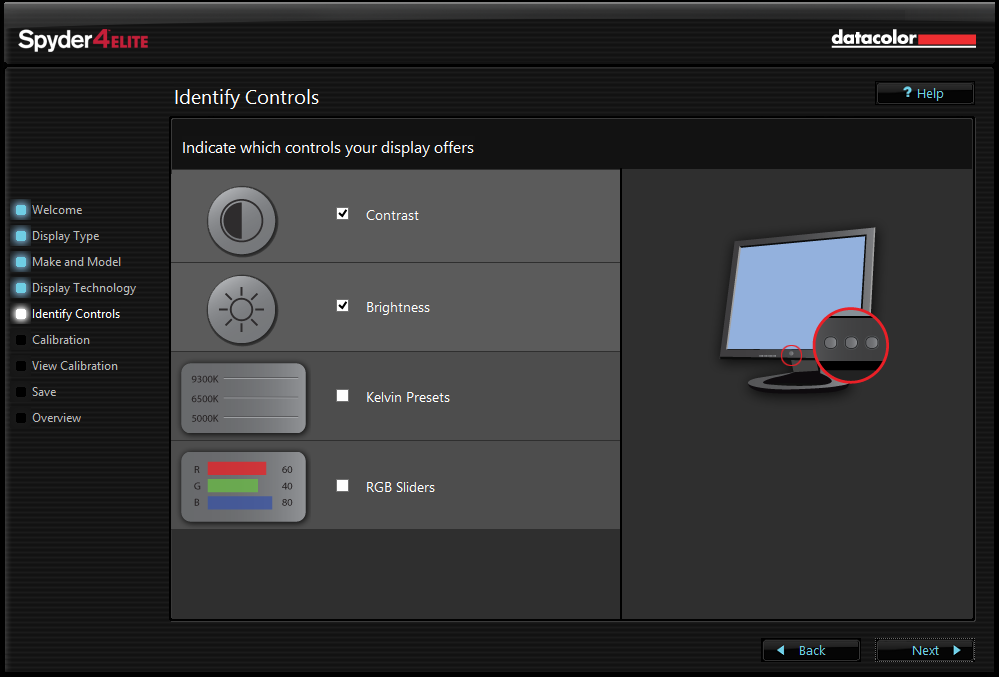
Identify Controls
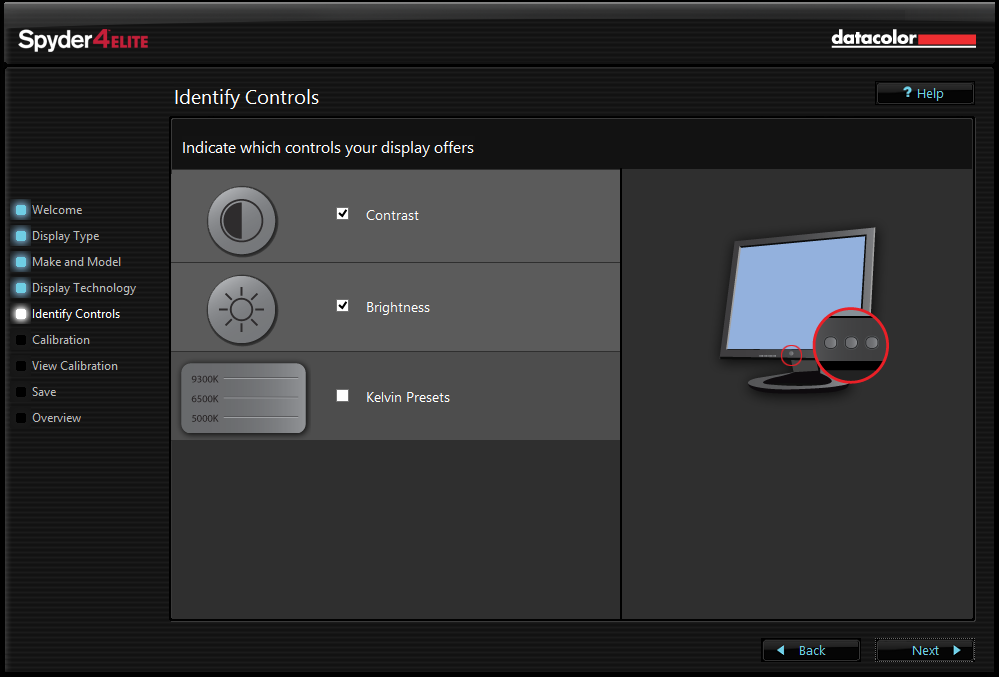
The following screen holds check boxes for Contrast, Brightness, and Kelvin Presets.
Only check the boxes corresponding to the image adjustment controls available on your monitor.
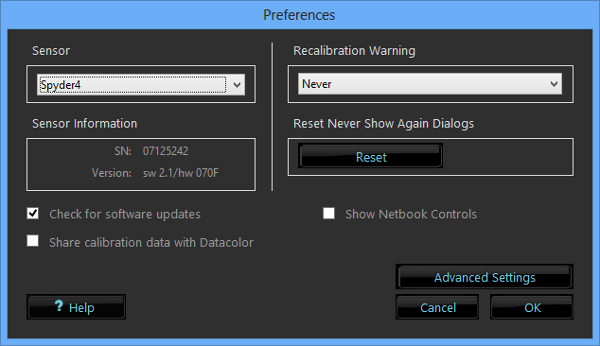
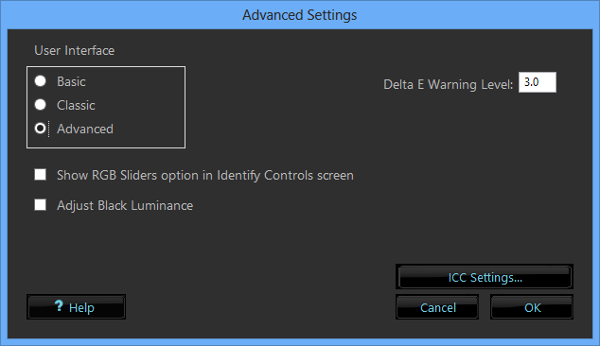
If your monitor has the rare RGB Sliders, you can create this option by opening the File menu and selecting Preferences.
From here, choose Advanced Settings, and a new window will open. Now check the box next to Show RGB Sliders option in Identify Controls screen, then click OK on both the Advanced Settings and Preferences windows.
After answering these questions, click Next. Now it's time to start the calibration process.
Current page: Spyder4Elite How To: Getting Started
Prev Page Datacolor's Spyder4Elite Display Calibration System Next Page Spyder4Elite How-To: Setting Up
Christian Eberle is a Contributing Editor for Tom's Hardware US. He's a veteran reviewer of A/V equipment, specializing in monitors. Christian began his obsession with tech when he built his first PC in 1991, a 286 running DOS 3.0 at a blazing 12MHz. In 2006, he undertook training from the Imaging Science Foundation in video calibration and testing and thus started a passion for precise imaging that persists to this day. He is also a professional musician with a degree from the New England Conservatory as a classical bassoonist which he used to good effect as a performer with the West Point Army Band from 1987 to 2013. He enjoys watching movies and listening to high-end audio in his custom-built home theater and can be seen riding trails near his home on a race-ready ICE VTX recumbent trike. Christian enjoys the endless summer in Florida where he lives with his wife and Chihuahua and plays with orchestras around the state.
-
Someone Somewhere I've been doing this for years.Reply
However, I wouldn't recommend Colorvision - their support for open source software is pitiful.
It would be nice to have the option to calibrate the monitor instead of just using colour profiles though. It can get irritating to run the same test on multiple OSs or computers attached to the same monitor. -
envy14tpe Thank you so much for doing this article. I think calibrating a monitor (at home) is very important for accuracy.Reply
I use the Spyder Express 4 and love the results. There are 3 models of the Spyder 4 and buyers need to choose which is best for their use.
Would it be possible to make the images a larger file so people can see the difference more clearly? -
daglesj I have a Spyder 3 Pro.Reply
Great device when you first unbox it, then not so good when you find the colours and visuals look far worse after you finish with odd tinges and hues.
Then you read up and find the the devices are not actually calibrated and set properly when they leave the factory.
Pretty useless. I wouldn't buy another spyder. Look elsewhere for proper results. -
Traciatim I've been looking at picking up a calibration tool set for a while so I liked reading this article. My question though is that I want to use my setup to calibrate TV's for friends, Monitors, Laptops, multi monitor setups, TV's with PCs and Multiple other devices attached . . . I was looking at getting the Spyder4 Elite and the TV HD upgrade but it seems like if I calibrate a TV with a PC attached using the TV HD version and then try to do the PC with the software then is that going to mess up the previous settings?Reply
If anyone has any experience with these tools in multi-use and multi-display scenarios or has a better option on what tools to get I would really appreciate any info.
-
WyomingKnott "All modern fixed-pixel displays create images in RGB format." Sharp states that their Aquos line has a yellow sub-pixel. It might be interesting to compare one of their TVs to a similar RGB panel.Reply -
Someone Somewhere None of the connections allow it to receive data with a yellow channel though, so it's all interpolated in the display.Reply -
ddpruitt Great article, I always try to do this with monitors and displays. Most are set up so horribly out of the box and people always use what feels good instead of what's right. I have never used a color calibrator because there's so little factual information. I'll probably ending getting one of these now.Reply -
ojas I wish you could cover some free/open source software, $249 is still a bit much for some like me...plus exchange rate is getting painful these days :(Reply
