Ubuntu 11.04 (Natty Narwhal), Reviewed In Depth
Ubuntu 11.04 (Natty Narwhal) has arrived, and we have the scoop on everything you need to know about Canonical's latest Linux, along with the usual review and benchmarks. Is this the change we've been waiting for, or is the Natty Narwhal a fail whale?
Installation Walkthrough
Exactly two years have passed since we did our first Ubuntu installation guide in Desktop Linux For The Windows Power User. So, we decided to cover the subject again. On this page, we'll take you through the installation procedure for Ubuntu 11.04.
If you don't want to perform a real installation of Ubuntu 11.04, you can still follow along using one of three alternate methods:
- Live CD or USB thumb drive
- Wubi
- Virtual machine (such as Oracle VirtualBox)
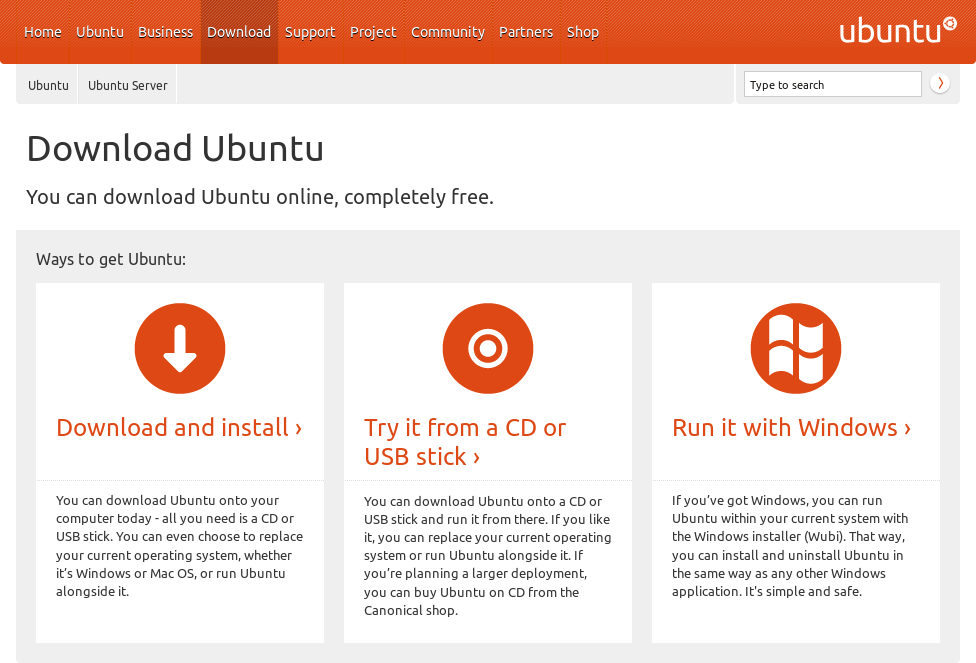
The first step to any of the above usages is grabbing an Ubuntu 11.04 ISO file (you can grab the 32-bit version from us, right here). Canonical makes the choices very easy this time around. Simply choose Download and install if you're planning to use a virtual machine. Select Try it from a CD or USB stick if you're going to do a real installation or trying the operating system out live. The only real choice to make is whether you grab a 32 or 64-bit build, and that depends entirely on what your processor supports. Finally, click Run it from Windows if you want to use Wubi.
Live CD or USB Thumb Drive
Once you've downloaded the ISO file for Ubuntu 11.04, Canonical's Web site provides excellent instructions for creating a live CD or USB thumb drive. Directions are available for Windows, Mac, and Ubuntu users, and we verified that they all work.
Once the live media is created, reboot your system with the CD/USB inserted. Note that your BIOS or UEFI needs to be set to boot from the CD drive or a USB port.
Wubi
Get Tom's Hardware's best news and in-depth reviews, straight to your inbox.
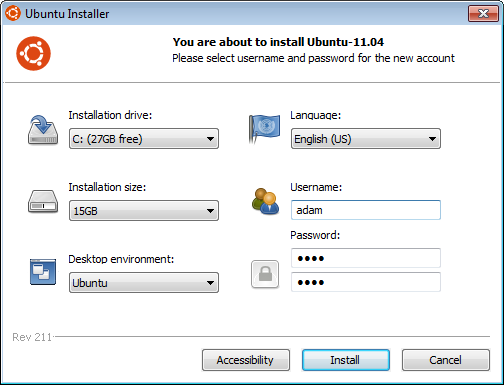
Ubuntu can be installed within Windows via Wubi. Wubi allows you to install Ubuntu as you would any other Windows application. You don't need to download an ISO with Wubi; simply grab the 1.5 MB wubi.exe file and follow the wizard. The proper files are automatically downloaded from the Web during the setup process. Whenever you restart your machine, a boot loader gives you the option to boot into Ubuntu or Windows. In this way, Ubuntu can be easily uninstalled via the Add/Remove section of the Windows Control Panel, just like any other Windows application.
Virtual Machine
Hardware permitting, installing Ubuntu 11.04 to a virtual machine is another option. Oracle provides the cross-platform VirtualBox virtualization software for free, and we already have a guide for setting up Windows XP in VirtualBox. Simply follow the wizard, but set it up for Ubuntu Linux instead of Windows XP.
Note that this method requires that Unity 2D be installed after the installation in order to use the new GUI.
Installation Procedure
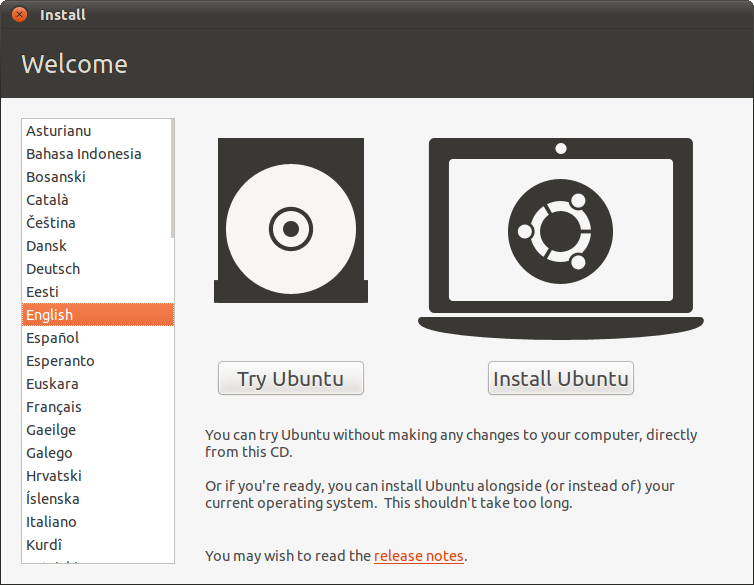
Whether you chose to install Ubuntu 11.04 onto a hard drive, run it inside of a virtual machine, or try it out live via a CD or USB thumb drive, you'll come to this screen first:
Choose Install Ubuntu if you want to install onto a hard drive or inside of a virtual machine. If you plan on simply trying it out from the Live CD/USB, choose Try Ubuntu.
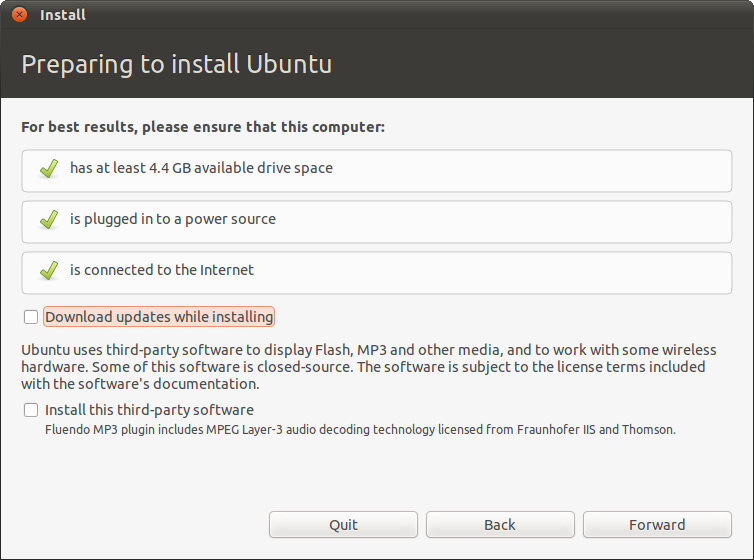
The next screen shows whether or not your system has the minimum 4.4 GB of disk space, is plugged into a power source, or connected to the Internet. The disk space requirement is non-negotiable, while the other two are more like suggestions. If you're installing Ubuntu 11.04 onto a mobile system and the battery dies during the installation procedure, you will have to start over and may even incur data loss in a dual-boot scenario. If you are not connected to the Internet, the following two options won't be available to you.
If you do have active Internet access, you may choose to Download updates while installing and Install third-party software. The former applies critical updates during the installation as opposed to after it, while the latter installs all kinds of essential packages for audio and video playback.
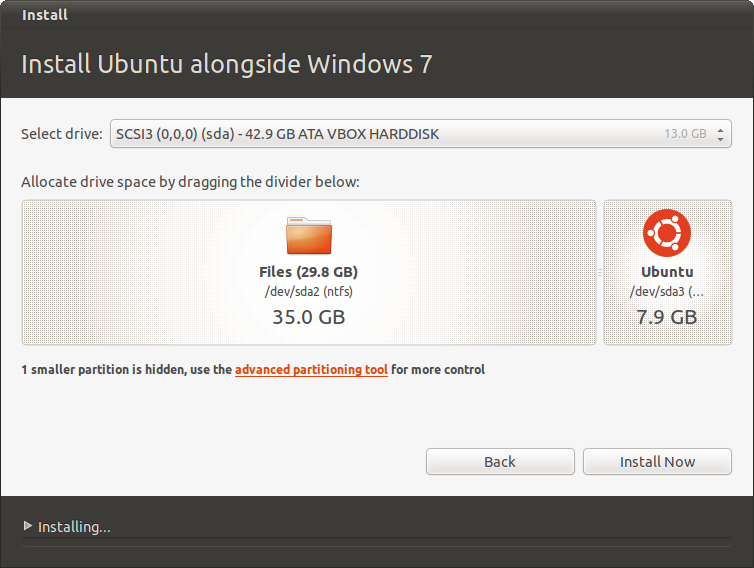
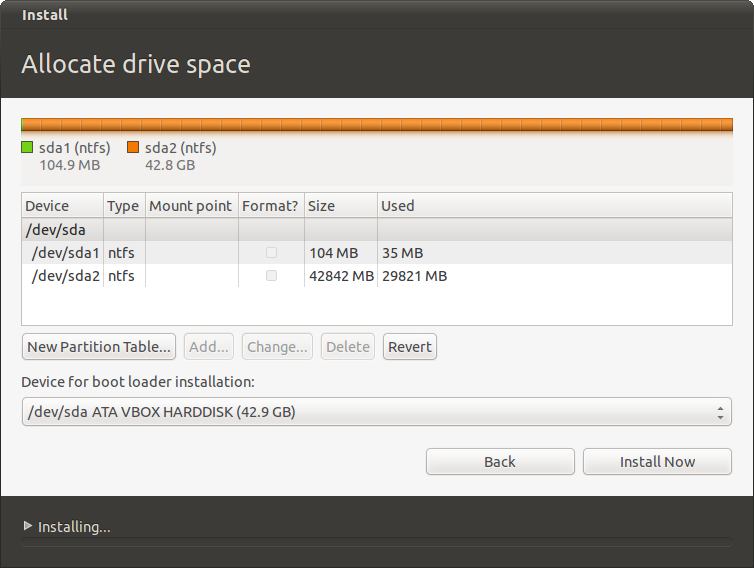
The next window provides simple guided partitioning options. This screen will be different depending on the target hard drive. The first part of the screenshot below shows the options that appear if the target hard drive is clean. The second part of the screenshot shows the options available if Windows 7 is currently installed on the target hard drive.
After a guided partitioning scheme is chosen, you have the option to adjust the amount of disk space given to the new installation with a simple slider.
Choosing Something else from the guided options opens the advanced partition editor, which allows the user to create a custom partitioning scheme.
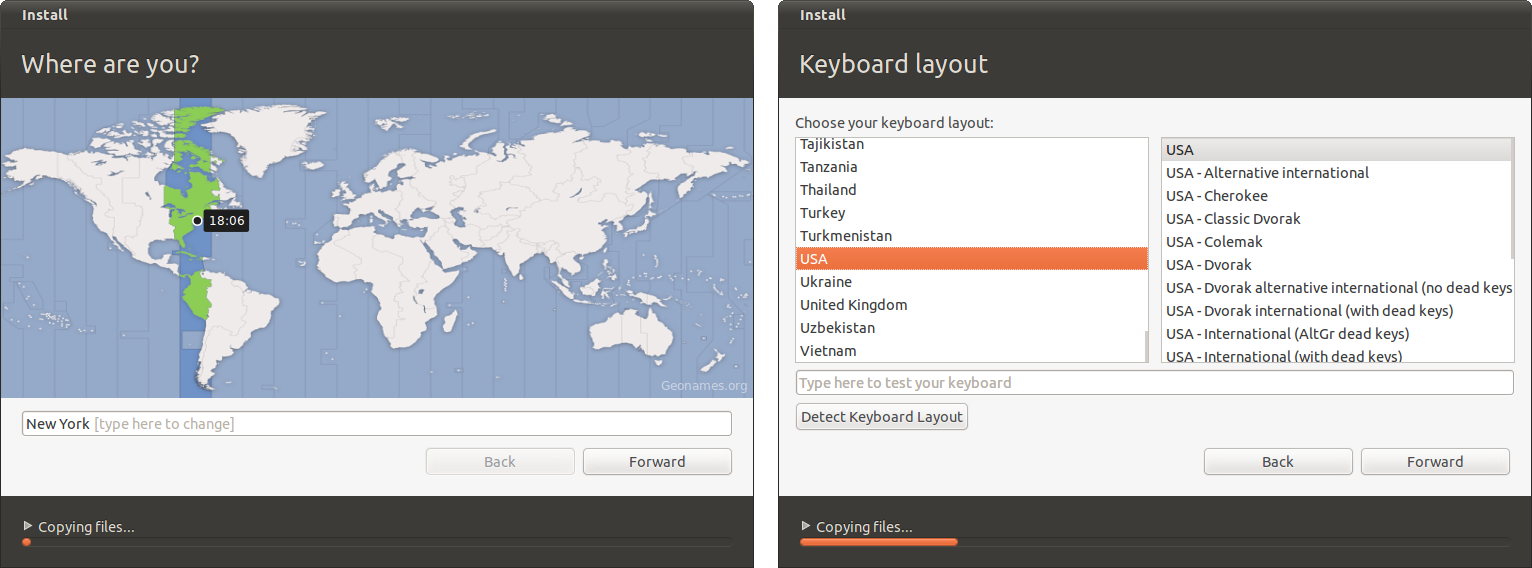
Now the installation begins; but the setup isn't quite finished yet. The next steps help you select your time zone and keyboard layout.
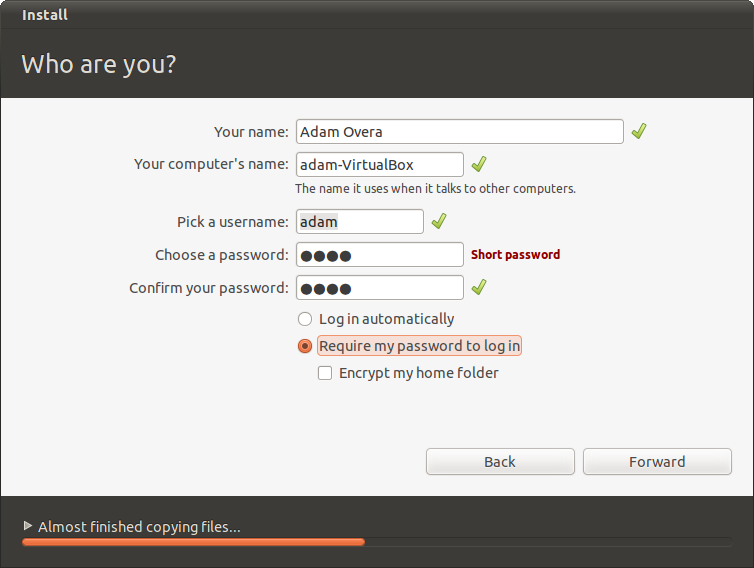
On the next screen some important choices must be made. Enter your name in the first box. The computer name automatically populates using the first name you entered combined with the motherboard or model number of your system. The user name box also automatically populates with your first name. Then you have to create a password. The strength of your password is displayed after it's entered, at which point you may want to consider creating a better password if it comes back as weak.
This page also contains two login options: Log in automatically and the default Require my password to log in. Below these, there is the option to encrypt the Home directory. While automatic login is definitely a time-saver, we have to recommend that you leave the default Require my password to log in option selected. When we installed Natty Narwhal on an older Pentium 4-based computer that couldn't support Unity, we experienced a hiccup with Log in automatically selected. The PC simply showed a blank desktop. No Panel, no Launcher, no log off; we had to reinstall. Besides, automatic login can always be enabled after installation via the Login Screen tool in the new Control Center.
Update: This situation appears to have been rectified in a recent update. However, if you're not connected to the Internet during installation, and cannot update during the installation, it is highly likely that this will still happen.
At this point there is nothing to do but read the slides and wait until the installation finishes. Below is a screenshot compilation of the installation slides for those of you who aren't following along.
-
jryan388 One problem I faced with the standard unity desktop is the horrible performance even on my Athlon II @ 3.6 and Radeon 5750. I upgraded on launch day, so maybe canonical fixed it by now, but the performance was absolutely abysmal. The easiest fix is the unity-2d package. Great performance, doesn't look any worse.Reply -
-Fran- 11.04 sucks; plain and simple.Reply
Power users can do little to nothing to fix things between gnome3 and the buggy Unity.
I wouldn't even bother with 11.04 when 10.04 is rock solid.
Cheers! -
davewolfgang I tried the upgrade, but unity is blech. I am still using the upgrade, but doing the classic.Reply
But I may go back to 10.10 for my EeePC. -
adamovera jryan388One problem I faced with the standard unity desktop is the horrible performance even on my Athlon II @ 3.6 and Radeon 5750. I upgraded on launch day, so maybe canonical fixed it by now, but the performance was absolutely abysmal. The easiest fix is the unity-2d package. Great performance, doesn't look any worse.Wow, that isn't right, the old X2 test system which has a considerably older Nvidia card runs it great. What's the full specs?Reply -
adamovera ksa-_-jedU should add more distros to the benchmarks like Debian, Fedora, and open SUSE.Fedora 15/GNOME 3 coming up next. I have never had any luck whatsoever with openSUSE, will keep trying new versions as they come out though.Reply -
bellman80 I tried 11.04. Unity was more annoying than useful. I installed the new Linux Mint instead, I'm a happy camper now.Reply -
Tamz_msc I'm going to stick with 10.04, because it has been running rock-solid without a glitch for almost a year. It was able to find drivers for my on-board audio which even Windows 7 could not find.Reply
Unity is not my cup of tea., though I'm looking forward to GNOME 3.0.
Till then Lucid Lynx FTW! -
RogueKitsune Unity is a nice idea, but not my cup of tea. Overall I am happy with the changes in 11.04. Right now i have my laptop(AMD Turion x2, radeon x1200)running it with no problems(everything worked out of the box)Reply
