ViewSonic VP2780-4K 27-inch Ultra HD Monitor Review
We've got ViewSonic's VP2780-4K in the lab today. Is this 27-inch, Ultra HD, IPS-based monitor worth your hard-earned money? Let's find out!
Why you can trust Tom's Hardware
OSD Setup And Calibration
OSD Tour
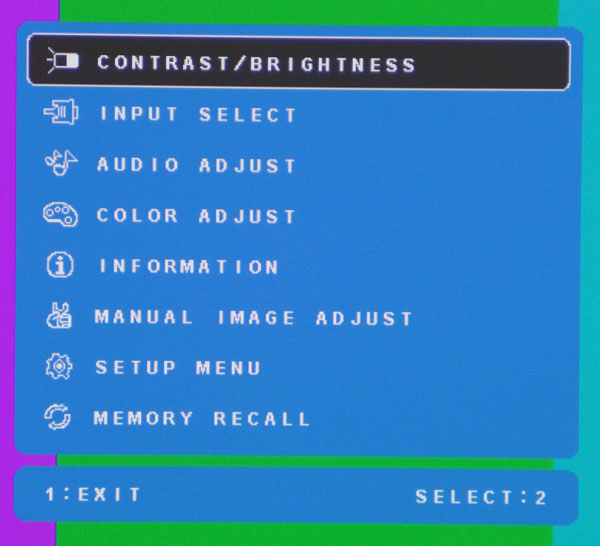
Touching the key marked “1” brings up the main menu. The “2” key takes you straight to the input selector. The down arrow adjusts the Blue Light Filter feature, and the up arrow selects from the three user-programmable picture presets.
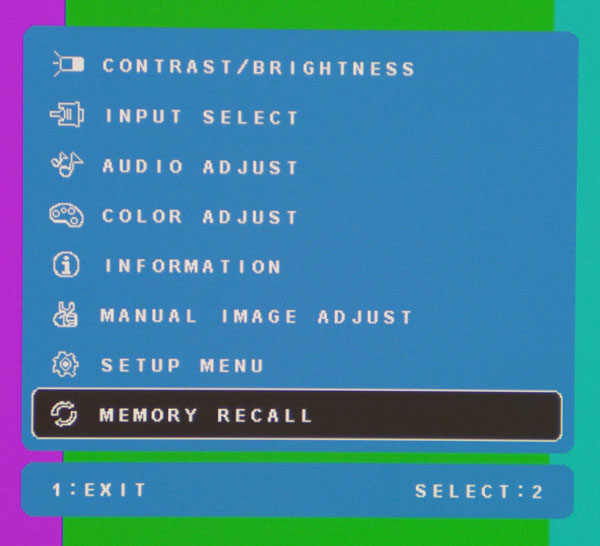
The OSD is divided into seven sub-menus, the first of which is contrast and brightness.
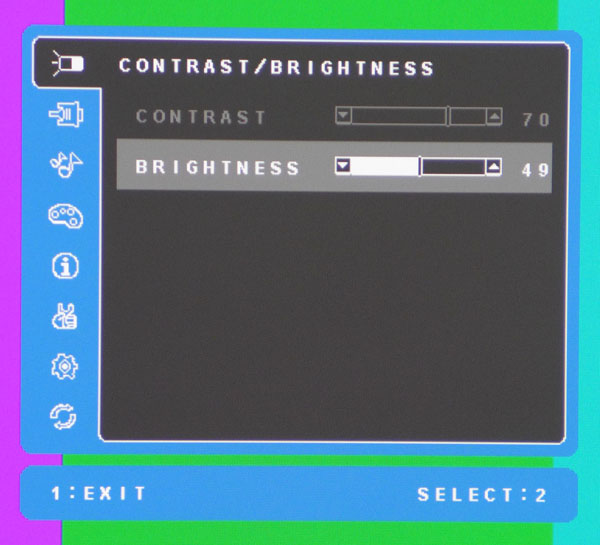
Pressing “2” brings you into each sub-menu which has sliders for various adjustments. The contrast control is grayed out in the sRGB mode which is selected in this photo. We found no need to adjust it when it was enabled in the other modes.
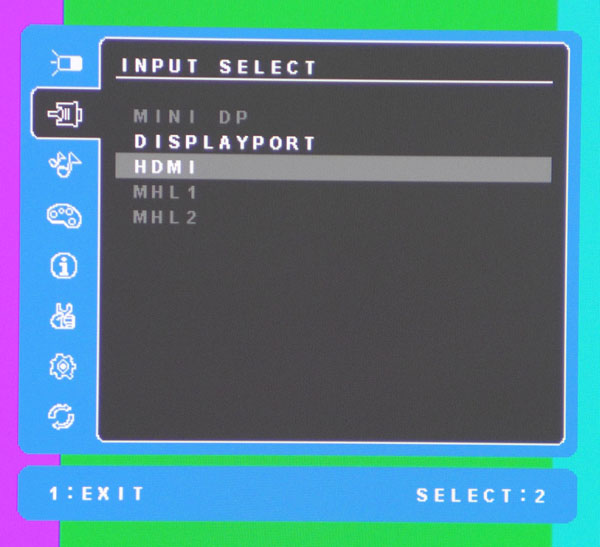
You can connect up to five sources to the HDMI and DisplayPort inputs. Up to four of them can be viewed simultaneously using the multi-picture function, which we’ll describe below.
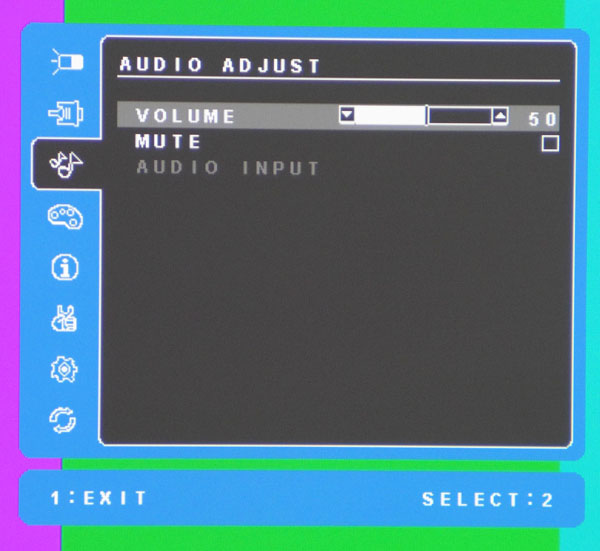
There are no speakers, so volume and mute only affect the headphone output. Since audio signals can be carried by both HDMI and DisplayPort, the Audio Input option lets you choose which source you want to hear.
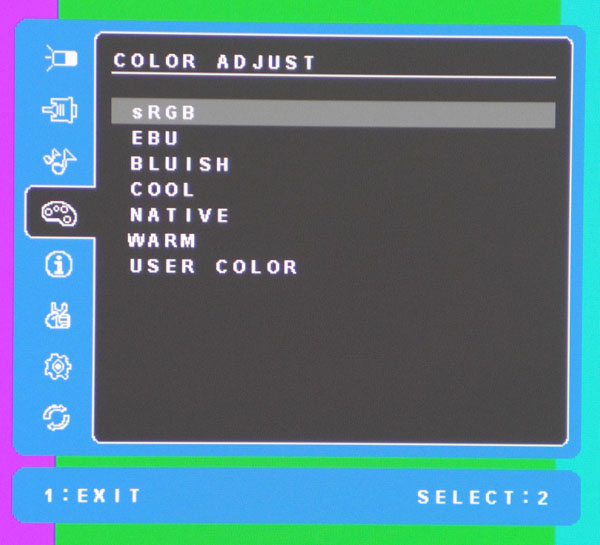
Color Adjust is another term for the VP2780-4K’s picture modes. sRGB is the most accurate out of the box, followed by Native, which is the default mode. User Color pops up RGB sliders which allow for very accurate grayscale tracking. There is however a caveat to that, which we’ll explain on page five.
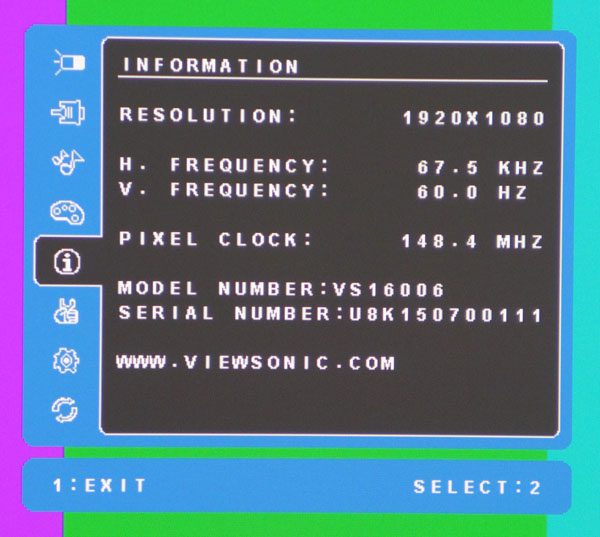
Here is the very complete signal information screen. Not many monitors tell you all the frequency parameters like this one.
Get Tom's Hardware's best news and in-depth reviews, straight to your inbox.
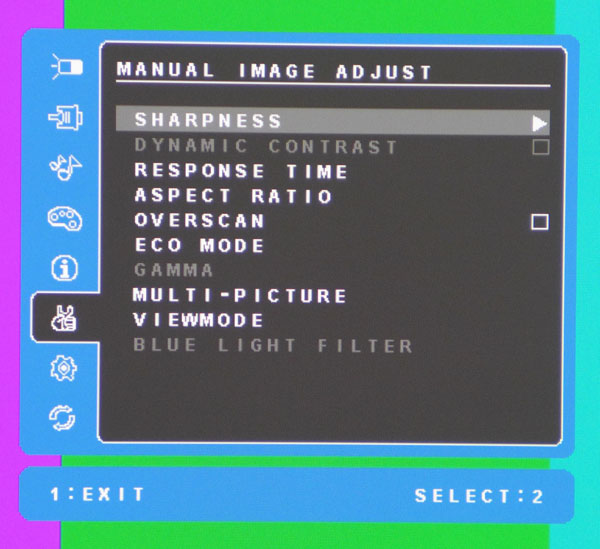
Here are the remaining image adjustments. Sharpness has four levels, of which 50 seemed the best to our eyes. Turning it to max produces very slight ringing but not as much as most displays we’ve seen.
Response Time is the VP2780-4K’s overdrive control. On some screens it can cause additional ghosting but we saw only a small amount of the artifact regardless of the setting. Standard showed a little stuttering in our tests, so we opted for the Ultra Fast option.
Aspect ratio includes 4:3, along with full screen and 1:1 options. 1:1 will show lower-res signals windowed, so use full screen if you plan to work at resolutions other than the native 3840x2160 pixels.
You’ll notice Gamma is grayed out in the above photo. Presets are available in the Bluish, Cool, Native and Warm modes. You can’t change the tracking in sRGB, EBU or User, which we found to be a limitation.
Multi-Picture is very cool. You can display either four or two sources at once. When you have two, they can be viewed side-by-side or top-and-bottom. You can also set up PIP if you wish.
Viewmode is another list of image modes that include Standard, Game, Movie, Web, Text or Mono (black & white). They will take precedence over other picture adjustments, including brightness. We left this option on Standard for our tests.
Blue Light Filter will reduce the intensity of the blue primary to create a warmer color temp.
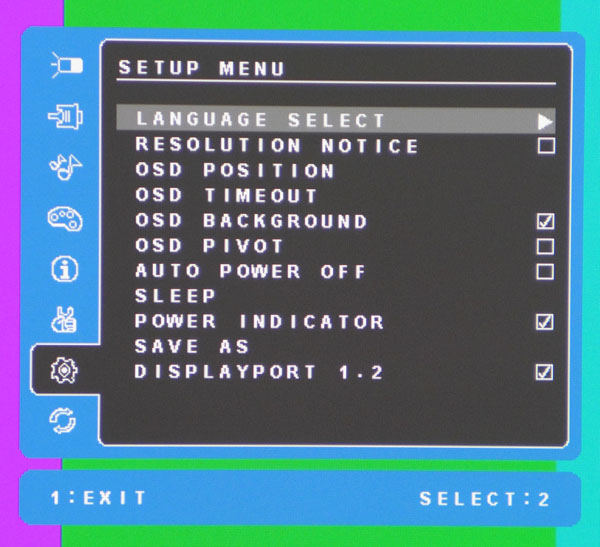
The OSD can be viewed in nine languages. It can also be positioned anywhere on the screen, and its timeout can be up to 60 seconds. If you employ the portrait mode, check the OSD Pivot box to rotate the menu accordingly. The Save As option contains three memory slots, but they only work in the User picture mode.
You might think Memory Recall is used to access the three programmable memories, but it’s actually a factory reset. And there is no confirmation dialog. Our advice is to record all your settings after calibration in order to avoid accidentally erasing them.
Calibration
The VP2780-4K comes with a factory-certified calibration supported by a complete data sheet that is unique to each sample. Our tests results matched ViewSonic’s almost exactly. You don’t need to calibrate if you use either the sRGB or Native modes. We attempted to calibrate the User mode and were rewarded with extremely accurate grayscale tracking, but then our luck ran out. We encountered gamma issues which in turn affected color saturations below 100 percent. The bottom line is that we were unable to exceed the accuracy offered by the preset picture modes. We don’t consider this a deal-breaker. The monitor is extremely precise as-delivered, and if you want greater accuracy, you can use a software LUT provided by CalMAN or the equivalent.
If you want to try our RGB settings in the User mode, we’ve provided them below. Otherwise, we recommend using the sRGB preset. Our brightness number provides 200cd/m2 of output.
| Mode sRGB | |
|---|---|
| Brightness | 49 |
| Sharpness | 50 |
| Eco | Standard |
| Mode User | |
| Brightness | 35 |
| Contrast | 70 |
| Sharpness | 50 |
| White Balance | Red 94, Green 95, Blue 100 |
| Eco | Standard |
Current page: OSD Setup And Calibration
Prev Page Packaging, Physical Layout, And Accessories Next Page Brightness And Contrast
Christian Eberle is a Contributing Editor for Tom's Hardware US. He's a veteran reviewer of A/V equipment, specializing in monitors. Christian began his obsession with tech when he built his first PC in 1991, a 286 running DOS 3.0 at a blazing 12MHz. In 2006, he undertook training from the Imaging Science Foundation in video calibration and testing and thus started a passion for precise imaging that persists to this day. He is also a professional musician with a degree from the New England Conservatory as a classical bassoonist which he used to good effect as a performer with the West Point Army Band from 1987 to 2013. He enjoys watching movies and listening to high-end audio in his custom-built home theater and can be seen riding trails near his home on a race-ready ICE VTX recumbent trike. Christian enjoys the endless summer in Florida where he lives with his wife and Chihuahua and plays with orchestras around the state.
-
Daniel Ladishew I keep seeing prices quoted in your reviews that are lower than the links provided in the same article. This is very misleading and frankly confusing when trying to align your evaluation with the prospect of a purchase. Maybe it's time to review your system of automatic price linking and/or including how much a product costs in the text of your articles? While I don't expect it to match on the penny every time, several hundred dollar swings makes for a hard sell when you claim "a very reasonable $890 MSRP" for a product showing for over $1000.Reply -
tomc100 4K displays should start at 40" to really take advantage of the increased resolution. 27" doesn't make any sense.Reply -
Walter Smith And yet be sure we will soon be seeing 4k resolution being common in our 5" or 6" screen smartphones. As an all purpose, everyday main monitor, at this price point, this screen bears some serious consideration.Reply -
FritzEiv ReplyI keep seeing prices quoted in your reviews that are lower than the links provided in the same article. This is very misleading and frankly confusing when trying to align your evaluation with the prospect of a purchase. Maybe it's time to review your system of automatic price linking and/or including how much a product costs in the text of your articles? While I don't expect it to match on the penny every time, several hundred dollar swings makes for a hard sell when you claim "a very reasonable $890 MSRP" for a product showing for over $1000.
Thanks for the input. In many articles we do call out the fact that the prices in the article are based on the writing time frame. I'll make a note about getting better and more consistent at that. The "buy buttons" we place into the articles, which are linked from e-tailers/merchants are typically dynamically linked using APIs. So the prices in those buttons are supposed to represent real time pricing, which, as you know, fluctuate madly depending on the category. The upside is that we'll always have the latest pricing. The downside is that it's different than what we put into our written text, and sometimes how we determine our "value" analysis, where applicable. Another downside is that sometimes the API implementations are a little wonky, a situation our development and commerce teams are continually trying to address.
- Fritz Nelson, Editor-in-chief
-
zcat Do all of these 4k monitors do decent 1080p upscaling? That's my only real concern, since nobody's going to be gaming @ 4k native for quite a while, so the upscaling should look good and have negligible impact.Reply -
Brian_R170 I really like this monitor, but fear Viewsonic's reliability. In 2008-2009, my work group bought a few hundred value-priced 27-inch Viewsonic monitors and 23-inch Viewsonic TVs. The failure rate was unbelievably high, easily surpassing 50% in the first year for the 27-inch model. The 23-inch TVs fared better, but surpassed 50% failure within 3 years. Viewsonic replaced the ones that failed under warranty with refurbs, and they failed, too.Reply
I personally bought one of the same 27-inch models from Costco for home use after using one at work, it failed in less than 3 months. Thank goodness for Costco's warranty.
Maybe just really bad quality control on a couple of low-end models, but it scares me when the author writes "The obvious question has to be: what’s missing?", because in my past experience, what was missing was quality control. -
InvalidError Reply
Tell that to people who choose to do most of their reading on 1200-1600p 7-10" tablets due to the more pleasant, crisper, more paper-like fonts. I wouldn't mind having a 24-27" UHD display for reading. I am still a big fan of dead-tree format for reading because crisper fonts and higher contrast reduce eyestrain.16167997 said:4K displays should start at 40" to really take advantage of the increased resolution. 27" doesn't make any sense. -
-Fran- Looks like a solid option. I miss my low latency Viewsonics from old, but Samsung gave fierce competition. I wonder what Samsung will bring to the table now.Reply
And please make prices go down already. I want one of these puppies at a reasonable 300-ish price, haha.
Cheers!
