System Builder Marathon Q1 2016: $662 Budget PC
It’s been a while since we’ve made a true low-budget machine. So how much performance can you get for under $600 of hardware now?
A Return to Basics
System Builder Marathon Q1 2016
Here are links to each of the four articles in this quarter’s System Builder Marathon (we’ll update them as each story is published). And remember, these systems are all being given away at the end of the marathon.
To enter the giveaway, please fill out this SurveyGizmo form, and be sure to read the complete rules before entering!
- $1275 Professional Workstation
- $1232 Prosumer PC
- $662 Budget PC
- System Value Compared
$662 Budget PC
Regular SBM readers will know I spent the last six months trying to wring every drop out of an Athlon 860K (within reason). The upside was tempting. An unlocked quad-core CPU that can theoretically compete with the more expensive i3 for less money is the low-budget tweaker's Holy Grail. What I found is an age-old lesson: there’s no such thing as a free lunch. The time and money it takes to reach the i3 level is greater than the cost of an i3 platform itself.
The feedback from readers was mixed on a variety of things, but one thread was fairly constant: where were the low-budget builds? It’s been a year since we’ve seen an SBM entry under the $700 mark. Where was the love for our readers without bottomless bank accounts? While I was tempted to follow my cohorts with a mid-range system this time around, ultimately I decided to cut my budget for my fiscally-minded friends.
| Q1 2016 Low-Budget PC Component List | ||
|---|---|---|
| Processor | Intel i3-6100 (Skylake) | $129.99 |
| CPU Cooler | DeepCool T200 | $14.99 |
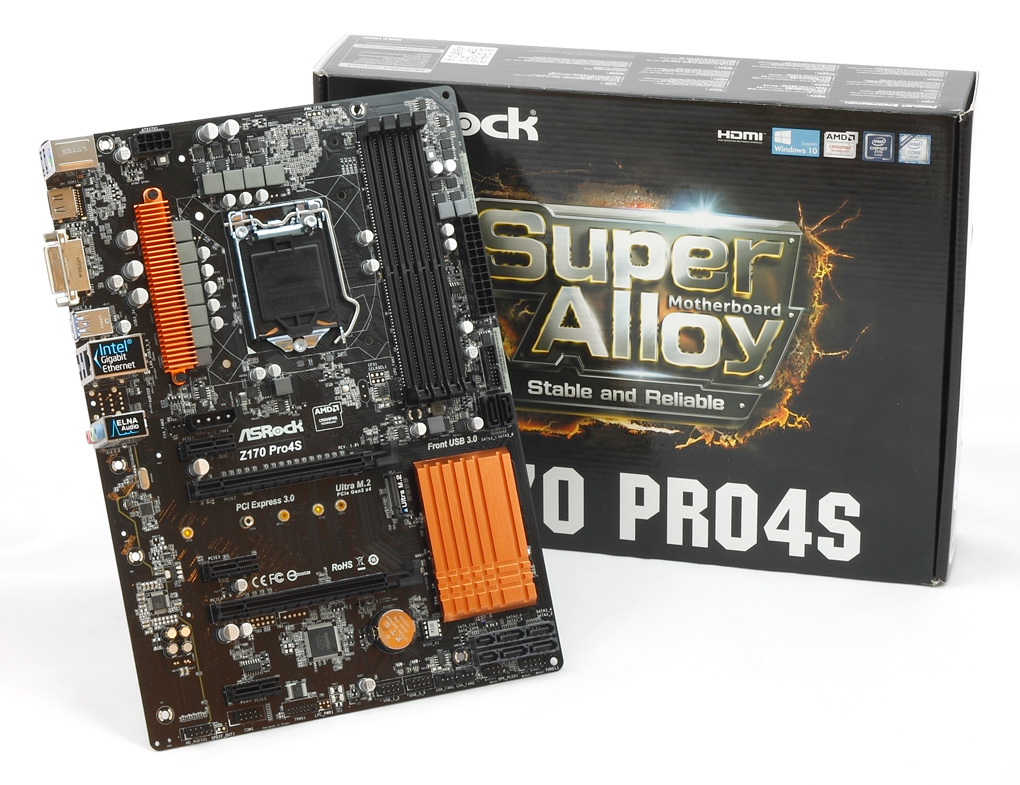
| Motherboard | ASRock Z170 Pro4S | $79.99 |
| Graphics | Asus Stric GeForce GTX 950 2GB | $155.09 |
| Memory | Mushkin Redline DDR4-2400 CAS13 (2 x 4GB) | $42.99 |
| System Drive | WD Blue 1TB 3.5" | $53.99 |
| Power | Antec VP-450 | $37.99 |
| Core Cost | $515.03 | |
| Case | Rosewill Redbone U3 | $42.99 |
| Total Performance Cost | $558.02 | |
| Storage Drive | None | $0 |
| Optical Drive | None | $0 |
| Total Hardware Cost | $558.02 | |
| OS | Windows 10 x64 Home | $104.48 |
| Complete System Price | $662.50 |
I hesitate to call this a “gaming” build. I’m not sure how I’d classify it, truth be told. I’ll leave the machine to talk for itself and let the readers categorize it. As always, I’m sure you’ll have a lot to say in the comments, and I’m eager to see your responses. As always, I only ask that you read the article in its entirety before posting. I assure you it will answer most of the obvious questions. And hat tip to user filippi. Whether he was serious or not, his prediction from three months ago came true.
A New Directive
Thomas, Chris and I followed a similar theme this time as last quarter, seeking only performance value, but this time we have no inherited restrictions from prior machines. I received an additional directive from Editor-in-Chief Fritz: knock Thomas down a peg or three and beat him. Mr. Soderstrom has gone more than a year since losing the final value crown in the SBM. My Intel Munchkin last quarter tied him at stock clocks, but got thrashed when overclocking was counted. No SSD and limited RAM capacity in Thomas’ declared “Prosumer” build left him with a little ire from the readers last quarter, but the fact is the numbers were not firmly on my side.
Get Tom's Hardware's best news and in-depth reviews, straight to your inbox.
A Chance to Excel
Last quarter I was hobbled in my value pursuit by the original Munchkin. While the GTX 970 is a great card, and perhaps still the best mid- to high-end gaming value on the market, gaming benchmarks make up a small portion of the overall test suite. I'll never see value investment returns when spending 40% of my budget on a GPU. Swapping it out for a mainstream GPU should still net me good game performance without spending too much.
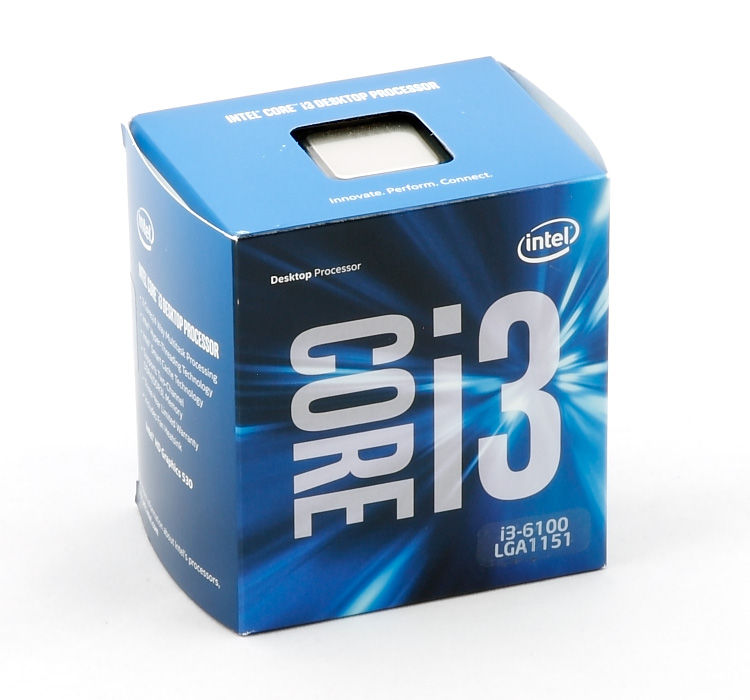
On the CPU side there's no need for any drastic change. I could go for an unlocked i5 that Thomas used last quarter, but that would undoubtedly increase the machine cost above any reasonable notion of "low-budget." I'll be sticking with an i3 again this quarter, though I'll be upgrading to the Skylake platform. This brings up the question of BCLK overclocking. Those who looked at the component list on the first page already know the answer. You should be asking, "Is it worth it?" instead. You'll get your answer to that in the next few pages.
Component Selection
The i3 last quarter proved a winner for me so there's little reason to go away from that now. However, there's little reason to stay with Haswell at this point. Moving to Skylake gets me better efficiency, DDR4 memory, and the possibility of BCLK overclocking. While I didn't set out for the latter, I ended up giving it a whirl as you'll find out below.
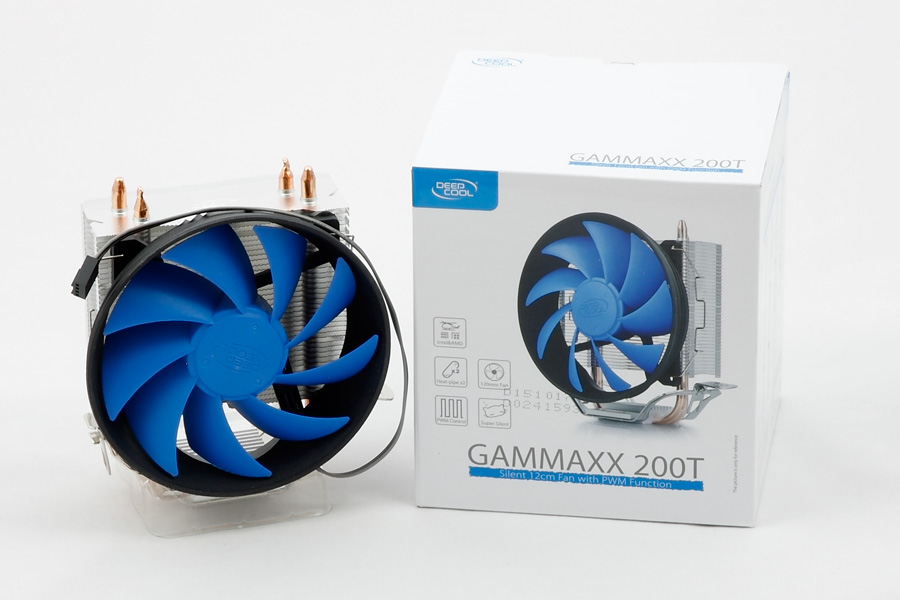
I actually like Intel's stock coolers, but that's provided you get the nicer ones with the copper slug. Those that come with the i3 are solid aluminum and don't perform as well. That being the case, and since I was attempting to overclock the i3, an aftermarket cooler seemed prudent. The i3 gives off very little heat compared to other Intel CPUs, so a small cooler would be more than adequate. I was stung by another DeepCool product last quarter for not fully clearing RAM modules. However, since this is a small tower cooler, I doubt I'll run into similar problems. The 200T's bigger brother just earned Thomas' adoration, so that (hopefully) bodes well for me.
Originally I had no intention of overclocking the i3 through its BCLK. The news seemed to change every other day whether it was possible or not. And after the troubles I had the last two quarters, I didn't want to take the time either. So I first settled on a good H110 board. The MSI H110M Gaming was on sale for only $70. While you can get a cheaper H110 board, this one featured USB 3.1 ports. MSI boards also have a reputation of better RAM support, so I was hoping for some better memory overclocking than I had last quarter. Then I got wind of an email discussion between Thomas and ASRock.
Not only was Thomas going for a Xeon build, but according to ASRock, they had boards they guaranteed would overclock a Xeon without disabling Hyper Threading. Without that hurdle I knew there was no way my humble i3 could compete. I fired off my own email to ASRock, asking if this could be done on an i3 at a reasonable price. Their response was that any Z170 board would be up to the task. Fearing that meant a drastic increase in system price, I hit up Newegg. To my surprise I saw the MSI Z170-A on sale for $80 instead of the normal $120. That was only $10 more than I spent on the H110 board. If I could overclock even 5 percent, I would end up ahead in terms of value. Knowing this was likely putting me back in the headache I swore off three months ago, I sent in the purchase order.
Sadly the sale ended the morning the purchase was approved. Going back to Newegg I looked for cheap Z170 boards and found ASRock's Z170 Pro4S for the same $80. It meant giving up USB 3.1 for 3.0, but it was the best Z board I was likely to get without greatly increasing my budget.
This is the third Asus card I've used in a row. No, I don't have some secret loyalty to Asus. Like most things in the SBM, it's the timing of when parts go on sale. I'd decided on a 950 when I first elected for a low-budget gaming and all-around performance machine. Initial prices when I was part shopping had MSI and EVGA cards on sale. By the time my list got finalized, those cards jumped up $15 while the Strix went on sale. My cohort Mr. Carbotte sang this card's praises, so that's enough for me to give it a go. Its black and red color scheme also matched my chosen (at the time) motherboard, so bonus style points.
Mushkin's kit has much better timings than most inexpensive RAM kits available. While most are DDR4-2133 CAS 14 or 15, Mushkin ups the frequency and lowers the latency. The rated 1.2V also might give a little room to push it higher. At time of original purchase, they also matched the motherboard and GPU in color. I don't normally prioritize style and looks when building computers, but who am I to deny Fate when she hands me a great color scheme?
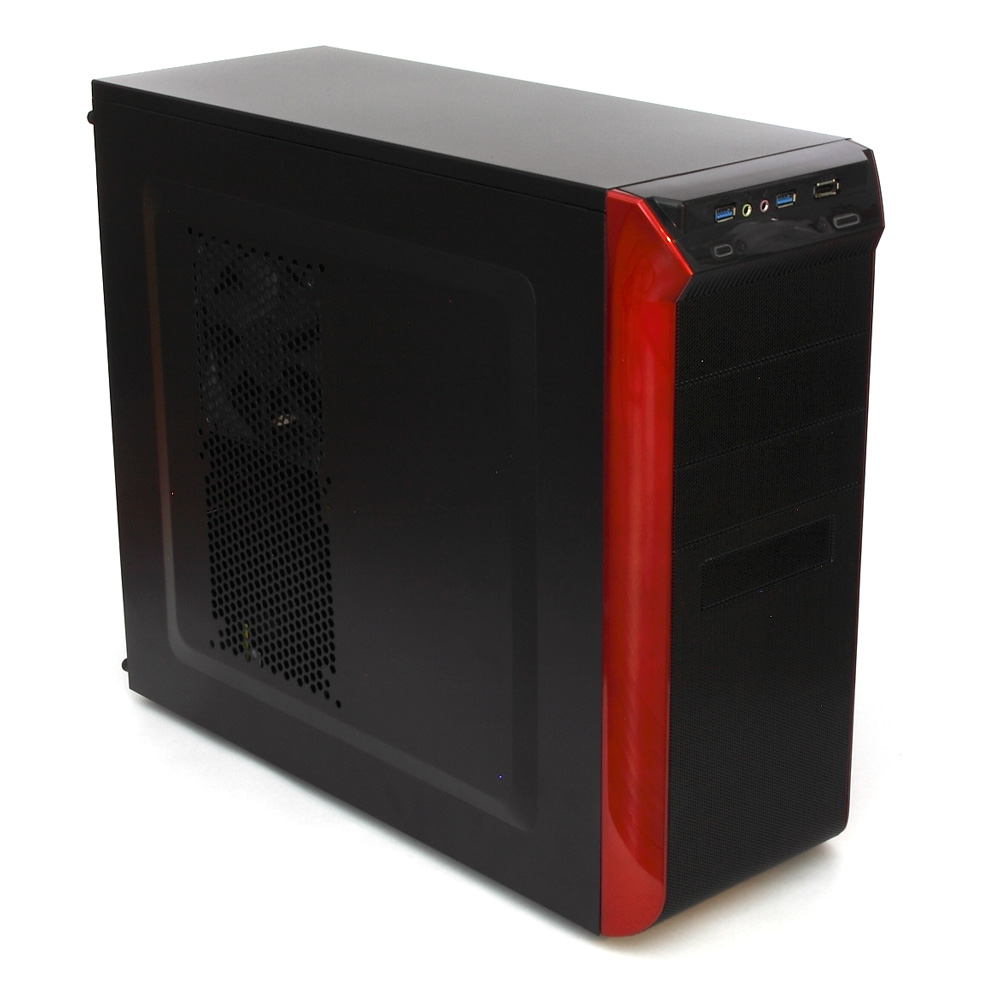
Not all in-house brands are inferior and not all cheap cases are flimsy sheet metal boxes masquerading as computer enclosures. The Redbone may not be quite as rigid as other more expensive chassis, but it does offer front panel USB 3.0, eSATA and three 120mm fans pre-installed. Paul, Don and Thomas have all used this case in SBMs to success and I expect to do the same. Having already selected a board, GPU and RAM, I admit I did spend an extra $3 on this case for the color. If $3 makes the difference in my value win, then I don't deserve it this time.
The list of good quality, low price PSUs in the 400W – 500W range is pretty slim. Getting one with a PCIe power lead makes it even harder. Finding Antec's unit at a discount was a small blessing. This machine shouldn't come anywhere near even half of the 450W this supply can handle, but going with anything smaller means either spending more money or powering the GPU off molex adapters, neither of which is a good option.
The absence of a SSD will no doubt be disappointing to some. That disappointment is not unmerited. I didn't have any budget restrictions, so I can't say I couldn't afford one. I was hoping to keep the total system under (or at least around) $650 total. Even without a SSD I overshot that goal a little. The SBM test image requires at least 200GB of disk space. That means I would've needed at least a 240GB SSD, and those run at least $60. That would put me over $700 total. At that point I feared the low-budget crowd would think the SBM had ignored them once again. I could've used a 120GB drive, but since that couldn't hold the test image, it wouldn't have counted in the benchmarks. The spindle drive seemed to be the best way to hit the most goals possible.
OS – Windows 10 x64 OEM - $100
Like last time, our part list shows Windows 10 while the bench results say Windows 8. We're still finalizing the new test image so that will have to wait a little longer. Also like last time, I added an 8GB USB drive for the winner that I'll load with the Windows 10 install files so they won't need to use a DVD drive. There was a little discussion last time as to whether this is fair or not. So I'll add that $4.50 to my total machine cost.
MORE: Latest Systems NewsMORE: Systems in the Forums
Assembly
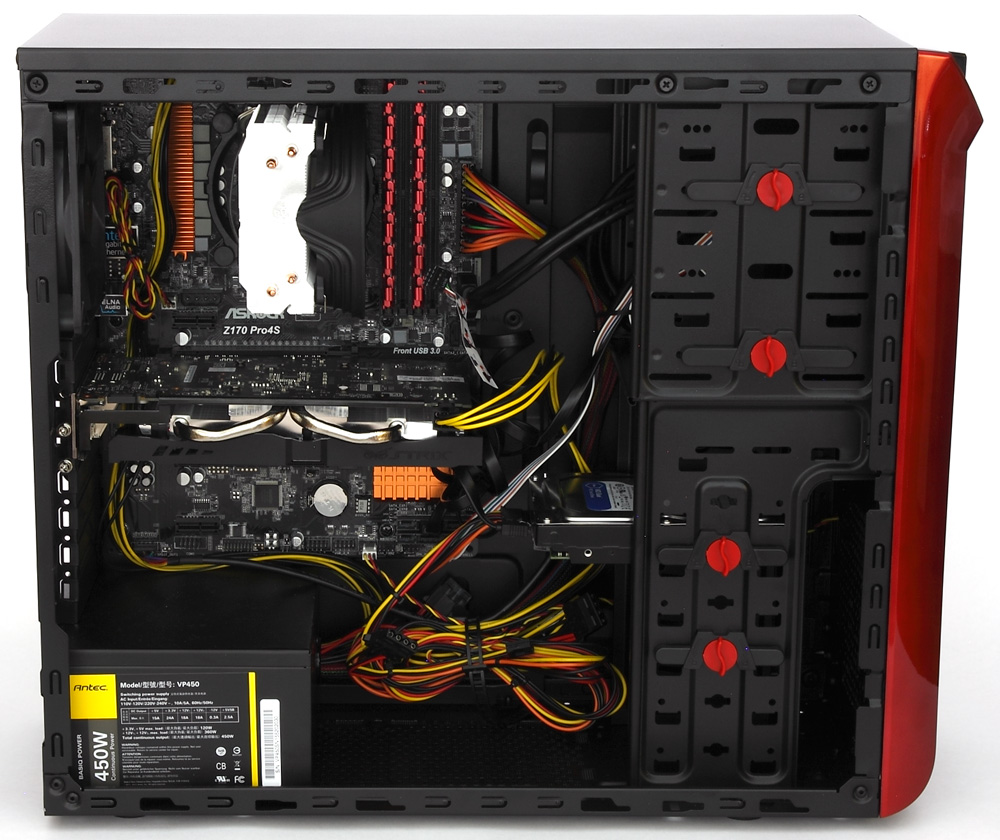
A spacious ATX tower case seems luxurious after six months of cramped ITX quarters. Assembling the components in the case went smoothly. The 200T has a mounting system similar to Intel's stock cooler. A base ring attaches to the motherboard using push-pins and the cooler clamps to the ring. In an AMD build, the cooler can attach directly to the stock AMD mount plate. I'm not a fan of push-pins in general, but this system proves both elegant and effective.
As Thomas and others have found before, the Redbone offers practically no accommodations for clean cable management. None of the cutouts were useful. The best I could do was tuck and tie the cables out of the main air paths. It's not pretty but it shouldn't pose any thermal problems. My CPU cooler was short enough to still fit under the side case fan in its stock position. However the CPU had plenty of thermal headroom so I moved it lower on the panel to give the GPU more air. Installation of software proved more problematic
Our master test image for the SBM is still on Windows 8, not even 8.1. Simply getting the image loaded and running on the new hardware was difficult enough. None of the manufacturer provided driver installation packages wanted to work. Now I may be knowledgeable enough to extract a driver out of the package and manually apply it, but most people aren't. This is just a gentle reminder to those complaining about Microsoft dropping additional support for older Windows versions on newer hardware. Other companies are doing it too. If you look at the motherboard drivers for new LGA1151 boards, you may notice that most no longer offer Windows XP drivers. It wouldn't surprise me if Windows 7 drivers got dropped in the next generation.
Overclocking
My dad had a favorite saying: I hate it when they do it to themselves. I'm sure he'd be laughing at me right now. Only a few short months after swearing off overclocking this quarter, here I am again. Worst of all, I brought it on myself. I could've said no. I could've said it's not worth it. I could've said I wasn't going to mess with the morass that seems to be Skylake BCLK tinkering. Just do a simple memory and GPU boost and be done with it. But I've never claimed to be an overly humble fellow, and when I heard Thomas was having success overclocking a supposedly locked down Xeon, it's difficult for me to swallow pride and take that lying down.
But don't let me scare you off with tales of doom and horror. The overclocking started off quite easy. The 3.0 BIOS that was on this board still had ASRock's Sky OC feature, but I ignored it at first. Sky OC is reported to disable AVX. A lot of the CPU tasks in the SBM bench suite enable AVX and if I lost that acceleration I would lose more performance than I would gain in pure clock speed. Instead I got my hands dirty in the pure manual settings.
A quick bump to a 105 MHz BCLK showed no problem. Another jump to 110 MHz likewise went well. At this point I went for gusto and punched in 120 MHz. Finally I hit a boot error. Slowly lowering the BCLK it seemed 115 MHz was either this motherboard's limit or the CPU wouldn't budge above 4.225 GHz. It wasn't a thermal issue as the CPU wasn't going over 60 degrees C total, and boosting the voltage wasn't helping either. With my CPU limit in hand, I turned to the RAM.
Setting the BCLK back to 100 MHz, I started stretching the RAM above its XMP values. The modules proved stable at DDR4-2666 and auto timings so I tried for 2800. That too was a success so I went for 2933. The system booted but proved unstable at the lightest load. Dropping back to 2800 I found I couldn't get the timings tighter than CAS 15. A quick run of Sandra showed the bandwidth wasn't any better than the 2400 XMP. Dropping once again to the 2666 multiplier I found CAS14 was both stable and offered better bandwidth than either 2400 or 2800. I found my two sweet spots so now it was time to marry them. And that's when the horror show started.
Access Denied
With a 115 MHz BCLK, using the 2400 multiplier would result in DDR4-2760, which was a little higher than I'd proved was stable, but I'd give it a go. Except I couldn't boot the system at all on those settings. A little disappointed I lowered BCLK to 110 MHz and tried again. This time the computer at least booted, but the RAM wasn't stable. This confused me as it was only DDR4-2640, or slower than I had done boosting the RAM alone. I brought the BCLK back up to 115 MHz but lowered the RAM multiplier to the 2133 default for DDR4-2453. Again, it would boot but it wasn't stable. At this point I was wondering if the memory controller in the CPU simply didn't respond well to the higher BCLK. It was fine for light loads, but any sort of heavy memory work resulted in crashes and rounding errors.
At this point I contacted ASRock for assistance and advice. They provided a new BIOS which somewhat helped, but not entirely. I still couldn't reach the RAM speeds on an overclocked BCLK as I could at stock. In desperation I turned to Sky OC. Perhaps it would unlock some additional memory controls and multipliers. Perhaps the cache being tied to the main CPU multiplier was causing problems and Sky OC would give me separate controls.
Sky OC did get me booted and stable at BCLK 110 and DDR4-2640, but it was at CAS 18. Not only that, but AVX had been disabled. At this point, things looked grim. The incredible 15 percent overclock I was able to get with the CPU would be for naught as the system wouldn't be able to complete the test battery. I had to roll back the CPU until I could stabilize the memory system.
A Changed Outlook
While licking your wounds is hardly pleasant, this time it came with a feeling of relief. There was little chance I was going to catch Thomas this quarter (sorry Fritz!). At this point I was just looking for the highest BCLK that didn't kill the RAM and didn't disable AVX. It took a few tries, but I finally locked it in at 102 MHz. That brought another problem as I noticed the motherboard automatically lowered both my CPU and cache multiplier from 37 to 36. Meaning I was actually losing clock speed. As the i3 is a locked chip, multiplier controls are nowhere in the UEFI. However, A-Tune in Windows has the ability to bump them back up. The cache multiplier change actually seemed helpful as I reached DDR4-2720 CAS 14. It helped in making up for the hurt of losing 13 percent of my gains, but not much.
Between hassling with drivers and fiddling with the CPU and RAM overclock, I was very short on time to tune the GPU. I went back to Kevin's review and looked at what he was able to reach. I tried those settings and found them relatively stable. A few extra tweaks and I was done. My memory was friendlier than Kevin's sample and was able to take a 250 MHz boost. My GPU core wasn't quite as nice, but it was able to go up another 125 MHz by raising the power target to 120 percent.
-
turkey3_scratch I love this build! I used to recommend the Redbone U3 case a lot. Rosewill cases are great, and one of the greatest features is that they come with plenty fans. My cheap $29 Rosewill case came with 2 fans, and the case itself is very durable steel. I think that was a great case choice. As for the overclocking troubles, do you think it was more CPU or motherboard related? I would argue motherboard related. I am a huge fan of the I7-5820K and the X99 platform, and one of the arguments many people make in support of the I7-6700K is that the motherboards are far cheaper, so it brings down the cost of the I7-6700K a lot. But this is a perfect example of the downfalls of overclocking on cheap boards, even if it is Z170. Too limited. At least if I go X99 and have to pay $150 for a board, I know the board is going to be well up for overclocking with a powerful VRM.Reply -
kunstderfugue That overclock story is such a bummer. I'd love to see a roundup of Z170 boards for BCLK overclocking, provided it's going to be doable without some microcode update built into windows disabling it.Reply -
AlistairAB I think this is a great build for Americans ;)Reply
Here in Canada, that motherboard is crazy expensive, and the i3 alone is over $170 after shipping. Since AMD's new 870K with the quiet cooler is just $110 CAD, AMD still wins for me outside the U.S.
Come on Intel, stop gouging us with your i3 prices :) -
RedJaron I'm almost positive the overclock limitations were from the board. Even at 4.225 GHz, the CPU didn't break a sweat. I still had plenty of thermal headroom and was only using a 1.32V VCore. No, I think it had more to give, the board just wouldn't let it get there. I saw the same thing last year with the H81 and B85 roundup. None of the boards could stably hold 4.3 GHz or higher. Putting the same chip in even a cheap Z97 board got me 4.4 GHz easy. Now that was probably more about VRM capacity and power flow, which I don't think was the case this time. But in my other mboard reviews, you see some that can just hit the higher BCLK marks.Reply -
Onus Very interesting. I'll need to reread again when I'm awake again tomorrow, but it looks like you've provided some good data once more.Reply
The only change I might suggest would be one of Seagate's SSHDs. Either the 1TB or 2TB model is frequently discounted.
-
RedJaron That's not a bad idea for a real-world build. I just don't know that a hybrid drive will show any benefit in the SBM test suite. You typically have to use those drives for at least a few days before the caching algorithm knows what to store and keep in the cache. That would speed up some tests, but not others, and I don't know how you would control the ones that get the speed.Reply
If it was me and I had to stay around $650 total, I'd probably drop the GPU to the 750 Ti and get a 120 GB SSD. That would also let you save on the PSU since you wouldn't need the PCIe lead. Of course that also limits your future GPU upgrades, so pick your poison. -
damric Looks like your overclock was limited by the low-end RAM. It's a shame because there are 2666 and 3000MT/s kits going for cheap right now.Reply
Personally, I used the same high end DDR3 that I already had, and I think that was to my advantage as I had many more RAM dividers to drop down to while raising the base clock.
Maybe you can make another attempt at this again later and give us an update. -
RedJaron I don't think it was the RAM. If it was, I should have had problems with it at the faster speeds regardless of the BCLK. However I got it fully stable at DDR4-2700 with a 102 BCLK, but I couldn't even get DDR4-2400 when the BCLK was above 105. I don't think it was the cache multiplier either because 2666 was rock steady with a 3.7 GHz cache.Reply
I'm sure we'll see a lot more i3 tinkering in the days to come, and this is hardly an exhaustive study. On your personal i3 overclock, have you seen any memory problems? How do you stress yours to test it? -
damric Reply17748517 said:I don't think it was the RAM. If it was, I should have had problems with it at the faster speeds regardless of the BCLK. However I got it fully stable at DDR4-2700 with a 102 BCLK, but I couldn't even get DDR4-2400 when the BCLK was above 105. I don't think it was the cache multiplier either because 2666 was rock steady with a 3.7 GHz cache.
I'm sure we'll see a lot more i3 tinkering in the days to come, and this is hardly an exhaustive study. On your personal i3 overclock, have you seen any memory problems? How do you stress yours to test it?
lol...if you only knew how many times I re-installed Windows on my bench drive due to corrupted file system while overclocking my i3... The first week was really rough. I've still not got my DDR3 as far as I got it with Kaveri (2400CL9), but even still it is showing better bandwidth and latency at like ~DDR3-2300CL9 than my 860K could do. I'm capped at 1.65v in my Z170 BIOS though, whereas I could push literally as far as I wanted on my FM2+ motherboard.
But now I'm more comfortable, fully stabilized a 24/7 overclock and still chipping away at stabilizing 4.7GHz.
For stressing I obviously can't use the typical AVX workloads, so I'm experimenting several other synthetics and real work loads such as loops of 3dmark physics, CPU-Z stability test, Kombustor CPU stability test, AIDA 64 Extreme stability test, ASUS Realbench CPU stability test, and of course just normal gaming and work loads. Some of these tests indicate very high temperatures in AIDA when I crank the voltage (nearing 80C), and others are lower temps like 50C. I've pushed voltage as high as 1.5 already though it did no good, so maybe I'm hitting my cache limit. -
Mac266 Just for the archives, I offer a similar build here in Aus. Counting all the costs, Including my charge, the cheapest you can pick it up is $1050 AUD. Crazy stuff.Reply
