Acer XG270HU 27-inch FreeSync Monitor Review
We’ve had G-Sync monitors for many months now, but AMD fans had to wait for FreeSync screens. Today we’re looking at Acer’s 27-inch QHD XG270HU.
Why you can trust Tom's Hardware
OSD Setup And Calibration
OSD Tour
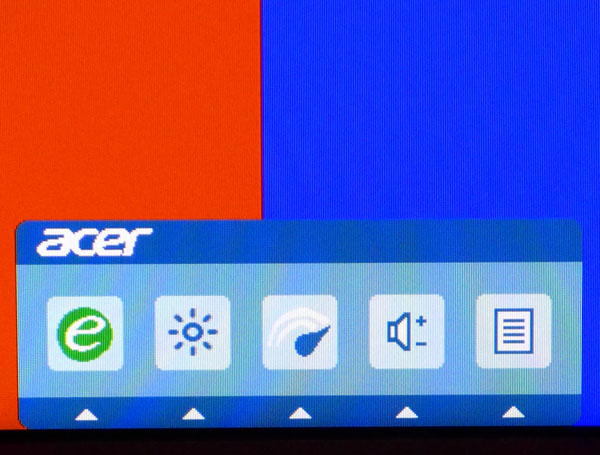
Pressing any control key brings up a small set of icons.
The e symbol represents the XG270HU’s five picture modes: User, ECO, Standard, Graphic and Movie. Standard is the default, but if you change any color option, the monitor switches automatically to User.
The second icon adjusts brightness, the third is Acer’s two-level overdrive control, the fourth adjusts speaker and headphone volume, and the last icon brings up the full OSD.
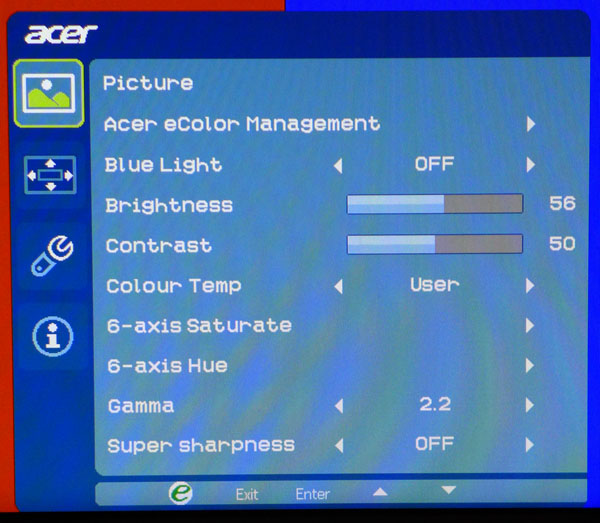
Acer eColor Management is another term for the five picture modes mentioned above. BlueLight gradually warms the color temp until the image is quite reddish. It also takes over the brightness setting. We suggest selecting the Warm color temp preset if you don’t plan to calibrate. It measures pretty close to D65.
Unusual in a gaming monitor are the six-axis color saturation and hue controls. Saturation can be used to adjust color luminance, while hue works well for tweaking the secondary colors, magenta, cyan and yellow.
Gamma presets are offered only at the 2.2 and 1.8 levels. The 2.2 option is quite accurate so we left it alone.
Super Sharpness adds in a slight amount of edge enhancement. While it might make graphic and video content appear sharper, the feature creates white outlines around black text in most applications.
Get Tom's Hardware's best news and in-depth reviews, straight to your inbox.
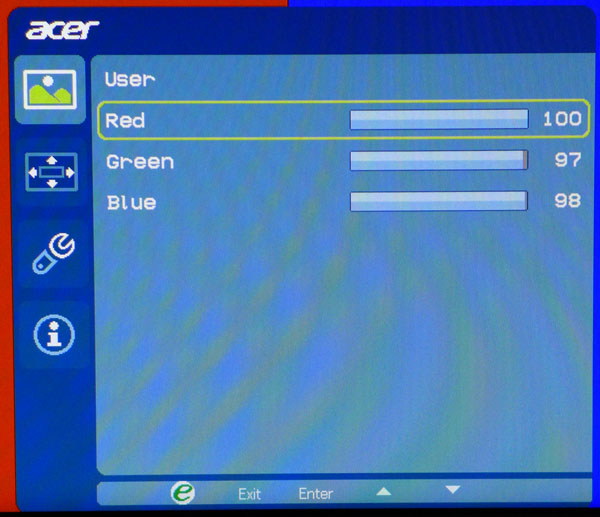
When you choose the User color temp, another click of the Select key brings up the RGB sliders. They work well, but we'd prefer a two-point control. Only a slight improvement in overall grayscale tracking is possible because you can’t manipulate the high and low end of the brightness scale separately. We’ll explain that in more detail on page five.
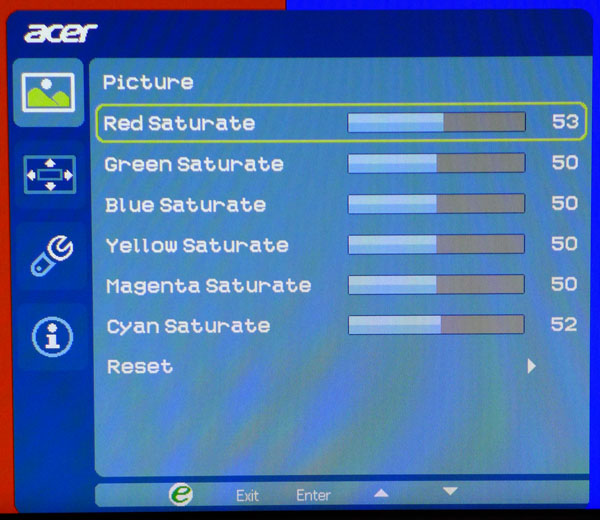
Here is the six-axis color control for saturation. Hue has a similar screen. Each color can be raised or lowered in value; a nice touch. Saturation actually does a better job dialing in color luminance and again, we had to compromise a bit when adjusting the CMS. The hue controls work nicely for bringing the secondary colors in line.
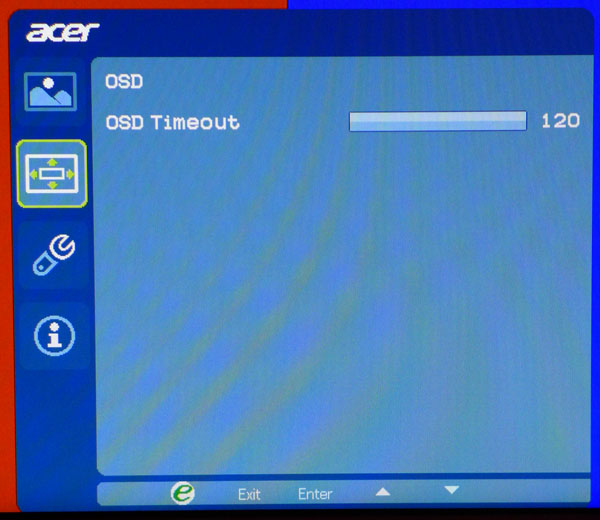
The only OSD control is timeout, which can be extended to 120 seconds. There is no need to move the menu around the screen since it defaults to the lower right-hand corner.
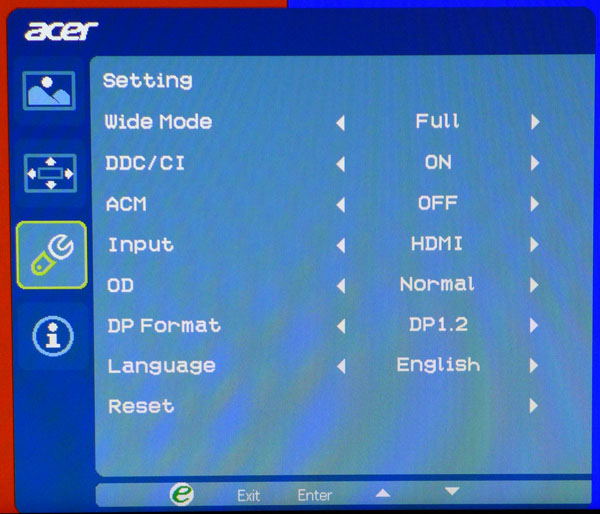
The third submenu, Tools, contains aspect ratio options, DDC/CI (leave this one), an input selector, overdrive, DisplayPort version and language. If you’re wondering about ACM, well, we weren’t sure either since it’s not explained in the manual. It stands for Adaptive Contrast Management though, also known as dynamic contrast. Use it sparingly since it crushes highlight and shadow detail. Speaking of the input selector, the XG270HU has an auto-sense feature that locks onto the first active signal.
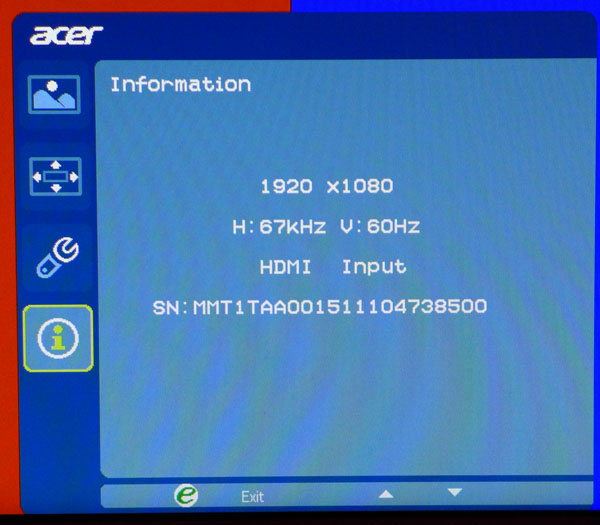
Finally, you have access to signal information including resolution and horizontal/vertical refresh rates. The current input and serial number are also displayed.
Calibration
The XG270HU offers good accuracy at its default presets--Standard mode, Warm Color Temp and Gamma 2.2. We tweaked the RGB sliders and the Six-Axis Saturate and Hue controls just a bit to try improving things. You’ll see in the test results that we made some small gains, though ultimately the visual difference was slight. Please feel free to try our settings below.
| Acer XG270HU Calibration Settings | |||
|---|---|---|---|
| Picture Mode | User | ||
| Brightness | 56 | ||
| Contrast | 50 | ||
| Color Temp User | Red 100, Green 97, Blue 98 | ||
| Gamma | 2.2 | ||
| Super Sharpness | Off | ||
| Red Saturation | 53 | Red Hue | 50 |
| Green Saturation | 50 | Green Hue | 50 |
| Blue Saturation | 50 | Blue Hue | 50 |
| Yellow Saturation | 50 | Yellow Hue | 47 |
| Magenta Saturation | 50 | Magenta Hue | 50 |
| Cyan Saturation | 52 | Cyan Hue | 50 |
Current page: OSD Setup And Calibration
Prev Page Packaging, Physical Layout, And Accessories Next Page Brightness And Contrast
Christian Eberle is a Contributing Editor for Tom's Hardware US. He's a veteran reviewer of A/V equipment, specializing in monitors. Christian began his obsession with tech when he built his first PC in 1991, a 286 running DOS 3.0 at a blazing 12MHz. In 2006, he undertook training from the Imaging Science Foundation in video calibration and testing and thus started a passion for precise imaging that persists to this day. He is also a professional musician with a degree from the New England Conservatory as a classical bassoonist which he used to good effect as a performer with the West Point Army Band from 1987 to 2013. He enjoys watching movies and listening to high-end audio in his custom-built home theater and can be seen riding trails near his home on a race-ready ICE VTX recumbent trike. Christian enjoys the endless summer in Florida where he lives with his wife and Chihuahua and plays with orchestras around the state.
-
rdc85 Look goods,Reply
hope they can make 144hz IPS "Freesync" monitor...
24" preferred.. 27" just to big for me.. -
eklipz330 "In the case of the XG270HU, its frame rate range is 30-144Hz, which means you can benefit from FreeSync down to 30 FPS."Reply
my god that is wonderful -
ubercake Reply"In the case of the XG270HU, its frame rate range is 30-144Hz, which means you can benefit from FreeSync down to 30 FPS."
The first freesync monitor with such a range. This is great for competition!!!
my god that is wonderful
I also like the fact these freesync monitors are not limited to a single DP input.
Now I feel like I have a choice again. AMD corrected their FCAT issues I had been complaining about for years and now freesync? I may head back to team red with the next gen. This is good stuff. How are the drivers lately? -
wtfxxxgp Very sexy monitor. That IPS version is also supposed to be QHD... That's going to be pricey for sure, but at least it's the start of good things to comeReply
-
wtfxxxgp ReplyLook goods,
hope they can make 144hz IPS "Freesync" monitor...
24" preferred.. 27" just to big for me..
Seriously? 27" 1440p is the SWEET SPOT. -
UncleVesper Reply"In the case of the XG270HU, its frame rate range is 30-144Hz, which means you can benefit from FreeSync down to 30 FPS."
my god that is wonderful
It figures Tom's Hardware does not actually do a full review of their products. The FreeSync range they just took for granted in what they were told. According to GURU3D, they experienced tearing this monitor < 40 FPS, so the minimum range is NOT 30 but 40 HZ.
http://www.guru3d.com/articles_pages/amd_freesync_review_with_the_acer_xb270hu_monitor,12.html -
UncleVesper Link cut off, this was the conclusion: "We did noticed on the ACER screen that at low sub 35 FPS screen tearing was back, which was disappointing. From what we learned, the ACER dynamic range starts at 40Hz, and thus so will FreeSync. If you cannot achieve such a framerate then you need to tweak image quality in such a manner that it stays above the minimum dynamic range. But FreeSync at 40+ FPS is as good as it is at 60 FPS, that is a fact."Reply -
Wisecracker Reply16039451 said:"In the case of the XG270HU, its frame rate range is 30-144Hz, which means you can benefit from FreeSync down to 30 FPS."
my god that is wonderful
Yup.
The first OEMs to seriously target entry-level and 'mainstream' 30Hz+ at a respectable size and resolution are sitting on gold mines. Hopefully, it will happen sooner rather than later.
If Intel gets behind it, it's a done deal. Being the big dog with DX12 on the immediate horizon, and with their investment made into integrated graphics, it is a natural extension to bring DP to great, inexpensive motherboards.
I'd love to see some gaming reviews at the lower-end. Let us see the experience with a $130 APU.
-
singemagique ReplyVery sexy monitor. That IPS version is also supposed to be QHD... That's going to be pricey for sure, but at least it's the start of good things to come
Yep, the XB270HU is 1440p, IPS, 144hz, 4ms, GSync. I picked up two last month from Amazon at $738. They are excellent panels and the best monitors I have used outside of professional monitors. -
quilciri Why, oh why, oh why doesn't it have a VESA mount? You were so close to the perfect monitor, Acer.Reply
