BenQ RL2460HT 24-Inch Monitor Review: Is Gaming Good At 60 Hz?
Does a true gaming monitor need to have a 120 or 144 Hz refresh rate? BenQ’s RL2460HT offers plenty of features that cater to enthusiasts, but it tops out at 60 Hz. Can those extra capabilities compensate, or should you continue your search elsewhere?
OSD Setup And Calibration Of The BenQ RL2460HT
Pressing control keys on the side of the RL2460HT made us really miss the slick S Switch controller from the XL2720Z we reviewed last month. Other than that, the menu system is exactly the same. The OSD is fixed in the lower-right corner of the screen. It’s pretty large, but won’t interfere with our test patterns.
OSD Tour
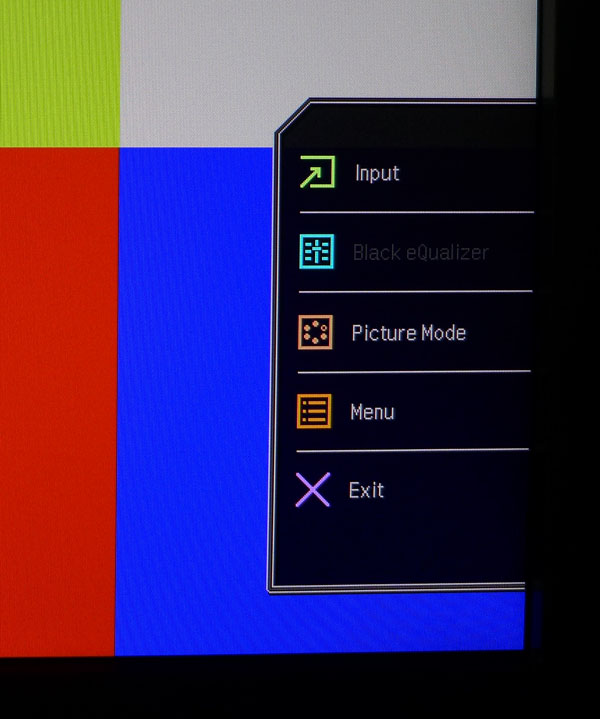
Clicking any button brings up this quick menu.
We’re showing you the default setup. However, the top three keys can be customized to provide quick access to other functions like brightness and contrast or color temp preset. Selecting Menu brings up the main OSD.
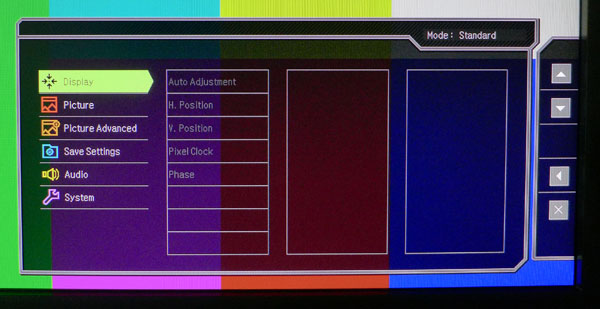
The RL2460HT won’t pick up where you left off; it always starts with the Display submenu. Options on that screen only apply to analog signals. You can size, position, and sync the image when you use the VGA input.
Now we get to the important stuff.
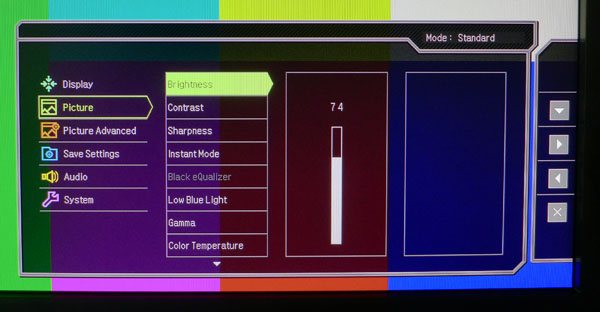
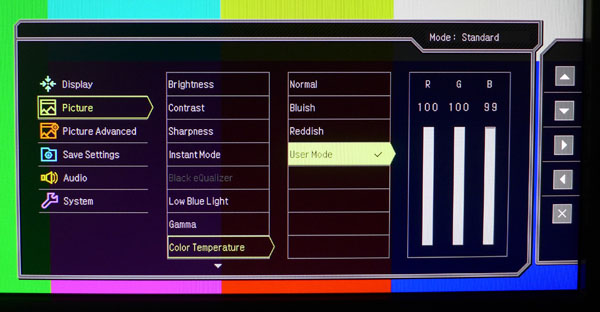
A majority of the calibration controls are in the Picture menu. Selecting any of them brings up either a vertical slider or a set of options. The icons on the extreme right show the function of each button and change depending on what you’re doing.
Brightness controls the backlight (as it does on every computer monitor we’ve tested). There is no separate black level control. Contrast won’t clip detail at its default setting of 50, but we lowered it to improve grayscale accuracy at 100-percent brightness.
Get Tom's Hardware's best news and in-depth reviews, straight to your inbox.
Sharpness’ default setting is 5, which produces an obvious edge enhancement in our test patterns. Dropping it to 1 fixes the problem.
Instant mode bypasses video processing to improve input lag. We were able to leave it On for all our tests.
Black eQualizer adjusts gamma at the low end of the brightness scale. If you’re having trouble seeing shadow detail, raising this control can help.
Low BlueLight is a feature unique to some BenQ monitors. It has the same effect as lowering the Blue slider in the color temp window. It goes from 0 to 10 and each click higher reduces blue, thereby making the image warmer in tone. It’s designed to combat eye fatigue, though a proper calibration yields the same result.
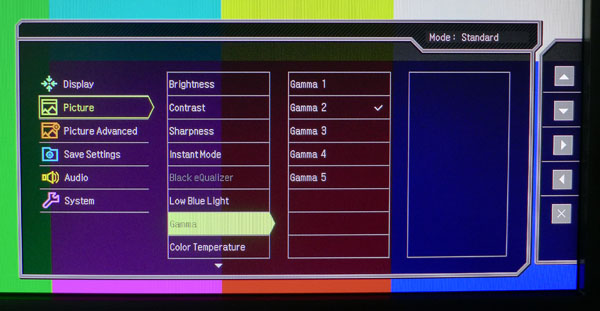
There are five gamma presets, but only numbers 2 and 3 come close to our standard of 2.2. There are tradeoffs to consider either way you go. We'll explain the differences in more detail on page six.
Choosing the User Mode color temp brings up a traditional set of RGB sliders. They are very precise and only require small adjustments to create excellent tracking. Depending on the gamma preset you choose, you’ll have to calibrate grayscale differently.
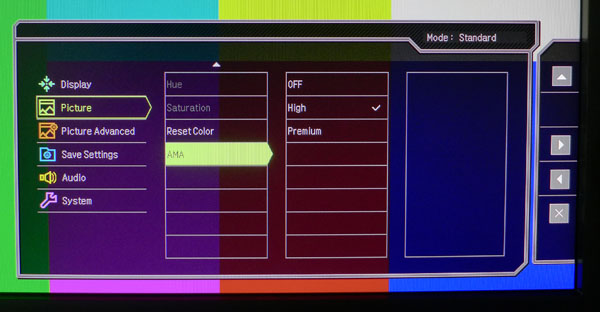
AMA stands for Advanced Motion Accelerator. It works like TraceFree to reduce ghosting behind moving objects. We saw better motion resolution in the games we tried. But in Windows, vertically-scrolling text suffered from a color fringing artifact.
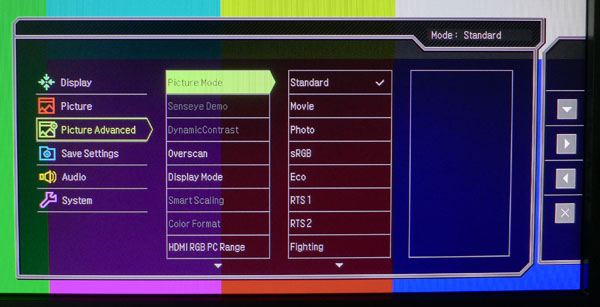
The Picture Advanced menu is where you’ll find the picture modes and aspect ratio options. Aside from the common sRGB, Movie, and Standard modes, you get more gaming-oriented settings like RTS, FPS, and Fighting. In our experience, sRGB and Standard are the most accurate right out of the box.
If you’re watching a broadcast video source, you may see noise around the edge of the image. Using the Overscan feature zooms in 1.5 percent to remove that artifact.
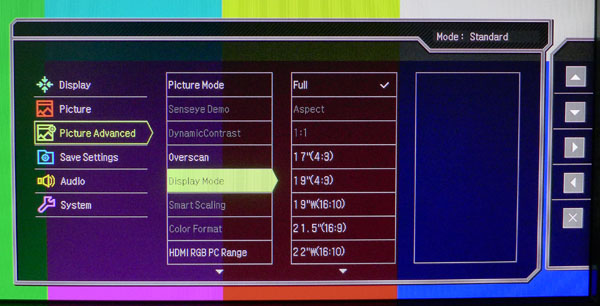
Full uses the entire screen to render an image, no matter what resolution you specify. The other choices create a windowed picture that is meant to mimic different sized and shaped monitors. We saw this on the 27-inch XL2720Z and thought it was pretty cool. If you have a game that is optimized for a different size or aspect ratio, BenQ can accommodate it without distortion.
Like the XL2720Z, our press sample RL2460HT was set for video levels (16-235) rather than PC (0-255). If you don’t change this, detail in games and productivity apps may not be visible. You’d only use the video setting for a source like a Blu-ray player or cable TV receiver.
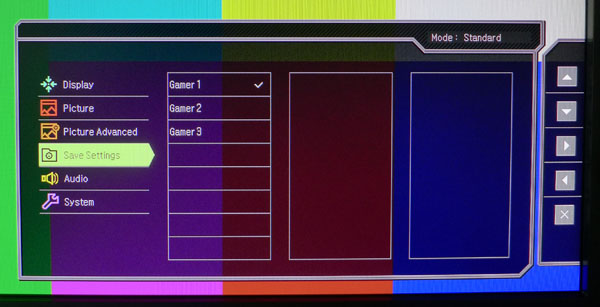
After choosing your options and/or calibrating the RL2460HT, you can save the configuration to one of three user memories. From there, it’s easy to call up different setups with just a couple of button clicks. We’d like to see this feature on all computer monitors.
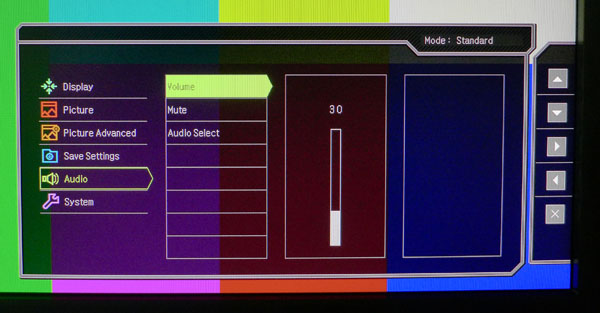
The audio volume and mute controls govern both the speakers and headphone output. Like all built-in transducers, BenQ's sound small and tinny with a distinct emphasis on the upper-mid-range. The headphone connection is much better, offering a low noise floor and good fidelity.
Audio Select lets you choose between the HDMI, DisplayPort, and analog signal sources.
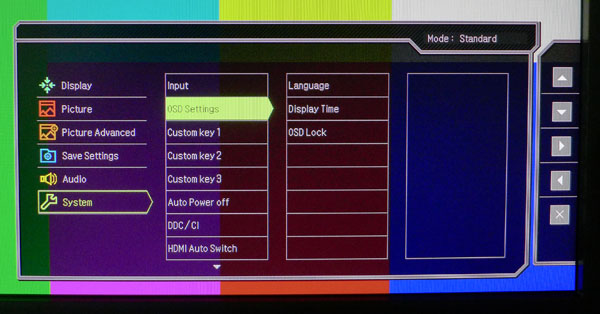
The OSD options include 17 languages, a display time of up to 30 seconds, and a complete lock-out feature. To restore it, press any button for 10 seconds.
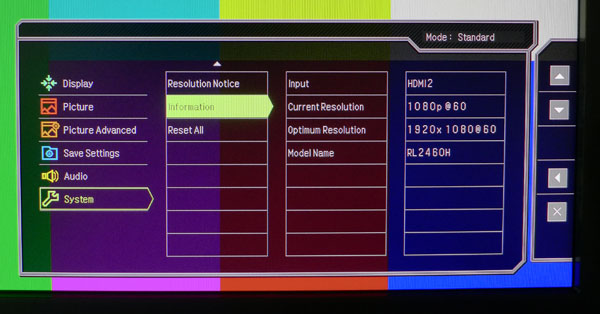
The final screen contains the signal information. You get resolution, refresh rate, and active input, but not the firmware version.
BenQ RL2460HT Calibration
We explored three different picture modes to find the best starting point for calibration. The RL2460HT arrived in our lab set to Fighting. While that preset's grayscale and gamma accuracy are alright, the color gamut has some significant errors. sRGB is a good choice, but it locks out the gamma presets and color temp adjustments. We settled on Standard because it measures fairly well out of the box and allows a fairly precise calibration with little effort.
The gamma presets introduced some unique challenges during our tests. The default setting of Gamma 3 has excellent tracking, but rides above the 2.4 level. Gamma 2 is closer to 2.2. However, it suffers a dip at 10 percent and a peak at 90 percent. Changing presets also upsets the RGB, Brightness, and Contrast adjustments to where you’ll have to re-calibrate depending on the gamma you choose. We preferred the image quality of Gamma 2. We'll publish both configurations so you can make up your own mind, though.
| BenQ RL2460HT Calibration Settings, Gamma 3 | |
|---|---|
| Brightness | 63 |
| Contrast | 49 |
| Color Temp User | Red 100, Green 99, Blue 98 |
| BenQ RL2460HT Calibration Settings, Gamma 2 | |
| Brightness | 73 |
| Contrast | 40 |
| Color Temp User | Red 100, Green 100, Blue 99 |
The difference between both configurations is small. Either one represents a high level of accuracy. We suggest saving them to the user memories so you can make a side by side comparison.
Current page: OSD Setup And Calibration Of The BenQ RL2460HT
Prev Page Packaging, Physical Layout, And Accessories Next Page Measurement And Calibration Methodology: How We Test
Christian Eberle is a Contributing Editor for Tom's Hardware US. He's a veteran reviewer of A/V equipment, specializing in monitors. Christian began his obsession with tech when he built his first PC in 1991, a 286 running DOS 3.0 at a blazing 12MHz. In 2006, he undertook training from the Imaging Science Foundation in video calibration and testing and thus started a passion for precise imaging that persists to this day. He is also a professional musician with a degree from the New England Conservatory as a classical bassoonist which he used to good effect as a performer with the West Point Army Band from 1987 to 2013. He enjoys watching movies and listening to high-end audio in his custom-built home theater and can be seen riding trails near his home on a race-ready ICE VTX recumbent trike. Christian enjoys the endless summer in Florida where he lives with his wife and Chihuahua and plays with orchestras around the state.
-
eldragon0 ReplyDoes it even matter when games automatically enable Vsync setting to 60 Hz?
No, but chances are if you're dropping 300+ on a monitor and genuinely want the extra frame rate you will be the type of person who is ready and expecting to tweak the game's files to run at those frame-rates. -
Heironious Yes, it matters. After buying the ASUS VG248 with Lightboost enabled in 2D gaming, I can not go back to a 60hz monitor. Is it really that hard for you to disable Vsync in the games settings?Reply -
envy14tpe I think most mid-range gamers go 60Hz TN panel monitors that sell for $150 or less. This monitor seems pretty pricey and is stuck between those and the 144Hz monitors. I don't' think this will sell all that well.Reply -
therogerwilco The ZR30W is 2560x1600, yet only 60 hz.Reply
I achieve first place in multiple games when playing multiplayer, on a regular basis.
60hz is not the problem, the problem is your system if it CAN'T sustain 60 fps. -
Xivilain If your monitor supports 30hz, 60hz, or even 120hz, its nice to see the visual difference they make when compared side by side. I like to show other people this demo to compare FPS:Reply
http://frames-per-second.appspot.com/ -
xenol When frame rate time periods start exceeding the fastest reaction times of humans, I start to question whether or not even faster frame rates are necessary.Reply
I don't think competitive players win because they have 144Hz monitors and can react with all that information being fed to them. I think they win because they are proactive, and that there are many tells anyway to allow someone who's tuned in the game to react quickly.
I mean, StarCraft has choppy animation that is independent of refresh rates (they look like they move at 20FPS), but there's a lot of high level competition there. -
heydan Im still don´t know how people reach the 120-144 fps in any game even at 1080p, maybe they refer to fps higher than 60fps, like 70, 80, and maybe for some old games the 120-144 fps, or they play games with low settings in order to reach those fps?, can someone explain me?, because I can find any review about any high end GPU and found that there´s so little games that achieve 120-144 fps at 1080p with everything max out...Reply -
tipmen ReplyIm still don´t know how people reach the 120-144 fps in any game even at 1080p, maybe they refer to fps higher than 60fps, like 70, 80, and maybe for some old games the 120-144 fps, or they play games with low settings in order to reach those fps?, can someone explain me?, because I can find any review about any high end GPU and found that there´s so little games that achieve 120-144 fps at 1080p with everything max out...
You do have a point with newer games that have very nice graphics. Such as, BF, Metro LL, and Arma 3 you need a beefy GPU set up or some people turn down the settings. (Eye candy is nice but if it is going to be a slideshow it isn't worth it) However, older titles such as CS GO where having the higher FPS will give you an edge doesn't take much to get 200+ FPS. Basically computers with at least an i5 and a 6970 or 580 can hit FPS 100+ on older titles. Newer titles i5/i7 (depends on the game if it take advantage of the hyper threading) 7970(280)/290x or 680/780. Crossfire or SLI helps but I personally find the gaming experience smoother playing CS GO on one 7970 instead of two in crossfire. With one I am still well over 100 FPS. When I play BF4 I have crossfire enable and high settings with some things turned down I get over 100FPS on DX11 API. When I try mantle (When it works....) I get an extra 10fps if I am lucky and feels smoother. You also can check Toms GPU charts of even their recently released SMB. I own Asus 144hz and never can go back to playing FPS on something less. I just wish they will catch up to my golden days with the CRTs refresh rates .
