Chroma Keying for the Masses: Serious Magic Ultra
Applying The Points
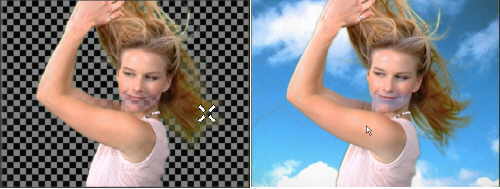
Clicking on Apply Points in the Keyer tab will turn the green/blue color into the background that you selected. You will probably notice that some areas on the actor/actress will be transparent. The checkerboard pattern really helps you see the transparent areas. This transparency is normal and can be easily fixed by moving the transparency slider to the right until you don't see the checkerboard any more.
Transparent Objects
Chroma keying has traditionally had trouble with keying out hair and semi-transparent objects such as veils or water bottles. Ultra, however, has no problem with these situations. You can see in our wedding picture that the veil is very thin and that you should be able to see through it in real life. On the right side is the final render where the ocean and sky colors can be seen through the veil.
Complete Control
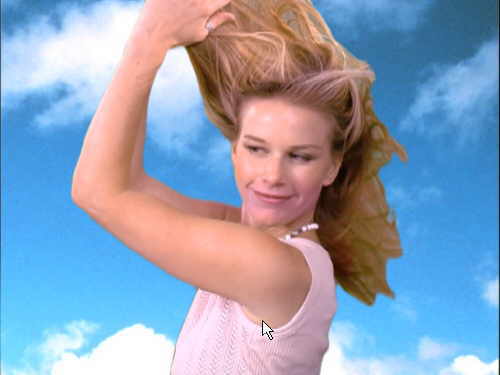
Ultra gives you complete control over the keying process. After the points are applied, you will often have to change how hard or soft the key is against the subject. A nice zoom feature helps you examine trouble areas. In the picture above, we can see that there is a slight green glow on the actress's skin. This is referred to as spill and is sometimes caused by light bouncing off the green screen and onto the person.
Various color correction tools are available to change how the actor looks. This is useful because you want to match the actor to the background. For example, a darkly lit actor would look a little out of place when placed on a sunny beach background.
While the number of controls may seem daunting at first, you will quickly get used to them. The layout is such that you can zip through the settings in less than a minute in most situations.
Get Tom's Hardware's best news and in-depth reviews, straight to your inbox.
Humphrey Cheung was a senior editor at Tom's Hardware, covering a range of topics on computing and consumer electronics. You can find more of his work in many major publications, including CNN and FOX, to name a few.


