Tom's Hardware Verdict
Large format printing with a direct drive extruder? The Elegoo Neptune 3 Plus is a printer that looks good on paper, and looks even better on a workbench.
Pros
- +
Silent steppers allow for very quiet printing
- +
Large and usable build volume
- +
Automatic 49-point bed leveling with adjustable thumbscrews
- +
Integrated LED bar for illuminating build volume
- +
Removable PEI sheet makes for fast part removal
- +
Dual Z axis threaded rods
Cons
- -
Currently not in stock
Why you can trust Tom's Hardware
The Elegoo Neptune 3 Plus is the middle child of the new Neptune 3 line of printers, falling between the Neptune 3 Pro and the Neptune 3 Max. The Neptune 3 Plus offers an impressive 320mm x 320mm x 400mm build volume and features the same direct drive extruder and automatic leveling probe as the smaller Neptune 3 Pro, a printer that impressed us during testing. The Neptune 3 Plus lives up to this reputation, and we were impressed with the quality and features of the printer as well as how easy it was to set up.
The features of the Elegoo Neptune 3 Plus are impressive on their own, but when weighed against its $350 retail price, it deserves a place among the best 3D printers. The Neptune 3 Plus handles notoriously difficult-to-print flexible TPU filament just as easily as it handles PLA, and the included Elegoo Cura slicer app makes it easy for beginners to set up their first prints.
Specifications of Elegoo Neptune 3 Plus
| Machine Footprint | 20.98 x 20.35 x 25.19 inches (533mm x 517mm x 638mm) |
| Build Volume | 12.6 x 12.6 x 15.78 inches (320mm x 320mm x 400mm) |
| Material | 1.75mm PLA, PLA+, TPU, PETG |
| Power Supply | 480W |
| Bed Leveling | 49-Point Automatic Mesh Leveling |
| Nozzle | .4mm |
| Max. Nozzle Temperature | 260°C / 500°F |
| Max. Bed Temperature | 100°C / 212°F |
| Printing Speed | 30-180mm/s |
| Build Platform | Magnetic Flexible Removable PEI Platform |
| Connectivity | USB, microSD |
| Interface | 4.3-inch Color Touchscreen LCD |
Unpacking and Assembling the Elegoo Neptune 3 Plus
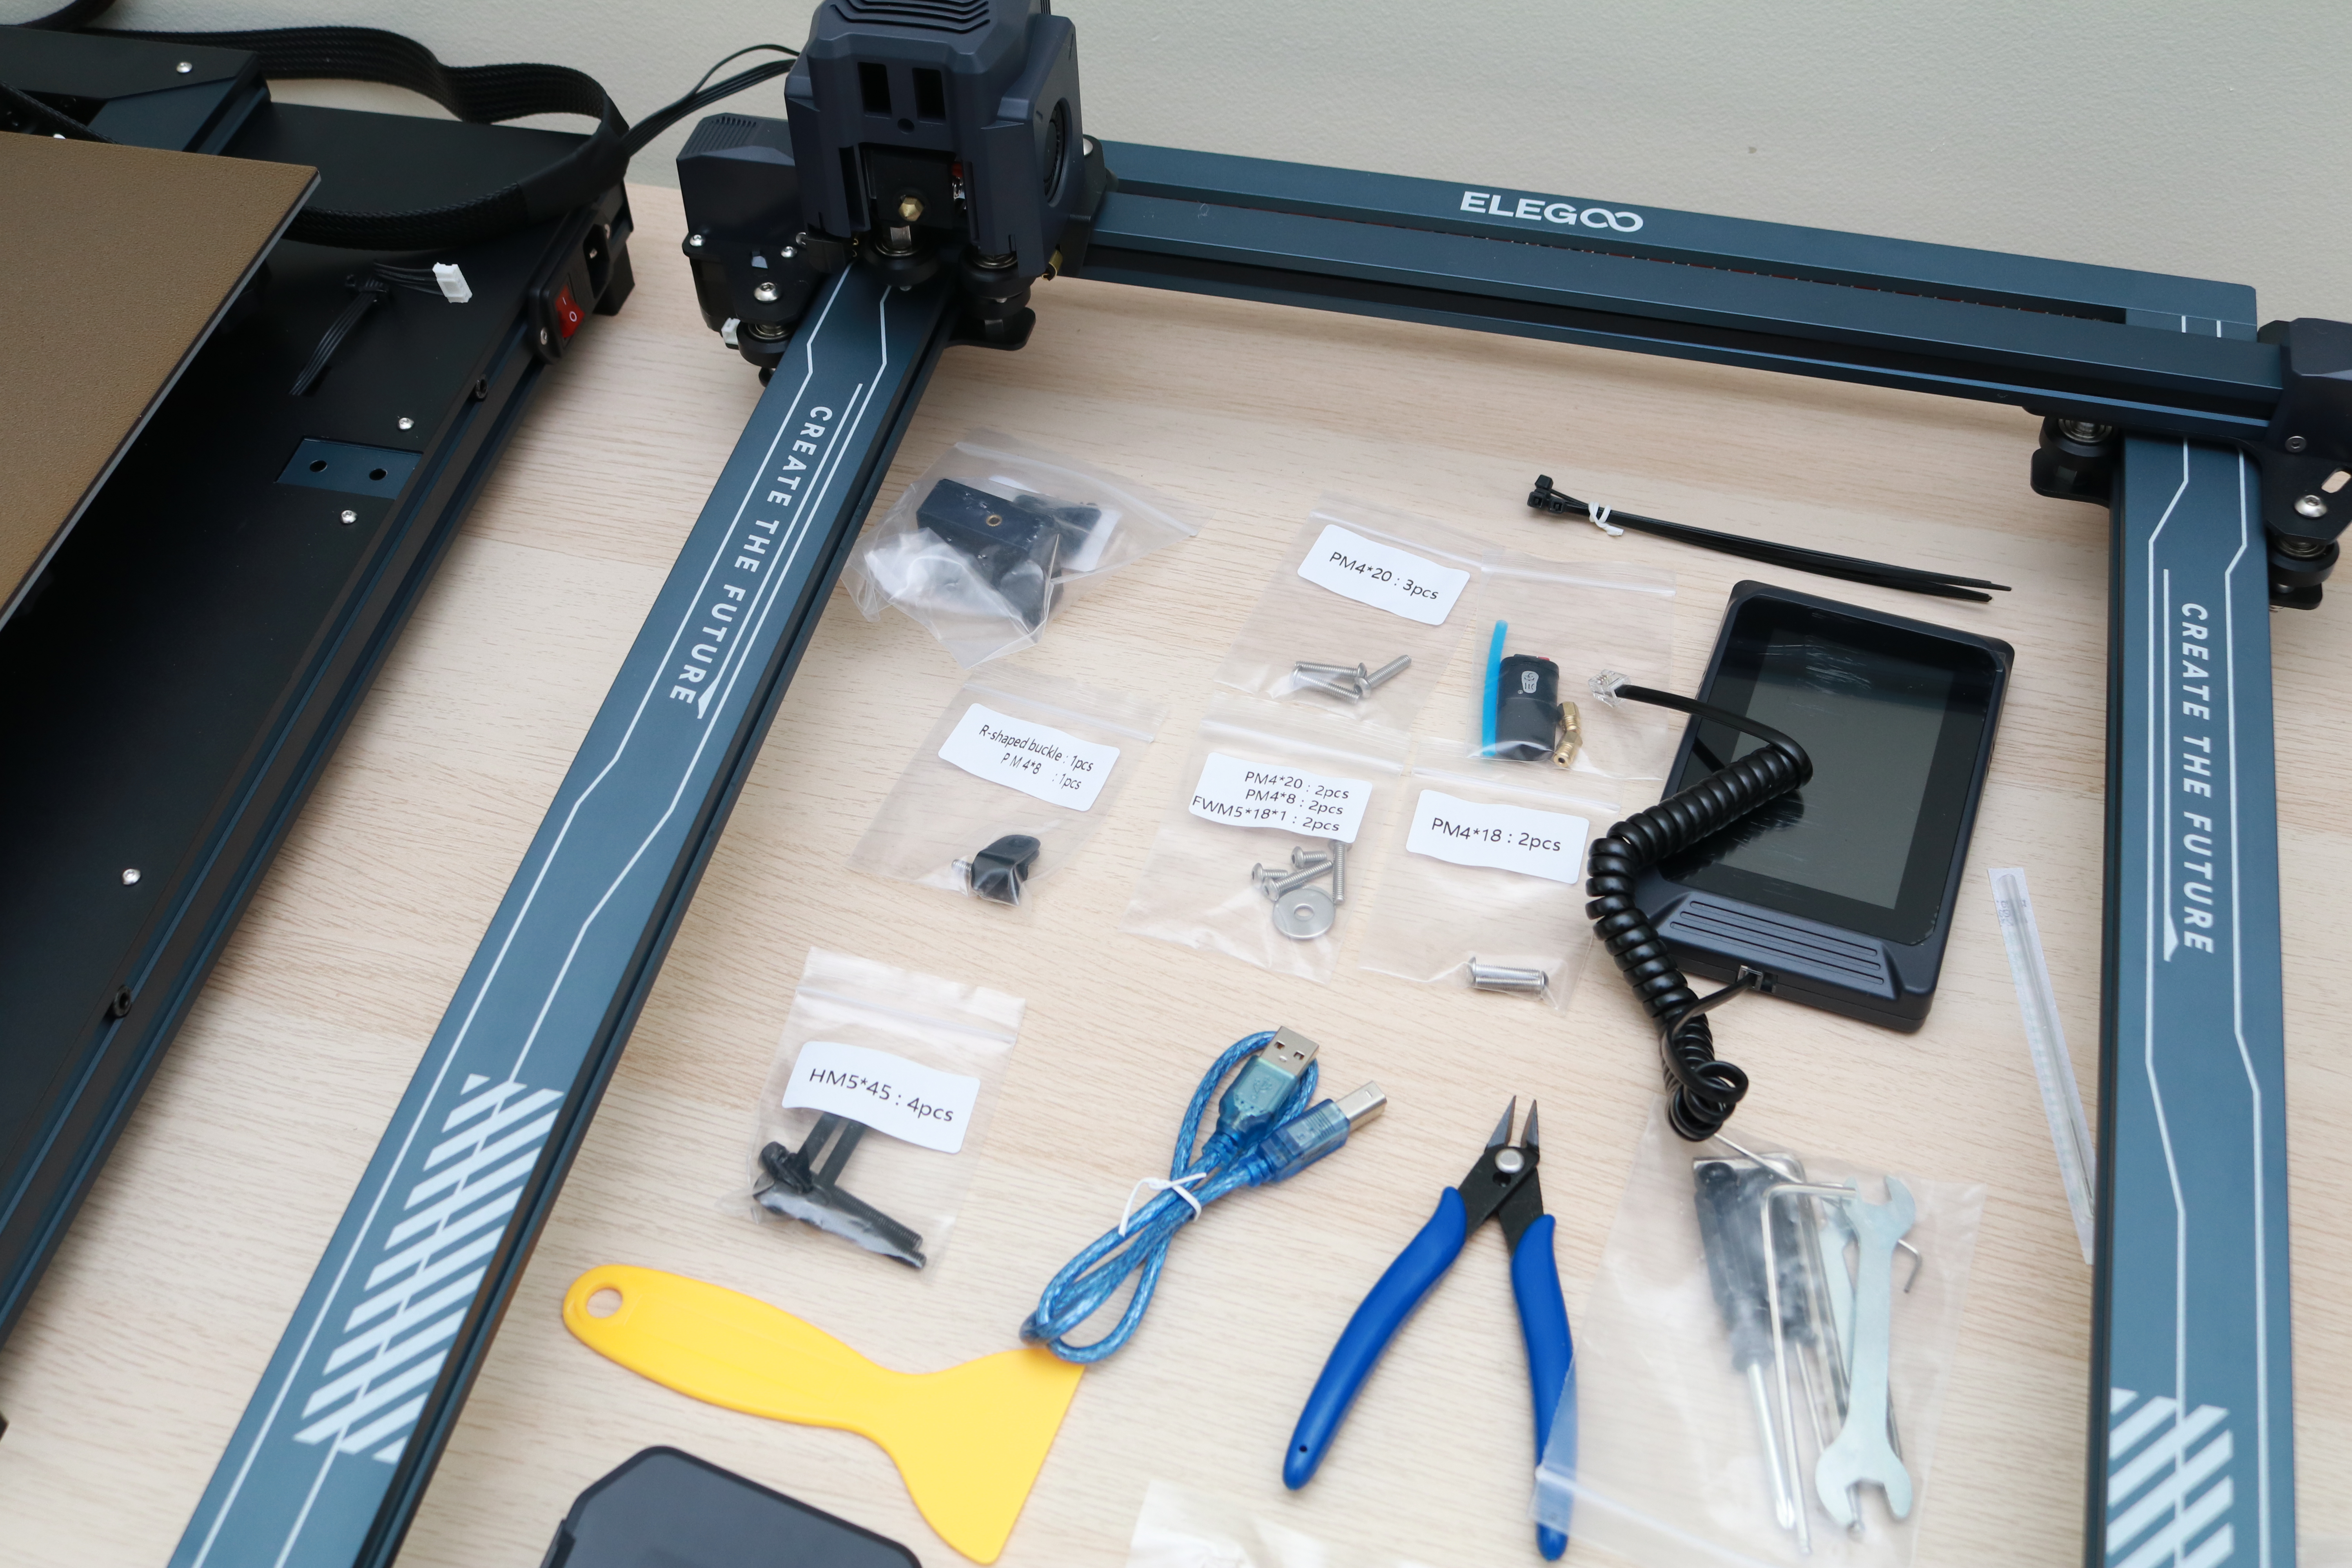
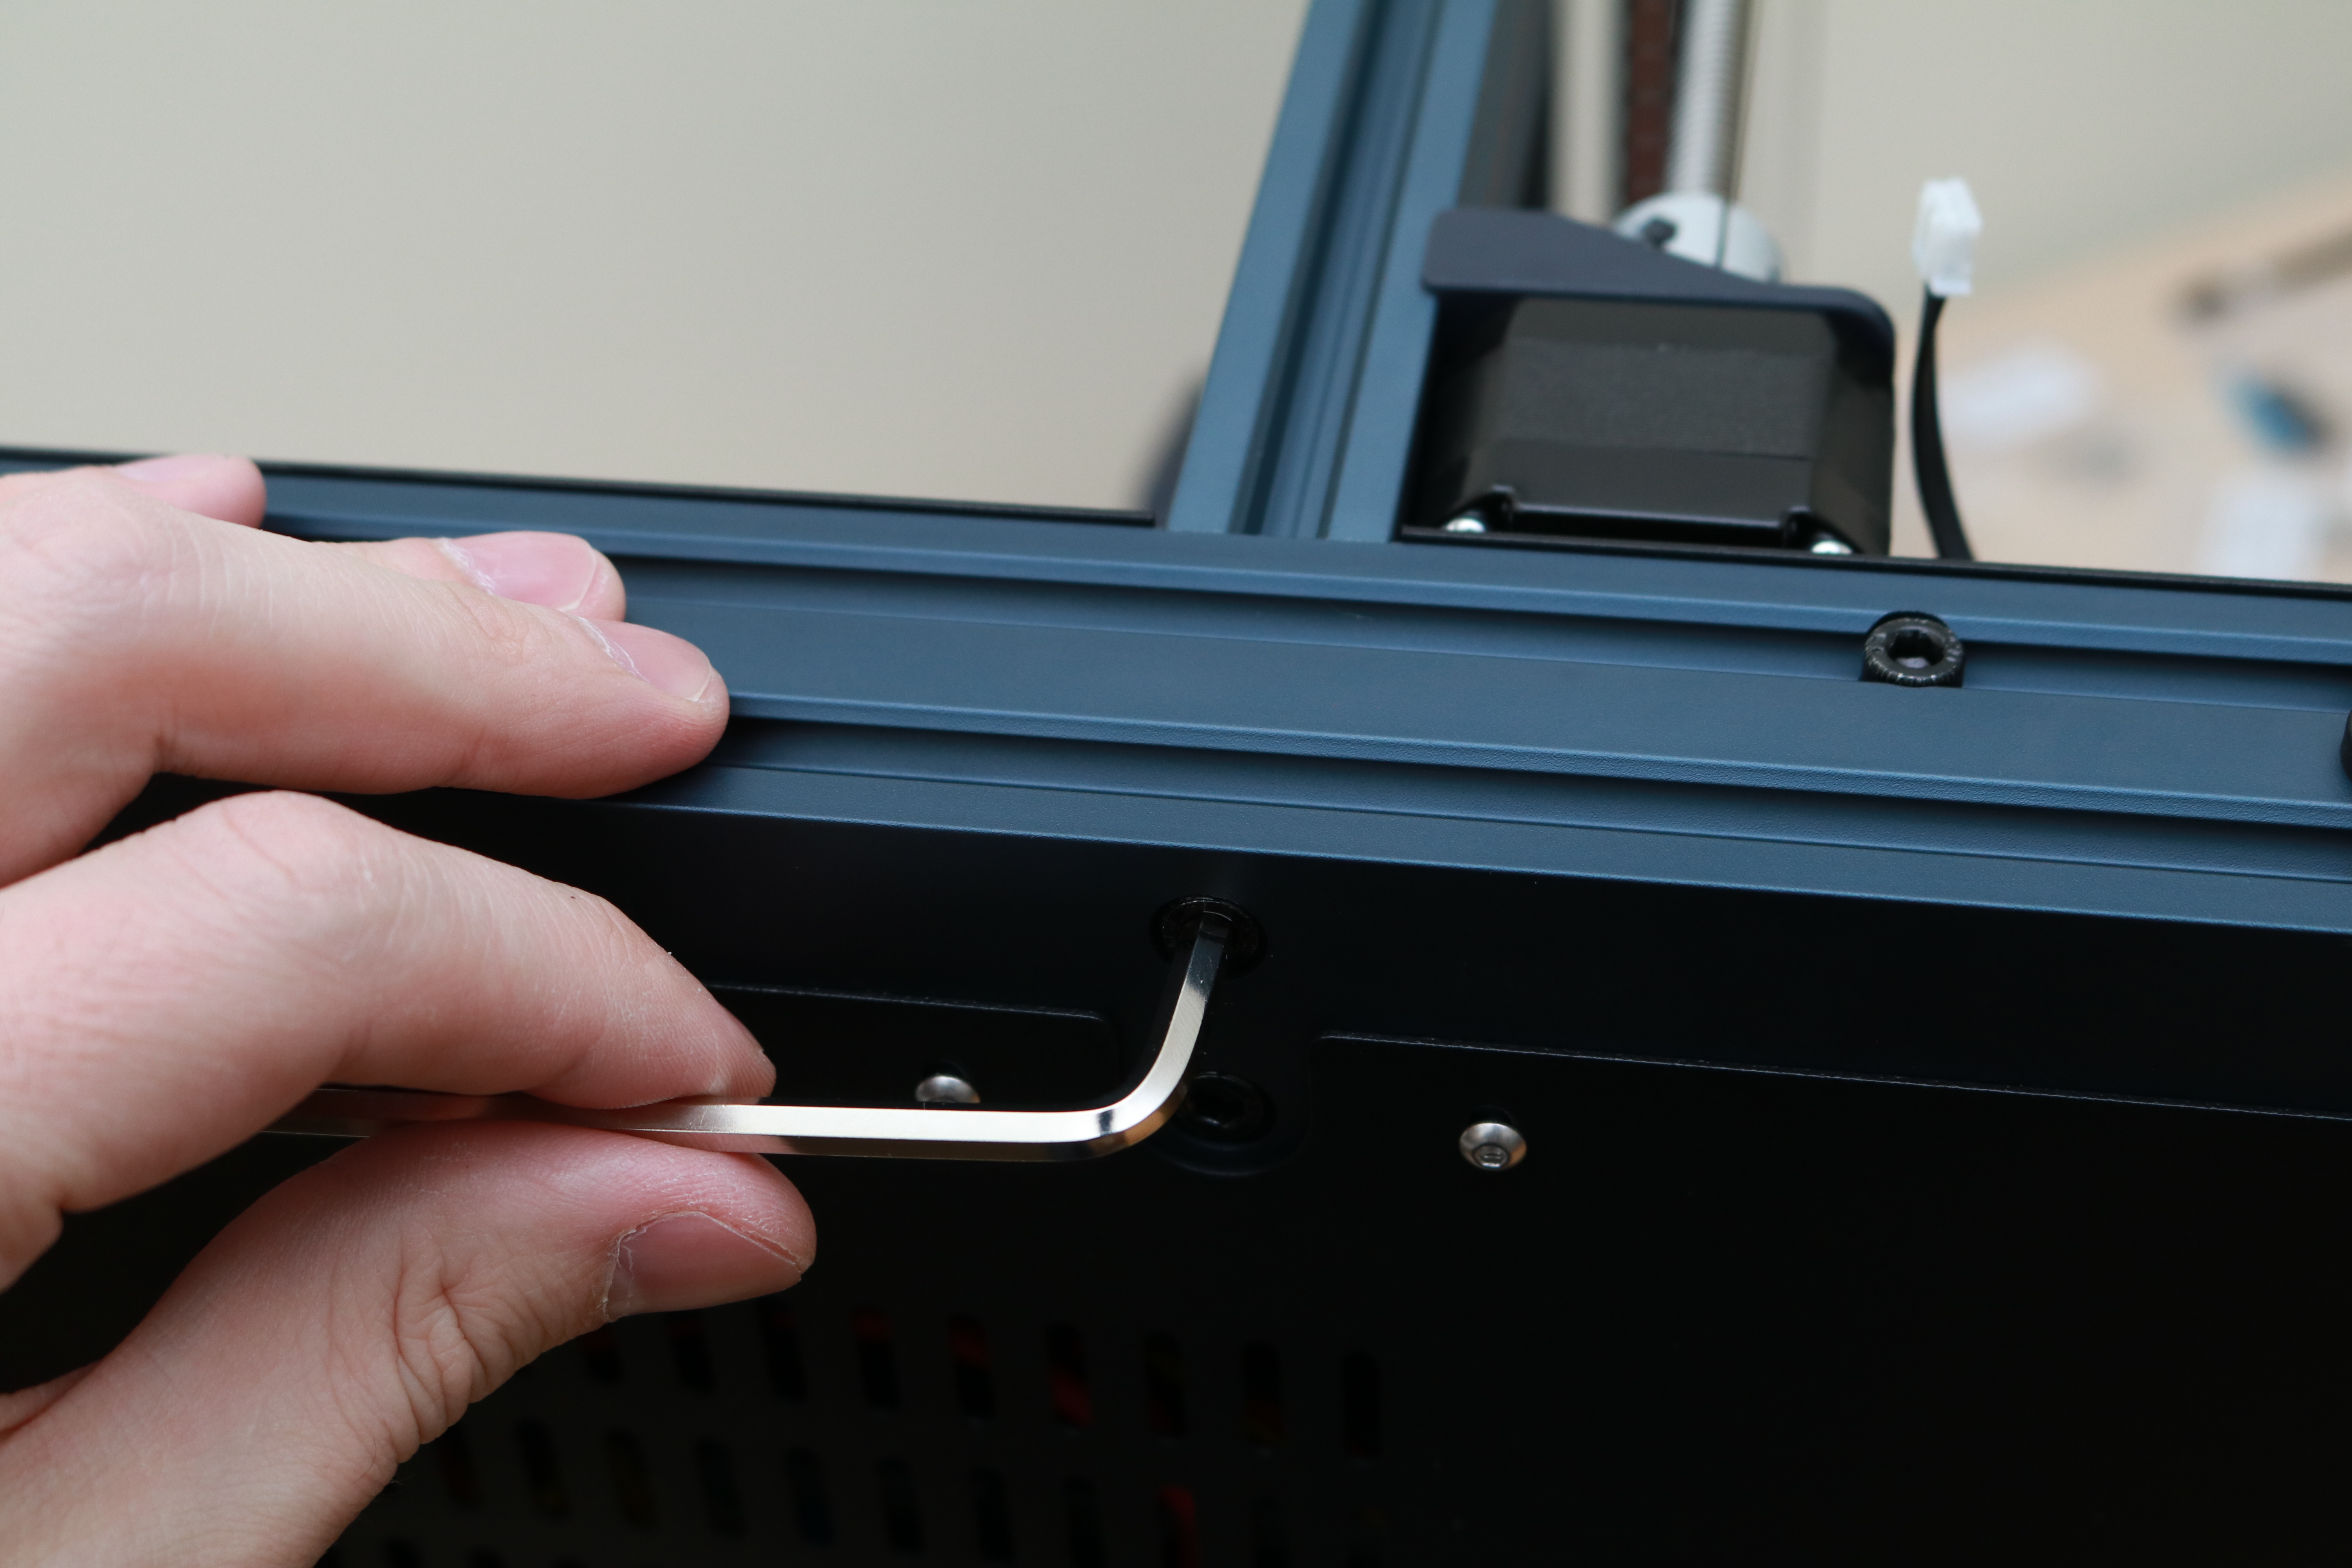
The Elegoo Neptune 3 Plus ships almost completely assembled, with the only real assembly consisting of attaching the Z-axis frame to the base of the printer. This process requires only 4 bolts, but the large size of the Neptune 3 Plus means a second set of hands will be helpful when aligning and attaching the frame. The included printed manual includes well-written instructions and should be easy for even novice users to follow.
The Neptune 3 Plus is designed in a way that allows most users to go from unboxing to first print in well under 30 minutes. Allen keys, flush cutters, screwdrivers, and a variety of other tools are included but will likely only be used once during the initial assembly of the printer. The Neptune 3 Plus even includes a scraper for removing parts from the platform, which you probably won’t need due to the excellent adhesion and easy part removal provided by the textured PEI build platform.
Design of Elegoo Neptune 3 Plus
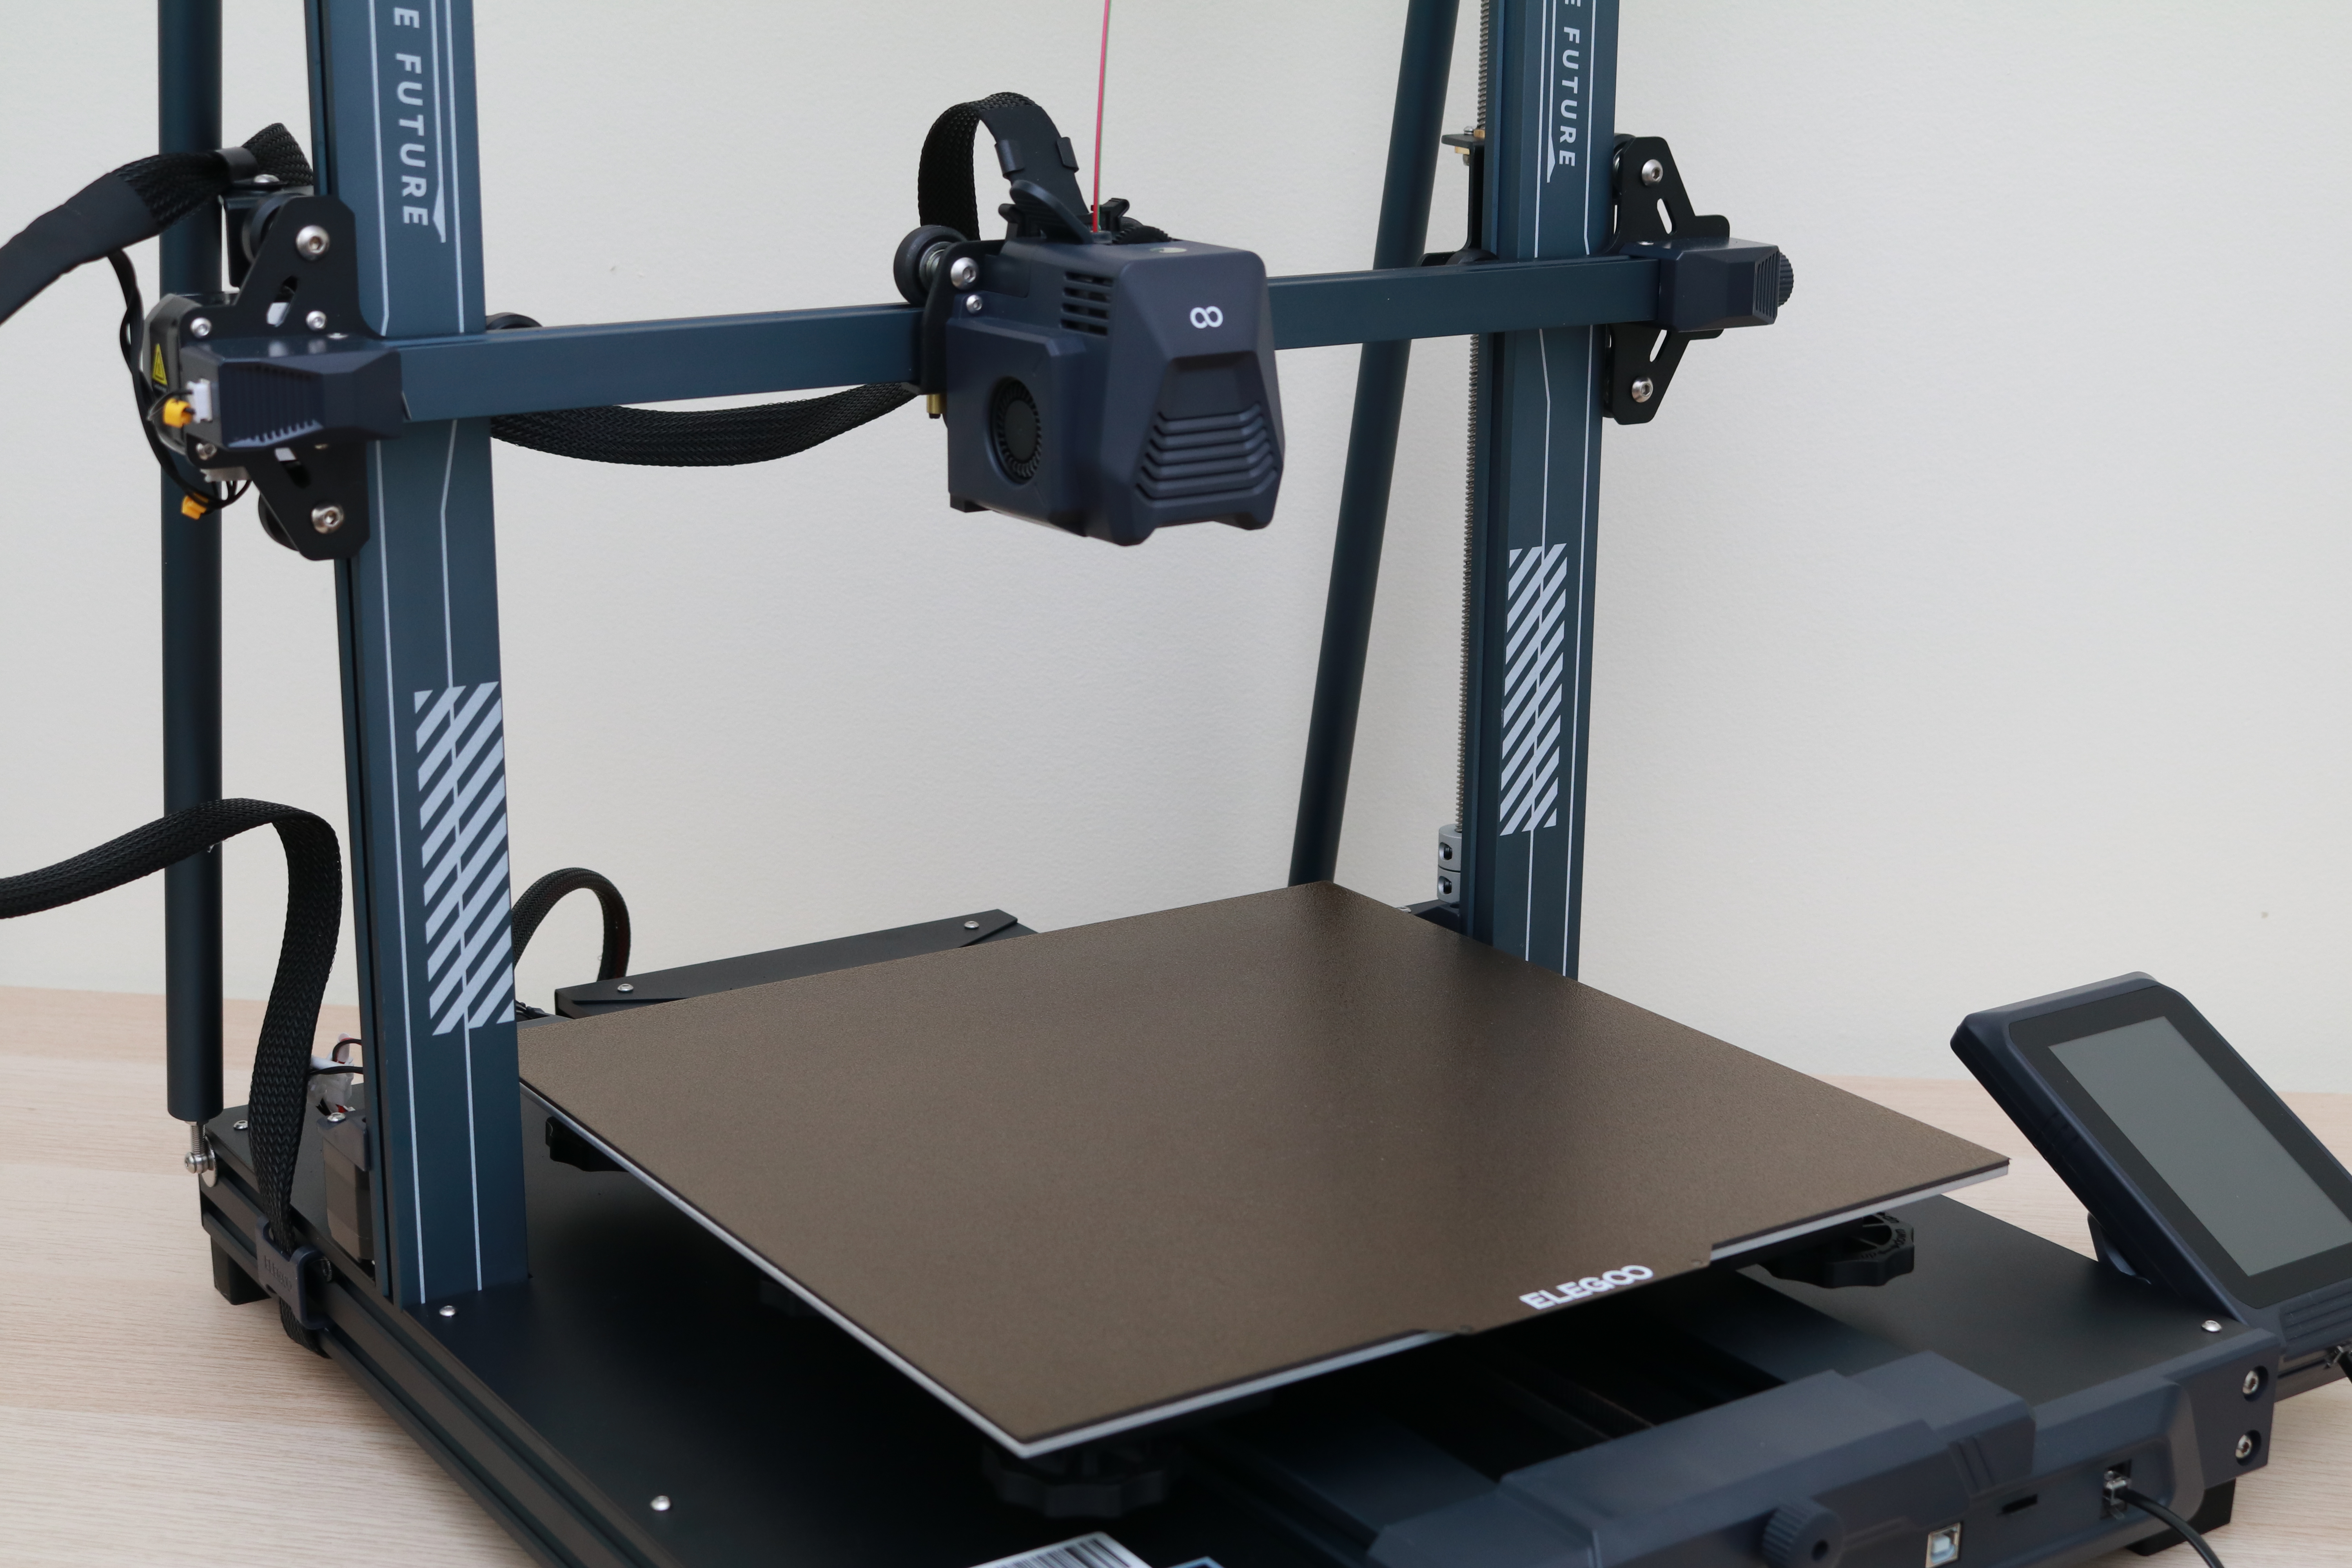
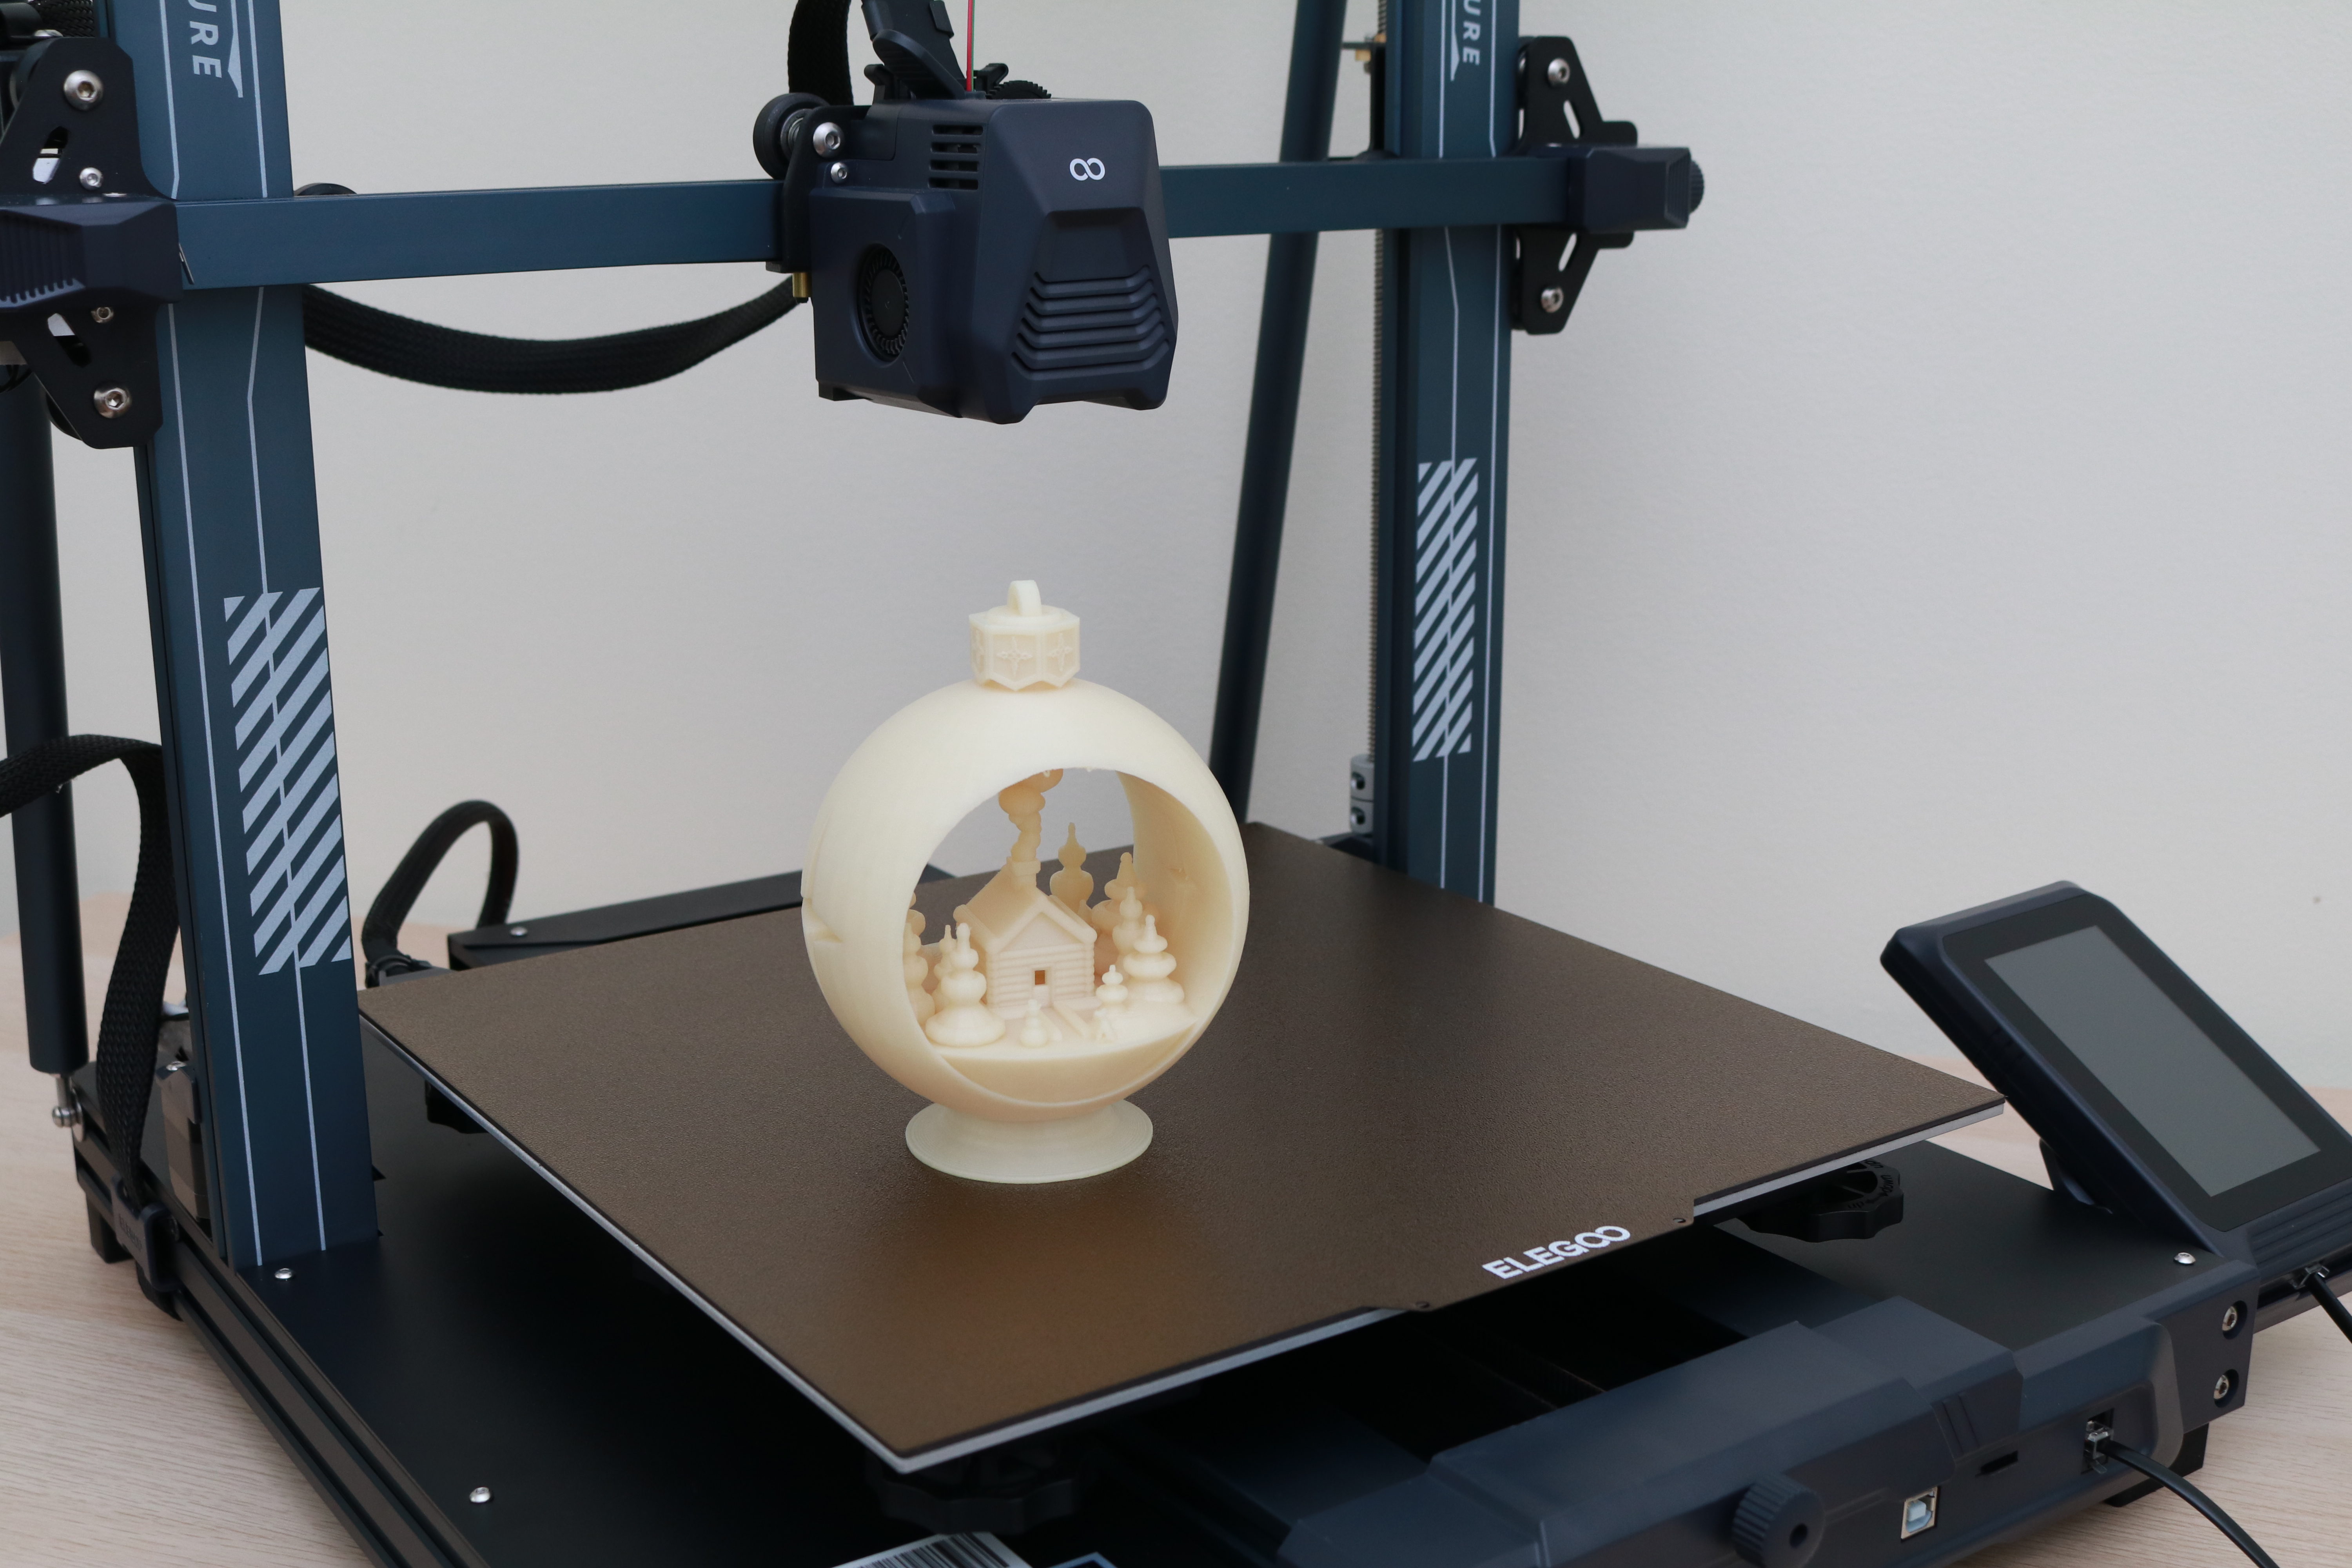
The Neptune 3 Plus looks like an oversized Creality Ender 3 Pro or any other number of bed-slinger style i3 3D printers. Dual rails on the Y-axis provide stability for the large moving build platform, and the removable LCD touchscreen interface is located on the right side of the printer. The spool holder is mounted to the center of the top bar, and the peg that the spool sits on can be mounted on either side.
Overall, the Neptune 3 Plus has a polished feel with molded plastic components and a generally high-quality appearance. However, the “CREATE THE FUTURE” text that is printed on both sides of the Z axis frame isn't necessary and slightly cheapens the look of this premium printer.
The Neptune 3 plus includes an integrated LED light bar on the top of the Z-axis frame, a welcome feature for anyone who has trouble seeing their prints during printing. Some printers include a single LED mounted to the hot end module that will illuminate parts during printing, but this can also make it difficult to see or photograph light-colored filament or thin parts. The top-mounted LED light bar illuminates the entire build volume, and makes it easy to see parts during printing.
Get Tom's Hardware's best news and in-depth reviews, straight to your inbox.
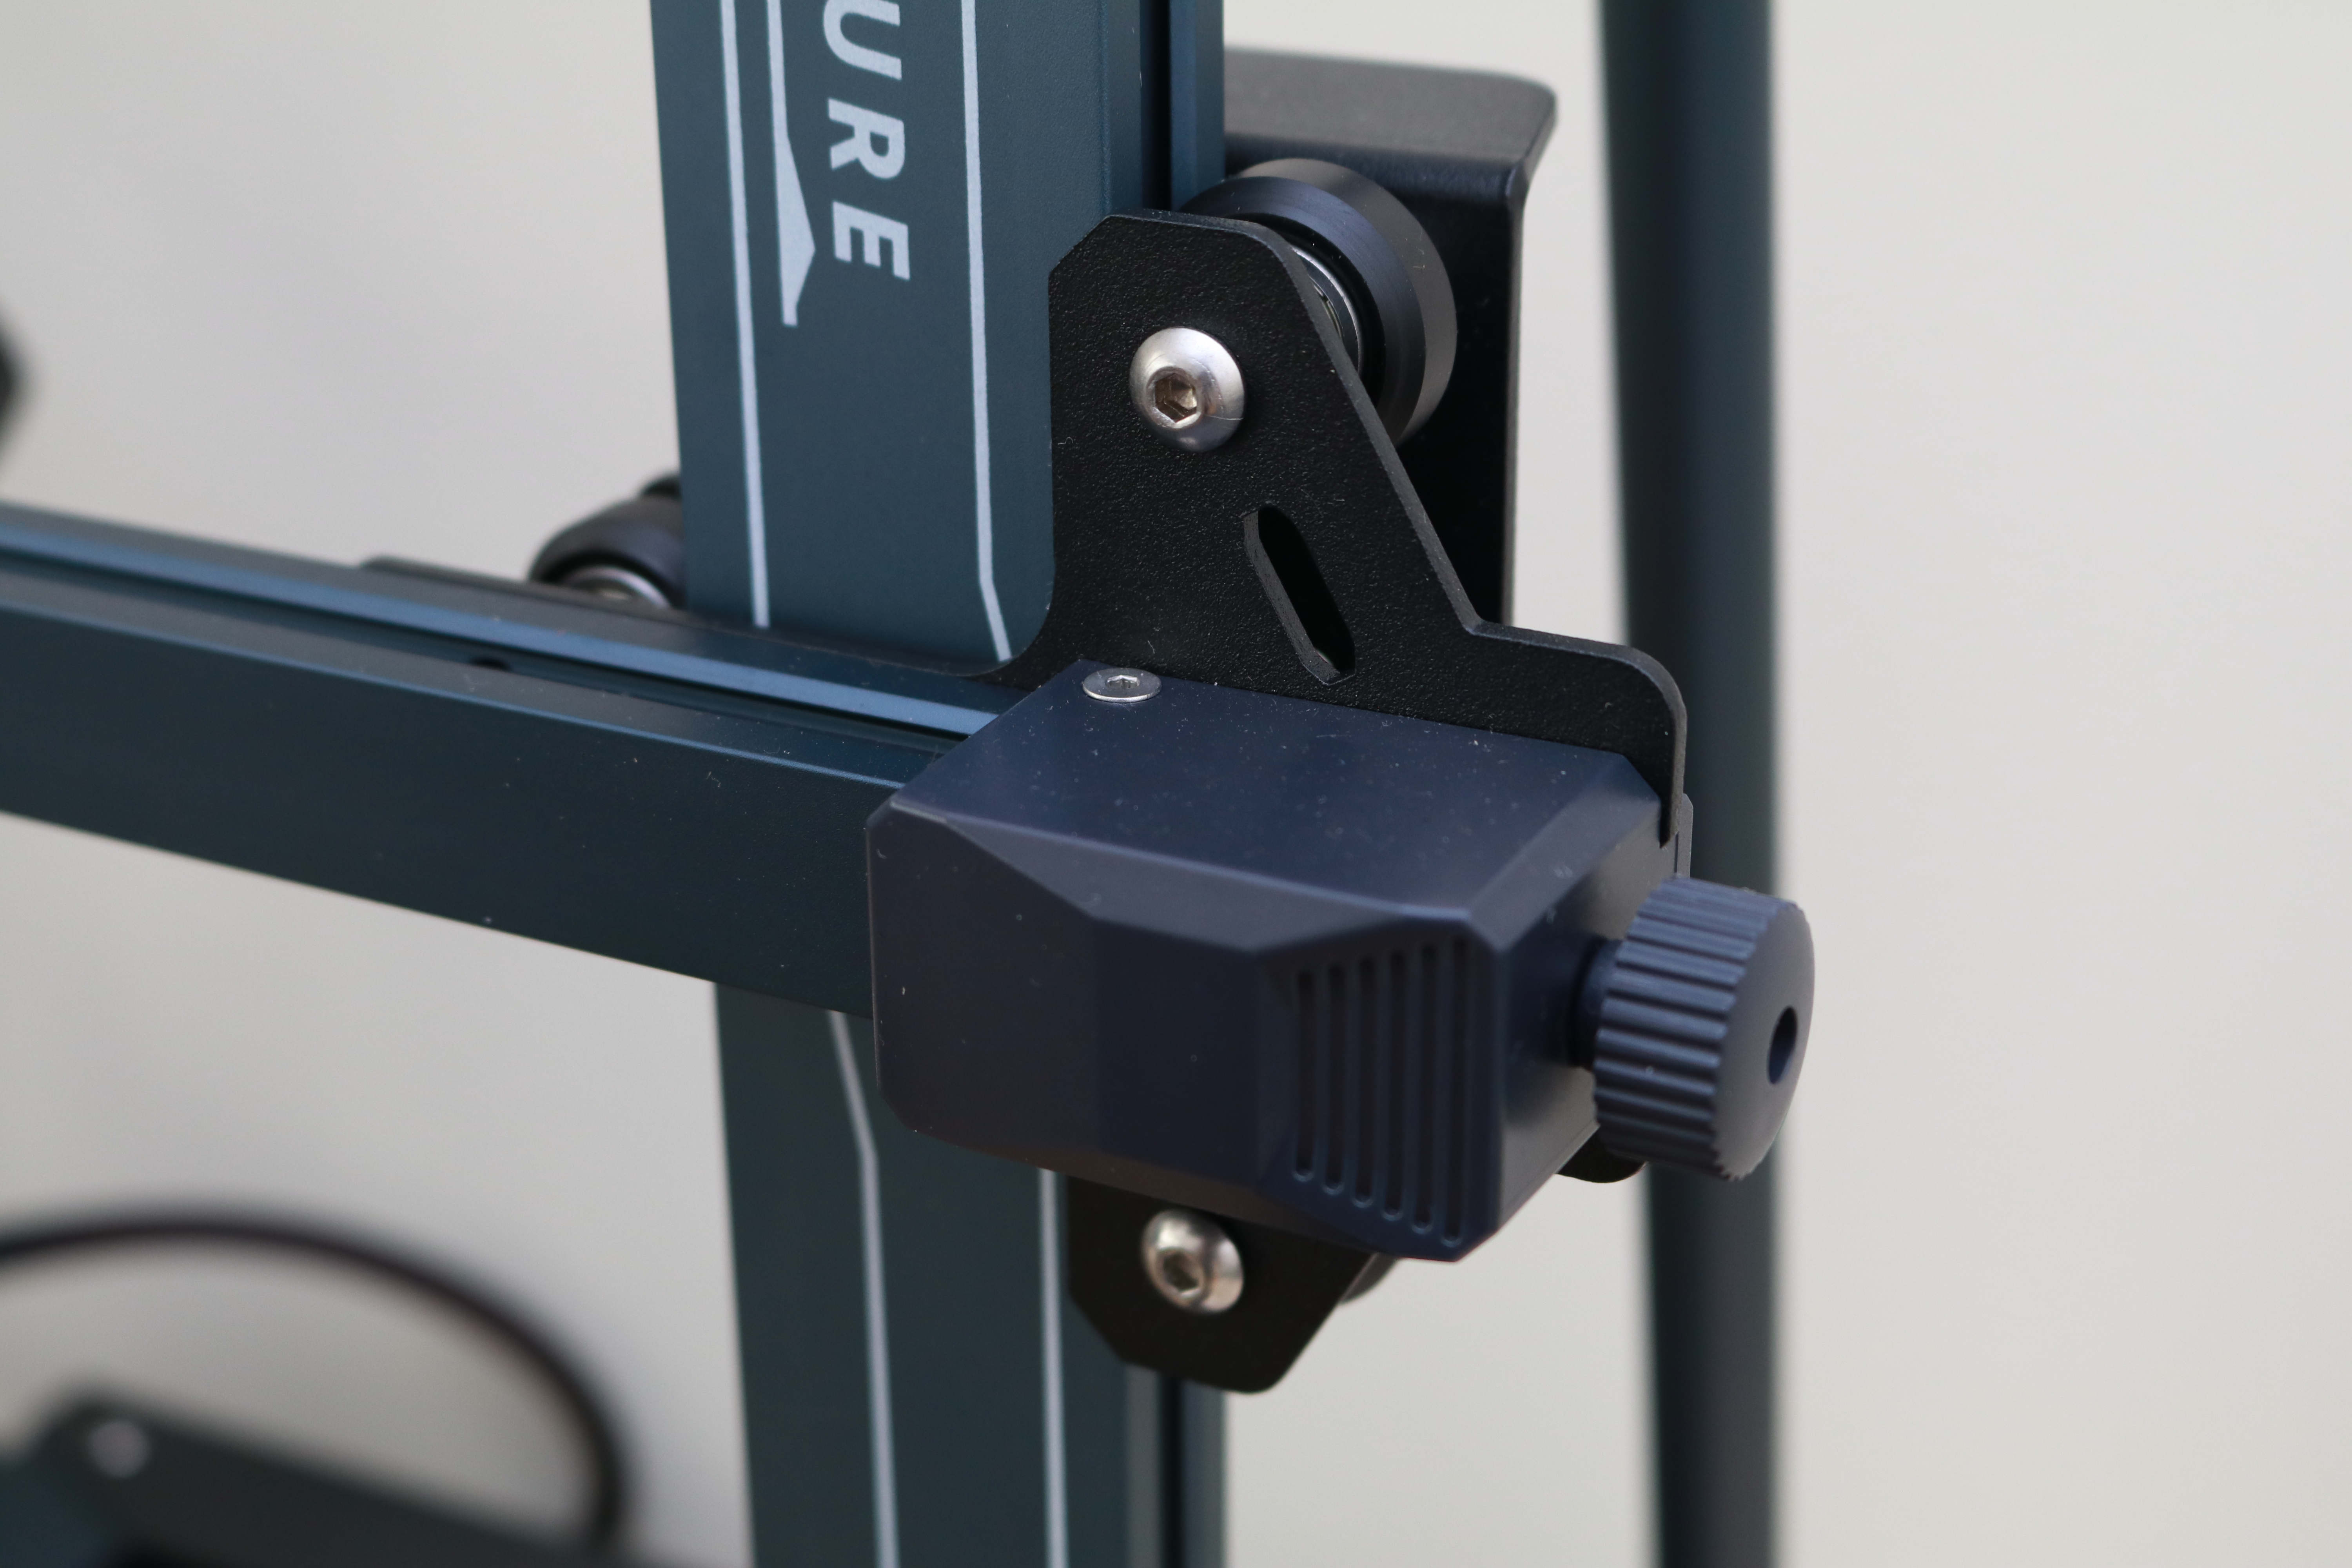
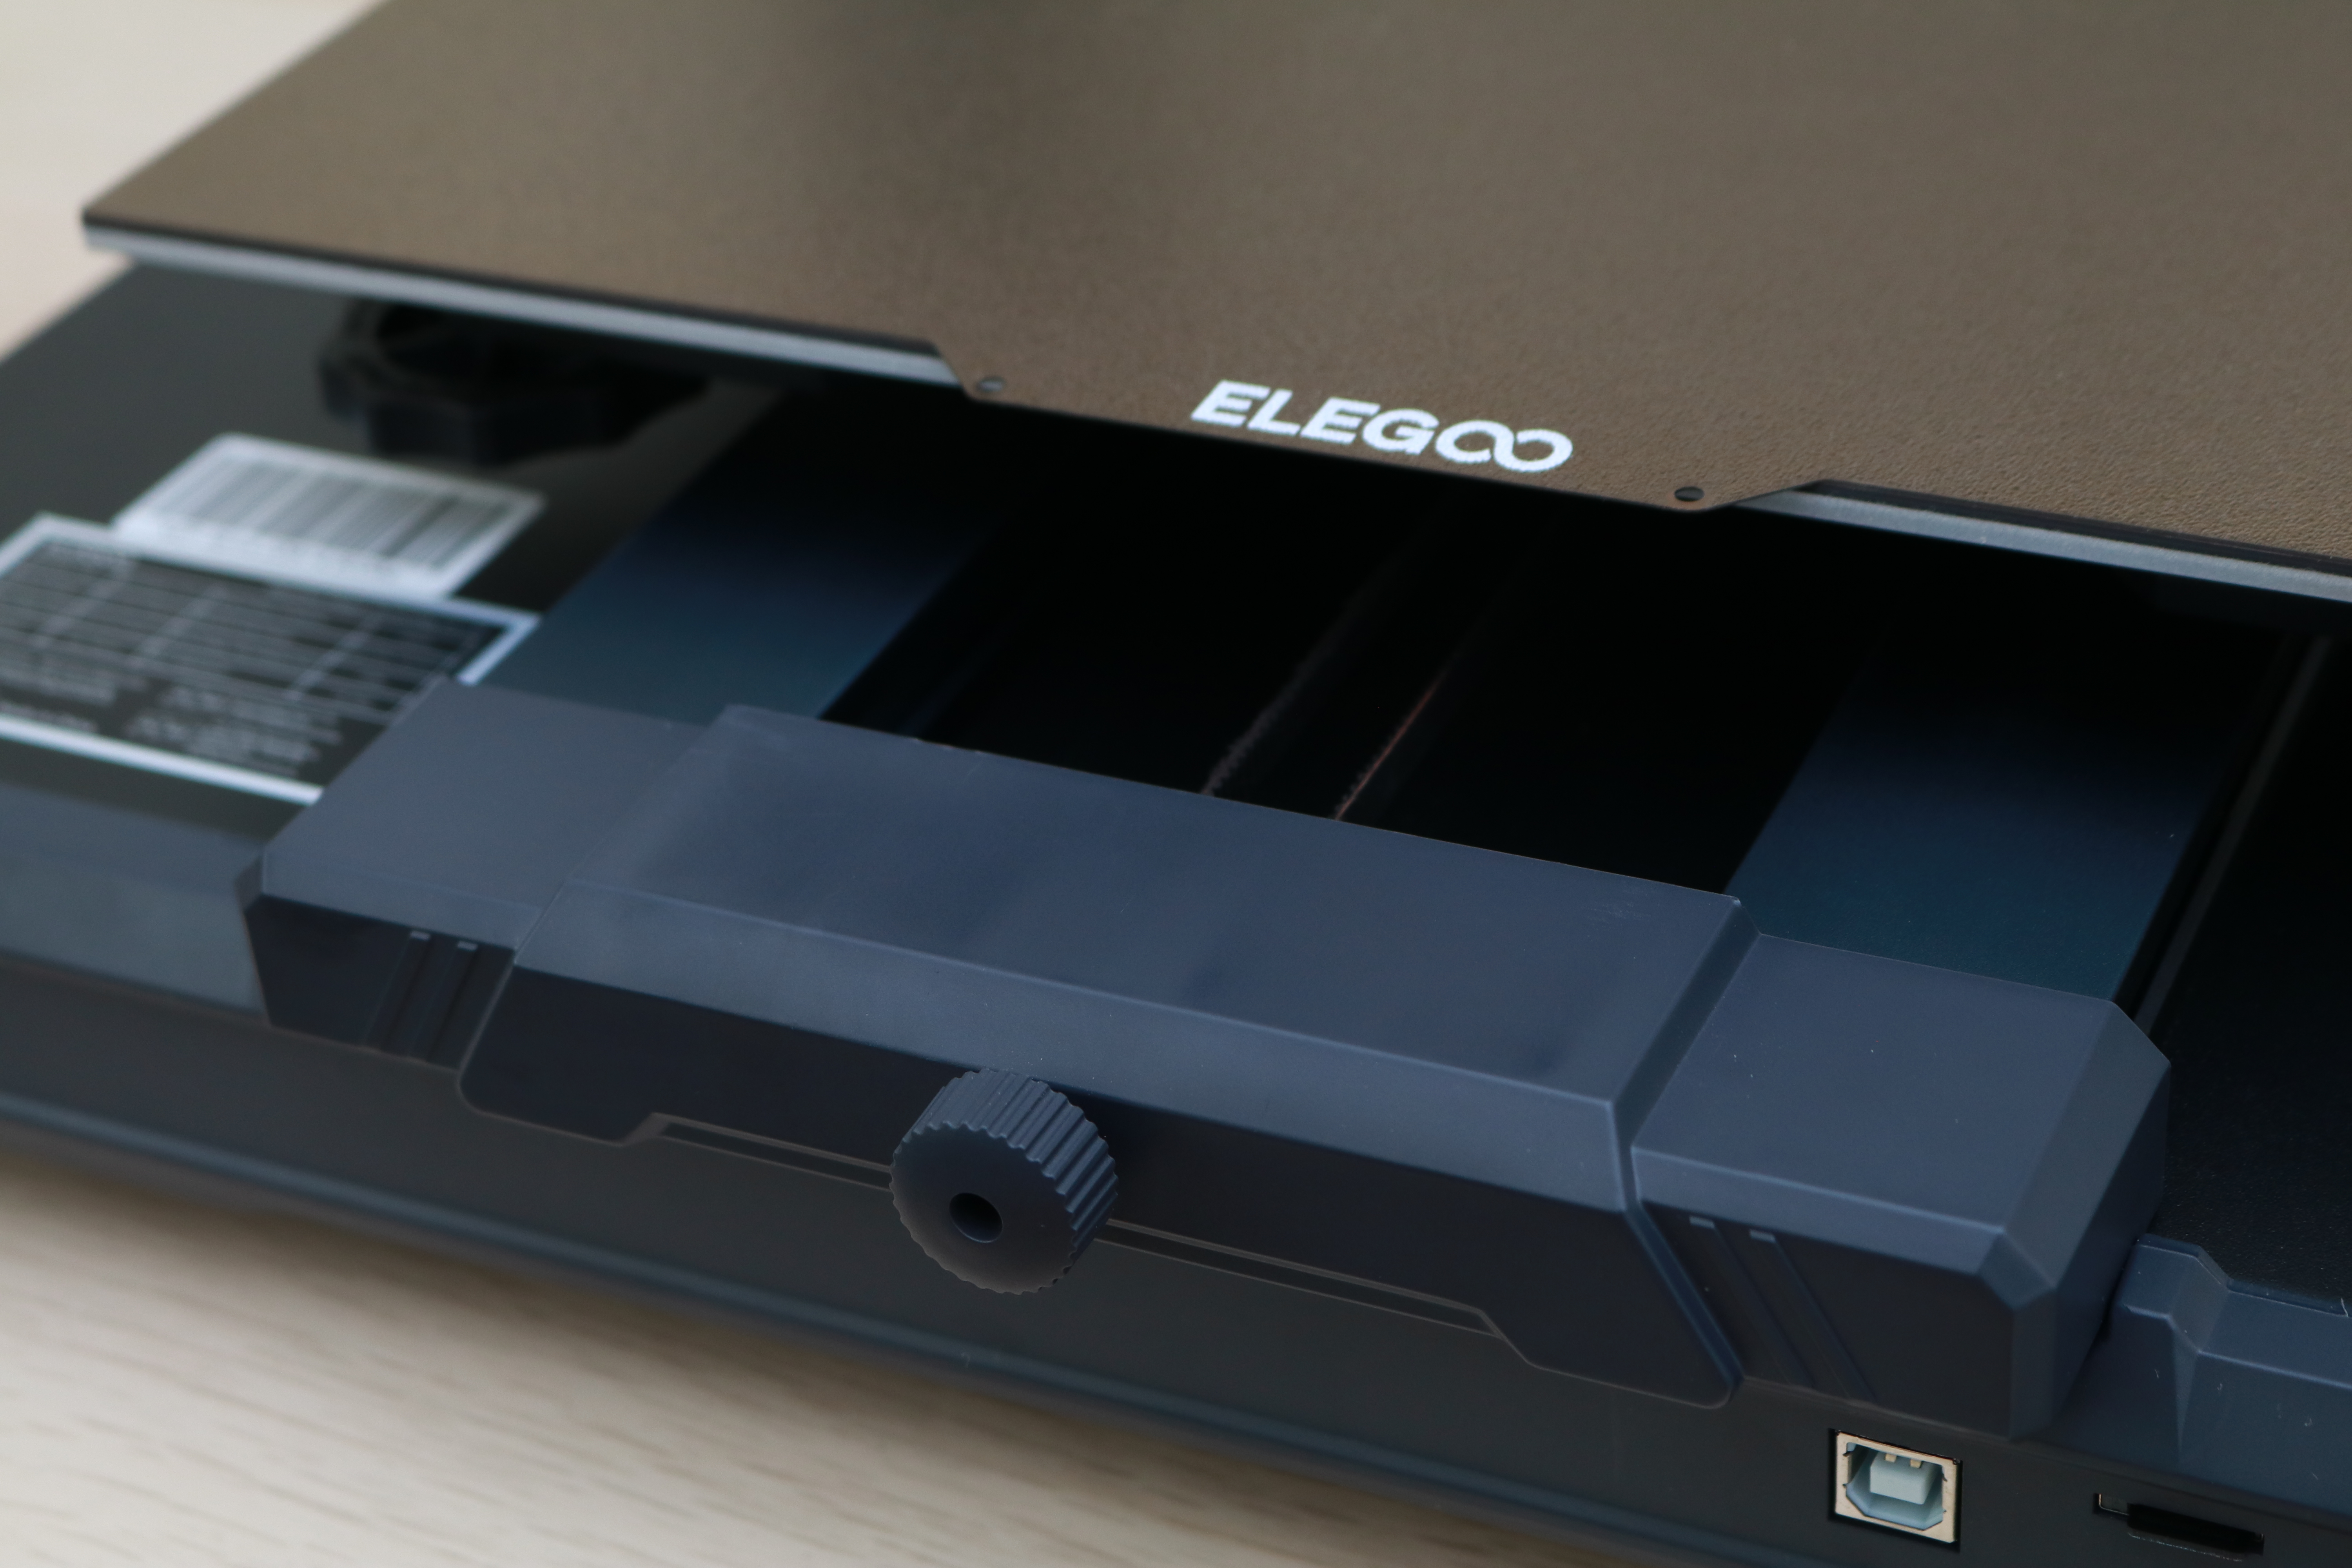
The Neptune 3 Plus includes tensioning knobs on both the X and Y axis, which make adjusting the belt tension very easy. The dual threaded rods on the Z axis frame are connected by a timing belt located at the top of the printer, which prevents the threaded rods from falling out of sync with each other during printing.
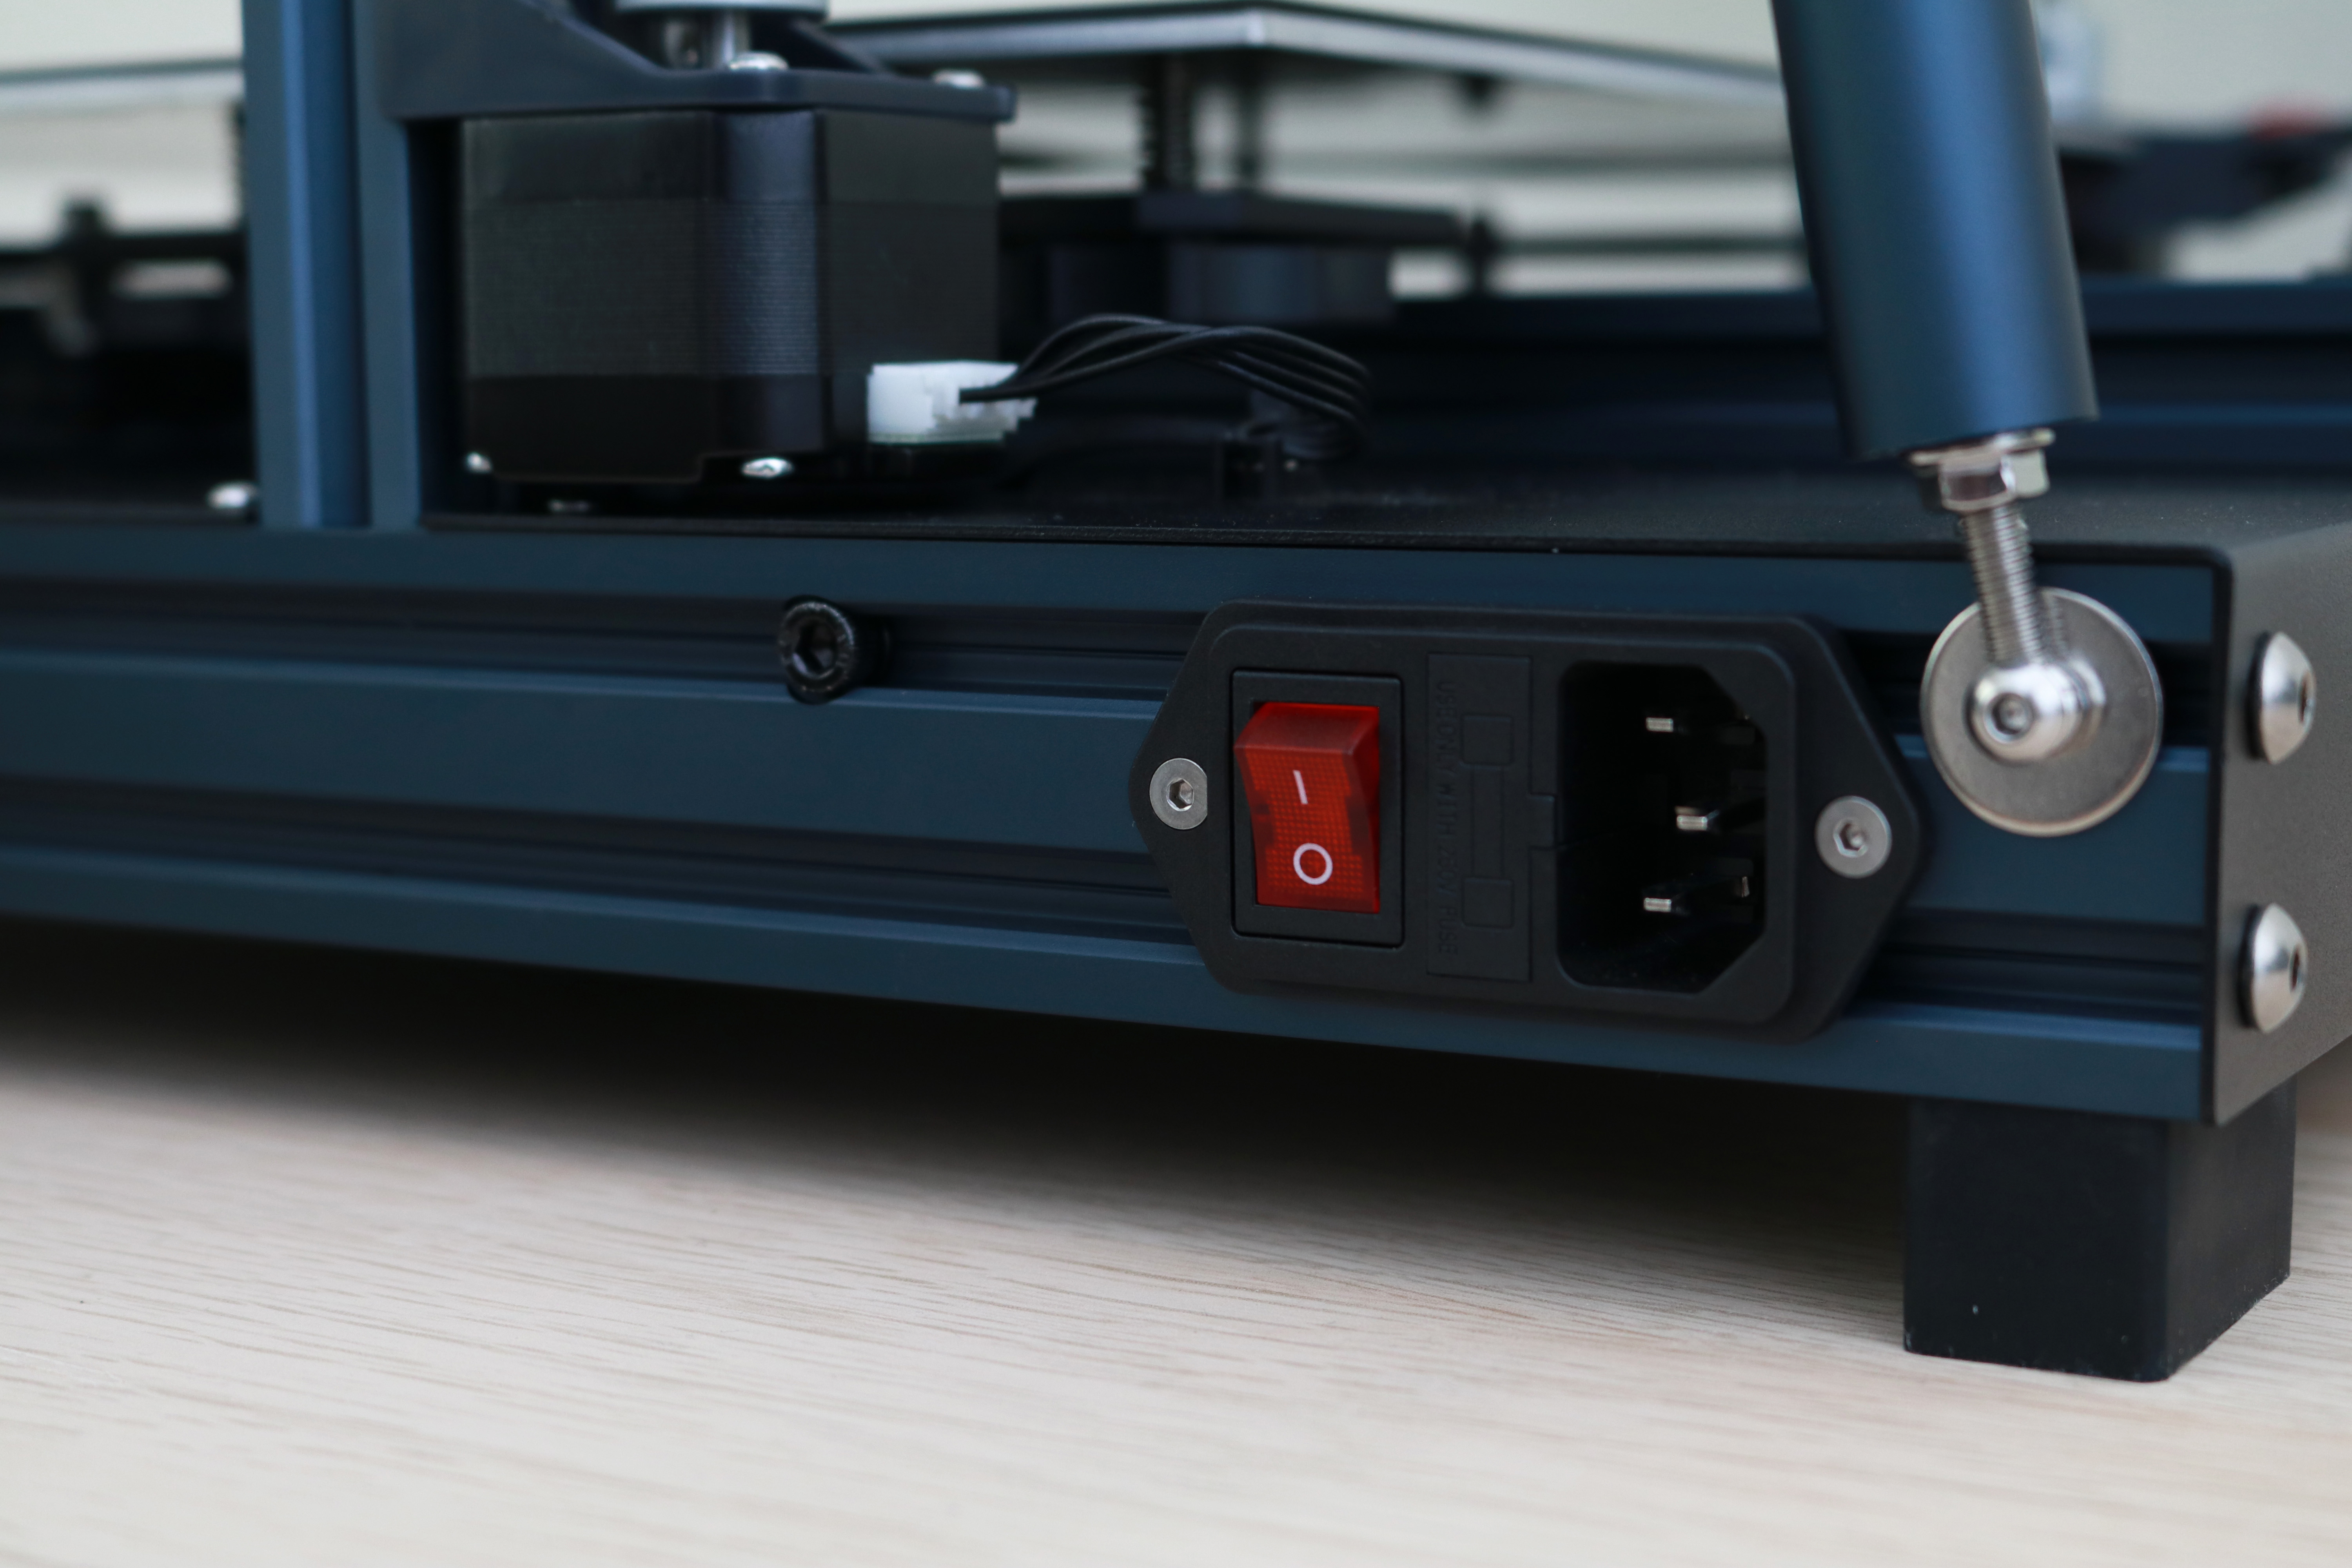
The 480 Watt power supply is mounted underneath the build platform and missing the 115/220V switch typically seen on similar power supplies. Elegoo designed the Neptune 3 Plus to accept either voltage, something that will save users a step during the initial setup of the printer. The 480 Watt power supply provides enough juice to quickly bring the bed up to printing temperature, despite the large area that needs to be heated.
User Interface on Elegoo Neptune 3 Plus
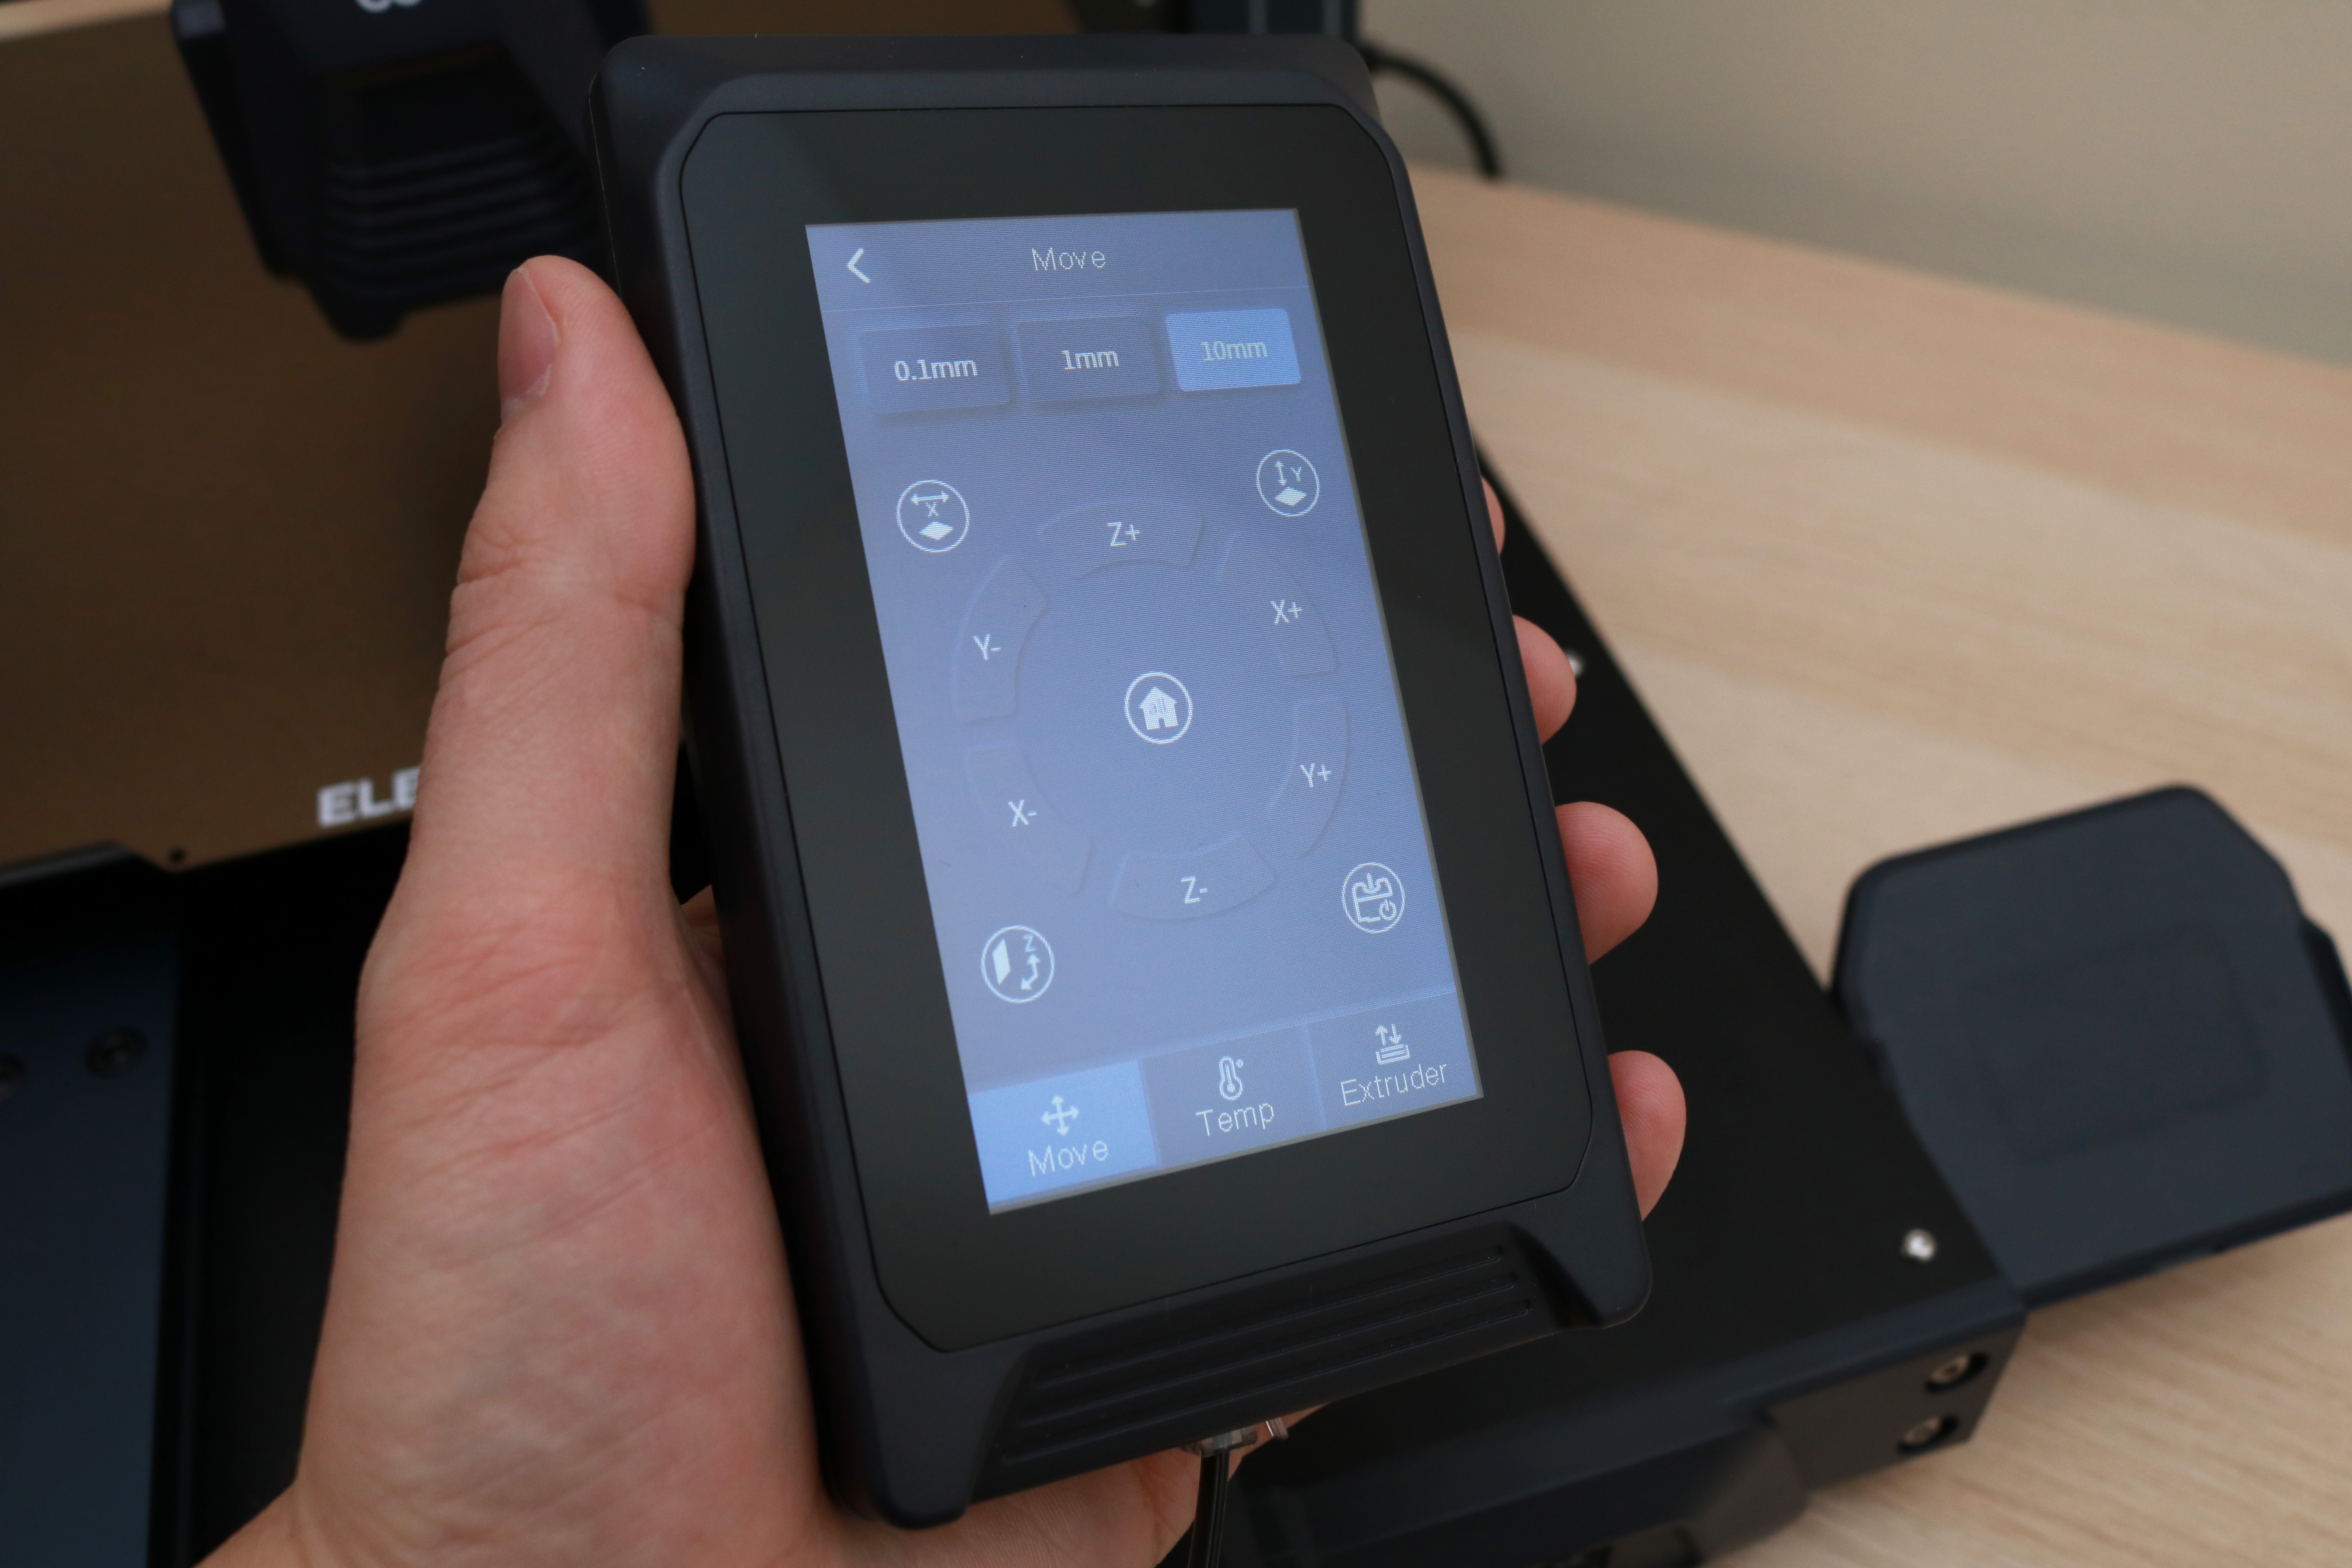
The 4.3-inch touchscreen LCD on the Elegoo Neptune 3 Plus has a bright, easy-to-read screen and intuitive menus. Features such as filament run-out and power loss recovery are easily accessible during printing. The settings and tools are laid out in an intuitive fashion, and I was impressed with the UI / UX on the Neptune 3 Plus.
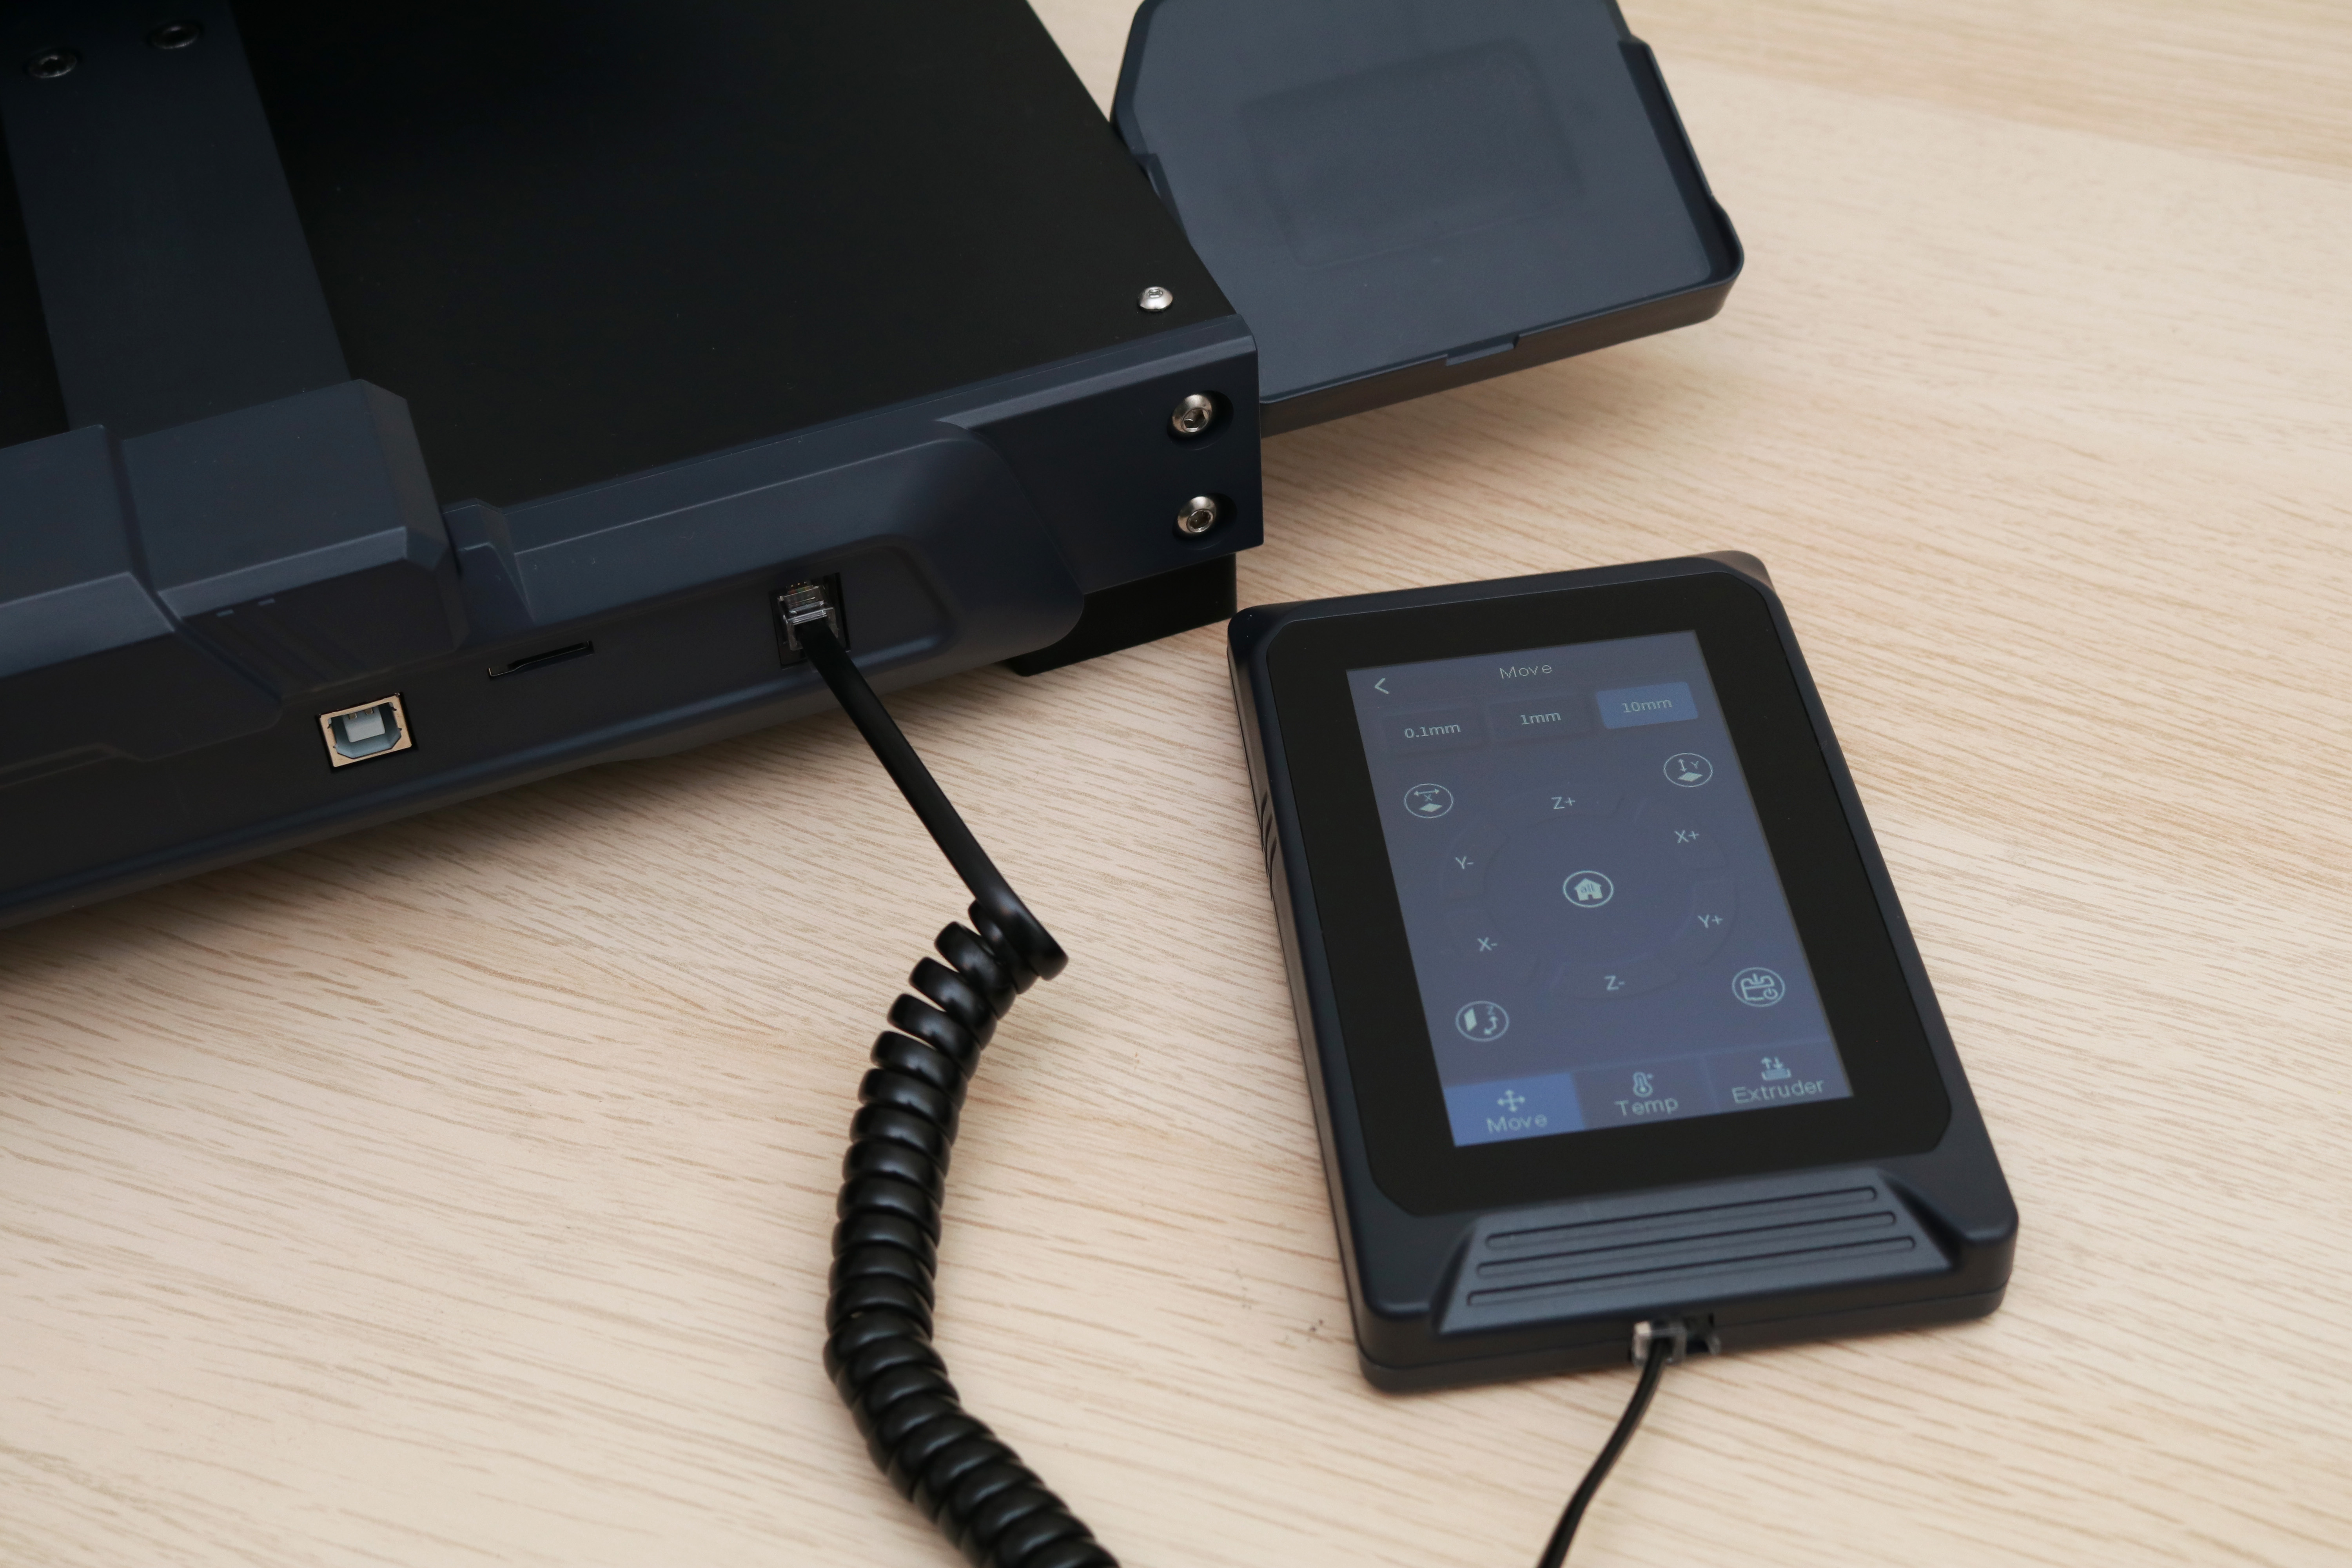
The touchscreen module is connected to the printer with a curly cord that allows the user to remove it and make adjustments during a print without disconnecting it. The touchscreen module has a magnet embedded in the back of the case, which aligns it with the printer base and holds it in place. Being able to remove the screen and use it without disconnecting it from the printer is a useful addition to the Neptune 3 Plus, and this feature is also present on the Neptune 3 Pro and the Neptune 3 Max.
Calibrating and Leveling Elegoo Neptune 3 Plus
The Elegoo Neptune 3 Plus is advertised as featuring 49-point Auto Mesh Leveling, which enables precise calibration across the entire build platform. The Neptune 3 Plus has a probe mounted on the hot end module which is used to detect the distance between the platform and the probe at 49 discrete points.
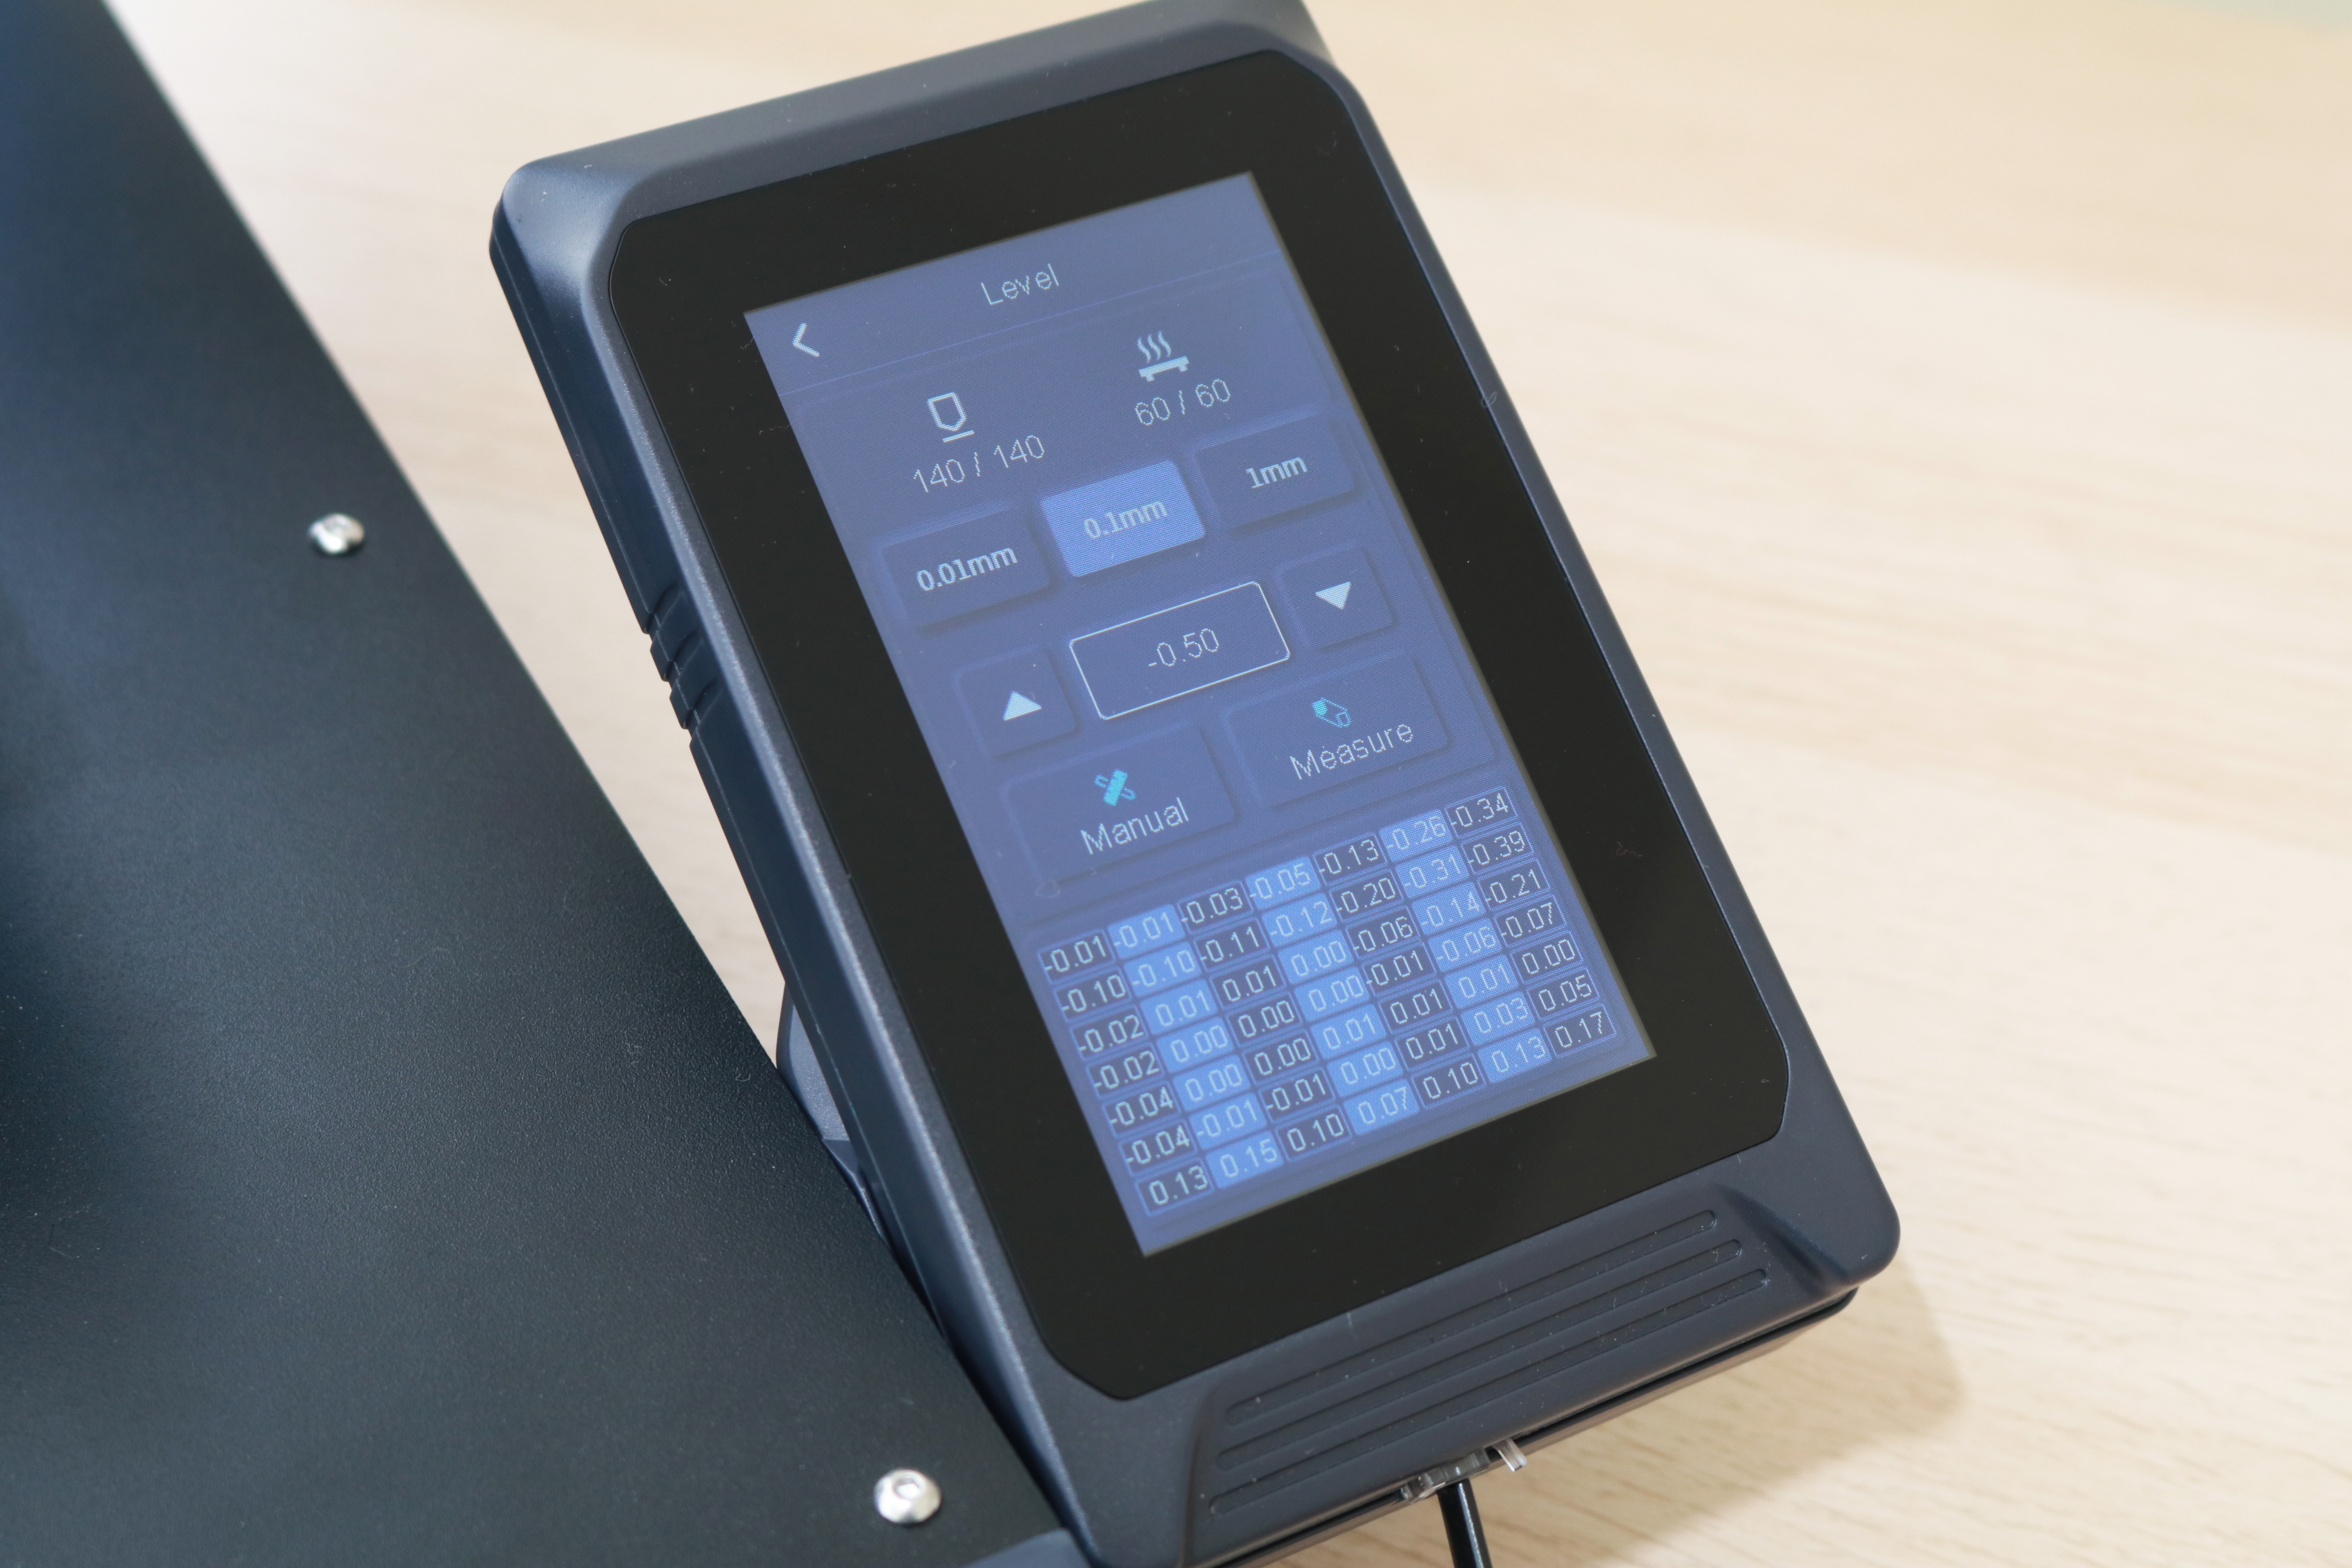
The automatic build platform leveling is accessed through the printer UI, and the process is highly automated with minimal user input required. After initiating the leveling process, the hot end and bed will heat up to a set temperature before detecting the height at 49 different points across the platform. Once the offset detection is complete, the printer UI will show a map of all the different points and the offset amount at each point. This intuitive layout makes it easy to visualize where the platform is high or low relative to the rest of the platform.
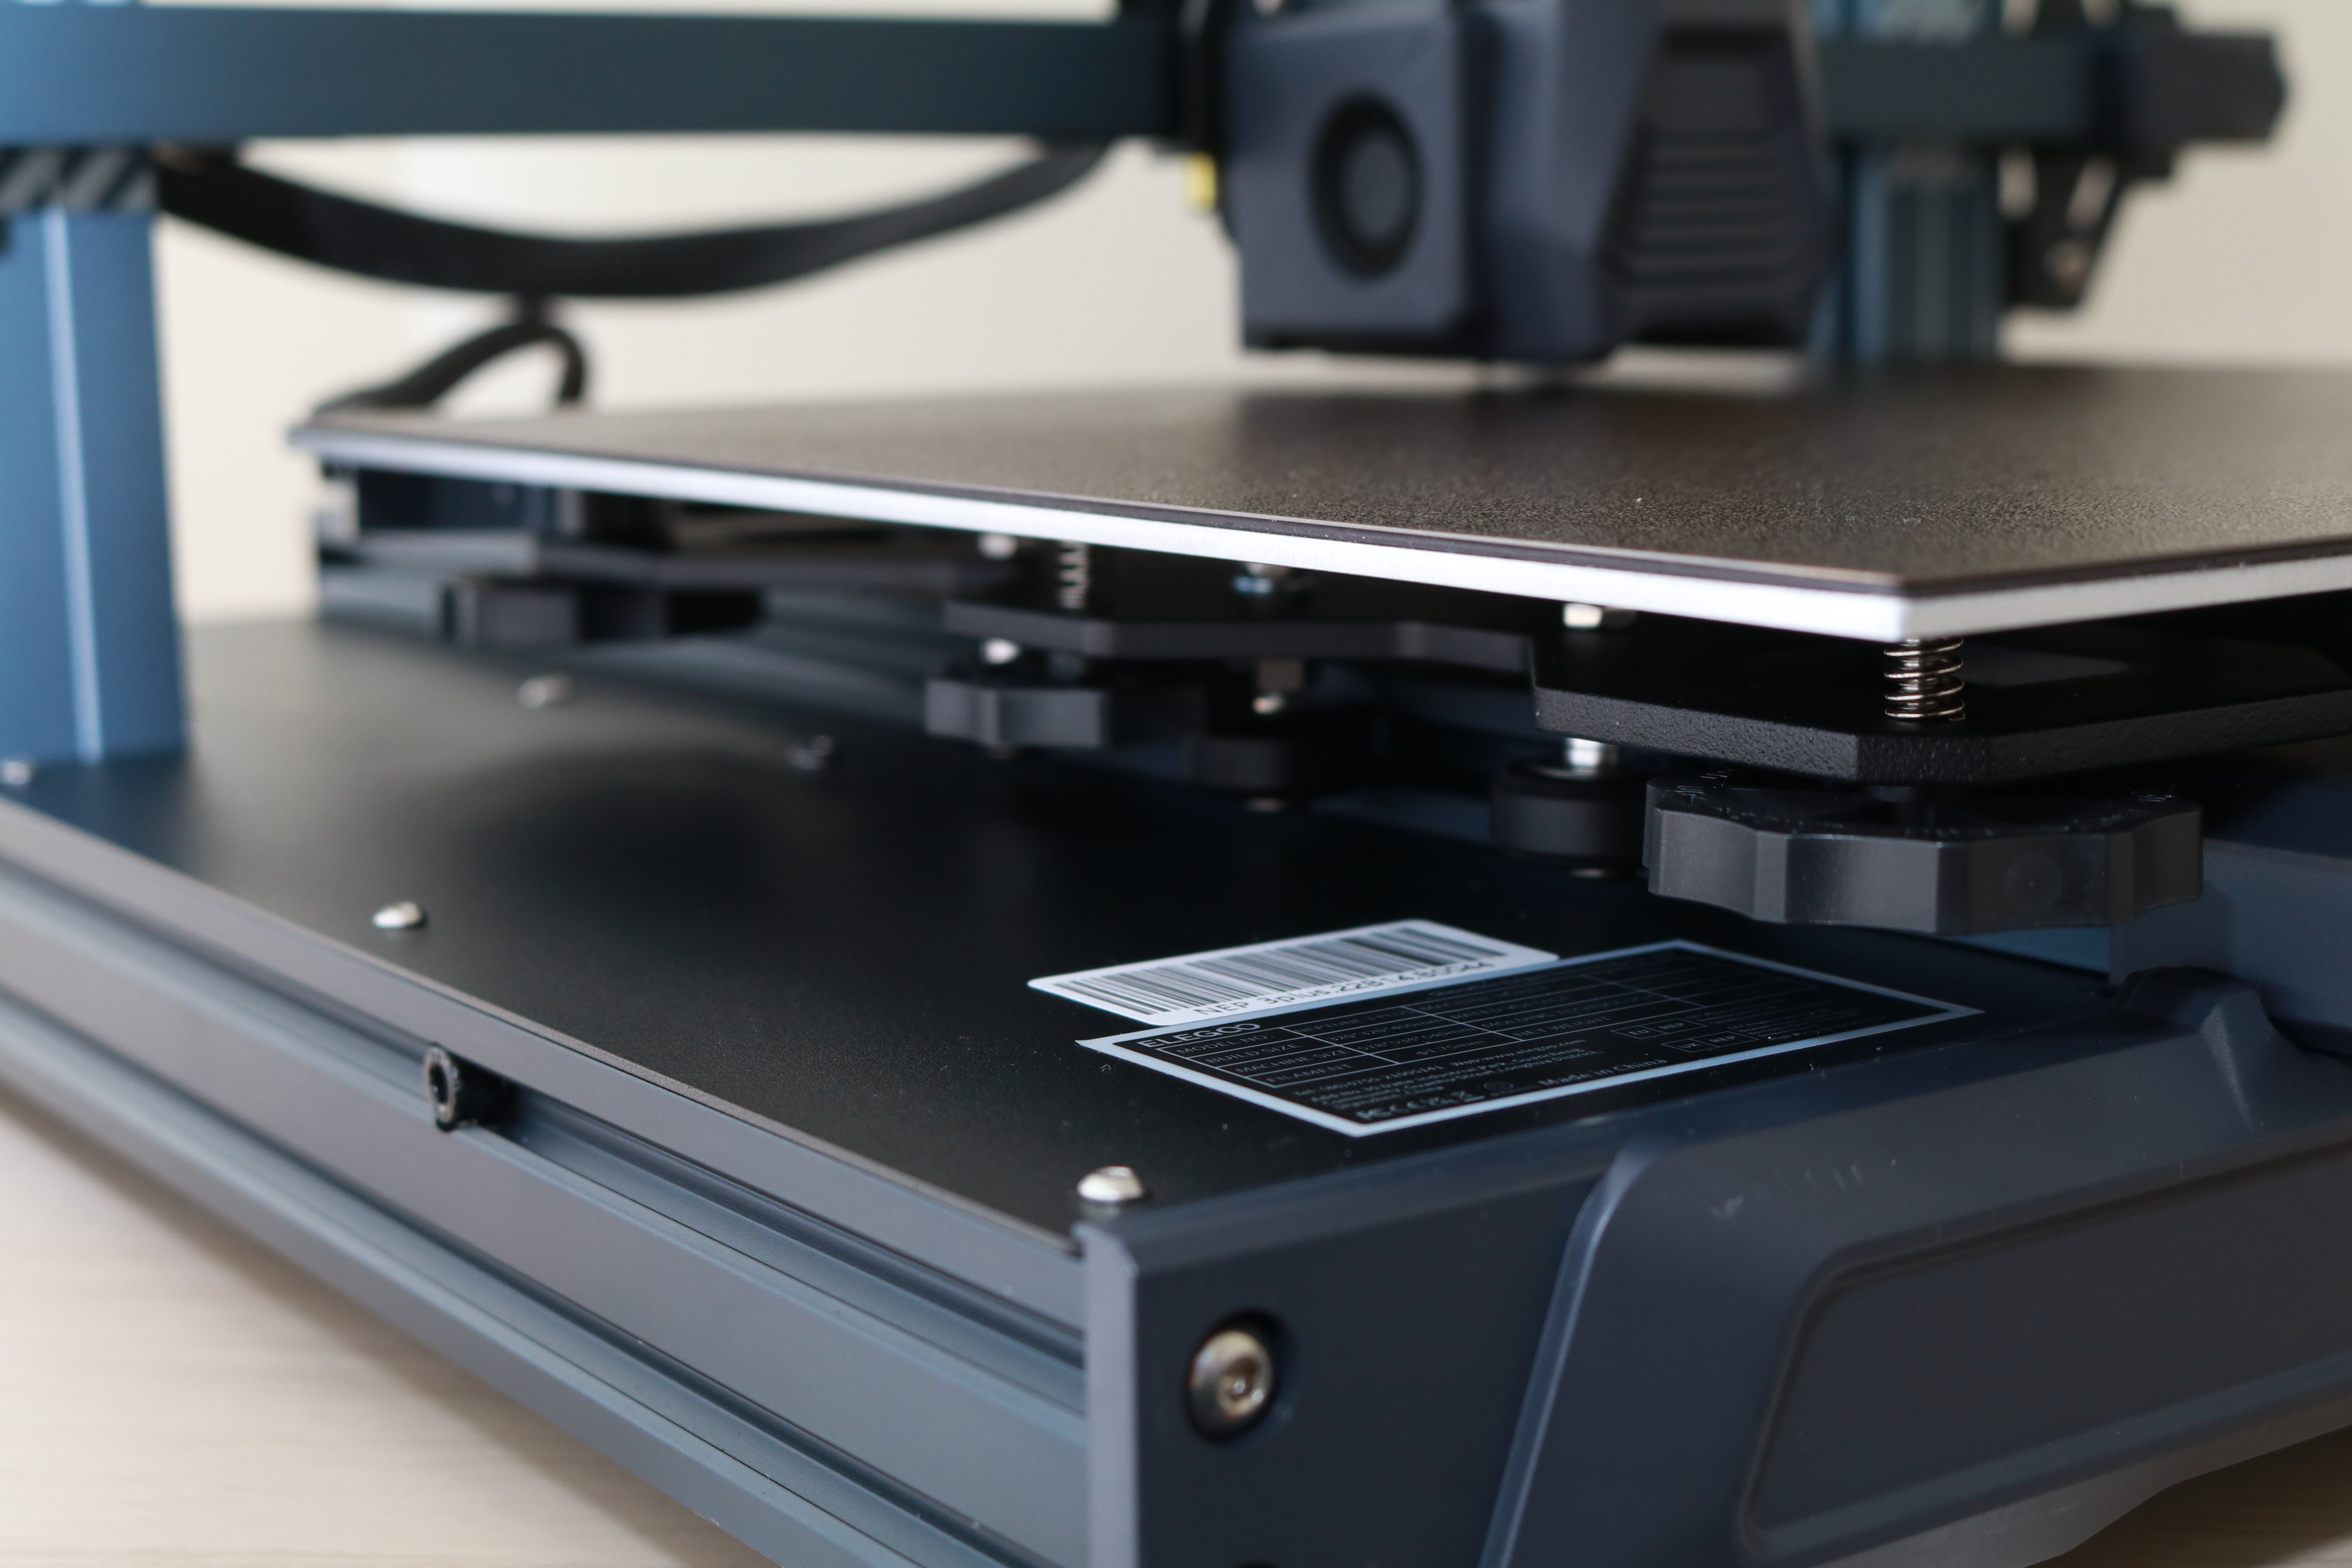
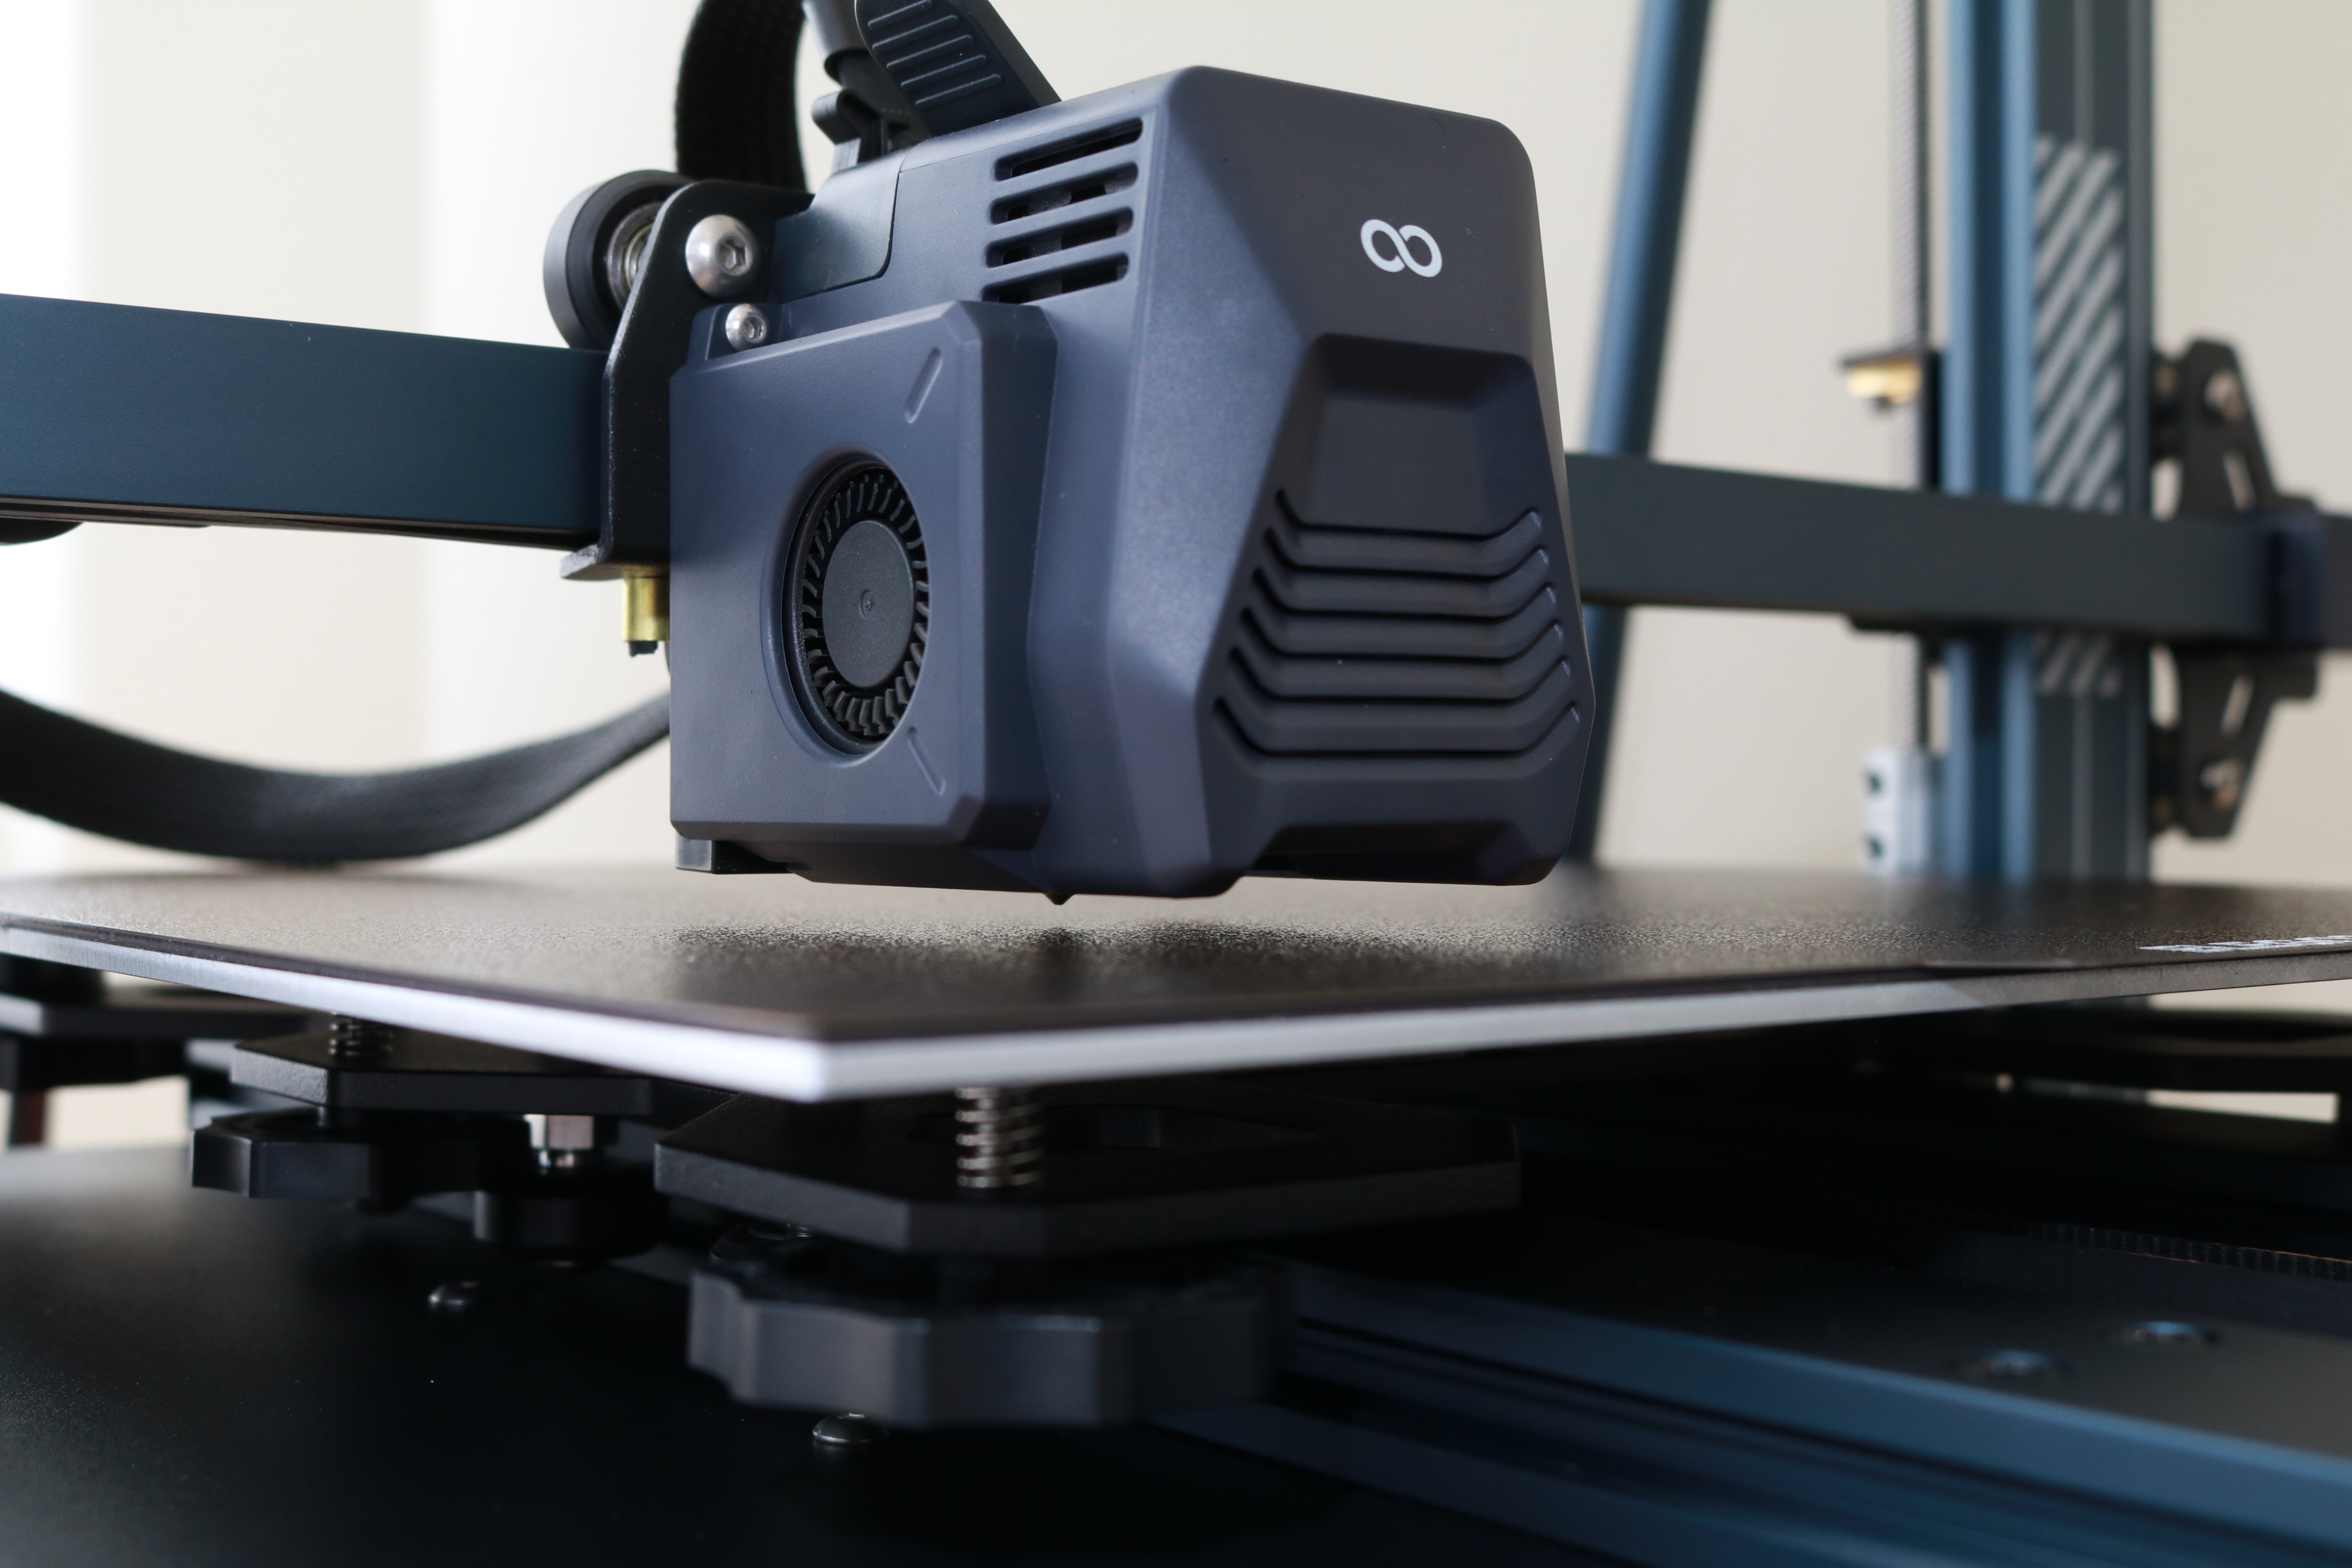
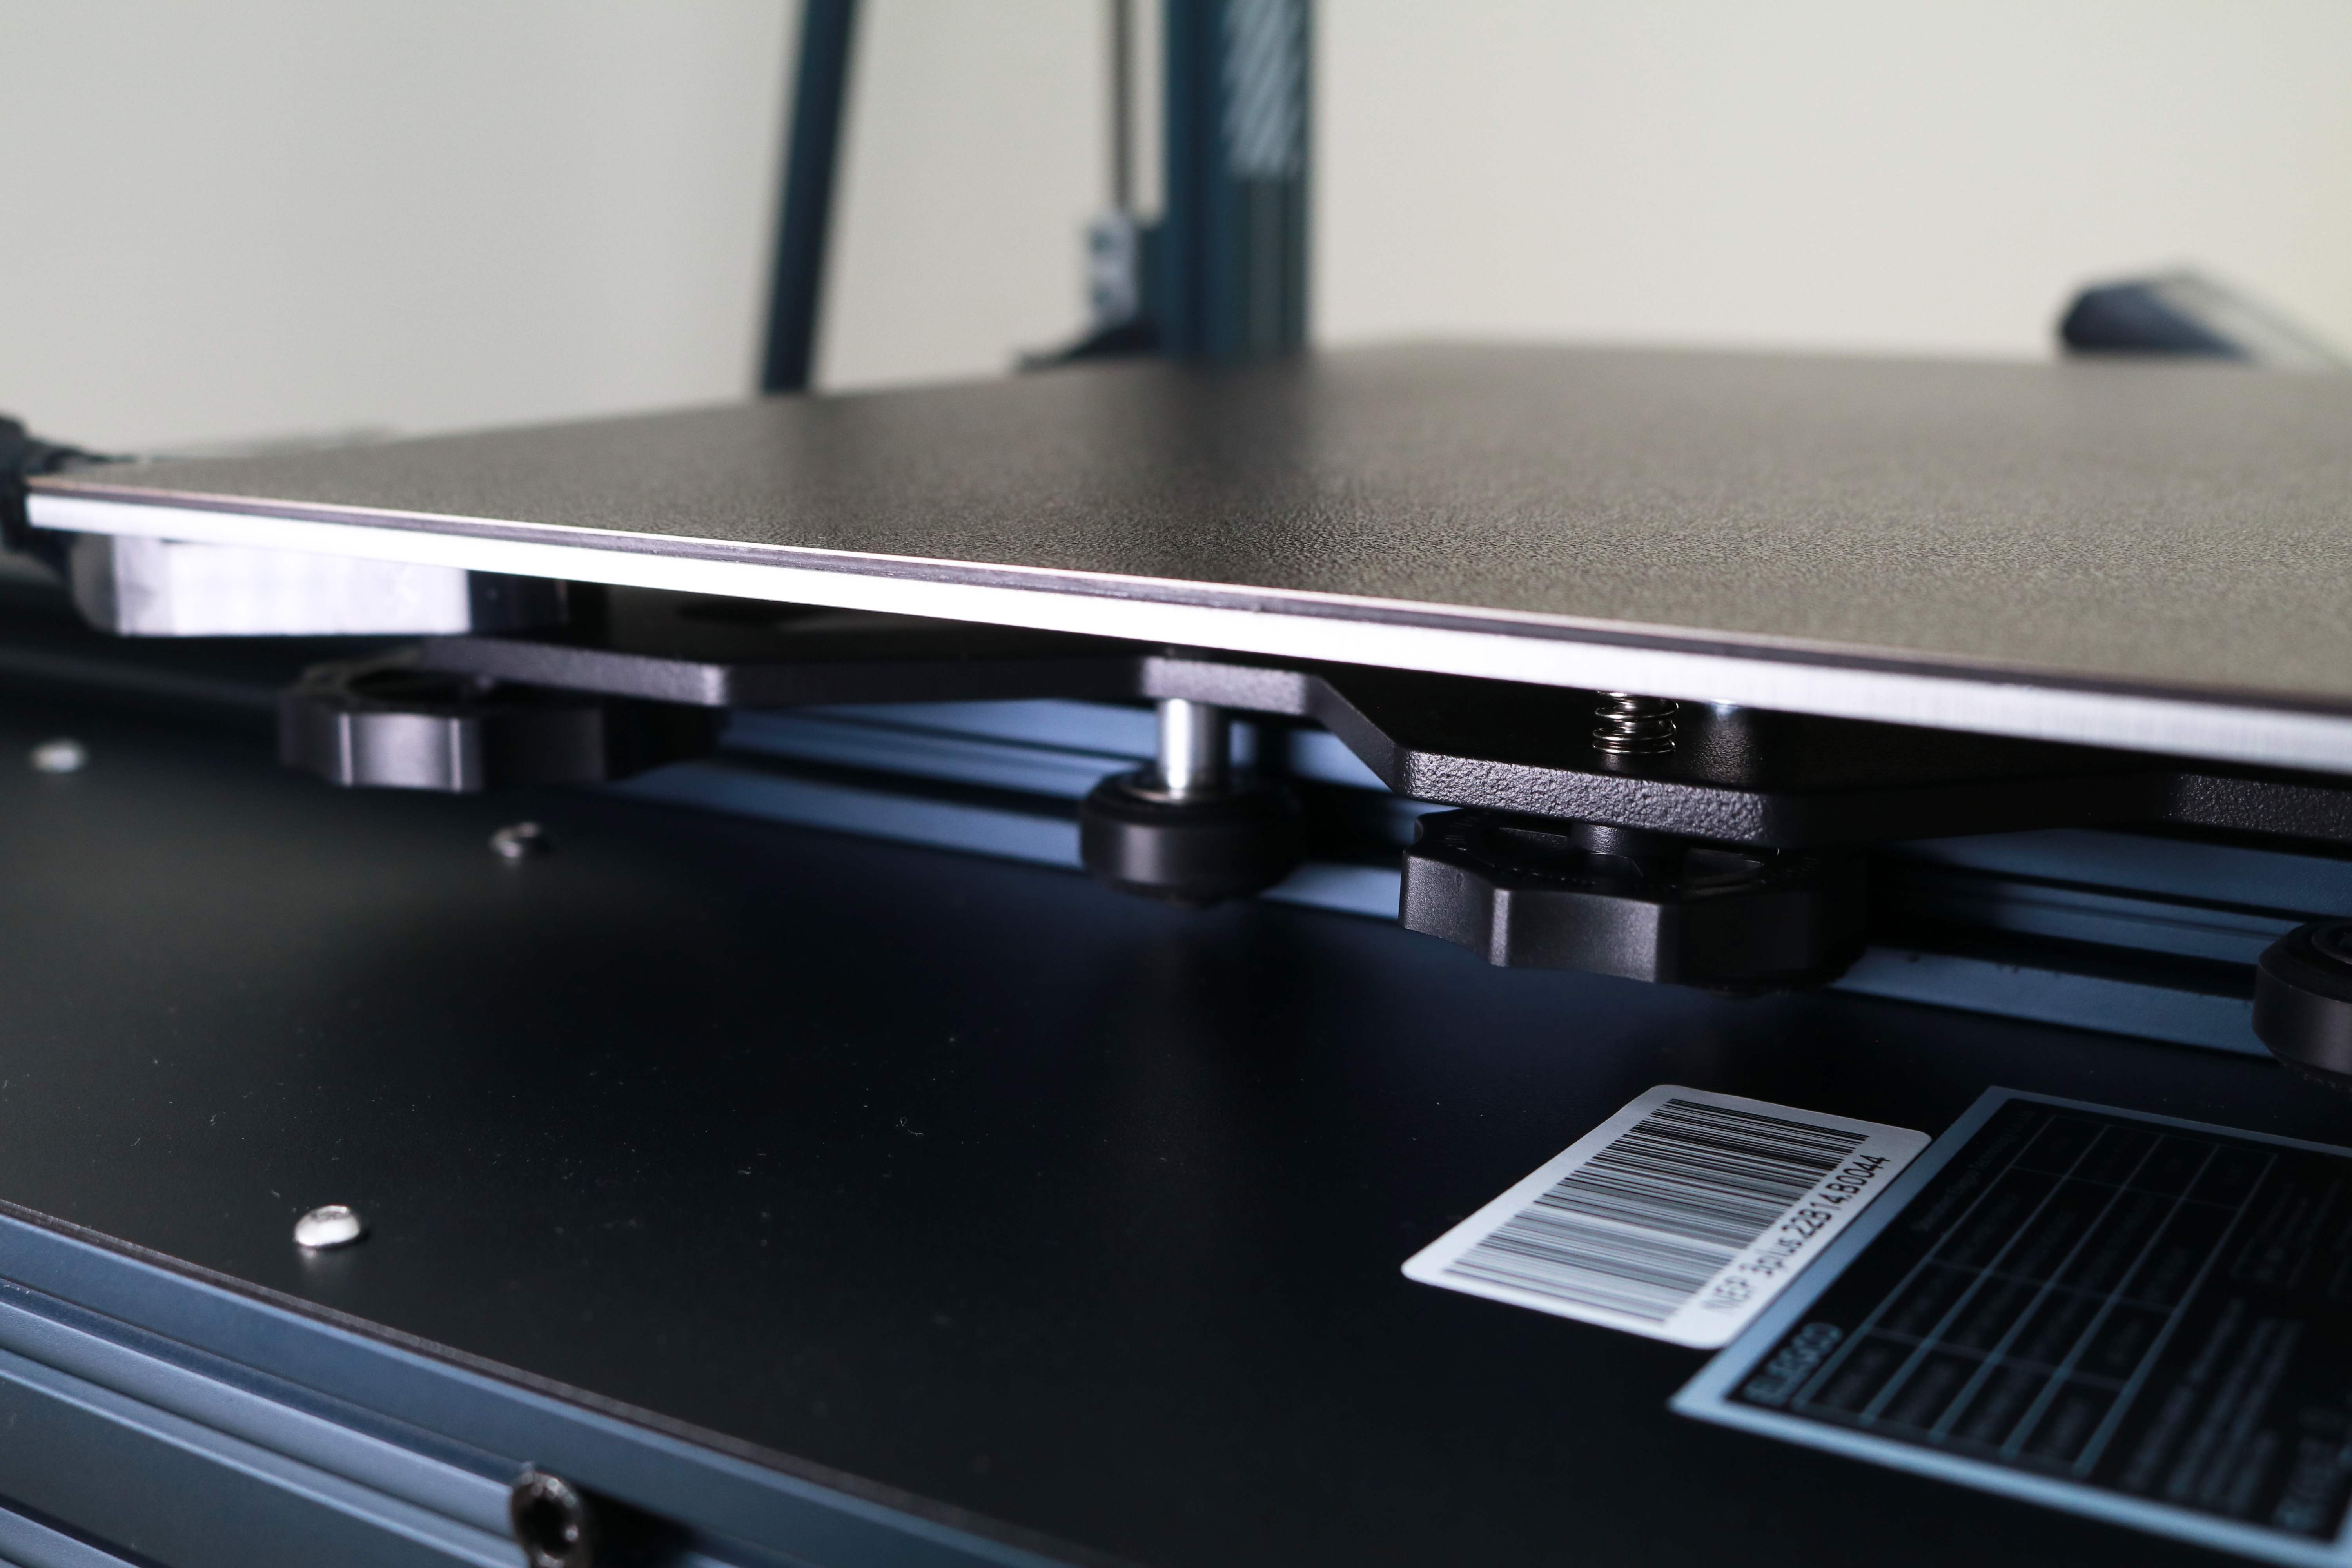
Unlike the smaller Elegoo Neptune 3 Pro, the Neptune 3 Plus has adjustable wheels on the corners of the platform for making small adjustments. The Neptune 3 Plus is unique in that it has six adjustable offsets as opposed to four, something I have never seen on a 3D printer before. Most printers use four adjustable points (one at each corner) combined with a global Z height to create a flat surface for printing. Some printers (like the Makerbot Replicator+) use a three point leveling setup for creating a flat place, but these are much less common.
In theory, you only need three points to define a plane. However, most printers use a four point leveling system, which can be trickier to visualize when adjusting the corners. The six points on the Neptune 3 Plus are likely to be a highly-debated feature, as six points is technically double the required amount. It’s worth remembering that the three point plane exists only in theory: in practice, the large platforms used on 3D printers can have high or low spots due to manufacturing issues, warping during heating, or damage to the build platform from previous prints.
The six point leveling on the Neptune 3 Plus allows users to make minor adjustments to compensate for these defects while still automatically detecting the offsets using the built-in sensor. I wasn’t sure how useful the six point leveling setup would be when I first started using the Neptune 3 Plus, but after some use, I found it helpful.
Build Platform on Elegoo Neptune 3 Plus

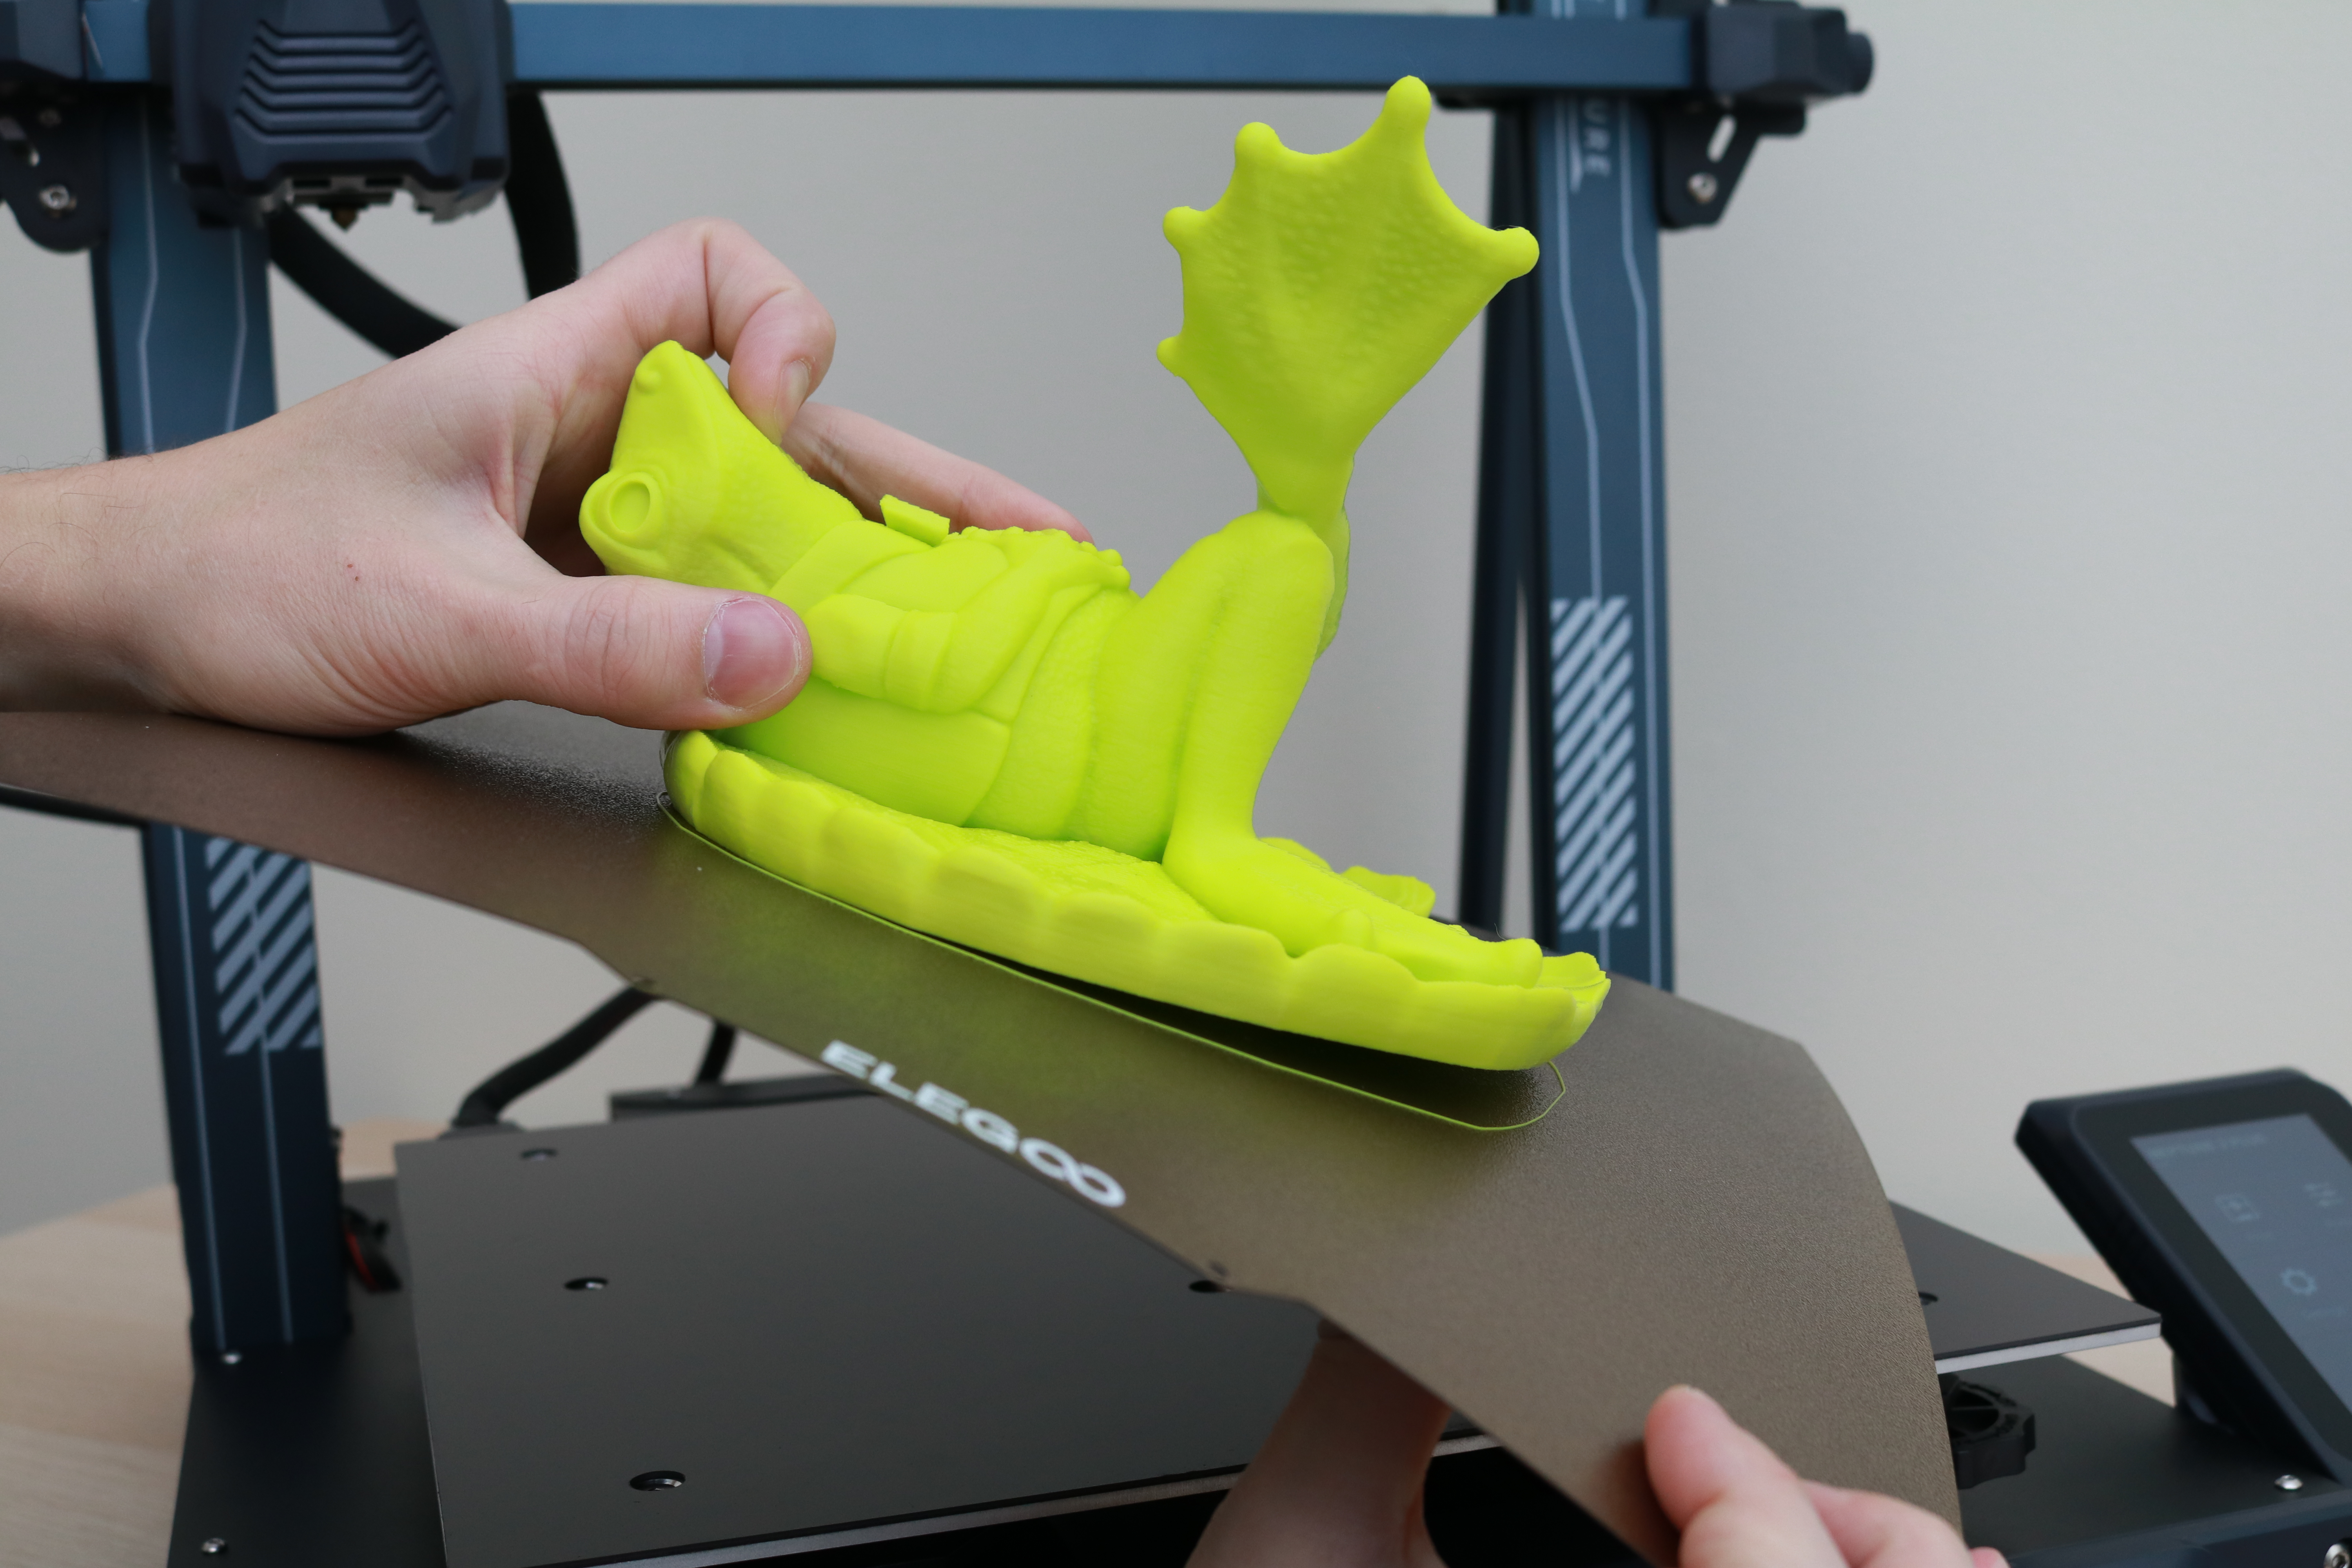
The Elegoo Neptune 3 Plus uses a textured PEI sheet that can be easily removed from the magnetic surface that holds it down. This sheet is thin and flexible, and can be bent to easily pop parts off after printing.
While the platform is heated during printing, parts have excellent adhesion and aren’t easily removed. Once the print is finished and the platform has cooled, the part will easily detach with minimal effort. More complex or delicate parts can be removed by flexing the platform and allowing the part to organically delaminate.
The gritty texture on the platform also translates over to the printed parts, and leaves a texture on any platform-facing surface. This texture isn’t necessarily a bad thing, and it looks more consistent than the mirror-like finish on printers that use glass build platforms. For organic parts with high levels of detail and texture, this gritty texture gives the part a more intentional appearance.
Printing on the Elegoo Neptune 3 Plus
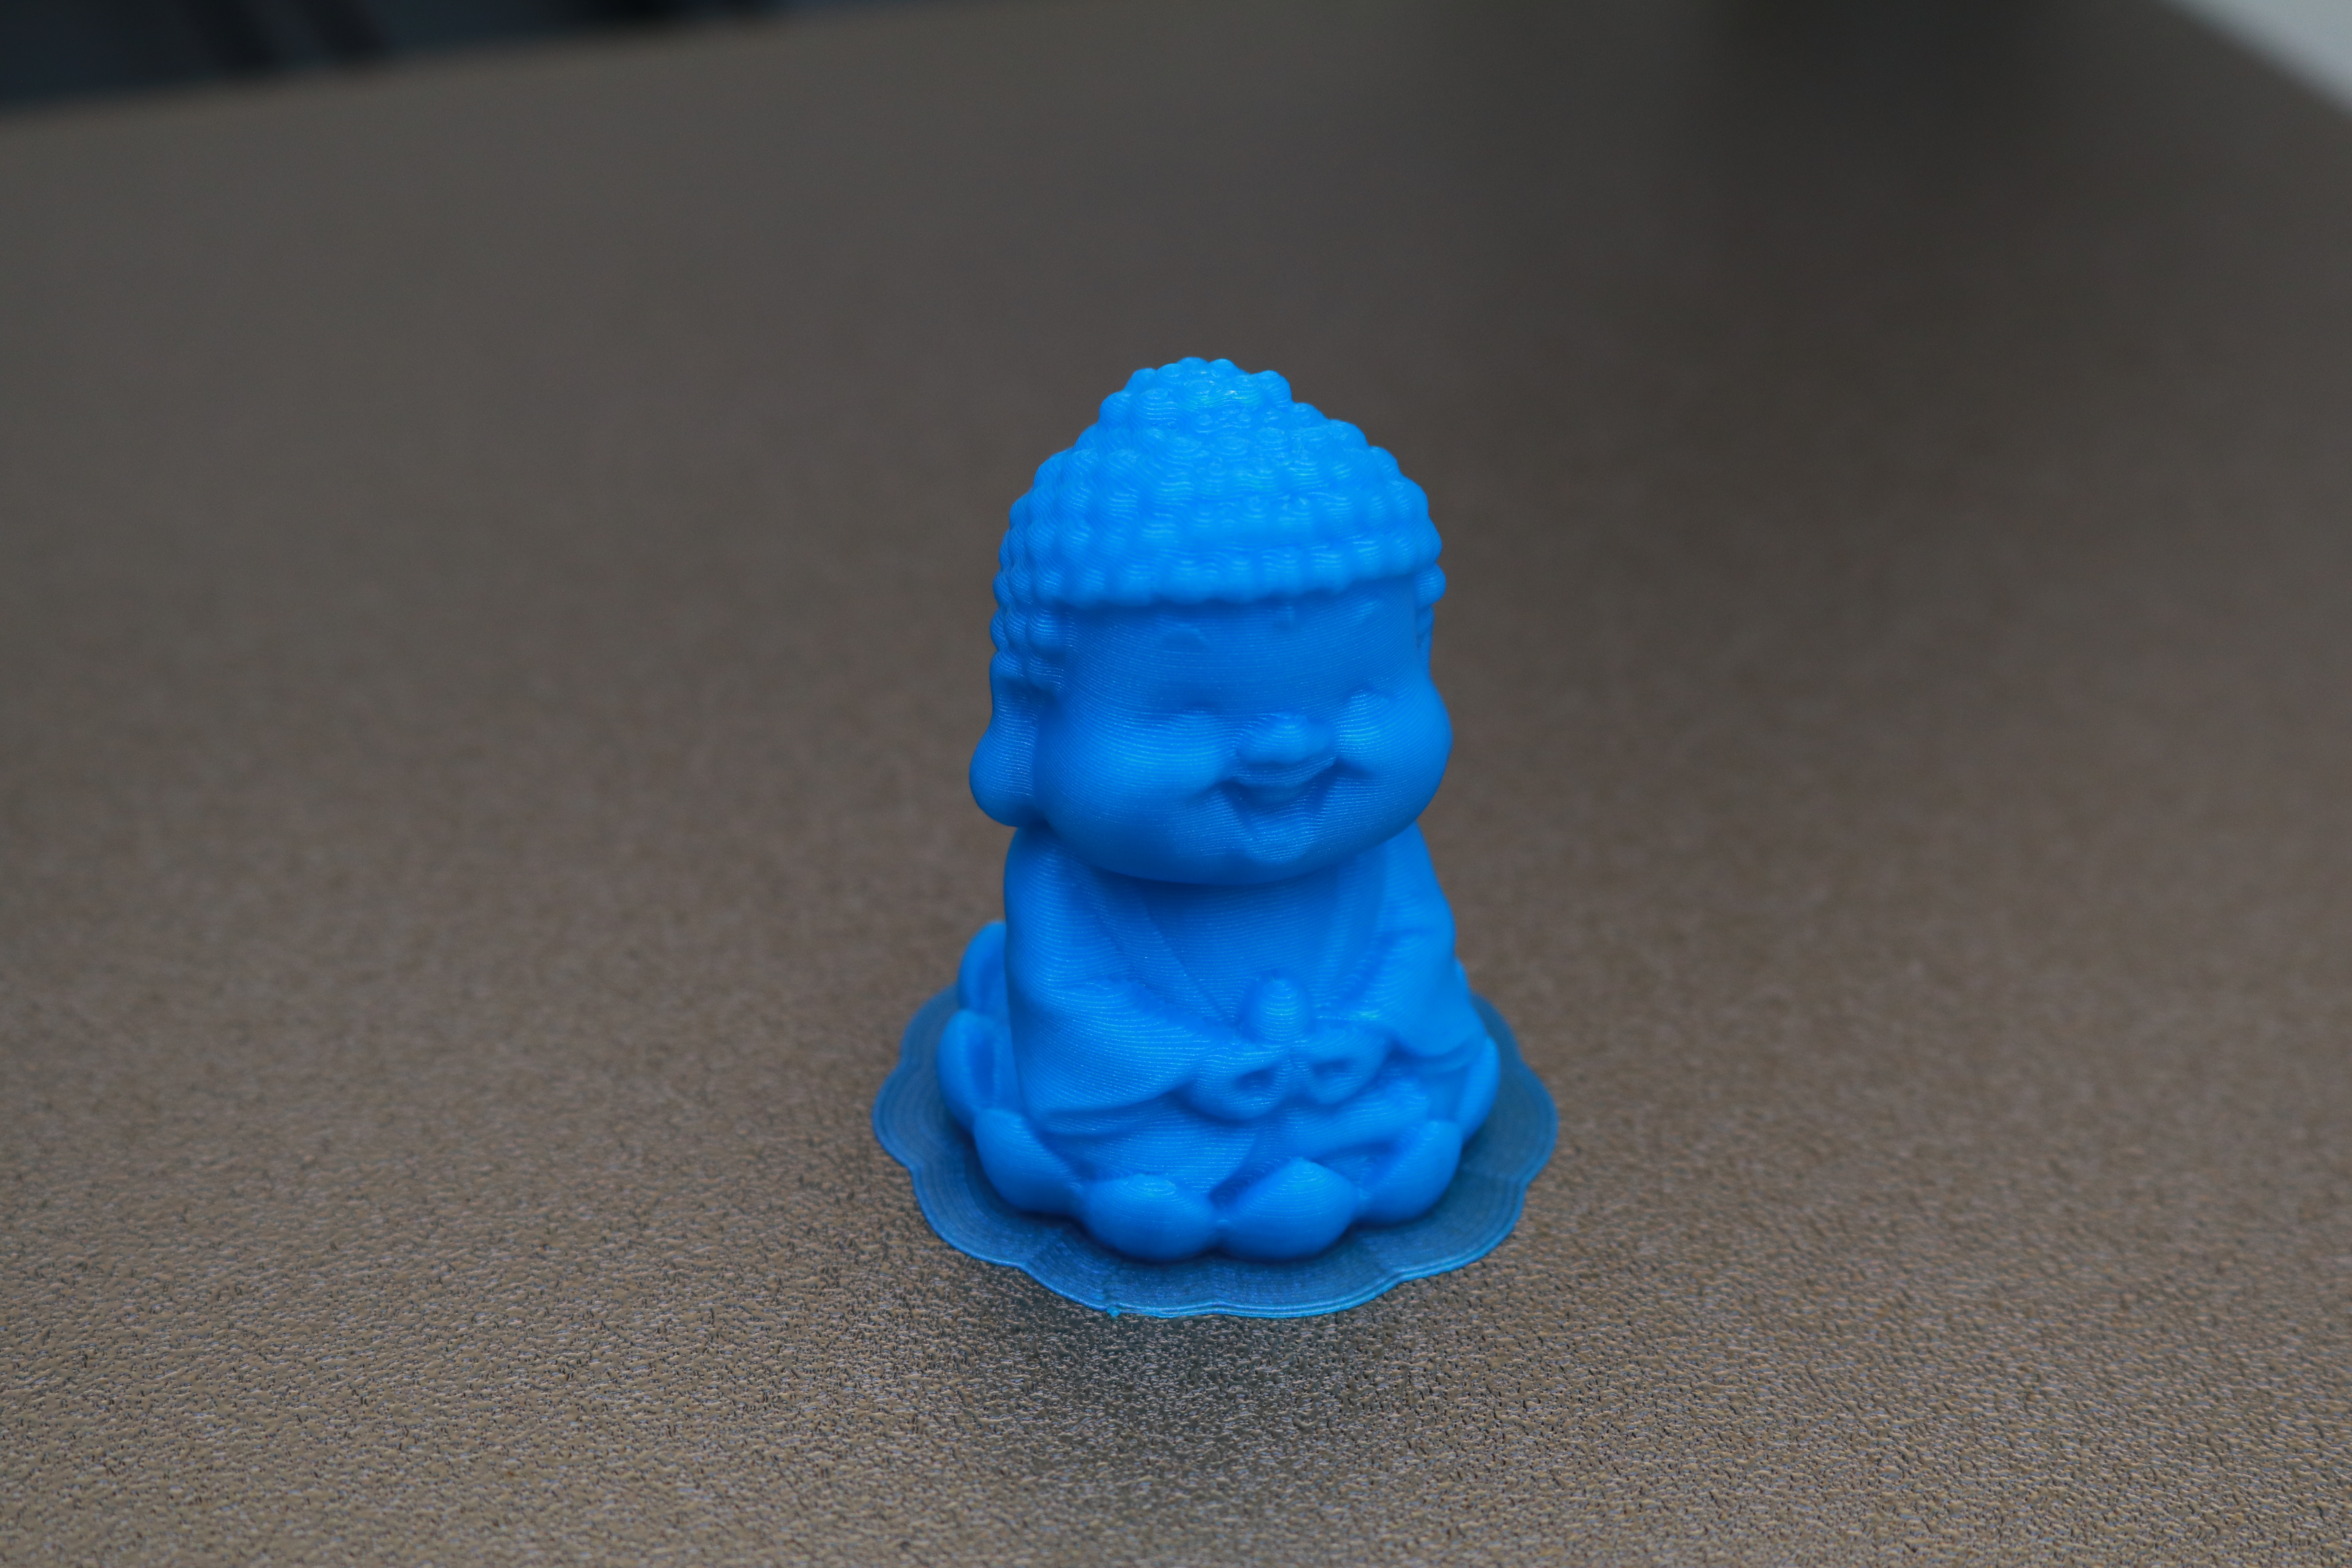
The Elegoo Neptune 3 Plus includes a pair of demo models: a small Buddah statue and a tool holder that attaches to the frame of the printer. The Buddah statue has been prepared and is included in a print-ready .gcode format, while the tool holder is included only as an .STL file. The Buddah file is a good demonstration of textured surfaces and organic shapes, and the resulting print looked very sharp printed in Prusament Azure Blue PLA, which is one our list of the best filaments for 3D printing.
The tool holder is an excellent example of what printer manufacturers should aspire to include with their machines. The print is reasonably long (about 2 and a half hours at standard settings), and includes precisely-sized cutouts for the included Allen keys, screwdrivers, and other tools. This shows both the accuracy of the printer as well as the repeatability across each individual slot. This is an excellent test print, unlike the difficult-to-remove rook test print that Elegoo includes on the Saturn and Mars resin 3D printers.
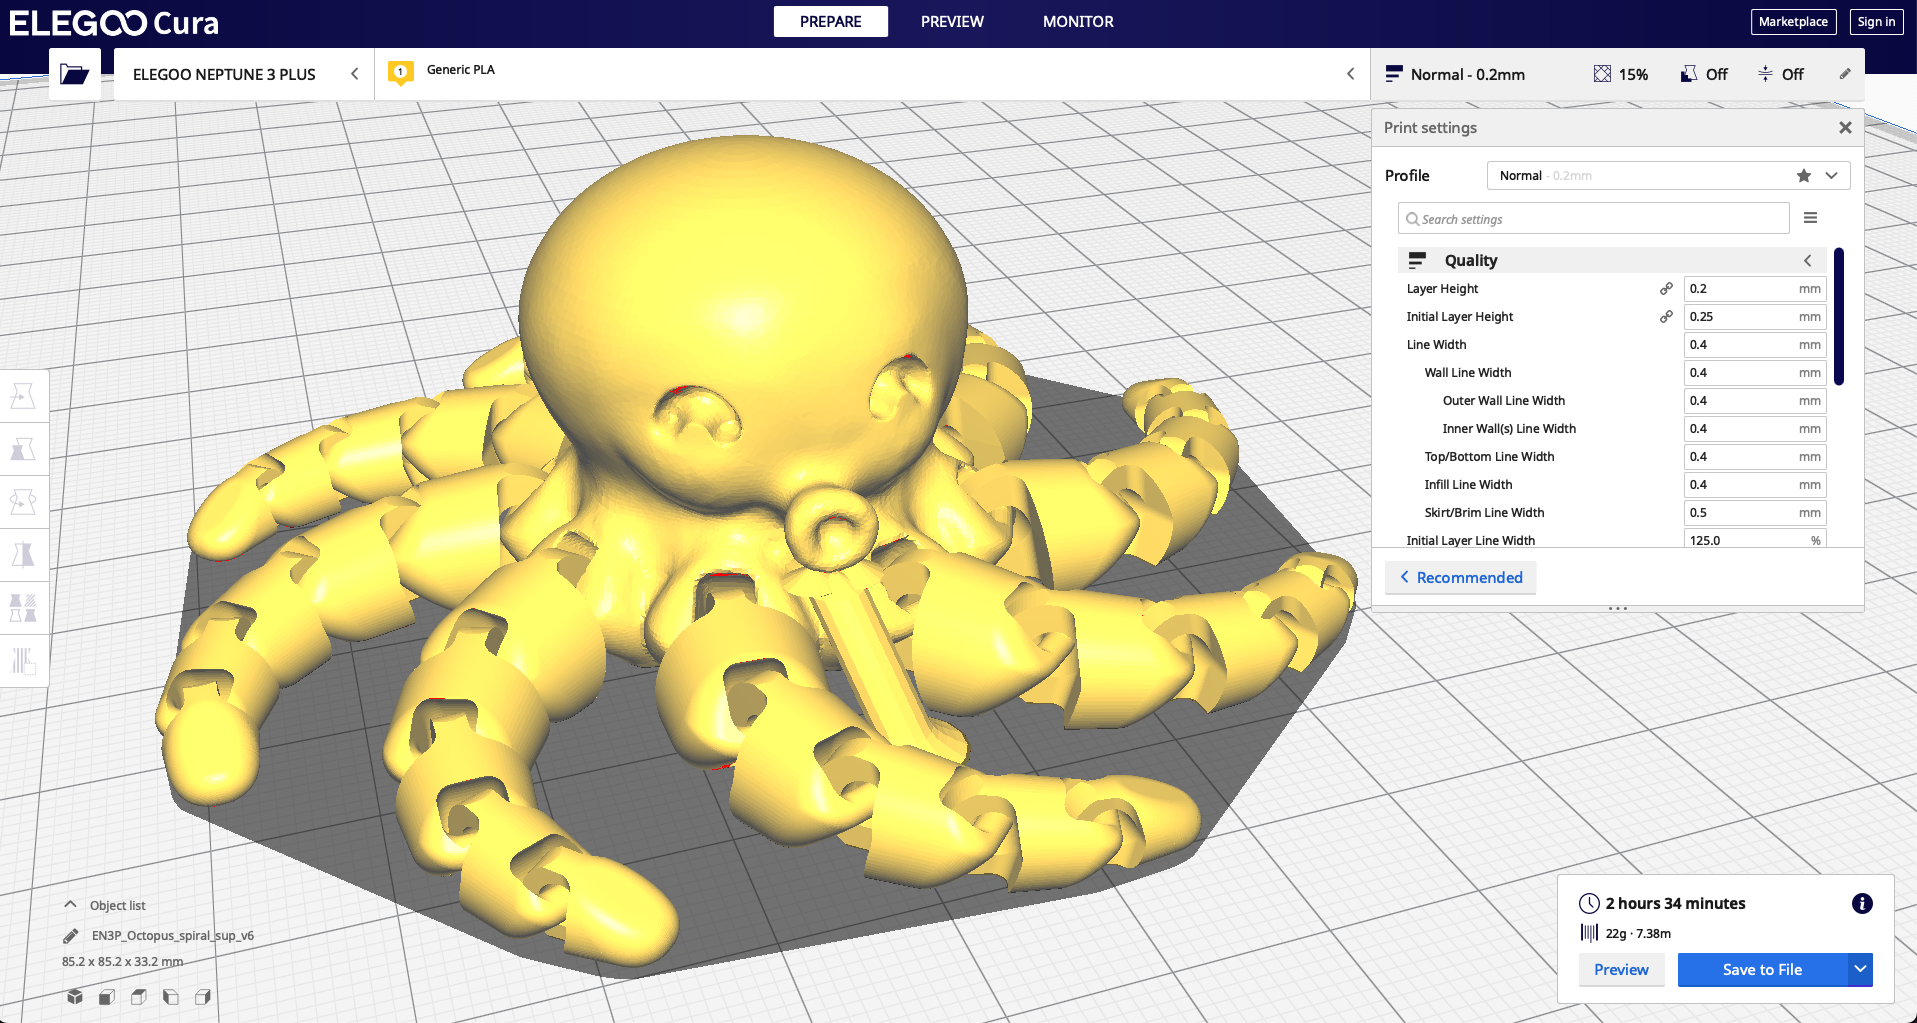
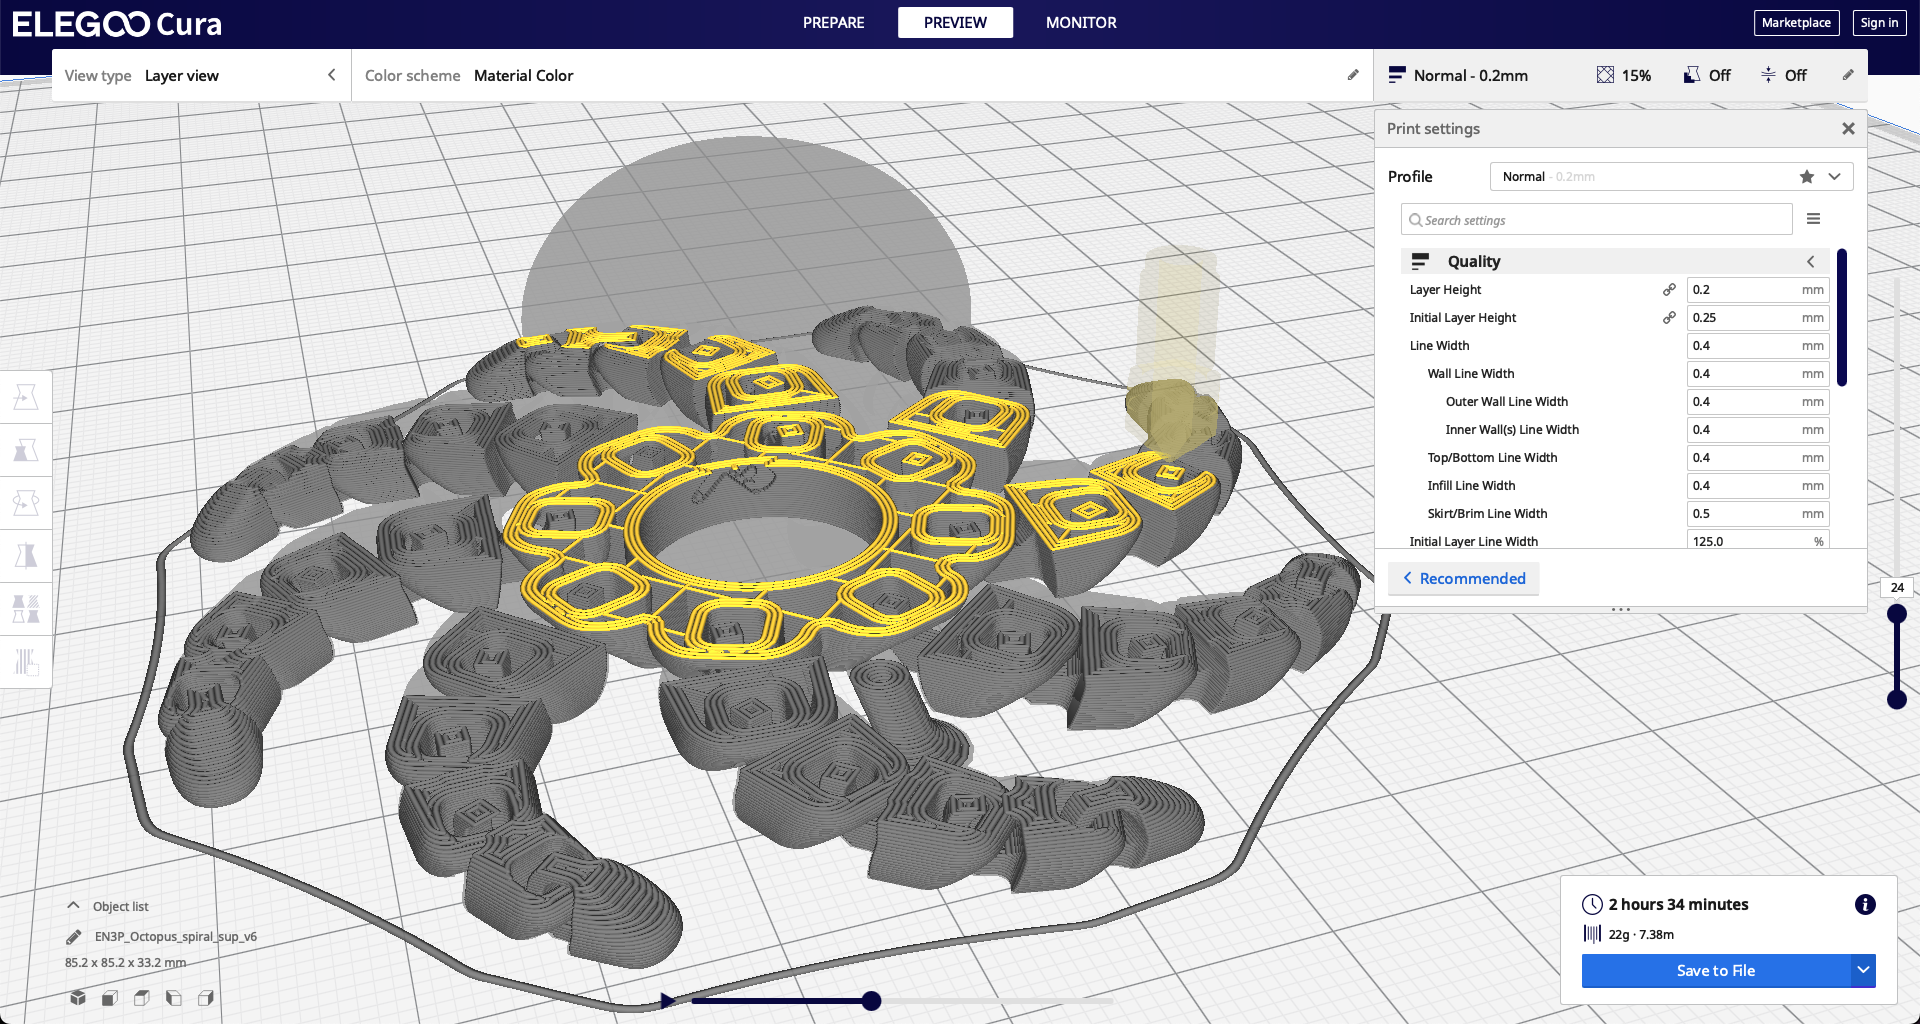
Elegoo includes a copy of Elegoo Cura 4.8.0 on the microSD card, a skinned version of the popular Ultimaker Cura slicer app. Elegoo Cura includes profiles for the Elegoo Neptune 3, Neptune 3 Pro, Neptune 3 Plus, and several older Elegoo 3D printers. While this version of Cura doesn’t include some of the newer features or architecture of the latest version of Ultimaker Cura (5.2.1 as of the writing of this article), it is still a reasonable choice for a first slicer app.
The default profile for the Neptune 3 Plus is a conservative starting point for a printer of this size, with a 60mm/s print speed, a 200°C nozzle temperature, and 15% grid infill. Elegoo Cura allows for a line-by-line preview of the toolpath, which can be useful when planning a complex print that requires specific toolpathing or pauses.
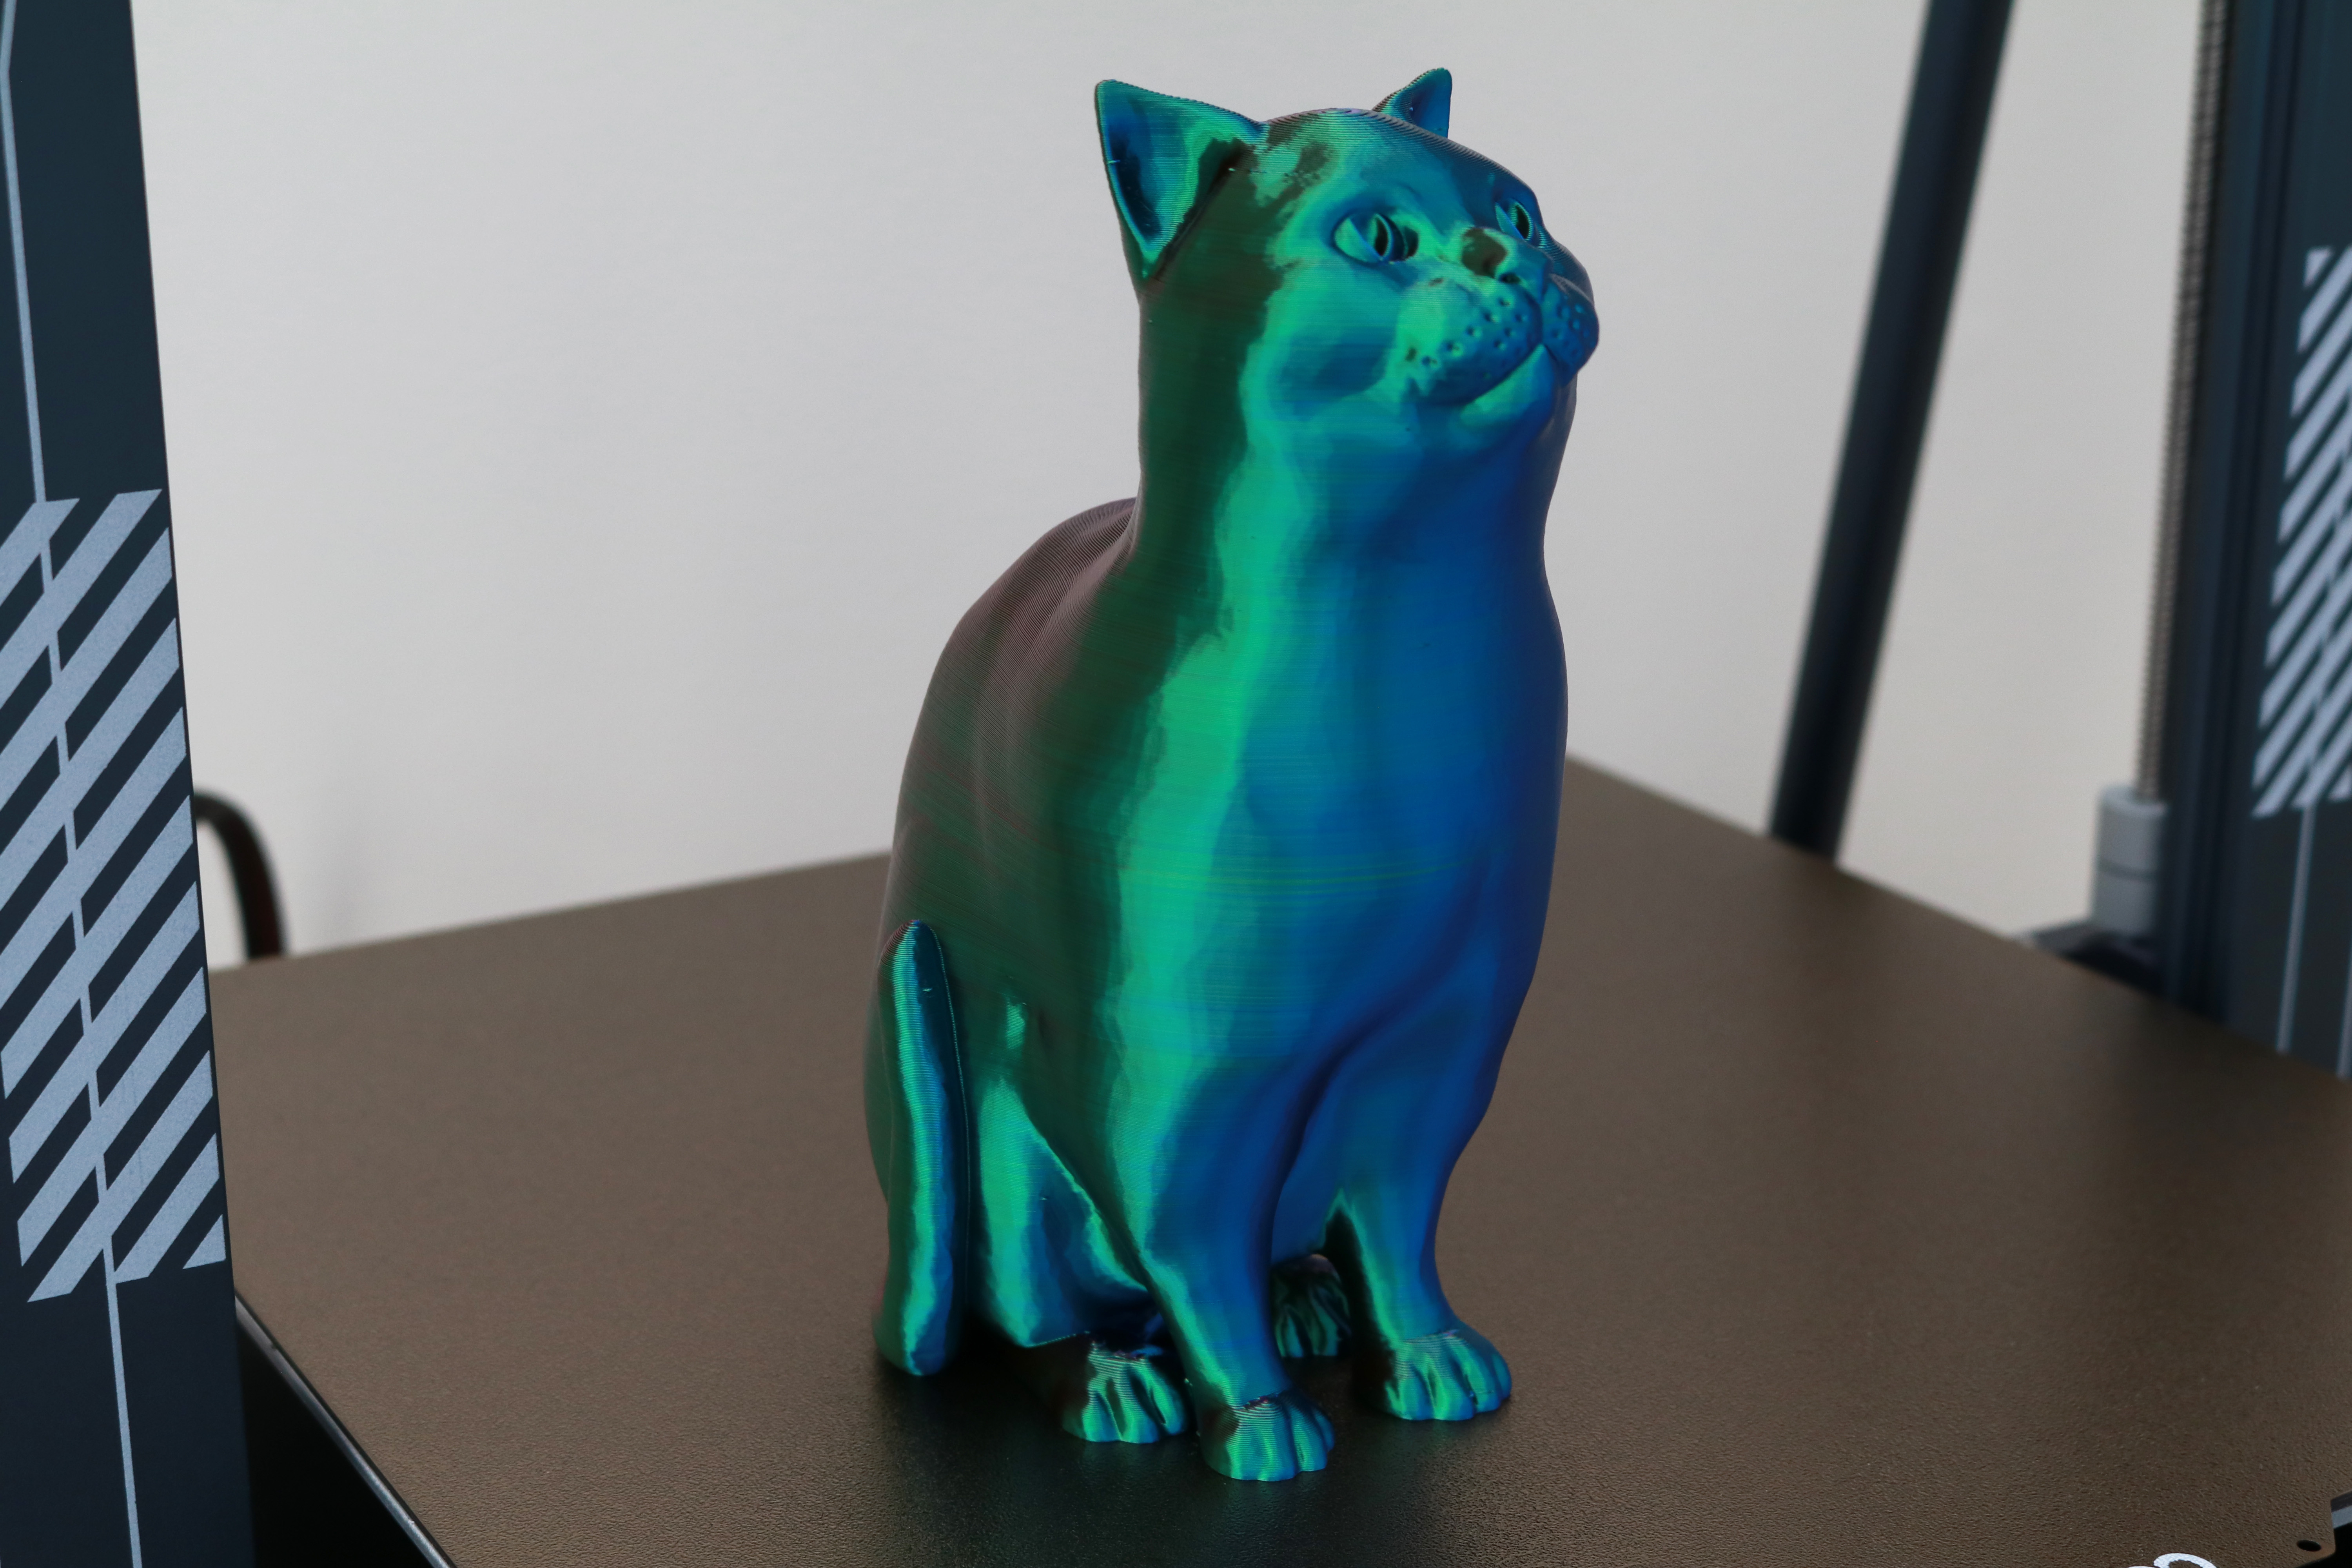
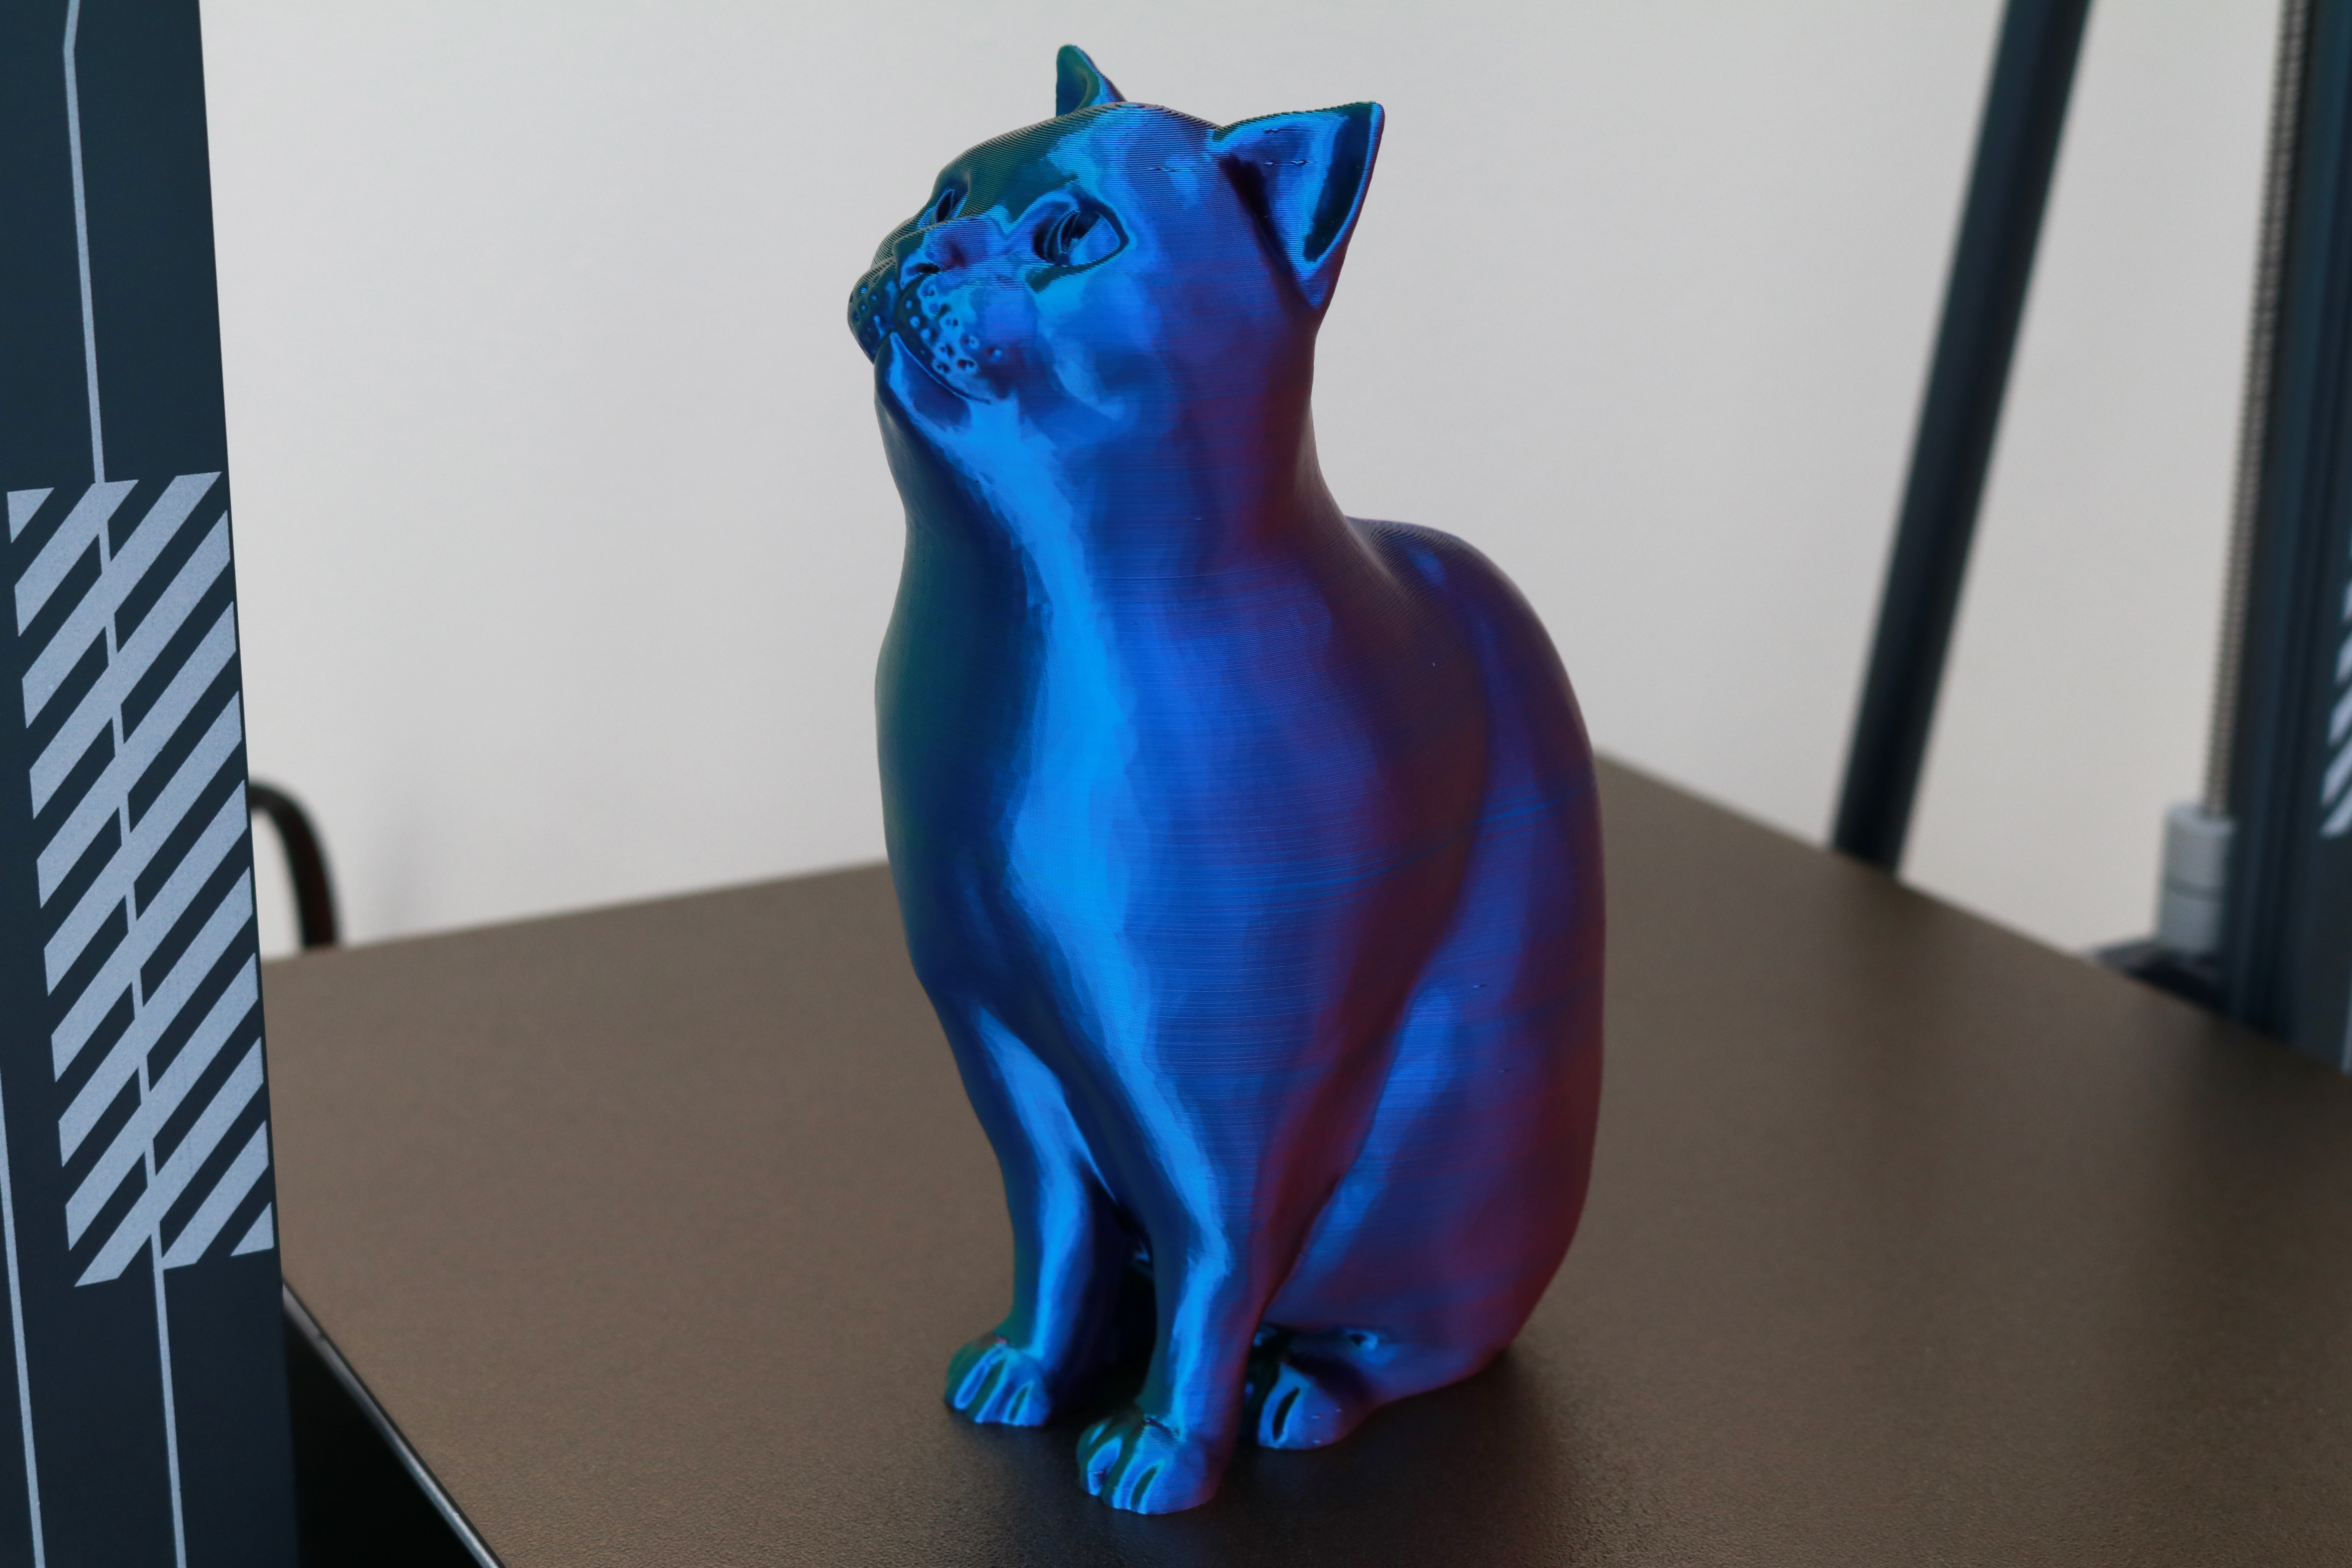
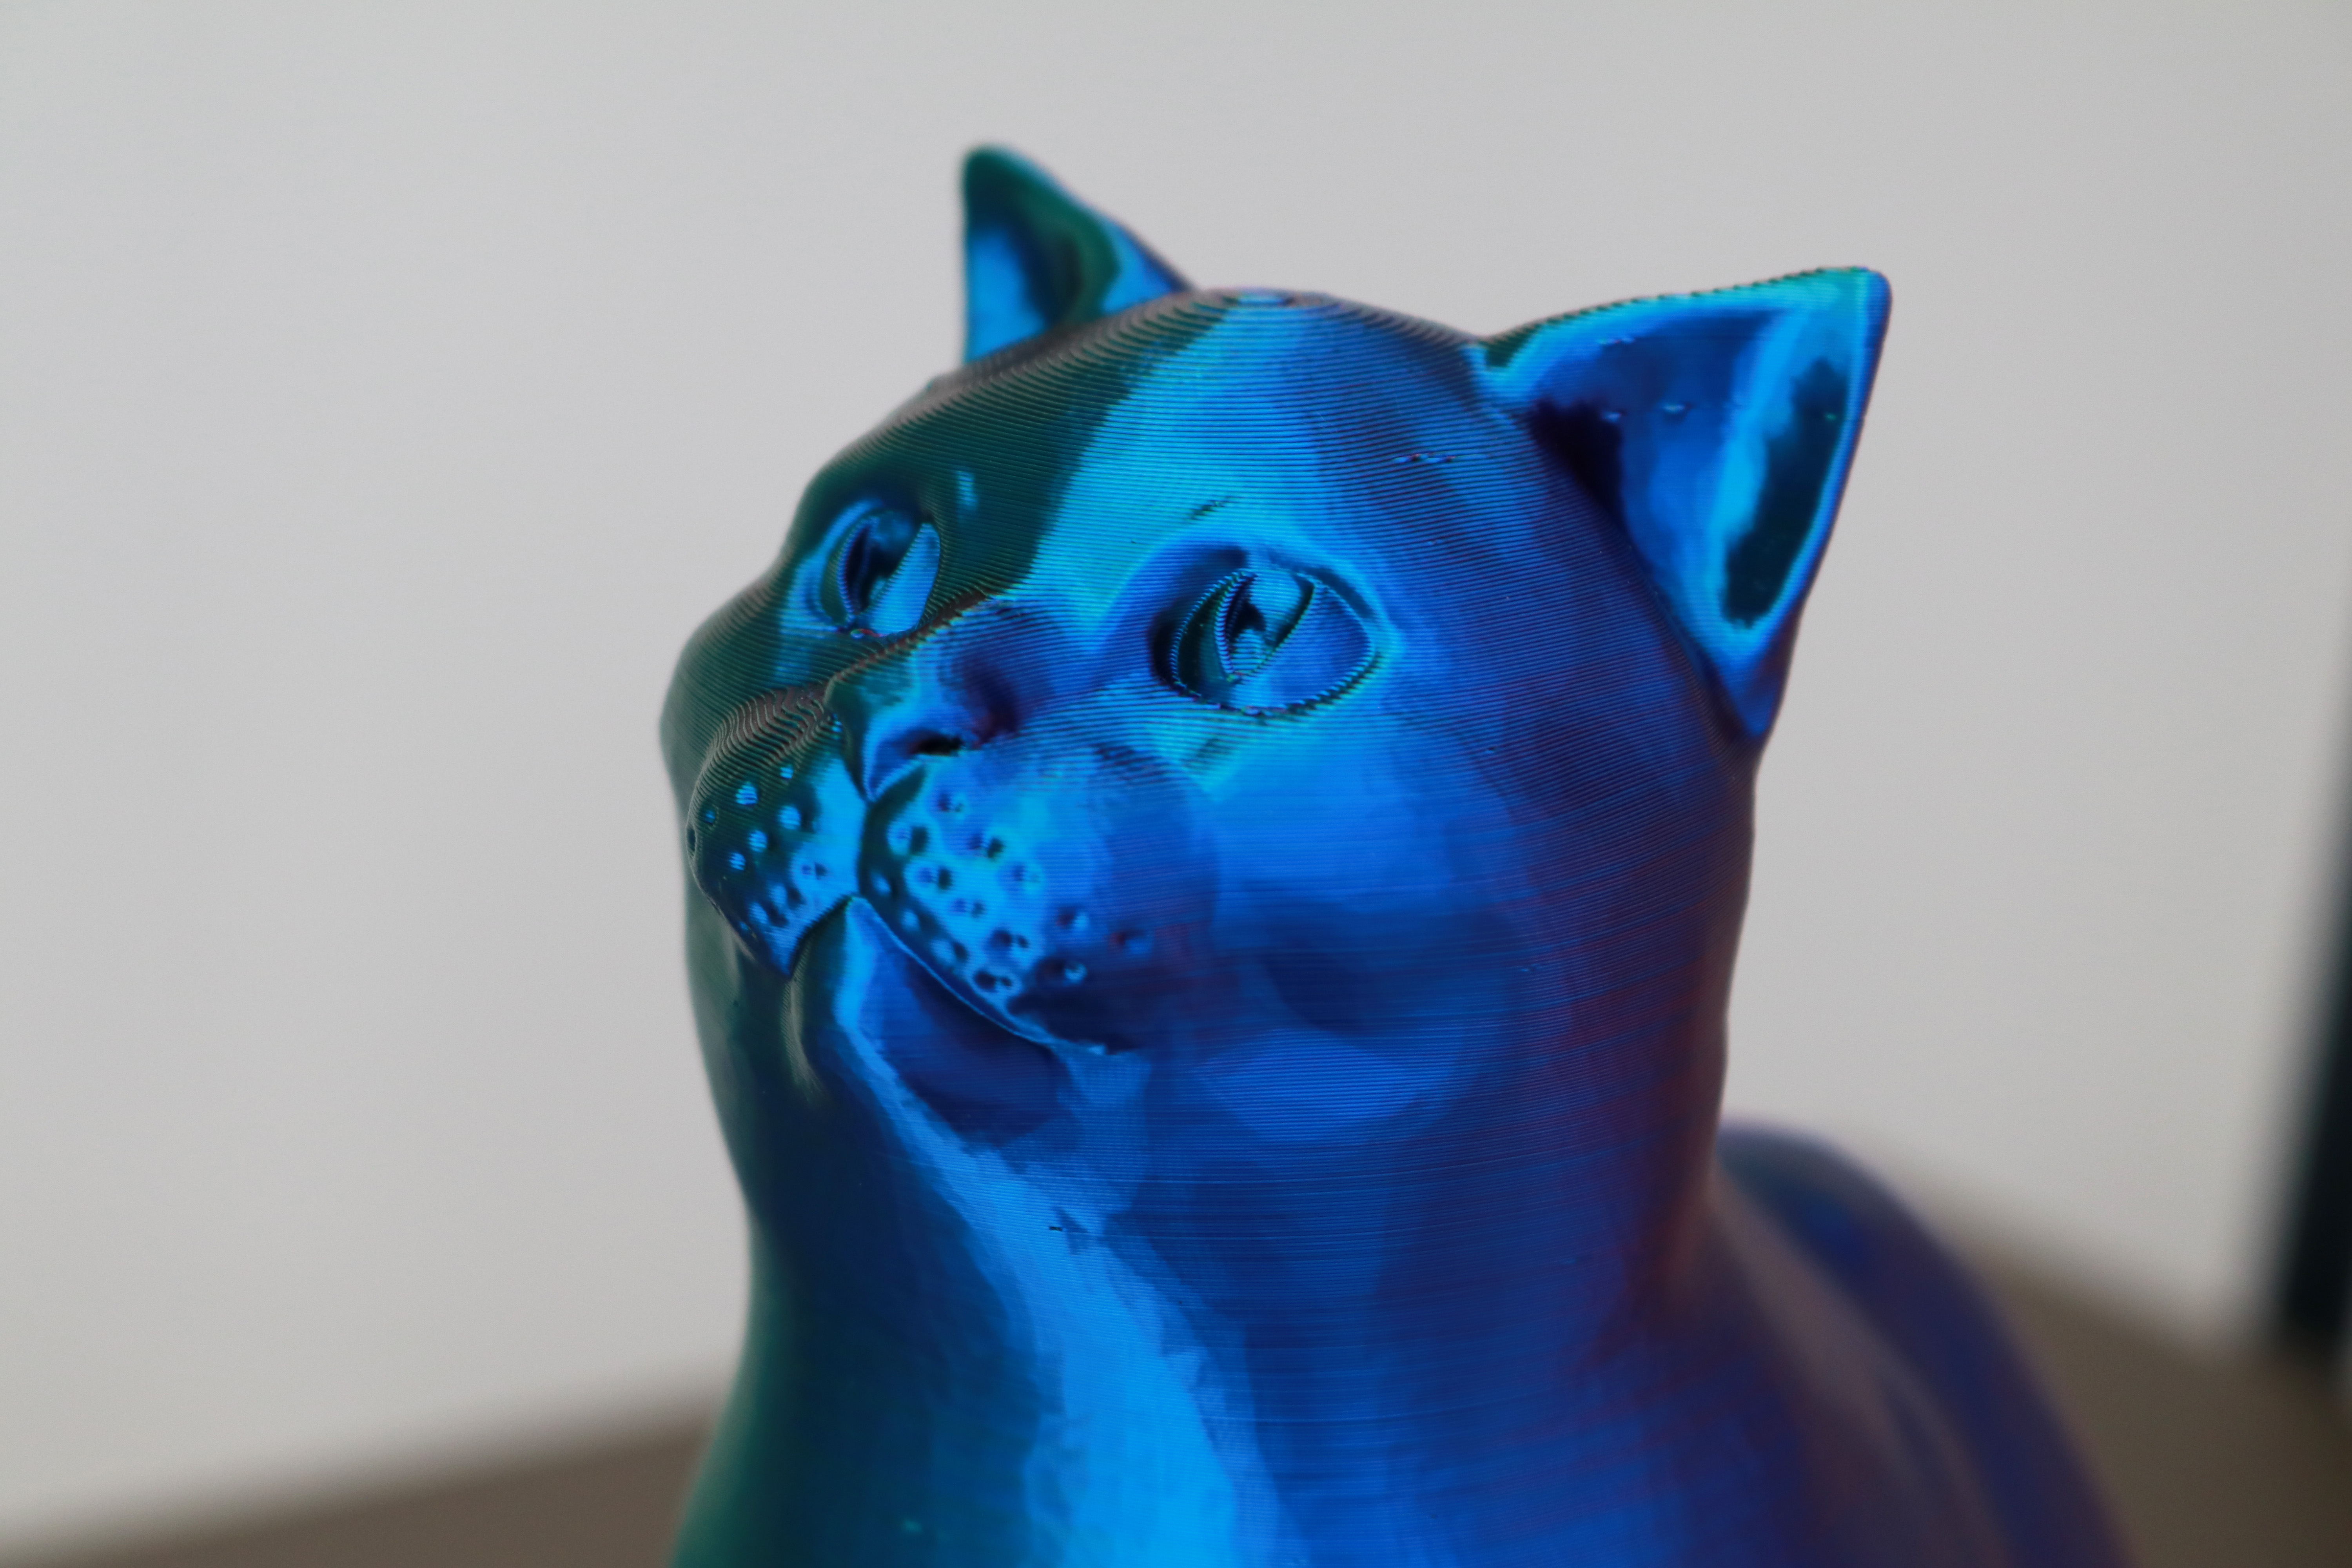
The Shrodinky cat model by Loubie3D printed perfectly on the first attempt, and the clean and consistent toolpathing from the Neptune 3 Plus resulted in a smooth and even model. Printed with Amolen Tri-Color Silk PLA using the default .2mm profile, the organic curves of the model look clean and the resolution is high enough to see the tessellation of the mesh .STL file.
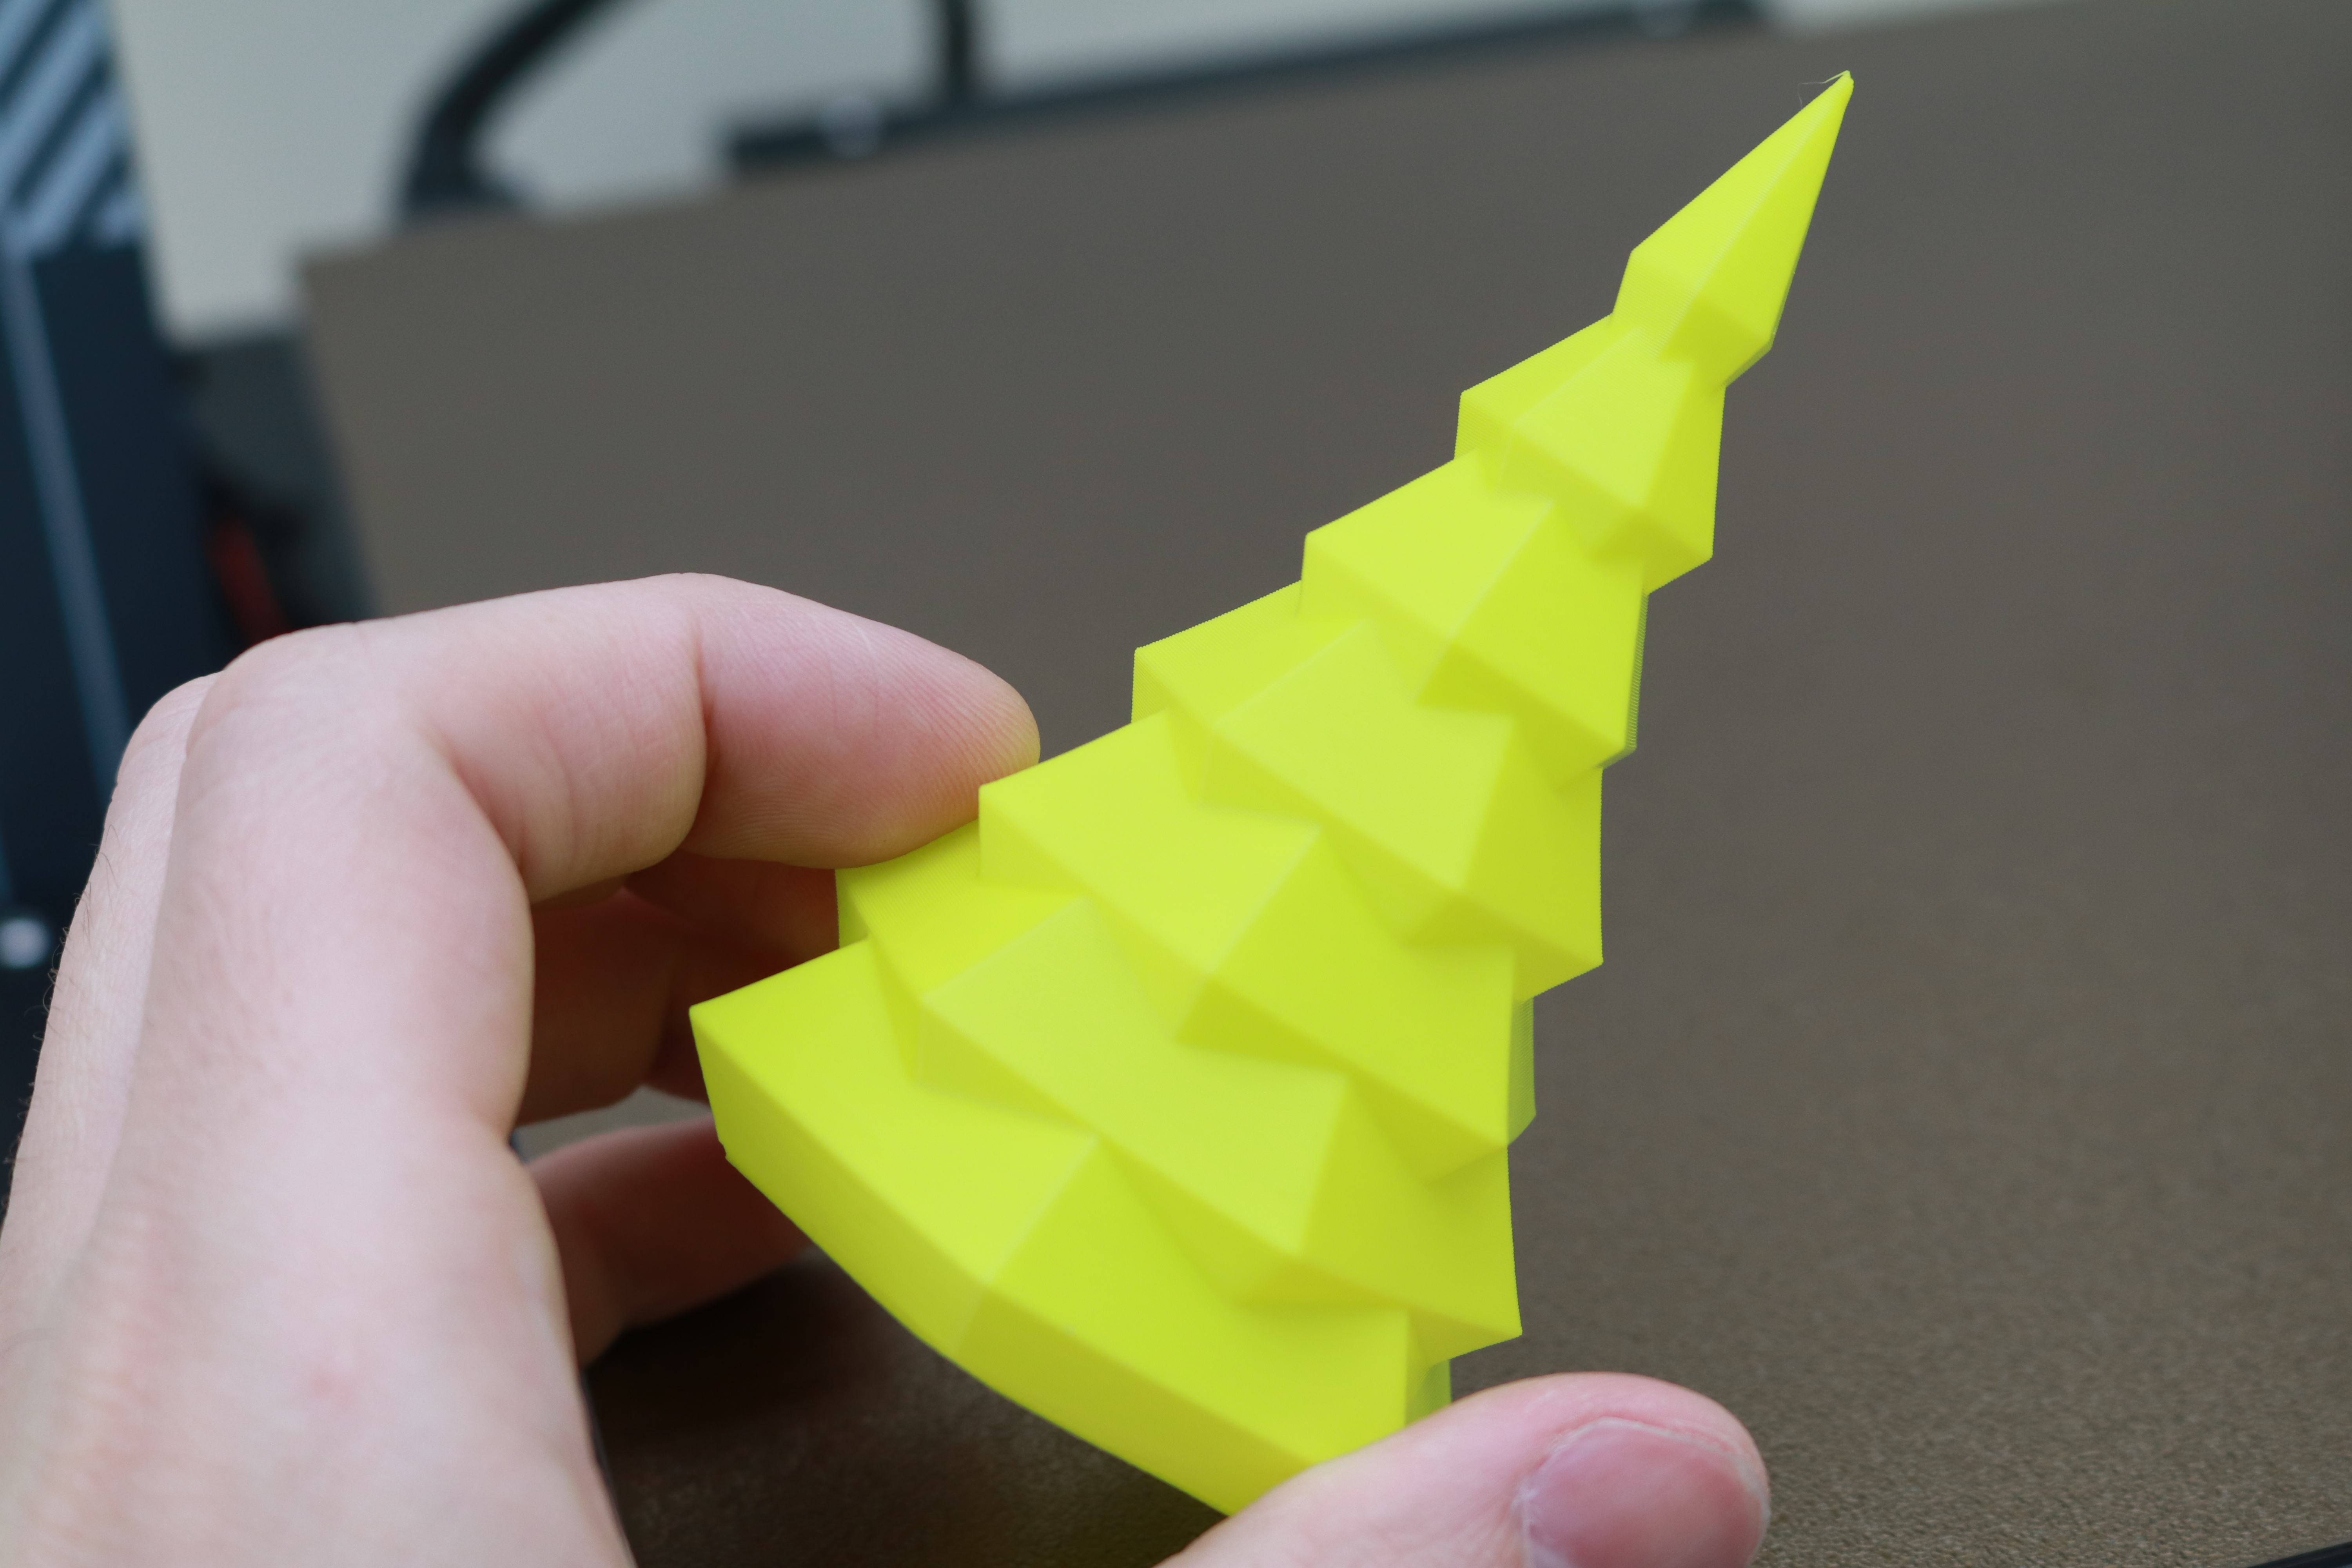
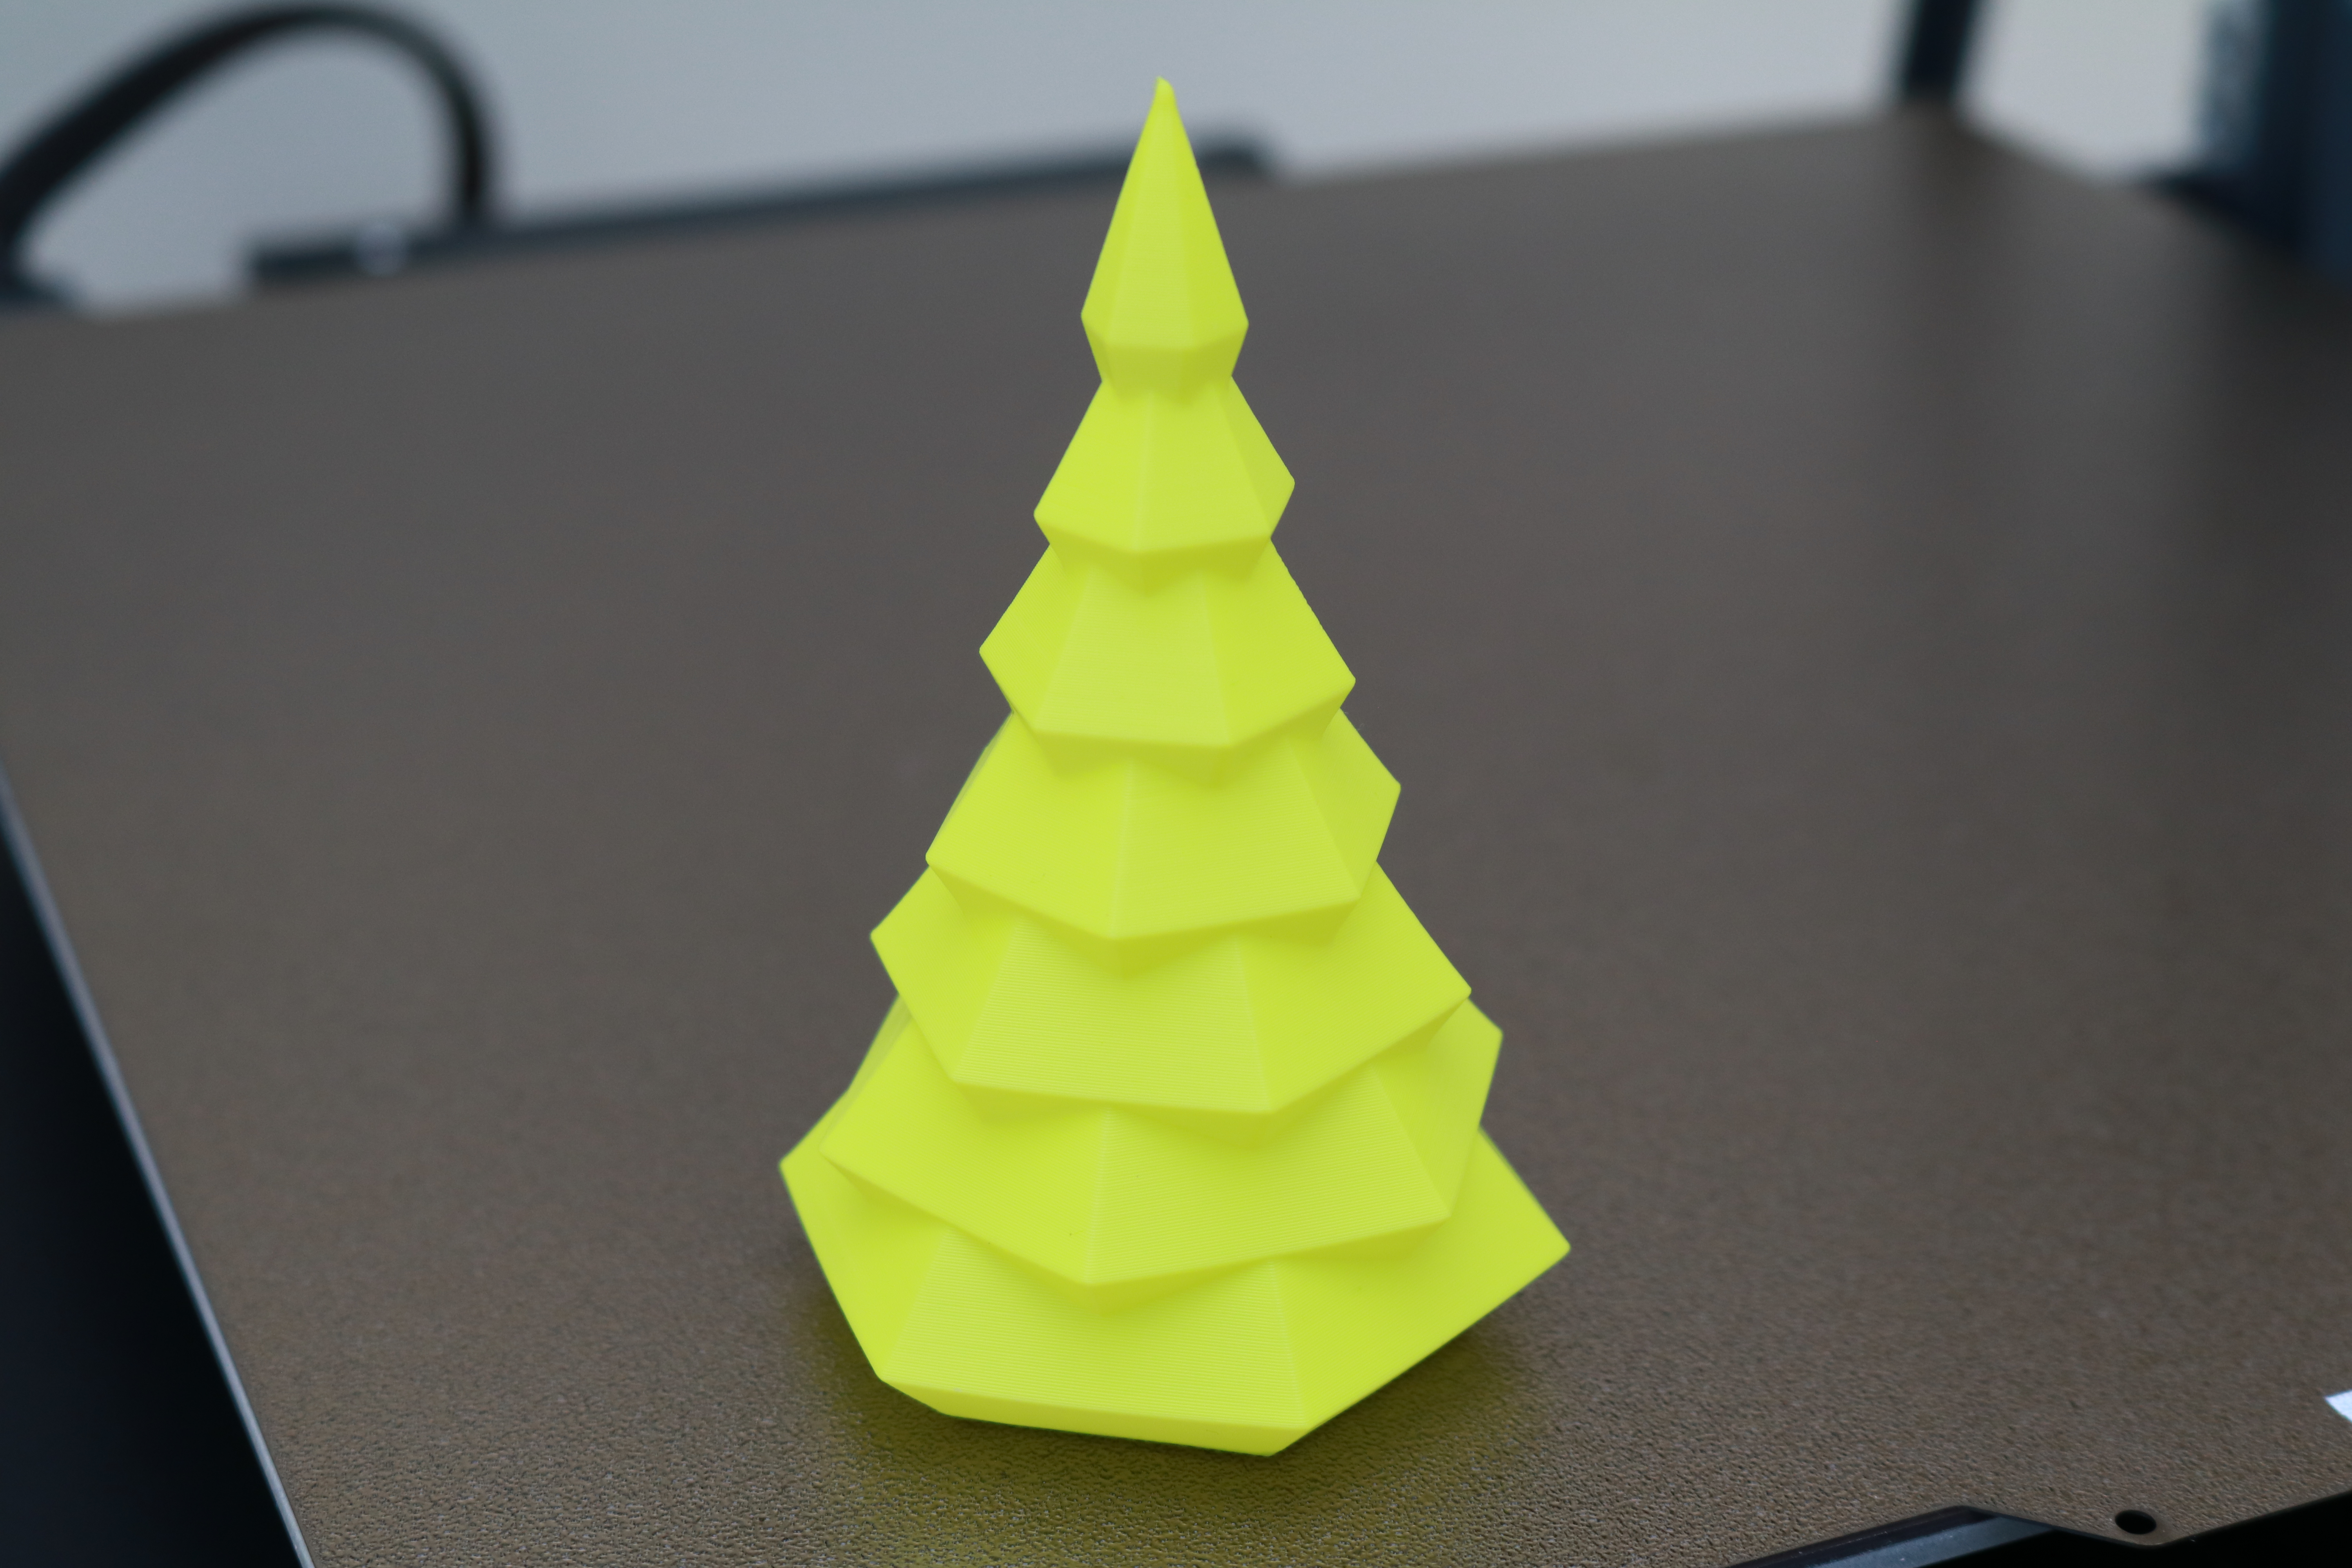
Just in time for the holidays, the Vase Mode Christmas Tree by Kazi Toad printed in just over an hour using a single spiralized toolpath. Vase mode prints can be tricky to remove from a glass platform as they tend to be thin and delicate. Being able to bend the platform and pop the model off reduces the chances of damaging the vase mode print while also allowing the operator to quickly prepare the printer for another print.
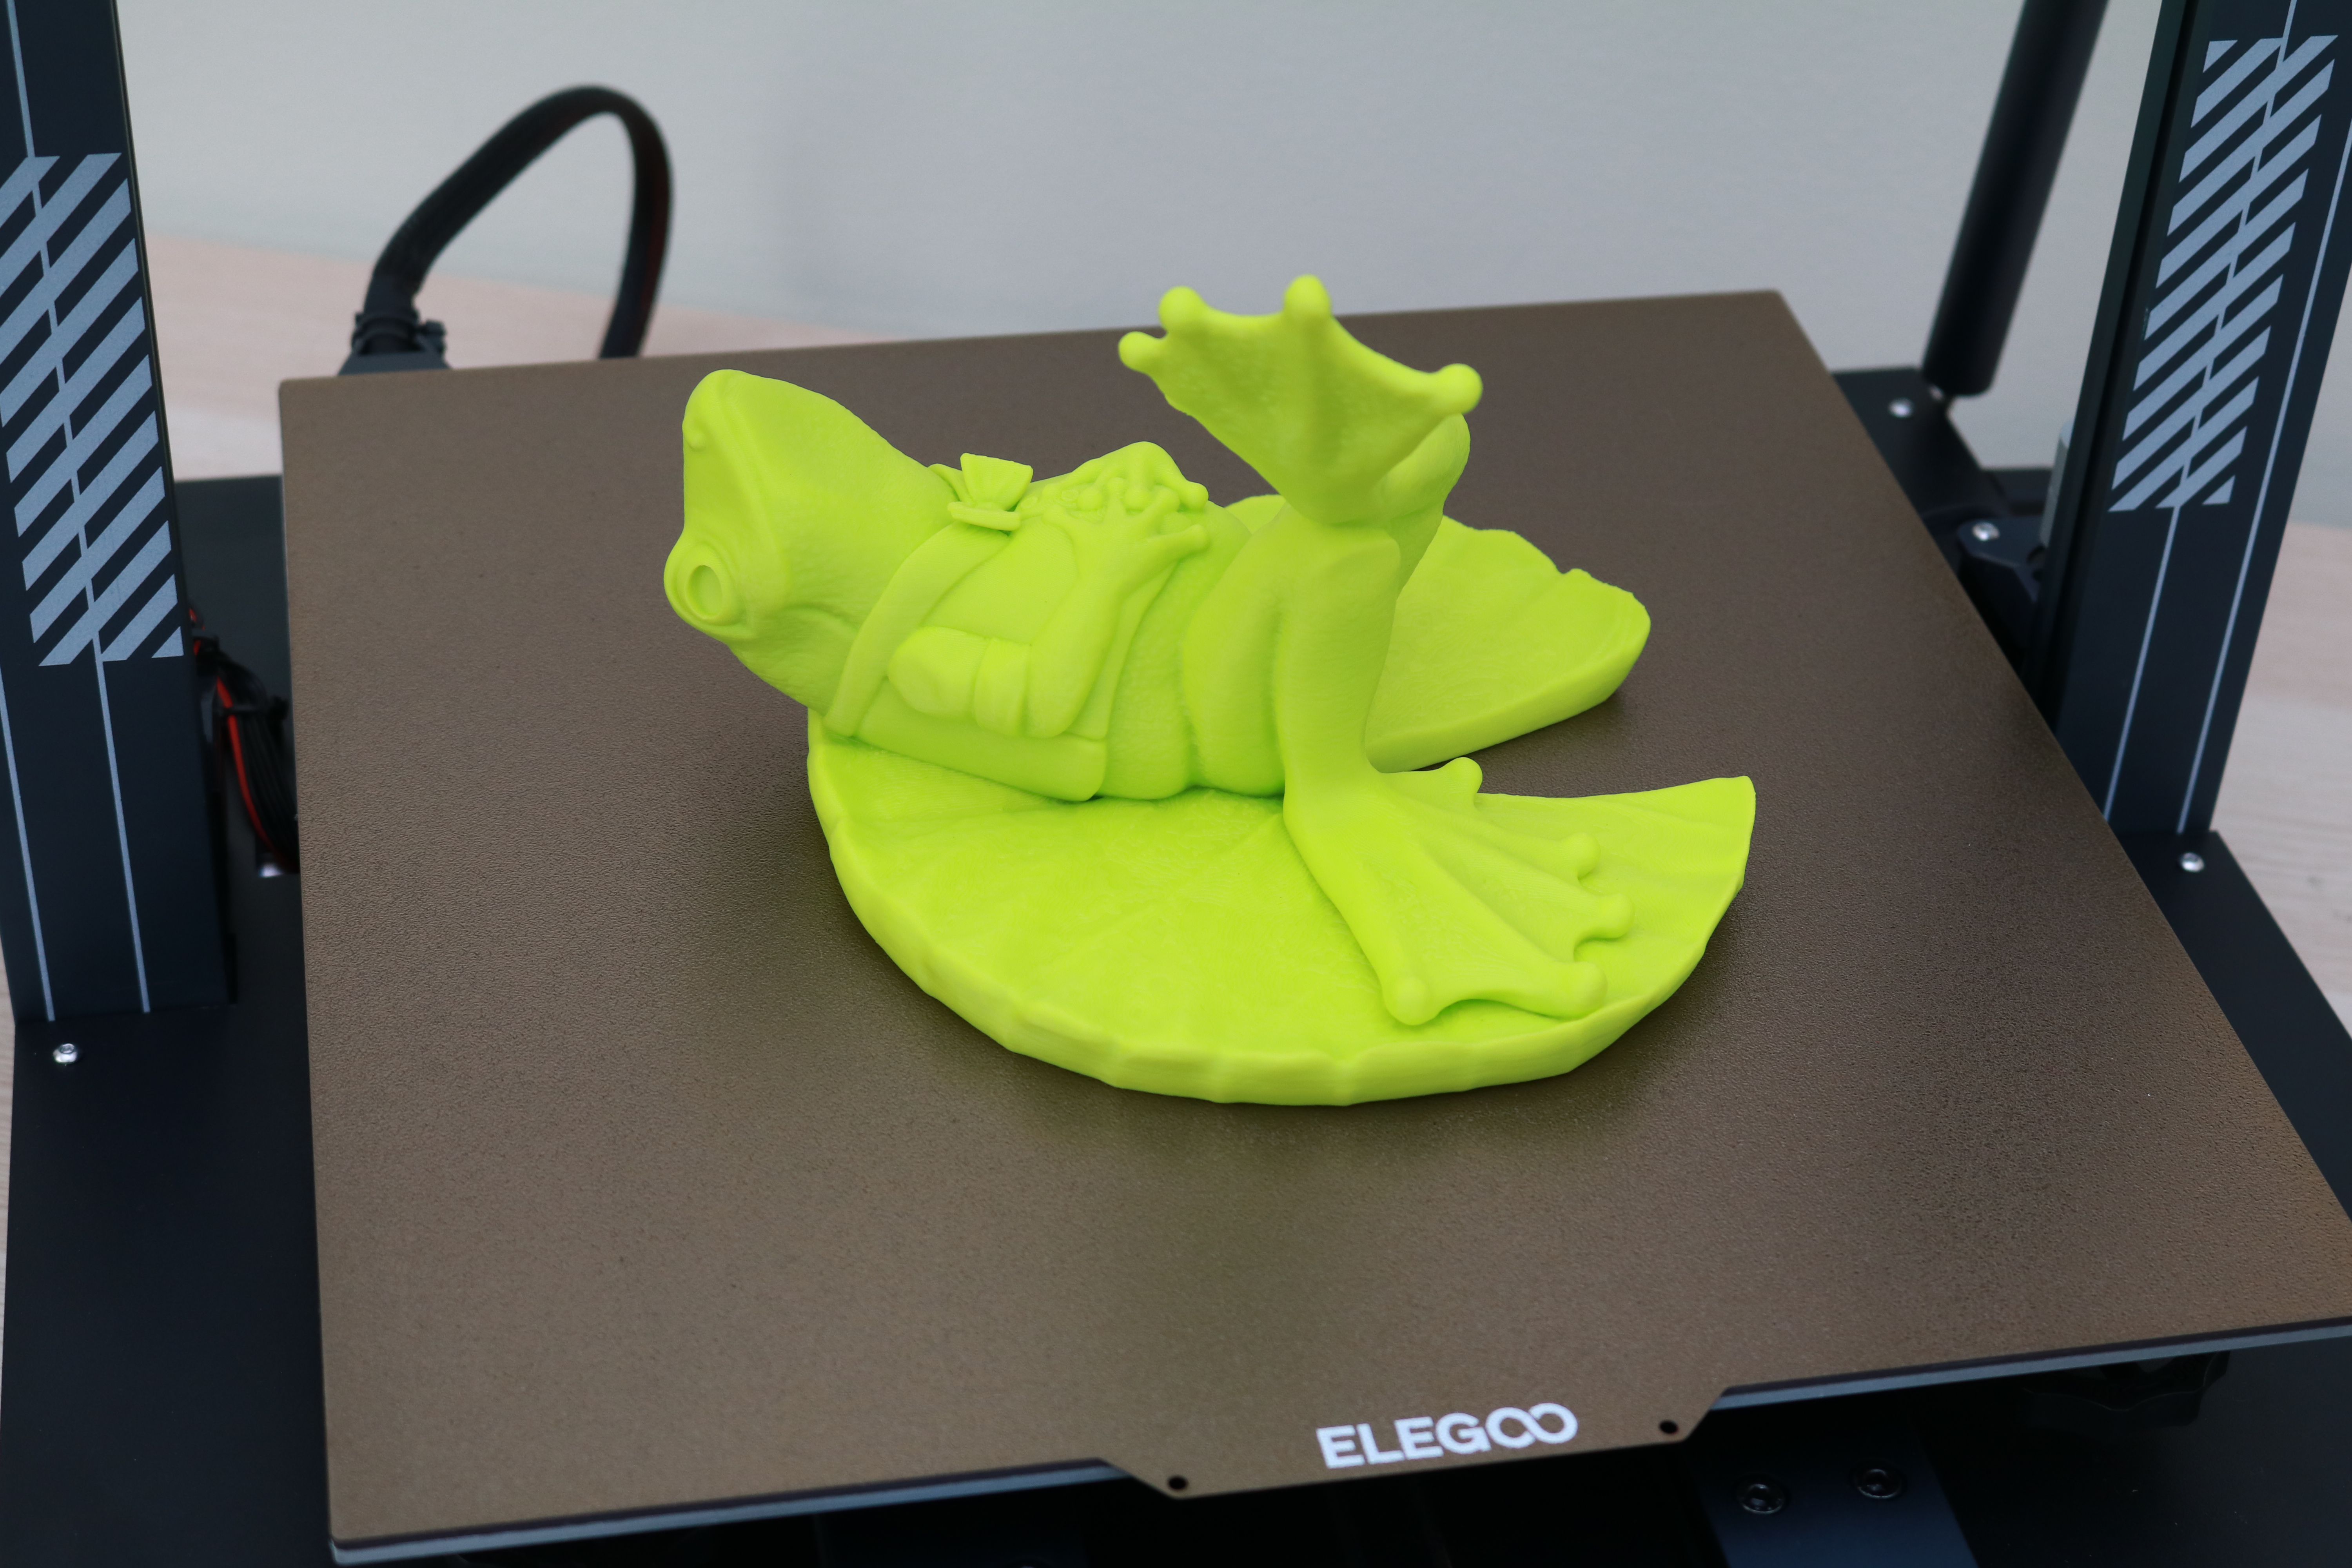
The generous build volume of the Elegoo Neptune 3 Plus makes it ideal for printing large models in a single piece, like the sculpt of a frog on a lilypad by Loubie 3D. This model was printed with Sliceworx Robitobi Green PLA and took about 19 hours to print in a single piece and highlights some of the strengths of the Neptune 3 Plus. The wide area of the base can be a challenge to print without warping due to the large cross-sectional area, but the textured PEI sheet on the Neptune 3 Plus kept it locked down during printing.
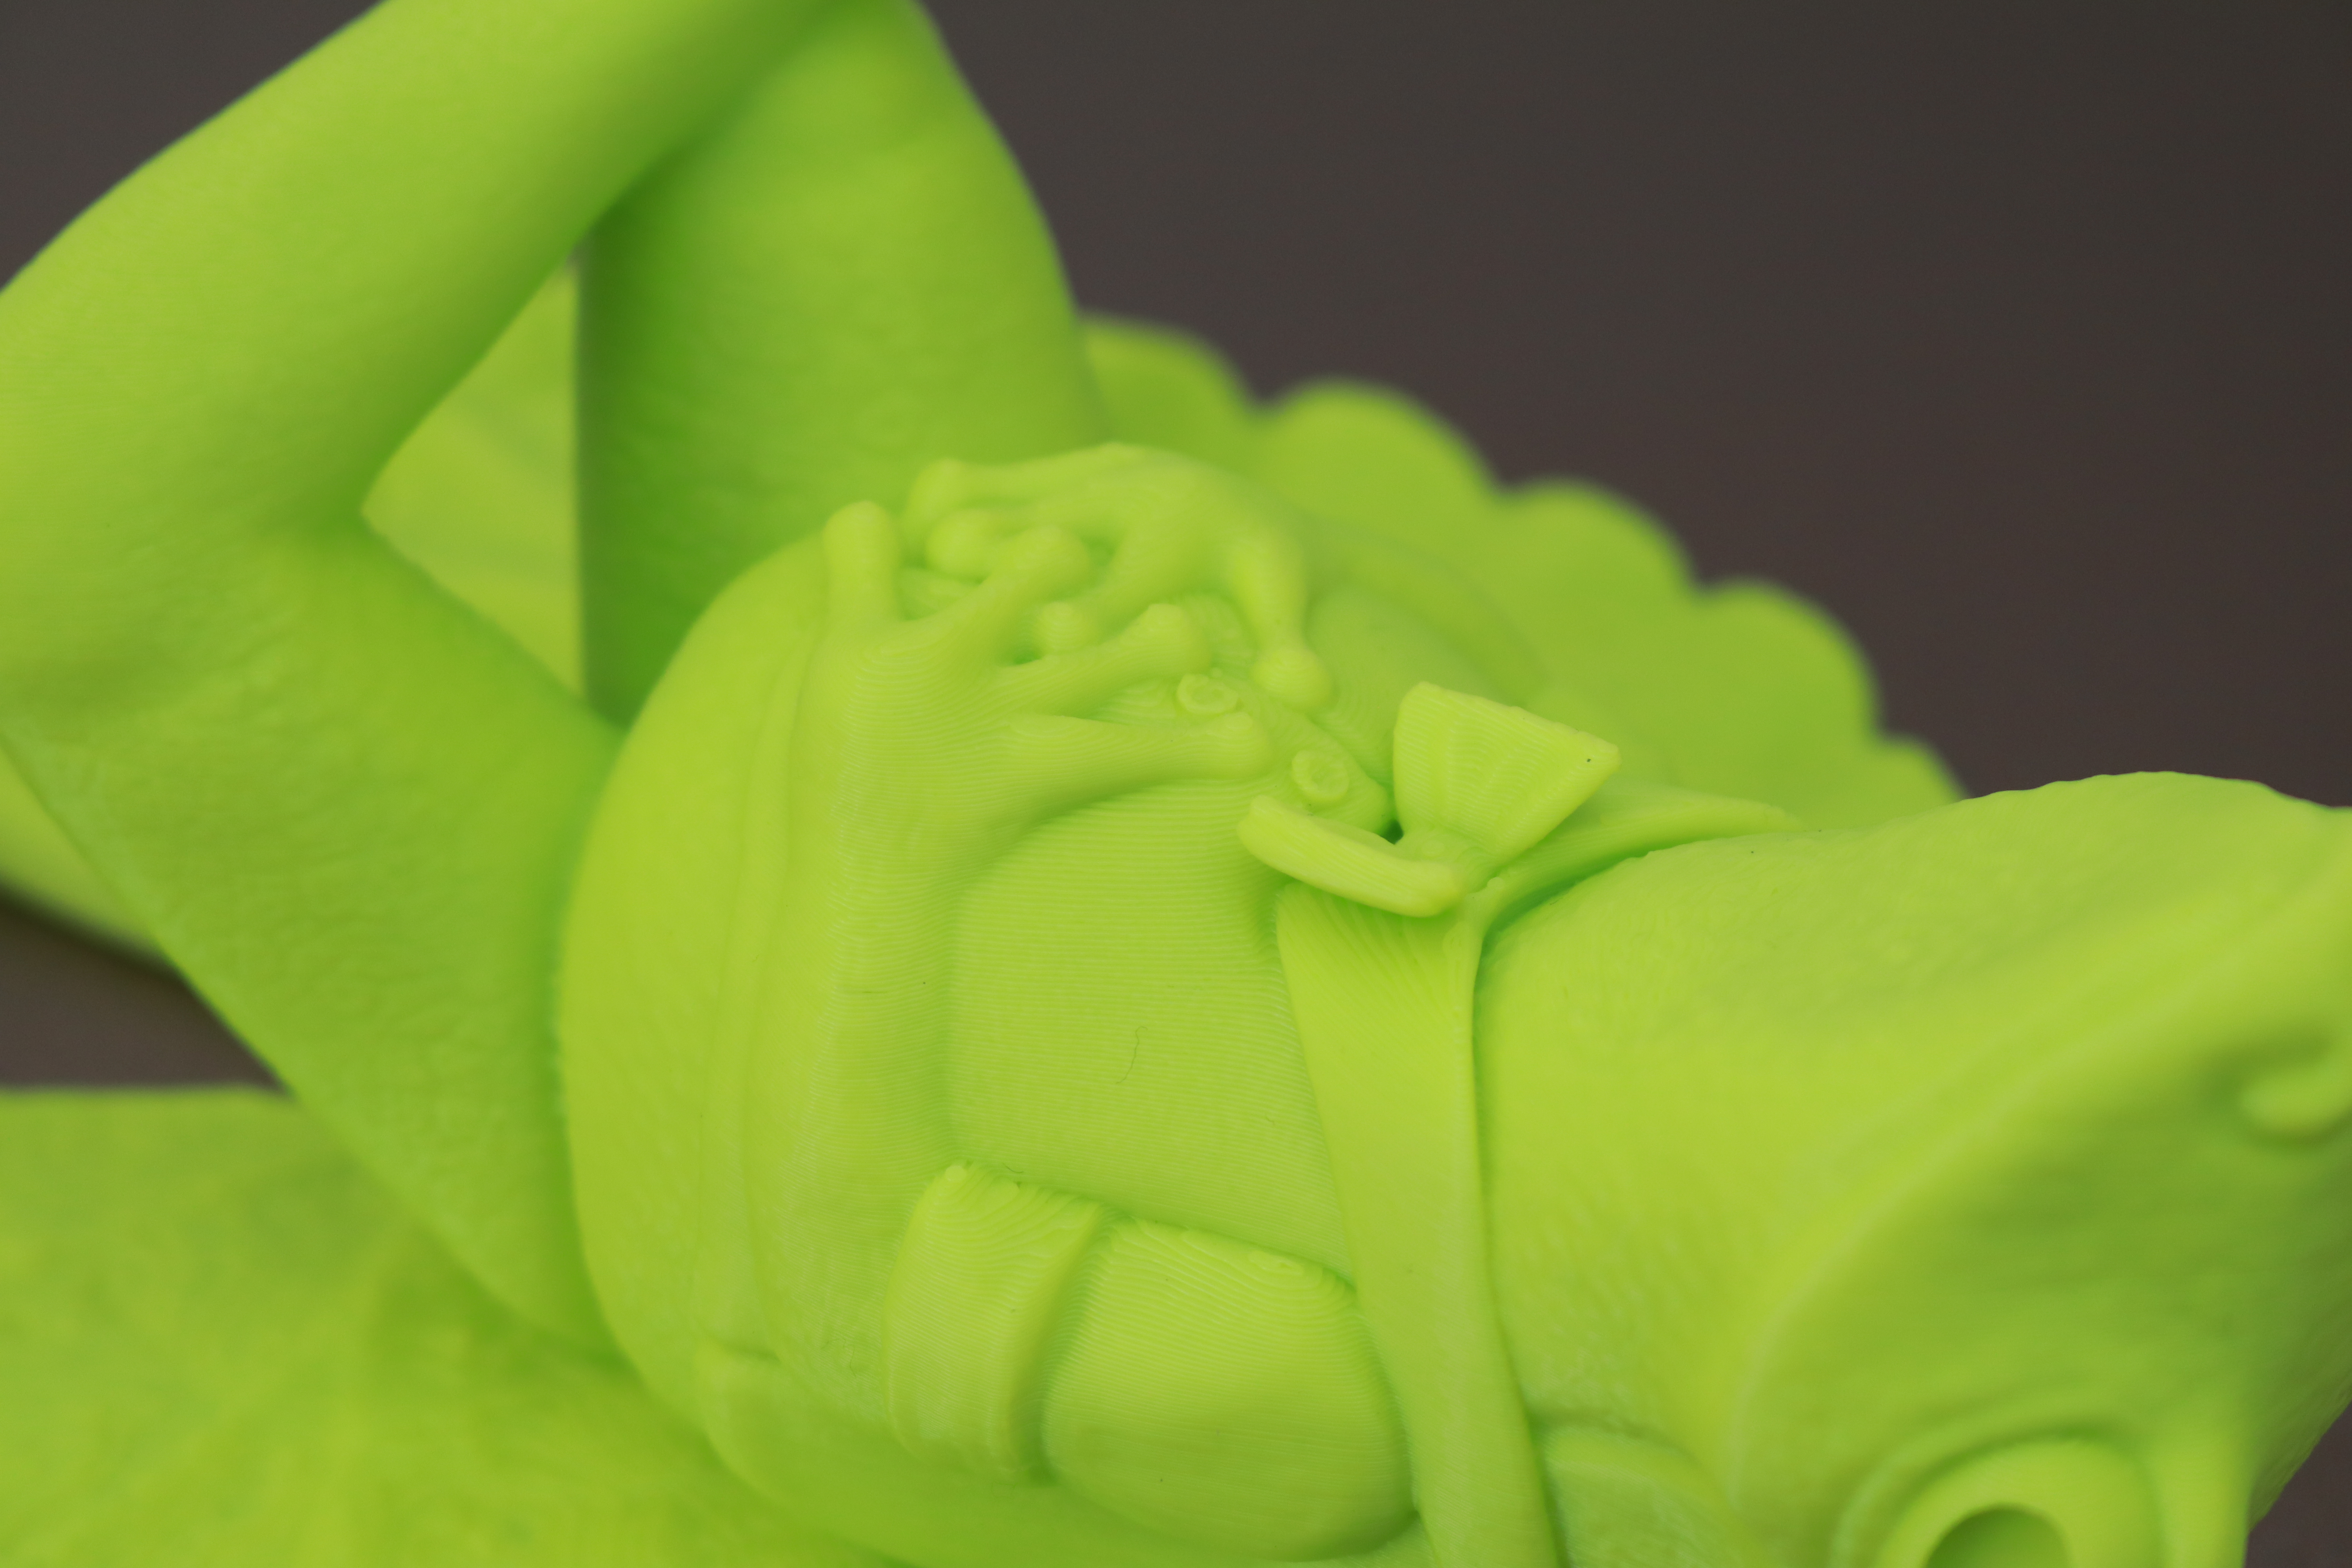
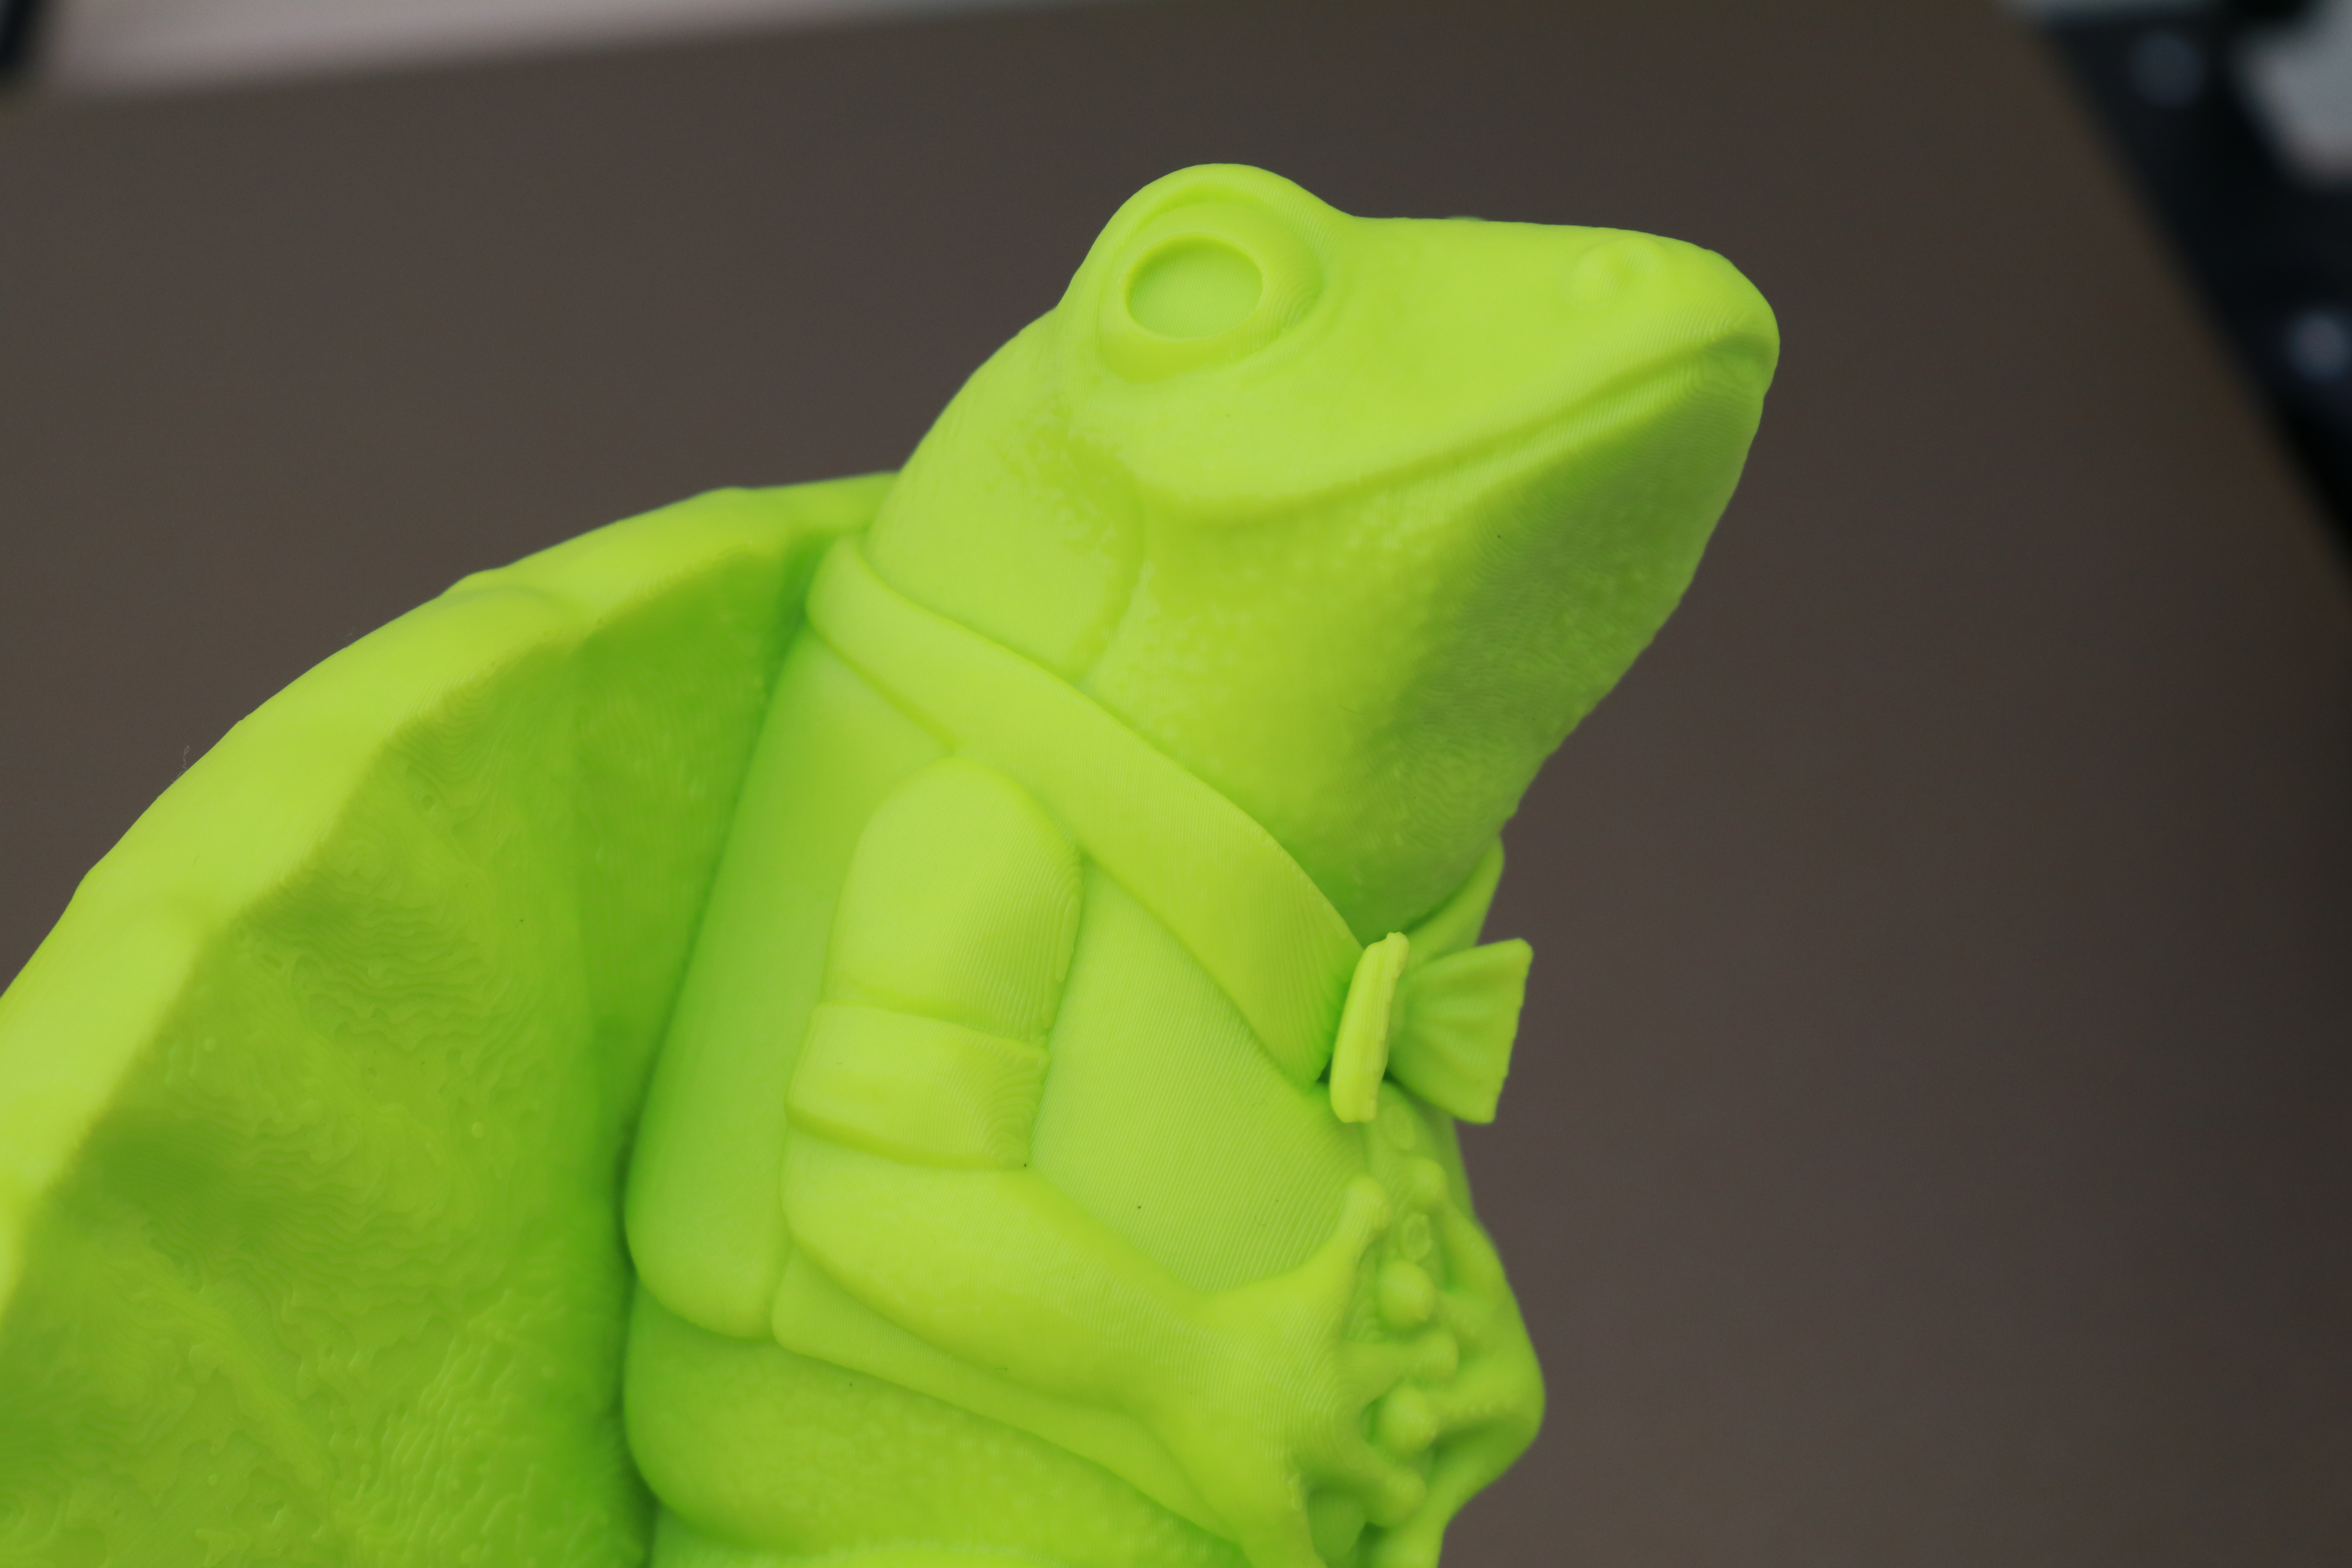
The model has fine details present throughout, including individual buttons on the vest and a small bow tie that printed without any issues. The model has an organic texture applied to it, which both hides the layer lines and highlights the fine detail that the Elegoo Neptune 3 Plus is capable of printing with a .4mm nozzle.
Printing TPU on Elegoo Neptune 3 Plus
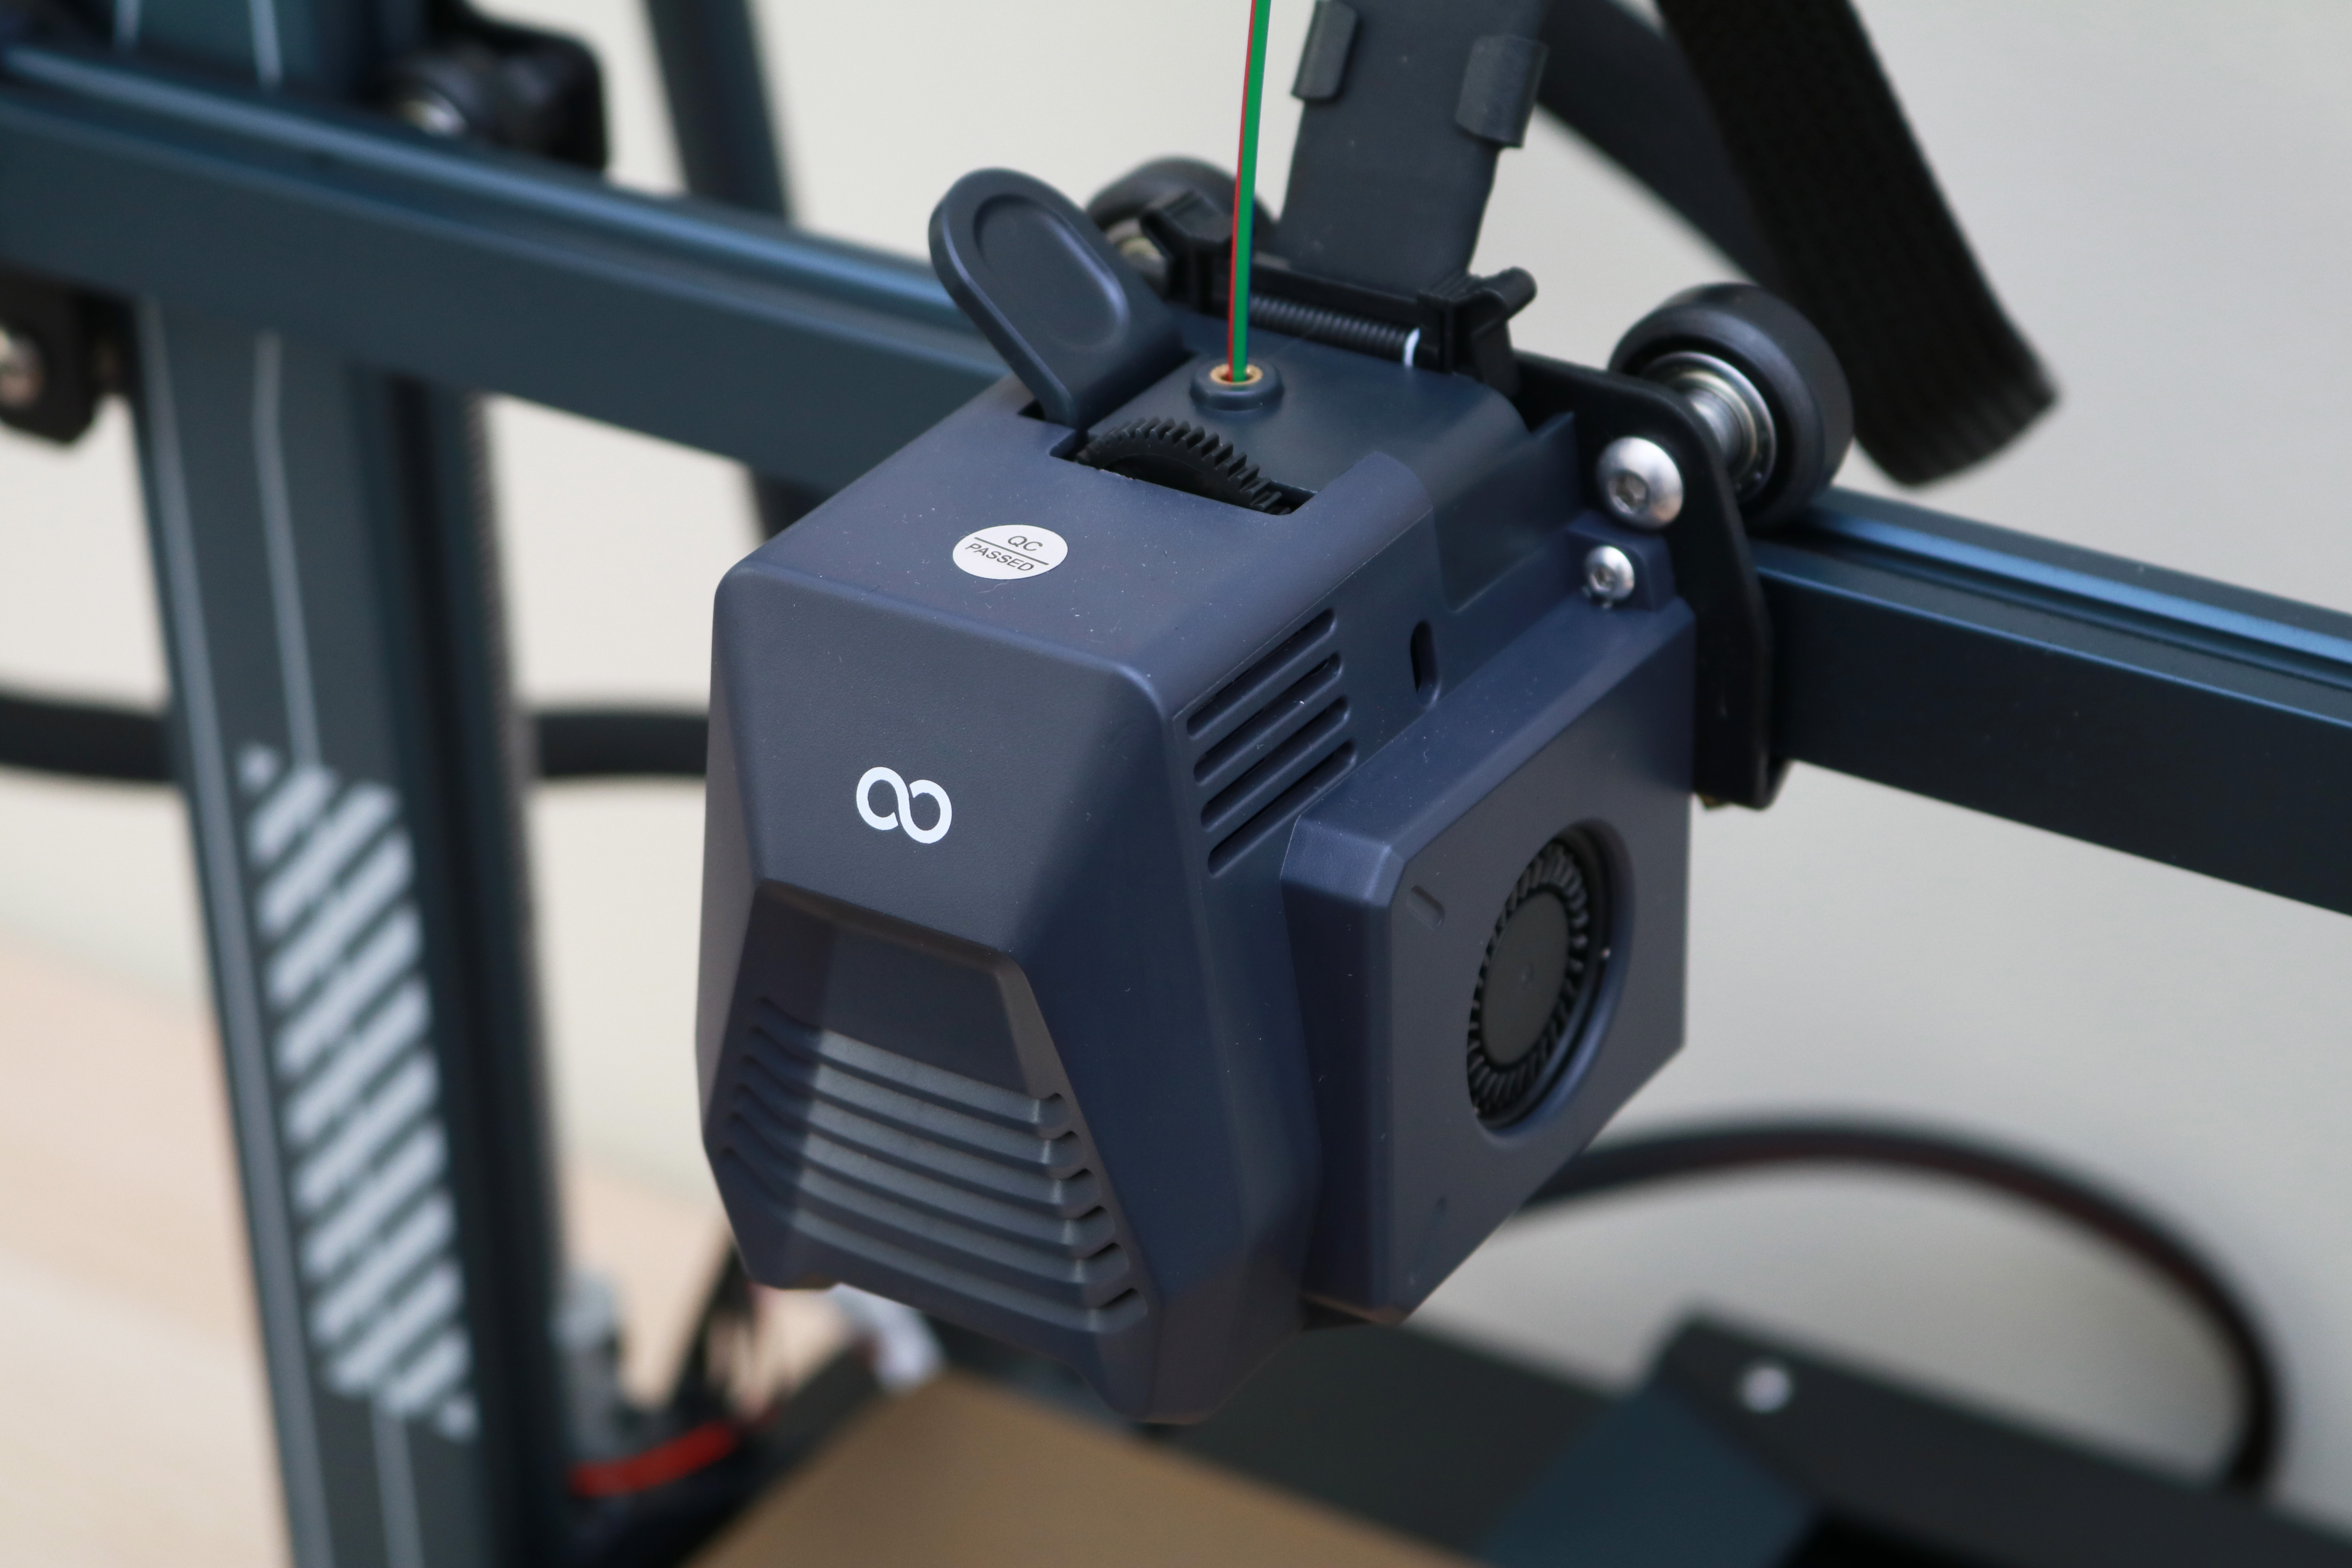
The dual-gear direct drive extruder on the Elegoo Neptune 3 Plus offers a short and constrained filament path, both of which are ideal for printing TPU filament. Flexible and stretchy, TPU is notoriously difficult to print on low-cost printers with Bowden extruders that have to push the rope-like filament through a long tube before heating and extruding. The extruder on the Neptune 3 Plus excels as printing TPU, and is capable of printing the material without much difficulty.
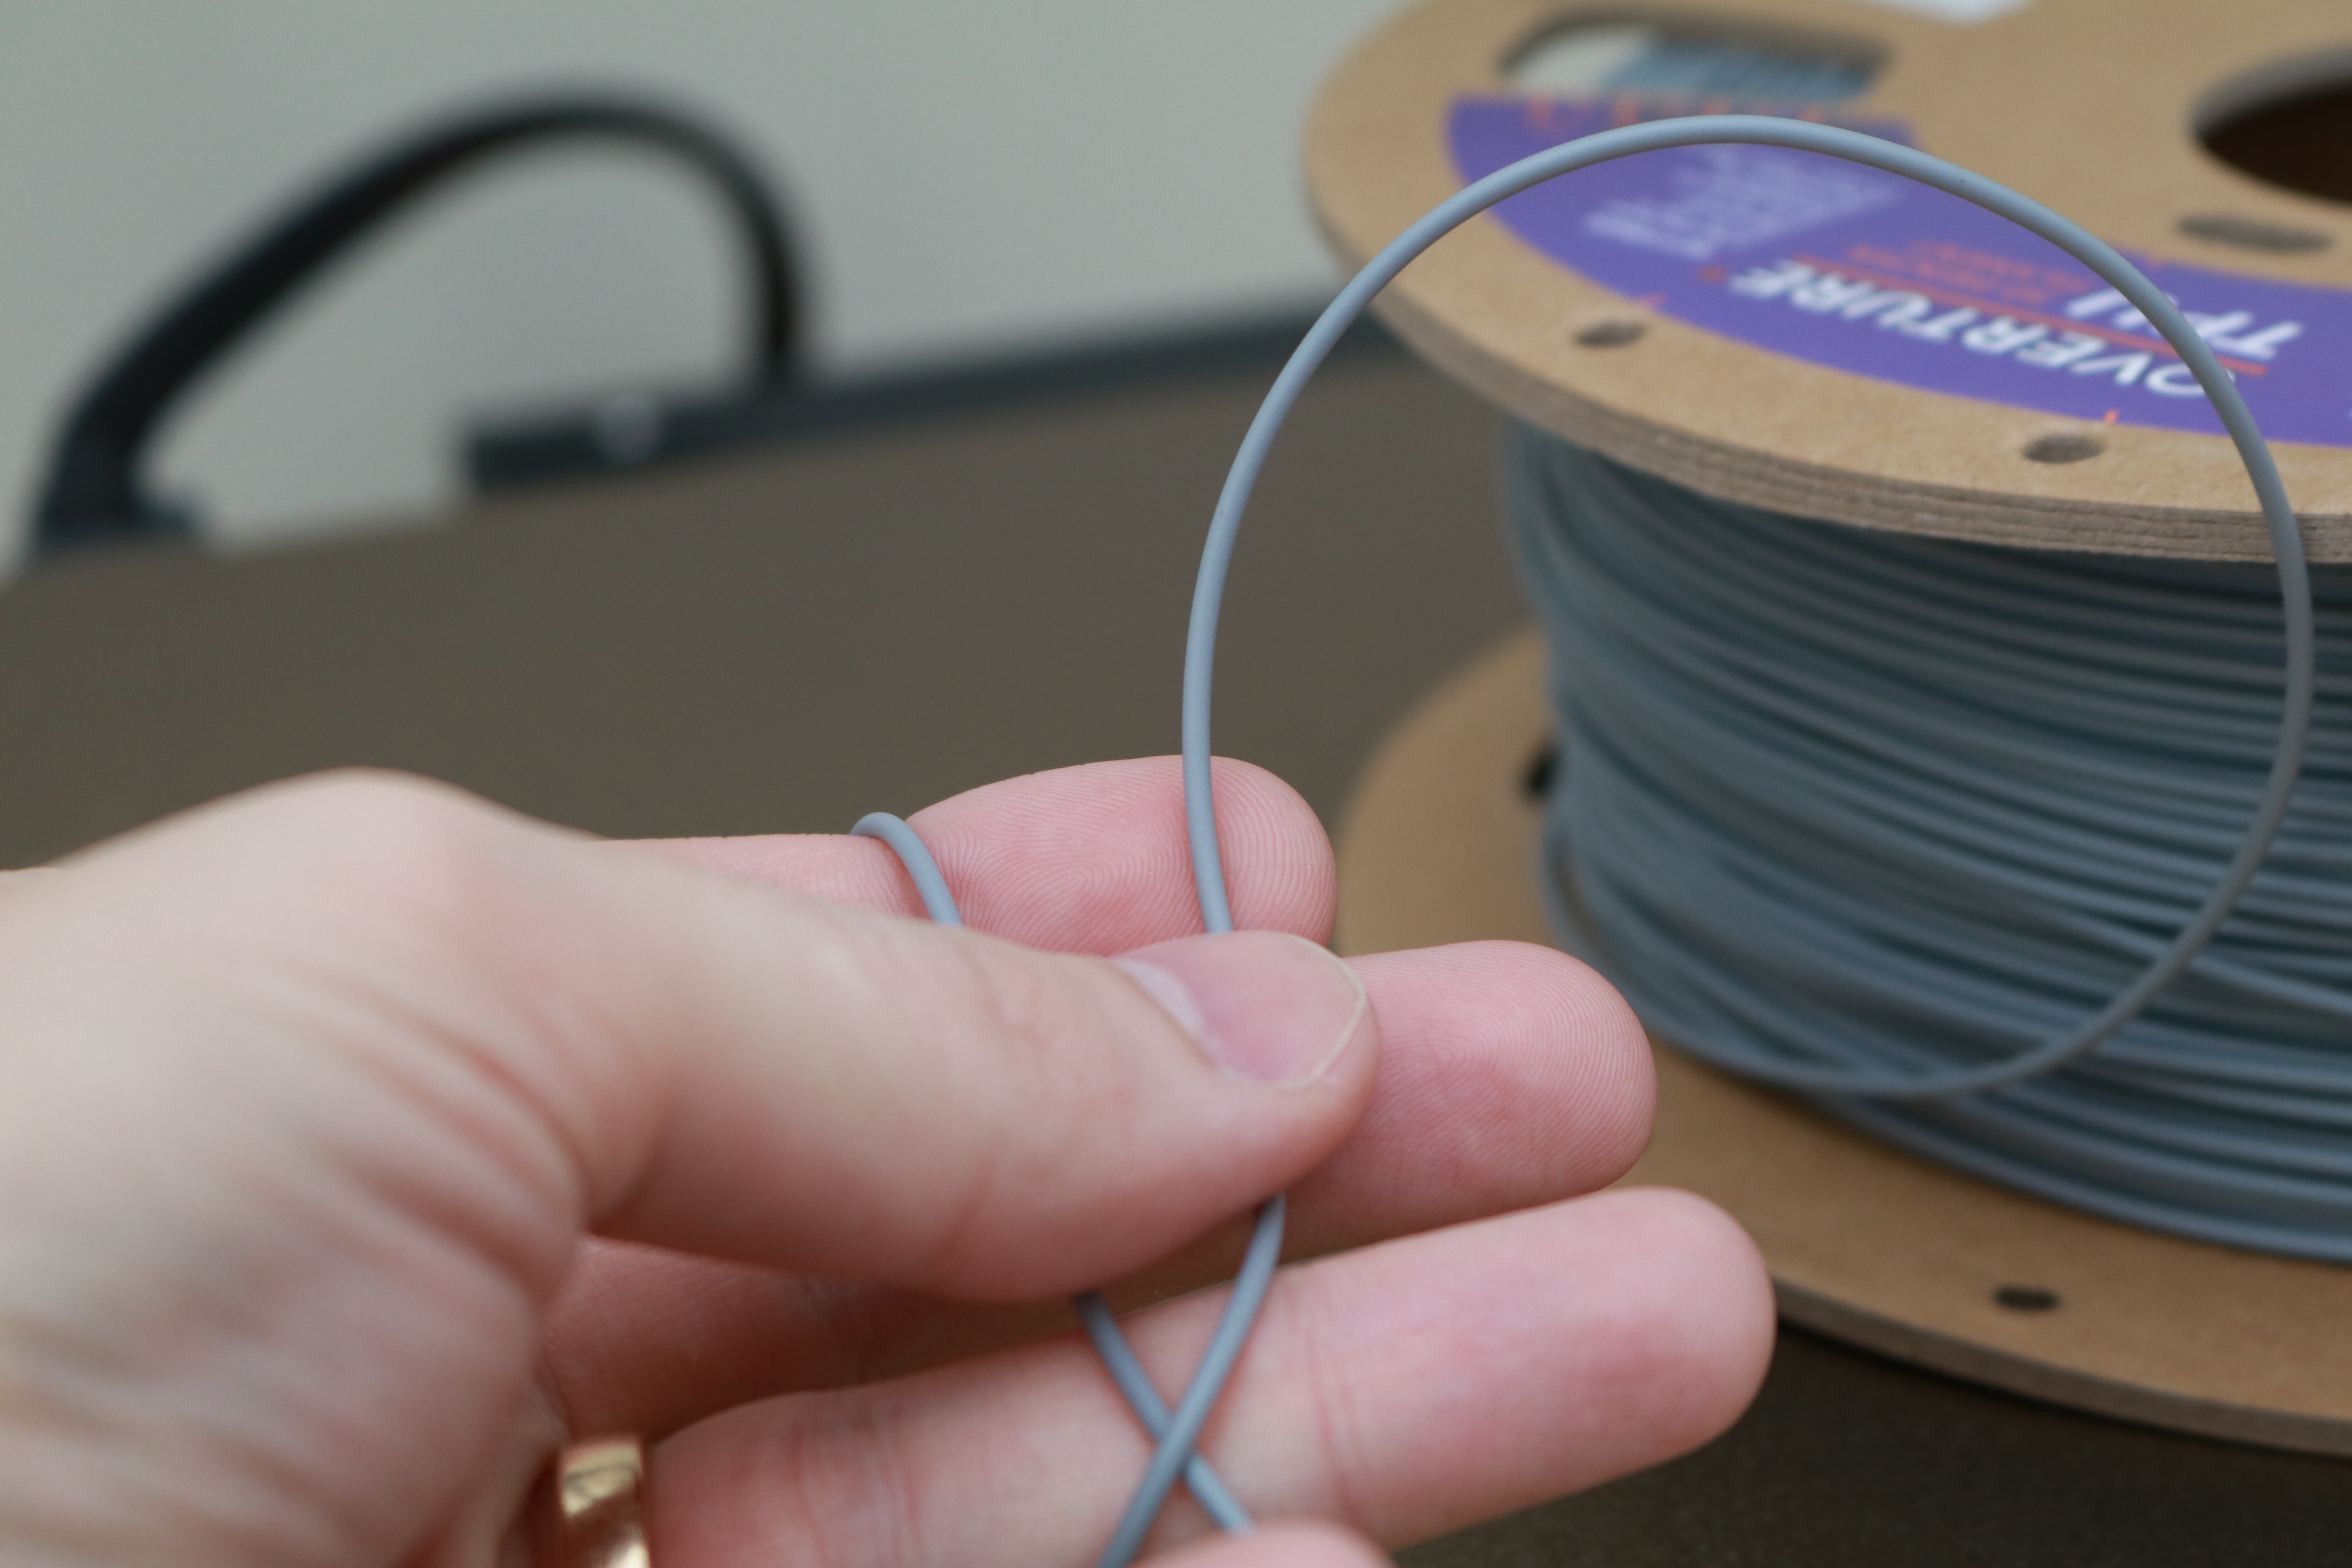
TPU is a naturally resilient material and can be stretched, bent, and deformed repeatedly without permanent damage. TPU filament on a spool feels a bit like a wet noodle, and can be easily stretched or compressed. The filament path from the spool to the dual-gear extruder is practically a straight line, so the filament doesn’t have a convoluted path to travel before reaching the nozzle.
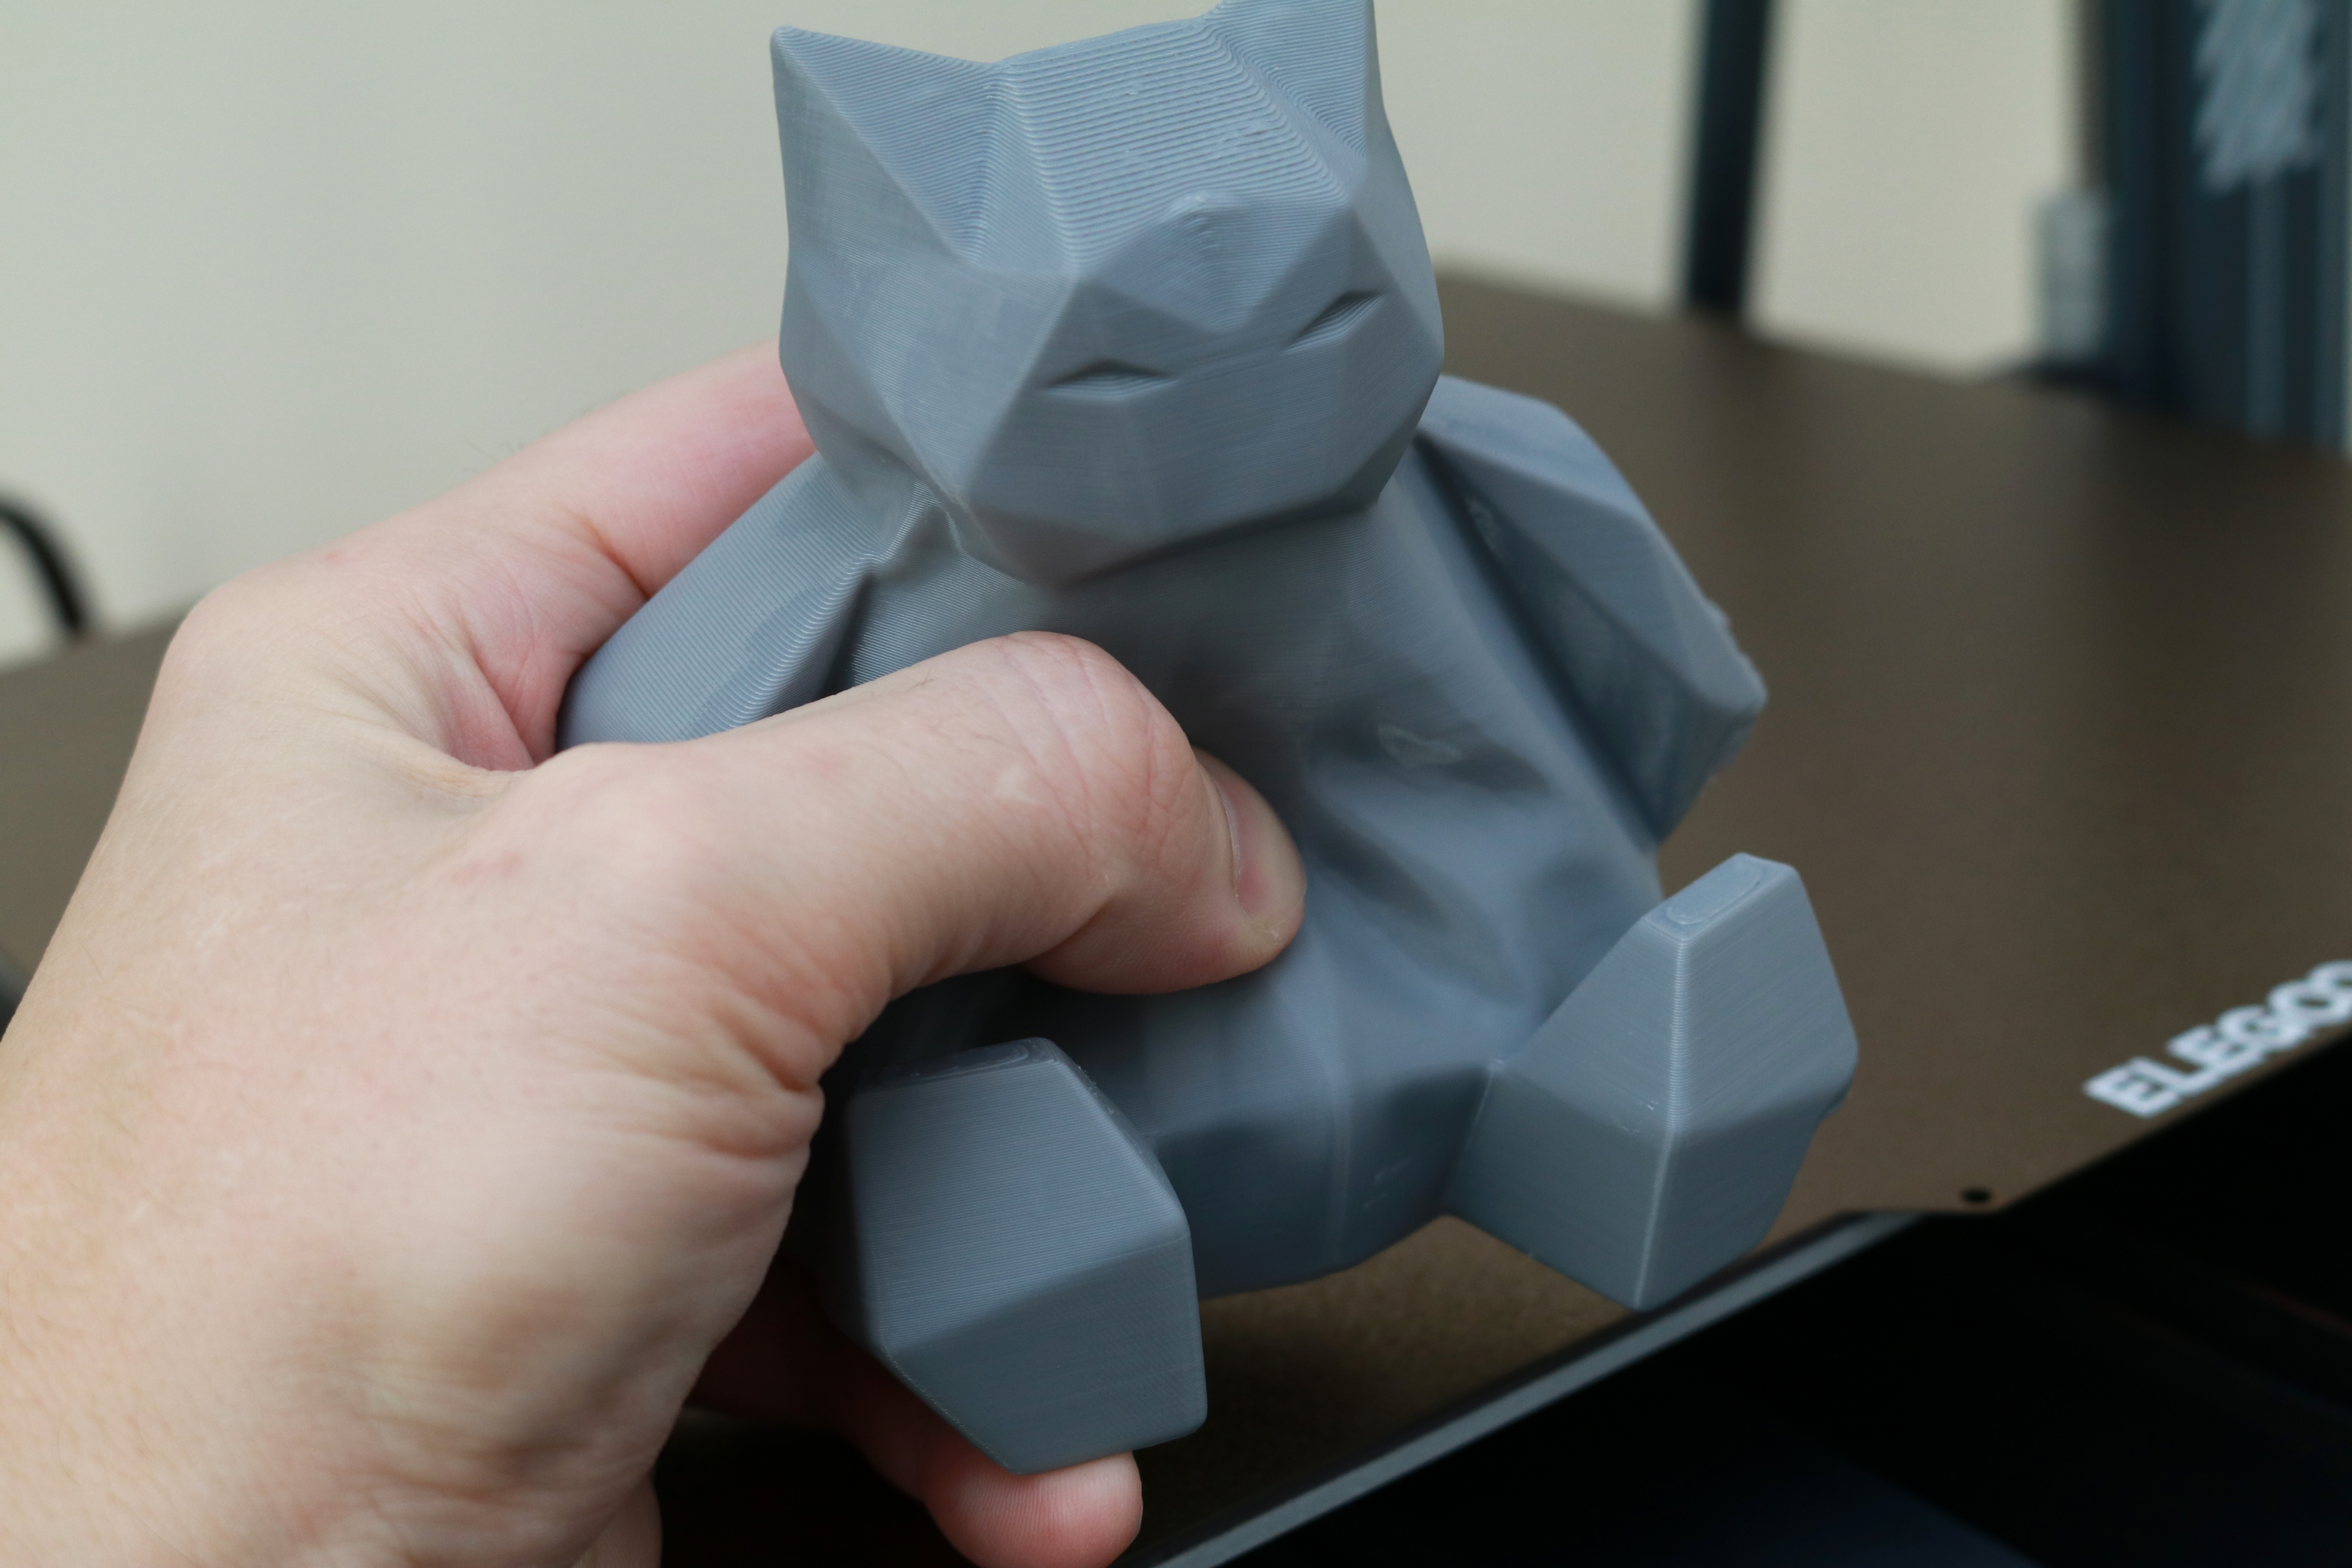
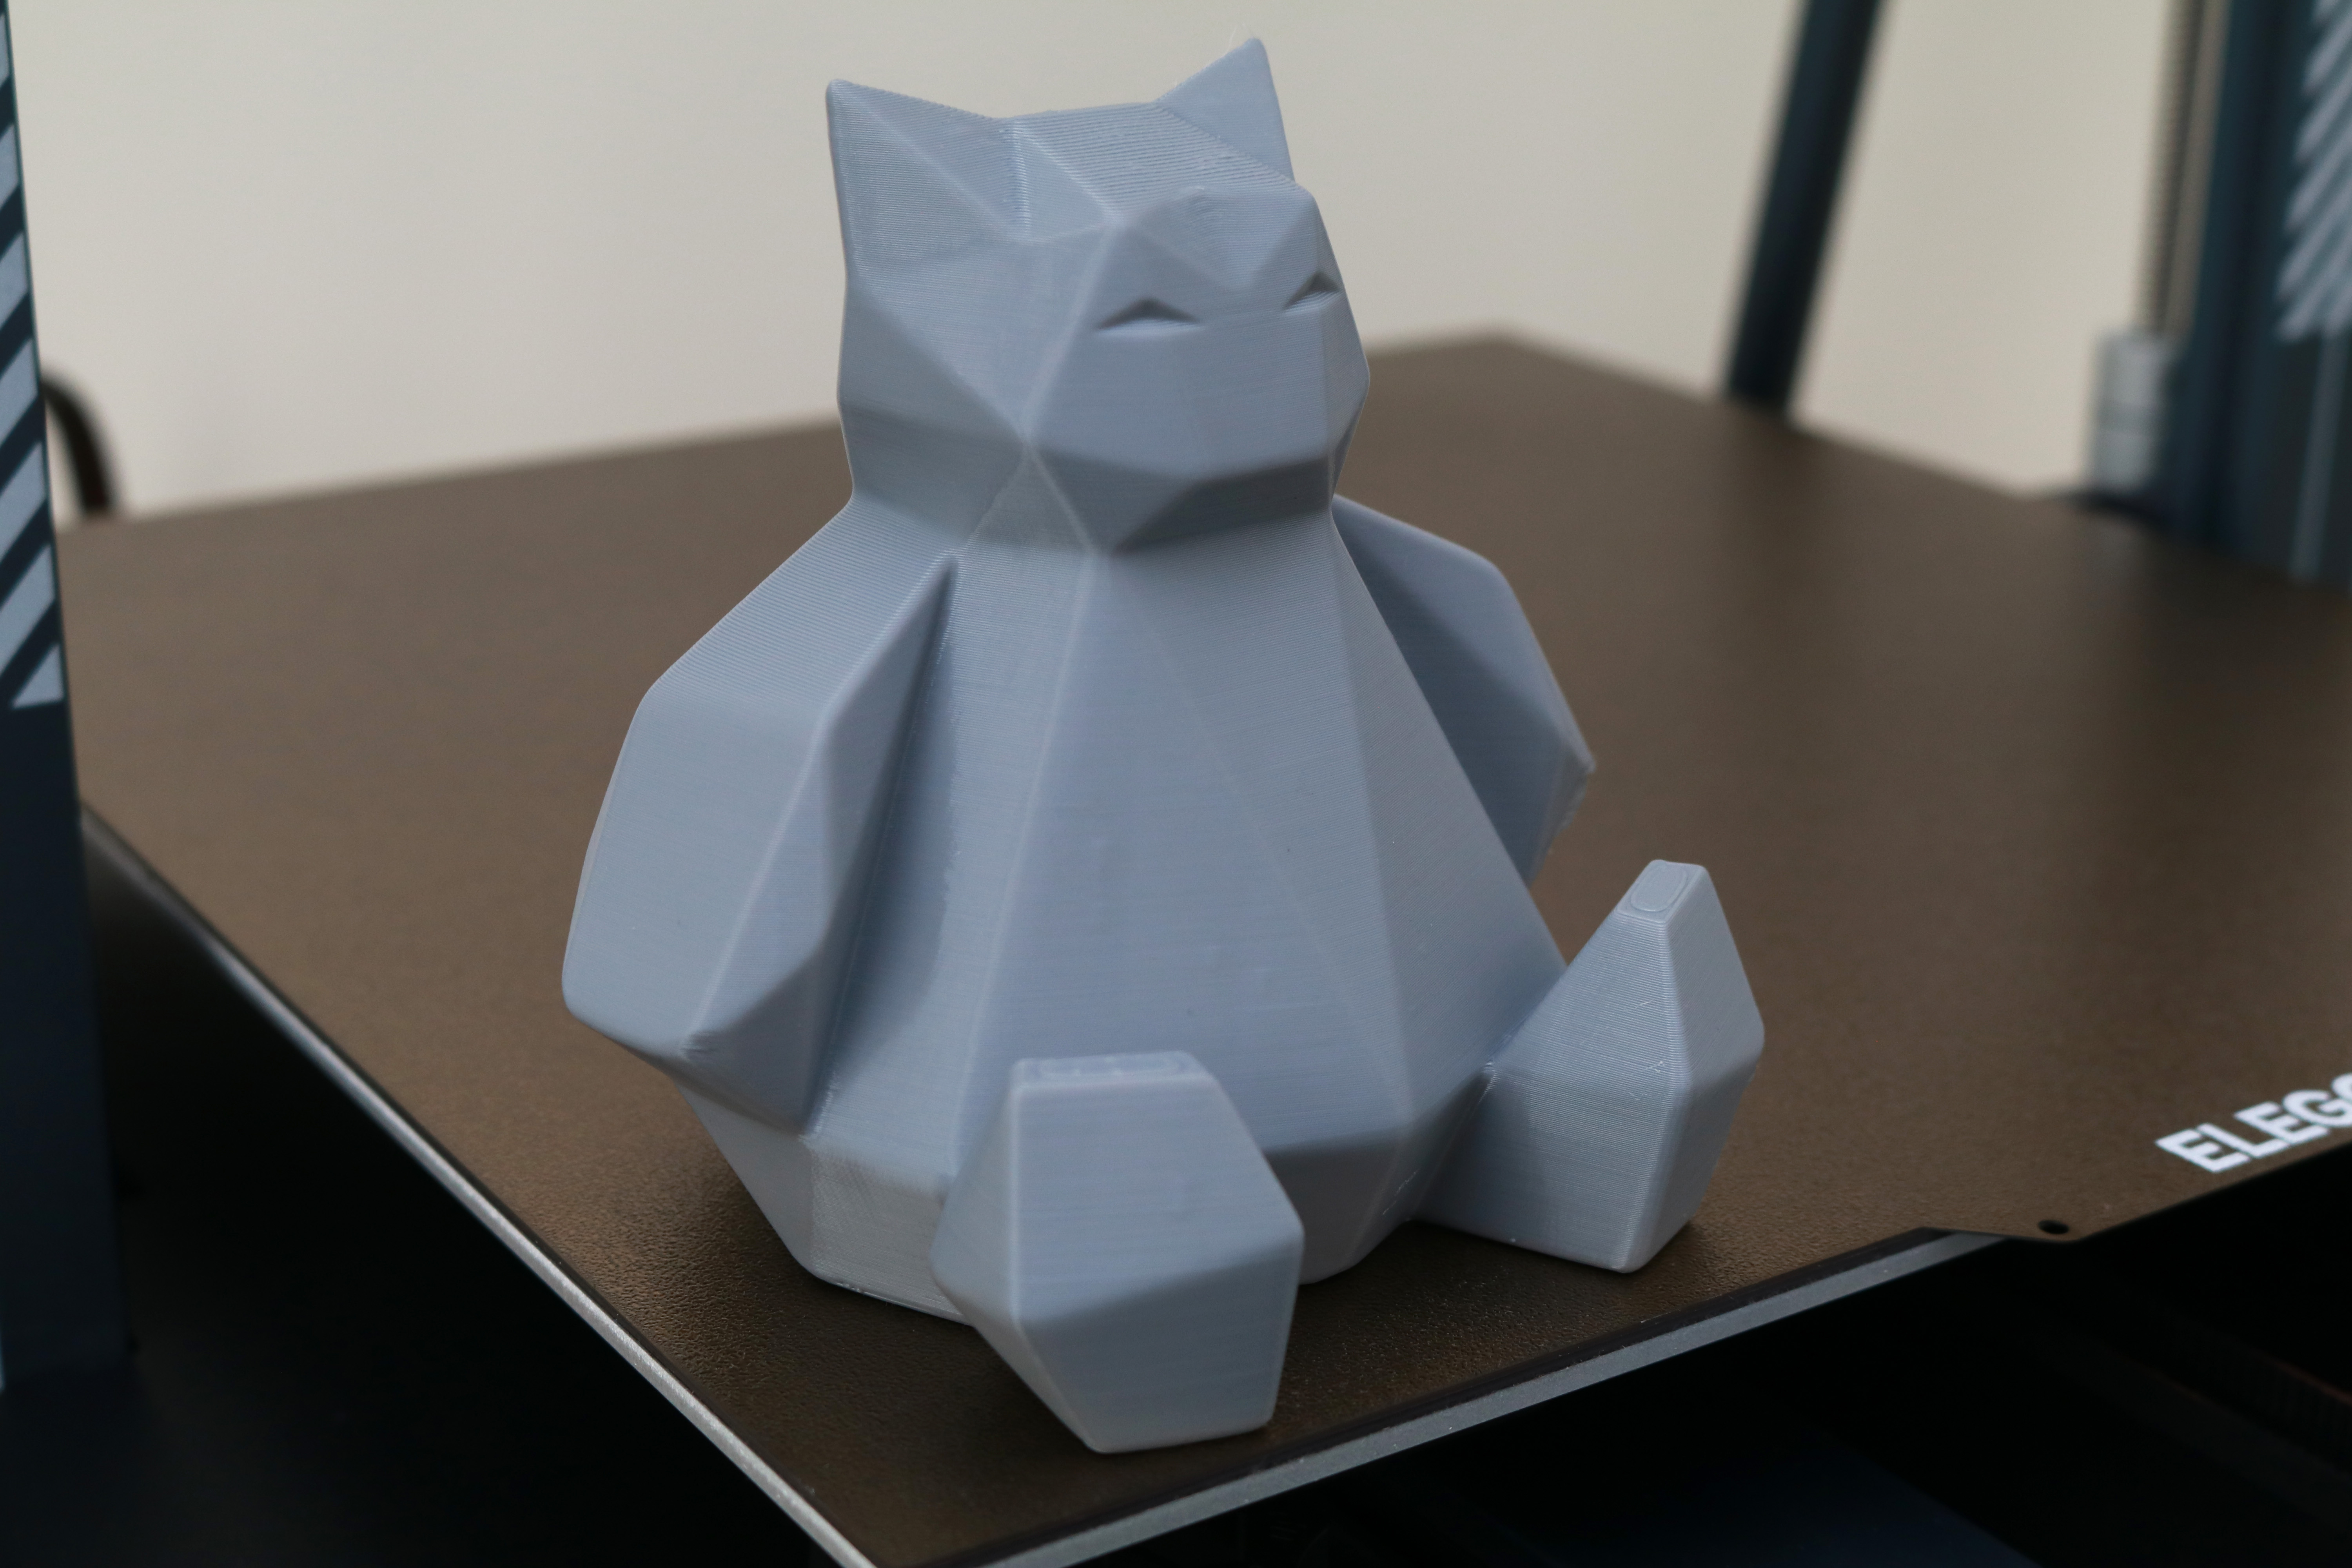
Using the default TPU profile and a .2mm layer height, the Low Poly Snorlax by Flowalistik highlighted the ability of the Neptune 3 Plus to print this tricky material without issue. Reducing the infill to 8% and scaling the model to 150% resulted in a mostly hollow model that is easily deformed and can be squeezed like a stress ball.
Printed with Overture TPU in Space Grey, the layers all adhere well to each other and the model is flexible and malleable without breaking. Some of the overhangs showed drooping, which can typically be addressed by tuning the print speed, toolpath width, and other parameters.
Bottom Line
The Elegoo Neptune 3 Plus represents a major milestone in the consumer 3D printing market: a large format direct drive extruder 3D printer that can be purchased new for under $400. Typically printers under this price point lack instructions, slicer setups, or have other compromises that keep them from reaching widespread adoption. The bundled slicer app, intuitive touchscreen LCD, and fast assembly all give the Neptune 3 Plus a serious edge in an otherwise saturated market.
While other printers like the AnkerMake M5 offer faster print speeds and other features, they typically come at a higher price point and are less accessible to consumers on a budget. Elegoo posted a statement on Twitter that indicated they had listened to customer feedback and integrated it into the new Neptune 3 line, and the resulting printers (Neptune 3 Pro, Neptune 3 Plus, and Neptune 3 Max) will all likely be major hits for Elegoo.
With a retail price of $350, the Elegoo Neptune 3 Plus is a direct competitor to other large format FDM 3D printers like the Anycubic Kobra Plus. The direct drive extruder, flexible PEI sheet, and low-cost of this machine all come together to make it one of the best 3D printers that you can buy in 2022. If you’re interested in a similar printer with a similar spec sheet but smaller build volume, the Elegoo Neptune 3 Pro and Anycubic Kobra Neo are printers worth investigating.
MORE: Best 3D Printers
MORE: Best Resin 3D Printers
MORE: Best Filaments for 3D Printing

Andrew Sink first used a 3D printer in 2012, and has been enthusiastically involved in the 3D printing industry ever since. Having printed everything from a scan of his own brain to a peanut butter and jelly sandwich, he continues to dive ever more deeply into the endless applications of additive technology. He is always working on new experiments, designs, and reviews and sharing his results on Tom's Hardware, YouTube, and more.
