MSI Optix MPG27CQ Gaming Monitor Review: Color Curves, Calibration Conundrums
Why you can trust Tom's Hardware
OSD Setup & Calibration
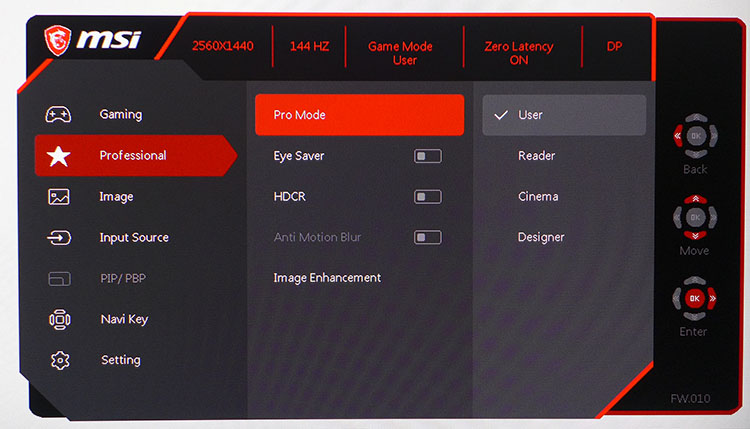
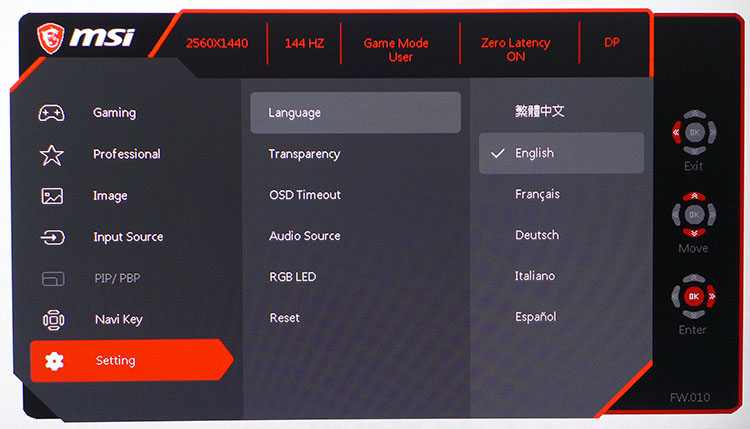
The MPG27CQ has a dashboard-style menu that shows input resolution, refresh rate, image mode, zero latency status and active input in all screens. It’s divided into seven sub-sections.
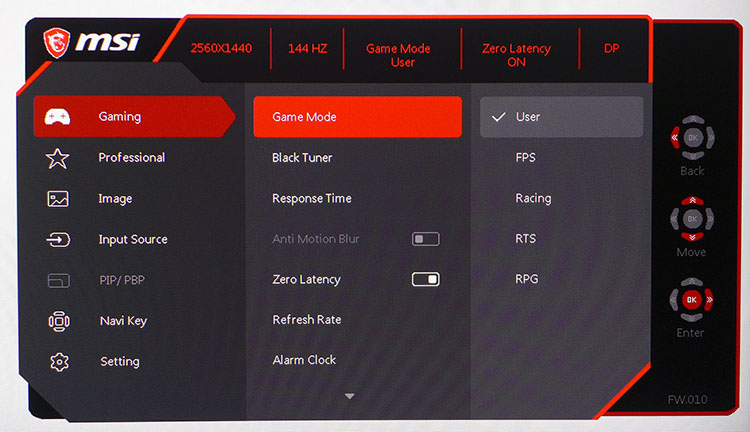
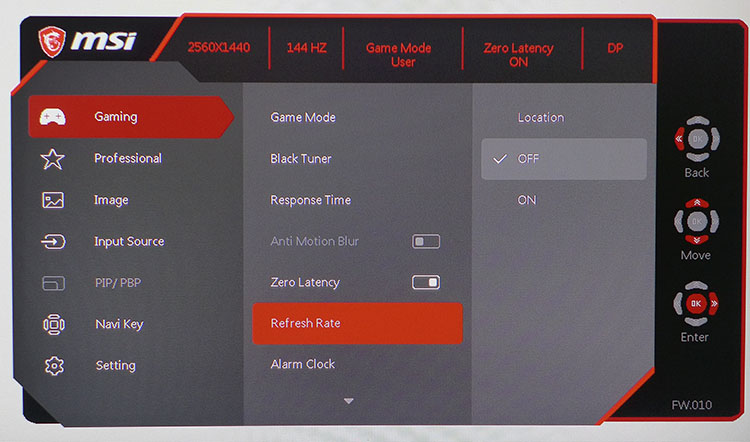
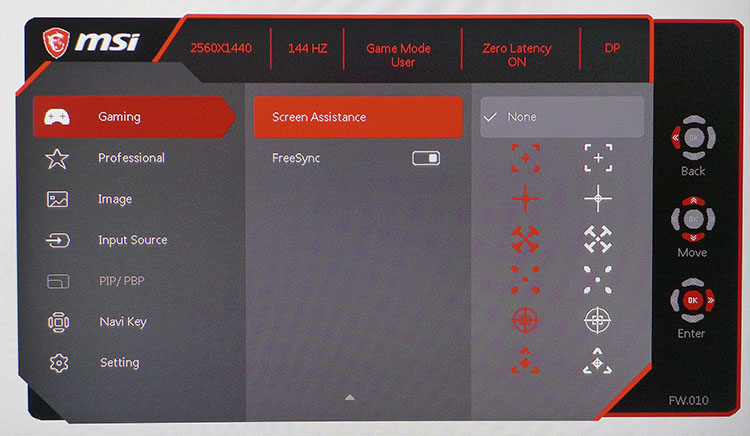
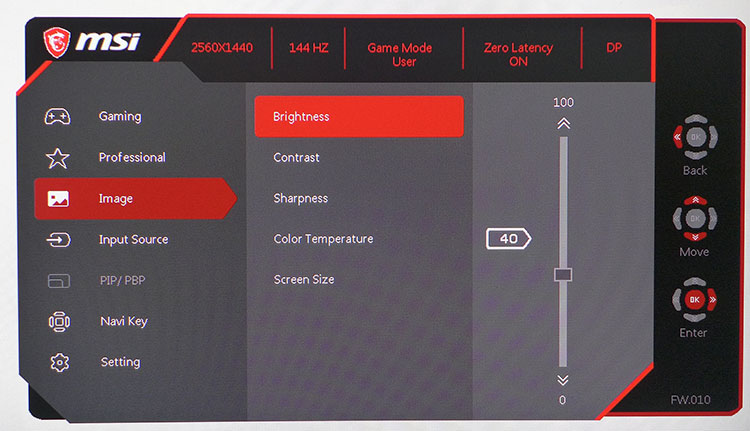
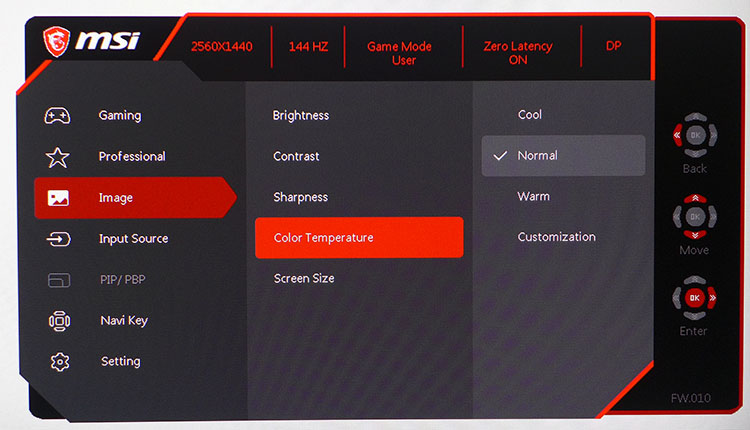
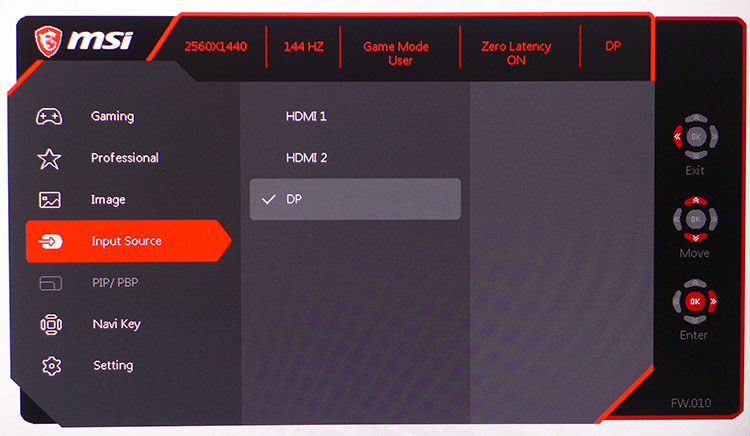
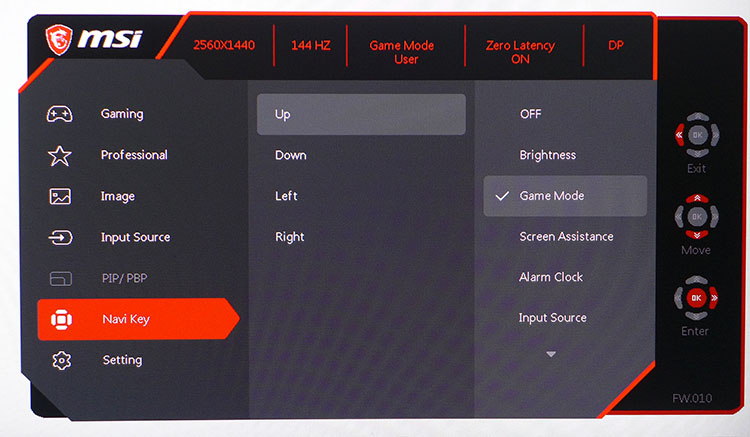
First up is Gaming, where you can choose from one of five image modes. User is the default and the most color-accurate as well. Other options include Black Tuner, which increases shadow detail, Response Time (overdrive), Anti Motion Blur (backlight strobe), Refresh Rate (fps counter), Alarm Clock (lets you know when to stop playing), Screen Assistance (12 different aiming points) and a FreeSync Toggle. The Anti Motion Blur option is enabled when FreeSync is turned off and will work up to 144Hz. It’s like the ULMB feature found on G-Sync monitors. It also reduces brightness by around 8% and disables both the Zero Latency option and brightness slider. Output is then locked at around 180 nits of brightness.
The Professional sub-menu will appeal to non-gamers, with four additional picture modes along with Eye Saver (low blue light), HDCR (dynamic contrast) and Image Enhancement. The latter should be avoided as it creates significant rings around dark objects. The MPG27CQ is sharp enough without additional edge enhancement.
The Image menu has the usual brightness, contrast and sharpness controls, along with three color temp presets and a User mode. We’ll detail our calibration experience below, but the short story is choose Normal and set brightness to taste. There is no benefit to using the provided RGB sliders.
After the Input Source selector is a PBP/PIP menu. It allows the viewing of two sources simultaneously. Navi Key lets you program the four directions of the joystick from a nice list of different functions, giving quick access to commonly used options.
Setting offers multiple OSD languages, menu transparency and timeout, audio source selection, a toggle for the LED lighting effect and a full reset of all menus.
Calibration
The MPG27CQ is reasonably color-accurate out of the box, but its grayscale and gamma tracking have room for improvement. Unfortunately, any attempts at calibration were thwarted by some odd behavior in the Customization color temp mode. Switching to this mode reduced brightness by more than 50% and took gamma to a place we’d rather not go. The bottom line is that our calibrated results were worse than the default numbers and we could find no workaround. We recommend leaving the monitor in its default state and simply setting brightness to a level appropriate for your environment.
Get Tom's Hardware's best news and in-depth reviews, straight to your inbox.
Here’s where to place the brightness slider to achieve commonly used brightness levels.
| MSI Optix MPG27CQ Calibration Settings | |
| Picture Mode | Custom Color |
| Brightness 200 nits | 40 |
| Brightness 120 nits | 19 |
| Brightness 100 nits | 14 |
| Brightness 80 nits | 10 |
| Brightness 50 nits | 4 |
MORE: Best Gaming Monitors
MORE: How We Test Monitors
MORE: All Monitor Content
Current page: OSD Setup & Calibration
Prev Page Features & Specifications Next Page Brightness & Contrast
Christian Eberle is a Contributing Editor for Tom's Hardware US. He's a veteran reviewer of A/V equipment, specializing in monitors. Christian began his obsession with tech when he built his first PC in 1991, a 286 running DOS 3.0 at a blazing 12MHz. In 2006, he undertook training from the Imaging Science Foundation in video calibration and testing and thus started a passion for precise imaging that persists to this day. He is also a professional musician with a degree from the New England Conservatory as a classical bassoonist which he used to good effect as a performer with the West Point Army Band from 1987 to 2013. He enjoys watching movies and listening to high-end audio in his custom-built home theater and can be seen riding trails near his home on a race-ready ICE VTX recumbent trike. Christian enjoys the endless summer in Florida where he lives with his wife and Chihuahua and plays with orchestras around the state.
-
Dantte Perfect example of being torn between 2 options... Do I get a single 21:9 1440p monitor with similar specs (waiting on gsync HDR), or 3 of these monitors?Reply
I currently have 3 Asus VG278H monitors I use for both gaming and work. I want to upgrade to 1440p, curved monitors (3 - flat 27" are a little wide), and better contrast (VA panel).
Setup #1, 21:9 flanked by 2 of the older monitors. I would use all three for work, but only the center 21:9 for gaming.
Setup #2, (3) of these monitors to completely replace what i have.