System Builder Marathon, March 2010: $3,000 Extreme PC
Hardware Installation
Today’s article isn’t a complete how-to guide, but a few build details separate this machine from a typical system, so it's worth noting some of its eccentricities.
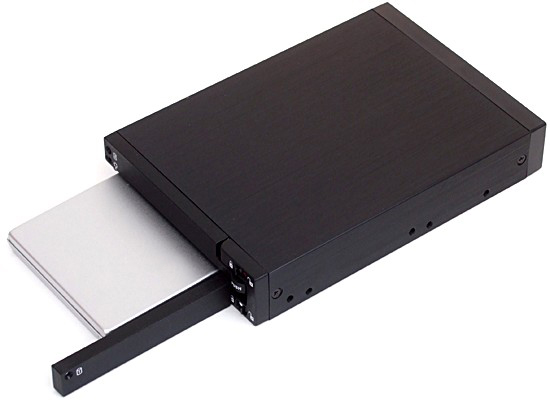
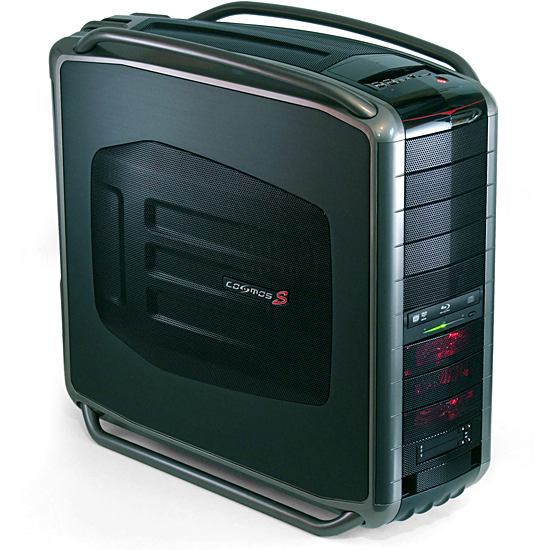
The easiest part of our installation was inserting the two Crucial SSD drives into the SNT drive rack. The rack was then installed as an external 3.5” drive in the Cosmos S case using its included 5.25” to 3.5” single-bay adapter rails. One of the case’s 5.25” bay covers has a removable panel for use with 3.5” external drives.
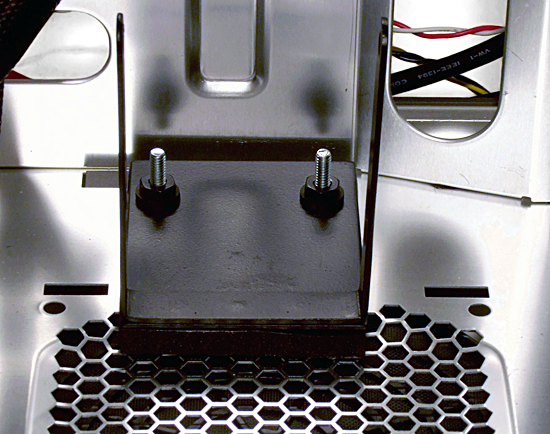
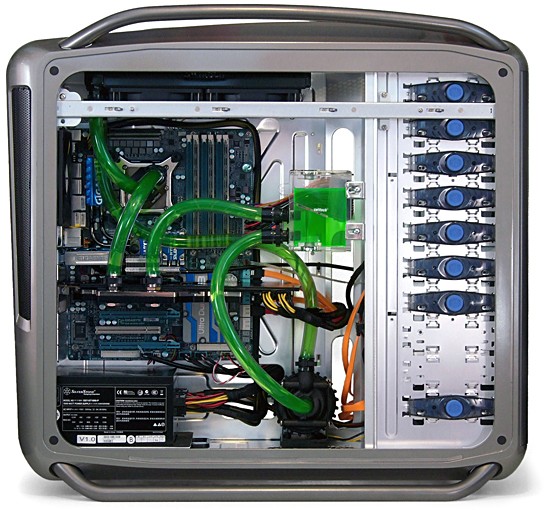
After installing the normal stuff, we moved on to the liquid-cooling system. Swiftech’s MCP-655B pump isn’t self-priming (it can’t pump air out of its chamber), and should therefore be installed at the bottom of the case, where it will always have liquid. The best place we found to mount it was along the rear edge of the base, above the optional intake fan mount.
Note that even though the pump mounts to a self-adhesive pad, it also includes two mounting screws, two nuts, and four rubber washers to dampen vibrations between the pump base and screws. These additional pieces prevent this heavy component from tearing away from its self-adhesive mounting pad, but require two holes to be drilled in the bottom of the case. Removing the pump from its bracket as shown above allows for an easy installation of the nuts.
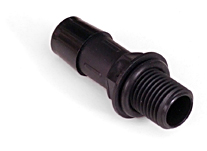
The liquid-cooling kit’s MCRES Micro Revision 2 reservoir comes with hose barbs and O-Rings packed separately. Grooves around the reservoir’s holes appeared to be designed for these seals, though the instruction manual didn’t mention the parts. Unclear instructions aside, we slipped an O-ring over each barb to assure a perfect seal.
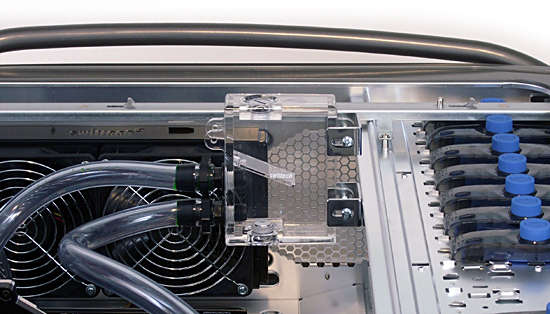
We mounted the reservoir on the vertical edge of the case’s drive cage above all card slots to allow extra room for coolant lines. Two holes must be drilled into the mounting surface to attach the reservoir’s mounting brackets. Removing the top screw following a test fit allows the reservoir to be tipped away from the chassis, as shown below.
The reservoir must be at the highest point of the cooling system in order to successfully purge air bubbles from the system. This might sound like an impossible task with the radiator mounted in the top panel, but laying the case on its side solves the issue. Tipping the reservoir as shown above allows it to be filled with the case on its side.
Angelini: Kudos to Thomas on one of the cleanest water-cooling builds I've ever seen
With the fill cap securely replaced, the reservoir now holds its air pocket as the case is tipped upright. Replacing the upper bracket screw keeps the reservoir vertical until its next refill.
Lite-On’s BD-RE drive was placed in a lower 5.25” bay to ease desktop use, where the “minimum height” is usually the height of whatever might sit in front of the PC (such as a left-front speaker or large beverage). Builders who’d rather subject their system to the dust and hair nightmare that typifies floor placement will instead prefer the top bay. The internal hard drive cage was raised by one bay position to improve airflow from its cooling fan to motherboard components and the rarely accessed 2.5” drive rack was slipped under it, using the previously mentioned bay adapter and convertible bay cover.
Get Tom's Hardware's best news and in-depth reviews, straight to your inbox.
-
zoemayne More than 64GB is gonna be needed for multiple games and good apps... those ssd's can only handle 5 games max.Reply -
Crashman zoemayneMore than 64GB is gonna be needed for multiple games and good apps... those ssd's can only handle 5 games max.Reply
You're repeatedly ignoring that it's 128GB, not 64GB, because the article repeatedly states that the drives are striped (Level 0) by the RAID controller. And there's a terabyte of added storage on top of that for stuff that isn't programs. -
anamaniac Nice as it is, my only complaint is that...Reply
Overclocked 5970 + i7 on a single 120.2?
ARE YOU MAD!
Likely.
Well, I personally would have dropped something else and gone for a 120.3 or 140.3 radiator. =D
Hell, maybe even a 140.4 radiator, but then again, I like my system to run chilly and silent. It's also be very difficult to mount a 140.4 I assume. Maybe I could jack a radiator form work, I think it's about 1 metre by 3 metres by half a metre. Granted, it's for industrial use, but just for one day, please boss please?
Good results on the i7 though. Decently low voltage and still managed to reach 4.3GHz. My i7 is a lemon. It makes me sad. =(
Also an impressive overclock for a 5970.
At this kind of power, you should be testing multi monitor resolutions. I have a 5770 and I run 7 megapixels, you use a 5970 and only run 4 megapixels.
Looking forward tho the $1,500 build. See how my build compares to one six months older on a similar budget (and cry). -
tacoslave http://www.youtube.com/watch?v=U9l-XQzdRGg&feature=related this is what happened when i saw that 5970 in action "I CAME"Reply -
Crashman Reply9490893 said:Nice as it is, my only complaint is that...
Overclocked 5970 + i7 on a single 120.2?
ARE YOU MAD!
Well, the explanation is in the conclusion, the builder wanted redundant storage instead of the big radiator but chose neither, leaving enough room in the budget for anyone who wanted to copy the build to make their own upgrade choice.
But what's not in the budget is that the water was never hot, it was barely warm. The problem with running the CPU at 100% load and the GPU at 100% load is that the water temperature went up by around 10 degrees...we're talking about going from the 30's to the 40's here at full load. The article points to the GPU cooler as a likely flow restriction so I have three solutions:
Solution 1: Add 1/2" by 3/8" adapter T's and cool the chipset block, parallel to the GPU block. That would allow some of the water to bypass the GPU cooler, which is OK since the GPU was always cold. But 1/2" by 3/8" T's are hard to find outside of a hardware store, and Newegg certainly doesn't have them.
Solution 2: Switch to a 3-fan radiator. A 4-fan unit won't fit nicely into that case, and making an ugly system wasn't considered a solution.
Solution 3: Add a second liquid-cooled 5970 parallel to the first. Get twice the GPU power and completely unblock the lines in the process. The GPUs would run slightly hotter when each gets only half the water, but at least the CPU block's flow won't be restricted. And...since it's probably adding another 10 degrees to the coolant...stick the three-fan radiator in there as well. For FOUR grand you could have a KILLER system!
OK, so solution 1 is the cheapest, but you have to admit solution 3 is tempting...
-
Sihastru I kinda like it. Dramatic power increase for the overclocked components. But also dramatic performance increase.Reply
Another solution to the constricted water flow would be to change the block on the 5970.
This build gets one and a half thumbs up from me, not that anyone cares...

