Tom's Hardware Verdict
The Sovol SV07 does Klipper the right way by including a Klipper screen, accelerometer and tons of cooling power.
Pros
- +
Klipper firmware pre-installed
- +
Klipper Screen
- +
Faster print speeds
- +
All Metal Hotend
- +
Auto bed leveling
Cons
- -
Loud
- -
Painted lines peeled off the build plate
Why you can trust Tom's Hardware
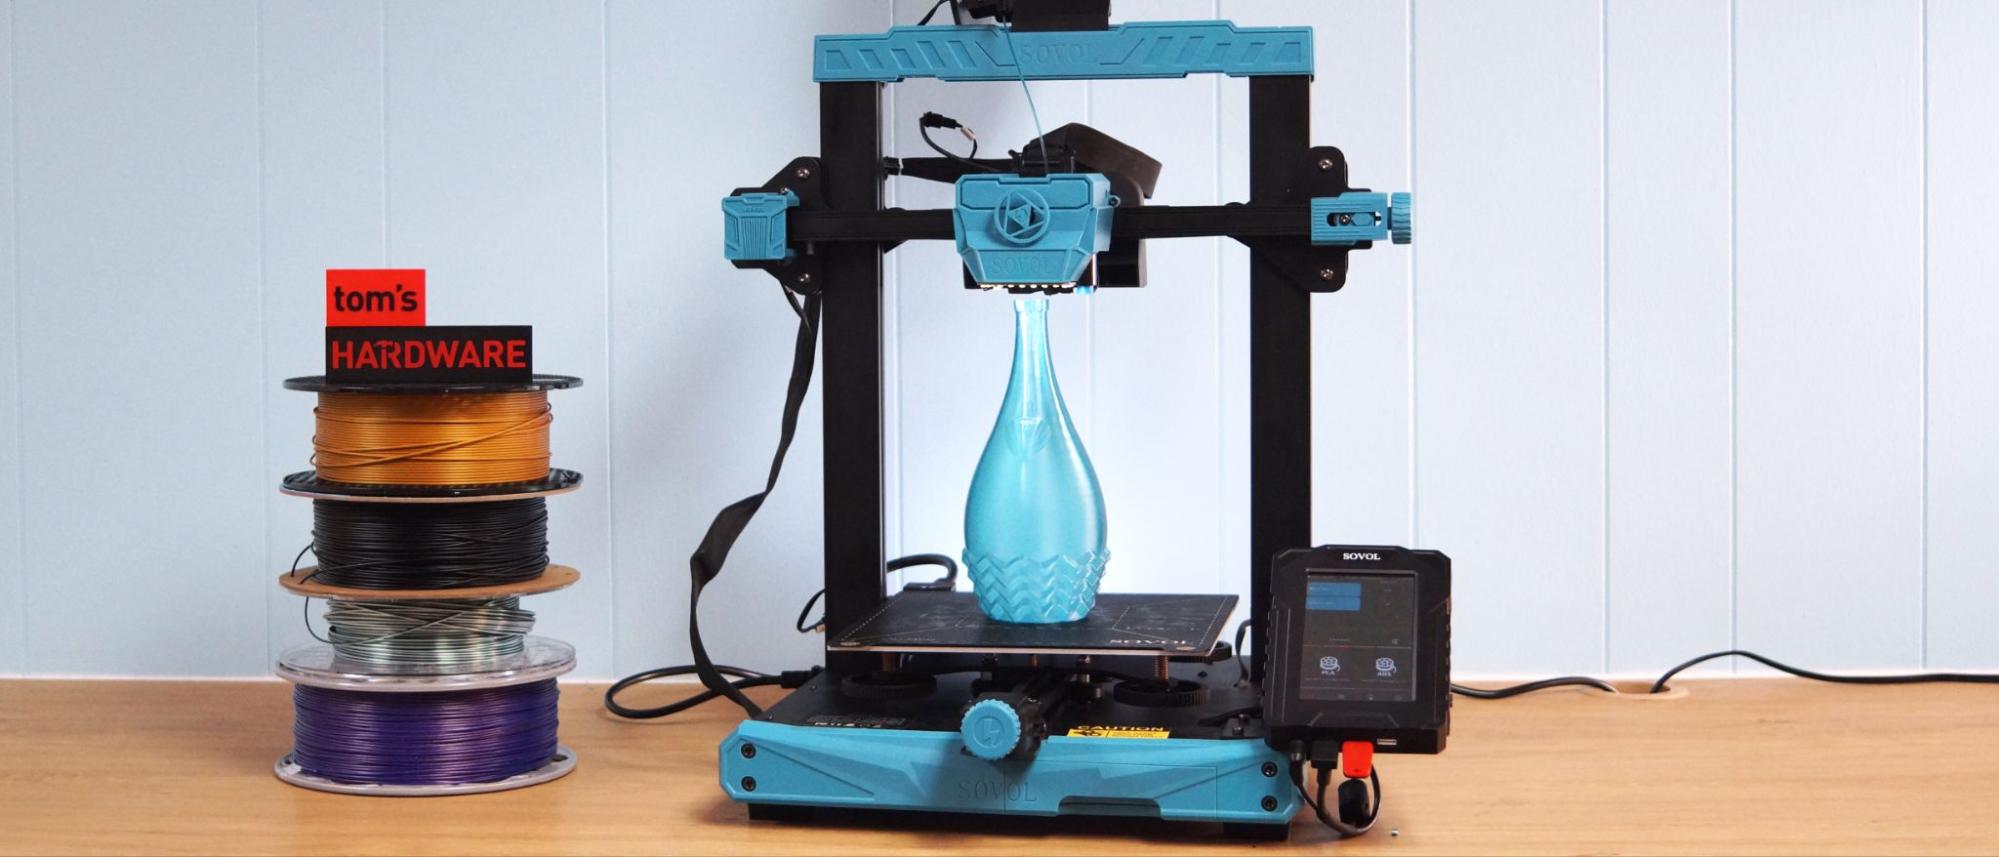
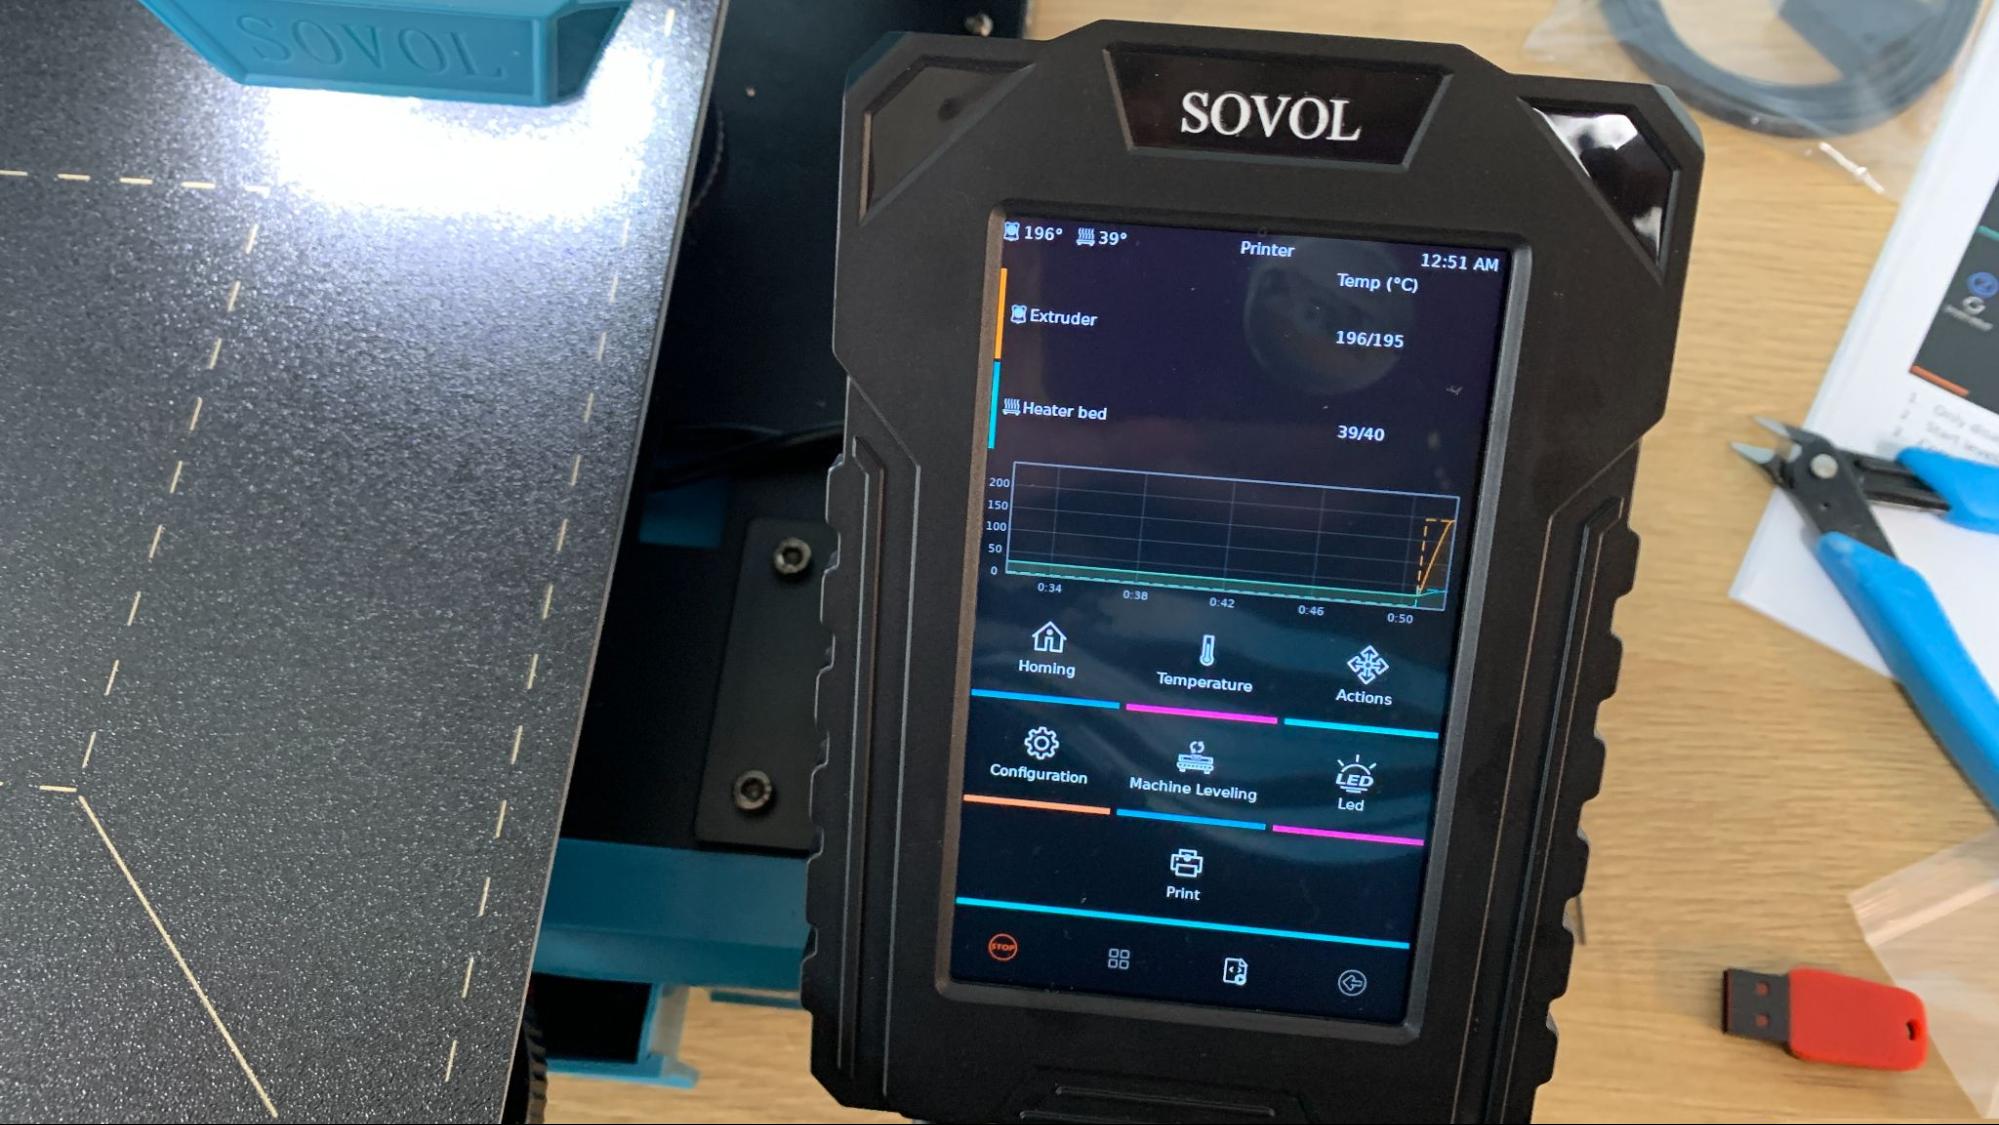
The Sovol SV07 brings Klipper to the masses with an easy-to-use and affordable bed slinger. 2023 is turning out to be the year of speed, with several companies rushing to add variations of Klipper to their 3D printers. Up until last year, this fast and accurate firmware could only be obtained by installing it yourself on a Raspberry Pi tethered to your printer. Sovol makes Klipper effortless by including it on a 5-inch touchscreen mounted on the printer.
Retailing at $339, the SV07 looks like a typical Cartesian style printer, reminiscent of the SV01 Pro we reviewed last year. Its KlipperScreen has an easy to navigate display that shows thumbnails as well as details about your prints. It has all the features we like to see on a 3D printer: auto bed leveling, a PEI coated flex plate, and a direct drive with an all metal hotend. The SV07 also has a bonus curtain fan attached to the X gantry to amp up the cooling needed for high speed printing.
The SV07 can hit print speeds up to 500 mm/s, and comes with input shaping tuned from the factory that’s pretty decent. An accelerometer is included with the printer if you want to fine tune your calibration. The SV07 makes Klipper so easy, it’s one of the best 3D printers we’ve seen of this new category.
Specifications: Sovol SV07
| Build Volume | 220 x 220 x 250 mm (8.6 x 8.6 x 9.8 inches) |
| Material | PLA/PETG/TPU (up to 300 degrees) |
| Extruder Type | Direct Drive |
| Nozzle | Creality K1 |
| Build Platform | PEI textured spring steel sheet, heated |
| Bed Leveling | Automatic with sensor |
| Filament Runout Sensor | Yes |
| Connectivity | USB Drive, USB Type C, Ethernet, WiFi |
| Interface | LED touch screen, Fluidd |
| Machine Footprint | 460 x 457 x 625mm (18.1 x 17.9 x 24.6 inches) |
| Machine Weight | 9.7 KG (21.3 lbs) |
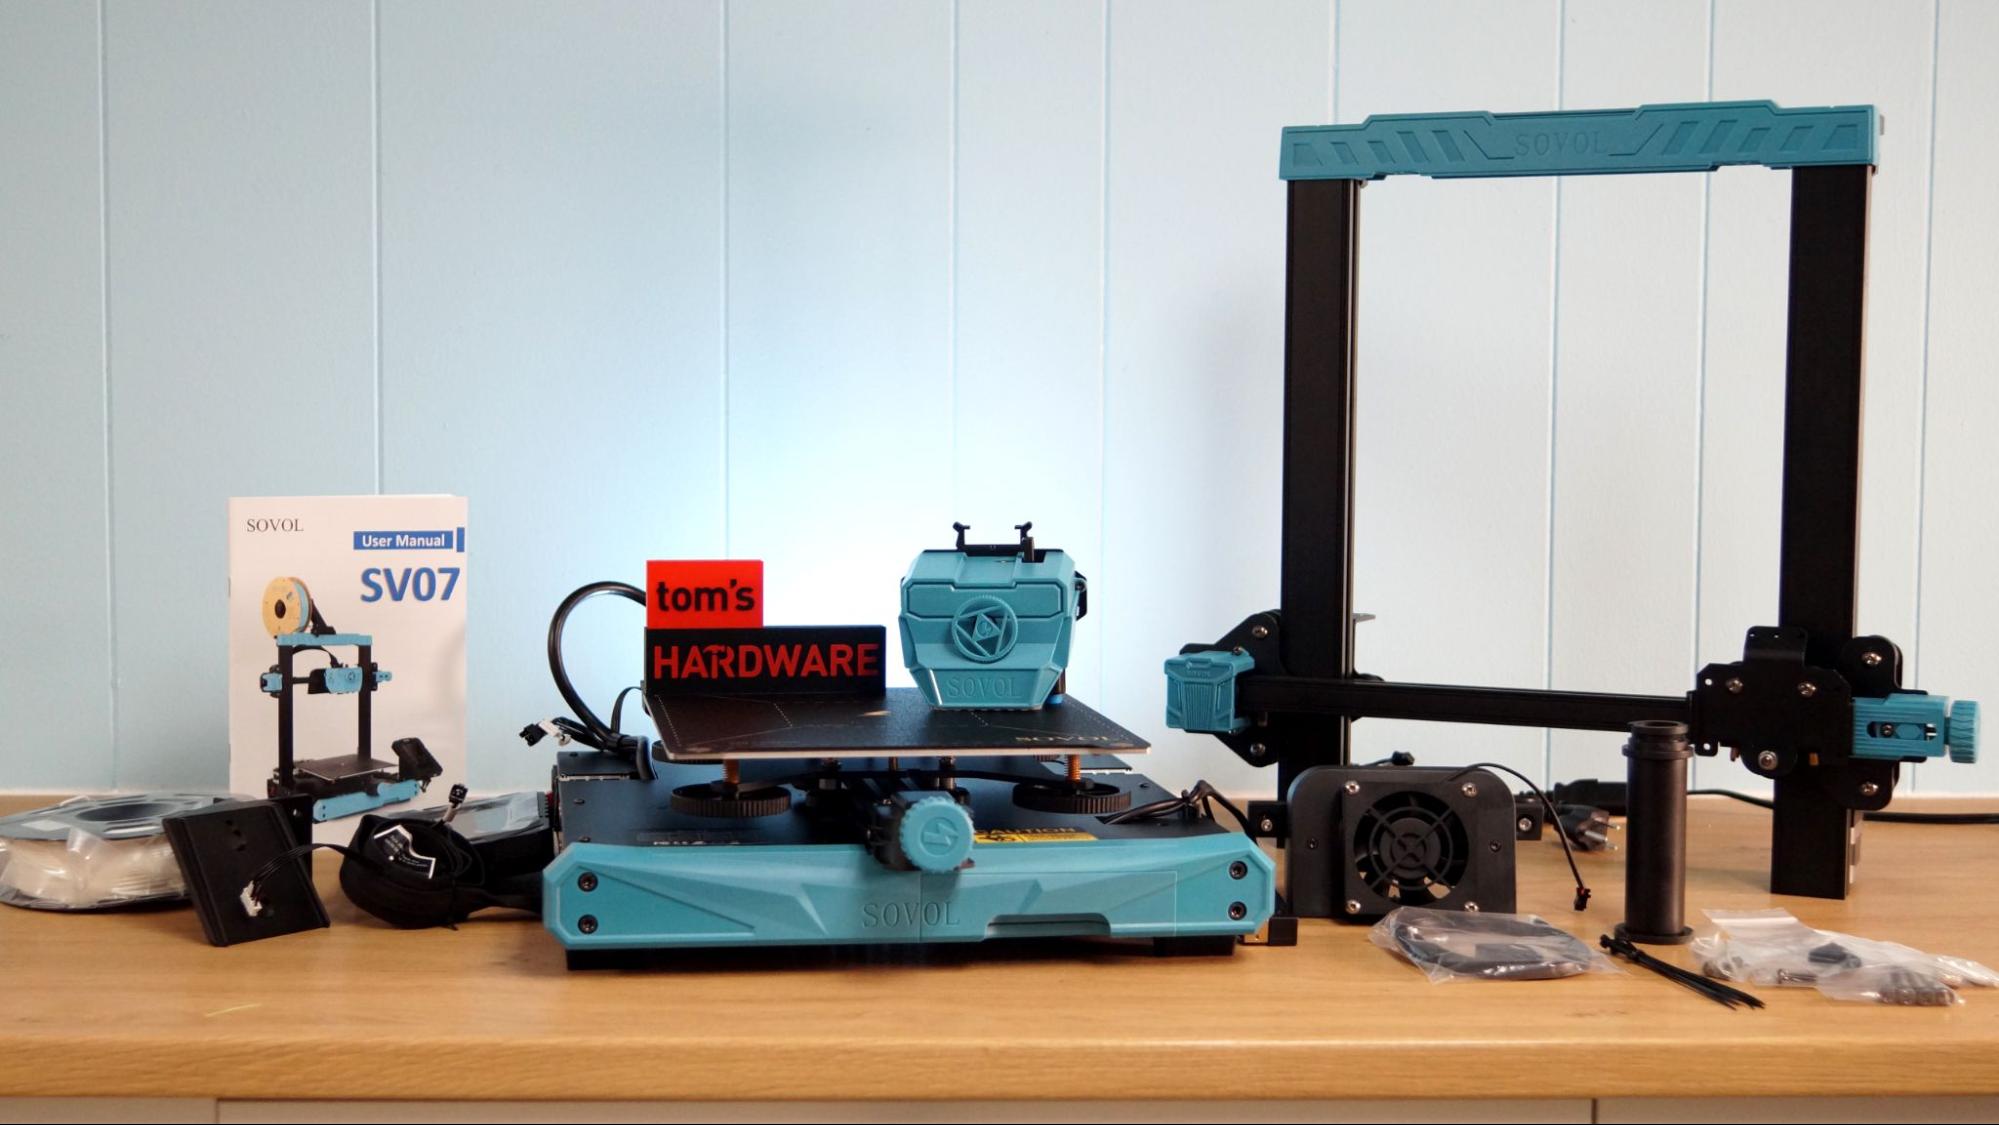
Sovol SV07: Included in the Box
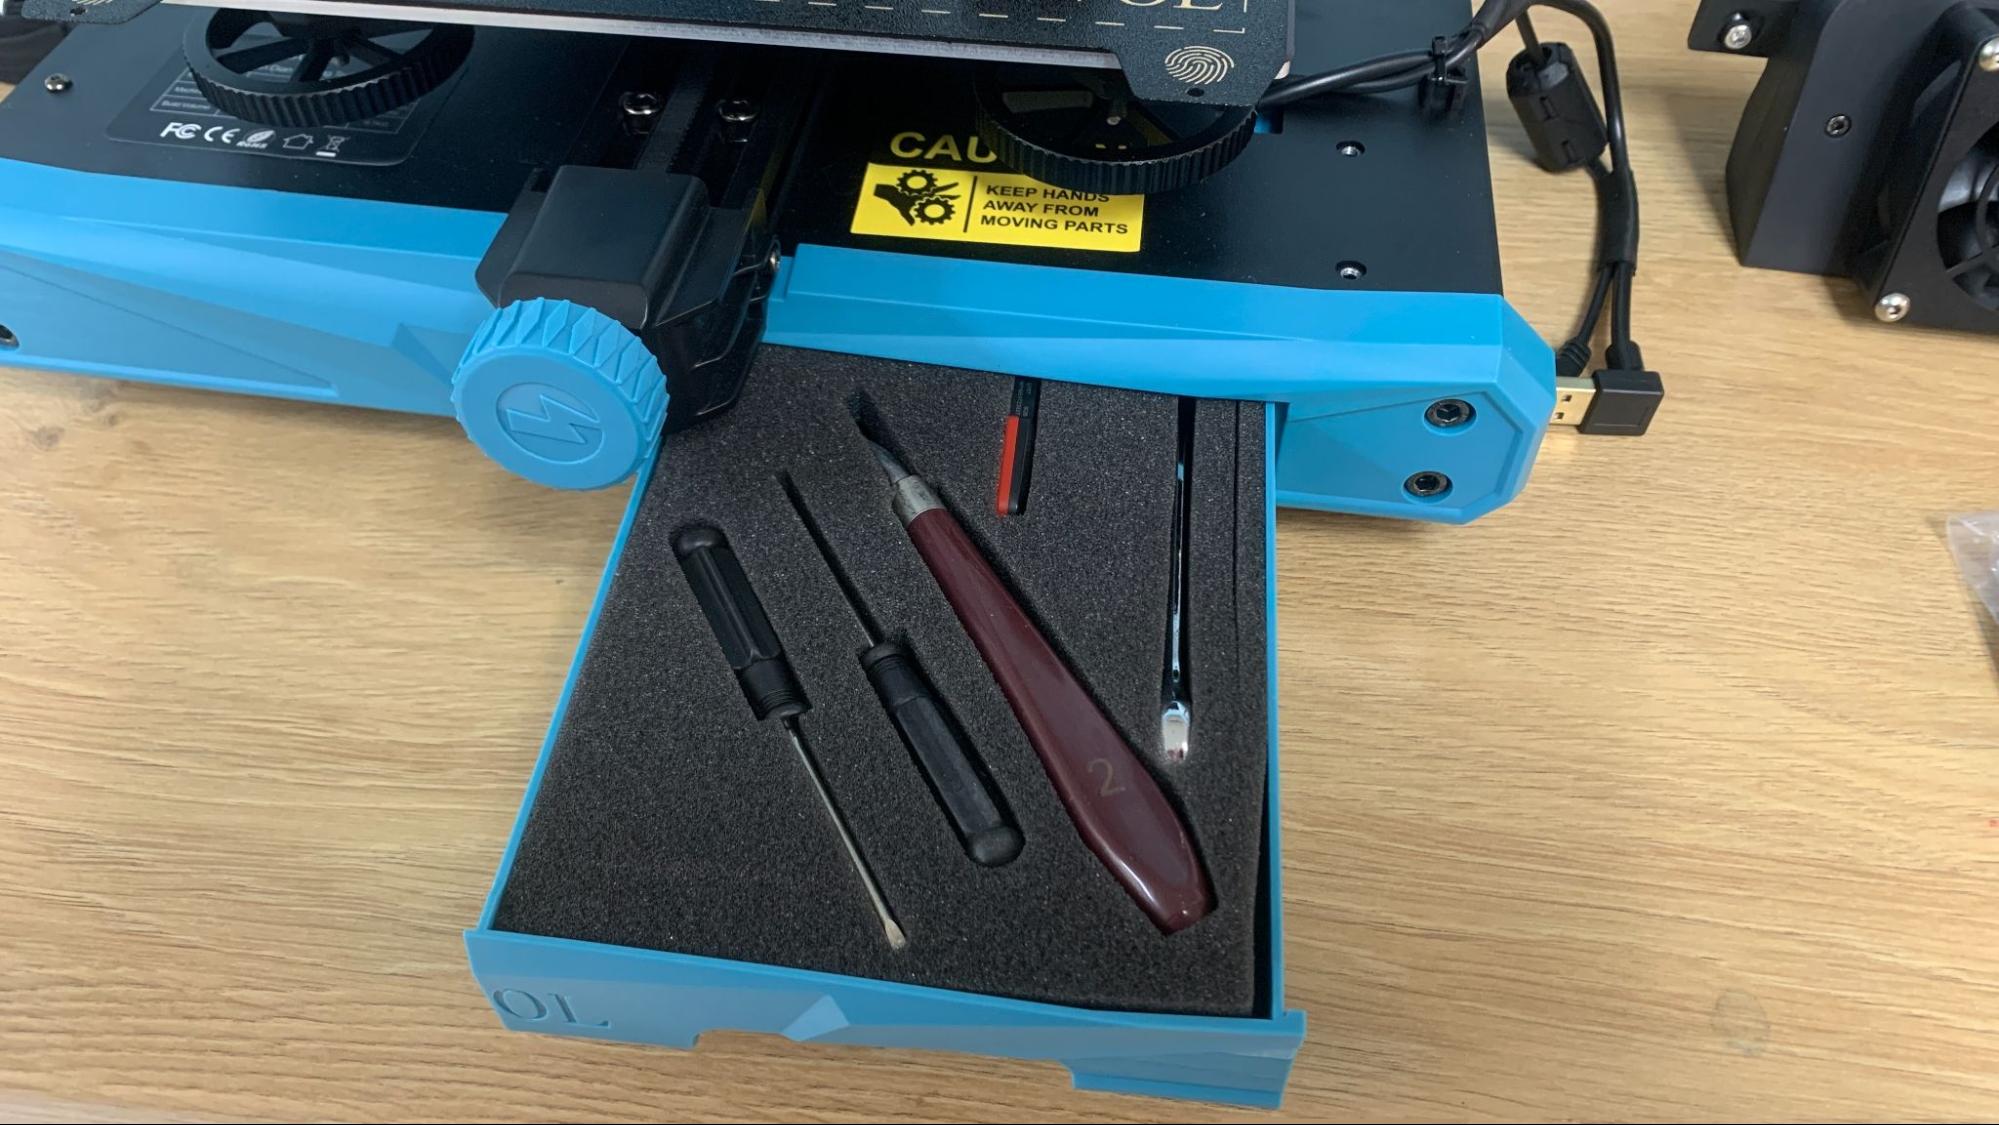
The Sovol SV07 comes with everything you need to get your printer set up. You get tools to build and maintain the printer, a spare nozzle, a USB stick and an ADXL 345 Accelerometer for fine-tuning Klipper. There’s also a small spool of white PLA to print your first model.
The USB stick contains test models to print, and a pdf of the manual. There’s also a detailed paper copy of the manual.
Design of the Sovol SV07
First, the SV07 is not an upgrade from or sequel to the SV06 – these are two entirely different machines. The SV07 has the feel of an Ender style machine, while the SV06 is an i3 style (cough, Prusa, cough).
The SV07 has more injected molded parts than its brethren, all in a stylish Robin’s Egg blue. Some of these parts are just for show, like the front case that conceals a tool drawer, and the chunky extruder cover that houses a sizable number of LED lights. Others are more functional, like the top gantry bar and adjustment knobs.
Get Tom's Hardware's best news and in-depth reviews, straight to your inbox.
I was relieved to see that Sovol didn’t repeat the missteps of BIQU’s Hurakan which came with Klipper preinstalled, but did little to explain it. Sovol chose to install Klipper on an easy to use pad, which has a graphic interface that’s much easier to navigate and gives you more control options than the average 3D printer. Most importantly, there’s no exposed SD cards containing critical config files you can accidentally remove. Everything is safely tucked into the pad.
I should also point out that Sovol made the right choice and has partnered with Klipper to run the complete open source Klipper firmware. You have full access to Klipper and the ability to tweak the config file and add mods to your heart’s content.
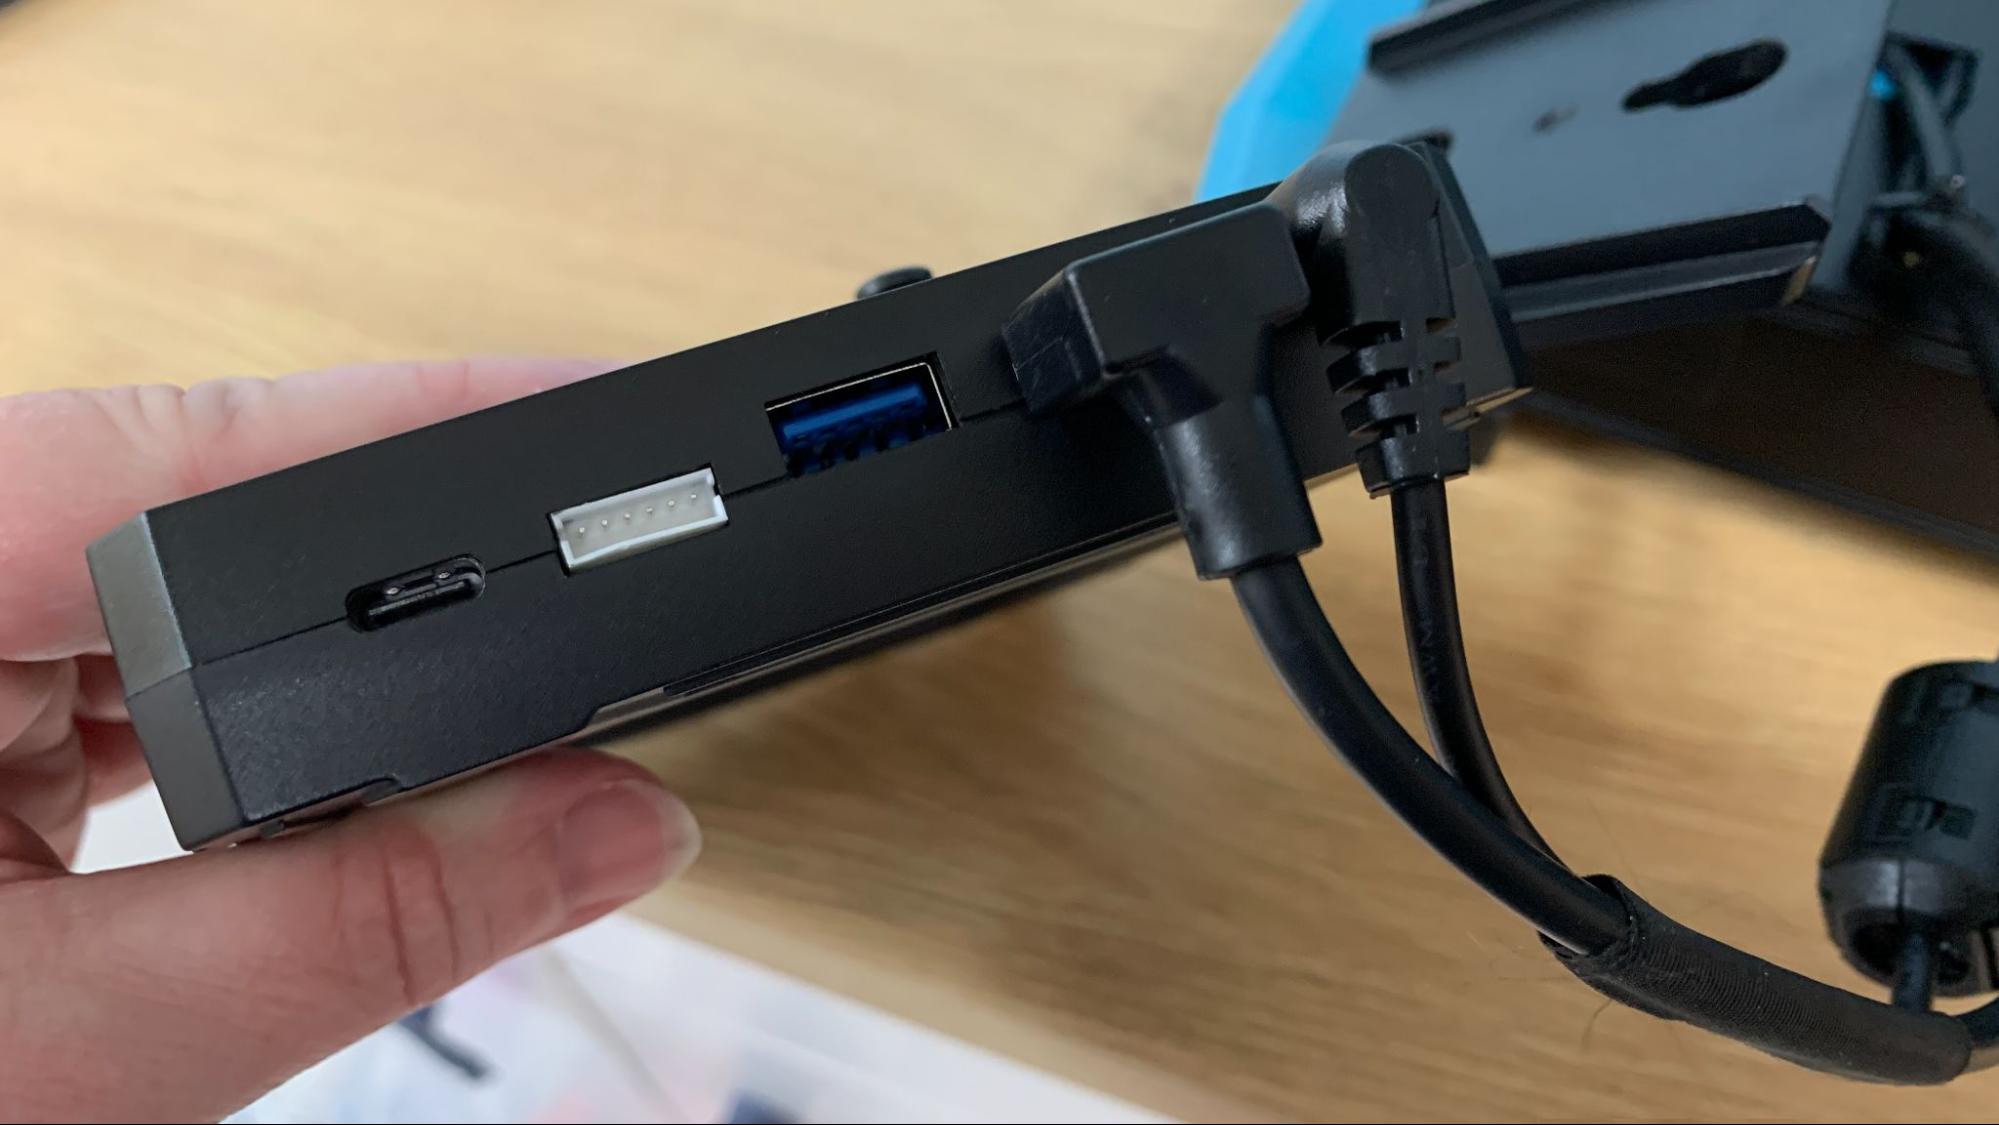
Unlike other 3D printer displays, the Klipper pad has all the plugs and ports. One plug powers the pad, another carries data. There are two ports for USB – one on the bottom, another on the side – which can accommodate a web camera or a USB stick for manually adding files. There’s also a USB-C port and a plugin for the accelerometer for fine-tuning input shaping.
It has everything I like to see in a Cartesian machine: dual z axis, direct drive, a metal PEI flex sheet, and an all-metal hotend. This combination of parts promises effortless and clog free printing.
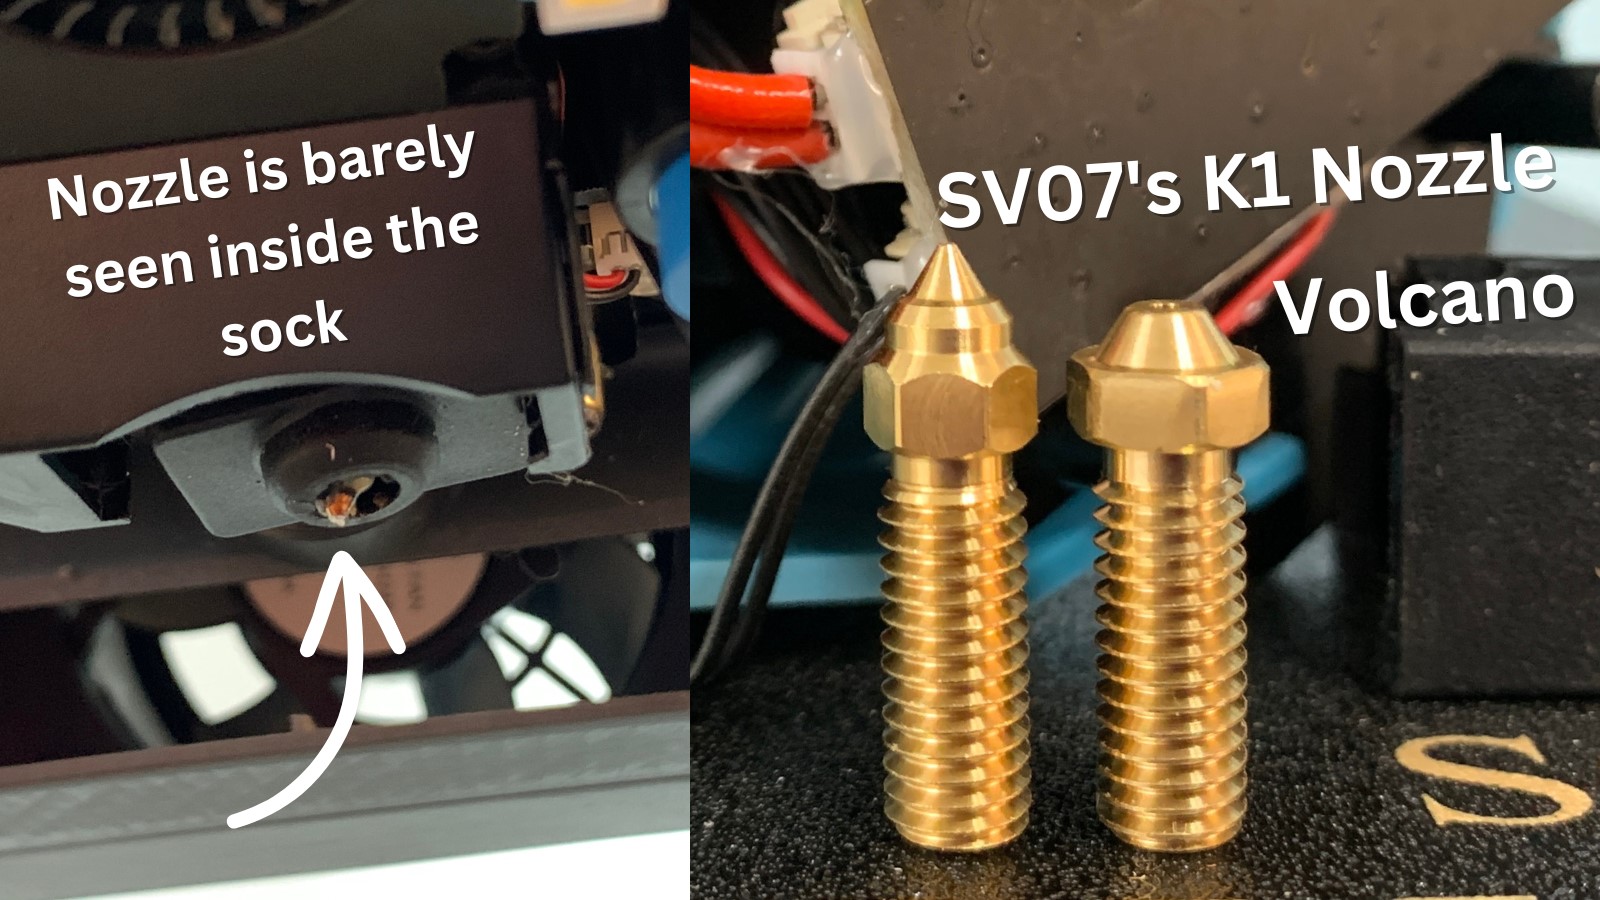
The machine has a Volcano style hotend, with a grippy planetary-geared extruder which provides faster flow with plenty of control. It uses the same nozzle developed by Creality to fit the K1. Though the nozzles have the same threads, the Sovol SV07 needs that extra length at the tip to peek beyond its silicone sock.
Unfortunately, the printer is only quiet when it’s not running. The case fan will turn off when the printer is completely cool, but while running the extra cooling fan is pretty noisy. It’s the price we pay for speed. I don’t think the SV07 could print the way it does without that extra cooling, which is aimed at precisely the right spot.
The Sovol SV07 has built-in Wi-Fi, which allows you to use the Fluidd interface on your computer to remotely upload files.
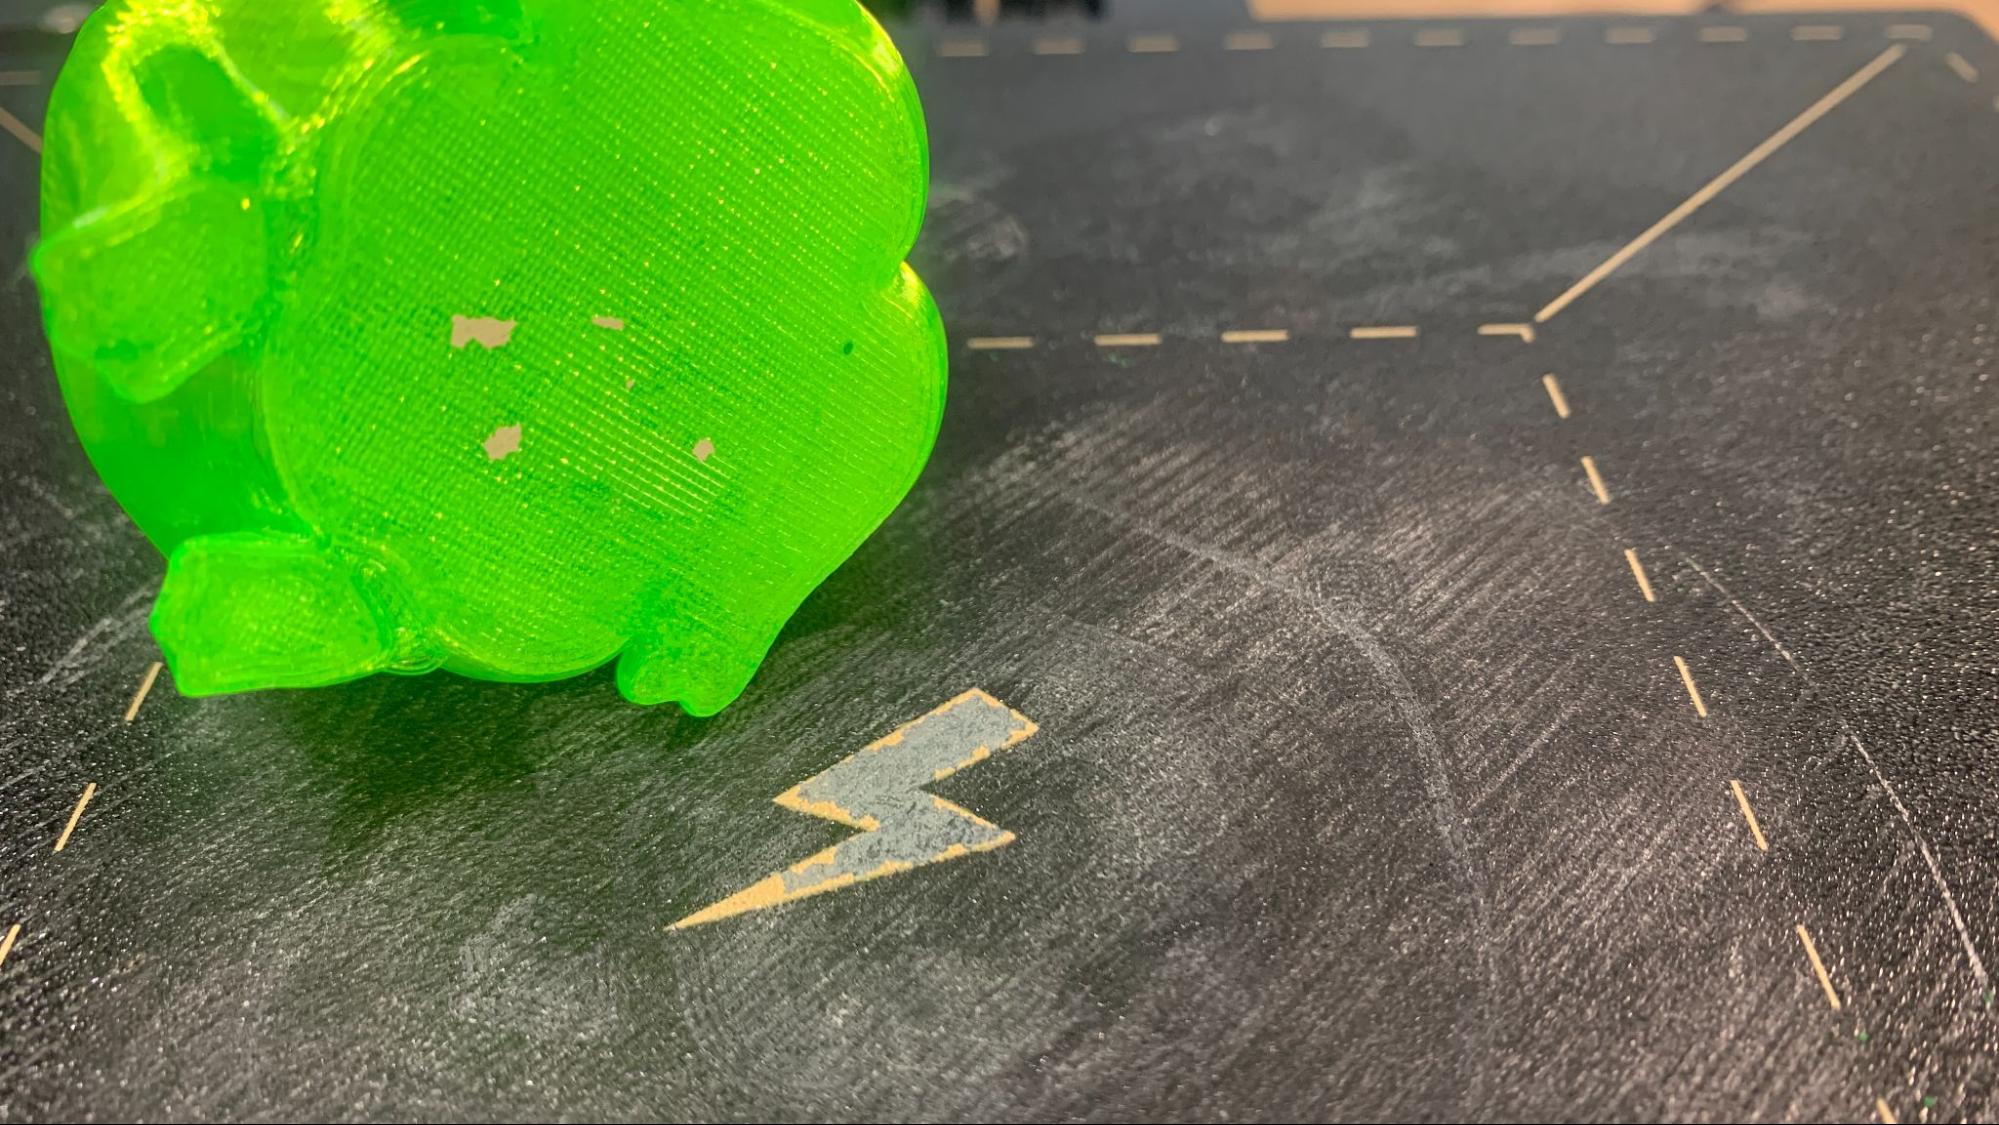
The SV07 has a very good two-sided removable PEI coated metal flex plate. I had no trouble getting prints to stick or to pop off when finished. However, the surface has painted details which stuck to my prints and peel off.
Assembling the Sovol SV07
The printer is about 90% pre assembled for you, and took about half an hour to put together. The manual offers clear instructions.
The gantry slots into the base and is attached with four bolts from underneath. You’ll need to attach the screen holder, tool head and curtain fan with screws. The spool holder and screen pop into place. The last step is wiring and everything is well labeled and easy to sort out.
Check the eccentric nuts under the bed and on the tool head to make sure nothing is wobbly. Then finally check the voltage switch – I needed to flip it to 115v.
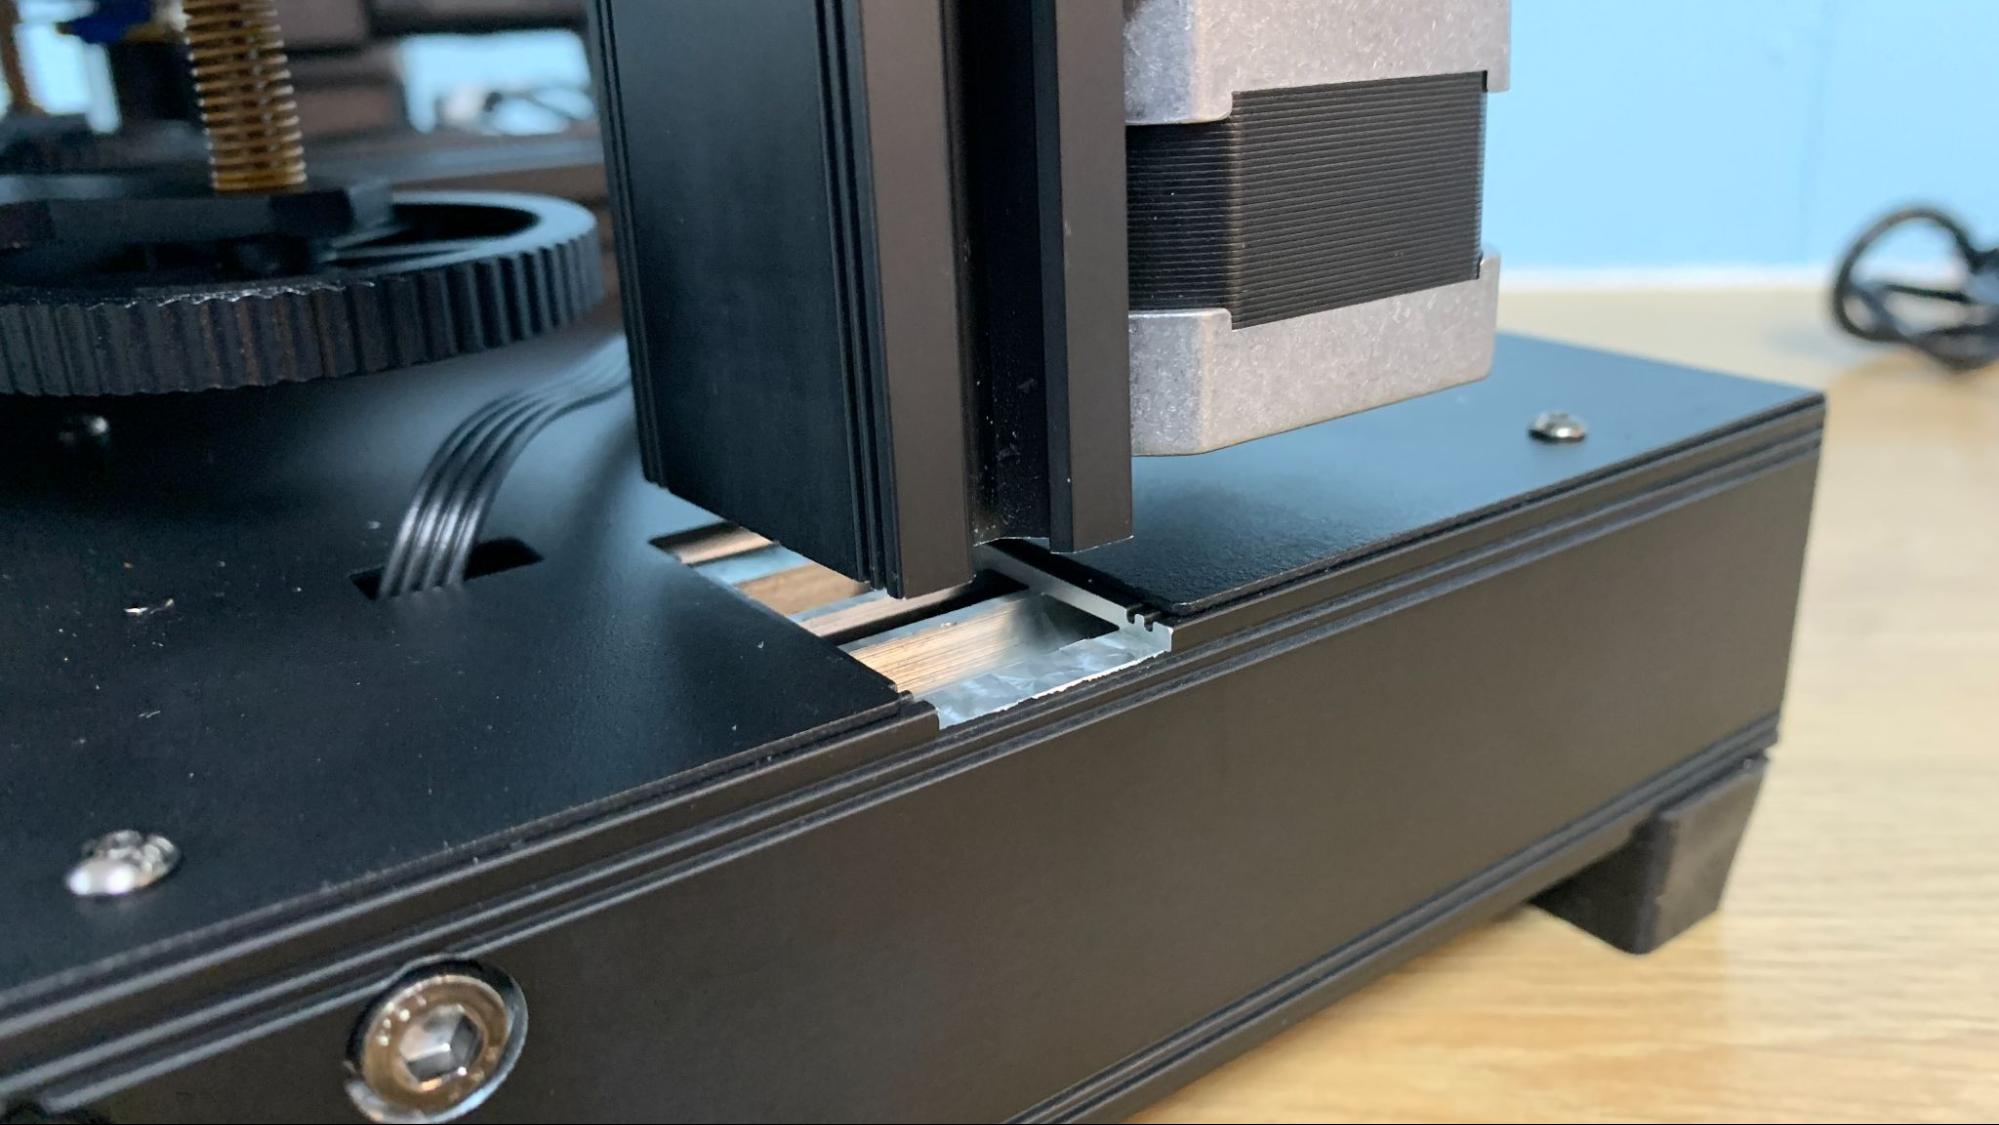
I should mention that our test printer came with a loose grub screw on the X stepper motor. This is highly unusual and caused a lot of headache (and layer shifts) until the problem was sorted out. I was able to get quick answers from Sovol’s technicians, who looked at my early failed prints and were able to diagnose the problem. Once everything was properly tight, the printer worked as it should.
Leveling the Sovol SV07
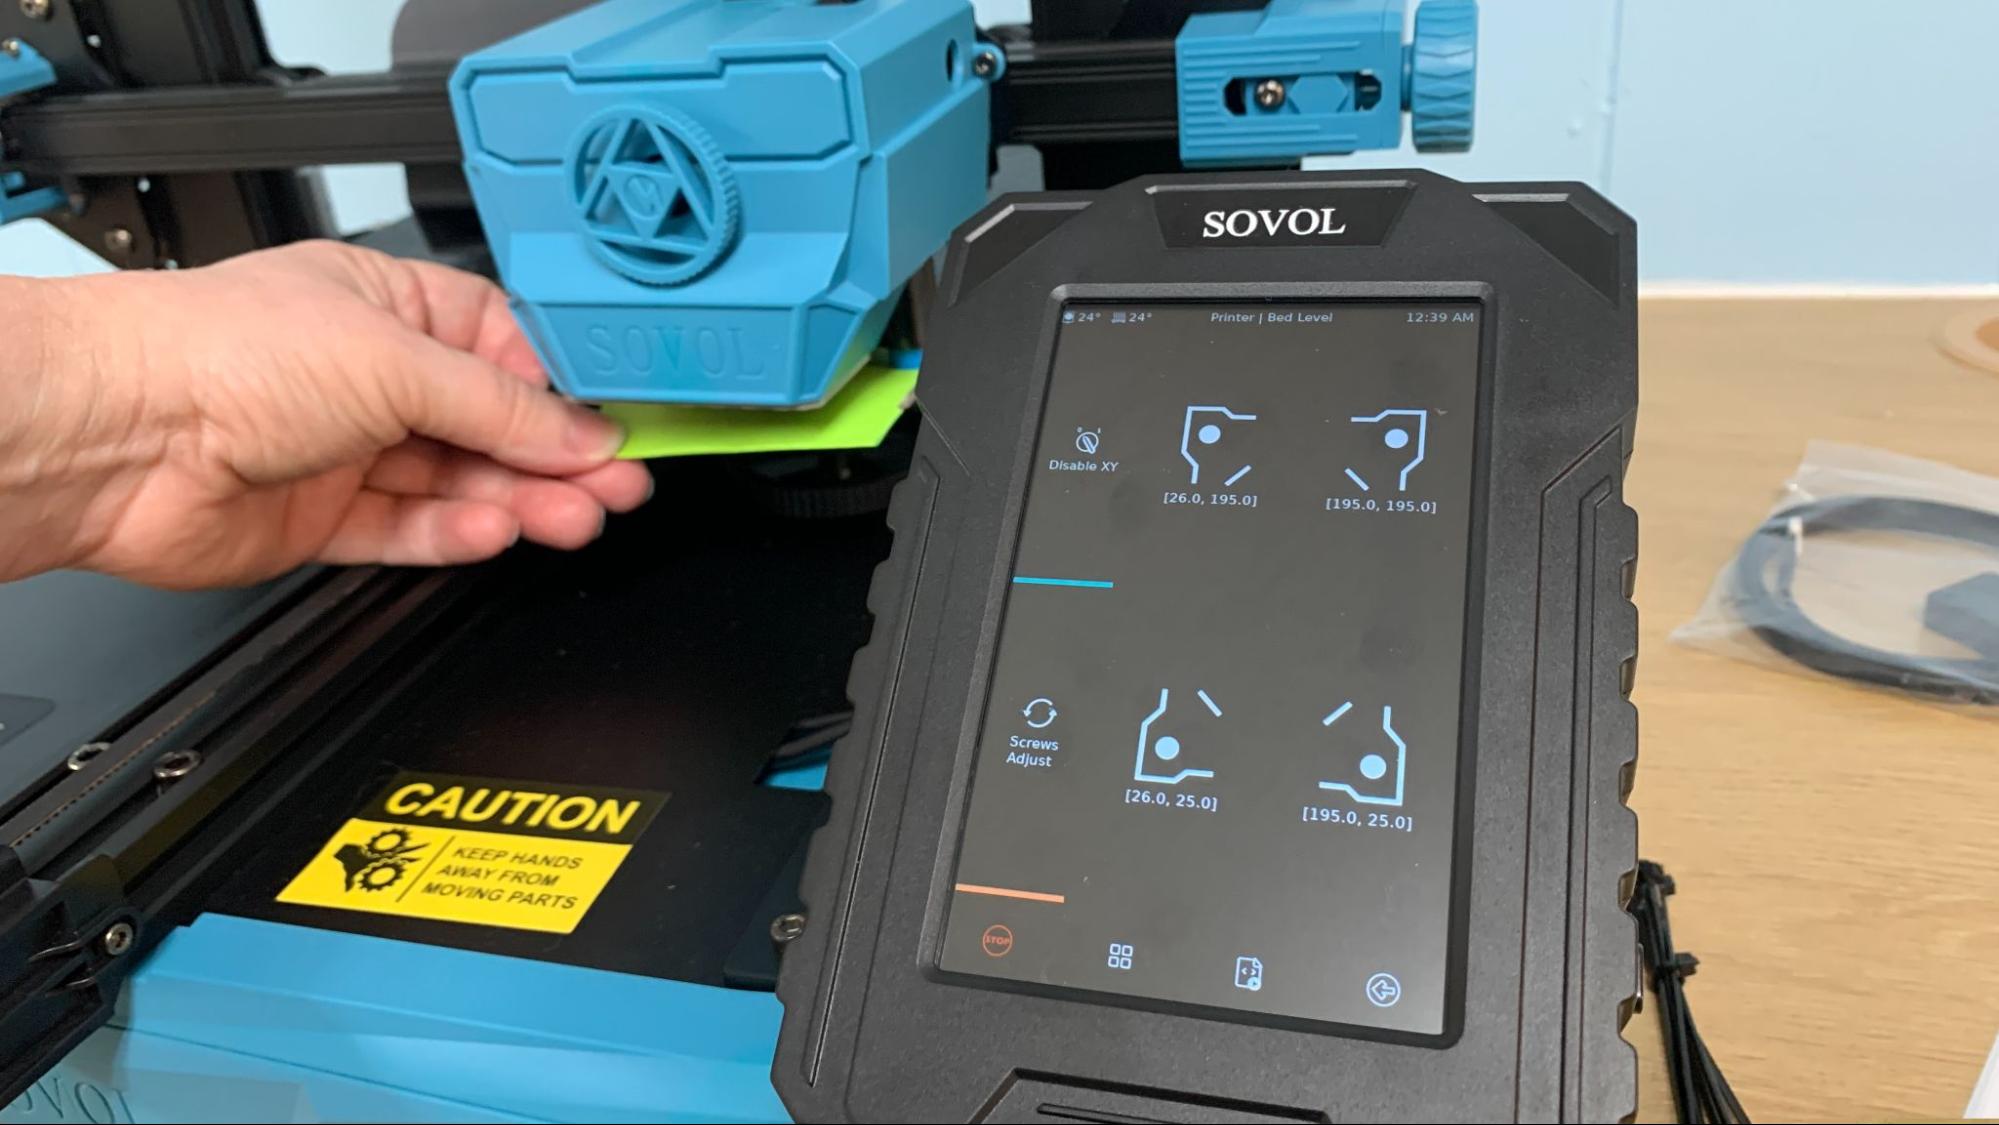
The SV07 comes with auto bed leveling and manual adjustment knobs. To level (or tram) the bed the first time tighten all the knobs counterclockwise until tight, then back off two turns.
Click Configuration on the main screen, then Machine Level and Z Calibrate. Click Start. The printer will home then move to the center of the bed. Put a piece of paper under the nozzle and push raise or lower nozzle until it just scrapes the paper. Click accept when done.
Next, you’ll manually level the machine. Click Configuration on the main screen, then Machine Level. The touch screen will display the corners of the bed. Tap the corner you wish to adjust and turn the nob underneath until a piece of paper under the nozzle just scrapes the surface.
Finally, go back to the home screen. Click Configuration, then Machine Level and now Bed Mesh. The printer will tap the bed in the grid pattern to do a final calibration.
You can still tweak the Z height from the Fine Tuning menu while a print is running – but I didn’t need to do that while testing the printer.
Loading Filament on the Sovol SV07
The SV07 is a direct drive printer with the extruder inside the tool head.
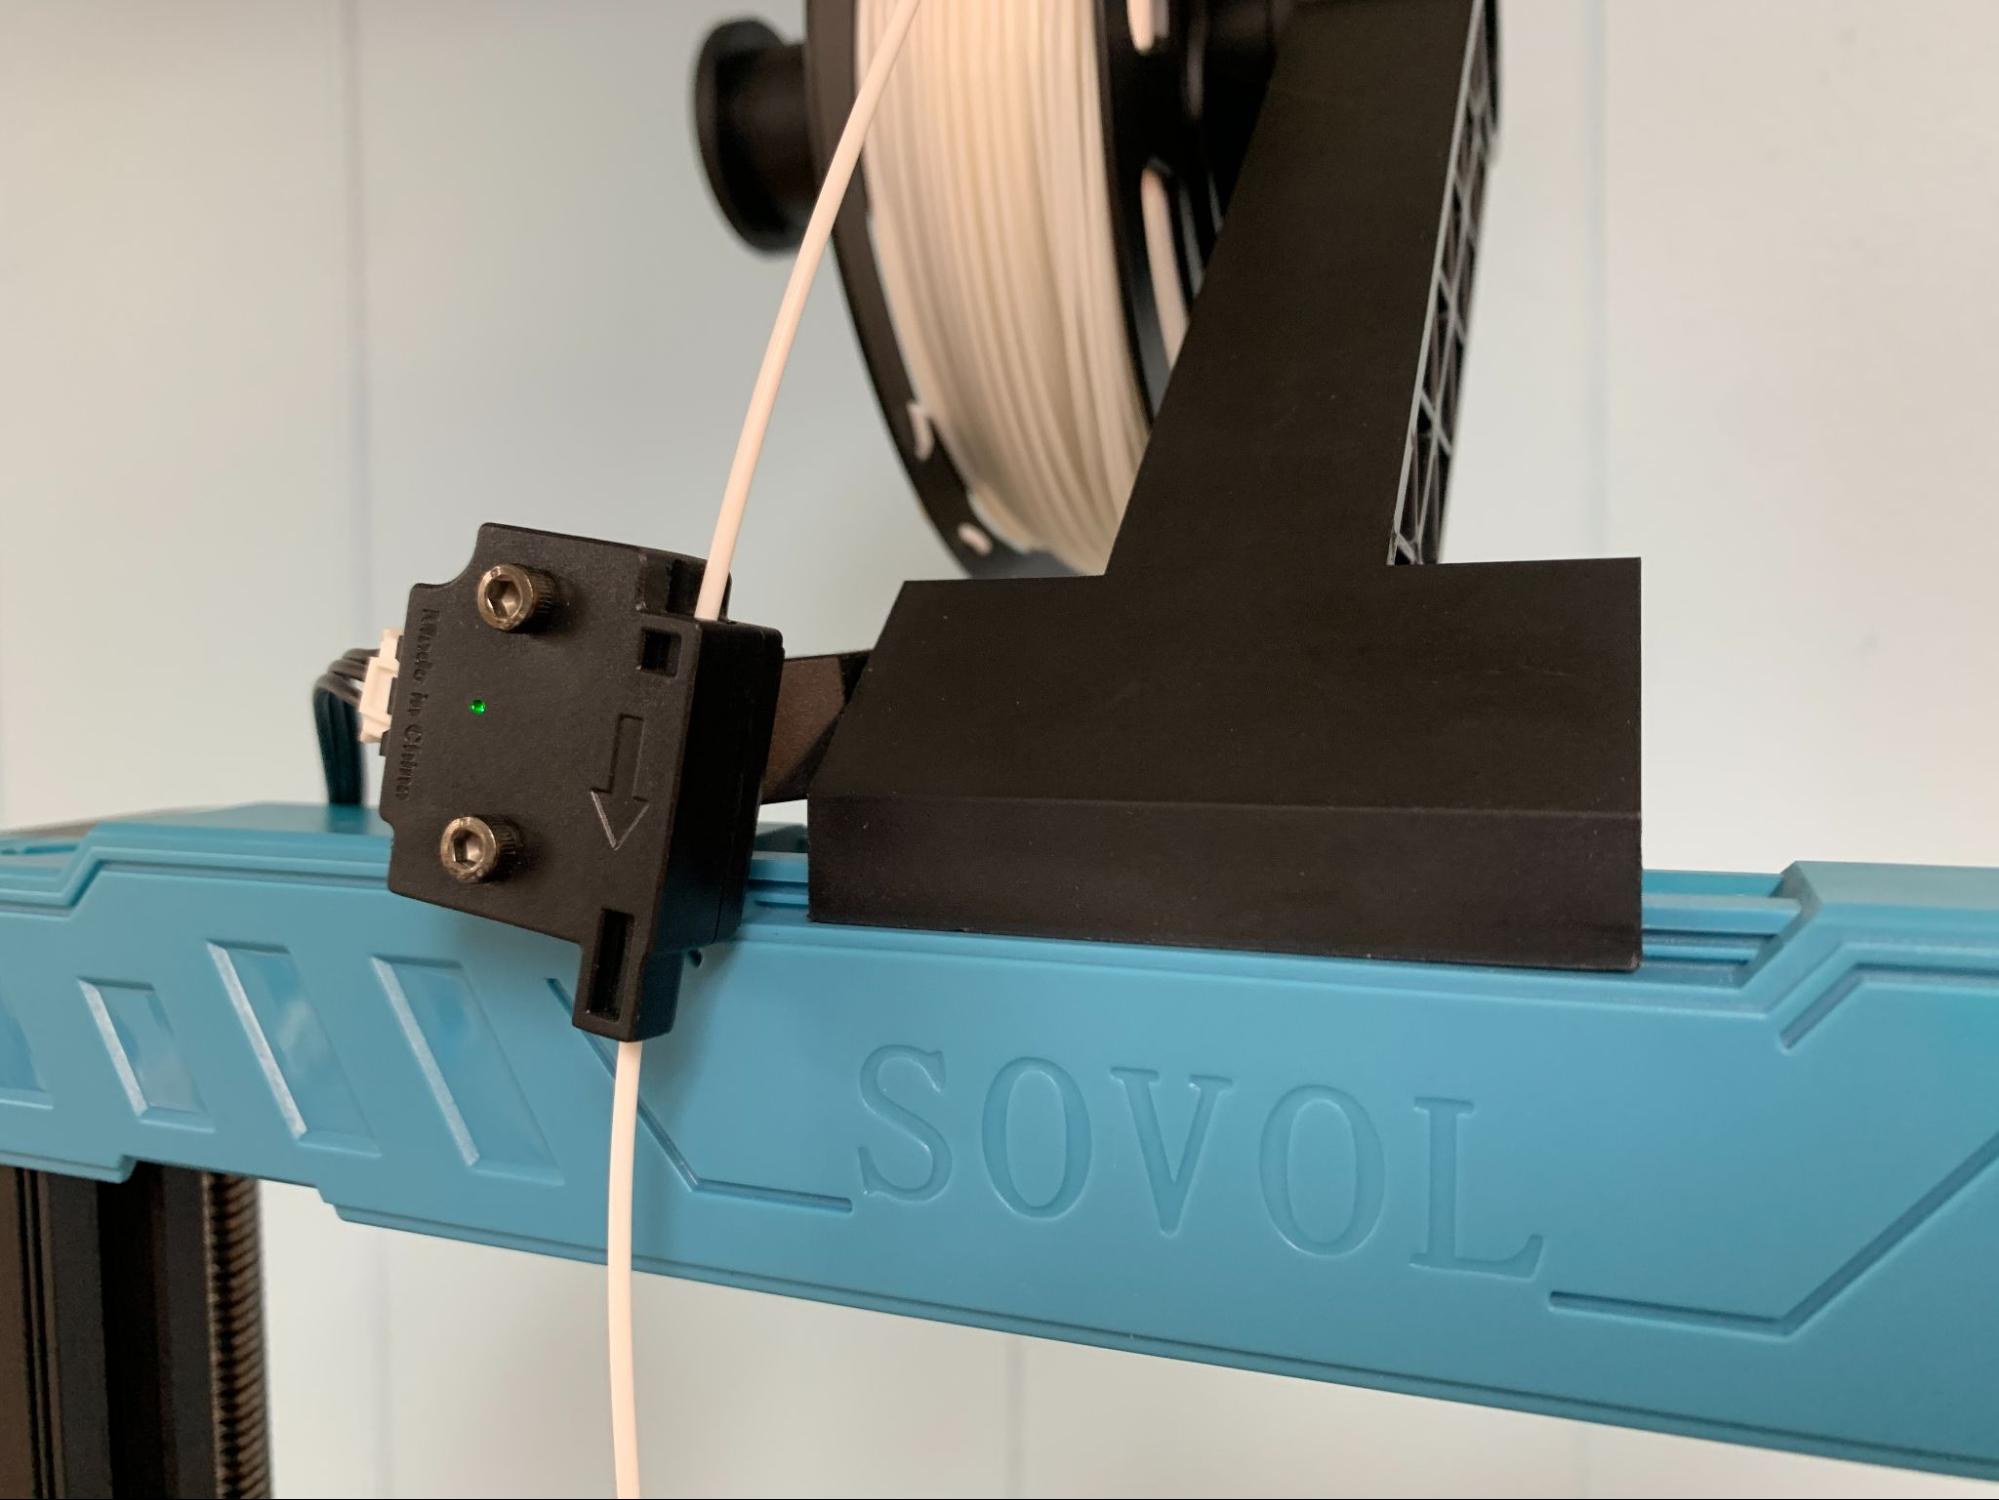
To load filament, first warm up the hotend by selecting Actions, then Extrude. Tape the Temperature icon and tap PLA (or select whatever temperature suits your needs). Insert the filament into the runout sensor near the spool holder, then down to the extruder. Push the lever on the extruder to release the tension and manually push the filament inside.
Click Load and the machine will draw the filament into the hotend.
To unload or change colors, simply reverse the process.
Preparing Files / Software for Sovol SV07
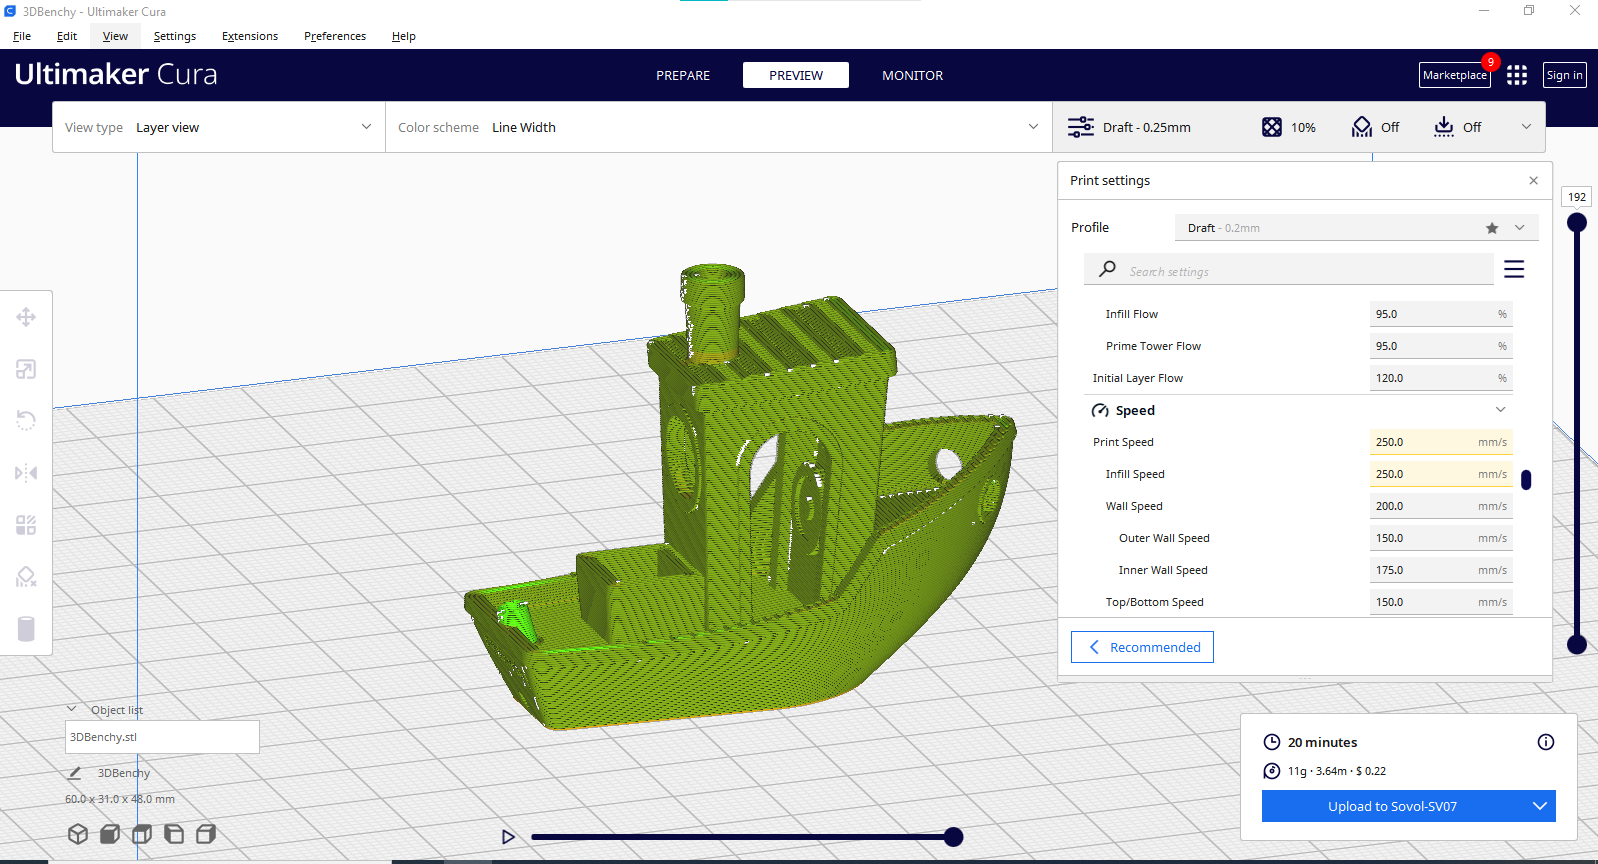
The Sovol SV07 comes with a copy of Cura 5.0 with a profile for the SV07. In a rare move, this copy of Cura is otherwise “vanilla” – not rebranded to Sovol – it even found my collection of Cura profiles for other machines and imported them over.
I did encounter one problem: the start and end gcodes in the machine settings were written for an ordinary Marlin printer, and probably copied over from one of Sovol’s other machines. These codes caused conflicts that prevented the print from starting. Once replaced with “START_PRINT” and “END_PRINT” to trigger Klipper’s own macros, the printer worked fine.
There is no profile provided for Prusa Slicer or Orca Slicer, but you can of course make them from scratch.
Printing on the Sovol SV07
The Sovol SV07 uses Klipper to produce quick prints at speeds up to 500mm/s. 500 is the top speed, not the average speed, and generally only used for printing infill and travel moves. The default setting actually slows the walls to 150 on the outer and 175 on the inner. The SV07 was able to produce a very good 22-minute Speed Benchy model – very fast indeed when you think that a couple years ago a typical bed slinger might make a Speed Benchy in an hour.
We kept the factory setting for input shaping and were quite happy with the results.
Sovol included a generous 200g sample spool, but you’ll soon run out. Check out our guide to the best filaments for 3D printing for examples of our favorite materials to add to your supply.
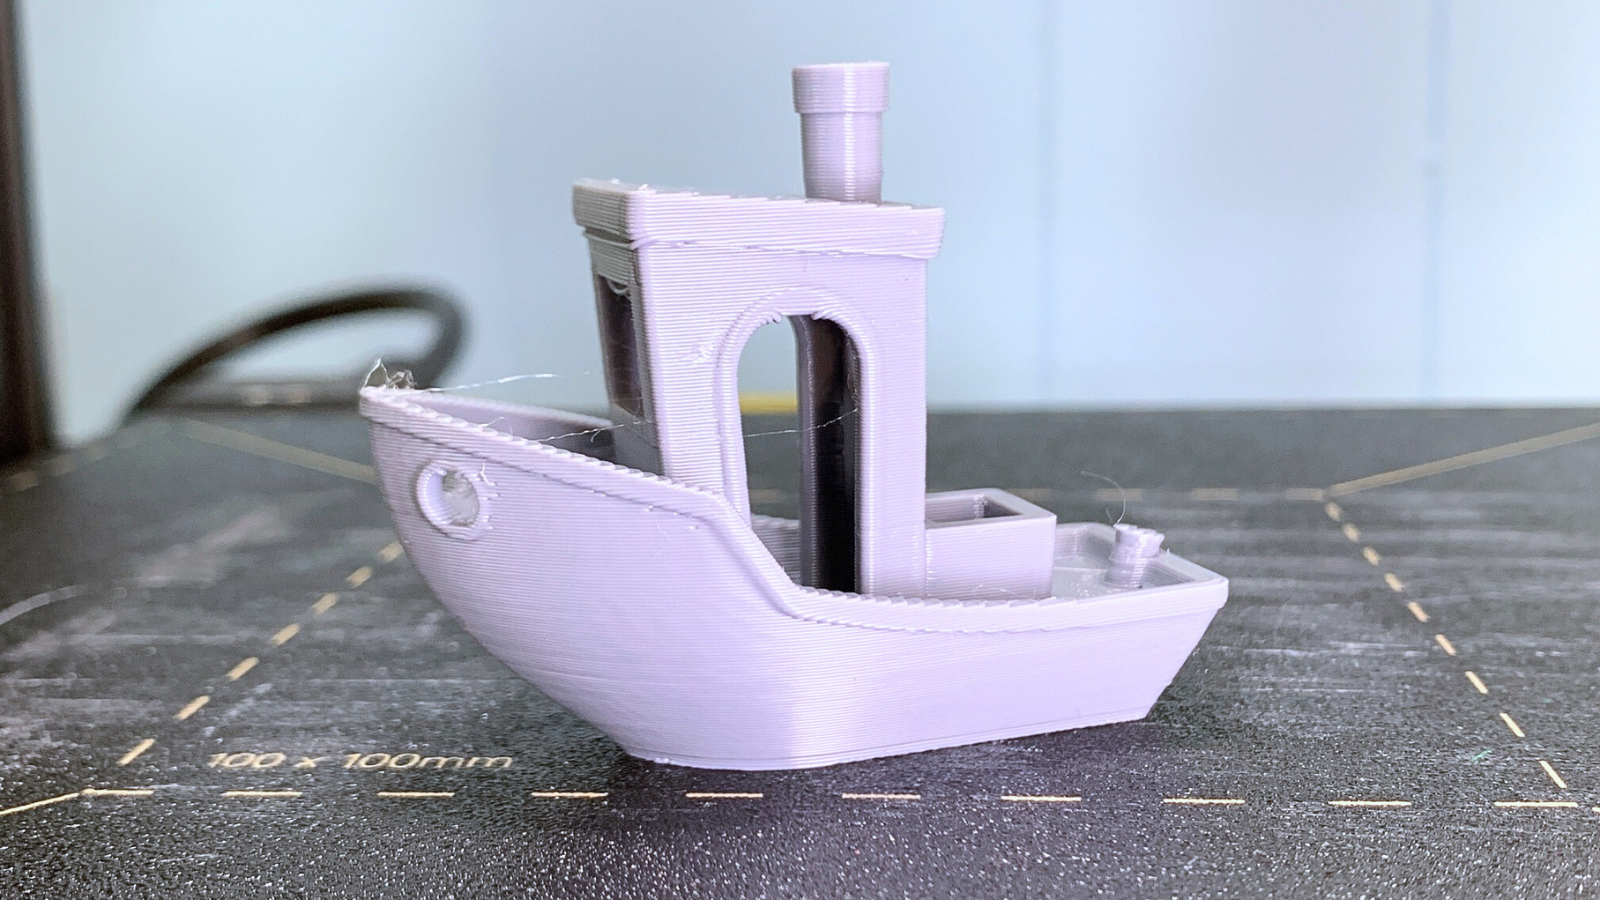
The first print was of course a Speed Benchy sliced according to the official #speedboatrace contest rules. This boat has 2 walls, 3 top/bottom layers, 10% infill and use a .25 layer height and .5 layer width. It printed in a blazing 22 minutes in ordinary Inland Grey PLA . Despite the speed, there’s no ringing around the porthole, the layers are consistent and the smokestack is crisp. There’s some bridging issues around the top of the cabin and a tiny bit of stringing.
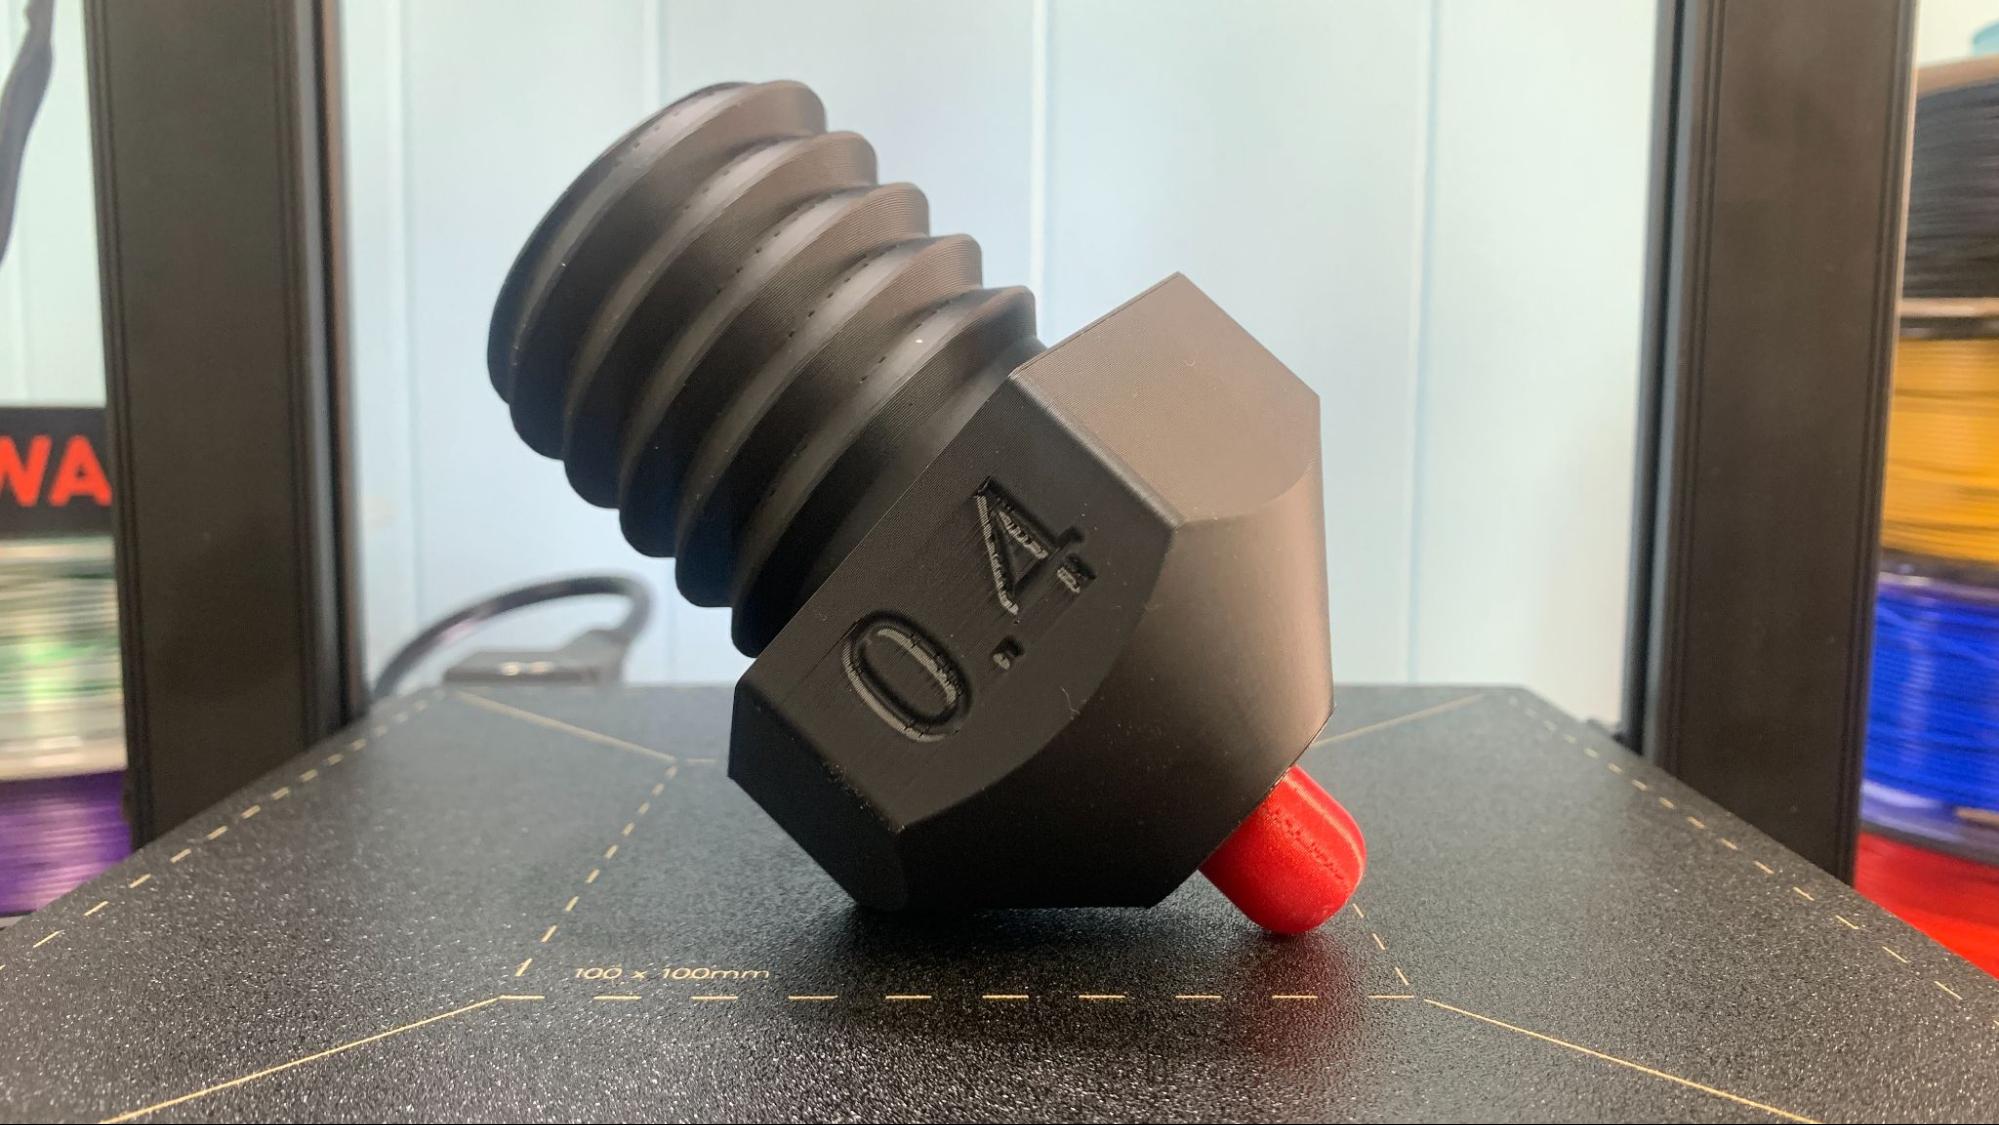
This giant nozzle is part of a flexi toy printed in budget priced black Jayo PLA and red Amazon Basics PLA at 150%, using a standard .2mm profile and 250mm/s speed. The marks inside the screw threads are from the Z seam, but the roughness around the numbers was unavoidable. Otherwise the walls and rounded surface are quite smooth. The “nozzle” printed in 1 hour and 13 minutes, while the “filament” portion took 10 minutes and 20 seconds.
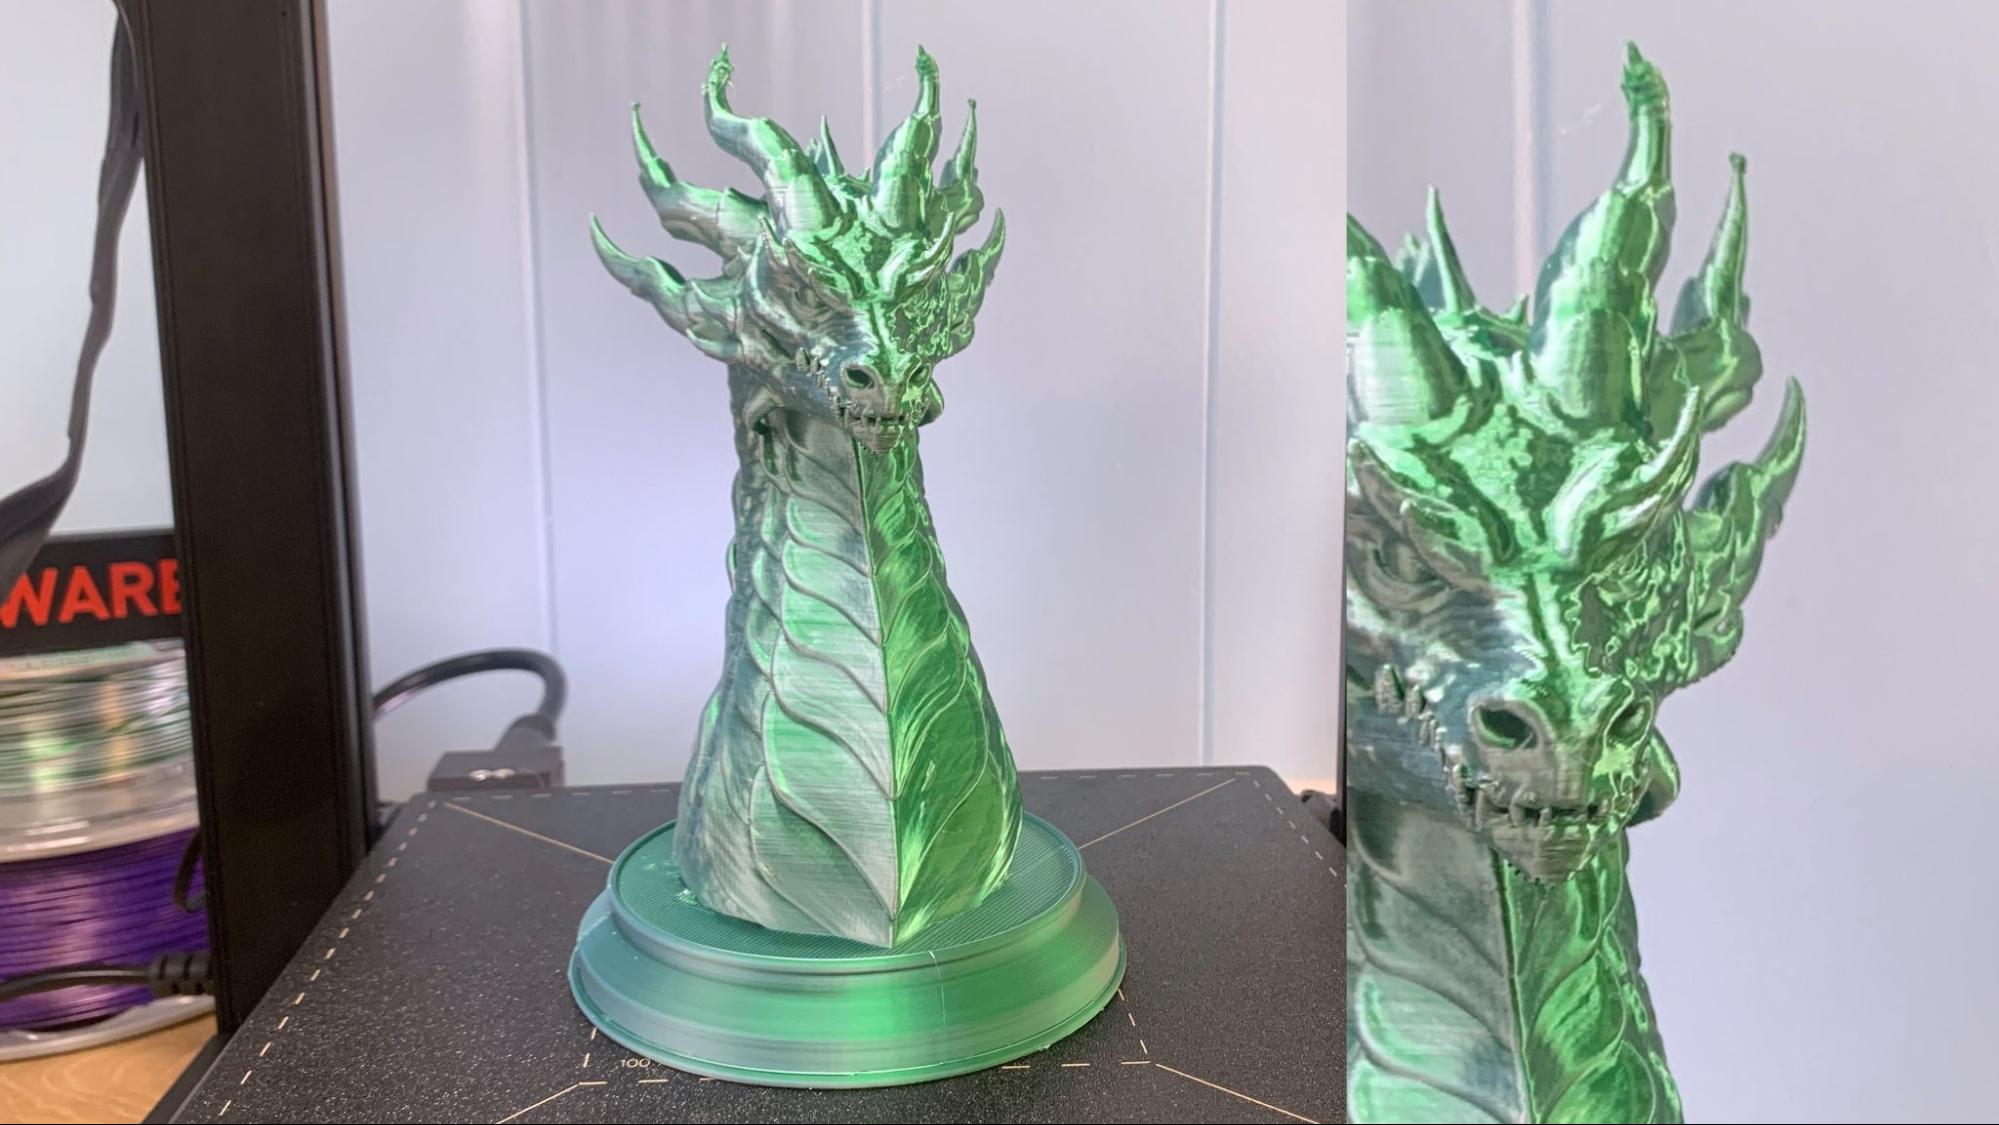
Wekster’s dragon print in Quantum White Green turned out 99% fantastic, with a goober on the very top of the horns where the filament didn’t cool fast enough. This print looks great, but took three tries to keep it on the bed, which shows why sometimes speed can backfire on a bed slinger. The last try included a raft, which finally had the sticking power to keep the supports in place. This printed at .2mm layer, using the default 250 mm/s speed and took 7 hours 38 minutes with tree supports.
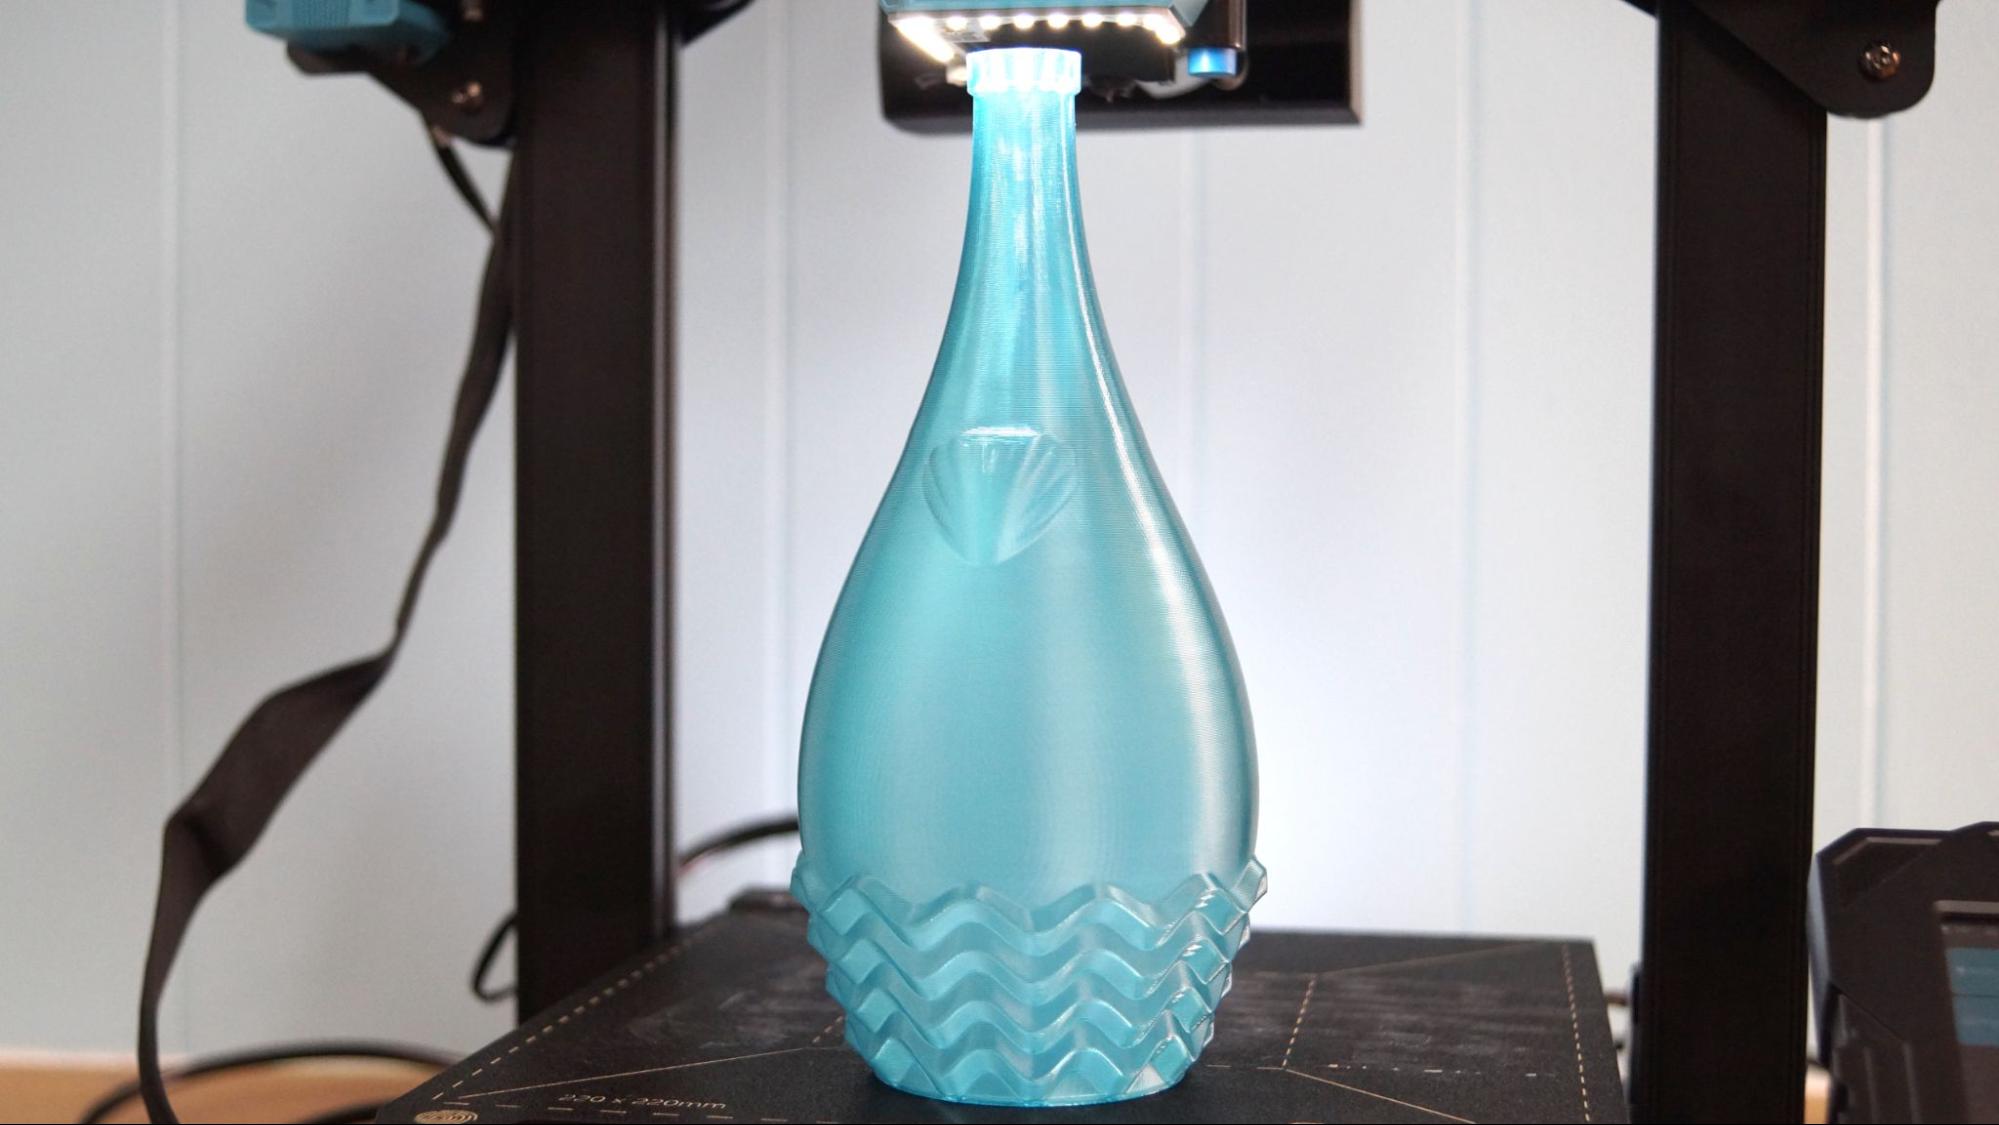
Petg printed without issue, and this vase mode Shell Bottle looks great. This is printed in IC3D Recycled PETG Blue Razz. Recycled PETG needs to run a little hotter and actually works very well for high speed printers. This print took 1 hour and 8 minutes using a .28 layer height and a 250mm/s print speed.
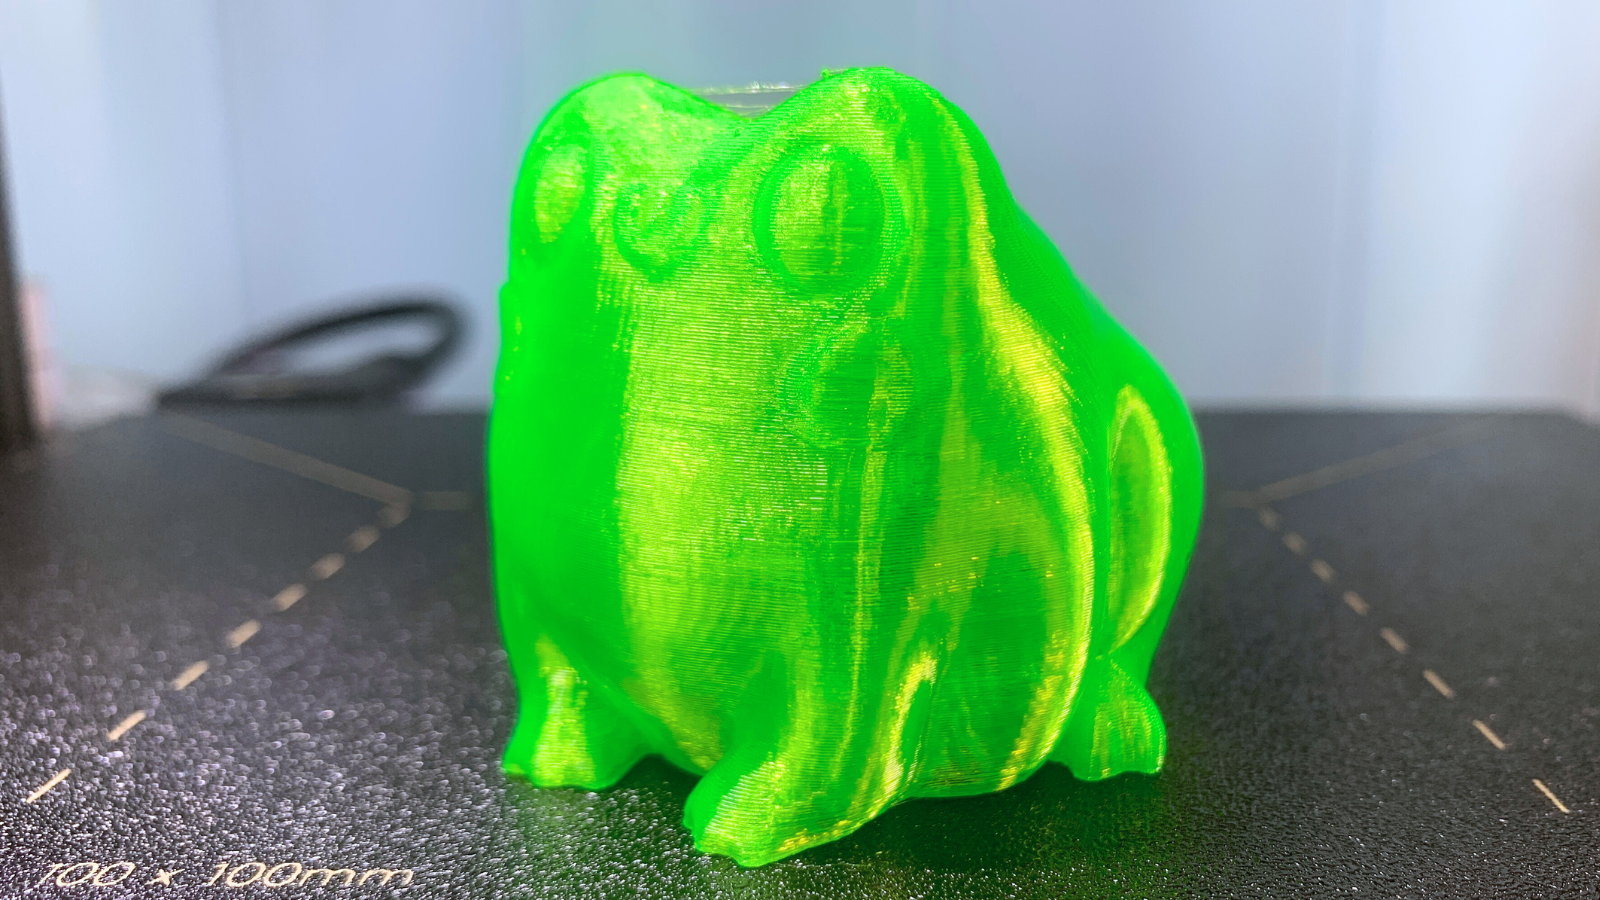
The SV07 printed TPU surprisingly well with the help of its direct drive. I did have to slow it down to 75 mm/s, but it printed with smooth even layers and just a tiny bit of wisps in 50 minutes and 22 seconds. This is printed in Matterhackers Green MH Build TPU with a layer height of .2mm.
Bottom Line
We’ve reviewed several printers with Klipper and the Sovol SV07 has been one of the easiest to set up and use. It really is an excellent choice for people who want to get into Klipper without the hassle of setting up a Raspberry Pi and also need a new Ender style bed slinger. It’s easy enough to use to be a beginner’s first printer, but experienced users will also enjoy having full access to Klipper.
It can’t quite go toe to toe with a Core XY machine, which has the added stability of a steady Z axis for smoother prints. But with a price tag of $339, the SV07 offers a lot of bang for your buck. It has many of the great features we like to see on any printer: dual Z axis, double-sided PEI coated flex plate, auto bed leveling and USB ports for adding a webcam for monitoring prints. The LED lights on the tool head are a nice touch and the cooling might be loud, but it really does the trick.
If you have the budget for a Core XY machine, check out the Creality K1 a super speedy all enclosed 3D printer for $599, or our favorite all around machine, the Bambu Lab P1S for $699. If you want a printer that works great right out of the box – and saves you some cash – have a look at the Neptune 3 Pro, currently available for $230.
MORE: Best 3D Printers
MORE: Best Budget 3D Printers
MORE: Best Resin 3D Printers

Denise Bertacchi is a Contributing Writer for Tom’s Hardware US, covering 3D printing. Denise has been crafting with PCs since she discovered Print Shop had clip art on her Apple IIe. She loves reviewing 3D printers because she can mix all her passions: printing, photography, and writing.
