Wooting One Analog Mechanical Keyboard Review
Why you can trust Tom's Hardware
Software: The Digital Profile
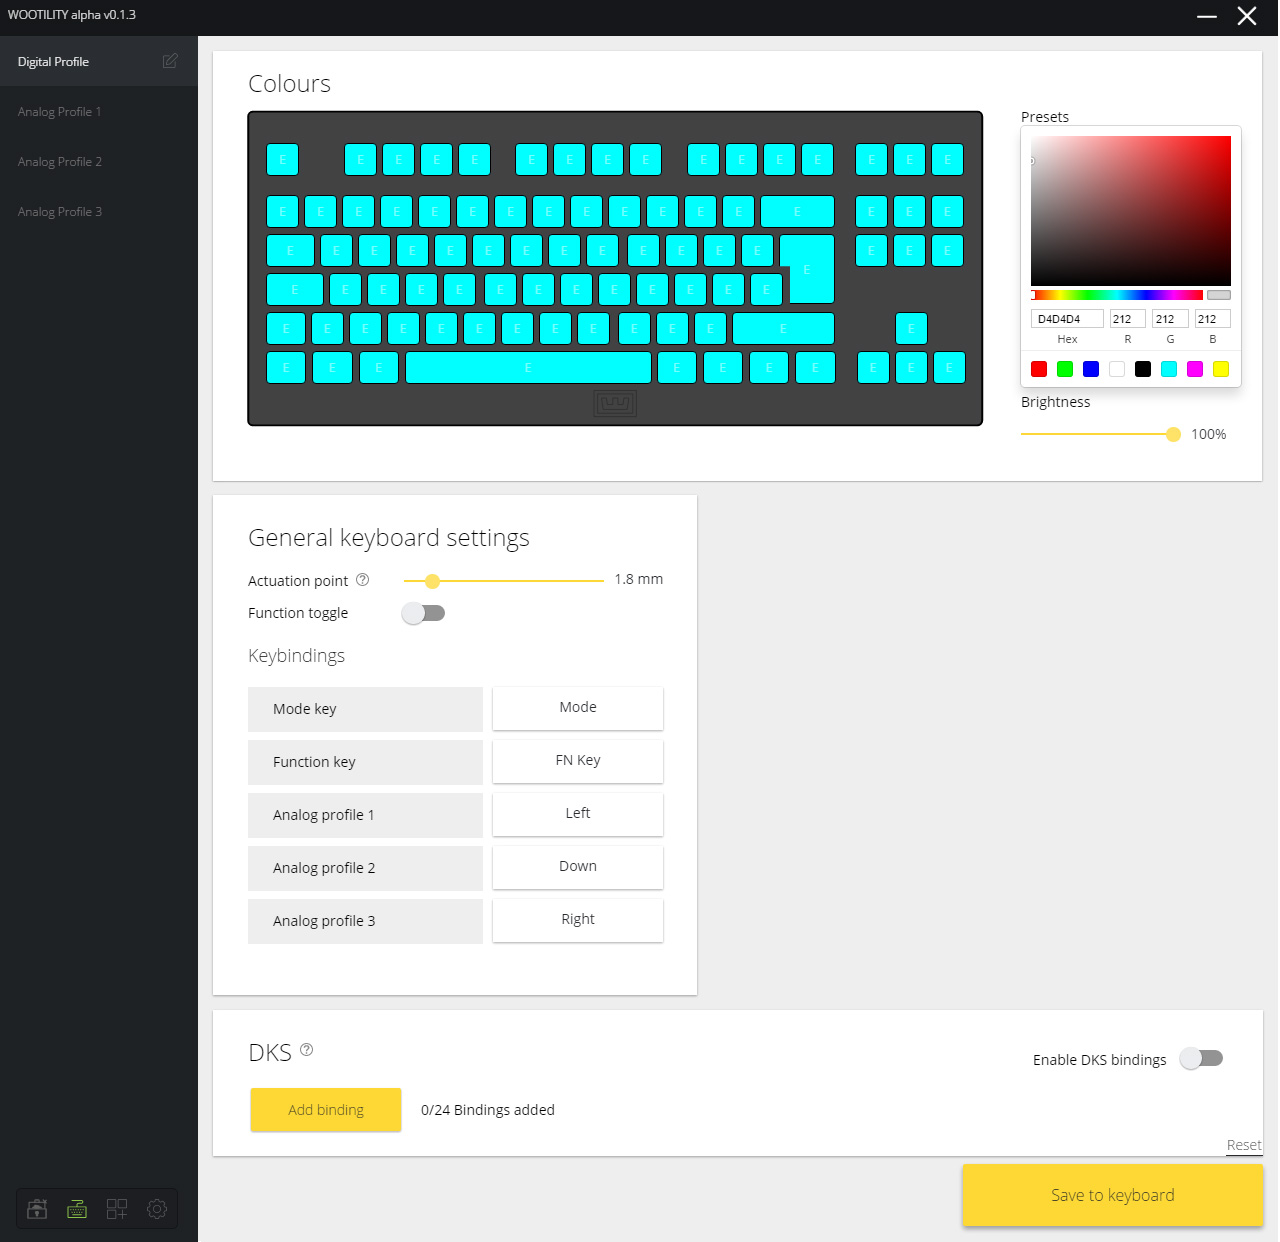
In the “Digital Profile,” under the keyboard GUI is “General keyboard settings.” Here, you can change the actuation point of the switches with a simple slider. You’ll note that this range is limited to 1.5-4mm, and it may also occur to you that an actuation point of 4mm on a switch that has a total travel of 4mm is...stupid and pointless. The range is there simply because that’s the range of analog sensing, and instead of trying to handicap the actuation point in the Digital Profile, Wooting left the range alone.
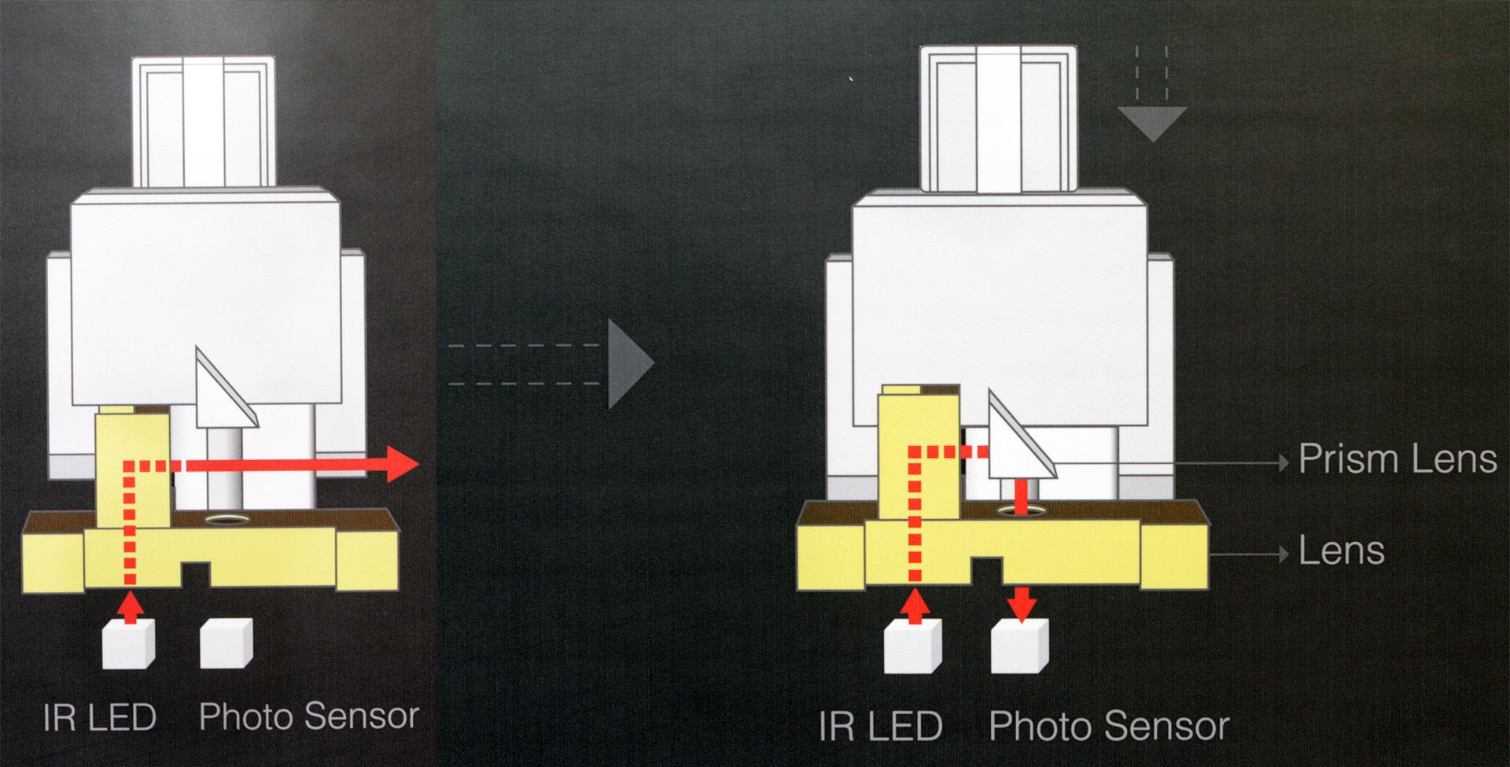
We’ve written before about why the analog range on Flaretech switches doesn’t begin until 1.8mm into the travel. In (very) short, it’s this:
The way the optical sensing is done on the desktop Flaretech Prism switch is that a light beam, pointing up from the PCB, gets shot across the opening of the switch shaft. When you press the key, the switch stem descends, and when the prism interrupts the beam, it gets bent 90 degrees, down to the photo sensor (which is also mounted on the PCB).
Astute readers will notice, though, that the switch specifications claim an analog range of 1.8-3.6mm, which conflicts with the Wootility’s 1.5-4mm slider. So what gives? Wooting told Tom’s Hardware that the precise beginning and end of the analog range depends on the keyID and switch. (This of course makes sense; all mechanical switches have certain manufacturing tolerances, and these switches are no different.) The analog range on these Flaretech switches, we’re told, begins anywhere from about 1.5-1.8mm and ends around 3.5-3.8mm.
Wooting said that no matter what, the sliders will always give you a slightly relative range, but it’s continuing to refine its manufacturing processes to get increasingly accurate.
That’s all fair, although it would perhaps be less confusing to users if the sliders were limited to that 1.5-3.8mm range instead of expanding all the way to 4mm.
In any case, it’s worth noting that being able to program the actuation point to anywhere within the normal pretravel range of most switches on the market--about 1.5-2.2mm--is a marvelous customization feature.
Get Tom's Hardware's best news and in-depth reviews, straight to your inbox.
Below the actuation point slider is the Function Toggle. As we mentioned, some of the keys on the Wooting One serve double duty as media keys and lighting controls. Pressing Fn+[key] also switches between profiles, by default. (You can also toggle between the Digital Profile and one analog profile by pressing the Mode key in the upper right corner of the One.)
By flipping on the toggle, you enable a Fn layer so you don’t have to press Fn first. In other words, the Fn toggle turns double-duty keys into dedicated media, lighting, and profile switching keys. This would be handy if, for example, you prefer having dedicated media controls instead of the Home, Pg Up, Pg Dn, etc. keys.
That brings us to the Keybindings area. This is where you can see the key bindings that you use to switch between profiles. These are easily changed; click the button(s) on the right (Mode, FN key, etc.) and press any key (but not a key combination) to create a new binding. Click “Save to keyboard.” It’s that simple.
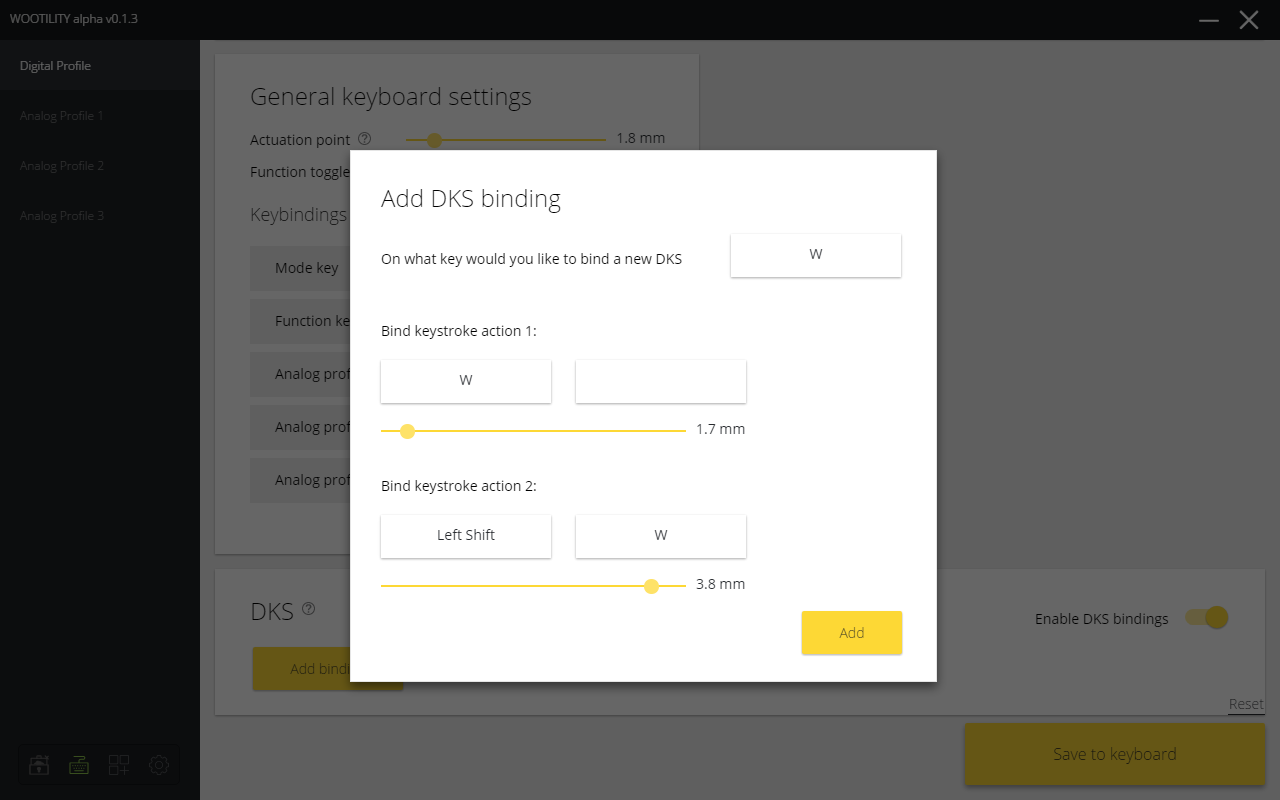
At the bottom of the Digital Profile section is the “DKS,” or double keystroke feature. Simply put, this allows you to program two commands to a single keystroke--essentially two actuation points within one stroke--and you can use the slider to set actuation points for both. This short video explains it nicely and succinctly:
Obviously, the feature has limitations. Although the “qQ” example in the video does a nice job showing how it works, using the feature for something like capitalization is obviously useless because to get to the capital Q you have to first get through the lowercase q. It’s like sharing a drink with someone, guzzling it all, and saying that you had to drink through their half on top to get to yours on the bottom.
In games, though, it has some use, and you can actually use it as a sort of de facto analog input in some cases, and also as a de facto macro tool. Both have significant limitations, but if you get creative, there’s a lot you can do.
The example in the video is using the same key to perform normal or quick casting as well as smart casting in League of Legends. Press partway down and hit the normal/quick casting, and press down further to perform smart casting.
In that same vein, if you want to put walking and sprinting on one key (like you can in analog mode), you can program the top part of the press to “W” and the bottom part to Shift + W. Or if you’re one of those people who likes to bind diagonal movement to Q or E instead of having to press W+A or W+D,you could use this feature to program the A key thusly: First actuation = A, secondary actuation = A + W.
You get the idea.
You can set the actuation point for either action anywhere between 1.5-4mm, which, as we noted above, is actually going to be within the 1.5-3.8mm range. Obviously you need to use common sense there so as to leave yourself enough travel for the feature to work. For example, you probably want to bind the first actuation point at 1.5mm and the other at, say, 3.5mm. By default, the first is set to 1.7mm, and the second is at 3.8mm (But hey, you do you.)
Note that you can bind a maximum of two keys per actuation point, and you can’t bind any mouse functions to any of them. The DKS feature is absent on the three Analog profiles.
MORE: Best Deals
MORE: How We Test Mechanical Keyboards
MORE: Mechanical Keyboard Switch Testing Explained
MORE: All Keyboard Content
Current page: Software: The Digital Profile
Prev Page Software: Overview & Lighting Controls Next Page Software: The Analog ProfilesSeth Colaner previously served as News Director at Tom's Hardware. He covered technology news, focusing on keyboards, virtual reality, and wearables.
-
SinxarKnights Oh it's finally out, nice! I really want one but my wallet is dead from starvation already. Frankly i'm surprised it took this long for someone to develop an analog keyboard. It was something I wanted from my earliest PC gaming days, having analog input on the keys would have been very useful for many games.Reply -
Mansen I'm glad you didn't give them too much criticism over the software considering the potentially game changing features. At least things like macros and light effects can be patched in later. Much harder to add hardware features for existing boards. :)Reply -
nimbulan While it sounds interesting, I feel like the extremely narrow 2.5mm of analog range will be too difficult to control precisely in the heat of the moment and will ultimately end up not being terribly useful. It's difficult enough on gamepads which have approximately twice as much range on the thumbsticks. It's not often that analog control actually gets used even on gamepads outside of driving and flying games anyway.Reply -
MrPleasantEXE Great review however as a BETA tester i wanna point some things out...Reply
The issue with the LEDs is most likely due to ISO being loaded on a ANSI keyboard (the on you received) as they have different amount of keys, to load ANSI for all LEDS you need to go to profile manager and load it, if you want to import my profile go ahead =D e04967ea-671f-6558-f4bc-19792281e905
As for the wobble issue, i personally don't see this unless i go to physically wobble them, for me its not a huge issue.
As for the software, you are using the alpha version which is different from the final version, or well will be, the version you have should have a feature similar to macro's.
Overall i love the review however software wise, the final version will be different.
-MrPleasant -
scolaner Reply19949515 said:While it sounds interesting, I feel like the extremely narrow 2.5mm of analog range will be too difficult to control precisely in the heat of the moment and will ultimately end up not being terribly useful. It's difficult enough on gamepads which have approximately twice as much range on the thumbsticks. It's not often that analog control actually gets used even on gamepads outside of driving and flying games anyway.
Yeah, that is a limiting factor. Currently, it's a limitation baked into the Flaretech switch. I need to do a deep dive on the structure of the other optical switches on the market and see if any of those would avoid that problem.
Also, I'd been thinking (but neglected to mention in the review) that I think a 5mm travel would work better.
But I'm withholding some judgment on that until I spend even more time with it. You get used to the analog feel. How much you can "get used" to that small range, I don't know yet. I'm sure some of those uber talented gamers out there would get it really fast. I'm old, slow, and inaccurate. ;)
-
nostalgion ive been wondering if this type of technology existed. i knew it could be done, and i knew i wanted it, and now. i cant afford it. but a massive praise to wooting for creating a dream, and making it reality, evolved gaming. a blacksmith is only as good as his tools, and his tools just got so much better.Reply


