Wooting One Analog Mechanical Keyboard Review
Why you can trust Tom's Hardware
Software: The Analog Profiles
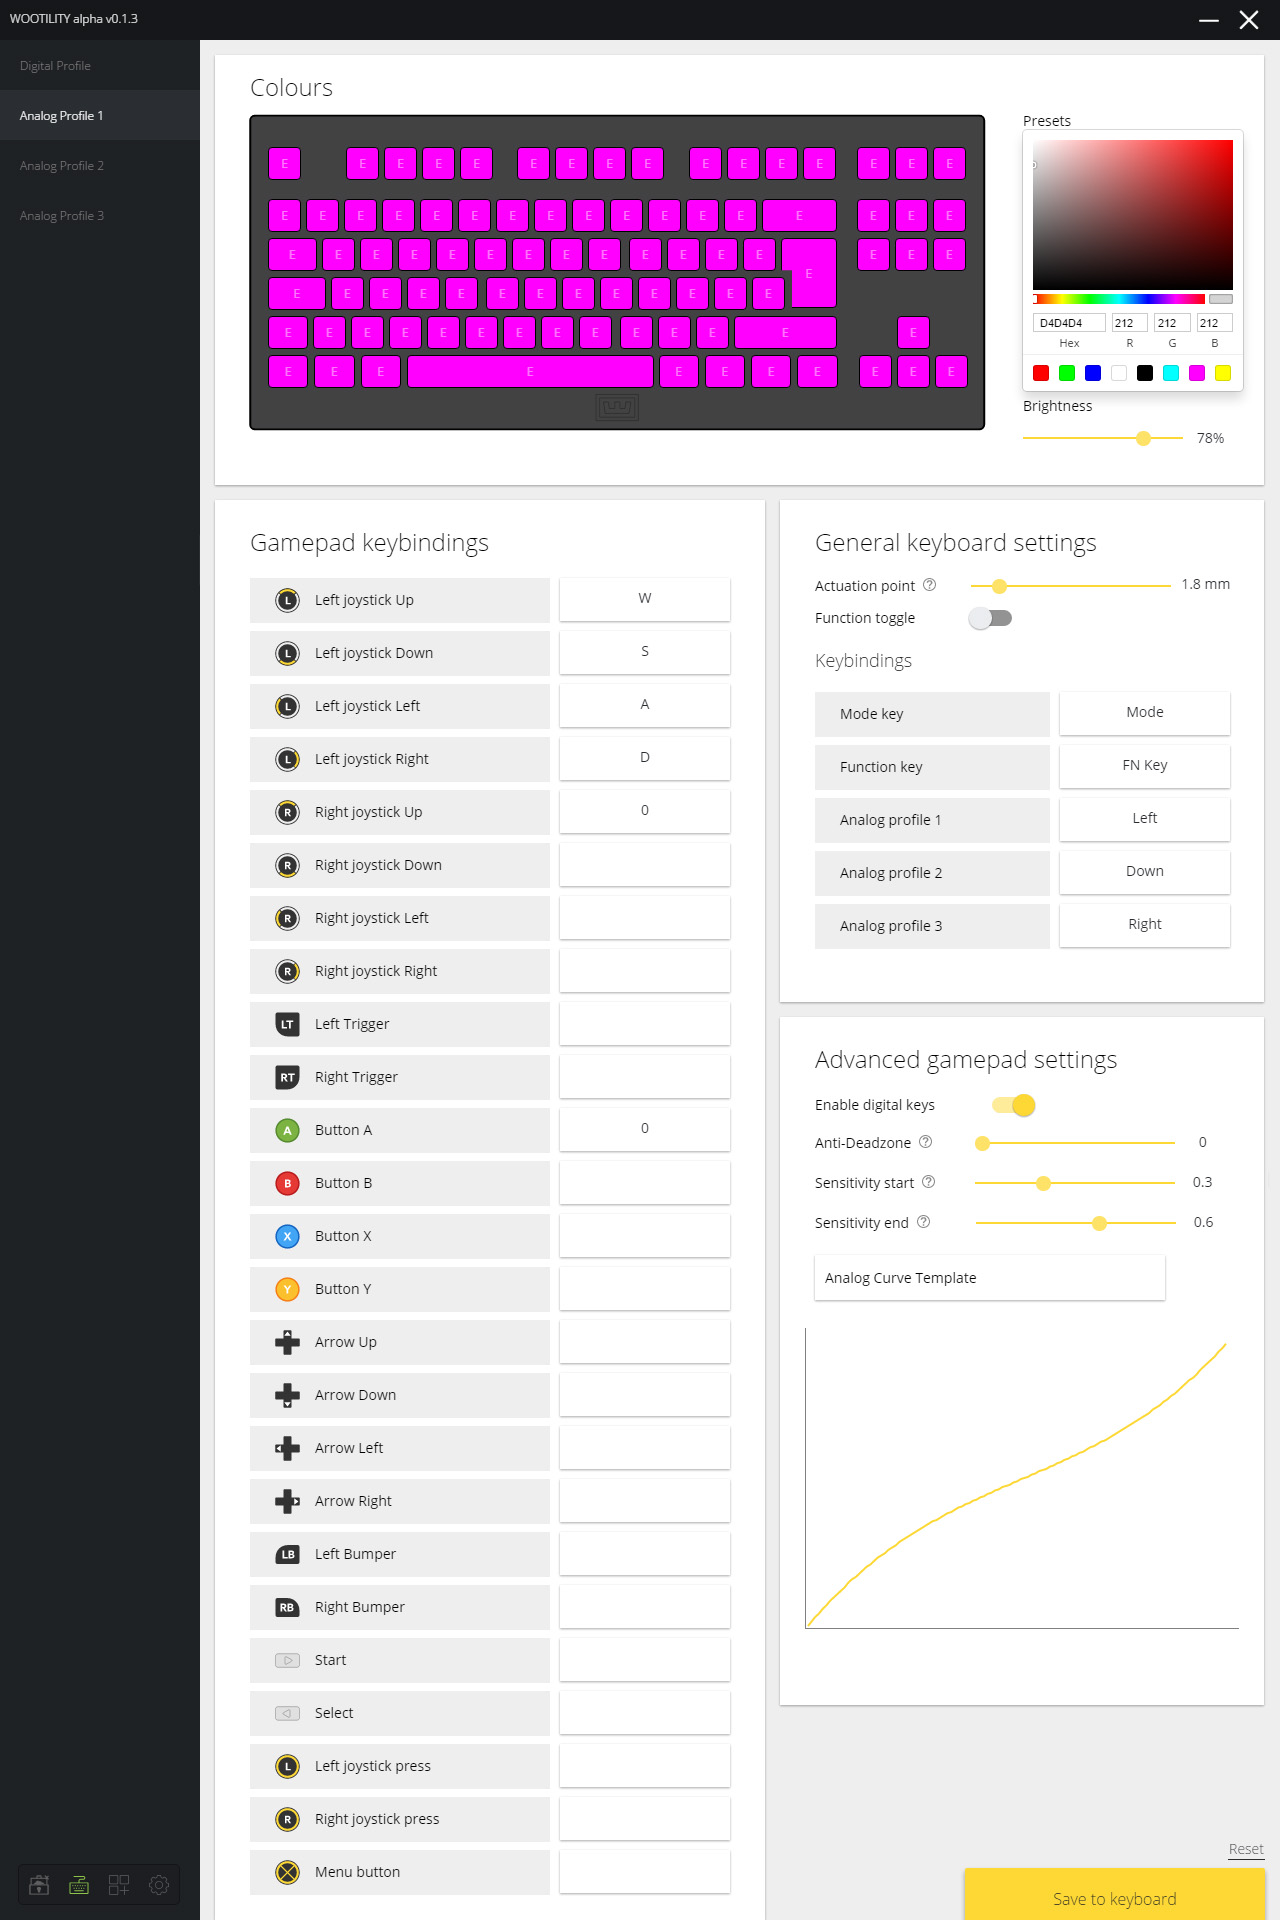
All three of the analog profiles in Wootility are eminently configurable. One of them is set for flying games by default. The other two just have the WASD keys preset as the left analog stick controls. Each of the three profiles is set to a different color by default. (As with the Digital Profile, you can quickly and easily change the lighting scheme.)
The “Gamepad keybindings” and “General keyboard settings” are where you’ll work the analog magic.
You’ll note that the former has two columns. The left column shows all the buttons, sticks, and triggers of an Xbox controller. The right column shows which keys are bound to those controls. When you’re in an analog profile and fire up a game, the game thinks the keyboard is a gamepad, and thus these bindings are your controls. Some of the bindings are preset (eg, the WASD keys bound to the left analog stick’s directional functions), whereas others are blank (represented by a “0”).
To assign a key to one of those gamepad controls, simply click the empty slot and press the key. Click “Save to keyboard” in the lower right corner, and Bob’s your uncle.
The “General keyboard settings” area of the analog profiles is the same as on the Digital Profile. However, note that changing the actuation point here actually does nothing; the feature is only for the Digital Profile. Wooting likely just left it like that because it was easier to copy over the same code. The final version of Wootility might handle that differently. When you configure the analog curves, you’ll effectively be adjusting the actuation point anyway, though.
Below that is the “Advanced gamepad settings,” which is where you can set your analog curve, and where the real fun begins.
Remember, every key on the One is capable of analog input. When you change the analog settings here, you change them for all of the keys.
Get Tom's Hardware's best news and in-depth reviews, straight to your inbox.
First, you’ll see the “Enable digital keys” toggle. Wooting built this in as a “just in case” sort of a feature. In its materials, Wooting said, “In this mode you can still use it as a regular keyboard but some games don’t play nice with keyboard + gamepad input at the same time. You can choose if you still want the normal keyboard enabled in the Analog mode.”
Below that is the “Anti-Deadzone” slider. A “deadzone” is a way to prevent users from accidentally engaging movement (or what have you) in an analog controller, such the joystick on an Xbox controller. There are “steps” within any analog control’s range; the more steps there are, the smoother and more refined the control can be.
So, simply put, if a given controller has 100 steps, the manufacturer could set the joystick’s deadzone such that it won’t actuate until step 25. With the Wooting One, there’s already a hardware deadzone (described above), so Wooting figured that employing an actual deadzone on the One made no sense. However, some games have their own deadzone built if for Xbox controllers, to the “Anti-Deadzone” slider is a way for you to get rid of that. Wooting noted that, for example, you can completely remove the in-game deadzone in Rocket League.
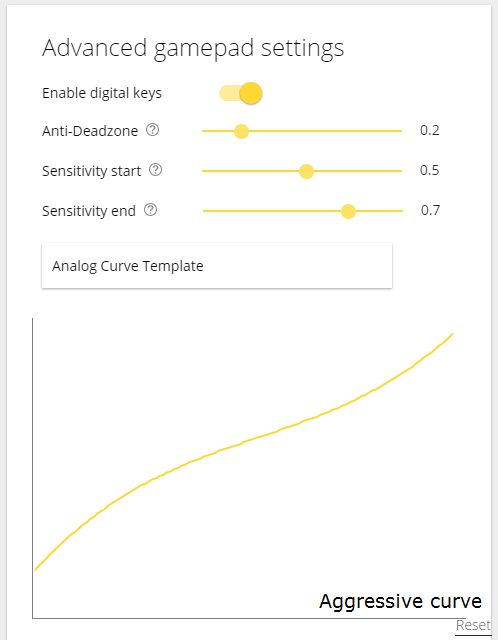
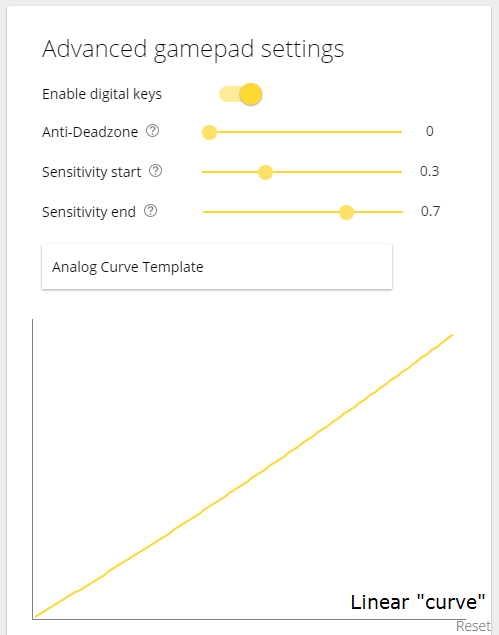
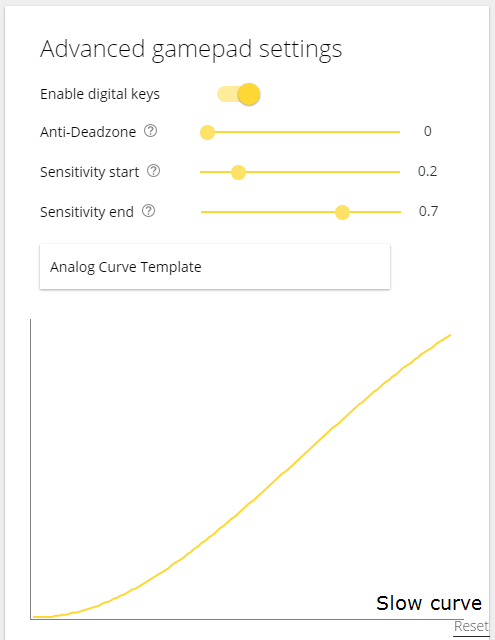
Next is the “Sensitivity start” and “Sensitivity end” sliders. Using these, you can shape your analog curve--that is, how the analog input plays out under your fingers. You can adjust either end of the sensitivity by clicking and dragging the sliders, and you’ll see that the line in the graph below will change its shape commensurately. For now, ignore the numbers and focus on the line on the graph; the numbers, at this point in Wootility’s life, are not particularly instructive.
You can go a little nuts with these sliders.
Short of endlessly fiddling with the sliders, you can also select from one of three preset curves. If you click “Analog Curve Template,” you’ll get a drop-down menu that lists “Linear curve,” “Aggressive start curve,” and “Slow start.” Each one will give you its own preset analog curve.
You can then use the sliders to further adjust any of the template curves that you choose.


This should be the point in the article where we’d offer suggestions on curves that work best in certain types of games and explain why. Afters hours of experimenting, though, we’re not going to bother; the whole thing is far too subjective.
And that’s a good thing--a very, very good thing. What we found is that from genre to genre, game to game, and even character to character, we would tinker and tweak to find just the right fit. Take a title like Overwatch and its cavalcade of characters to choose from. You may find that you want X analog curve for a speedy character and a Y analog curve for one of the bigger, slower ones. Or perhaps Z curve is ideal because of one character’s particular primary weapon.
Then, perhaps you switch to Star Wars: Battlefront, where you’ll want separate profiles for when you’re running, driving, or flying. Then Team Fortress 2, for which you may want to slightly adjust the settings for those characters. Then Rocket League, for which you’ll want a special driving profile. Then--well, you get the idea. It’s a rabbit hole.
For what it’s worth, after hours of gameplay and much tweaking of the settings, I personally found that I preferred this analog curve for FPS titles:
It gives me sensitivity early in the keypress, so I can start creeping slowly with a gentle press. I feel like I still have a lot of control over my speed in the middle of the press, and then when I panic (I always panic) in the middle of a firefight and mash the key down, I’m at an all-out sprint.
Suffice it to say that the “ideal” analog curve is completely subjective. But that’s the whole point--the One’s analog capabilities give you more control over your movement, and you can customize it quite granularly.
MORE: Best Deals
MORE: How We Test Mechanical Keyboards
MORE: Mechanical Keyboard Switch Testing Explained
MORE: All Keyboard Content
Current page: Software: The Analog Profiles
Prev Page Software: The Digital Profile Next Page The Analog Gaming ExperienceSeth Colaner previously served as News Director at Tom's Hardware. He covered technology news, focusing on keyboards, virtual reality, and wearables.
-
SinxarKnights Oh it's finally out, nice! I really want one but my wallet is dead from starvation already. Frankly i'm surprised it took this long for someone to develop an analog keyboard. It was something I wanted from my earliest PC gaming days, having analog input on the keys would have been very useful for many games.Reply -
Mansen I'm glad you didn't give them too much criticism over the software considering the potentially game changing features. At least things like macros and light effects can be patched in later. Much harder to add hardware features for existing boards. :)Reply -
nimbulan While it sounds interesting, I feel like the extremely narrow 2.5mm of analog range will be too difficult to control precisely in the heat of the moment and will ultimately end up not being terribly useful. It's difficult enough on gamepads which have approximately twice as much range on the thumbsticks. It's not often that analog control actually gets used even on gamepads outside of driving and flying games anyway.Reply -
MrPleasantEXE Great review however as a BETA tester i wanna point some things out...Reply
The issue with the LEDs is most likely due to ISO being loaded on a ANSI keyboard (the on you received) as they have different amount of keys, to load ANSI for all LEDS you need to go to profile manager and load it, if you want to import my profile go ahead =D e04967ea-671f-6558-f4bc-19792281e905
As for the wobble issue, i personally don't see this unless i go to physically wobble them, for me its not a huge issue.
As for the software, you are using the alpha version which is different from the final version, or well will be, the version you have should have a feature similar to macro's.
Overall i love the review however software wise, the final version will be different.
-MrPleasant -
scolaner Reply19949515 said:While it sounds interesting, I feel like the extremely narrow 2.5mm of analog range will be too difficult to control precisely in the heat of the moment and will ultimately end up not being terribly useful. It's difficult enough on gamepads which have approximately twice as much range on the thumbsticks. It's not often that analog control actually gets used even on gamepads outside of driving and flying games anyway.
Yeah, that is a limiting factor. Currently, it's a limitation baked into the Flaretech switch. I need to do a deep dive on the structure of the other optical switches on the market and see if any of those would avoid that problem.
Also, I'd been thinking (but neglected to mention in the review) that I think a 5mm travel would work better.
But I'm withholding some judgment on that until I spend even more time with it. You get used to the analog feel. How much you can "get used" to that small range, I don't know yet. I'm sure some of those uber talented gamers out there would get it really fast. I'm old, slow, and inaccurate. ;)
-
nostalgion ive been wondering if this type of technology existed. i knew it could be done, and i knew i wanted it, and now. i cant afford it. but a massive praise to wooting for creating a dream, and making it reality, evolved gaming. a blacksmith is only as good as his tools, and his tools just got so much better.Reply

