System Builder Marathon, Q4 2012: $2,000 Performance PC
Overclocking
We chose Gigabyte's Z77X-D3H based on our own recommendations. And yet, we suggested the Gigabyte board for enthusiasts on a more limited budget. We had apparently forgotten why the company's -D3H-series motherboards had previously been left out of our high-end builds since last year, only to remind ourselves on overclocking day.


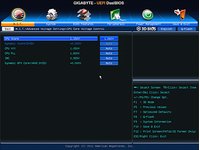
We wanted a constant voltage level between 1.25 and 1.30 V. But the Z77X-D3H's voltage regulator simply couldn’t do what we asked under the rigors of overclocking. Setting the firmware’s Loadline Calibration setting to High kept the voltage where we wanted for a while. But, again, full-load testing stress caused a protection circuit to reset the system. The same safeguard keeping us from destroying the board instead inhibited our overclock, even though the processor was never active for long enough during real-world testing to exceed 70° Celcius.


The Medium Loadline Calibration setting allowed the core to drop to around 1.23 V under full load, in turn limiting our processor's maximum clock to 4.4 GHz.
The issues didn’t end there however, as the Core i7-3770K eventually climbed to 84° Celcius, even at our more conservative settings. Had we picked a motherboard better able to contend with aggressive overclocking, the mediocre heat sink and fan would have been our next bottleneck to address.


A combination of overclocking consistency and value pricing put G.Skill's 8 GB DDR3-1600 kit in our system. Proof of that consistency came when it achieved the same DDR3-2133 data rate at 10-11-10-24 timing seen in our previous $2,000 build.
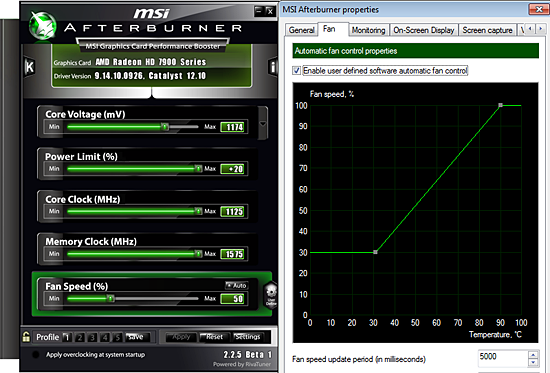
Graphics cards tend not to be as flexible as host processors when it comes to voltage levels and overclocked frequencies, but we didn't need any more voltage to push the limits of MSI’s Radeon HD 7970 cards.
Automatic fan speed wasn’t sufficient for our overclocked settings, though. So, we set a simple slope in MSI Afterburner’s advanced settings. We also set “Start With Windows” and “Start Minimized” under the program’s General tab.
Current page: Overclocking
Prev Page Building Our $2,000 PC Next Page Benchmark And System ConfigurationsGet Tom's Hardware's best news and in-depth reviews, straight to your inbox.
-
Crashman NovuakeYeah, should have gone for an ASRock board at the same price point...Maybe, maybe not, motherboard market has changed a little since the parts were bought and I've since seen some D5-series Gigabyte boards (with their better PWM) drop to $150...at least temporarily.Reply -
For the next SBM build, use the "SAMSUNG 8GB (2 x 4GB) DDR3 1600 (PC3 12800) MV-3V4G3D/US". People are posting low timings with very high frequencies. Plus it is low profile (half the size of every other non-heatsink memory modules on the market) and operates at 1.35v (overvolt it to 1.65v without worry).Reply
http://www.newegg.com/Product/Product.aspx?Item=N82E16820147096 -
kj3639 After building that awful piledriver rig you go ahead and do something like this... and totally REDEEM YOURSELVES!!!Reply
-Good Job -
herooftimex Suggested changes:Reply
Core i5 3570k - savings of $120
2x - MSI N670 PE 2GD5/OC - $800 (gtx 670 OC'd to 1019 core clock)
Rosewill FORTRESS-750 - $140 (80 plus platinum + 7 year limited warranty)
LIAN LI PC-7B plus II - $100 (gamer cases look tacky, less is more) -
Darkerson kj3639After building that awful piledriver rig you go ahead and do something like this... and totally REDEEM YOURSELVES!!!-Good JobThey really had nothing to redeem themselves about. They went with something a little different, just to try it out. Id rather they go off the beaten path so we can get a better idea of how these builds would turn out without having to buy and build them ourselves.Reply
Also, if they didnt try something different, they would almost always be cookie-cutter builds until the next big thing came out. No thanks!
At any rate, this is a really nice build. Have to say, though, I would be happy to win any of these. -
C12Friedman My first thought, I kept going back to it also, was the motherboard, why? I kept going 2nd page, 1st page, 2nd page, back to first page, confusion reigned in my head. Took me a while to get past the second page. But since it was addressed at the end of the article, I guess it's known.Reply -
One think to consider are both Q3 and Q4 systems future proof. It's important for games and serious task to be able to extend life of your PC and Q4 in this category is certainly penny wise but pound foolish.Reply


