The Mirror Maze PC: Building an Ultra-Quiet, Liquid-Cooled PC to Get Lost In
Get lost in a silent labyrinth of mirrors, nickel and chrome.
Now that the system is up and running, I have a confession to make: This is the first time I’ve successfully built a custom loop with hard tubing. I attempted this before in 2015 when I did my first ever custom loop, but due to a lack of experience planning my bends, I ended up having to resort to soft-tubing to complete that build.
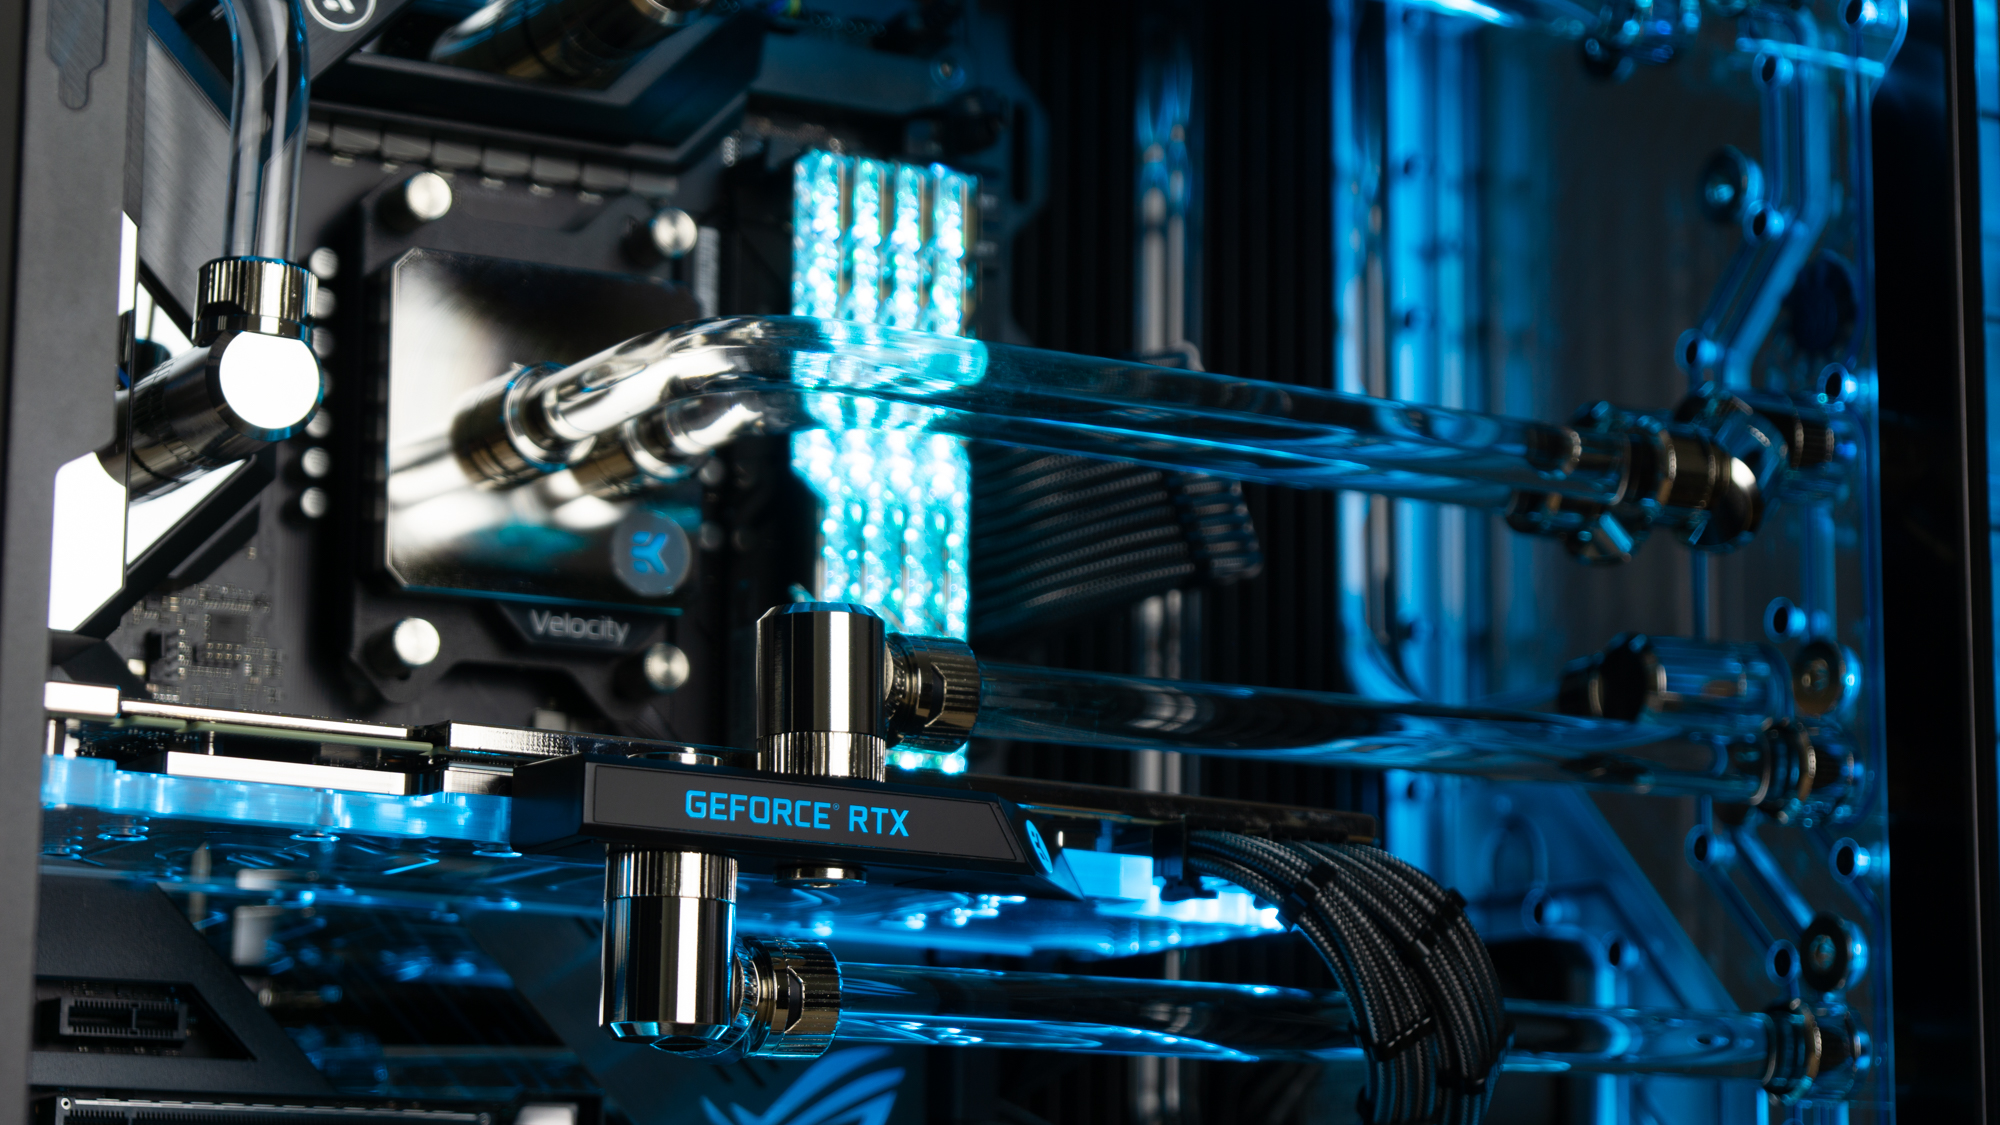
The Mirror Maze build, on the other hand, actually went quite well. The PC-O11 Dynamic is obviously an excellent foundation for a liquid build, and EKWB’s Quantum-Reflection distribution plate, paired with enough fittings, ensured I wouldn’t need more than one bend per tube. Sure, I ran into a few unforeseen hiccups during the build process, but these were easily sorted out. Even incorporating the Asus Crosshair VIII Formula’s VRM block into the loop went without a hitch.
Fan Curves, Overclocking and Thermals
Not everything went smoothly, though. Remember that I dropped the CPU block onto the Ryzen 3700X’s heatspreader during installation. And, as predicted, the tiny bump didn’t do thermals any favors. We didn’t need to run the chip at stock settings, but enabling AMD’s PBO (Precision Boost Overdrive) was the most I was comfortable with. With this, a Prime95 Smallest FFT’s load translated to a CPU temperature of 84.5 degrees, and the CPU boosted to 4002 MHz on all cores. That’s warmer than the CPU should run at under water, but it’s within norms and no cause for concern. So long as you get a CPU that's amenably to high clocks and you don't drop any of the key components, you should see better results here.
Next, I overclocked the EVGA RTX 2080 Super Gaming Black. Using MSI Afterburner we maxed out the card’s power limits (116%), and offset the core clock by +150 MHz and the memory by +1000 MHz. The GPU boosted to a stunning 2100 MHz under load, and under extended tests, the temperatures did not exceed 49 degrees in a 25 Celsius room. I was able to push the chip a little further to boost to 2115 MHz, and though it ran stable and temperatures were still in check, I saw some minor artifacting, so I backed off and kept it at the 150 MHz offset.
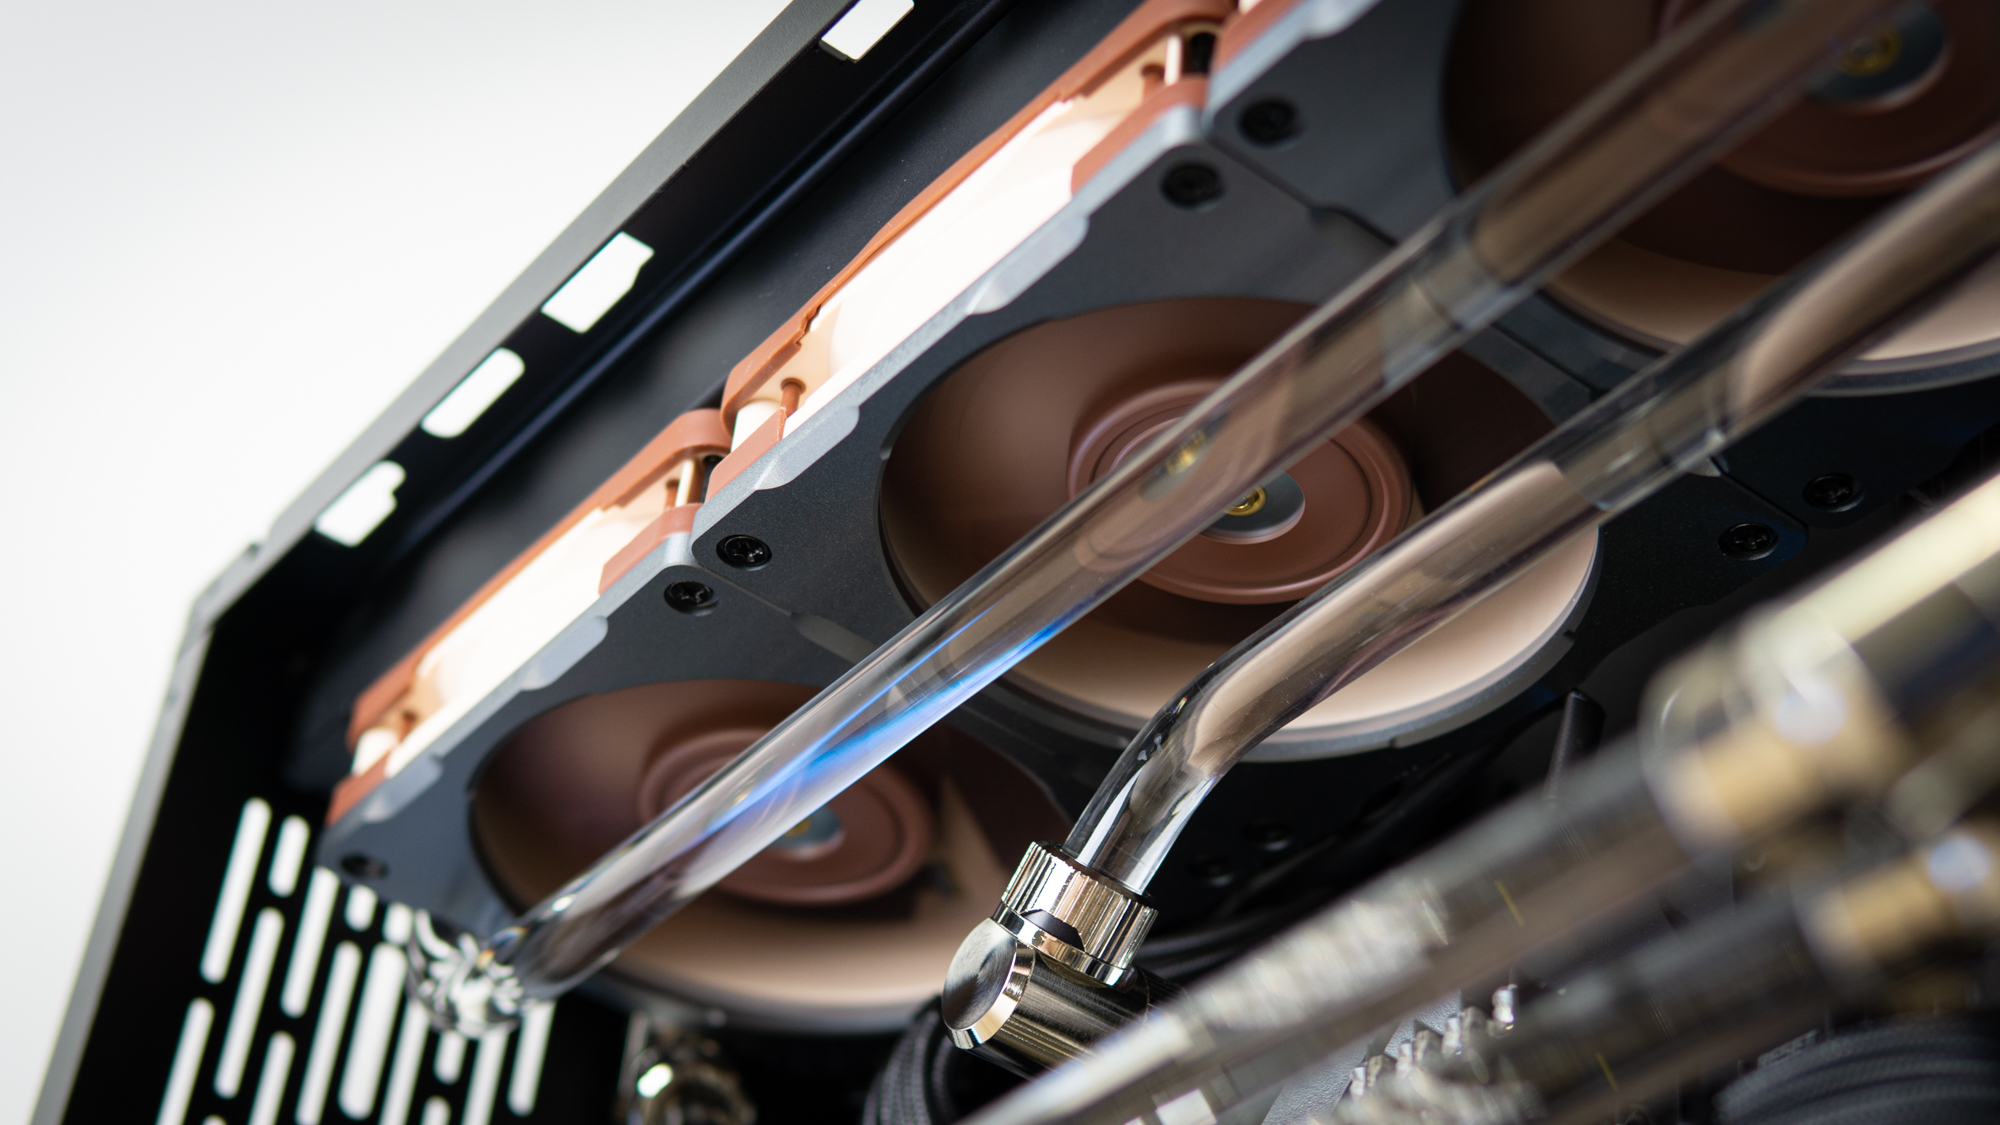
For cooling, I quickly found out a mistake in my loop: It lacked a sensor for coolant temperature. The pump speed we were able to fix at 35 percent, as this made it barely audible, and higher flow doesn’t help temperatures anyway. However, the fan speeds were driven by the CPU’s temperature, which isn’t helpful when the GPU is able to dump 250 watts (or more) of heat into the loop, but the loop isn’t instructed to dissipate this heat. This led the fans to ramp up far too quickly when the CPU briefly spiked in temperature. With some testing, I found that running the Noctua NF-A12x25 fans at 40 to 50 percent duty was more than enough to keep the system cooled well, with a solid safety margin, while remaining incredibly quiet. For reference, the coil whine produced by the graphics card isn’t loud, but it was audibly louder than the system’s cooling loop.
A future upgrade would therefore be to add a coolant temperature sensor to the loop, so that you'd be able to set a fan curve based off this reading and push the system to run even quieter. This would remove the noise spikes and only cool the fluid when it actually gets warm due to extended loads.
Nevertheless, we slapped on all the panels and dust filters and ran our usual 15 runs of Metro Exodus to simulate half an hour of gaming. This resulted in an average CPU temperature of 63.2 degrees Celsius, with an average GPU temperature of 46 degrees C. Those are good figures if you consider that both are overclocked. I also pulled out the dB meter and recorded a figure no louder than 38.8 dBA. If you’re familiar with my case reviews, you’ll know that that’s extremely quiet.
Get Tom's Hardware's best news and in-depth reviews, straight to your inbox.
Gaming Performance
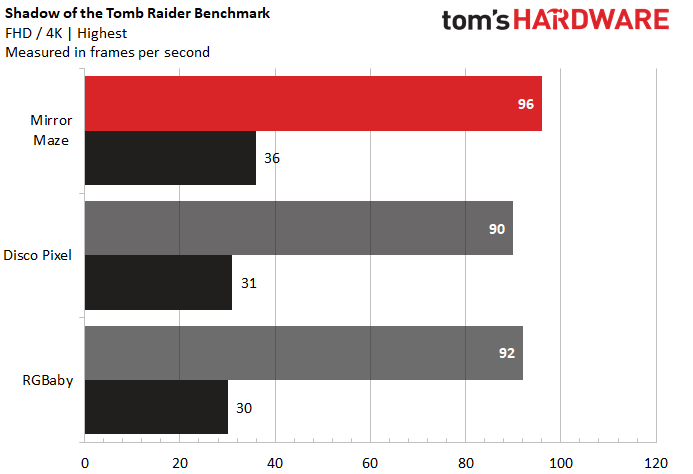
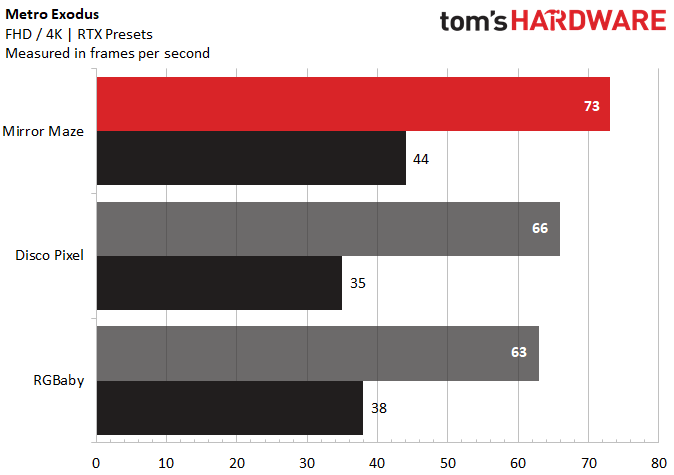
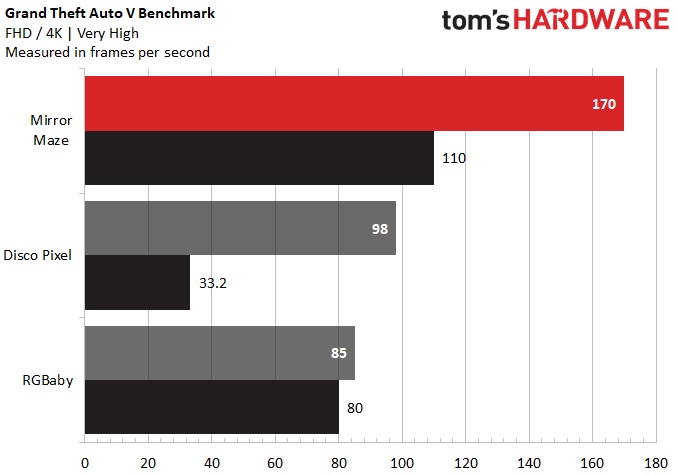
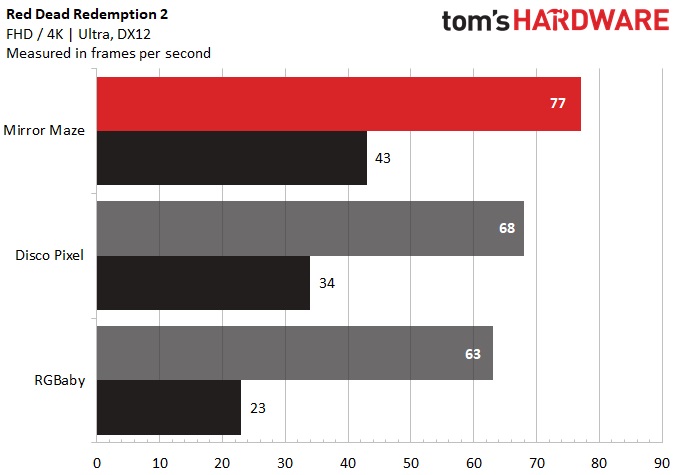
Performance in gaming is also good. That’s no surprise of course given that this system packs a more powerful GPU than our comparison builds, the Disco Pixel and RGBaby, not to mention the Mirror Maze build is liquid cooled and overclocked.
Performance in Shadow of the Tomb Raider and Metro Exodus appears to scale the way it should, though in Red Dead Redemption 2 and especially GTA 5 we saw performance increases that cannot be explained. Trust me, I set all the graphic setting sliders to the highest level possible in order to get performance to go down, closer to my colleagues systems, but the Mirror Maze has an inexplicable, very significant lead in these titles. I honestly don’t know why – liquid cooling and overclocking helps, as do game updates, but not normally that much.
Conclusion
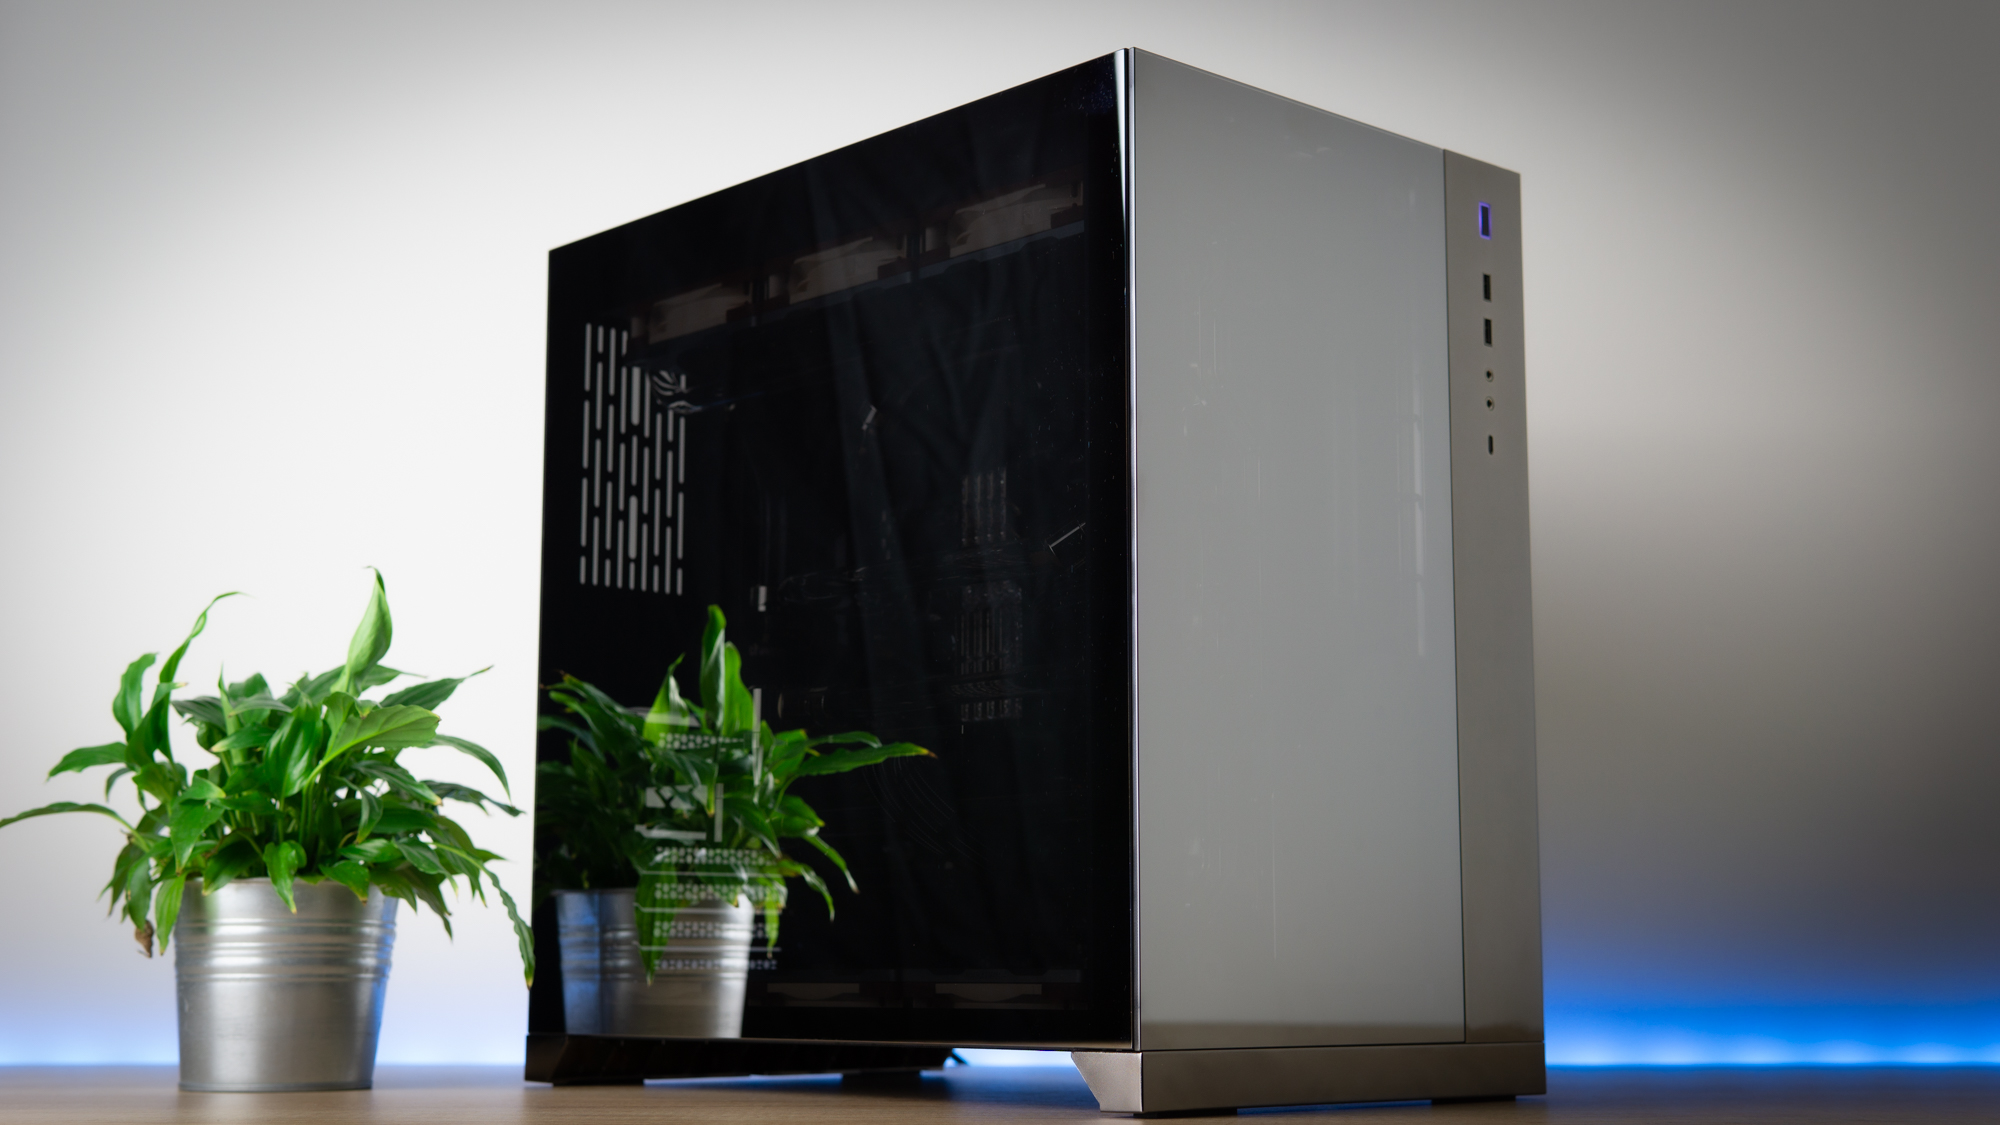
If you were to ask me what tips I could give you when doing your first hard tubing build, I would tell you to ensure you need no more than one bend per tube, get plenty of angled fittings, use a pressure tester -- and no, a distribution plate isn’t cheating (but it does make your life so much easier). Other than that, there’s no more to it than customizing the parts to your liking and taking lots and lots of time to do the build right. Because doing it wrong can be an expensive mistake.
The Mirror Maze build ended up roughly as I had expected it would. In terms of looks, the system means business by day with all the RGB lighting off. But at night, when it’s time to play, it’ll put on quite a show – either customized to your liking or going full-on rainbow.
Performance is impressive as well, with a lofty GPU overclock, and even so, the RTX 2080 Super’s core remained at a maximum temperature of 49 degrees C. Chuck a synthetic load on the CPU and GPU at the same time to maximize heat output, and the Noctua NF-A12x25’s easily manage to quietly keep thermals under control without even approaching what experienced gamers and enthusiasts would consider 'loud.'
The primary hurdle with a system like this -- and it's a big one, particularly in times like these -- is cost. The primary components (sans cooling) in our build will set you back ~$2,905, but with all liquid cooling and related bits, you'll looking at a price tag of about $4,350.
No one ever said custom, near-silent cooling on a high-end PC was going to be cheap. If you want to save yourself some time and money (OK, a lot of money) and don't mind taking a step down in the aesthetics department, you could opt instead for a good AIO cooler and and a premium headset to drown out the extra fan noise. But if you have the cash and time to spend on a custom loop, a build like our Mirror Maze will serve you well for several years to come, while standing out as a show piece wherever you decide to put it.
Niels Broekhuijsen is a Contributing Writer for Tom's Hardware US. He reviews cases, water cooling and pc builds.
-
Endymio >" It comes with mirrored tempered glass panels that, while making it a major pain to photograph, also make it perfect for the mirror maze theme we’re going for...."Reply
Is that Niels' face reflecting off the glass in frame #2? :) -
eklipz330 Nice build, minus the fans. Totally undoes the entire build, should have went with a neutral color.Reply
And before you use the "it's the best performing fan" argument, you could have used the money saved by getting cheaper fans to upgrading to a better CPU. You would have had a better performing computer. Or just get fans with LEDs already. White fans with nice LEDs would have complimented the chrome finish very nicely. -
trance77 Great build except for the fans, don't care how good they are would never use them in that colour.Reply -
everettfsargent Such a waste of time and money. I spent less then $500US (including tax) and get to 90% of what you get on the CPU side of things (same 3700X). Pre-built system to boot. No time and almost no money.Reply -
everettfsargent Oh and in just another three days you can be the prideful owner of last year's GPU!Reply -
nofanneeded This Guy gave all the idea 5 years ago (all SELF ENGINEERED DIY)Reply
Project R40 2015
-OwB5al5KXgView: https://www.youtube.com/watch?v=-OwB5al5KXg
Project R80 2016
KrsfkTXDpisView: https://www.youtube.com/watch?v=KrsfkTXDpis
Project Auros 2017
ozOm9NuSEQ0View: https://www.youtube.com/watch?v=ozOm9NuSEQ0 -
w_o_t_q First Mb is total overkill and they don't use water cooling capabilities ... No sense to buy if not use VRM water cooling ... especially in Halo build ... Second vents they look ugly in this case use Lian Li ones ... with RGB they would look much better ... or go with nice RGB form EK or Corsair system ... Lazy job ... ;)Reply -
elli0t_ This build is sweet. Don't mind the fans either, especially with the reflective glass. If going with the Halos though I'd prob just get Arctic P12's.Reply
I'd really like to see more photos of the top fittings of the side rad, and how much clearance there is up there. I'm considering a similar setup but with a 54mm top radiator. Any idea if that would work with this distro plate? I also won't be doing VRM in the loop. Just CPU, GPU, 54mm top and 30mm side rads. Cheers
