GETIHU PB-01 Power Bank Tear-Down
Charging Test
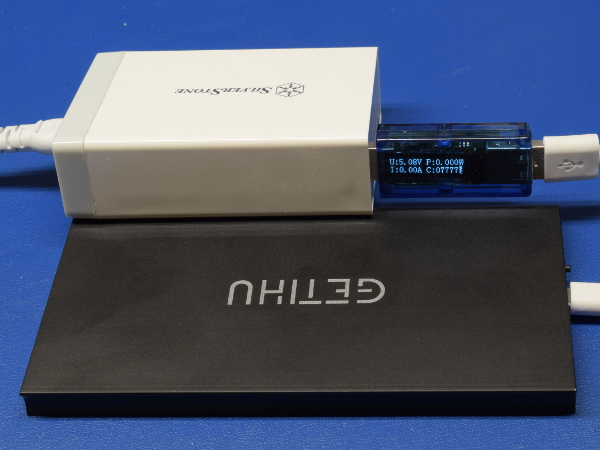
Charging the PB-01 after running it flat using the bundled LED lamp yields a 7.777Ah charge on this run. At 5.04V coming from my SilverStone UC01 adapter for most of the process, we get 39Wh going into the power bank. That's in line with the ~37Wh you can expect to be stored in a typical 3.7V/10Ah lithium battery, albeit at an improbable 95% charging circuit efficiency.
Is the power bank incredibly efficient? Does it have a fake rating? Could it be something else? Let’s see how much energy can be pulled out of it for possible clues.
MORE: QQC Q-Swap Power Bank Tear-Down
MORE: SilverStone PB06 USB Power Bank Tear-Down
Discharge Test
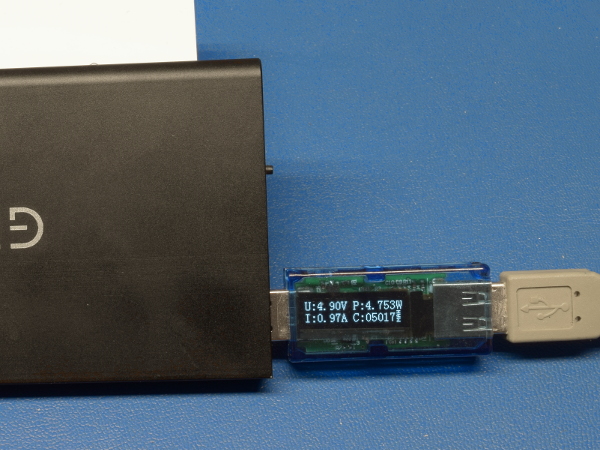
Discharging the PB-01 at 1A constant current yields a usable output capacity of about 5.2Ah at 4.9V (this photo was taken shortly before the power bank cut off at 5.17Ah, rounded up to 5.2Ah to offset the USB meter’s own power draw). That's only 25.5Wh out of an allegedly 37Wh cell. Either the DC-DC boost converter is horribly inefficient or something suspicious is going on.
When GETIHU contacted me about my initial Amazon review, where I pointed out the lower-than-expected capacity, I was told the power bank uses a shallower charge-discharge cycle for improved endurance. At the time, I decided to accept this response as plausible until proven otherwise. I updated my review accordingly and GETIHU refunded my purchase.
MORE: QQC Q-Swap Power Bank Tear-Down
Get Tom's Hardware's best news and in-depth reviews, straight to your inbox.
MORE: SilverStone PB06 USB Power Bank Tear-Down
Opening Up
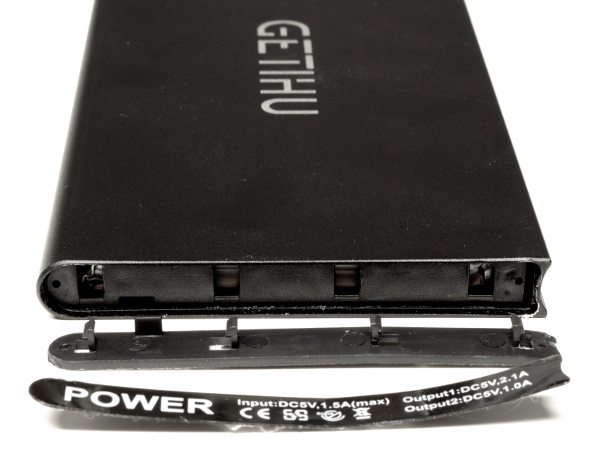
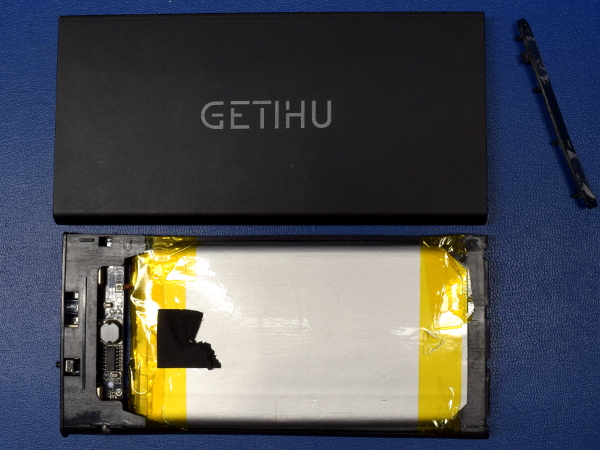
How do you open one of these things up? First, you have to use a thin blade to get under the end cap’s sticker. Once it is out of the way, gain access to the clip pins attaching the end cap to the internal framework. With all four clips disengaged and the cap removed, the internal frame containing the polymer cell and circuit board can be pushed out through the front.
Strong adhesive between the sticker and cap, combined with no significant gap to pry from, make it seemingly impossible to remove without marring the housing’s finish.
MORE: QQC Q-Swap Power Bank Tear-Down
MORE: SilverStone PB06 USB Power Bank Tear-Down
Thin-Lipped
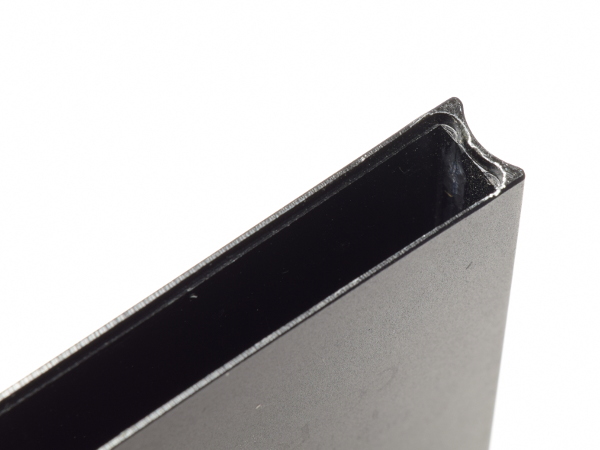
What prevents the power bank’s innards from spewing out when force is applied to either end? A 0.25mm lip milled around the inside of the extruded aluminum housing, giving the ends something they can rest against.
I was surprised to see the concave end flat on the inside apart from the milled areas. Then again, that would have required a more complex and delicate extrusion die.
If you ever take one of these apart, beware of how the sharp machined edges tend to bite into tape or anything that sticks out when you re-assemble it.
MORE: QQC Q-Swap Power Bank Tear-Down
MORE: Silverstone PB06 USB Power Bank Tear-Down
The Prize
After much prying and pushing, the battery, circuit board, and plastic tray securing everything within the aluminum housing slide out as a neatly packed assembly. Compared to loose cells or cells shoved down into the housing with double-sided adhesive, which we've seen in other cheap power bank tear-downs, I like what GETIHU has here.
MORE: QQC Q-Swap Power Bank Tear-Down
MORE: SilverStone PB06 USB Power Bank Tear-Down
Truth Exposed
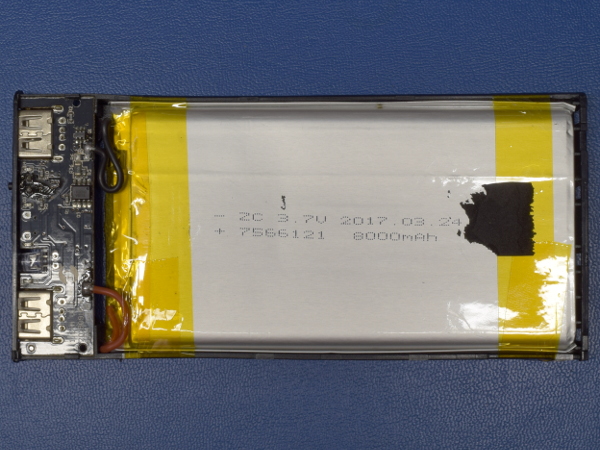
Flipping the internal assembly over exposes the truth about the power bank’s unexpectedly lower capacity: if its markings are to be believed, the cell in this 10,000mAh power bank is actually only rated at 8000mAh. For this 29.6Wh cell to deliver 25.5Wh, as previously measured, the boost converter needs to be better than 86% efficient to offset the loss of effective capacity as current draw increases.
Since GETIHU lied about the unit’s lithium cell being 10Ah, let’s verify whether the 8Ah rating printed on it is genuine with a 1A constant-current discharge test.
MORE: QQC Q-Swap Power Bank Tear-Down
MORE: SilverStone PB06 USB Power Bank Tear-Down
Truth or Dare?
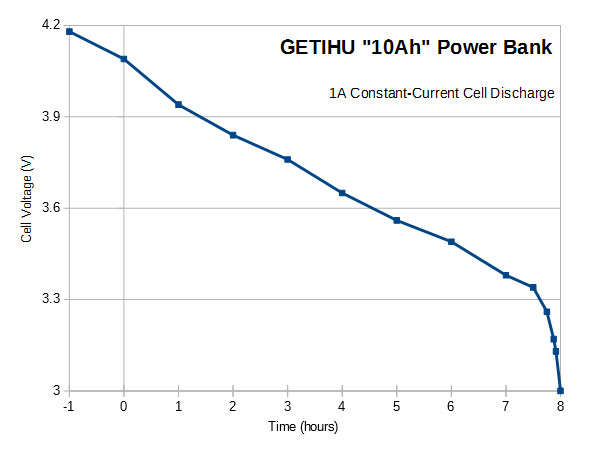
The cell started out with a 4.18V open-circuit voltage, dropped immediately to 4.09V when I turned on my load, and lost a steady 100mV/Ah until the seventh hour, where it began its increasingly steep dive from 3.38V to 3V. Since this C/8 discharge is harsher than C/20 cells are typically rated at, and the cell still held above its cut-off voltage for eight hours, its 8Ah rating is indeed true with 29.3Wh on the curve.
When I contacted GETIHU to share my discovery via both email and an updated Amazon review, its support staff was allegedly shocked that the OEM short-changed them on the cells and purportedly started an investigation into the matter. I was also offered a $35 Amazon gift card for my trouble, and have yet to respond to this offer at the time of writing.
MORE: QQC Q-Swap Power Bank Tear-Down
MORE: SilverStone PB06 USB Power Bank Tear-Down
Some Fillers Required
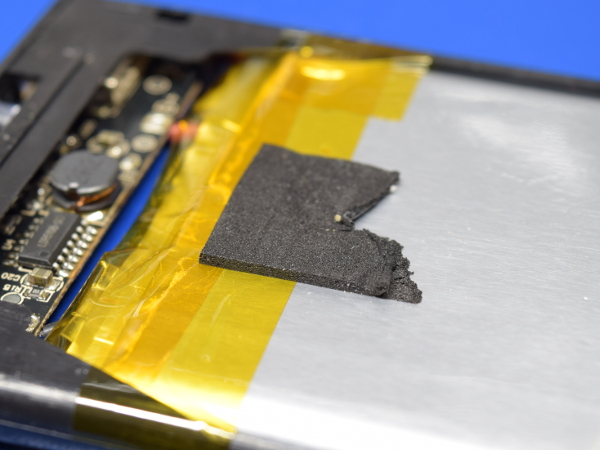
Of the PB-01's 10mm total thickness, 1.8mm are taken up by the extruded aluminum walls, 7.3mm by the lithium cell, and the rest by self-adhesive foam pads on the cell to keep it from rattling around inside.
While it may be possible to cram a 9Ah cell in there, doing so would leave no space for the cell to expand and delaminate should something go wrong. Since delamination provides lithium-polymer cells some degree of intrinsic self-limiting, as layers that no longer touch each other cannot produce any meaningful current, confining them in a rigid body with no room to expand greatly increases the rate of energy release, rendering a hazardous situation worse.
MORE: QQC Q-Swap Power Bank Tear-Down
MORE: SilverStone PB06 USB Power Bank Tear-Down
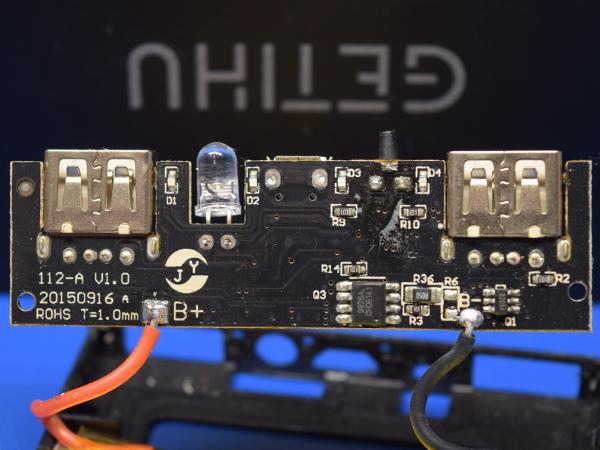
First Look At The PCB
Soldering quality varies considerably between components and even more so between through-hole pins. Leftover flux in the switch area makes it obvious that the switch either got reworked or manually soldered. Whatever the case may be, there's a definitely lack of consistency.
MORE: QQC Q-Swap Power Bank Tear-Down
MORE: SilverStone PB06 USB Power Bank Tear-Down
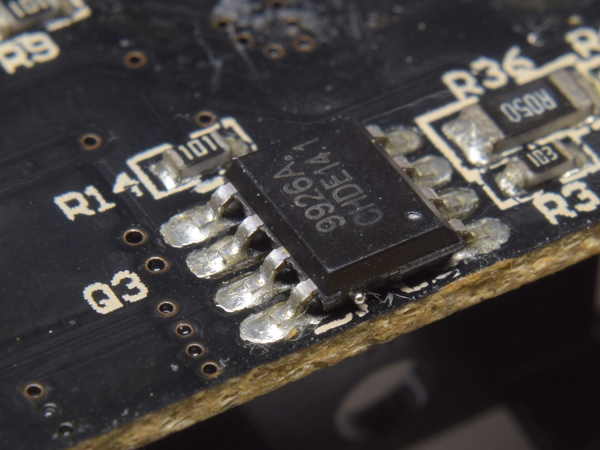
Drag Queen
Taking good pictures of small details is quite challenging, and I could not quite manage to do it in this case. Here, the bend at each lead's tip shows a tiny amount of solder on top, with the first two pins almost tented over with solder. This is typical of drag-soldering. I could not find signs of glue on any surface-mount component, which might mean the top was reflowed in an oven, while the bottom was assembled by hand. The two resistors to the right do not look like oven-reflowed jobs either.
MORE: QQC Q-Swap Power Bank Tear-Down
MORE: Silverstone PB06 USB Power Bank Tear-Down
-
dudmont Interesting. Doubt the OEM ever expected someone to get quite so "intimate" with their product. It's articles like this that keeps OEMs vaguely honest in this day and age. Who needs UL when when Toms will give a product a full rectal?Reply -
Daniel Sauvageau Reply
:)20716732 said:Who needs UL when when Toms will give a product a full rectal?
Just keep in mind that UL, CSA, VDE, etc. mainly deal with electrical, fire and mechanical safety issues, not misleading or fraudulent marketing or performance. Fraudulent claims is something for the consumer protection, advertising standards and other similar agencies to deal with. You could get the most blatant PoS falsely advertised gizmo you can conceive of UL-listed as long as it passes safety checks for whatever applicable UL categories you apply for. If your gizmo has power outlets on it, you can probably get it UL-listed for UL 1363 (relocatable power tap) regardless of how unsafe unrelated additional functions might be as the UL listing pertains exclusively to the power bar function and related aspects of the product. Secondary features such as built-in USB ports would be covered separately under something like UL/CSA 60950 which is specifically about information technology equipment safety. -
BaRoMeTrIc This is the problem with open trade. These products get into the U.S. from China via amazon, newegg, ebay... They slap fake UL stickers on there, fake specs. No one checks them out or holds them accountable. We need better regulation.Reply -
dudmont Reply20717076 said:This is the problem with open trade. These products get into the U.S. from China via amazon, newegg, ebay... They slap fake UL stickers on there, fake specs. No one checks them out or holds them accountable. We need better regulation.
Do you think someone working for uncle Sam would have done what Sauvageau did(and the answer is no, because someone from the electronics industry is already offering any competent engineer from Gov. who would checking stuff like this a job)? Call me a strong skeptic. Government, business, my neighbors, everyone but my own flesh and blood is to be trusted, but verified(and possibly not even trusted in the least). -
Daniel Sauvageau Reply
I haven't had one of those yet, so no first-hand comment on that but one of my friends who owns a few Anker accessories is eagerly waiting for me to get around to tearing into one and see if I'll find anything that might shake his confidence in the brand.20722606 said:any brands to recommend here, or just stick with Anker
Between power banks I've shown here so far though, the SilverStone PB01's track record for poorly soldered micro-B ports (two out of three, though I haven't opened the third one to check, only saying so because it hasn't failed me yet, unlike the 2nd unit whose micro-B was practically DOA) is very unfortunate and although the Q-Swap is neatly built, it is expensive compared to countless other 10Ah-class alternatives. The GETIHU may have been ok-ish for the price had it been advertised at its actual 8Ah. -
Gam3r01 Im using an Anker powercore 10k and Im liking it, but it sure would be great to see something this in depth on it.Reply -
icycool_q1 I love reading your tear-downs.Reply
These companies should start paying you to get their products right!
