Wall-Sized 3D Gaming With Nvidia 3D Vision
A couple of months ago, we built a 3D dual-projector system, just like in movie theaters. Now, we're comparing it to Nvidia's 3D Vision projector-based setup to see which option offers the best consumer-level 3D experience for your living room.
Installation And Setup
Installing a 3D Vision projector system is incredibly easy compared to setting up a polarized dual-projector system. For example, you do not have to worry about filters that need to be mounted or screen calibration. Some hardware mounting is involved, but it's a straightforward affair.
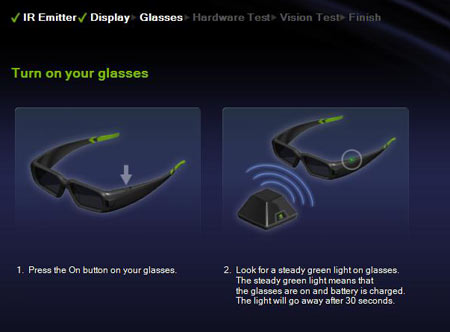
Before you do anything else, plug your 3D Vision glasses into the included USB cable to charge them. There's nothing worse than having everything else ready and no glasses to use.
Now you want to install the screen, and to do that, you'll want to test-fire your projector and see how far away from the screen it will have to be placed to produce the image size image you'd like. When this is done, you should have a good idea of where everything will be placed. Projector screens are often attached to the wall/ceiling by a few screws, which is not difficult to do.
With the screen installed, you move onto the projector mount. Ideally, you'll find a centered ceiling joist to carry the weight of the projector and mount it there. Every mount has its own particular mechanism for bolting to the projector, which is usually mounted with three small screws to secure the base.
With the hardware mounted, power and display cables need to be routed to the projector. In our temporary setup, we simply mounted the cables to the ceiling, but a permanent solution would probably benefit from a stealthy installation behind the wallboard or ceiling tile.
With the projectors mounted and cables attached to the PC, it's time to turn everything on. A quick note about the Acer H5360 projector: there is a 3D Vision option in its menu. Our testing shows that this option does not enable 3D Vision. Instead, it provides a number of extremely irritating messages whenever the resolution is changed. You should probably keep this option off if you value your sanity.
With everything powered up, you install the newest GeForce drivers that include all of the necessary optimizations for 3D Vision. In this case, we're using build 257.21, but there is a newer package on Nvidia's site. After installation, make sure you set the display resolution to 1280x720 at 120 Hz. This is critical because lower refresh rates will not work with 3D Vision. With this done, you can enable 3D Vision and test it out.
Get Tom's Hardware's best news and in-depth reviews, straight to your inbox.
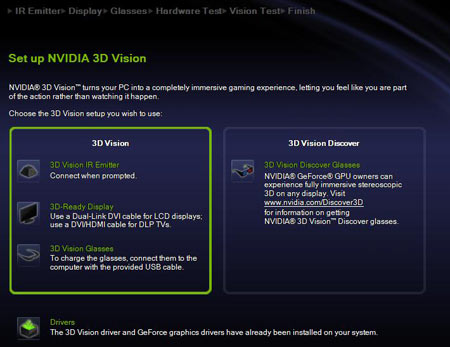
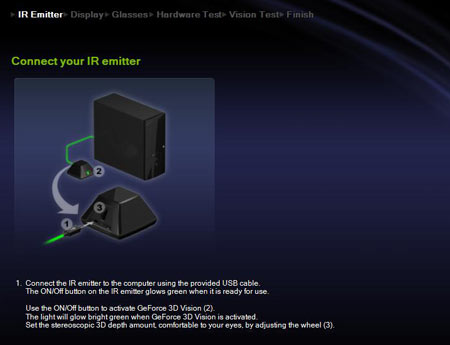
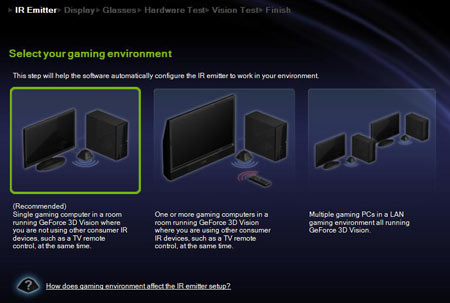
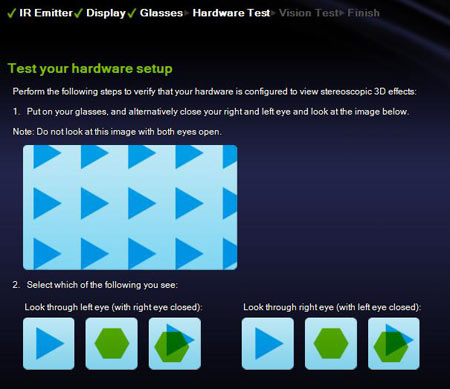
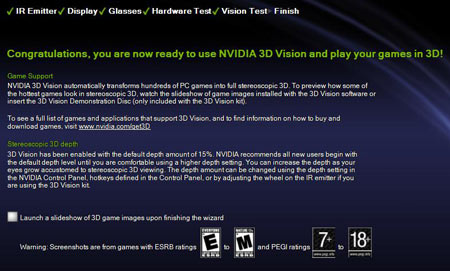
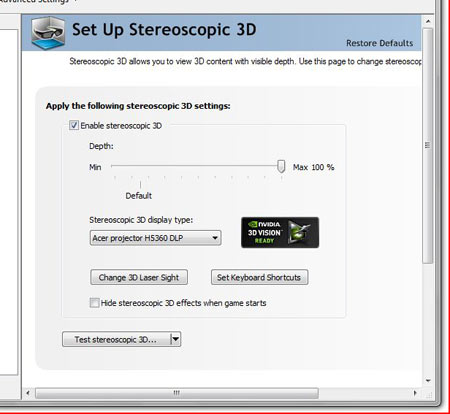
The 3D Vision controls are in the Nvidia Driver Panel, and the first time you try to enable the feature, you instantiate the 3D Vision wizard. It's a helpful little app that simplifies the setup of 3D Vision and makes sure everything is working well.
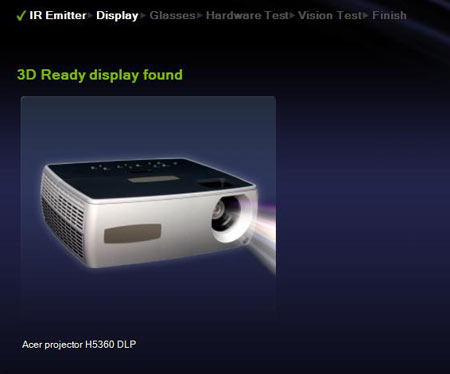
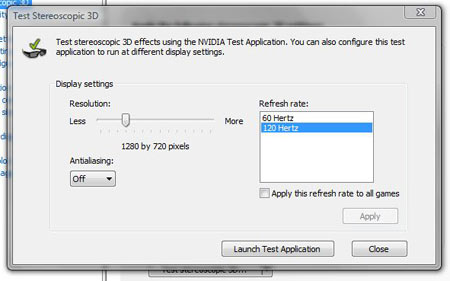
The 3D Vision wizard ensures the display is working properly with the emitter and glasses by displaying some imagery and quizzing you about what you see. After the wizard is certain everything is working, you are prompted to click the “Test Stereoscopic 3D” button in the driver panel for a full-screen 3D video test.
There is an important detail to note when using Acer's projector for 3D Vision duty: 3D mode only seems to work properly at 1280x720 using the 120 Hz refresh rate. This means that you will have to run your games at this setting in order to view them in 3D. Interpolating higher resolutions down to the monitor's native resolution will not work in 3D mode.
This nostalgic test is the same one Nvidia's 3D driver has been using for years--you can tell by the old rendition of the Nvidia logo--and it continues to do a fine job of letting you know if 3D is indeed working on your system or not.
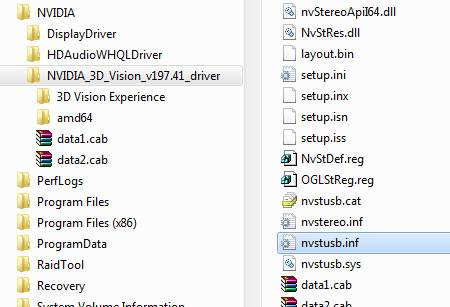
During our setup stage, we had two issues that were both illuminated by the 3D Vision setup wizard. First, the system did not automatically recognize our 3D Vision IR emitter. This is a rare problem in the wild, but we've experienced it a number of times with our particular sample. In any case, the problem is solved by manually applying the nvstusb.inf driver from an older 3D Vision driver.
Our second issue was a bit more disturbing. The PC did not detect our Acer H5360 projector when we used the HDMI input, and since it wasn’t detected as a 3D Vision-ready display, 3D Vision would not work. We worked around this incompatibility by using a VGA cable instead of an HDMI connection. The tradeoff here is that HDCP compatibility is lost over VGA, resulting in a loss of resolution during Blu-ray playback.
Current page: Installation And Setup
Prev Page The Hardware: 3D Vision Theater Checklist Next Page Using 3D VisionDon Woligroski was a former senior hardware editor for Tom's Hardware. He has covered a wide range of PC hardware topics, including CPUs, GPUs, system building, and emerging technologies.
-
infodan What about DLP 3D? the projector supports it, DLP-link glasses are cheaper and dont require a transmitter like the nvidia glasses.Reply -
TheStealthyOne "The whole experiment consisted of about $2500 worth of hardware and software, NOT including the PC driving the displays."Reply
I cringed. -
kolsky I own a acer h5360 and I agree, it is awesome watching 3d movies on it. 1080p? Dont even notice pixellation at 115 inch screen. 720p is fine and at a great price. 1080p 3d projectors will be extremely expensive for average consumers.Reply -
kolsky Im sorry, but 3d is NOT expensive. The acer 5360 can be bought for as low as 580 and the nvidia vision glasses kit can be bought for as low as 150. That is under 1,000... less than the cost of a 3D TV.Reply -
DaFees Interesting read, but ultimately all this 3D talk leaves me with a big question. I have a PS3 and if I upgrade my PC to a 3D vision enabled PC is there a projector (perhaps the one discussed in this article) that would allow me to enjoy the 3D from my PS3 and my PC? I understand if I would need a switch between devices or manually switch cables. I know NVIDIA is working on a 3DTV play tech that let's you use the glasses of 3D enabled HDTV to enjoy NVIDIA 3D Vision, but is there a similar option for projectors?Reply
