The 5 GHz, Six-Core Project: Core i7-980X Gets Chilly
Tom’s Hardware has been ringing the 5 GHz bell for years, yet those efforts have never yielded a practical daily-use solution. Today we take a look at how far off-the-shelf parts can take us with an ambitious 5 GHz, six-core overclocking project.
Reworking The Installation
We’ve already proven that we’re not afraid to risk a little “free hardware” to prove a point, and we’re completely familiar with methods that would have prevented condensation from accumulating in fragile areas. These methods include painting the entire board with nonconductive sealant, sealing the entire area around the CPU with nonconductive putty such as kneaded eraser, and filling the LGA with dielectric grease. Unfortunately, most of these solutions cannot be completely removed from the motherboard. While we only needed our system to run for 12-hour intervals, we do recommend most of these precautions for extended use.
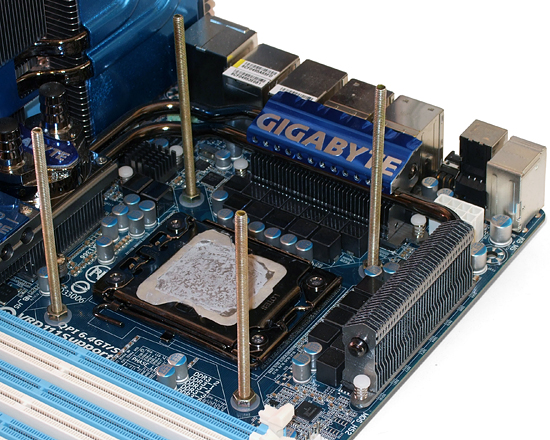
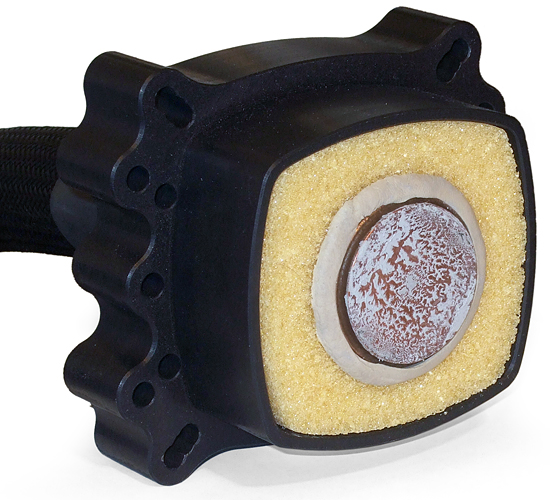
The one drop of water that stopped the system had left a trail, starting at the evaporator and running past the round hole in the foam barrier, down the side of our CPU socket, and into the Land Grid Array (LGA). Nonconductive putty was added to fill the gap between the CPU’s heat spreader and socket’s pressure plate.
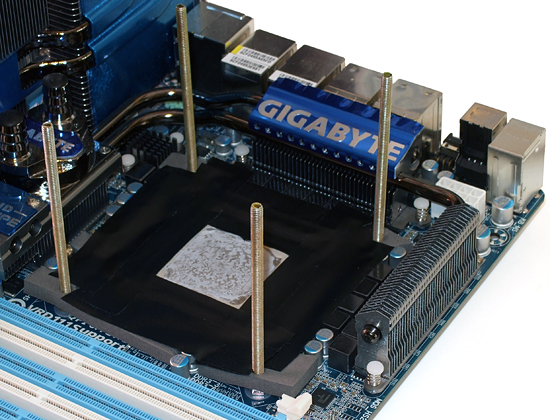
A new layer of tape seals the CPU area to the reinstalled, custom-cut foam layers. The foam sheet with the round hole was reinstalled over this tape.
A bead of putty fills the space between the evaporator’s mounting block and top foam sheet. These minor changes allowed our system to run eight, but not the full twelve hours between dry-offs.
Removing the CPU after an eight-hour test session revealed drops of condensation on each of its 1366 contact pads. Air circulating under the CPU was the problem, and that problem can be solved by filling the LGA with dielectric grease. Petroleum jelly makes an adequate substitute for dielectric grease when used at moderate to low temperatures, such as those experienced with sub-ambient CPU cooling systems.
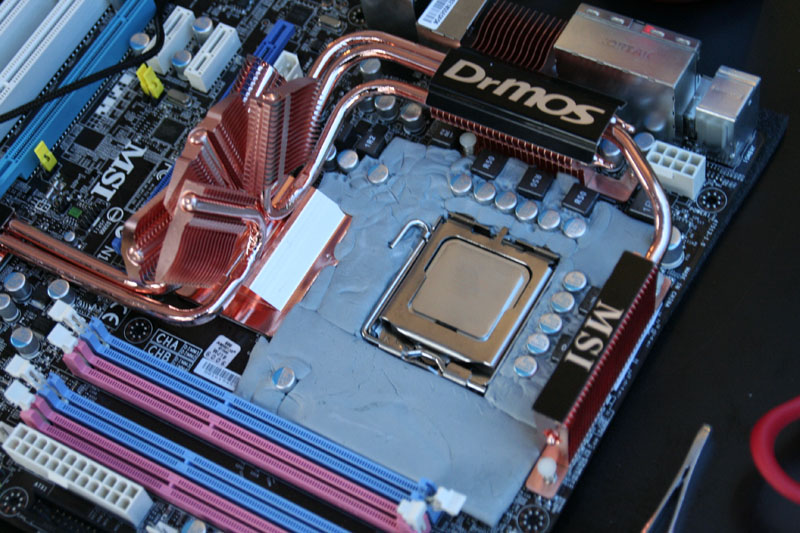
As seen in our 2008 Overdrive Competition, applying putty around the CPU socket is another option to further prevent air from getting underneath it. Unfortunately, voltage regulator chokes immediately adjacent to the socket of the motherboard we used today would have severely obstructed such work.
Get Tom's Hardware's best news and in-depth reviews, straight to your inbox.
-
Crashman tacoslavei thought it would perform much better in games Check this out:Reply
http://www.tomshardware.com/reviews/core-i3-gaming,2588.html
For the CPU to become the choking point, you need the GPU to be extremely powerful. Tom's Hardware formerly used unrealistic tests like Half Life 2 at 640x480 just to prove the CPU performance difference in games, but the fact that nobody used those settings eventually lead to the discontinuation of that testing method. -
noob2222 tacoslavei thought it would perform much better in gamesThere was a thread several months ago comparing the Intel Vs AMD platforms regarding the graphic card bottleneck. Suprising enough Intel cpus capped at a certain overclock where as AMD did not, eventually becoming faster FPS but required a much higher clock speed. It was determined that Intel has a limit on pcie bandwidth. Good luck finidng it, its probably over 6 months old.Reply
back to the arcitle, very interesting, and extremely expensive to even consider doing something like this.
Finally there’s the expense. Our $900 cooler requires around 480W of power in addition to that consumed by the rest of the PC
Add in the cost and time required to set this type of thing up as well as coating the MB ... lol, I don't even want to think about actually trying to go this extreme.
Water is good for me, and if I want extreme, I will wait till winter and throw my radiator out the window while its freezing outside and pump antifreeze through it lol. -
liquidsnake718 zorky9Cooler Master’s reputable CMPSU-850HXDid you mean Corsair?Nope coolmaster has a whole line of PSU's... they are decent and perhaps compareable to Corsair for albeit a slightly lower price point. But Oc'ing to 5.ghz and above is really crazy stuff here. I am actually happy with 3.0 and above already stock but damn, I dont think i would like to tax my system to 5.0 and above, regardless of cooling! It would cost more, but I do see the sport of it and commend those that take time to reach 5.0 and above figures with regular water cooled systems.Reply -
vinehoyle Amusing article. However some correcting is needed. The next to last paragraph states the cooler consumed 480W and the cpu consumes according to ur graphic 220w? My math says 700w JUST for the cooler and cpu. This calls in to question ur power bill figures. It's clearly much greater. I won't even talk about once u add things, though it would have been a good idea to calculate that figure too. Simply to show the madness of this project to ur power bill lol!Reply -
Crashman vinehoyleAmusing article. However some correcting is needed. The next to last paragraph states the cooler consumed 480W and the cpu consumes according to ur graphic 220w? My math says 700w JUST for the cooler and cpu. This calls in to question ur power bill figures. It's clearly much greater. I won't even talk about once u add things, though it would have been a good idea to calculate that figure too. Simply to show the madness of this project to ur power bill lol!The article specifically states that the "added expense" figures are based on the 480W it takes to run the cooler. It assumes you're already planning to use the rest of the system at whatever speed you can get WITHOUT the cooler, and tells you how much MORE it costs to use the cooler. I think its fairly well explained, but feel free to point out any specific spot I missed, thanks!Reply
liquidsnake718Nope coolmaster has a whole line of PSU's... He's right, CMPSU-850HX is a Cosair model. Cooler Master does have some decent 850W power supplies though, I have one sitting in my liquid cooling bench station.
-
Moshu78 I'm sorry but once again, Tom's is testing CPU's while bottlenecking the Video. Can't you guys just use a simple rule like: When you test the CPU, use highest available video power (like Xfire of 5970), and when testing the GPU, use highest available CPU (980X). It's THAT simple. The 3D benchmarks are meaningless, waste of time AND money AND information. I predicted those graphs in the moment I saw you used a 5850 for the tests.Reply


