Over-clocking the GeForce256
Testing Methodology
To determine each of the boards (SDR & DDR) core/memory frequency limitations we ran several games until we hit each boards frequency limit (both core & memory). So how did we decide if a particular test setting was stable enough to pass the testing? We ran the highest given setting through our full benchmark suite and if the tests didn't crash or show visual defects, it passed. Keep in mind that this will not guarantee all cards will over-clock or stay predictably stable through all software applications. Keep in mind that although both boards have the same core chip, the peak core speed on one of our boards was higher than the other and unfortunately it wasn't the DDR board. After finding our test points, we ran each setting through our usual graphic benchmark suite along with the new DMZG (Dagoth Moor Zoological Gardens) benchmark. All tests were run at high resolution to stress the graphics cards.
Clock Frequency Adjustments
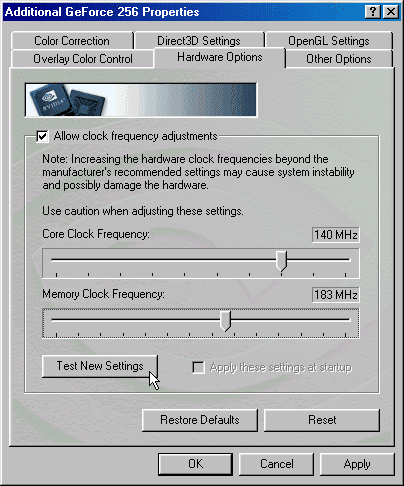
With a few changes to the registry we were able to dig out some hidden display property settings that allowed us to adjust all the clock settings that we needed. As we've seen with the TNT2 based cards, OEM's in the past have provided over-clocking utilities with their cards so that users can push their hardware to the limit and we are pretty sure the same will hold true for the GeForce based boards. With that said, I doubt anyone will have to deal with the registry settings like we did to tweak the card frequency adjustments.
So what do the core and memory performance changes do for you? We will keep this explanation simple because there are so many factors involved. The core clock getting faster increases the performance of anything being processed within the graphics chip. This includes having a, a higher triangle and fill-rate and stronger T&L performance in the case of the GeForce. As for the memory performance (we're talking speed not size), the need for greater memory speeds is increased when you have large resolutions, triple buffering, complex filtering, high depth complexity, large z-buffer and high color depths. With the increased bandwidth, you are able to process more screens of information per second.
Here is a peek at what we were working with.
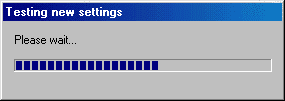
You'll use this panel to setup your core and memory adjustments to your liking. Once you've ready to move forward, you have to test the setting before it's applied. When you run the test you get the following messages.
Voila, as long as your computer didn't freeze, you'll be using your new settings after hitting the ok button. Even though the built-in test might pass, it doesn't necessarily mean the board will be stable. We still had to run the board through our graphic test suite before we labeled the settings stable.
Get Tom's Hardware's best news and in-depth reviews, straight to your inbox.


